tiistai 31. heinäkuuta 2018

PictureCorrect.com: Street Photography Tips with Any Camera

Street photography is very, very different from documentary, photojournalism, or even travel photography. We’ll look at it as soon as I tell you this quick story.

black and white street photo sephora

Street Photography

Amidst Kuala Lumpur’s shimmering skyscrapers, I planned to capture some corporate video and photography footage. Next, I decided to hit the food streets. It has been the fasting month of Ramadan. I wanted to document the culture, food, and people. I was planning to capture real emotions of the vendors and hawkers serving their customers. Seemed like a bright idea until I hit some serious roadblocks.

street vendor photo

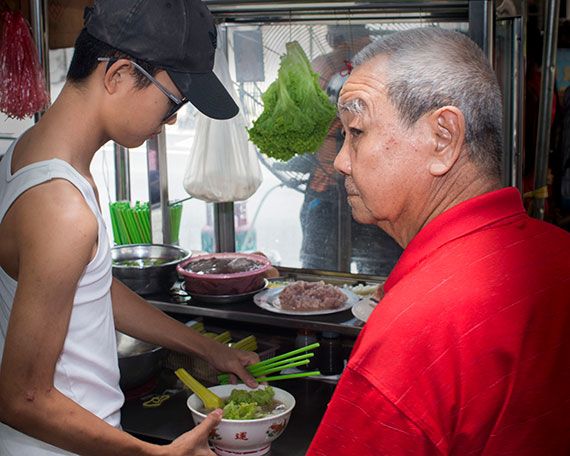
Hawkers stall in Georgetown. I did get permission from them by the way, but picked this photograph to illustrate the next point. I enjoyed their noodle soup.

Some of the locals raised their fingers in V’s and put on a huge smile to pose for my lens. It’s nice to get posed pictures, but I was looking for candid shots. A few reacted to the camera differently; they turned away. The last thing on my mind was to offend anyone, so I’d point my focus toward the food if I felt that someone was uncomfortable. Since they were still in the frame, though, any wide shots weren’t usable since they had their backs turned toward the camera.

These experiences were alright. But what came next was the worst. I had set up a frame to do a long exposure shot at Pavilion. This was on the street and outdoors. The security hassled me saying I couldn’t use a tripod. I was shocked. This wasn’t even a professional or large tripod. It was $5 tripod that I had bought outside the LRT station that could barely carry the weight of a small Olympus point and shoot camera. Mind-you, I hadn’t carried my DSLR.

This got me thinking. What gear would be best to carry around for these situations? What are some tips to not aggravate the local people? How do I overcome these overzealous security guards? And how do I get street shots that are Instagram worthy?

So in this article we will discuss three things:

  1. Technical. What lenses, cameras, zoom ranges and settings to use? What shots can be snapped on a smartphone? And, I’ll share camera settings that work on both, too.
  2. Gear. What equipment to carry around so that you don’t appear as a threat to locals and security?
  3. Tips & Tricks. First hand tips for better street photography. while they’re still fresh in my mind.

Tech Specs and Settings

Street photography is unique and very different from other photography. This is why the technical approach to it is also very different from other types of photography. Typically, when you document events you might have a story in mind. Meanwhile, with street photography it’s just a fleeting moment that might make sense. Sometimes, not so much. It could be the way clouds reflect on a skyscraper or a corporate employee rushing across the street with papers flying in the air. It’s all about getting lucky. The hard part is to bring attention to a subject amidst all the chaos.

Blurry Images

This got me thinking, while I sorted out my photos for the day. What’s the main reason I had to discard some otherwise good photographs?
The number one reason was blurry images! So let’s look at some tips to tackle blurry images. Blurry images could result from camera shake while handling your camera without stabilization or because of a low shutter speed setting. Usually both!

Manual Settings

Don’t be overwhelmed with the manual settings. They’re quite simple once you have a little bit of help and reference settings to get started. I am going to share some ideal camera setting in each section as well.

Shutter Speed

Shooting at a higher shutter speed will solve a lot of these problems.

flames street photography

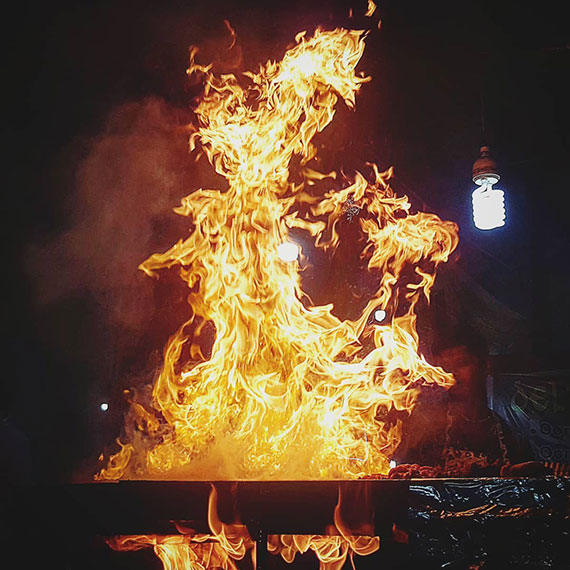
Shot on Samsung Galaxy Note 5 with manual settings. Food stall. Bangalore, India.

Shutter Speed for Smartphone Users:

Even if you’re on a smartphone, you might want to check your phone settings and apps to see if you can manually set your shutter. I was lucky to have these options on my phone. I use a Samsung Note 5.
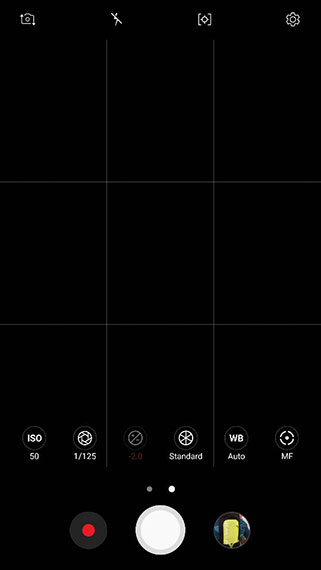
manual smartphone photography app screenshot

Manual Camera App

Shooting at low shutter speeds could be super advantageous, especially on a smartphone. You’ll be able to produce some usable pics in low light. Typically smartphones shoot at lower shutter speeds when there isn’t enough light. This is why they take forever to snap. The downside is if your camera is not stable your photos are most likely to turn blurry.

Third Party Camera Apps:

If you don’t see the shutter or pro options on your phone you could try using a third party app that lets you control shutter speed. Here are a few Camera FV-5, A better Camera and Open Camera for Android and Pro Camera, Camera+ for iPhone/ iPod.
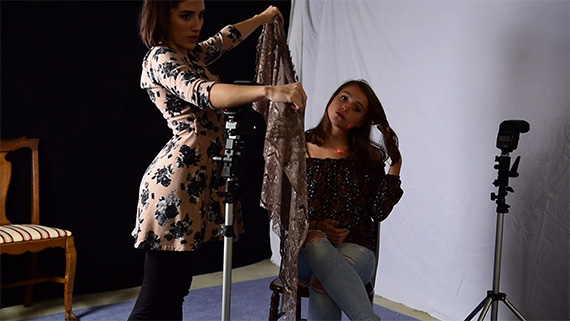
Stabilization

A super way to combat blurry images or camera shake is to use better stabilization. A rig or a tripod can help you shoot at slower shutter speeds. Keeping the camera stable will help you capture sharper and crisper images (while your subjects aren’t moving). Meanwhile, you could capture movements of trails or even streaks of light while objects are in motion. They make for interesting captures.

street photo malaysia

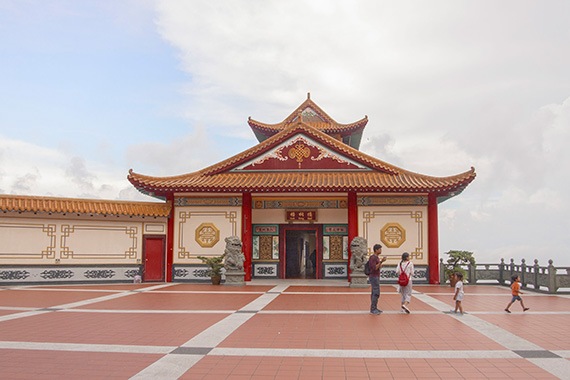
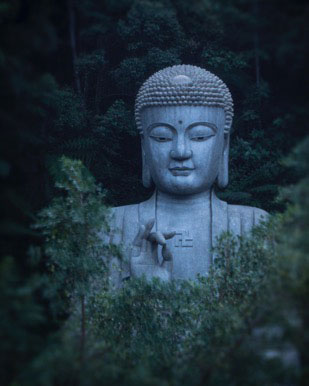
Chin Swee Temple. Genting Highlands, Malaysia.

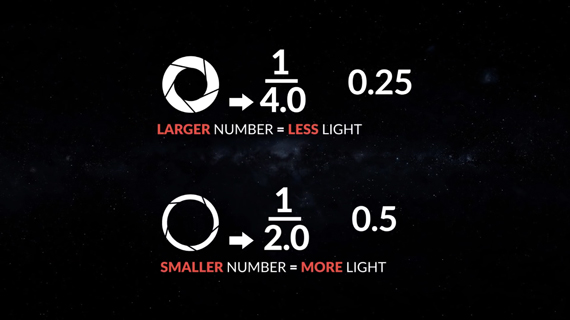
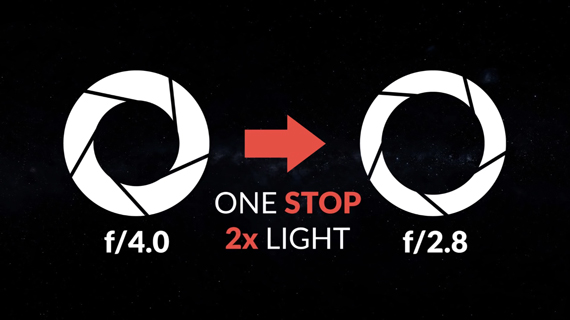
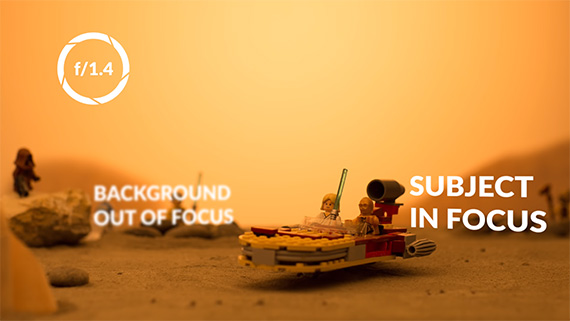
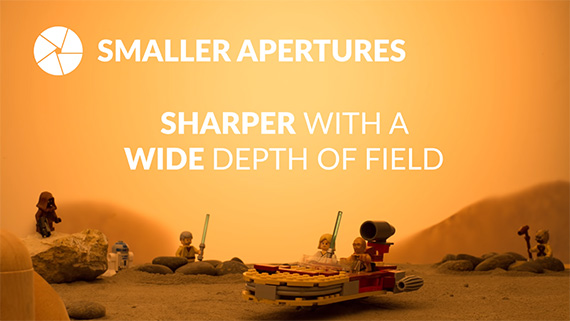
Lens Speed & Aperture

Closing your aperture settings, allowing less light in makes for sharper or deeper depth of field. I’m really not a big fan of photography that separates the subject through shallow depth of field (blurry backgrounds). I would prefer to separate my subject from the background with the use of contrasting colors or natural vignettes. When your aperture settings are closed and you’re shooting at higher shutter speeds your pictures are going to get dark. This is because less light is allowed into your sensor.

night street photography

Shot on Samsung Galaxy Note 5. Georgetown, Penang.

Speed Lights

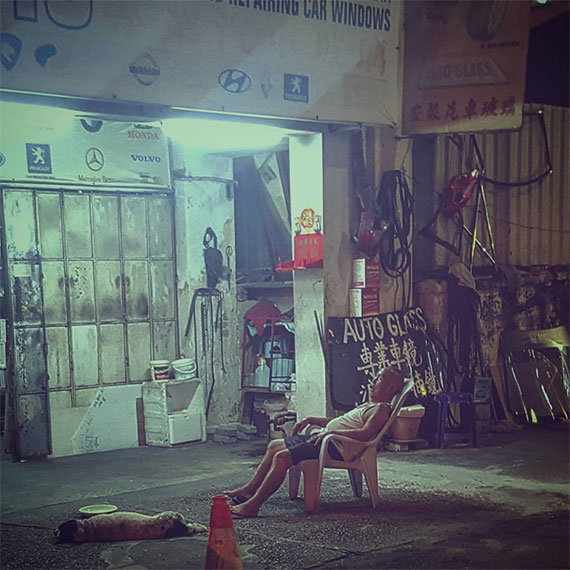
Don’t be afraid to pump up your ISO settings. Street photography is supposed to be gritty. A little noise doesn’t hurt. If you’re shooting at night, please consider using an external flash. If you don’t have a place to bounce the flash, use it directly on your subject on minimum power. Step back or forward to get a well exposed shot separating your subject from the environment. Meanwhile, try to avoid hotspots or burnt out highlights.

Filters

What happens when the sun is too bright and you’re getting overexposed highlights—especially if you like shooting with your aperture more open? This is a good time to consider buying a set of polarization filters for your lenses. I am not sure if they’re available for smartphones, but typically, most smartphones aren’t bright enough to call for filters.

Zoom Range

From my experience and style of shooting, the most optimum zoom range has been 35mm to 70mm. When it comes to capturing a good shot there’s no other way than to get involved up close and personal. When I used a telephoto lenses I kept missing shots. By the time I zoomed in, the moment was over. When I clicked wide shots, they usually looked too busy. The frames were too wide and chaotic to make the cut. 35mm is really my sweet spot. There’s enough room to crop and vignette out unnecessary details, and it lets you get close to the action with less obstructions in your frame.

retail street photo

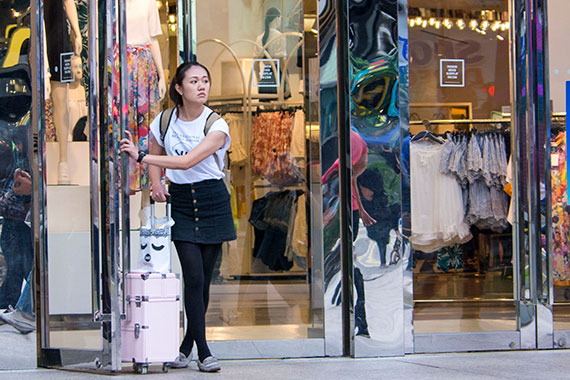
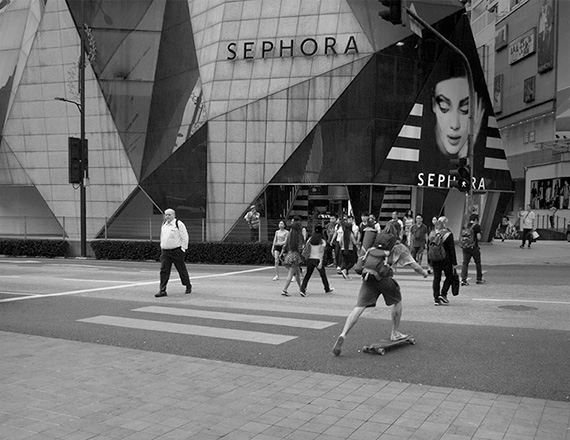
Bukit Bintang H&M Kuala Lumpur, Malaysia.

Framing

How do you bring your viewers’ attention to the story? What idea do you want to sell through your photography?

When you’re using your smartphone, it makes sense to plan ahead. Most pictures might be a little too wide with too many things happening. Expect to crop your images. If there’s something interesting in a frame and you’re too far away, you might want to consider cropping it in post. Setting the largest dimensions to capture photos on your phone helps. The lenses on most older model phones are quite wide.

Here are my typical camera settings:

  • Aperture: f/3.5
  • Shutter Speed: 1/125 to 1/500 second
  • ISO 800

I add an external speed light or polarization filters to further fill or cut light into my scene.

The Gear

Preparedness is always better. Being geared to be able to snap a moment at any random time is imperative. A great picture could happen at any time. Packing less has many advantages. Being clever about what you carry on your person is crucial to mastering street photography.

penang street photography

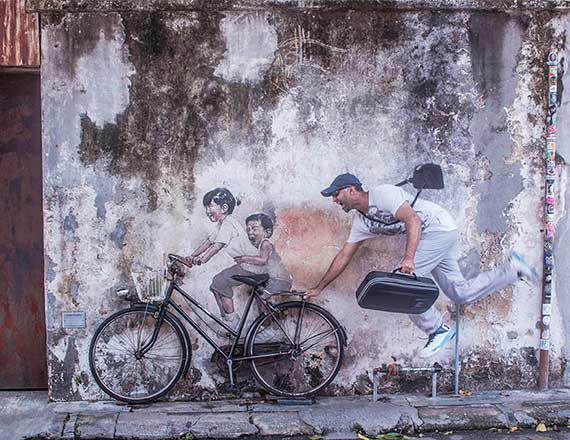
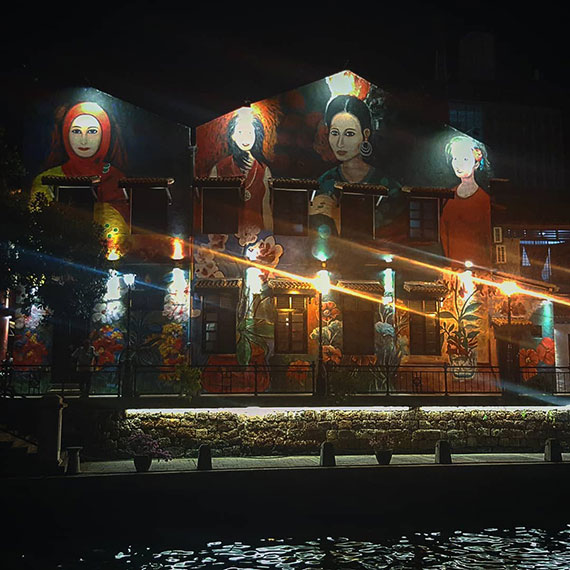
Armenian Street, Penang.

What do you need?

Cameras

Pick your smallest camera capable of manual settings. If you’re using your smartphone, consider purchasing a third party app to allow you to adjust camera settings manually.

Tripod

A very tiny gorilla-pod or Z mount to help you angle your camera and keep it steady. Traditional tripods could be asking for trouble and gathering too much attention.

z mount

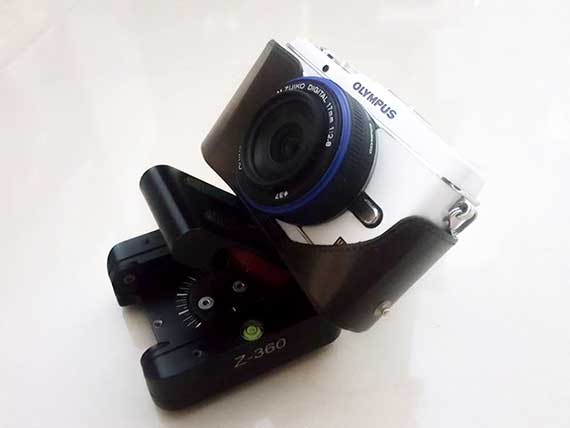
Z-mount setup that’s stable enough to replace a tripod in the field.

Speed Light

And for safety, an external speed light and a variable polarization filter an be mounted on your lens.

A clever trick I discovered is to carry all your gear in a pouch. The pouch also acts like a sandbag for stabilization.

stabilization for street photography

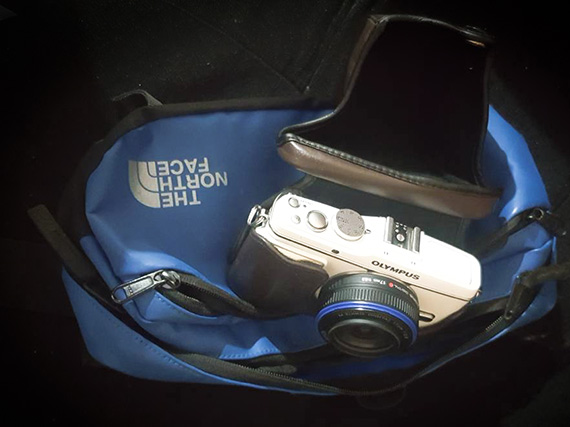
My pouch that acts as a sandbag. I use it in place of a tripod.

A bonus tip is to dress like a tourist, even if it’s your hometown. I usually wear a hat, flip flops, t-shirt and shorts/track pants.

Tips and Tricks

My top seven tips and tricks for street photography:

1. Recce

I usually take a walk around and decide what I want to shoot and where I want to shoot so that I don’t waste time. I don’t want to lose natural light being stuck at the wrong spot. Most of my long exposure or beauty shots happen in the evening between 6 and 7 PM. I do a quick Instagram and Google image search before I hit a location. This helps me see what other photographers have done in a place and I identify interesting frames and locations.

2. Permissions

If I’m at a place like a hawkers’ stall, I’ll take a walk around and usually order my food at the most interesting stall to me. Usually the one that faces the road. After my meal I ask if it’s OK for me to take a few pictures; they usually oblige. Sometimes, they’ll pose for the first few photos. I am not a huge fan of them interacting with the camera. So after a few I ask them to continue their work by motioning to them. I always want to snap a few pictures while they’re working.

3. Burst Mode

While I’m sitting at a place waiting for people to pass or capture a moment, I shoot on burst or continuous mode. As you squeeze your shutter button the camera clicks multiple photos. This way I get to capture movement of people walking. I like it when they lean slightly forward and their legs are stretched in an “inverted V” or if I’m lucky a model type “S”.

4. Reflections

Reflections are always interesting. Textures and lights reflected on buildings and water make for very lucid images. Most streets these days have parked cars that make some of the frames really ugly. I discovered that the rooftops of these cars could come in quite handy to capture a reflection of a building. Black cars work better.

temple

Chinese Temple. Penang. Malaysia. Reflections caught on the roof top of a black car.

5. Mirrors

I also keep a look out for large mirrors or reflective glass from retail stores on the street. This works in trains, too. I typically notice that people exude better posture in front of mirrors and it’s interesting to capture them along with their reflections. I usually find such frames and water for the moment to happen. Having a telephoto or a zoom lens is an advantage in these situations.

mrt window

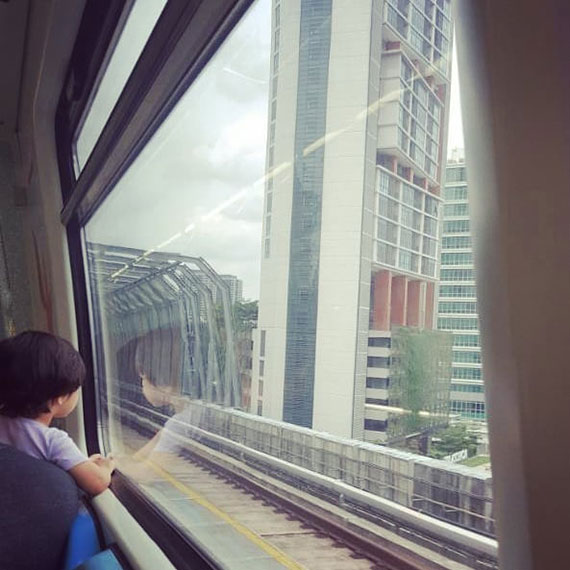
MRT. Kuala Lumpur. Shot on Samsung Galaxy Note 5.

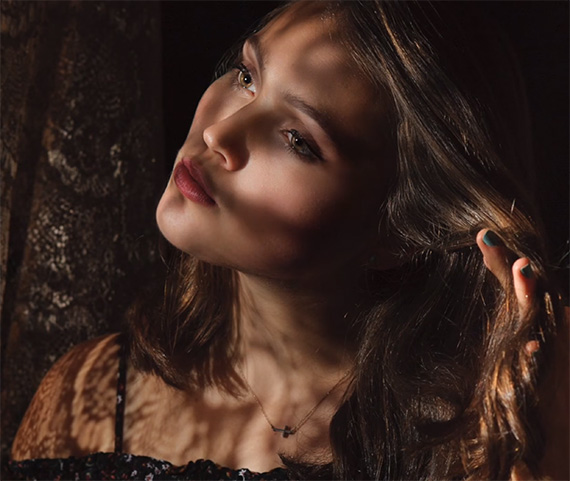
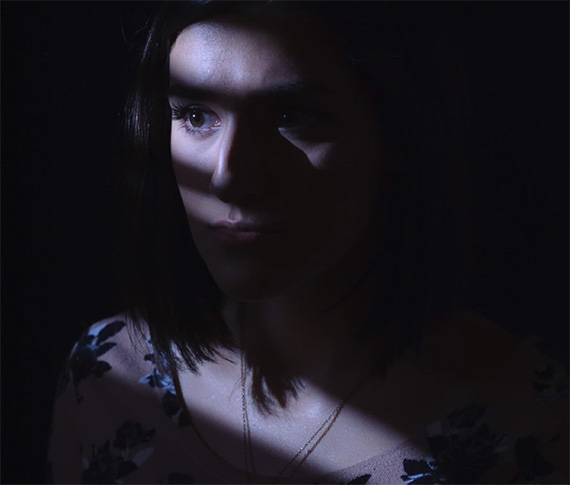
6. Vignettes or Separation

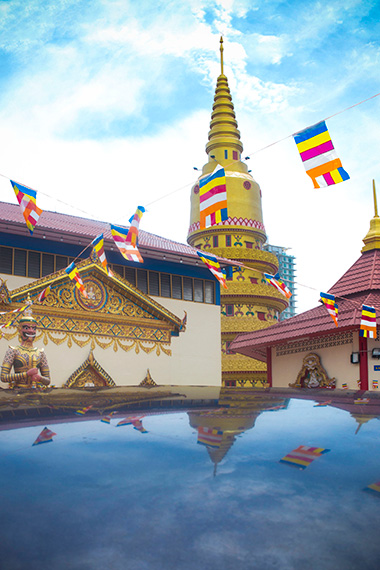
Vignettes or darker backgrounds make for contrasting images to separate the main subject. I’m always on the lookout for frames that naturally do this.

malaysia street photography

Chin Swee Temple. Genting Highlands. Malaysia.

7. Lens Cleaning

Wipe your lens to avoid flare, especially on streets with a lot of dust and street food, I’ve noticed that there is a lot of oil in the atmosphere. This makes the lens sticky. The lenses attract more dust and also create a lens flares on street lights. This happens more when I’m using my smartphone. I carry a bunch of disposable microfiber wipes. They are available for spectacles and they come in a pouch. They are also disposable. I use them on my camera lens, too. Using cloth usually smears grease around the lens. Especially when I notice extra flares in my photos, I’ll quickly stop for lens cleaning.

nighttime street photography flares

Shot on Samsung Galaxy Note 5. Notice smaller sensors give out larger lens flares. Malacca. Malaysia.

Post Production

A bonus tip is to touch up your photos. Consider removing unwanted wires and other small distractions before you publish them. Creating vignettes, cross processing colors and background blurs also help to create your own style of photos. I use them to separate my subject from all the chaos in the backgrounds. You could also use a polar filter on Photoshop to make your wide pics look like a small world or planet. These mega wide 360 degree looks make for interesting points of views.

That’s it for me. Let me know if you’ve got some awesome tips or hacks on street photography in the comments below.

About the Author:
Mark is a corporate film and documentary filmmaker at https://webinteractivefilms.com. He also produces commercial photography shoots and loves to shares tips on photography. You can follow his smartphone photography on Instagram.


Go to full article: Street Photography Tips with Any Camera

What are your thoughts on this article? Join the discussion on Facebook

PictureCorrect subscribers can also learn more today with our #1 bestseller: The Photography Tutorial eBook

The post Street Photography Tips with Any Camera appeared first on PictureCorrect.


from PictureCorrect https://ift.tt/2Ov1JM6
via IFTTT

PictureCorrect.com: Interesting Photo of the Day: Long Exposure in the Woods

What are you more afraid of: fast cars or woods that look haunted? The following photograph by Scott Wilson is a smooth combination of speed, a ghostly touch, and creativity shot at Cypress Tree Tunnel in Northern California. The place in itself is quite amazing as the trees form a tunnel-like structure through a good stretch of the road:

long exposure photo in woods

“Long Exposure Into the Haunted Woods” by Scott Wilson (Via Imgur. Click image to see full size.)

Wilson used a Sony A7RII body with a Rokinon 14mm lens at f/11, 30 seconds, and ISO 200. Although he has not elaborated much on how the photograph was taken, we can anticipate that he used a flash with the camera set to front curtain sync to freeze the car first and then capture the trails later. Also, to expose the trees properly, he could have painted them with some light.

Have you taken a long exposure photo this creative? Let us know in the comments below.


Go to full article: Interesting Photo of the Day: Long Exposure in the Woods

What are your thoughts on this article? Join the discussion on Facebook

PictureCorrect subscribers can also learn more today with our #1 bestseller: The Photography Tutorial eBook

The post Interesting Photo of the Day: Long Exposure in the Woods appeared first on PictureCorrect.


from PictureCorrect https://ift.tt/2LGJ96a
via IFTTT

PictureCorrect.com: How Aperture Works

If you observe your lens, you will notice that there is a small opening at the back made up of blades. This opening is called the aperture. The size of the aperture can be changed by changing the camera settings, which in turn changes the amount of light hitting the sensor. But this isn’t the only effect that aperture has on a photograph. Aaron Nace, with the help of some Star Wars Legos, discusses the basics of aperture:

Aperture and Aperture Value

Aperture is the opening of the lens through which light enters the camera. The size of the aperture can be varied either via the camera settings or by rotating the aperture ring in the lens (if it has one). A wider aperture allows more light through the lens and is handy in low light conditions, while a narrower aperture allows in less light and is useful when the lighting is adequate.
For beginners, it’s important to note that a smaller f-value, like f/1.4, indicates a wide opening, whereas a bigger f-value, like f/8, indicates a smaller opening.

f number in photography

What is an f-stop?

In photography, a “stop” refers to the doubling or halving of light that enters through the lens. For instance, when we change the aperture from f/4.0 to f/2.8, we are allowing double the amount to light to enter the camera. So, we say that there is a one stop difference between f/4.0 and f/2.8.

concept of stop in photography

How Does Aperture Affect Sharpness?

First, let’s understand the concept of depth of field. In simple terms, depth of field (DoF) is the amount of area in three dimensional space that the lens has in focus. For instance, you might have noticed in some portraits that the subject’s eyes are in sharp focus while the hair and the background are out of focus. We refer to this condition as the lens having a “shallow depth of field.” On the other hand, you must have also seen some landscape images with sharp focus from the front up until the mountains, which are far away. This condition is referred to as a “greater depth of field“. The same lens can be adjusted to have a shallow as well as a greater depth of field. One of the key factors that affects the depth of field is aperture.

wide aperture effects

Shallow Depth of Field

When the aperture is wide open (f/1.2, f/1.4, or f/1.8, for instance), an image has a very shallow depth of field. Only a small area of the image will be in focus so it is very important to set the focus correctly in such settings. If you are having difficulty in nailing sharp focus, try to increase the f-value. So the next time you see an amazing portrait with very sharp eyes and a creamy smooth background, understand that the photo was taken at a wider aperture. On the other hand, when the aperture is narrowed down (f/8, f/11, or f/16 for example), the lens will have a greater depth of field and most of the area of the image will be in focus. Having a greater depth of field is important mostly while taking group photos and landscapes, for example. Most lenses deliver the sharpest result at around f/8 to f/11. At even narrower settings, the image will start getting softer due to a phenomenon called “diffraction”.

wide depth of field

Effect of Aperture on Shutter Speed and ISO

As aperture, shutter speed, and ISO are a part of the exposure triangle, a change in one of these variables has an effect on the others. When you set the aperture to a wider setting, you allow more light to enter the camera. This means that you can set the shutter speed at a faster setting (less blurry image) and keep the ISO low (less noise). Whereas, when you set the aperture to a narrower setting, only a small amount of light is allowed to enter and hence you may need to slow down the shutter speed (chance of motion blur) and bump the ISO up (noisy image) to balance the exposure.

If you’re just starting out and find it difficult to manage a balance between these three variable, start out with Aperture Priority mode (Av) in your camera. In this mode, you can choose your aperture and the camera will decide the shutter speed and ISO for you.

Now that you understand how aperture can affect your images, grab your camera, get out, and start shooting. Experiment with various aperture settings and see what kind of results you can get.


Go to full article: How Aperture Works

What are your thoughts on this article? Join the discussion on Facebook

PictureCorrect subscribers can also learn more today with our #1 bestseller: The Photography Tutorial eBook

The post How Aperture Works appeared first on PictureCorrect.


from PictureCorrect https://ift.tt/2LP0MzN
via IFTTT

maanantai 30. heinäkuuta 2018

PictureCorrect.com: The Artist Behind the Viewfinder: Emotional Photography Insight

Photography. When you picture a photographer, it’s always the camera that you see first, unlike when you’re asked to picture an artist or a great chef.

photography inspiration

photo by Florian .

Unfortunately, this is part and parcel of the game of photography, where most people think that a great photographer is made up of great equipment and, to a much smaller degree, talent.

True photographic artists have the power to convey thoughts, ideas, feelings, and moods all based in one timeless and inspirational image. Captured in a millisecond by pushing down on that button. I have known photographers who are utterly obsessed with new equipment and all the wiz bang technology that comes out seemingly every day. What they fail to realize is that being technically adept is only one part of the puzzle. Bringing out the emotional side of your photographic art plays a large part in creating images that will wow your audience. The best images created are not always the most original, technically correct, or perfectly framed. Like any art form, the greatest images evoke some kind of emotional response in the viewer. The truly great evoke different emotions in different people at different times.

impactful photography

photo by Felice Rusconi

I have noticed in my own imagery the fact that my own underlying emotional state at the time of creation plays an enormous part in the emotional content that my final image conveys. With my paintings, I have had pieces that I just could not get back ‘into the groove of’ because it was just really hard to get back to the same emotional state that I was in when I began creating it—or ‘I wasn’t feeling it!’

With my photography, I found that I was able to take photos from places I had been to before and the whole vibe of the images was completely different to that of the previous ones.

It was akin to my own little aha moment in time. If in the passion for creating the imagery, the art was missing, then inevitably the result would be a very ho-hum, although technically correct, image.

One very quick way I’ve found to get out of this ho-hum state is to stop. Put the camera equipment down and just observe, enjoy, and be part of the moment. In next to no time you will find that you start firing on all cylinders and the creative juices kick in. That’s when you’ll be itching to pick up the camera again!

About the Author:
My crazy world has included successfully combining all the skills of a artist, photographer, designer, programmer, and marketer into one crazy life. I’m available for guest blogging, article writing and speaking events. Follow me in my crazy world via my site or Instagram!


Go to full article: The Artist Behind the Viewfinder: Emotional Photography Insight

What are your thoughts on this article? Join the discussion on Facebook

PictureCorrect subscribers can also learn more today with our #1 bestseller: The Photography Tutorial eBook

The post The Artist Behind the Viewfinder: Emotional Photography Insight appeared first on PictureCorrect.


from PictureCorrect https://ift.tt/2t3QDVE
via IFTTT

PictureCorrect.com: Interesting Photo of the Day: Mists of Myanmar

Looking ethereal and otherworldly–more like a painting than a photograph–today’s featured photo shows the magic of early morning light. Captured during a sunrise hot air balloon ride over the ancient city of Bagan, Myanmar, the photo shows the first rays of sunlight piercing through the fog to stream through temple spires and palm fronds:

myanmar landscape

View from a hot air balloon in Bagan, Myanmar. Photo by Dima Chatrov (Via Imgur. Click for larger size).

When the photo, shot by Dima Chatrov, was featured as a National Geographic Photo of the Day, Chatrov described the experience of capturing the moment:

“The first sunbeam breaks through the haze on the east and colors the valley in golden tones. A few more seconds and thousands of light blades pierce the fog. It is so beautiful and unusual that it seems like you are no longer in the 21st century, but somewhere in the middle of the 19th, flying like the heroes of Jules Verne, to open the unknown …”


Go to full article: Interesting Photo of the Day: Mists of Myanmar

What are your thoughts on this article? Join the discussion on Facebook

PictureCorrect subscribers can also learn more today with our #1 bestseller: The Photography Tutorial eBook

The post Interesting Photo of the Day: Mists of Myanmar appeared first on PictureCorrect.


from PictureCorrect https://ift.tt/2M4Yz01
via IFTTT

PictureCorrect.com: DIY Gobos for Moody Portraits

A gobo, in photography, can be anything that goes in between your subject and the light source. So, when you take a photo the model, instead of being evenly lit, has certain patterns of lights and shadows on him/her. Why would you want something in between the model and the light you ask? The answer is simple: to get a more artistic result. And no, you don’t need to go out and buy a gobo. Photographer Bill Lawson shows us how to use household items as gobos:

Lawson demonstrates how everyday items can be used to cast interesting shadow patterns, resulting in an interesting portrait. All we have to do is place the object in front of the speedlight. So when the flash is fired, the light passes through the openings of the gobo and casts a pattern of shadow and light on the model. By changing the distance between the gobo, the speedlight, and the model, the shadow patterns can be changed.

use lace as gobo

Some items that Lawson uses as gobos include the following:

  • lace
  • a dish drain
  • a scoop with stripes
  • a colander
  • a hat
  • fake flowers
  • a chair

lace go between

dish drain gobo

What other things do you see around you that can be used as gobos?


Go to full article: DIY Gobos for Moody Portraits

What are your thoughts on this article? Join the discussion on Facebook

PictureCorrect subscribers can also learn more today with our #1 bestseller: The Photography Tutorial eBook

The post DIY Gobos for Moody Portraits appeared first on PictureCorrect.


from PictureCorrect https://ift.tt/2LzSUTw
via IFTTT

sunnuntai 29. heinäkuuta 2018

PictureCorrect.com: Still Life: Photography Activity

This is a study of an inanimate object, such as a vase of flowers or bowl of fruit.

You’ll need:

  1. A source of light (a window is good)
  2. A subject. I suggest a nicely arranged bowl of fruit.
still life photography activity

Photo by Janice Cullivan; ISO 200, f/2.8, 1/1000-second exposure.

Camera Setup

  • Mode: Aperture Priority (often shown as Av on the mode wheel)
  • ISO: 100 or so (there will be lots of light)
  • White Balance: Custom
  • Aperture: Experiment!

Lighting

Make sure your light has some directionality, coming from the side. Otherwise it will be flat and boring.

White Balance

Take a shot of your grey card or reference paper in front of the subject. Make sure it’s bright grey, and set custom white balance.

The Pose

Arrange the subject so that it’s visually pleasing and there are no stickers on the fruit. You can try a bit of spray water for a fresh look. Arrange yourself and the subject so that some light falls on the item from a side angle. If the light is bright daylight (sun) or a lamp, the shadows will be sharp and harsh. If the light is overcast or through a diffuser (shades, a sheet, etc.), the light will be very soft and spread out.

Framing the Image

You can shoot still life as a centered image, or not—this is your choice. Since a still life print is often used as a “peaceful” image, a centered composition will connote balance and harmony. Watch the background. If your f-stop is not too wide open, you’ll see elements of the background in focus. If it’s a bit busy, consider arranging a dark cloth or other plain background to limit distracting elements. And consider your camera angle—20-30 degrees above horizontal may be the most appealing angle, but you can experiment.

still life

“Fruits d’automne” captured by Didier

Take the Image

Watch your shutter speed here, and stabilize your camera if it gets below 1/60 second.

Analyzing and Improving

Experiment with different light directions, camera angles, and light diffusion. Really look at the light and the shadows before you take the image. This is one of the benefits of this activity—you have the time and a patient subject, so use the opportunity to study the lighting, and the background and the subject.

Advanced Tricks

In post production, you can play with the levels tool or brightness/contrast tool to tweak the brights and darks. You can use the saturation tool to increase the color of the image, but be careful to not overdo it! You can use the soften tools and any available painterly effects, such as watercolor or pastel, to turn your image into a painterly masterpiece!

About the Author:
John Huegel (jhphotomusic.com) is a photographer in the Erie, Pennsylvania area who specializes in Seniors, Dance Studio, Families and other groups. He is active in many charitable and volunteer activities in the Erie area.


Go to full article: Still Life: Photography Activity

What are your thoughts on this article? Join the discussion on Facebook

PictureCorrect subscribers can also learn more today with our #1 bestseller: The Photography Tutorial eBook

The post Still Life: Photography Activity appeared first on PictureCorrect.


from PictureCorrect https://ift.tt/2LvQqWd
via IFTTT

PictureCorrect.com: Interesting Photo of the Day: Meet Dexter, the Kayaking Dog

We’ve all heard the saying: a dog is man’s best friend. Most people probably wouldn’t take it as literally as Galen Lofstedt, who brings his adorable furry friend on leisurely kayak trips— just like two old buddies:

dog-in-kayak

Dexter the fun-loving, kayaking pooch. (Via Imgur. Click to view full size.)

Lofstedt snapped this chuckle-worthy photo on his GoPro after passing under the Granville Street Bridge in Vancouver, BC. Lofstedt put it quite simply, “Dexter likes to kayak!” Judging by the smile on Dexter’s face, we certainly agree!


Go to full article: Interesting Photo of the Day: Meet Dexter, the Kayaking Dog

What are your thoughts on this article? Join the discussion on Facebook

PictureCorrect subscribers can also learn more today with our #1 bestseller: The Photography Tutorial eBook

The post Interesting Photo of the Day: Meet Dexter, the Kayaking Dog appeared first on PictureCorrect.


from PictureCorrect https://ift.tt/2LxgujO
via IFTTT