maanantai 31. elokuuta 2020

PictureCorrect.com: The Top 3 Basic Portrait Photography Settings

In portrait photography, one of the main differences between a happy snapper and a professional, besides the number of years of experience and accumulated skills, is that the professional takes control of the camera settings and has a good knowledge of lighting aspects. They also understand what makes for a good composition. Professionals also tend to use a lens with a focal length of 85mm equivalent or slightly greater. This puts the camera farther away from the subject and produces softer results. Here are the top three portrait photography settings employed by professionals.

1. Aperture

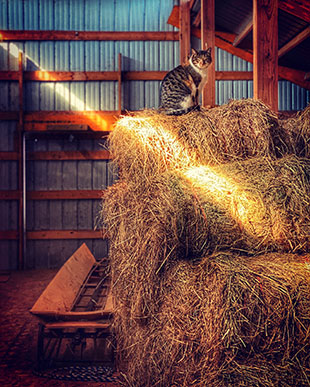
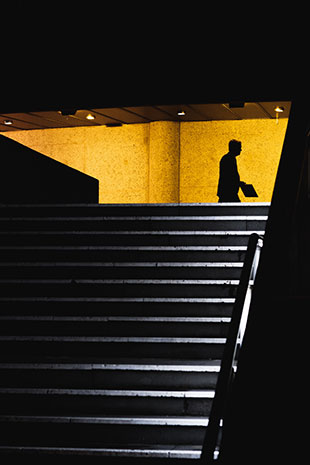
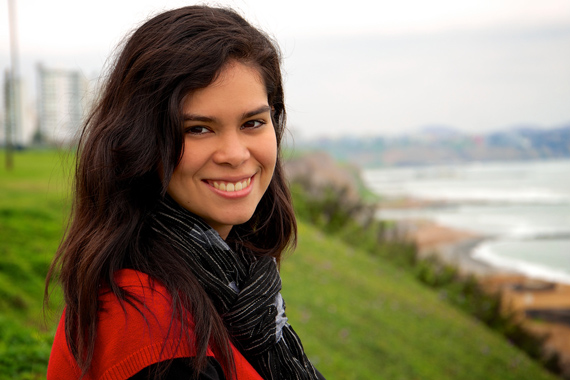
In portrait photography, you very rarely see the background properly, as it is usually out of focus, allowing the viewer to concentrate on the subject.

portrait with blurred background

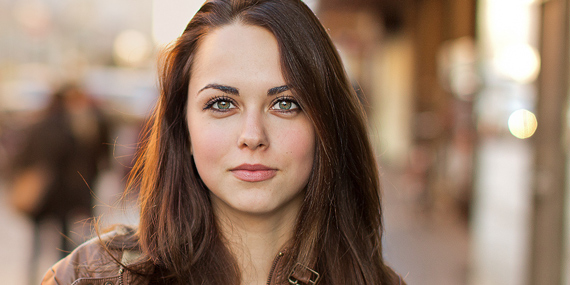
“Stranger Portrait No. 40” captured by Chris Zerbes

The subject can be in sharp focus or have a softness to it, which is kinder to some subjects. This effect is created with the judicious use of aperture control on your camera. If you set Aperture Priority on the camera, you can control the aperture setting while the camera sets the shutter speed. Selecting Manual mode allows you to set the aperture and shutter speed yourself. If you select the largest aperture, which is the lowest f-stop value (e.g. f/1.8), it creates a very limited depth of field. In fact, at the largest aperture, the eyes can be in focus while the nose may not be — or even just one eye might be in focus. You have to reduce the aperture slightly to get the result you want. I have a tendency to shoot at f/5.6 or f/6.3 most of the time inside a studio. Outside, I could increase that to f/8 if I want to show a bit more of a particular background. If you find that focusing can be a problem, change from auto focus to manual focus to give yourself more control.

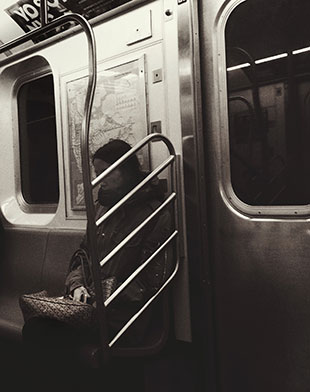
A note of caution: If you’re working in dim lighting conditions, you may have to increase the ISO to shoot at a fast enough shutter speed to avoid camera blur. Of course, if you use a tripod and advise your subject to remain still while taking the shot, camera blur shouldn’t be an issue.

tripod for portrait

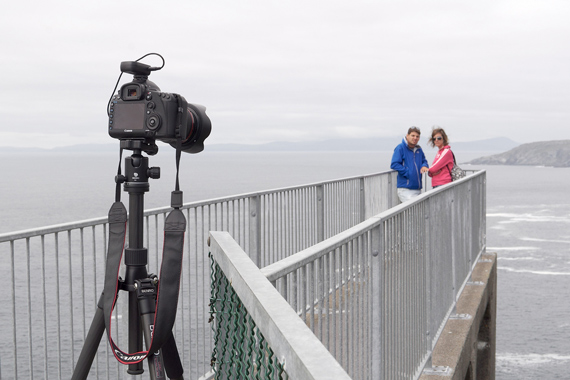
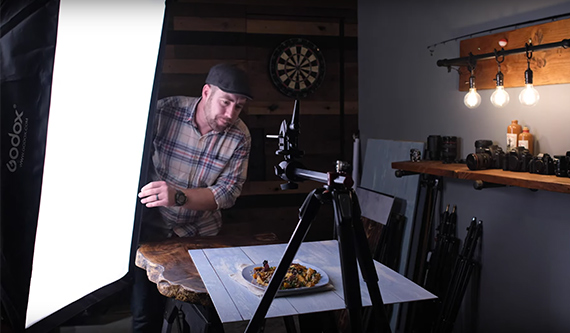
“Tripod remote controlled selfies, Mizen Head” captured by Flickr user “tubb”

If you use flash lighting to fill in shadows, then camera blur will also not be an issue for you in this situation. You may want to reduce the output or place a light modifier such as a softbox over the flash head if flash lighting is your only source of light, as direct flash lighting can produce harsh light and shadows. If you notice that your background is washed out or the skin tones are too light, you can increase the exposure level to +1 EV or +2 EV.

2. Shutter Speed

Most professional photographers shoot portraits at a shutter speed of around 1/200 of a second. This is not because of camera shake, generally, but because this is the maximum synch speed of most flash units employed in studio portrait shoots. Manual mode is used more often, as opposed to shutter priority mode. Shutter priority mode allows you to choose the shutter speed while allowing the camera to set the aperture. As we want to control the aperture as well, only manual mode allows you to do both.

3. ISO

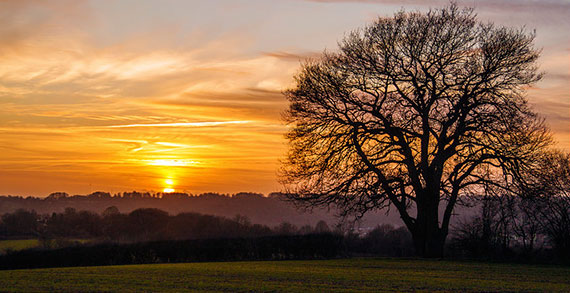
Choose the lowest ISO setting possible for the available light. In sunny conditions, you will probably need to set the ISO to 100 for the best results, in cloudy conditions to 200.

cloudy day portrait

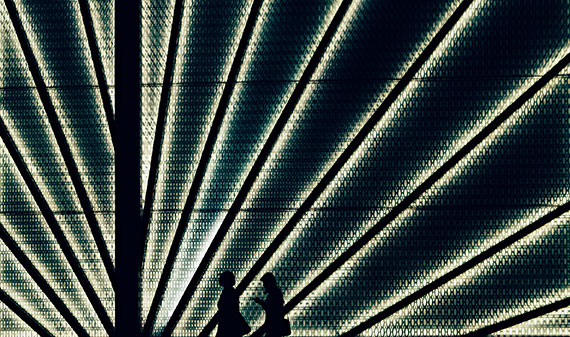
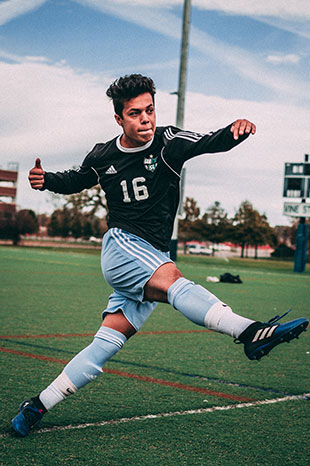
“My Medicine” captured by Rafael Soares

I tend to shoot routinely with an ISO setting of 200 anyway, regardless of whether I am outside or in the studio. If I need to adjust settings after capturing the images, I make sure I use the RAW camera setting, as it gives me much more flexibility than shooting JPEG images. In the studio without flash or in low lighting conditions, you may need to increase the ISO accordingly. Most modern cameras will allow you set an ISO of 3,200 or even 6,400 without too much noticeable noise in the resulting photograph. If you are planning on enlarging your photos dramatically, then keep the ISO down to a minimum and use flash lighting.

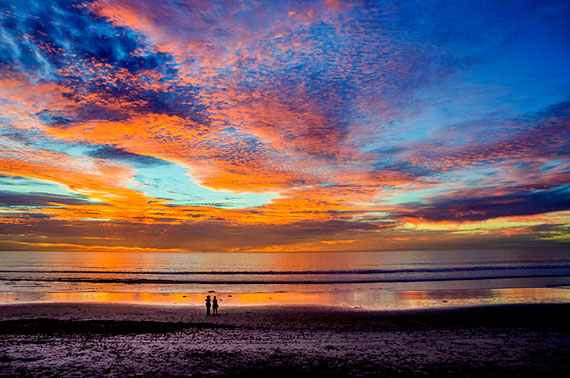
Finally, while not one of the top three camera settings, Auto White Balance is generally good for portrait shots in a studio because the lighting levels can be fixed and you will get consistent results throughout the shoot, until you adjust the lighting. However, shooting in daylight can be a problem. For example, if you are shooting at midday in a shady area, you may not get the proper white balance unless you allow for it. Similarly, if you shoot in scenes which are predominantly white (such as snow, a sandy beach, etc.), your whites may look grey or unnatural.

snow portrait

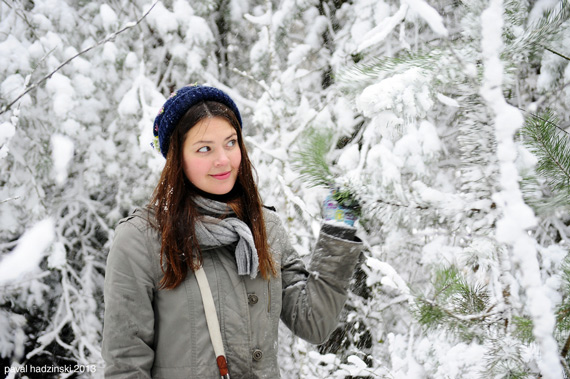
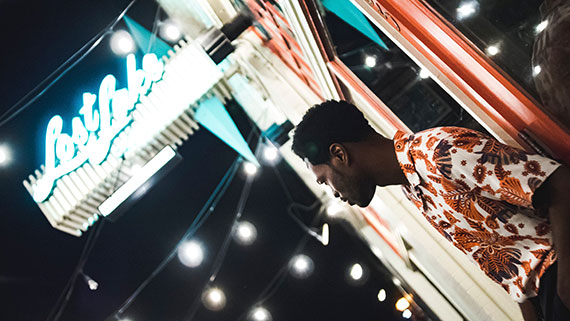
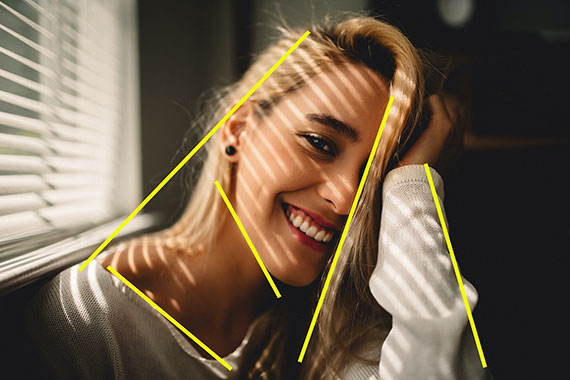
“Advent” captured by Paval Hadzinski

Using a preset white balance or a grey card helps to choose the correct white balance in these situations. I often select a grey component of my photo as my preset and see what the white balance looks like. Keep in mind that you have the option to change white balance settings after shooting and apply correction, if you are shooting in RAW mode. So if that portrait shot is quite important for you, shoot in RAW so you have an option to correct white balance later on.

About the Author:
Geordie Parkin keeps a website about wildlife photography, pet photography or general questions about digital photography (photopress brianparkin). Parkin is a photographer based in Forest Lake, Qld in Australia.


Go to full article: The Top 3 Basic Portrait Photography Settings

What are your thoughts on this article? Join the discussion on Facebook

PictureCorrect subscribers can also learn more today with our #1 bestseller: The Photography Tutorial eBook

The post The Top 3 Basic Portrait Photography Settings appeared first on PictureCorrect.


from PictureCorrect https://ift.tt/3gSBKLS
via IFTTT

PictureCorrect.com: Interesting Photo of the Day: Serene 8 Minute Exposure

Sometimes, there is something so serene about water. When it’s at its calmest, still and quiet, void of passing boats, noise or people. The stillness can wash over you. Here is that feeling captured through photography by reddit user sakelazy. Captured about an hour after sunrise, the photographer took in eight minutes of peace by the water while waiting for this long exposure:

serene-water-photo

8 Minutes of Peace by sakelazy (Via Imgur. Click image to see full size.)

The photo is breathtaking and does a great job of portraying a feeling of complete peace and calm. It’s almost as if you’re standing on the beach, can you smell the cool air?

Equipment and Settings

  • Canon 5D Mark II
  • Canon 17-40 f/4L at 21mm, f/11, 487 seconds, ISO 100
  • Formatt Hitech Firecrest IRND 16-stop Filter
  • Formatt Hitech 105mm Circular Polarizer Filter

Go to full article: Interesting Photo of the Day: Serene 8 Minute Exposure

What are your thoughts on this article? Join the discussion on Facebook

PictureCorrect subscribers can also learn more today with our #1 bestseller: The Photography Tutorial eBook

The post Interesting Photo of the Day: Serene 8 Minute Exposure appeared first on PictureCorrect.


from PictureCorrect https://ift.tt/2LUup3H
via IFTTT

PictureCorrect.com: Black and White Photo Editing Tips

On the surface, a black and white photograph appears merely as a desaturated version of a regular color image. But in reality, there’s much more to it. You can’t achieve a good looking black and white image simply by taking away colors. A meaningful black and white image has just the right amount of highlights and shadows to add a certain punch to the image. In today’s video, we have acclaimed photographer Dotan Saguy who gives insight on how he edits his black and white photos for a stunning effect:

As Saguy demonstrates in the video, he uses Silver Efex Pro which is a part of Nik Collection, to edit his photos. Before diving into Silver Efex Pro, it’s important that you check your histogram to ensure that the exposure is optimal. You want to be sure that the important bits are not underexposed. Otherwise, the final image will lack that punch. So, feel free to make any adjustments to the original image before converting it to black and white.

“With a monochrome, I underexpose images on purpose. So in Lightroom, I would bring them back slightly so that I have a proper histogram before going into Nik.”

The plug-in features around 48 presets. The idea is not to slap one of those presets to your photo but to use one of them as a starting point to work with your photo. Once you have a preset selected, you can then work with all the adjustments that the plug-in has to offer to fine-tune your images.

Be sure to watch the entire video as Saguy takes you through all of the adjustments that he makes in his photos.


Go to full article: Black and White Photo Editing Tips

What are your thoughts on this article? Join the discussion on Facebook

PictureCorrect subscribers can also learn more today with our #1 bestseller: The Photography Tutorial eBook

The post Black and White Photo Editing Tips appeared first on PictureCorrect.


from PictureCorrect https://ift.tt/34NxQBq
via IFTTT

sunnuntai 30. elokuuta 2020

PictureCorrect.com: The Dynamics of Diagonal Lines

Final reminder: only hours left for The Photography Action Cards at 88% Off

Diagonal lines are used by photographers to lead a viewer’s eyes to a particular spot in the composition. This spot is often the subject or very near the subject.

diagonal line of light

Photo by Kent DuFault

Create Visual Tension

Visual tension is created by a diagonal line. This tension is heightened when it intersects with other lines or other vital elements in the composition.

In some instances, a diagonal line works as a leading line and even as a pseudo-focal point.

diagonal lines as leading lines

Photo by Kent DuFault

There are two ways to get started with diagonal lines in your photography:

1. Focus your attention on spotting diagonal lines in a scene you wish to photograph.
2. Create the diagonal line to suit a particular composition or storytelling purpose.

Diagonal lines are super-efficient at moving a viewer’s eyes through a picture. When a diagonal line(s) intersects other objects in the composition, this creates point(s) of interest. These points of interest can become focal points.

In the photo above, the woman is almost completely obscured. However, the diagonal lines of the metal bars bring your eyes directly to her.

They then lead downward where they are abruptly cut off right at the woman’s hand, clutching her bag. This set of diagonal lines helps to create a story element.

Try a Dynamic Composition

When a composition has many diagonal lines, it’s called a Dynamic Composition.

The diagonals create visual excitement and are somewhat subconsciously unsettling as opposed to a static composition.

A static composition makes use of horizontal and vertical lines that imbue a sense of security and safety.

creating visual excitement with diagonal lines

Visual Excitement with Diagonal Lines

This photograph is a perfect example of dynamic composition. Do you notice how the diagonal lines lead right toward the subject? When they intersect and abruptly end at the robust vertical line, they create a focal point right next to the subject.

Critical Thought: Diagonal lines suggest a feeling of movement or direction. Objects presented in a diagonal line visually suggest instability in relationship to gravity. Since they’re neither vertical nor horizontal, your mind tends to imagine that something is moving or about to fall. This visualization creates tension and drama in a viewer.

diagonal lines in american flag

Diagonal Lines in American Flag

Key Lesson: Diagonal lines can be a huge asset to your composition toolbox. You can look for diagonal lines in a scene or create them by tipping your camera. The key to successfully tilting the camera for diagonal line use is to learn when the effect is appropriate.

Tilt Your Camera

Diagonal lines were created with this American flag by merely tilting the camera.

Tilting your camera to capture diagonal lines is also known as the “Dutch Angle” or the “Dutch Tilt.” German Expressionist filmmakers first popularized this use of a camera.

In the example above, you can see how this technique creates drama with the diagonal lines. The viewer feels like something is about to happen.

paris building behind hill

Photo by Paul DuFour

Let’s use this photo of a building in Paris, France to show how the Dutch Angle can really take a photo’s viewer for a ride.

This shot was taken with the camera horizon properly and appropriately set. We have a building behind a hill.

dutch tilt applied to photograph

Photo by Pauline Loroy

In this photo, the photographer applied a Dutch Tilt, making the hill the horizon line and the building askew. This picture is so much more dynamic than the first version!

Where to look for diagonal lines or scenes to apply the Dutch Tilt:

  • Architecture including roof lines
  • Bridges
  • Telephone and power line wires
  • Staircases
  • Canyons and rock formations
  • Body Language

Remember: Any horizontal line viewed from the side becomes a diagonal line. Any vertical line viewed from above or below becomes a diagonal line. You may be able to create a diagonal line by only moving your camera position.

IDEA: Take a trip downtown and spend an afternoon photographing buildings. Look for naturally occurring diagonal lines, but also create some diagonal lines by tipping your camera.

diagonal lines in the shadows

Photo by Kent DuFault

Another fantastic place to find naturally occurring diagonal lines is in the shadows!

Critical Thought: You can exaggerate diagonal lines using a wide-angle lens or in the positioning of your camera.

diagonal lines that emphasize depth of field

Left photo by David Clarke, center photo by Jorge Salvador, right photo by Ricardo Gomez Angel

Exaggerate Depth

By placing your camera closer to one end of the diagonal line, you can exaggerate depth perception.

Important Thought: You can start using diagonal lines with any camera, even your mobile phone camera. This technique requires no special tools. You simply need a keen awareness to this valuable composition tool.

lines on stairs create more depth

Lines on Stairs Create More Depth

Diagonal lines can create a depth perception of going into a picture. It can also create a feeling of going up or down.

Man & Staircase – This example of a ‘found’ scene uses two diagonal lines. The lines complete three tasks. They move the eyes toward the man. They help to create a direction in the photo from left to right. Finally, they create a visual tension that manifests itself at the point of the subject.

Use Body Language

No discussion of diagonal lines and dynamic composition would be complete without talking about body language.

creating motion in a portrait with diagonal lines

Photo by Ben Weber

Take a look at the athlete photo above. This is a classic example of a diagonal line creating the visual effect of motion and direction in a still photograph.

portrait positioning that creates drama

Photo by KAL VISUALS

This portrait displays the prominent diagonal highlight lines from the window blinds.

However, it’s the body language diagonal lines that give this image its oomph. The positioning of the head and hands create drama that focuses us on the young woman’s eyes and smile.

Remember these skill points as you practice learning how to use diagonal lines.

  • Look into a scene with a specific eye toward spotting the diagonal lines.
  • You can create a sense of motion and direction using a diagonal line, especially with body language.
  • Try tilting your camera to create a diagonal line where one doesn’t exist.
  • Using diagonal lines, you are creating a dynamic composition, which in turn helps give your photograph a mood and a sense of story.
lines created with shadow and light

Lines Created with Shadow and Light

As with this portrait of a woman, diagonal lines do not have to be physical objects. They can be created through light, shadow, or color. This photographer placed his subject near some diagonal lines to help set a mood for the resulting photograph.

Why don’t you give this a try?

  1. Organize a photoshoot using a model. Scout out several locations that you can use diagonal lines to set a variety of moods – peaceful, angry, excited, unhappy, busy.
  2. Go on a photoshoot where you seek diagonal lines existing in scenes, and then use them in a composition. Try twisting the camera POV to create diagonal lines.
  3. Print out your photos – study and share your results.

What do you think?

  • Were you able to create different moods with your model and diagonal lines? What feelings did you capture? Share your results with others for opinions.
  • Were you able to locate existing diagonal lines in a scene and use them?
  • Did you create diagonal lines by tilting your camera? Do you feel that you achieved a more dynamic shot as a result?
  • What was your favorite diagonal line technique?
  • Can you see yourself using this in the future to create dynamic compositions for your photography?

About the Author:
Kent DuFault is an author and photographer with over 35 years of experience. He’s currently the director of content at the online photography school, Photzy.

For Further Training, Deal Ending Soon:

With summer here and readers looking for more photography practice near home, we were able to get another huge markdown on the popular Photo Action Cards – which includes a card specifically on dynamic lines. Expand your photography skills with 65 printable project sheets that will give you over 200 photography assignments, covering everything you can imagine. They are currently 88% off until the end of the month, August 31, if you want to try them out.

photo action cards

New: The Photography Action Cards (Click to See How They Work)

These Action Cards discuss a photographic topic, provide you with suggested considerations, and give you specific photographic assignments. They’ll kick you out of the “nest” to go have a personal discovery experience all on your own. P.S. try the coupon code picturecorrect at checkout for even more of a discount which ends soon.

Only hours left: The Photography Action Cards at 88% Off


Go to full article: The Dynamics of Diagonal Lines

What are your thoughts on this article? Join the discussion on Facebook

PictureCorrect subscribers can also learn more today with our #1 bestseller: The Photography Tutorial eBook

The post The Dynamics of Diagonal Lines appeared first on PictureCorrect.


from PictureCorrect https://ift.tt/2YNzAH3
via IFTTT

PictureCorrect.com: Interesting Photo of the Day: Relaxing on the Beach

If your ideal Saturday night isn’t at a downtown club, but rather on the beach with a bonfire, some beers, your closest friends, and a gorgeous sunset, then congratulations—you’ve found your new desktop wallpaper.

campfire at haystack rock

(Via Imgur. Click image to see full size.)

The image, shot on Oregon’s Cannon Beach, comes from Jon Martin, who used a Canon 5D Mark II with a Canon 17-40mm f/4L USM lens. Here’s the story, from his Flickr page:

“As usual with the people I seem to meet here, they all had relatives in Norway. Or at least these thought they did; as their name started with Mac… I said, sure, you might be Norwegian and took them up on their offer of a shoreside drink, or it might have been five, to celebrate our (and prove my) ethnic heritage.

I thus missed missed a very nice, partly cloudy post-rain photo op of some large rocks. Oh, well.”


Go to full article: Interesting Photo of the Day: Relaxing on the Beach

What are your thoughts on this article? Join the discussion on Facebook

PictureCorrect subscribers can also learn more today with our #1 bestseller: The Photography Tutorial eBook

The post Interesting Photo of the Day: Relaxing on the Beach appeared first on PictureCorrect.


from PictureCorrect https://ift.tt/2lsqpaY
via IFTTT

PictureCorrect.com: iPhone Food Photography Tips

Ready to make some mouths water? As it turns out, a high-end camera isn’t a pre-requisite for stunning images on par with what a professional could deliver. Expert director and food photographer Skyler Burt proves in this video that, with a little bit of precision and a few secret weapons, your smartphone can capture five-star photos:

If you’re ready to take your cell snapshots to the next level, here are a few ways to up your game.

Work with the Lightroom Mobile app

Especially if you already have an Adobe subscription. Lightroom mobile can do a significant amount not only for your image organization but for the quality of your shots as well.

When you take a photo through Lightroom mobile, it initially doesn’t look much different than the standard default camera apps installed in virtually every smartphone. However, when you change the shooting mode from auto to professional, an array of camera options previously unavailable will suddenly appear. Lightroom mobile also makes it easy to streamline editing and export to the cloud, your camera roll, or to an email address.


Don’t let the machine make decisions for you

While it’s possible to make great photographs with a smartphone, your best results likely aren’t going to come from the automated camera included on your phone. Just like you wouldn’t blindly take an auto shot with a DSLR and expect immediate magic, you won’t get professional results with your phone by simply snapping the shutter without a second thought.


Burt recommends the Lightroom mobile app camera, but it’s certainly not the only choice available for those looking to improve their smartphone’s photo output. Search for an app that allows you to take control of settings like shutter speed, white balance, and focus/aperture. Tools such as levels and grids can also make a huge difference in composing a professional-looking photo.

Think about the light

This may seem a bit like stating the obvious. However, whether you’re working with the world’s most expensive Hasselblad or an outdated iPhone, light is the number one component that will make or break your photographs. When working with food, it’s hard to go wrong with the soft highlights and shadows provided by natural light. Seek interesting and flattering light wherever you happen to be. If it’s not quite perfect, don’t be afraid to modify it with a diffuser or a reflector.

light in smartphone food photography

Unfortunately, beautiful natural light isn’t always an option. In such cases, don’t shy away from artificial continuous lights. Just shine it indirectly and use bounce cards to get a better quality of light. Paired with a few white balance adjustments, viewers will be none the wiser!

Grab a tripod

A tripod may not seem like a necessity when working with a handheld smartphone. But, believe it or not, they can make a huge difference.

When paired with a clamp and an extending central column, you can easily position your smartphone at a birds-eye vantage point. once you’ve determined that your phone is level, you can simply lock it into place rather than attempt to maintain balance by hand. What’s more, having the camera held by tripod allows you to use both hands to compose your scene while observing the camera’s view.


Don’t forget to edit!

If you pay careful attention to lighting, composition, and camera settings, you’re sure to get a great shot. However, any shot can be improved upon by taking a little bit of time in post to edit.

Of course, you should tweak the color and tones present in your shot and add a bit of sharpening to clean it all up. However, you may want to use a more advanced editing app to deal with some of the finer details. For instance, Lightroom mobile’s brush tool can be used to perfect specific areas without making overall changes to your file.


Never underestimate the power of your smartphone. Whether you’re a seasoned pro or an aspiring iPhoneographer, you’re more than capable of using the contents of your pocket to bring your next meal to life!


Go to full article: iPhone Food Photography Tips

What are your thoughts on this article? Join the discussion on Facebook

PictureCorrect subscribers can also learn more today with our #1 bestseller: The Photography Tutorial eBook

The post iPhone Food Photography Tips appeared first on PictureCorrect.


from PictureCorrect https://ift.tt/2EKjG9c
via IFTTT

lauantai 29. elokuuta 2020

PictureCorrect.com: 2 Horizon Photo Tips For Better Landscape Photos

Landscape photographs are among the most beautiful photos you can produce. But it isn’t easy! To get decent results, you have to know, understand — and follow — tons of rules. Individually, none of them are a very big deal, but they combine to create powerful landscape photos. Today’s two photo tips are each another of those little steps to greatness.

tips for taking pictures of the horizon

Photo by Sarampión.♪♫; ISO 125, f/5.6, 1/80-second exposure.

1. Make Sure Your Horizon Is Straight

This seems so basic as to be almost unworthy of mention, but it is amazing how often the horizon line is not straight. True, when you’re shooting a mountainous scene (with hills, valleys and so on), it can sometimes be difficult to determine just where the horizon is. But you have to find it and make it level. It becomes more obvious when you’re looking at a photo of the ocean. That horizon absolutely must be level, and frequently, it isn’t. It’s a bit disconcerting to see it sloping to one side. Is the ocean pouring out of the frame?

best tips for horizon photos

Photo by Jozef Macak; ISO 100, f/2.5, 1/800-second exposure.

It only takes a second; double check and make sure your horizons are level.

2. Make Sure Your (Straight) Horizon Is Not Dead Center

You need a “star” for the viewer’s eye to settle on. This rule is easier to violate than the level horizon one — and it is violated right and left! Having the horizon in the center of the frame feels right, while having it off center is counter intuitive. But it’s a compositional must. When the horizon divides the photo in half, it’s very static and boring. There is no excitement or drama. The viewer doesn’t know what’s important and what they should focus their attention on. The sky or the ground? Where should they look?

Any contest-winning photograph needs a “star.” In this case, what is the star? Is it the sky? Did you want to show the viewer the dramatic clouds with golden light kissing the bottom? If so, lower the horizon to about the bottom third of the frame and make the sky the star.

tips for taking pictures of the horizon

Photo by Markus; ISO 800, f/7.1, 1/60-second exposure.

Is the star the ground? Did you want to draw attention to some natural feature or possibly a placid lake? Raise the horizon to about the top third of the frame and accent the ground.

tips for horizon and landscape photography

Photo by Amateur with a Camera; ISO 100, f/2.8, 1/125-second exposure.

There was something that caught your eye when you decided to take the shot. What was it? Make sure to raise or lower the horizon to make it the star, then make sure the horizon is level. These two photo tips will help you become the best landscape photographer in your area.

About the Author:
Dan Eitreim writes for ontargetphototraining.com. He has been a professional photographer in Southern California for over 20 years. His philosophy is that learning photography is easy if you know a few tried and true strategies.


Go to full article: 2 Horizon Photo Tips For Better Landscape Photos

What are your thoughts on this article? Join the discussion on Facebook

PictureCorrect subscribers can also learn more today with our #1 bestseller: The Photography Tutorial eBook

The post 2 Horizon Photo Tips For Better Landscape Photos appeared first on PictureCorrect.


from PictureCorrect https://ift.tt/2EECeb5
via IFTTT

PictureCorrect.com: Interesting Photo of the Day: Golden Hour Geyser

The best nature shots are the ones that make you want to pack up and start roaming the landscape in search for something as beautiful as what you’re seeing in the picture. That’s certainly the case for me when I first saw this truly epic geyser shot:

great fountain geyser sunset yellowstone

Great Fountain Geyser at Sunset (Via Imgur. Click image to see full size.)

Photographer Leon Jenson captured this photo of the Great Fountain Geyser in Yellowstone. Taken at just the right time, it is a true testament to the power of the golden hour, and how it can take a stunning shot and make it breathtaking.


Go to full article: Interesting Photo of the Day: Golden Hour Geyser

What are your thoughts on this article? Join the discussion on Facebook

PictureCorrect subscribers can also learn more today with our #1 bestseller: The Photography Tutorial eBook

The post Interesting Photo of the Day: Golden Hour Geyser appeared first on PictureCorrect.


from PictureCorrect https://ift.tt/2xkrJW5
via IFTTT

PictureCorrect.com: 7 Mistakes to Avoid in Landscape Photography

Mistakes are an indispensable part of the learning process. They’re also an indication that you’re actually putting in some effort. In photography, we can see photographers making a lot of mistakes, and that’s fine. What’s not fine is if we continue repeating those mistakes and not bother to improve. In this video, landscape photographer Nigel Danson talks about 7 photography mistakes that many photographers make and ways to avoid them:

Danson touches on a fundamental yet critical aspect of photography in this discussion – composition. After all, it’s the composition that determines the success or failure of an image. Settings and techniques come later.

“You could leave your camera on full auto and still get amazing photos. But composition is that thing that’s just a little bit trickier.”

Starting off with the concept of having a sense of balance in an image, Danson explains what impact it has, and how you can achieve balance in your image. He then explains the importance of foreground, and how having a foreground that seamlessly connects with the midground and the background can elevate your photography.

Every image should have an element where the viewers’ eyes can rest for a bit. This is the hero of the image – the subject. Be sure to have at least one compelling element in the scene. Having too many subjects is not a good idea either. Competition dilutes the overall essence of the image. This brings us to another important topic of keeping things simple when composing. Otherwise, the image will feel cluttered and make no sense.

Besides these, Danson also covers a range of other topics with examples to help you understand better. Be sure to go through the video to have an in-depth understanding of the mistakes you should be avoiding when starting out in photography.


Go to full article: 7 Mistakes to Avoid in Landscape Photography

What are your thoughts on this article? Join the discussion on Facebook

PictureCorrect subscribers can also learn more today with our #1 bestseller: The Photography Tutorial eBook

The post 7 Mistakes to Avoid in Landscape Photography appeared first on PictureCorrect.


from PictureCorrect https://ift.tt/3bkOLg5
via IFTTT