tiistai 31. lokakuuta 2023

PictureCorrect.com: What a First Time Wedding Photographer Needs to Know

The news that you are photographing your first wedding often leads to emotions ranging from excitement to apprehension, and in some cases, fear. Assuming you have experience with your equipment and have developed the necessary skills to take great photographs, the wedding event has a greater likelihood of being a successful one if you follow some key steps.

ways to prepare for your first wedding photography job

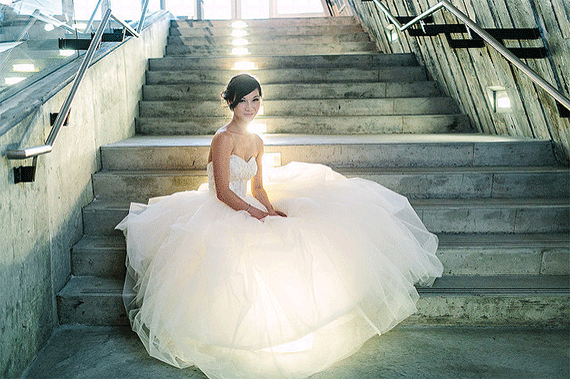
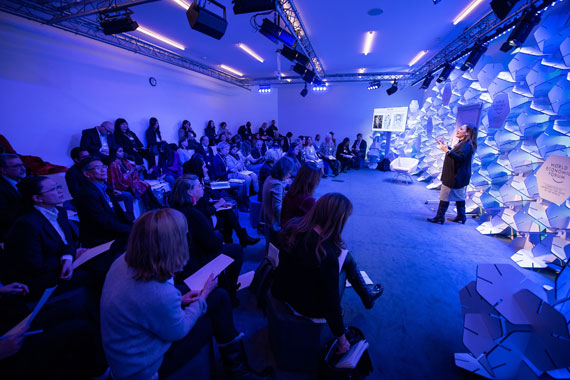
Photo by Joel Bedford

This article provides an overview of important steps to follow before, during, and after the event. As with any important job, the keys are preparation, focus, and follow-through.

Before the Wedding

Proper preparation before the event is the best way for a photographer to have a successful outcome. I spent several weeks before my first wedding visiting other photographers’ web sites. I read books on wedding photography, and I researched photography blogs and forums. It is amazing how much information is available for little or no charge. These tips and photographs can inspire you and get you thinking about what you want to accomplish and how you are going to make it happen.

It is important that you have a standard written agreement that is signed by the bride- and groom-to-be and the photographer. There is no excuse for not having this document in place. It should describe the deliverables and the fees associated with the service and products. It should also include a model release so you can use the photos for promotional purposes. It is highly recommended that you contact an attorney and draft a standard agreement that protects you.

At the time of signing the agreement, there are two other opportunities to enhance the process. First, get to know the bride and groom. Spend some time chatting so you will know their story and they will know you. When the wedding day comes, they should feel comfortable with you so their true personalities will shine. If possible, include a no cost or low cost engagement shoot so everyone can gain even more of a comfort level. It is a good opportunity to give them some posing tips that they can use on their wedding day.

It is also imperative to know the schedule. When you are meeting with the bride and groom, go over the agenda for the time you are expected to be at the wedding. Get to know their expectations. Let them know when you expect them to devote time to photographs with you in charge. This is a good time to talk about a wedding coordinator. If they will designate a friend or family member that will help the you identify important family members during the wedding day, it can be a tremendous help.

what to know about wedding photography

Photo by Parekh Cards

Another important component of preparation is checking your equipment. Check it thoroughly at least four or five days before a shoot. A check prior to my first wedding revealed a faulty auto-focus mechanism on one of my camera bodies, and I had to borrow a second camera for the shoot, but I was ready.

A proper equipment check also requires making sure you have backups of everything. You need two camera bodies and two flash units at a minimum. If you do not have them, you can rent them. On my first senior photo shoot, the wind blew my tripod and camera to the concrete surface. You never know when something will drop or just fail.

Check your batteries and memory card supplies, and bring more than you think you will need. It is not uncommon to take 2,000 to 3,000 images at a wedding. If you are using flash, you will burn through batteries very fast at that rate. For memory cards, it is better to have several smaller cards than just one or two big ones. If a card fails, you minimize your loss by using multiple cards.

Visit the venue(s) prior to the wedding day in order to scope out lighting and shot locations. Do you need to gel your flash for proper white balance? I often find that if I take a few test shots with and without flash, and perform a custom white balance check with my camera, that there are competing colors from the various light sources. For indoor venues, I often have to gel the flash to match the color of the venue’s lighting. This will save you much time and aggravation later in the process.

wedding photo practice

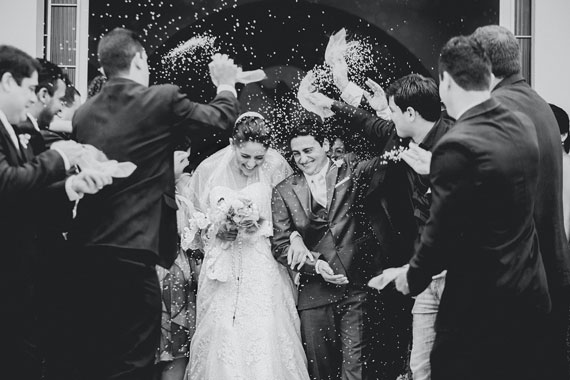
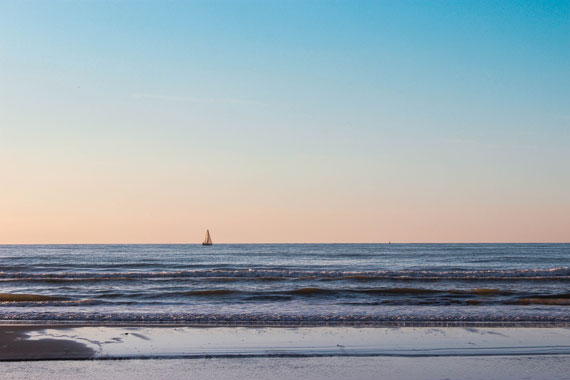
Photo captured by Jonathan Borba; 108mm, f/2.8, 1/1250s, ISO 1250)

To prepare yourself physically for a tiring day, have a light meal before you go. It is a good idea to bring granola, energy or candy bars, or other portable snacks. Bring water, too, just in case.

If you are prone to headaches, have a pain reliever with your in your pocket or bag.

Part of blending into the event is dressing appropriately. Talk to the bride and groom about their expectations before the event. In all cases, wear comfortable shoes.

Be insured. If someone trips over your equipment, are you covered?

The Ceremony

When you arrive, begin by taking outdoor venue shots. Here in southeast Michigan, you never know if the weather will turn on you later, and the same is true in many locations. Get some key building and landscape elements without people, just to have them.

Calibrate your camera’s white balance as soon as you walk indoors; do it for all of your cameras. Also, turn camera sounds off; you don’t want your camera to make noise during the ceremony.

Bring a fast lens; the faster the better. Indoor lighting at churches and reception halls is notoriously poor and dim. Be prepared with a fast lens (f /2.8 minimum – f/1.8 preferred). If you don’t have one, rent it.

advice for beginner wedding photographers

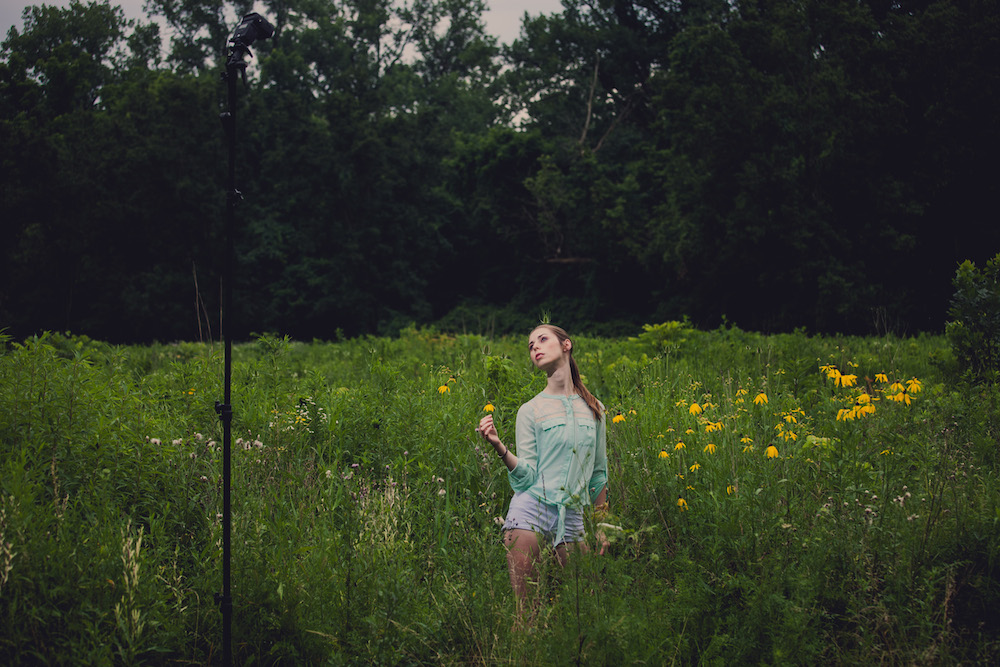
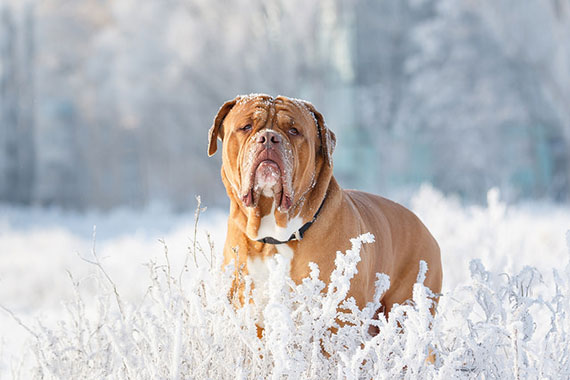
Photo by Missy Feigum; ISO 800, f/5.6, 1/320-second exposure.

If you are in a place of worship, have a clear understanding of where you can go and what locations are off-limits. Also, flash is usually not permitted in places of worship, but you can ask.

Consider bringing an assistant. Let them carry equipment, help set up shots, hold off-camera flash, and more. If you are working a 6-8 hour event, be prepared for the physical impact it will have on you. Having an assistant will ease the burden on you and should result in better photographs.

If you have a break from the bride and groom, start shooting the very young and very old early. They can get tired fast, and some may leave early.

If you have a camera bag, lock it down or have your assistant carry it. If you are on your own, consider using a cable lock for your camera bag and hide it out of sight. It serves as a deterrent from theft. You may feel comfortable with the bride and groom, but you never know about their friends and family or the staff at the venue.

Never reformat memory cards at the event. Backup when you can, but do not reformat. Check everything on your computer and complete backups before reformatting.

Take shots of the bride and groom as soon after the ceremony (or before) as possible. After people start drinking and celebrating, it will get harder to assemble people and have them look their best.

Most of the time, the photographer’s role should be to blend in and be discreet. Disappear in the background and try to capture people when they are relaxed, happy, emotional, etc.

If the wedding and reception are indoors, make sure to take shots of the bride and groom outside. Try to get away during the reception and get some outside shots–even if it is nighttime.

wedding ceremony

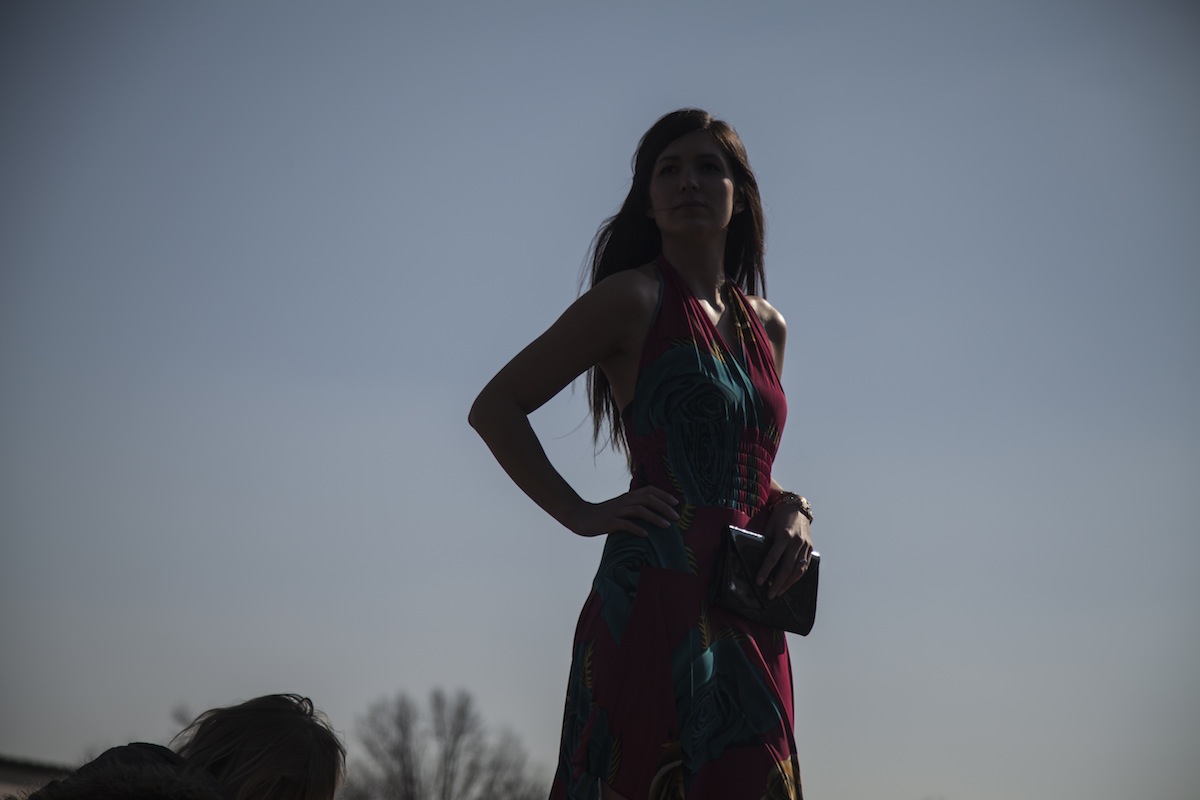
Photo captured by Jamie Coupaud; 80mm, f/2.8, 1/80s, ISO 3200

Take a group shot of everyone. This is a great way to have everyone in attendance in one photo. It makes for a great enlargement and an opportunity for sales to others in attendance at the wedding.

After the Event

After the event is over, I believe it is important to process the images as fast as possible. There is something to be said capturing taking the energy of the day and carrying forward. Posting images quickly to a web site will make everyone happy.

Keep in contact with the bride and groom and schedule a time to meet with them to go over the images and discuss ordering details. It is as important to provide a high level of customer service after the event and before it. If you establish a relationship with the couple, they will think of you for family portraits and portraits of their children in years to come.

Finally, take notes about what went right and what went wrong. This may help you do an even better job next time around.

About the Author:
This article was written by Rod Arroyo from City Photos, also on Twitter. Their photography services include weddings, high school seniors, families, and more. Based in the Metro Detroit, Michigan area.


from PictureCorrect https://ift.tt/nm9c08x
via IFTTT

maanantai 30. lokakuuta 2023

PictureCorrect.com: History of Masking Techniques in Photo Editing

Relevant note: only hours left for the Masking Photo Editing Guide at 68% Off

The art of photography has been inseparable from the techniques employed in editing and post-production. Among these, masking stands out as an invaluable tool that has allowed photographers to perfect their images, manipulate backgrounds, and create composite pictures with intricate detail. But masking in photo editing isn’t something that came about overnight; it has a rich history and has evolved significantly over the years with advancements in technology. In this blog post, we’ll explore the origins of masking and how it has evolved over time with the introduction of new tools and software.

masking history photo edits

What is Masking?

In photo editing, masking refers to the practice of hiding or revealing specific areas of an image. It allows you to manipulate only a portion of the picture without affecting the rest, offering tremendous control over the final output. The masked area can be edited, transformed, or even replaced altogether, all while keeping the rest of the image intact.

The Early Days: Analog Masking Techniques

Masking has its roots in the era of film photography. Early photographers used a variety of creative techniques to manipulate their photos. This included physically cutting and pasting different pieces of photographs together, painting onto negatives, and even using layers of glass to superimpose images. Though these methods were labor-intensive and required meticulous attention to detail, they were the foundations upon which modern masking techniques were built.

Hand-Made Masks

In the days of the darkroom, photographers would use hand-made masks, often cut from cardboard or paper, to cover parts of an image while exposing a print. These masks helped in dodging and burning, techniques to brighten or darken specific areas of a photograph.

The Digital Revolution

The advent of digital photography and editing software like Adobe Photoshop brought about a sea change in masking techniques. Instead of manually cutting out pieces of film or using physical masks, editors could now use software to achieve the same effect with far greater ease and precision.

Layer Masks

Layer masks in software like Photoshop allowed for non-destructive editing, where changes could be made to one layer without affecting the original image. This gave photographers the freedom to experiment and tweak their masks without worrying about irreversible mistakes.

Clipping Masks

Clipping masks took things a step further by allowing one layer to define the visible boundaries of another. This enabled more complex compositions, like text-filled shapes or images taking on specific forms.

Advanced Features: Smart Masks and AI Tools

As technology has evolved, so have masking capabilities. Smart masks can automatically detect edges and provide a more precise cutout of complicated shapes like hair and fur. AI-powered tools can even recognize objects within an image, making the masking process increasingly automated and accurate.

The Present and Future

Today, masking tools are more advanced than ever, offering features like feathering, variable gradients, and real-time previews. With the constant improvements in computing power and machine learning algorithms, the future of masking in photo editing looks promising.

Masking has come a long way from its humble beginnings in the darkroom. With the continual advancement in technology, this indispensable tool in photo editing is only set to become more sophisticated, providing photographers with even more control over their work. Whether you’re a professional photographer or a hobbyist, understanding the history and evolution of masking can give you a greater appreciation of the craft and inspire you to experiment with new techniques.

So the next time you sit down to edit your photos, remember that you’re participating in a long tradition of photographic artistry, empowered by tools that are the result of decades of innovation and evolution.

For Further Training:

Achieving perfect photography requires more than just in-camera skills in today’s environment. Yes, even the professionals now rely on post-production skills to PERFECT their images. One of the most important photo editing skills to learn is called “Masking” and an in-depth guide is now available to help photographers master it. It is 68% off until the end of the month, October 31, if you want to check it out.

understanding masking

Masking: A Critical Skill for Photo Editing

After you read this new masking guide you’ll realize that you are no longer tied to what you find. You can clean up the bugs in your shots. Fix those less than perfect rose petals. Take out that pesky truck that parked right in the middle of your landscape shot.

Ending at midnight: Understanding Masking for Photographers at 68% Off


from PictureCorrect https://ift.tt/D8yPZ0q
via IFTTT

sunnuntai 29. lokakuuta 2023

PictureCorrect.com: Soften Your Light Without Using Modifiers

Light modifiers are great. They can make a small light source appear larger. They can make hard light appear soft. They can even focus light down to a narrow shaft of light. However, when you are shooting outdoors, light modifiers, such as umbrellas, can quickly become cumbersome, as they turn your light stand into a sail when the wind picks up. Unless you have an assistant or two to lend a hand, carrying sandbags to anchor your light(s) is not an easy task. This tutorial will lead you through how to balance a hard light source with the ambient light to soften the appearance of your light. Note that I am not claiming that this is soft light; merely that it appears softer when balanced with the ambient light. If you have the luxury of an assistant to carry or hold all your gear, by all means use your softboxes and umbrellas.

lighting softening hard light without modifiers

Note that the single, barebulb speedlite was moved back several feet from subject and raised to around ten feet.

Your first goal is to make your light spread larger. This is done by backing the light off of your subject several feet. This allows the light spread to cover more of your subject. Because of the inverse square law (which I won’t go into), you will lose a substantial amount of your light output before it reaches your subject. This isn’t exactly a bad thing, however, assuming you aren’t trying to overpower the sun with a single speedlite. Besides increasing the spread of light, from the top to the bottom of the subject, this extra distance also helps even out the light from the front to the back of your subject. In other words, her right arm, which is closer to the light, is lit the same as her left arm, which is further away from the light. If you are using a speedlite, it’s helpful to set the zoom as wide as it will go, such as 24mm. If you are using a studio strobe, such as a Profoto head, pull the zoom reflector all the way back, to allow the widest possible spread. Also, consider raising your light several feet above your subject. This makes the light appear like a more natural occurring light source, such as the sun.

lighting softening hard light without modifiers

Flash at 1/8 power. Camera at ISO 50, F/9, 1/200.

Next, get a reading of your ambient light. As you can see in the first image, the ambient is considerably darker than the strobe light, making it appear very harsh. I brought up the ambient by lowering my shutter speed from 1/200 to 1/80 and opening my aperture up from f/8 to f/5.6. Note that if lowering the shutter speed alone had brought the ambient light to a good level, I wouldn’t have needed to adjust the flash settings. However, since I needed to also open up the aperture several stops, that meant I also needed to lower the output of the speedlite. Since it was a rather gloomy day outside, my already low flash output of 1/8 was lowered even further to 1/16.

lighting softening hard light without modifiers

Flash at 1/16 power. Camera at ISO 50, F/5.6, 1/80

After the ambient light is brought up, you can see that it begins to fill in the hard shadows, making the strobe light appear a little less harsh. The next thing you need to keep in mind is the direction of the subject to the light. Notice that when the subject turns away from the light source, the light creates harsh shadows on her face. By having the subject turn in to the direction of the light (or moving the light to a more frontal location), you eliminate some of the unflattering shadows.

lighting softening hard light without modifiers

If the subject is facing away from the light, this can create harsh shadows.

lighting softening hard light without modifiers

Turning the subject in the direction of the light helps alleviate some of the harsh shadows.

I also recommend using a longer focal length lens, such as a 70-200mm. Having a 2.8 aperture isn’t important either. I have the 70-200 f/4, and I prefer this, not only because it is half the price and lighter in weight, but because I would be shooting around f/4 anyway. The added depth of field from the smaller aperture allows my subject(s) to be sharp, from the tip of their nose to the back of their head. Yet I am still able retain a nice, soft depth of field in the background, due to the lens compression created by shooting at 200mm. This softening of the background further creates the impression of soft light.

lighting softening hard light without modifiers

Final image.

Now that the light is balanced and the subject’s general direction has been determined, the shooting can commence. Note that my final composition is a wider one, allowing the flowers and more of the park to show in the shot. This wider composition helps take the focus off any remaining hard shadows, such as the one below her jaw. Check out a few examples where I used this technique in other shoots.

lighting softening hard light without modifiers nick fancher photography commercial portrait

Unlit, midday sun.

lighting softening hard light without modifiers nick fancher photography commercial portrait

One, barebulb speedlite at full power. Note that I was shooting at 2.8, using a variable ND filter to lower the ambient light.

lighting softening hard light without modifiers nick fancher photography commercial portrait

unlit

lighting softening hard light without modifiers nick fancher photography commercial portrait

One, barebulb speedlite at full power. Note that I was shooting at f/4, using a variable ND filter to lower the ambient light.

About the Author:
Nick Fancher is a Columbus, Ohio—based portrait and commerce photographer. Author of Run and Gun Lighting Resource, he graduated from The Ohio State University with a BFA in fine art photography in 2005.


from PictureCorrect https://ift.tt/8YZUKXV
via IFTTT

PictureCorrect.com: 7 Essential Lessons from an Experienced Travel Photographer

During the years I’ve worked organizing photo tours, I have seen a lot of things, and helped people take a lot of incredible photographs. My clients often ask me for tips on how to do travel photography well, as it is quite different from other types of photography, and so I have come up with a list of essential tips that I think everyone should keep in mind when heading on a photographic tour or workshop.

men holding guns

  • Great travel photography requires a lot of planning, so take your time.
  • Look for any and all options when the opportunity you want doesn’t
    present itself.
  • Don’t get hung up on the right way to take any given shot.
  • Make sure to connect with your subject.
  • Get used to getting up close with your subject, enter in their
    psychological space.
  • Don’t act like a tourist.
  • Don’t act like a ‘pro’.

Great Travel Photos Require Planning

Some great photos seem spontaneous when you look at them, but the truth is, almost all great photos are a result of a time investment and good planning, not just a lucky shot.

When planning a picture you need to evaluate everything, look at where the light is coming from, how it falls, how it changes over the course of an hour or two. Watch the scene, see who comes and goes, how they stand against the background, and if this is the background you want. You need to pay attention because the devil’s in the details. Are the people coming from the same places, going to the same places? Is the motion more chaotic? You need time to notice some patterns about their movement. Also, what is the light doing, is it acting a certain way due to cloud cover, something that could vary greatly from minute to minute?

portrait of man on hillside

All great photos are a result of a time investment and good planning, not just a lucky shot.

Often times, such as the time I was in the Li River in China, with my China Photo Tour, I will find the place I want to photograph and spend an hour or two just watching and waiting. It might be that my picture comes together in those two hours, but it might be that I need to come back the next day to get the exact shot that I want.

Get Creative; There are Options Where You Least Expect Them

Sometimes it seems you are confronted with a shot that is impossible to take. When this happens, it is time to get creative. Especially in travel photography, the scene is almost never going to be exactly what you want. You need to move around the space, see how the story changes with respect to your position. See which subjects suddenly become important or appear when they had not been apparent before. You may need to do a bit of actual climbing to get up or down from a subject, or wait, as I said in point one, to see how the light will change your shot.

men boxing in street

Sometimes it seems you are confronted with a shot that is impossible to take. When this happens, it is time to get creative.

I am reminded of a situation I recently experienced on one of my Nomad Xpedition photo tours to Lalibela, Ethiopia. I was in a stone church that only had one light source – a small shaft of outside light coming down to one place, and it was not the one I wanted, initially. I had to do a lot of moving around, trying to use the very dim light of the candles around the edges of the church, to get what I wanted from this one shaft of light.

There is No ‘Right Way’ to Take the Shot You Want

Many times on my photo tours, people ask me, ‘what speed should I use right now’, or ‘I think this came out fuzzy, should I redo it? Does it matter?’ My answer is always, well, that depends on what story you want to tell.

motion blur of person walking

There is no one right way to take the shot you want. Two people faced with the same situation could decide on two opposite techniques and decisions. So, ask yourself not how to do it right, but what you want to do. Do you want to give the sense of motion or dreamy atmosphere? Then, you will need to use a slow speed. Do you want to freeze the moment in time? It will be a picture that comes from your own personal vision. To the person next to you, photographing the same subject, a slight blur might be an error, but maybe for your vision this blur will give the picture that sense of ethereal ambiance which is exactly what you want to portray.

And by the same token, don’t immediately throw out an accidental or ‘wrong’ photograph. It could turn out that with a little work, that slight bokeh around your main character, or the blurred background adds exactly what you needed to the entire composition.

Connecting With People is Important

Travel photography inherently means interacting with people. If you are trying to photograph people, and thus photograph life in general, it is paramount to connect with your subjects. Not doing so is not only disrespectful to the subjects you want to photograph, but you probably won’t get what you want if you don’t form any kind of relationship.

First, remember to smile. It doesn’t have to be a big show, just an effort. Even when everything is going wrong, even when your booking hasn’t appeared or you have miscommunicated with your transport, laugh a little, and smile. It eases the situation and it makes your subject feel like the problem, or the photograph, isn’t such a big deal.

Learn a few words in the native language. Show you are making an effort, even if you sound silly doing it. In the south of India on one of my photo tours I learned a few words in the Gujarati dialect, just a greeting and a few useful words like ‘Abayoo’ (out/over there) and ‘seedah, seedah’ (straight ahead, straight ahead). It worked wonders in terms of bringing me closer to the people I wanted to photograph.

three men inside buliding

Make eye contact, if the culture is alright with that. In most places, eye contact shows respect, and when you do not speak the language, remember that eyes are the windows to the soul. Eye contact allows the other person to read you and shows that you have nothing to hide. When you only know a few clips and phrases, gestures, like this one, go a long way.

Don’t be afraid either to take a stranger’s hand. While in western culture we might not be as used to physical contact, in many places in the world this is a way of connecting.

Don’t Be Afraid to Get Close

As I just said, eyes are the windows to the soul, and with portrait photography, you often need to get up close and personal. Sometimes good pictures are made on your knees. I am always irritated if I see a tourist standing above someone taking a picture of a person sitting on the ground beneath them. It is more respectful, and also a better photo, to get down to the subject’s level. It will bring you physically closer, but a good travel photographer doesn’t allow any feelings of awkwardness to come between them and the best shot.

get close to your subject

Also, forget about using long lenses. This will only keep people at a distance. A long lens and this kind of distance won’t create a photo that transmits much emotion. Prime lenses will become your best friend; they will force you to approach the subject as well as become aware of the entire frame, and to take your time.

So get close, and look people in the eye. I guarantee that your photography will improve.

Don’t Act Like a Tourist

Tourists take photos because they are convenient. If you want a great photograph, start taking time, and moving around. If there is a spot that is convenient that means a shot you take from that spot will be commonplace – every tourist will have one photo just like it. So, find the best light and then walk uphill, where no one else seems to be going. Maybe the light is worse, but wait around a few minutes to see what changes. Making a little more effort can ensure you are getting the shot no one else has.

lighting candles

And cross over to the other side. Remember that travel agencies generally organize things around comfort and convenience as well.

The more you wander away from that, the most likely you are to encounter something authentic, and thus, a much, much better picture.

Have a tea with the locals in a place were you don’t see other tourists.

Don’t Act Like a ‘Pro’

Basically, don’t ‘work’. Don’t force yourself into taking photographs just because you are holding a camera. Just take your photographs when you believe it’s the right moment for it. Focus on getting one good photo a day, nothing less, nothing more. If more than one comes out, it is gravy, but don’t aim for that. If you do, you might start rushing, or pushing yourself, and as a result, your photography will suffer. So take your time and do it calmly.

waterfront travel photo

Don’t force yourself into taking photographs just because you are holding a camera.

From time to time I get in my workshops a professional photographer who is struggling to create sellable images. It is a good thing to remind yourself, if you are in a rut, that you don’t need to produce, produce, produce, so much as remember what originally brought you to photography. Take the pictures you want to, don’t be afraid just because they aren’t pictures your colleagues might like, or because you think they might not sell.

I am always exploring new exciting destinations. If you would like to learn more about my China Photo Tour or come with me to other exotic destinations be sure to check
out my workshops in www.nomadphotoexpeditions.com.

About the Author:
Harry Fisch, travel photographer, has documented more than 40 countries through which he has travelled. A leader of photo tours to exotic destinations with his company Nomad Photo Expeditions. As part of his personal work, Harry is currently developing a photographic project related to the work in the bricks factories of Nepal and the spiritual activity at the churches in North Ethiopia.

His upcoming workshops will take place in India with the Kumbh Mela and a China Tribes Photo Tour with some days with the Cormorant fishermen of Guilin.

Winner of the 2012 World National Geographic Photo Contest (places), and later disqualified, his work has deserved several awards: Two Jury Awards in 2014 at the Grand Prix de la Découverte, France, finalist in the Sony 2012 World Photo Awards and selected in 2010 by Photoespaña—possibly the most prestigious Spanish photographic event—in the section “Discoveries”.

You can see some of his personal work here: https://harry-fisch-pgu1.squarespace.com/ and here http://cargocollective.com/HarryFisch.


from PictureCorrect https://ift.tt/S5bmF92
via IFTTT

perjantai 27. lokakuuta 2023

PictureCorrect.com: The Importance of Negative Space in Photography

In the visual arts, “negative space” refers to the area around and between the subject(s) in an image. Often overlooked, this concept is essential for creating well-balanced and impactful photographs. In this blog post, we will explore the importance of negative space, its impact on composition, and tips for effectively utilizing it in your photography.

negative space landscape

Photo captured by Thomas Griesbeck

What Is Negative Space?

Negative space is essentially the “empty” space in an image that surrounds the main subject. Contrary to its name, negative space is not necessarily “negative”; it serves multiple purposes such as balancing an image, enhancing the impact of the subject, and guiding the viewer’s eye.

Why Is Negative Space Important?

Balance

One of the most critical roles of negative space is to balance an image. Photos with too much “clutter” around the main subject can feel overwhelming and confusing. Negative space can offset this by providing a visual “breathing room,” thus allowing the viewer to focus on the subject more effectively.

Emphasis

Negative space can also be used to emphasize the subject in an image. When there is a significant amount of empty space around the subject, the viewer’s attention is naturally drawn to it, making the subject stand out.

Storytelling

A clever use of negative space can add depth to the narrative of a photograph. The emptiness can evoke feelings of loneliness, isolation, or even peace and serenity, depending on the context of the image.

negative space story

Photo captured by Simon Berger

Tips for Using Negative Space

1. Simplify the Composition

To make the most of negative space, aim for a simplified composition. Remove distracting elements that do not contribute to the main subject or the story you are trying to tell.

2. Use Rule of Thirds

Positioning your subject according to the rule of thirds can naturally create negative space. Place your subject off-center, and let the negative space occupy the rest of the frame.

3. Play with Angles

Experimenting with different shooting angles can dramatically alter the impact of negative space. Sometimes, a simple change in perspective can turn a mediocre shot into a masterpiece.

4. Mind the Colors and Tones

The color and tone of the negative space can also influence how the image is perceived. Lighter tones often evoke feelings of openness and tranquility, whereas darker tones can add drama and intensity.

Negative space is a powerful tool for photographers, offering a way to balance composition, emphasize subjects, and enhance storytelling. By understanding and applying the principles of negative space, you can elevate your photography to a whole new level. So the next time you’re framing a shot, remember: sometimes less really is more.

For Further Training:

As you journey through the minimalist photography landscape, having the right guide can significantly enrich your understanding and skill. The Minimalism Photography Extended Case Studies is a great resource that provides in-depth analysis and insights through real-world case studies. Currently on sale which ends soon if you want to check it out.

minimalism case studies

This product dives into the essence of minimalism, dissecting numerous images to provide a clearer understanding of the techniques and thought processes behind successful minimalist photography. Whether you’re a beginner or seasoned photographer, these case studies offer a valuable lens through which to view, understand, and practice minimalism in photography, sharpening your eye for simplicity and enhancing your ability to create captivating minimalist images.

Minimalism in photography is more than a style; it’s a mindset. By adopting a minimalist approach, you’re not only refining your photographic eye but also learning to see and appreciate the beauty in simplicity. With practice, patience, and the right resources, like the Minimalism Photography Extended Case Studies, mastering minimalism is well within your grasp.

Deal ending soon: Minimalism Photography Case Studies at 80% Off


from PictureCorrect https://ift.tt/kuoP0Js
via IFTTT

torstai 26. lokakuuta 2023

PictureCorrect.com: Travel Photography Tips and Techniques

With travel photography you want to convey not only the scenes you have seen but also the feelings and emotions associated with the locations. The unexpected is always around the corner when you travel and with some careful preparation and a keen photographic eye you can produce some memorable results.

Good travel photography starts at home or the office before you leave for the airport and weeks in advance of your trip. Here’s how capture great travel images.

1. Research before you leave

Purchase the best travel guide you can afford and find out everything about the locations you will be visiting. Find out about the natural beauty, tourist sites, and the culture. Look at the images in the guides and see what the important areas are and what you need to record.

Learn about local transportation and distances as well as timing to reach the areas you want to visit. Learn about the culture and find out what you can photograph and what is taboo, what the dress codes are and any local laws or rules. Buy a phrase book and learn some of the key phrases to communicate when photographing. You will be amazed at how this will open doors for you.

2. Prepare a checklist

Essential for any photographer is a checklist of everything you will need for the trip, photographically as well as you normal travel needs. Check that all your gear is covered by insurance and that it is up to date. Take proof that you purchased your equipment at home and not abroad so you don’t get landed with customs duty on your return.

3. Avoid cliches

Don’t return with all of the images that are in the guide books which everyone has seen. Use new angles and try get to viewpoints that are not traditionally used for photos. Leave the tourist path and get away from the bus. If you can afford it, hire a private guide to take you off the beaten track.

tips for travel photography

Photo by Giuseppe Milo; ISO 80, f/16.0, 1/30-second exposure.

4. Photograph local life

Local life in foreign countries is rich with sights and scenes that are brand new to you. You’ll often find that you will experience your photography much more by getting to know the local folk and seeing just what their daily life is like. By capturing the essence of their lives and homes you will experience the journey and capture memories that are unique and far more interesting.

5. Make yourself the subject

As the photographer you probably find that in all aspects of your life there are few images of you in front of the camera. So go out of your way to include yourself in photos while touring. Ask a travel companion, a guide or another tourist to take photos of you experiencing the local life. With digital you can see immediately the results of their work and whether you’ll need to reshoot it.

6. Take portraits

By respecting the local culture and as I mentioned learning a few of the most important phrases most locals will allow you to shoot their portraits. When photographing them close-ups are great and reveal character and the beauty of people you aren’t familiar with. But, this is the time to photograph portraits of people within their environments so shoot fewer head and shoulders and more with some of the background. Use wide angle lenses more often for great shots.

7. Shoot candids

With a longer lens and the ability to stay in the background and keep your distance you are able to photography people without them knowing. Unposed photos have people behaving totally naturally in their environments without the pressure to pose. The key here is to remain unobserved. Reveal yourself only once you have your shots. Look for opportunities that will reflect the local culture and people naturally.

times square photography

photo by Andrés Nieto Porras

8. Look for detail

By getting in closer and photographing the traditional clothes and jewelry you will see details in the color and styles. Look for details in the architecture, transport and local costumes that reveal something more than a traditional shot. A macro or telephoto is great for this type of shot.

9. Tell a story

By shooting a series of shots at a location you will be able to tell a story of the life of the local people. How they dress, work, have fun and where they live and relax. Select a theme or shoot at a market and try to think about the end result and how you will tell friends and family about your trip in just pictures. Maybe shoot a day in the life of a local you have befriended from morning till bedtime.

10. Take lots of photos

Work out how many images you think you should shoot and then double it. And then double it again. You can never take too many images. This may be the only opportunity for you to see this country and rather edit later than lose the memories by shooting too little. Not every picture will be perfect but it will be a memory. You are not just looking to create perfect photos but also great memories. Digital film is inexpensive so take lots of memory cards with you.

Travel is often a once in a lifetime opportunity for many people so go well prepared and come back with memories that will last a lifetime. Happy shooting!

About the Author:
Wayne Turner has been teaching photography for 25 years. Passionate about photography, radio and video. He is a Radio CCFm producer and presenter in Cape Town.


from PictureCorrect https://ift.tt/xhlWtnG
via IFTTT

keskiviikko 25. lokakuuta 2023

PictureCorrect.com: The Essential Shots Every Event Photographer Needs to Master

Event photography is a thrilling yet challenging domain. It’s about encapsulating the essence, emotions, and narrative of an event in a set of photos. For those who are venturing into the realm of event photography, knowing which shots are crucial and how to execute them can significantly up the game. Here’s a look at the essential shots every event photographer should master:

event photo

Photo captured by Evangeline Shaw; 16mm, f/4.0, 1/200s, ISO 3200

1. Candid Shots

Candid photography is the art of capturing spontaneous moments without the subjects being aware of the camera. These unposed shots often reflect the true essence and emotions of the moment.

Tips:

  • Stay Invisible: Blend with the crowd and avoid drawing attention to yourself to capture natural reactions.
  • Anticipate Moments: Keep an eye on the interactions and expressions, and have your camera ready to capture the fleeting moments.

2. Group Shots

Group shots are quintessential in events as they commemorate the gathering of families, friends, or colleagues.

Tips:

  • Organize Your Subjects: Direct your group with a friendly, but firm approach to get an organized shot quickly.
  • Use a Tripod: To ensure everyone is in focus, especially in large group photos, use a tripod to keep the camera steady.

3. Detail Shots

Every event has unique details that tell its story – the decor, food, venue setup, and other intricate elements.

Tips:

  • Arrive Early: Reach the venue before the guests to capture the details undisturbed.
  • Use a Macro Lens: For close-up shots of details, a macro lens can provide sharp and clear images.

4. Portraits

Portraits are personal and can be either posed or candid. They are a way to highlight the attendees and their connections to the event.

Tips:

  • Engage with Your Subject: Make your subject feel comfortable, talk to them, and perhaps share a laugh to get natural expressions.
  • Use a Shallow Depth of Field: A shallow depth of field helps in focusing on the subject and blurring the background, making the portrait more engaging.

5. Mastering Low Light Photography

Events often stretch into the evening hours, with dim lighting conditions. Mastering low light photography is crucial to ensure the quality of photos isn’t compromised.

low light event photo

Photo captured by Evangeline Shaw; 14mm, f/2.8, 1/250s, ISO 1000

Tips:

  • Use a Fast Lens: Lenses with wide apertures (like f/1.4 or f/1.8) allow more light into the camera sensor, aiding in low light conditions.
  • Increase ISO Sensitively: While higher ISO settings allow for brighter images in low light, they also introduce noise. Balance is key.
  • Steady Your Camera: Use a tripod or monopod to stabilize your camera, reducing the chances of blurred images due to camera shake.

6. On-Camera Flash Photography

On-camera flash can be a lifesaver in poorly lit environments, helping to illuminate the subject and surroundings adequately.

Tips:

  • Bounce the Flash: Instead of pointing the flash directly at the subjects, bounce it off a ceiling or wall for a softer, more flattering light.
  • Use Diffusers: Diffusers soften the light from the flash, reducing harsh shadows and highlights.

Conclusion

Mastering these shots requires practice, the right equipment, and a keen eye for storytelling through visuals. As an event photographer, evolving your skills to capture these essential shots will not only satisfy your clients but also provide a rewarding creative outlet. Each event is a new canvas with endless possibilities to capture enduring memories and tell compelling stories through your lens.

For further training: Secrets of Successful Event Photography at 33% Off

- - - - - - - - - - - - - - - - - - - - - - - - - - - - - - - - - - - - - - - - - - - - - - - - - - - - - - - - - - - - - - - - - - - - - - - - - -

Did you appreciate this newsletter? Please help us keep it going by Joining Our Patreon Supporters

What are your thoughts on this article? Join the discussion on our Facebook Page

Want help that you can print out and put in your camera bag? Try our full set of Photography Cheat Sheets

- - - - - - - - - - - - - - - - - - - - - - - - - - - - - - - - - - - - - - - - - - - - - - - - - - - - - - - - - - - - - - - - - - - - - - - - - -

The post The Essential Shots Every Event Photographer Needs to Master appeared first on PictureCorrect.


from PictureCorrect https://ift.tt/egRI4XW
via IFTTT

tiistai 24. lokakuuta 2023

PictureCorrect.com: Three Ways to Refine Subject Selection Masking

Mastering the ‘Select Subject’ tool in Lightroom and Adobe Camera Raw can significantly hasten the photo editing process. However, its automatic selections might require some tweaking for optimal results. In his insightful video tutorial, photographer Matt Kloskowski unveils three effective strategies to refine these selections. Here’s a distilled overview of his key recommendations:

1. Sky Subtraction Technique:

When working with outdoor photos where the subject is juxtaposed against the sky, it’s common for the ‘Select Subject’ tool to mistakenly include some sky in the selection. Matt’s solution is to use the subtract function and then select ‘Select Sky’, which effectively removes the sky from the selection, tightening the edges around the subject without the need for manual adjustment.

2. Color Range Subtraction:

In instances where the subject is surrounded by a solid color, employing the subtract function followed by ‘Color Range’ can be a lifesaver. By using the eyedropper tool to pick the color surrounding the subject, this method helps in refining the subject mask, particularly useful when the background color is consistent like a clear sky.

selection refinement

3. Harnessing the Object Selection Tool:

When the ‘Select Subject’ tool selects more than desired, utilizing the Object Selection Tool within the subtract function can be a game-changer. This tool allows for precise removal of undesired areas either by brushing or lassoing around them, enhancing the accuracy of the subject selection.

Matt Kloskowski’s tutorial is a practical guide for photographers keen on honing their selection refinement skills in Lightroom and Adobe Camera Raw. By implementing these three techniques, photographers can ensure that their subjects are accurately isolated, paving the way for more nuanced editing and ultimately, captivating visuals.

For further training: Wildlife Photo Editing Secrets

- - - - - - - - - - - - - - - - - - - - - - - - - - - - - - - - - - - - - - - - - - - - - - - - - - - - - - - - - - - - - - - - - - - - - - - - - -

Did you appreciate this newsletter? Please help us keep it going by Joining Our Patreon Supporters

What are your thoughts on this article? Join the discussion on our Facebook Page

Want help that you can print out and put in your camera bag? Try our full set of Photography Cheat Sheets

- - - - - - - - - - - - - - - - - - - - - - - - - - - - - - - - - - - - - - - - - - - - - - - - - - - - - - - - - - - - - - - - - - - - - - - - - -

The post Three Ways to Refine Subject Selection Masking appeared first on PictureCorrect.


from PictureCorrect https://ift.tt/9IyzVr2
via IFTTT

maanantai 23. lokakuuta 2023

PictureCorrect.com: Simplicity in Focus: Mastering Minimalism in Photography

In a world where chaos often reigns, the allure of minimalism is ever-growing, not just in lifestyle, but in photography as well. Minimalism is about reducing elements to the essentials, creating a simple, yet strong composition. It’s an art that, when mastered, leads to visually arresting images that hold the gaze. Below are some tips on how to embrace minimalism in your photography, along with a look at a new tool that can significantly aid your journey: the Minimalism Photography Extended Case Studies (currently 80% off today)

minimalism photo

Photo captured by Hannah Reding; 55mm, f/10.0, 1/200s, ISO 100

1. Less is More:

Declutter the scene, keeping only what’s necessary for your composition. Look for simplicity, and let each element in your frame be significant.

2. Master the Negative Space:

Utilize negative space to emphasize your subject. This space doesn’t compete for attention but rather enhances the subject’s impact.

3. Color Palette:

Keep a simple color palette. Limiting your colors to one or two can create a powerful, visually pleasing image.

4. Strong Composition:

Compose with intent. Employ compositional techniques like the rule of thirds, leading lines, or symmetry to guide the viewer’s eye.

5. Focus on Texture and Shape:

With fewer elements in the frame, texture and shape become more pronounced. Seek out interesting textures and shapes to add a unique touch to your photos.

minimalism tips

Photo captured by Cristina Gottardi; 27mm, f/16.0, 1/500s, ISO 400

6. Quality Over Quantity:

Every element in your frame should contribute to your image’s story or composition. If it doesn’t, it’s merely a distraction.

7. Minimal Editing:

Keep editing to a minimum to maintain a natural and simplistic look. Excessive editing can detract from the minimalistic appeal.

8. Practice Patience:

Good minimalistic photos may require waiting for the right moment when elements align perfectly. Patience is key.

9. Experimentation:

Don’t be afraid to experiment. Minimalism offers a broad spectrum, from abstract to realistic. Explore to find your unique style.

Elevate Your Minimalism Photography with Extended Case Studies

As you journey through the minimalist photography landscape, having the right guide can significantly enrich your understanding and skill. The Minimalism Photography Extended Case Studies is a fantastic resource that provides in-depth analysis and insights through real-world case studies.

minimalism case studies

This product dives into the essence of minimalism, dissecting numerous images to provide a clearer understanding of the techniques and thought processes behind successful minimalist photography. Whether you’re a beginner or seasoned photographer, these case studies offer a valuable lens through which to view, understand, and practice minimalism in photography, sharpening your eye for simplicity and enhancing your ability to create captivating minimalist images.

Minimalism in photography is more than a style; it’s a mindset. By adopting a minimalist approach, you’re not only refining your photographic eye but also learning to see and appreciate the beauty in simplicity. With practice, patience, and the right resources, like the Minimalism Photography Extended Case Studies, mastering minimalism is well within your grasp.

Deal ending soon: Minimalism Photography Case Studies at 80% Off

- - - - - - - - - - - - - - - - - - - - - - - - - - - - - - - - - - - - - - - - - - - - - - - - - - - - - - - - - - - - - - - - - - - - - - - - - -

Did you appreciate this newsletter? Please help us keep it going by Joining Our Patreon Supporters

What are your thoughts on this article? Join the discussion on our Facebook Page

Want help that you can print out and put in your camera bag? Try our full set of Photography Cheat Sheets

- - - - - - - - - - - - - - - - - - - - - - - - - - - - - - - - - - - - - - - - - - - - - - - - - - - - - - - - - - - - - - - - - - - - - - - - - -

The post Simplicity in Focus: Mastering Minimalism in Photography appeared first on PictureCorrect.


from PictureCorrect https://ift.tt/ZBWxnTV
via IFTTT

sunnuntai 22. lokakuuta 2023

PictureCorrect.com: Pet Portrait Photography Tips

Taking great photographs isn’t easy. It takes time, patience, and a little bit of knowledge! This article focuses on taking photographs of pets or animals, and the challenges this sometimes poses.

taking pet portraits

Photo by Paul B; ISO 640, f/8.0, 1/160-second exposure.

What follows are a few tips I’ve learned over the years shooting animals and pets (but these tips can also translate for shooting other subjects).

1. Patience & Positive Attitude

This is definitely number one for me. If you rush through the shoot and become frustrated, the results will suffer. A positive, carefree attitude is felt by our furry friends and in turn they become much more comfortable with having a camera in their faces (as Cesar Milan would say “calm and assertive” is the best approach!). If you’re feeling frustrated or getting impatient, just take a break and get back to it when you’re in a better frame of mind.

Don’t rush the shoot; it can sometimes take hours to get a great shot.

2. Enjoy it!

If you’re not enjoying yourself, you can’t expect to get good shots. Have fun and the pictures will practically take themselves.

3. Natural Lighting

When possible, opt for natural light. Try shooting either at dawn or dusk, as this can create great natural shadows and light. Avoid high noon, as this is the harshest time of day to take photos outside.

If it’s cloudy, not to worry! This is the absolute best scenario. Cloudy days offer a soft lighting on your subject, without the harsh shadows.

If it’s a sunny day and you need to do the shoot then, go to a shaded area and shoot there.

pet photography

Photo by Andrey Shkvarchuk; ISO 250, f/4.0, 1/1000-second exposure.

Indoor shoots can be a challenge, but with the right equipment they turn out great. You need a flash or a very big, bright window to get good lighting. If you have a DSLR, a mounted flash is great when bounced off the ceiling or walls. If you’re using a point and shoot, I would opt for natural window lighting as the flash on those things is usually terrible. With cats I often have to use my flash, but since I bounce it off the ceiling and surrounding walls they don’t seem too bothered by it.

4. Experiment

Try different angles, lighting, and composition to get the best variety. Change things up as much as possible.

5. Shutter Speed and Aperture

As with any portrait, make sure you have these at optimal settings. For a nice blurred background, you want a very wide aperture. If you’ve just got a point and shoot, this likely won’t mean anything to you but the portrait auto modes can do a nice job on their own.

6. Restrict Movement

This sounds cruel, but I just mean keep them contained so you can get the shot. For example, with cats that are a little nervous, you can keep them confined to one room so you’re not chasing them around the house. This works great for kittens!

tips for great pet portraits

Photo by burlingtonhumane; ISO 1600, f/3.5, 1/45-second exposure.

More detailed articles on these subjects to come!

About the Author:
Leigha Taylor Photography (leighataylorphotography) specializes in innovative and unique portraits of both people and their pets. Leigha Taylor has over 10 years of shooting experience in Toronto. She has a masters degree, a day job, and many hobbies to keep her busy. She currently works in the environmental field conserving nature and taking pictures. Her journey with photography started in the dark room, in the days of film and enlargers. She prefers natural lighting over studio lighting and loves shooting outdoors.

- - - - - - - - - - - - - - - - - - - - - - - - - - - - - - - - - - - - - - - - - - - - - - - - - - - - - - - - - - - - - - - - - - - - - - - - - -

Did you appreciate this newsletter? Please help us keep it going by Joining Our Patreon Supporters

What are your thoughts on this article? Join the discussion on our Facebook Page

Want help that you can print out and put in your camera bag? Try our full set of Photography Cheat Sheets

- - - - - - - - - - - - - - - - - - - - - - - - - - - - - - - - - - - - - - - - - - - - - - - - - - - - - - - - - - - - - - - - - - - - - - - - - -

The post Pet Portrait Photography Tips appeared first on PictureCorrect.


from PictureCorrect https://ift.tt/ClNq4Rf
via IFTTT

lauantai 21. lokakuuta 2023

PictureCorrect.com: How This Everyday Backpack Stands Out for Photographers

When it comes to finding the perfect backpack for photographers, there’s a sea of choices out there. But amidst this vast ocean, the Peak Design Everyday Backpack has managed to create waves of its own. Here’s a deep dive into what sets it apart from the competition:

camera backpack

Customizable Interior Dividers: Unlike most backpacks that come with fixed compartments, the Peak Design Everyday Backpack features FlexFold dividers. These adjustable partitions allow photographers to customize the bag’s interior based on their gear, ensuring that everything from DSLRs to drones fits snugly.

Quick Access Points: Time is often of the essence in photography. Recognizing this, the backpack is designed with dual side zippers, granting users quick and easy access to their gear without needing to open the main compartment.

quick access points

Weatherproof Design: Come rain or shine, the Peak Design Backpack is ready. It boasts a weatherproof exterior and zippers, ensuring that your equipment remains dry and safe even in unpredictable weather conditions.

Expandable Storage: One of the standout features is its adaptable storage capacity. The top of the backpack can be expanded, providing additional space when you need it and remaining compact when you don’t.

Dedicated Laptop and Tablet Sleeves: Beyond camera gear, modern photographers often carry digital devices for on-the-go editing. This backpack comes with dedicated, padded sleeves for both laptops and tablets, ensuring they’re protected alongside your camera equipment.

External Carry System: Sometimes, the gear you need doesn’t fit neatly inside a bag. With the external carry system, photographers can securely attach tripods, monopods, or even a yoga mat to the outside of the backpack.

Magnetic Latches: The bag features an innovative MagLatch system for the main compartment, allowing for secure closure and easy, one-handed access.

backpack visualized

Sleek Aesthetic and Ergonomics: Apart from its functional brilliance, the Peak Design Everyday Backpack scores high on aesthetics. Its minimalist design is both stylish and ergonomic, ensuring comfort during long journeys or extended photoshoots.

Sustainability: In a world increasingly conscious about the environment, Peak Design’s commitment to using recycled materials and maintaining carbon-neutral operations makes it a choice that’s not just good for photographers, but also for the planet.

While there are countless backpacks tailored for photographers, the Peak Design Everyday Backpack emerges as a frontrunner due to its blend of innovation, functionality, and style. It’s evident that this isn’t just another backpack; it’s a thoughtfully designed companion for photographers on the move.

Currently limited stock: Peak Design Everyday Camera Backpack

- - - - - - - - - - - - - - - - - - - - - - - - - - - - - - - - - - - - - - - - - - - - - - - - - - - - - - - - - - - - - - - - - - - - - - - - - -

Did you appreciate this newsletter? Please help us keep it going by Joining Our Patreon Supporters

What are your thoughts on this article? Join the discussion on our Facebook Page

PictureCorrect subscribers can also learn more today with our #1 bestseller: The Photography Tutorial eBook

- - - - - - - - - - - - - - - - - - - - - - - - - - - - - - - - - - - - - - - - - - - - - - - - - - - - - - - - - - - - - - - - - - - - - - - - - -

The post How This Everyday Backpack Stands Out for Photographers appeared first on PictureCorrect.


from PictureCorrect https://ift.tt/dghquY4
via IFTTT

perjantai 20. lokakuuta 2023

PictureCorrect.com: New GenErase Tool Coming to Luminar Neo Photo Editor

Skylum, the developer behind the award-winning Luminar Neo photo editor, has recently unveiled its innovative generative AI technologies. These tools, integrated within the Luminar Neo platform, aim to provide photographers with more advanced and efficient editing capabilities. Let’s delve into the details.

generase

What’s New in Luminar Neo?

Luminar Neo’s latest update includes three groundbreaking AI-assisted tools: GenErase, GenExpand, and GenSwap. These features are set to roll out in stages, from October to December 2023, with GenErase leading the release on October 26, 2023.

  1. GenErase: This next-gen Erase tool is designed to effortlessly remove unwanted elements from your images, such as trash, graffiti, and crowds. What sets it apart is its content-aware AI capabilities. Instead of leaving a void, GenErase will intelligently fill in removed areas with textures and elements that match the surrounding region, maintaining the image’s coherence and beauty.
  2. GenExpand: This tool is a game-changer for those who wish to venture beyond traditional aspect ratios. With GenExpand, photographers can extend their image boundaries, making it particularly useful for creating panoramic views of landscapes or simply adding more space around a focal point.
  3. GenSwap: This technology offers photographers the ability to change an image’s composition by replacing or adding objects. GenSwap’s AI can introduce new details to a photo as per user prompts. Whether it’s replacing an unsightly tree, introducing a bird to the sky, or adding a stone to a desert scene, GenSwap aims to enhance the overall visual appeal of an image.

Why the Shift to Generative AI?

Skylum has always been at the forefront of AI-assisted photo editing. With the introduction of generative AI, Luminar Neo aims to save photographers time on routine tasks, letting them focus more on their creative journey. Ivan Kutanin, CEO of Skylum, emphasizes that while these tools provide advanced technology for visual storytelling, they are not intended to replace the real-life experiences that form the essence of photography.

Availability and Pricing

The generative AI tools and other platform upgrades are accessible to monthly, annual, and 2-year Pro, Explore, and Ultimate plan subscribers. Special pricing for new users starts at $14.95, going up to $269 until October 28, 2023. For those already holding a Luminar Neo lifetime license, Skylum offers options to switch to the Pro annual subscription at a discounted rate or purchase the 2023/24 Creative Journey Pass, granting access to these generative technologies and future features until August 16, 2024.

In summary, Skylum continues to push the boundaries of photo editing with the Luminar Neo’s new generative AI tools. These features aim to streamline the editing process, allowing photographers to bring their creative visions to life more efficiently.

Pre-release offer ending soon: GenErase in Luminar Neo Photo Editor

- - - - - - - - - - - - - - - - - - - - - - - - - - - - - - - - - - - - - - - - - - - - - - - - - - - - - - - - - - - - - - - - - - - - - - - - - -

Did you appreciate this newsletter? Please help us keep it going by Joining Our Patreon Supporters

What are your thoughts on this article? Join the discussion on our Facebook Page

PictureCorrect subscribers can also learn more today with our #1 bestseller: The Photography Tutorial eBook

- - - - - - - - - - - - - - - - - - - - - - - - - - - - - - - - - - - - - - - - - - - - - - - - - - - - - - - - - - - - - - - - - - - - - - - - - -

The post New GenErase Tool Coming to Luminar Neo Photo Editor appeared first on PictureCorrect.


from PictureCorrect https://ift.tt/rnAEuJ1
via IFTTT

torstai 19. lokakuuta 2023

PictureCorrect.com: Linear Gradient Tutorial In Lightroom Mobile

Linear gradients play a vital role in photography, elevating images from the ordinary to the extraordinary. Clifford Pickett, in his insightful video tutorial, sheds light on this dynamic tool and how it can transform our approach to photo editing.

Understanding Linear Gradients

Linear gradients are all about creating a transition in your photos. By using them from the edge towards the center, you introduce a gradient effect that can be used to either emphasize or de-emphasize certain parts of the image. This method can be particularly helpful in directing a viewer’s focus to the primary subject of the photo.

The iPhone Urban Photography Experience

Pickett showcases a striking photo captured during an iPhone Urban Photography class. The image perfectly exemplifies the power of linear gradients. The goal is to identify the primary subject, emphasize it, and de-emphasize or even remove what’s not the subject. This targeted approach ensures that viewers’ eyes are drawn exactly where the photographer intends.

Getting Hands-on with Linear Gradients

Diving into the practical aspects, Pickett demonstrates the process:

  1. Mask Selection: Start by selecting the masking icon and then choosing the linear gradient option.
  2. Gradient Application: Click and drag on the image, defining where you’d like the gradient to start and end.
  3. Adjusting Exposure: By adjusting the exposure, one can witness the gradient’s effects in real-time.
  4. Defining the Gradient: Depending on the desired result, the gradient can be made sharp or soft.
  5. Positioning the Gradient: Ensure the gradient is positioned optimally to enhance the image’s focal point.

Duplication for Symmetry

Pickett introduces a nifty trick to ensure uniformity. Instead of manually creating a similar effect on the opposite side of an image, he suggests duplicating the mask. This duplicate mask can then be repositioned and rotated to achieve the desired effect. Moreover, any adjustments made to one mask are replicated in its duplicate, ensuring consistency.

linear gradient

The Beauty Lies in the Details

Editing is all about refining details. Sometimes, it’s the minute adjustments that make all the difference. Pickett points out a distraction in the bottom left of his showcased image. By creating a soft gradient, he subtly de-emphasizes this distraction, further simplifying and improving the photo.

The Power of Simplification

The before-and-after comparison of the photo is a testament to the transformative power of linear gradients. By simplifying the image, Pickett ensures that viewers focus only on the intended subject. Simplification, he argues, invariably enhances a photo.

Conclusion

Linear gradients are not just tools; they’re instruments of artistry. They allow photographers to guide viewers, emphasizing what’s essential and removing distractions. As Pickett concludes, using linear gradients is not only the best method but also the quickest route to achieving photographic perfection.

For those keen on delving deeper into the world of iPhone photo editing, Clifford Pickett’s iPhone Editing Academy online course promises to be a treasure trove of techniques and tricks. Whether you’re looking to revamp old photos or enhance your best ones, this course seems like the perfect starting point.

iphone editing academy

New: iPhone Photo Editing Academy (see preview videos)

Pickett, who has edited over 10,000 photos using nothing but his iPhone and sold many to major corporate clients, has crafted this course as an accessible way to master photo editing.

Launch sale ending soon: iPhone Photo Editing Academy at 80% Off

- - - - - - - - - - - - - - - - - - - - - - - - - - - - - - - - - - - - - - - - - - - - - - - - - - - - - - - - - - - - - - - - - - - - - - - - - -

Did you appreciate this newsletter? Please help us keep it going by Joining Our Patreon Supporters

What are your thoughts on this article? Join the discussion on our Facebook Page

PictureCorrect subscribers can also learn more today with our #1 bestseller: The Photography Tutorial eBook

- - - - - - - - - - - - - - - - - - - - - - - - - - - - - - - - - - - - - - - - - - - - - - - - - - - - - - - - - - - - - - - - - - - - - - - - - -

The post Linear Gradient Tutorial In Lightroom Mobile appeared first on PictureCorrect.


from PictureCorrect https://ift.tt/qMQl3t8
via IFTTT

keskiviikko 18. lokakuuta 2023

PictureCorrect.com: Using Framing in Photography Compositions to Draw Interest

In previous lessons, we’ve been getting pretty heavily into scientific and technical issues, so today I wanted to step back and talk about one of the softer techniques. For today’s photo tip, we’ll move back into landscape photography composition. Framing is one of the major photo composition ideas and is a strategy that you should be using.

The composition strategy you select is important in creating a pleasing, contest-winning photo. So, for this series of landscape photography composition ideas, we’ll get started with framing. And no, I’m not talking about the frame you buy and put your finished photo into. I’m talking about framing as a composition technique in a photo to help direct the viewer’s eye.

framing your subject

photo by Chad Routh

The idea is to have some sort of visual frame in the foreground that surrounds the subject you want to draw the viewer’s attention toward (the “star” of your photo).

A common framing device is to have your main subject positioned somewhat in the center of the photo and in the foreground you will have large tree trunks going up either side of the image and branches going across the top to effectively frame the subject and draw the eye to it.

Another popular framing idea is to shoot from inside a building (old beat up barns work well for this) and have your main subject framed in the door or window.

how to frame using a window

photo by Nan Fry

We’ve previously discussed how the eye is drawn to the lightest part of a portrait. Well, the eye is drawn to the lightest part of landscape photography, too! The dark interior walls surrounding (framing) the lighter outside main subject can’t help but draw the eye.

Another example, taking the concept of framing literally, I once took a picture of a group of dancers—there were 5 or 6 of them as I recall. The photo was a just for fun portrait, not a formal dance troupe thing. I literally had the young ladies holding onto and looking at the camera through a photo frame! (The kind you buy to put around your finished photos.) All of their heads were in the frame while their bodies were going off in all directions!

We not only had a lot of fun, but the girls (and their parents) loved it and all of them bought a copy.

picture frame in photo

photo by Prayitno

While you’re thinking outside the box, try thinking inside the frame!

Take today’s photography composition tip—framing—and get out there this weekend! Find some ways to frame your subjects. Do some of the cliché frames, but also try for some unique ones you haven’t seen before! It’s fun. As photo composition ideas go, framing is one of the big ones!

About the Author:
Dan Eitreim writes for OnTargetPhotoTraining. He has been a professional photographer in Southern California for over 20 years. His philosophy is that learning photography is easy if you know a few tried and true strategies.

- - - - - - - - - - - - - - - - - - - - - - - - - - - - - - - - - - - - - - - - - - - - - - - - - - - - - - - - - - - - - - - - - - - - - - - - - -

Did you appreciate this newsletter? Please help us keep it going by Joining Our Patreon Supporters

What are your thoughts on this article? Join the discussion on our Facebook Page

PictureCorrect subscribers can also learn more today with our #1 bestseller: The Photography Tutorial eBook

- - - - - - - - - - - - - - - - - - - - - - - - - - - - - - - - - - - - - - - - - - - - - - - - - - - - - - - - - - - - - - - - - - - - - - - - - -

The post Using Framing in Photography Compositions to Draw Interest appeared first on PictureCorrect.


from PictureCorrect https://ift.tt/L6pRztJ
via IFTTT