maanantai 28. helmikuuta 2022

PictureCorrect.com: Tips to Improve Your Winter Photography

Going out for a nature photo shoot in the snow can transform old places into entirely new ones. However, with this exciting prospect, you’re also likely to face some challenges. So to help you out with tips and tricks on winter photography, today we have photographer Henry Turner in the following video:

An interesting tip from Turner is to keep track of the conditions at your destination via public webcam. Using such services, you can understand how things look ahead of time. They also help you plan your travel and prepare for the duration of your stay.

If you prefer working in auto or semi-auto mode, remember that the camera will be tricked when evaluating exposure. Chances are high that your images will come out a little underexposed, causing the snow to appear grey. In such circumstances, be sure to use your exposure compensation dial to slightly overexpose the scene.

“Hunt for snow just like you’d hunt for autumn colors in autumn, heather in summer and bluebells in spring.”

Since nothing gives a strong winter vibe like snow, put in your best effort to find the best-looking snow. This will help you land excellent winter shots. Whether it be snow-capped landscapes, blanketed trees or even rocks under a thin layer of ice, they all can be great subjects for your winter photography. Shoot wide or close and play around with your perspective.

If you’re looking for ideas and tips for winter photography, be sure to watch the complete video. You’ll learn a lot from Turner’s practical approach.


Did you appreciate this newsletter? Please help us keep it going by Joining Our Patreon Supporters

What are your thoughts on this article? Join the discussion on our Facebook Page

PictureCorrect subscribers can also learn more today with our #1 bestseller: The Photography Tutorial eBook

The post Tips to Improve Your Winter Photography appeared first on PictureCorrect.


from PictureCorrect https://ift.tt/Jo6YmFu
via IFTTT

sunnuntai 27. helmikuuta 2022

PictureCorrect.com: How to Find Your Unique Voice As a Photographer

It’s not just enough to be good – you’ve got to find your own unique voice. The question is – how?

unique photographer

Photo captured by John Hernandez; ISO 800, f/1.4, 1/1200s.

This article will take you though several things that you can to do help you discover and carve out your own one-of-a-kind path as a photographer.

1. Focus on what interests you

This may seem obvious, but there are still a lot of people who go about this all the wrong way. They ask themselves, “What field of photography has the most demand right now? What area will be the most lucrative?” And then they go out and try to fit themselves into that picture.

But you will never be as successful doing this as you could be taking pictures of what interests you.

Why? Because when you are interested in something, you will enjoy it more. You will go out of your way to portray it in a good light. You will be more creative and want to try new things. This is so important and yet most people don’t even think twice about it.

If you love food, take pictures of food. If you are an animal whisperer, maybe you would adore being a pet photographer. If there’s nothing in the world that feeds your soul like going for a hike, you would probably make an excellent nature or landscape photographer.

When you are passionate about what you do, it is a simple fact that your joy will propel you forward. You will not be dragging yourself out of bed, you will be leaping from the mattress full of excitement and enthusiasm, and that in turn will carry over into your work.

2. Ask yourself: “How could I do this in another way?”

This powerful question will get your mind working on new possibilities. Though you may not have an epiphany each time you ask yourself this, you are always encouraging your brain to make new pathways and connections. And every once in a while, you will have an “ah-HA!” that makes it all worthwhile.

If you are serious about photography, you should always be taking pictures of what you are most passionate about. But it’s also just as beneficial to try new things and take pictures of different subjects, too. This doesn’t necessarily mean forcing yourself to take pictures of things that you aren’t interested in, but finding ways of taking pictures of anything in such a way that you find it interesting. It pushes you to always stay fresh and always continue learning and growing. Reading books and taking classes is fine, but I believe that the best teacher is firsthand experience. If you are continually searching for new subjects and new ways of photographing them then you are keeping yourself on your toes, and you work will never become stale.

Passion and excitement are the fires that fuel brilliance, and in order to keep that flame stoked you will need to look for ways to keep your own interest pulsing within you. I know from firsthand experience that when I go out and do something I’ve never done before with my photography I take a giant creative leap and everything that I learn carries over into each project I take on next.

bird bokeh

Photo captured by Ray Hennessy; ISO 400, f/6.3, 1/1600s.

3. Avoid the #1 creativity killer

Contrary to popular belief, reading more books and taking more classes does not always make you a better photographer. Don’t get me wrong; they can be incredibly helpful tools that help you learn and grow – to an extent. However, there is a point that most photographers reach where studying and learning stops being helpful and becomes counterproductive. How do you know that you’ve reached that point?

When you find yourself critiquing and criticizing your work more than you are simply enjoying it.

You might be thinking, “Now wait a minute. Hold on. Critiquing helps me to get better! That’s how I learn. I see what worked, what didn’t, and I can correct and improve.”

Yes, in an ideal world. And usually this works in moderation. However, I’ve seen more photographers shut themselves down long before they ever truly delved into their potential because of this #1 creativity-killer: perfectionism. They over-analyze all of the details of their photos, attempting to make everything in each one of them just right.

Photography is not supposed to be perfect. There are technical tools that we can use to improve our photographs, but they are only that: tools – not rules. Just like people, photos are technically imperfect – and yet that’s what makes them so beautiful. Each photo is an impression of a moment in time that will never again be recaptured. And only you, from your unique viewpoint, have the ability to take that picture.

Some of the most famous photos, considered by many to be the best of the best, have imperfections! In fact, most of them do! Not only that, everyone has different tastes. Something that one person might call a “problem area” might be the reason that someone else LOVES that exact same photo. Are you going to deprive dozens of people the enjoyment of your art simply because one person said “this part isn’t in perfect focus.” Screw focus! Seriously!

unique pattern

Photo captured by Ricardo Gomez Angel; ISO 400, f/10.0, 1/1200s.

If you take the picture and you like it, then what anyone else says doesn’t matter. The “rules” are great to a certain extent, and then after that they start to hinder you. You may discover that you like those blurry abstract photos more than the ones in crisp, clear focus. And you might just find that there are a lot of other people out there who love this type of photography and would even hang it on their wall. But if you stop after that first blurry photo because some teacher or even just random person said that it makes it a bad photo, you may have just shut down the possibility of an incredible photography career because you limited yourself to the same box that everyone else lives in.

Stop trying to make your photos adhere to everyone else’s rules, and they will stop looking like everyone else’s photos.

The true “greats” in any field not only break the rules, but reinvent them.

4. Take photos every single day

Most photographers believe that searching for the problems and imperfections is not just the best way to improve, but the only way to improve. I disagree. Although this can be helpful to an extent, it is way more beneficial to just go out and take photos.

In fact, this is the best way to get good at anything: do it. Over and over and over and over and over again. By doing it, you train yourself to see the beauty in things and intuitively find the best angles. You get to the point where you don’t even have to think about it any more because it comes so naturally.

Take hundreds of photos. Don’t limit yourself. Yes, you can ask yourself as you are taking the picture, “How can I make this better? How can I frame this in order to enhance the features that I want?” But in this day and age, there’s no excuse not to take a photo if something catches your eye. With a digital camera, there are no negative consequences for filling up your memory card (unless you don’t have another one and still need to take more photos.) The more you take, the more selection you have to choose from.

where going

Photo captured by Rendy Novantino; ISO 250, f/1.4, 1/500s, 85mm.

Some of my very favorite photos that I’ve taken were simply on a whim. I saw something and thought, “hmm, I like that. I don’t know if it’ll make a very good photo, but there’s only one way to find out.” Click, click, click, click…. click. I’ll take the same picture from a few different angles. I’ll zoom out, zoom in, try different things. And often the one that I took as an extra is the very best one.

Try different things! Take the “technically correct” photo. Then break ALL off the rules! That’s how you step outside of the box and do new things.

Oh, and avoid those stupid forums where photographers sit around critique each others’ work. Well, you don’t have to if you don’t want to, but I’ve learned to stay away from them. People spend more time critiquing photos than they do taking them, and they’ve gotten so good at looking for problems that they see them everywhere. I’ve uploaded pieces of my best work to those sites, pieces are well loved by my agent, the design industry, my followers, and gotten critiques like, “Sorry, but there are parts of this that aren’t in focus. It’s just confusing and the photo doesn’t work.” Then other people rave over it and hang it on their wall and treasure it.

Just because one person says it doesn’t mean it’s true. Don’t let yourself get discouraged. Photography should be first and foremost, fun!

5. Don’t worry if you “miss” opportunities

Every photographer experiences those moments when we miss that perfect shot. That rare species of eagle (so to speak) flies over our head and we weren’t ready, or the exposure wasn’t right, or we got the shot, but it was blurry, and so on. I’ve seen a lot of people spend hours, and even occasionally days, agonizing over what they missed.

Photography isn’t how many shots you get or miss, it’s about how many you take – and keep taking. I have missed thousands of great shots – and screwed up thousands more. I take more “bad” photos than good, and though I do feel disappointed sometimes when I really wanted to get something and it didn’t work out, I always shrug my shoulders and say, “hey, it wasn’t meant to be.” Then I get out my camera, and go take some more pictures.

missed photo

Photo captured by Guy Kawasaki; ISO 250, f/8.0, 1/500s.

I can’t even tell you how many times I tried to get pictures of a bird of prey feasting on it’s dinner, and the shots didn’t turn out. I had so many “missed” opportunities. And then one day I looked out my grandmother’s kitchen window and just two yards away was this hawk eating a mouse. Because of the window between us, I was able to get as close as I wanted without scaring the bird away. There are always more opportunities.

When you have the attitude of not worrying about whether you get a shot or not and just enjoy the process, you invite more opportunities in. Life becomes magical.

6. Take photos because you love to – for no other reason

The #1 most important thing you can do to improve your photos and find your unique voice is to HAVE FUN!

Is it really that simple? Yes, yes, and yes!

When you are having fun and trying new things and exploring and enjoying yourself, you are naturally more creative. Ideas will occur to you that you never thought of before. Things will naturally fall into place. Having fun is the key to being good. Seriously.

Taking beautiful photographs is something that comes from the heart, not the mind. So many photographers spend all their energy researching the perfect equipment and collecting fancy lenses and filters. They strive for the technically perfect photo, and if they don’t achieve it they criticize their own work and hide it away.

Before I started photography, I don’t think I ever truly saw what was around me. In a sense, I was walking blind through my world, never noticing how pretty the cracks in the sidewalk were, or just how many colors there are in a single flower. To me, that’s the gift of photography; not the end result, but the ability to see the beauty of the world around me in a new way, and have the chance to capture it and share it with others. I do it for the joy of it, and if other people can share in that joy then it is wonderful. Still, even if others don’t, photography has been one of the greatest gifts of my life.

Photography is a journey. If you are trying to create work in order to sell it, you are probably over-thinking it. If you do it because you love it, you are creating what comes from your heart and soul. Do it because taking photos makes you feel good, and people will see it and like it because it resonates with them, and makes them feel good.

how to develop your unique eye in photography

Photo by Susanne Nilsson; ISO 400, f/5.0, 1/13-second exposure.

7. Get inspired!

Being truly unique is about getting all of the other voices out of your head about what you could do and what you should do and how things are supposed to be done. It’s about quieting all your thoughts and then listening to the stillness and the silence where all of the new ideas are and getting in touch with your spirit. This is where you will hear the inspiration that will cause you to make uncommon connections and spawn new and great creations.

Do those things that feed your soul – eat delicious foods, read inspiring books, spend time with creative people, listen to music that transports you to a whole new world. It is often in those moments when you are simply enjoying life that the best ideas occur or you have the most wonderful photo opportunities.

Those very things that inspire you are often hints and nudges in the direction that you could take your photography to move it to the next level.

About the Author:
Tien Frogget (paradigmdrift blogspot) is a third generation artist with a passion for creativity and beauty. She is a virtual renaissance woman and enjoys a wide variety of creative media besides photography, including painting, writing, filmmaking, music, cooking, dancing, and graphic design. It is the diversity of her experiences and passion for living that fills her creations with unique perspective.


Did you appreciate this newsletter? Please help us keep it going by Joining Our Patreon Supporters

What are your thoughts on this article? Join the discussion on our Facebook Page

PictureCorrect subscribers can also learn more today with our #1 bestseller: The Photography Tutorial eBook

The post How to Find Your Unique Voice As a Photographer appeared first on PictureCorrect.


from PictureCorrect https://ift.tt/4HX1agP
via IFTTT

PictureCorrect.com: Interesting Photo of the Day: Urban Density in Hong Kong

Hong Kong consistently ranks as one of the world’s most densely populated cities, but what that actually means for people living there is often lost on outsiders. If you ever wondered what it’s like to look up at a sliver of sky from amidst a jungle of skyscrapers, this is it:

hong kong city scene

Hong Kong (Via Imgur. Click image to see full size.)

The shot comes from travel photographer Elia Locardi. In his words:

“It’s unbelievable to me that people can live so tightly packed in like this. On the other hand, it’s also really cool to think that a place that most people rarely give a second look, or consider to be so ugly, can look so beautiful and interesting to a photographer…. It’s seeing places like this that always reminds me that beauty is truly in the eye of the beholder.”


Did you appreciate this newsletter? Please help us keep it going by Joining Our Patreon Supporters

What are your thoughts on this article? Join the discussion on our Facebook Page

PictureCorrect subscribers can also learn more today with our #1 bestseller: The Photography Tutorial eBook

The post Interesting Photo of the Day: Urban Density in Hong Kong appeared first on PictureCorrect.


from PictureCorrect https://ift.tt/UfsVcrT
via IFTTT

PictureCorrect.com: Dog & Puppy Photography: 8 Tips for Great Results

Everyone of us loves our dogs; there’s no doubt about that. And everyone loves dog photos, as well. But, taking photos of dogs can be a challenging task considering how active they tend to be. COOPH teamed up with dog photographer Anne Geier to present 8 simple tricks to shoot stunning photos of our dogs in the video below:

Freeze the action

Dogs are best shot when they are actively involved in something. Shoot their photos while they are running, jumping, and fetching. Use a fast shutter speed to capture details in their movement and to avoid motion blur.

dog photography freezing action

Lower your perspective

A general rule of thumb in photography is to shoot from the subject’s eye level. This creates an engaging shot. The same rule applies while photographing dogs. Get down and shoot from the dog’s eye level and always be ready to get your clothes a little dirty.

dog photography low perspective

Focus through frames

Photographs where the subject is framed within some natural or artificial frames are very much pleasing to the eye. You can apply the same concept while photographing dogs. Find some openings and place the dog in there to get a visually pleasing photograph. Small bushes work equally well.

dog photography tips framing

Shoot from above

This totally contradicts the second trick that we had just discussed. But, photographs of dogs shot from a higher angle create a sense of curiosity.

dog photography tips high angle

Play with props

Just as we humans sometimes use props in our photos, using props for dog photography can add to the cuteness. Add some jazz to the shot with some fashionable or cute little props like a hat, sunglasses, or the dog’s favorite toy.

dog photography tips use props

Clone your dog

This is a technique in which you can take multiple shots by placing the dog in various positions within the frame and then later create a composite in post.

dog photography tips clone composite

Capture gestures

Interact with the dog so that they strike some visually appealing poses. If they can, make them stand on their hind limbs, or try to get a high five (umm… paw-five???).

dog photography tips gestures

Wide angle portraits

Use wide angled lenses to take photos of the dogs in their surroundings. Include the place where they play, rest, or go out for a walk. Even if you are photographing the dog at home, shooting a wide angle portrait will let you connect with the photograph.

dog photography tips wide angle portrait

What other tricks do you use to photograph dogs?


Did you appreciate this newsletter? Please help us keep it going by Joining Our Patreon Supporters

What are your thoughts on this article? Join the discussion on our Facebook Page

PictureCorrect subscribers can also learn more today with our #1 bestseller: The Photography Tutorial eBook

The post Dog & Puppy Photography: 8 Tips for Great Results appeared first on PictureCorrect.


from PictureCorrect https://ift.tt/zs40l7V
via IFTTT

lauantai 26. helmikuuta 2022

PictureCorrect.com: 📷 Street Photography Tips with Any Camera

Street photography is very, very different from documentary, photojournalism, or even travel photography. We’ll look at it as soon as I tell you this quick story.

black and white street photo sephora

Street Photography

Amidst Kuala Lumpur’s shimmering skyscrapers, I planned to capture some corporate video and photography footage. Next, I decided to hit the food streets. It has been the fasting month of Ramadan. I wanted to document the culture, food, and people. I was planning to capture real emotions of the vendors and hawkers serving their customers. Seemed like a bright idea until I hit some serious roadblocks.

street vendor photo

Hawkers stall in Georgetown. I did get permission from them by the way, but picked this photograph to illustrate the next point. I enjoyed their noodle soup.

Some of the locals raised their fingers in V’s and put on a huge smile to pose for my lens. It’s nice to get posed pictures, but I was looking for candid shots. A few reacted to the camera differently; they turned away. The last thing on my mind was to offend anyone, so I’d point my focus toward the food if I felt that someone was uncomfortable. Since they were still in the frame, though, any wide shots weren’t usable since they had their backs turned toward the camera.

These experiences were alright. But what came next was the worst. I had set up a frame to do a long exposure shot at Pavilion. This was on the street and outdoors. The security hassled me saying I couldn’t use a tripod. I was shocked. This wasn’t even a professional or large tripod. It was $5 tripod that I had bought outside the LRT station that could barely carry the weight of a small Olympus point and shoot camera. Mind-you, I hadn’t carried my DSLR.

This got me thinking. What gear would be best to carry around for these situations? What are some tips to not aggravate the local people? How do I overcome these overzealous security guards? And how do I get street shots that are Instagram worthy?

So in this article we will discuss three things:

  1. Technical. What lenses, cameras, zoom ranges and settings to use? What shots can be snapped on a smartphone? And, I’ll share camera settings that work on both, too.
  2. Gear. What equipment to carry around so that you don’t appear as a threat to locals and security?
  3. Tips & Tricks. First hand tips for better street photography. while they’re still fresh in my mind.

Tech Specs and Settings

Street photography is unique and very different from other photography. This is why the technical approach to it is also very different from other types of photography. Typically, when you document events you might have a story in mind. Meanwhile, with street photography it’s just a fleeting moment that might make sense. Sometimes, not so much. It could be the way clouds reflect on a skyscraper or a corporate employee rushing across the street with papers flying in the air. It’s all about getting lucky. The hard part is to bring attention to a subject amidst all the chaos.

Blurry Images

This got me thinking, while I sorted out my photos for the day. What’s the main reason I had to discard some otherwise good photographs?
The number one reason was blurry images! So let’s look at some tips to tackle blurry images. Blurry images could result from camera shake while handling your camera without stabilization or because of a low shutter speed setting. Usually both!

Manual Settings

Don’t be overwhelmed with the manual settings. They’re quite simple once you have a little bit of help and reference settings to get started. I am going to share some ideal camera setting in each section as well.

Shutter Speed

Shooting at a higher shutter speed will solve a lot of these problems.

flames street photography

Shot on Samsung Galaxy Note 5 with manual settings. Food stall. Bangalore, India.

Shutter Speed for Smartphone Users:

Even if you’re on a smartphone, you might want to check your phone settings and apps to see if you can manually set your shutter. I was lucky to have these options on my phone. I use a Samsung Note 5.

manual smartphone photography app screenshot

Manual Camera App

Shooting at low shutter speeds could be super advantageous, especially on a smartphone. You’ll be able to produce some usable pics in low light. Typically smartphones shoot at lower shutter speeds when there isn’t enough light. This is why they take forever to snap. The downside is if your camera is not stable your photos are most likely to turn blurry.

Third Party Camera Apps:

If you don’t see the shutter or pro options on your phone you could try using a third party app that lets you control shutter speed. Here are a few Camera FV-5, A better Camera and Open Camera for Android and Pro Camera, Camera+ for iPhone/ iPod.

Stabilization

A super way to combat blurry images or camera shake is to use better stabilization. A rig or a tripod can help you shoot at slower shutter speeds. Keeping the camera stable will help you capture sharper and crisper images (while your subjects aren’t moving). Meanwhile, you could capture movements of trails or even streaks of light while objects are in motion. They make for interesting captures.

street photo malaysia

Chin Swee Temple. Genting Highlands, Malaysia.

Lens Speed & Aperture

Closing your aperture settings, allowing less light in makes for sharper or deeper depth of field. I’m really not a big fan of photography that separates the subject through shallow depth of field (blurry backgrounds). I would prefer to separate my subject from the background with the use of contrasting colors or natural vignettes. When your aperture settings are closed and you’re shooting at higher shutter speeds your pictures are going to get dark. This is because less light is allowed into your sensor.

night street photography

Shot on Samsung Galaxy Note 5. Georgetown, Penang.

Speed Lights

Don’t be afraid to pump up your ISO settings. Street photography is supposed to be gritty. A little noise doesn’t hurt. If you’re shooting at night, please consider using an external flash. If you don’t have a place to bounce the flash, use it directly on your subject on minimum power. Step back or forward to get a well exposed shot separating your subject from the environment. Meanwhile, try to avoid hotspots or burnt out highlights.

Filters

What happens when the sun is too bright and you’re getting overexposed highlights—especially if you like shooting with your aperture more open? This is a good time to consider buying a set of polarization filters for your lenses. I am not sure if they’re available for smartphones, but typically, most smartphones aren’t bright enough to call for filters.

Zoom Range

From my experience and style of shooting, the most optimum zoom range has been 35mm to 70mm. When it comes to capturing a good shot there’s no other way than to get involved up close and personal. When I used a telephoto lenses I kept missing shots. By the time I zoomed in, the moment was over. When I clicked wide shots, they usually looked too busy. The frames were too wide and chaotic to make the cut. 35mm is really my sweet spot. There’s enough room to crop and vignette out unnecessary details, and it lets you get close to the action with less obstructions in your frame.

retail street photo

Bukit Bintang H&M Kuala Lumpur, Malaysia.

Framing

How do you bring your viewers’ attention to the story? What idea do you want to sell through your photography?

When you’re using your smartphone, it makes sense to plan ahead. Most pictures might be a little too wide with too many things happening. Expect to crop your images. If there’s something interesting in a frame and you’re too far away, you might want to consider cropping it in post. Setting the largest dimensions to capture photos on your phone helps. The lenses on most older model phones are quite wide.

Here are my typical camera settings:

  • Aperture: f/3.5
  • Shutter Speed: 1/125 to 1/500 second
  • ISO 800

I add an external speed light or polarization filters to further fill or cut light into my scene.

The Gear

Preparedness is always better. Being geared to be able to snap a moment at any random time is imperative. A great picture could happen at any time. Packing less has many advantages. Being clever about what you carry on your person is crucial to mastering street photography.

penang street photography

Armenian Street, Penang.

What do you need?

Cameras

Pick your smallest camera capable of manual settings. If you’re using your smartphone, consider purchasing a third party app to allow you to adjust camera settings manually.

Tripod

A very tiny gorilla-pod or Z mount to help you angle your camera and keep it steady. Traditional tripods could be asking for trouble and gathering too much attention.

z mount

Z-mount setup that’s stable enough to replace a tripod in the field.

Speed Light

And for safety, an external speed light and a variable polarization filter an be mounted on your lens.

A clever trick I discovered is to carry all your gear in a pouch. The pouch also acts like a sandbag for stabilization.

stabilization for street photography

My pouch that acts as a sandbag. I use it in place of a tripod.

A bonus tip is to dress like a tourist, even if it’s your hometown. I usually wear a hat, flip flops, t-shirt and shorts/track pants.

Tips and Tricks

My top seven tips and tricks for street photography:

1. Recce

I usually take a walk around and decide what I want to shoot and where I want to shoot so that I don’t waste time. I don’t want to lose natural light being stuck at the wrong spot. Most of my long exposure or beauty shots happen in the evening between 6 and 7 PM. I do a quick Instagram and Google image search before I hit a location. This helps me see what other photographers have done in a place and I identify interesting frames and locations.

2. Permissions

If I’m at a place like a hawkers’ stall, I’ll take a walk around and usually order my food at the most interesting stall to me. Usually the one that faces the road. After my meal I ask if it’s OK for me to take a few pictures; they usually oblige. Sometimes, they’ll pose for the first few photos. I am not a huge fan of them interacting with the camera. So after a few I ask them to continue their work by motioning to them. I always want to snap a few pictures while they’re working.

3. Burst Mode

While I’m sitting at a place waiting for people to pass or capture a moment, I shoot on burst or continuous mode. As you squeeze your shutter button the camera clicks multiple photos. This way I get to capture movement of people walking. I like it when they lean slightly forward and their legs are stretched in an “inverted V” or if I’m lucky a model type “S”.

4. Reflections

Reflections are always interesting. Textures and lights reflected on buildings and water make for very lucid images. Most streets these days have parked cars that make some of the frames really ugly. I discovered that the rooftops of these cars could come in quite handy to capture a reflection of a building. Black cars work better.

temple

Chinese Temple. Penang. Malaysia. Reflections caught on the roof top of a black car.

5. Mirrors

I also keep a look out for large mirrors or reflective glass from retail stores on the street. This works in trains, too. I typically notice that people exude better posture in front of mirrors and it’s interesting to capture them along with their reflections. I usually find such frames and water for the moment to happen. Having a telephoto or a zoom lens is an advantage in these situations.

mrt window

MRT. Kuala Lumpur. Shot on Samsung Galaxy Note 5.

6. Vignettes or Separation

Vignettes or darker backgrounds make for contrasting images to separate the main subject. I’m always on the lookout for frames that naturally do this.

malaysia street photography

Chin Swee Temple. Genting Highlands. Malaysia.

7. Lens Cleaning

Wipe your lens to avoid flare, especially on streets with a lot of dust and street food, I’ve noticed that there is a lot of oil in the atmosphere. This makes the lens sticky. The lenses attract more dust and also create a lens flares on street lights. This happens more when I’m using my smartphone. I carry a bunch of disposable microfiber wipes. They are available for spectacles and they come in a pouch. They are also disposable. I use them on my camera lens, too. Using cloth usually smears grease around the lens. Especially when I notice extra flares in my photos, I’ll quickly stop for lens cleaning.

nighttime street photography flares

Shot on Samsung Galaxy Note 5. Notice smaller sensors give out larger lens flares. Malacca. Malaysia.

Post Production

A bonus tip is to touch up your photos. Consider removing unwanted wires and other small distractions before you publish them. Creating vignettes, cross processing colors and background blurs also help to create your own style of photos. I use them to separate my subject from all the chaos in the backgrounds. You could also use a polar filter on Photoshop to make your wide pics look like a small world or planet. These mega wide 360 degree looks make for interesting points of views.

That’s it for me. Let me know if you’ve got some awesome tips or hacks on street photography in the comments below.

About the Author:
Mark is a corporate film and documentary filmmaker at https://webinteractivefilms.com. He also produces commercial photography shoots and loves to shares tips on photography. You can follow his smartphone photography on Instagram.


Did you appreciate this newsletter? Please help us keep it going by Joining Our Patreon Supporters

What are your thoughts on this article? Join the discussion on our Facebook Page

PictureCorrect subscribers can also learn more today with our #1 bestseller: The Photography Tutorial eBook

The post 📷 Street Photography Tips with Any Camera appeared first on PictureCorrect.


from PictureCorrect https://ift.tt/5dbwZ6m
via IFTTT

PictureCorrect.com: Interesting Photo of the Day: Mysterious Frost Patterns

This is what you get when you match great photography skills with natural phenomena:

beautiful frost patterns formed on forest trees

Frost Patterns (Via Imgur. Click image to see full size.)

Jan Bainar captured this magnificence as he hiked in the Beskydy Mountains, a range forming the border between Slovakia and the Czech Republic. He used an Olympus E-520 camera with these settings: ISO 100, f/16, 1 second.

The ice was probably formed due to humid and windy conditions below zero. However, if this has been photographed in a different light setup it probably wouldn’t look so mystical and interesting.


Did you appreciate this newsletter? Please help us keep it going by Joining Our Patreon Supporters

What are your thoughts on this article? Join the discussion on our Facebook Page

PictureCorrect subscribers can also learn more today with our #1 bestseller: The Photography Tutorial eBook

The post Interesting Photo of the Day: Mysterious Frost Patterns appeared first on PictureCorrect.


from PictureCorrect https://ift.tt/LEh2iAv
via IFTTT

PictureCorrect.com: Wedding Photo Tips on a Bad Weather Day

Imagine that you have a big day for a shoot. You need to shoot a wedding but the weather is against you – it’s raining outside. Do you postpone the wedding? Of course not. As a working professional, you need to be prepared for such situations and make it work for you. Adorama has put together this video with wedding photographer Vanessa Joy who’ll show you how you can make a cloudy day look sunny:

Find an Overhang

It is important that the couple do not get during the shoot. This is even more important if you are photographing them before the ceremony. So, in order to shoot outside, do everyone a favor and find an overhang.

“Position your couple so that they’re as close to the edge of that overhang, but not getting wet.”

What this does is that, the overhang blocks the light coming in from above thereby preventing shadows from forming under the eyes, nose, and the neck region. No to mention that it keeps your couple from getting wet as well.

Have Control Over Lighting

Now that you have some control over the lighting from above, the next step is to have better control over the light from the sides. For her purpose, Joy uses the Profoto B10 with a CTO gel attached to the front. The gel helps in providing warmth to the flash in order to emulate the sun. However, when placing the light, it is extremely important that everything appears natural in the process.

wedding photo on a rainy day

“If you just have some random light coming from behind them, it might look cool, but it’s not believable that it’s actually the Sun. The further back you can go, the better.”

Also, have an assistant hold a reflector facing the couple to soften the light. Once you’re done taking some images, be sure to review them just to make sure that the image looks believable. If it does not, you may need to change the lighting position or the location.

wedding photo shot on a rainy day

“It’s about playing, it’s about maneuvering, and seeing where the light is, and making adjustments.”

With a little bit of thinking, there’s absolutely no need to panic if it rains on a wedding day. Be sure to try out these simple tips from Joy and assure any couple a sunny day picture every time.


Did you appreciate this newsletter? Please help us keep it going by Joining Our Patreon Supporters

What are your thoughts on this article? Join the discussion on our Facebook Page

PictureCorrect subscribers can also learn more today with our #1 bestseller: The Photography Tutorial eBook

The post Wedding Photo Tips on a Bad Weather Day appeared first on PictureCorrect.


from PictureCorrect https://ift.tt/4i8SHe2
via IFTTT

perjantai 25. helmikuuta 2022

PictureCorrect.com: The Artist Behind the Viewfinder: Emotional Photography Insight

Photography. When you picture a photographer, it’s always the camera that you see first, unlike when you’re asked to picture an artist or a great chef.

photography inspiration

photo by Florian .

Unfortunately, this is part and parcel of the game of photography, where most people think that a great photographer is made up of great equipment and, to a much smaller degree, talent.

True photographic artists have the power to convey thoughts, ideas, feelings, and moods all based in one timeless and inspirational image. Captured in a millisecond by pushing down on that button. I have known photographers who are utterly obsessed with new equipment and all the wiz bang technology that comes out seemingly every day. What they fail to realize is that being technically adept is only one part of the puzzle. Bringing out the emotional side of your photographic art plays a large part in creating images that will wow your audience. The best images created are not always the most original, technically correct, or perfectly framed. Like any art form, the greatest images evoke some kind of emotional response in the viewer. The truly great evoke different emotions in different people at different times.

impactful photography

photo by Felice Rusconi

I have noticed in my own imagery the fact that my own underlying emotional state at the time of creation plays an enormous part in the emotional content that my final image conveys. With my paintings, I have had pieces that I just could not get back ‘into the groove of’ because it was just really hard to get back to the same emotional state that I was in when I began creating it—or ‘I wasn’t feeling it!’

With my photography, I found that I was able to take photos from places I had been to before and the whole vibe of the images was completely different to that of the previous ones.

emotion photography

Photo captured by Rhendi Rukmana; ISO 250, 1/200s.

It was akin to my own little aha moment in time. If in the passion for creating the imagery, the art was missing, then inevitably the result would be a very ho-hum, although technically correct, image.

One very quick way I’ve found to get out of this ho-hum state is to stop. Put the camera equipment down and just observe, enjoy, and be part of the moment. In next to no time you will find that you start firing on all cylinders and the creative juices kick in. That’s when you’ll be itching to pick up the camera again!

About the Author:
My crazy world has included successfully combining all the skills of a artist, photographer, designer, programmer, and marketer into one crazy life. I’m available for guest blogging, article writing and speaking events. Follow me in my crazy world via Facebook.


Did you appreciate this newsletter? Please help us keep it going by Joining Our Patreon Supporters

What are your thoughts on this article? Join the discussion on our Facebook Page

PictureCorrect subscribers can also learn more today with our #1 bestseller: The Photography Tutorial eBook

The post The Artist Behind the Viewfinder: Emotional Photography Insight appeared first on PictureCorrect.


from PictureCorrect https://ift.tt/WNdbUwn
via IFTTT

PictureCorrect.com: Interesting Photo of the Day: Rainbow Over Moraine Lake

Nature has beautiful ways of surprising us. One of its finest moments was captured by ggmomster. While the glacially fed Moraine Lake in Banff National Park, Alberta, Canada looks amazing in itself, it amazed the people around even more when a beautiful rainbow appeared over the lake. The view was so amazing that there was an audible gasp from the crowd:

rainbow over moraine lake

“Rainbow over Moraine Lake” by ggmomster (Via Reddit. Click image to see full size.)

When asked why she decided to cut the top of the rainbow off, the photographer responded that it was a decision she had to take due to the number of people around her:

“This was tricky to frame. The rock was swarming with people. I had people below me, right next to me on either side – even a bride and groom doing a wedding shoot just to the left. It was nuts. I brought this out as wide as I could without including people, and didn’t want to crop out the foreground. Ultimately I liked the way it was framed and was happy with it given the conditions.”

If you’re around and want to visit Moraine Lake, she recommends that you get there super early. The parking lot is super small there and even when she reached it at 5:30am, it was almost half full. Also, it’s worth it to get there early to witness a beautiful sunrise.


Did you appreciate this newsletter? Please help us keep it going by Joining Our Patreon Supporters

What are your thoughts on this article? Join the discussion on our Facebook Page

PictureCorrect subscribers can also learn more today with our #1 bestseller: The Photography Tutorial eBook

The post Interesting Photo of the Day: Rainbow Over Moraine Lake appeared first on PictureCorrect.


from PictureCorrect https://ift.tt/Q9pTNgG
via IFTTT

PictureCorrect.com: Some Helpful Overlooked Photo Editing Tools in Lightroom

It’s natural to feel excited when you start learning something new. But once you’ve learned the basics, do you feel content and stop expanding your knowledge base? It’s always better to learn something new. Professional tools such as Adobe Lightroom have many powerful secrets to be discovered. So if you’re itching to learn some new tips, photographer Evan Ranft has some that you’ll wish you’d known about sooner:

He starts off by showing you how you can use the Photo Merge tool to mimic a wide-angle lens. It’s interesting to see how, by using this technique, you can emulate a wider perspective even though you have a standard lens. In the process, you also get to see how you can quickly straighten and fix the tilt in your images using the guided transform tool. As you can see, the process is quite simple but has a huge impact on your images.

Further into the video, you’ll also learn how you can efficiently work with a color’s hue, saturation and luminance by creating auto masks. This way, you can easily work with individual colors without wasting much time. And as far as exposures are concerned, you’ll also learn to use the “software’s vision” to visualize where you’re clipping the shadows and highlights data. If your workflow demands consistency, pay attention to the tricks on matching exposures in two images and Ranft’s reference photo trick.

For further training: The Fundamental Photo Editing Guide


Did you appreciate this newsletter? Please help us keep it going by Joining Our Patreon Supporters

What are your thoughts on this article? Join the discussion on our Facebook Page

PictureCorrect subscribers can also learn more today with our #1 bestseller: The Photography Tutorial eBook

The post Some Helpful Overlooked Photo Editing Tools in Lightroom appeared first on PictureCorrect.


from PictureCorrect https://ift.tt/qtZ9y5d
via IFTTT

torstai 24. helmikuuta 2022

PictureCorrect.com: 💡 Understanding Basic Light Properties for Photography

The way light acts upon a subject depends on the physical properties each light source presents. Before taking on the challenge of creative photographic lighting it’s worth your while to understand some of these properties.

photo light properties

Photo by Greg Rosenke; ISO 100, f/3.5, 1/8-second exposure.

Light Characteristics

Light characteristics define the way surfaces are affected by specific light sources.

Hard

  • Creates harsh shadows
  • Accentuates textures
  • Easy to control and shape

Soft

  • Creates soft shadows
  • Difficult to control
  • Presents form through a range of tones

Color Quality

Color quality defines the color cast from a particular light source.

  • Known as color temperature
  • Derived from the colors emitted when heating a black object through a range of temperatures. These colors are matched to light sources we use in photography.
  • Measured in ºK (Degrees Kelvin, just referred to as Kelvin or K)

Light Sources

  • Candle light: 1200K
  • Incandescent light bulb: 2700K
  • Red Head (quartz halogen bulb): 3200K
  • Sunrise and sunset: 3200K
  • Flash light: 5600K
  • Sunlight at midday: 5000K
  • Outdoor shade: 6000K
  • Skylight: 10000K

The temperatures listed will change depending on the age or wattage of the source light.

The color cast is referred to warm at the lower color temperatures and cool at the higher temperatures, changing from orange-yellow at the bottom to blue-white at the top. This is why the camera has comprehensive white balance, or color balance control functions that remove the color casts from the different sources and render white as white.

Natural Light

  • Natural light is from the sun, which can still present indoors by shining through windows, doors and skylights. These illuminations are a source which can be used to creatively light a subject. At certain times of the day the light is very even and is often diffused through a sun filter in a window.
  • Another sources of natural light is fire (candle, campfire)
light properties explained for photographers

Photo by Daniel Montemayor; ISO 100, f/1.8, 1/320-second exposure.

Artificial

  • Light powered by electricity is artificial light.
  • The most common are listed under Light Sources above.
  • A flash closely matches the light quality from the sun, but is still artificially generated.

Continuous

Continuous light is defined by a light source that is always there when switched on (light bulb or fluorescent) or a source such as sunlight.

  • The effect of a continuous light on a subject is always there to see (intensity and shadow positions) making adjustments real time and therefore easier.
  • Using a continuous light source also affects the way exposure is controlled regarding shutter speed in relation to aperture diameter.
  • The exposure is affected by a fast or a slow shutter speed using a continuous light source.

Flash

The flash offers a burst of instantaneous light and requires different lighting techniques to that of continuous lighting.

  • The shutter is synchronized to the flash
  • At certain shutter speeds the flash light will not register on the film or imaging device.
  • A model light or continuous light is often used to judge shadows on the subject before the flash is fired.
  • Blurring is less of a problem because the flash freezes a moment in time.
  • There are in effect two exposures when firing a flash. The camera exposes the ambient light while the shutter is released for a short time to allow the burst of flash into the camera. This duration that the shutter is open is often not enough time for the ambient light to make any difference to the exposure.
understand light properties in photography

Photo by Sam Javanrouh; ISO 800, f/5.0, 1/160-second exposure.

Application

Understanding light characteristics, natural or artificial, will help elevate you to the next level of photography. There is a plethora of lighting equipment on the market that you can acquire once you have found your preferred genre or niche in photography (weddings, portraiture, landscape, glamour). Photo lights have been designed based on the above properties and come in many shapes and sizes to meet specific photographic lighting applications.

About the Author:
Rob Gray from FacetMedia teaches television production as well as photography bringing over forty years of experience.


Did you appreciate this newsletter? Please help us keep it going by Joining Our Patreon Supporters

What are your thoughts on this article? Join the discussion on our Facebook Page

PictureCorrect subscribers can also learn more today with our #1 bestseller: The Photography Tutorial eBook

The post 💡 Understanding Basic Light Properties for Photography appeared first on PictureCorrect.


from PictureCorrect https://ift.tt/FidJYhl
via IFTTT

PictureCorrect.com: Interesting Photo of the Day: Hummingbird Swarm

They say patience is a virtue and patience really pays off when you have a hummingbird feeder. Photographer Brian Maffitt set up an angled mirror attached to a tripod under his hummingbird feeder and waited patiently. Using a remote shutter release he would take a burst of shots every time a bird came to feed:

hummingbirds composite

“Hummingbird Swarm” by Brian Maffitt (Via Imgur. Click image to see full size.)

Maffitt shot this in New York state using a Canon 5D Mark III and a Canon 100-400mm zoom lens. His settings were

  • 1/4000 of a second
  • f/5.6

He made a composite using about 70 layers in Photoshop. These are ruby-throated hummingbirds and they usually arrive in New York around May. Using a unique set up and planning out the image beforehand, Maffitt was able to create this beautiful shot. Have you ever tried using a mirror to get just the right angle?


Did you appreciate this newsletter? Please help us keep it going by Joining Our Patreon Supporters

What are your thoughts on this article? Join the discussion on our Facebook Page

PictureCorrect subscribers can also learn more today with our #1 bestseller: The Photography Tutorial eBook

The post Interesting Photo of the Day: Hummingbird Swarm appeared first on PictureCorrect.


from PictureCorrect https://ift.tt/HAdMVp7
via IFTTT

PictureCorrect.com: 5 Camera Settings to Master First

Every new camera model that hits the market these days, seems to pack a new feature. However, even with so many features built-in, a camera can sometimes produce undesired results. It becomes essential for you to take control over the camera for better results. Hence, an understanding of a few basic camera settings is by far the best way to start creating better images. Photographer Mike Browne explains about the 5 camera controls that will help you revolutionize your photography:

1. Manual Exposure

“You camera doesn’t know how much light is falling on it. It only knows how much light is reflected by it.”

The reflective light meter the camera is not 100% accurate. They are programmed to meter the scene to 18% grey and thus fail reproduce pure whites and blacks. Cameras are thus not so reliable with auto-exposure; specially in difficult lighting situations. So, you need to take control over the exposure with manual settings. You can do so with the help of the exposure triangle.

  • Aperture is the opening in your lens that controls how much of the light goes into the camera. Open it up to let a huge amount of light in, and narrow it down to cut the amount of light passing through.
  • Shutter speed determines the duration of time the sensor is exposed to light. If there’s abundant ambient light, use a faster shutter speed. This exposes the sensor for a very small amount of time. If the ambient light is low, slowing down the shutter speed will let greater amount of light to pass through to the sensor by exposing it for a longer period of time.
  • ISO setting determines the sensitivity of the sensor towards light. When you use lower ISO values, you tell the camera not to amplify the signals much. This is idle for well lit subjects. But, if the amount of light is low, increasing the ISO value tells the camera to amplify the signals thereby increasing sensitivity towards light.

You can thus manually change the settings in your camera by playing around with these three variables. Adjust these settings until the meter in your camera points to zero. This indicates that your exposure is okay. But, as soon as the lighting gets challenging, like in case of backlit subjects, of snowy mountains, the meter will again be fooled.

Like Browne demonstrates, even with manual exposure, when the camera meter pointed to zero, indicating perfect exposure, the white wall appeared grey. To make whites appear as pure whites, simply overexpose the scene by adjusting any of the three pillars of the exposure triangle. Similarly, if the blacks don’t appear as black, simply underexpose the scene a bit.

white appearing as grey

White wall appears grey even when the camera’s meter indicates correct exposure

white wall

Wall appears white after overexposing by 2 stops

“If you just follow what the light meter says, it’s the same as shooting on auto.”

2. Histogram

“A histogram isn’t really a camera control. It’s a feature, but it’s probably the most useful feature they every put on a camera ever.”

If you’ve not yet learnt how to read a histogram, now is a good time to do so. Understanding the histogram means that you’ll never have to worry about your exposure ever again.

If you use the camera in auto exposure mode and you realize that the image is a bit under or over exposed, simply refer to the particular histogram. If the histogram is crunched up more towards the left, it means that you have to let more light in. Similarly, if it is more towards the right, it means that you can cut down some amount of light entering the camera. When doing so, ensure that the histogram doesn’t clip the shadows and the highlights. Once clipped, the information is lost; and you don’t want that to happen.

underexposed subject with histogram

Underexposed motorcycle with data in the histogram more towards the left

properly exposed subject with histogram

Notice the slight shift in histogram towards the right. The motorcycle is now properly exposed.

Note: While it is good to have more of the data towards the middle of the histogram, it is not always necessary. For instance, if you’re shooting a silhouette, you will have lots of data on the right (back light), the left (silhouette), and almost no data in the middle.

3. Semi-Auto Modes

Once you are confident with setting your exposure manually, you can use your semi-auto modes for the sake of efficiency. You don’t have to shoot in manual all the time. If you’re in a situation where you don’t have the time to set all the parameters, semi-auto modes are the way to go. Make use of the camera’s aperture priority (A or Av) mode, shutter priority (S or Tv) mode, and the program (P) mode. And if you feel that the camera is making some wrong decisions for you, then you can always step in.

When working with shutter priority mode, you can select the shutter speed, and the camera will take care of the rest. Similarly, when working with aperture priority mode, you can select the aperture, and the camera will take care of the other parameters. And with P mode, it takes care of both the aperture as well as the shutter speed. The advantage of using semi-auto modes is that it allows you to focus more on the creative side of photography, while the camera handles the technical aspects.

“Semi-auto modes takes a pile of work away from you.”

4. Exposure Compensation

“Exposure compensation allows you to use semi-auto modes and still lets you control the exposure.”

Imagine that you’re using a semi-automatic mode in a contrasty lighting condition. After you take an image and refer to the histogram, you realize that the image is darker than it should be. This usually happens as the camera tends to use the settings that put most of the data in the center of the histogram. In such cases, you can use the exposure compensation setting and set it to +1 for instance, to overexpose by 1-stop. This way, you can control the exposure of the camera even when you are using it in semi-auto mode.

5. Auto Focus Area and Focus Modes

Have you ever noticed after taking a photo that the wrong area in the image is in focus? This usually happens when you let the camera decided where it should focus. Remember that the camera does not recognize who your subject is. It usually focuses on the closest thing, or on a high contrast area. Therefore, it is quite essential that you take control over where the camera focuses. You can usually do so by using the single point AF area, and placing the focus point over your subject. Be sure to go through your camera manual to understand and practice with the various focus areas.

Similarly, there’s a plethora of auto focus modes in your camera to choose from.

  • AF-S or auto focus single servo mode focuses on the subject only once. When in this mode, if the distance between the camera and the subject changes after the focus is locked, you’ll need to lock the focus again. Otherwise, the image will be out of focus. This is perfect for landscapes or for subjects that are not moving around much.
  • AF-C of auto focus continuous mode focuses on the subject continuously as long as you hold the focus button in your camera. If the camera to subject distance changes, the camera will automatically refocus to have the subject in sharp focus. This is useful for scenarios in which the subject is continuously moving, like in sports and wildlife.

Bonus Control: Focal Length

Focal length doesn’t only allow you to get a close up of distant objects. It has other implications as well. Wider lenses have the tendency to exaggerate features. For instance, anything closer to a wide lens appears elongated, and anything that’s far appears real tiny. They also have a greater depth of field and have a greater area in focus every time. On the contrary, telephoto lenses have a shallower depth of field, and thus create a beautiful separation between the background and the subject.

effect of focal length on photos

Creative aspect of photography comes second to your ability of taking control over your camera. Your creative vision will not matter much if you are not acquainted with your camera. You simply will not be able to capitalize on your creative vision. Therefore, spend some time getting to know your gear, and master these controls first.


Did you appreciate this newsletter? Please help us keep it going by Joining Our Patreon Supporters

What are your thoughts on this article? Join the discussion on our Facebook Page

PictureCorrect subscribers can also learn more today with our #1 bestseller: The Photography Tutorial eBook

The post 5 Camera Settings to Master First appeared first on PictureCorrect.


from PictureCorrect https://ift.tt/RKOcjCp
via IFTTT

keskiviikko 23. helmikuuta 2022

PictureCorrect.com: 📷 Street Photography Tips and Techniques

When you’re getting started the challenge is overcoming the fear of taking pictures of strangers. Since telephoto lenses are not normally used in street photography, how can you stand a few feet from your subject, put the camera to your eye, focus, and click the shutter without getting nervous? A good street photographer is not only fearful in the beginning (this is a good sign of being sensitive) but they also don’t want to do anything which will change the how the subject is behaving.

street subway photo

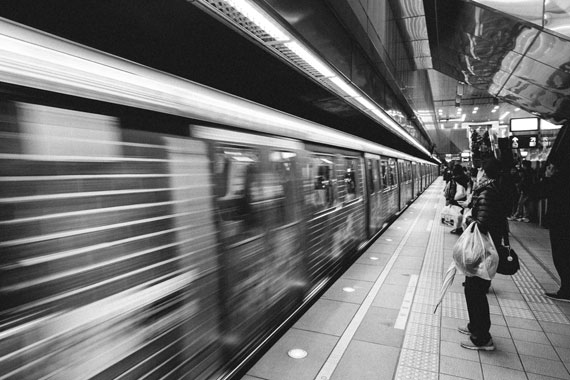
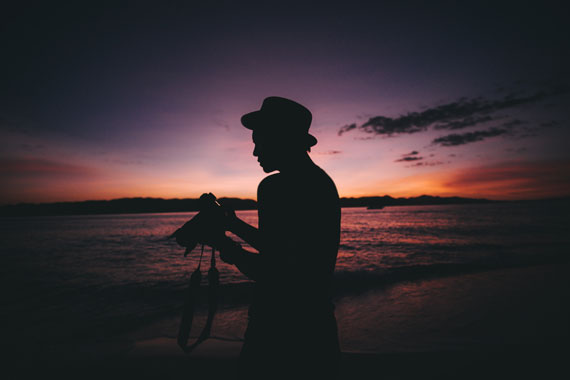
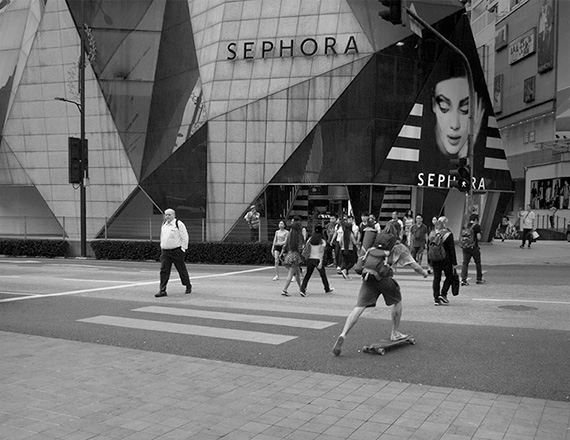
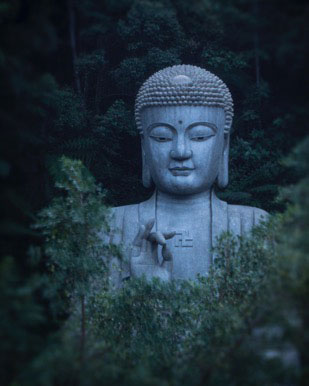
Photo captured by JC Gellidon; ISO 1250, f/5.6, 1/20s, 24mm.

With practice, you can overcome your reluctance to photograph strangers as well as learn techniques which will help you get better candid shots.

One word of caution – it can be addictive. After a while the street photographer will choose which seat has the best view in a restaurant, or which side of the street offers the best possibilities.

The Psychological and Moral Issues

The first thing to accept is that you are invading the privacy of your intended subject. You may have the best intentions in the world, but once you decide to point your camera at someone without their permission, you will be invading their personal space. This is what it means to take a candid street shot. Before going into the physical techniques which can make your job easier, it is important to look at your own motives. Most of the time, you see something that you simply want to share with the rest of the world. It might be funny, odd, mysterious, have an interesting design, or any other quality that you think is worth shooting. But you are nervous about taking the photograph. This is normal. When you are just starting out, ask yourself whether you would take the picture if you weren’t afraid of your imagined consequences. This may seem drastic, but pretend that this is your last day on earth, and that nothing else matters but getting this shot. Take a deep breath and after learning the various techniques listed below – you should be ready to get at it.

Dress the Part

You’ll be headed out to a tourist spot, so dress like a tourist. I’m not kidding. Although you may have lived in your city for 50 years, get yourself a tourist map and dress like you have just arrived from the mid-west on vacation. I’ll leave that part for you to figure out.

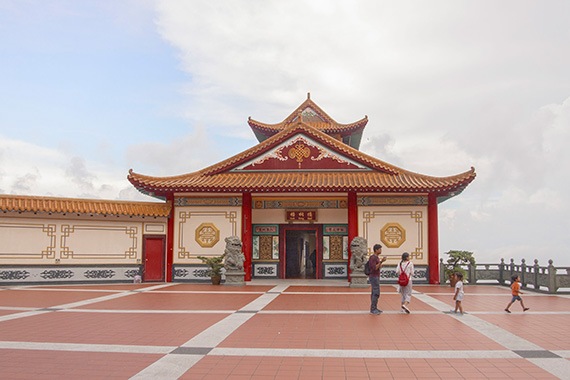
Visit a crowded tourist attraction where everyone has a camera. Dress and act as just another tourist. Study your tourist map. Gawk at the landmark like everyone else. And keep an eye out for interesting subjects.

street clothes

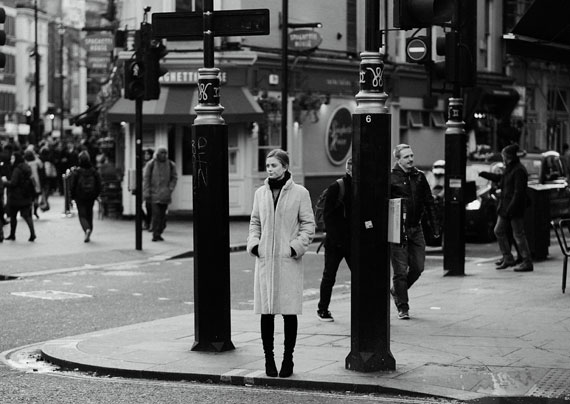
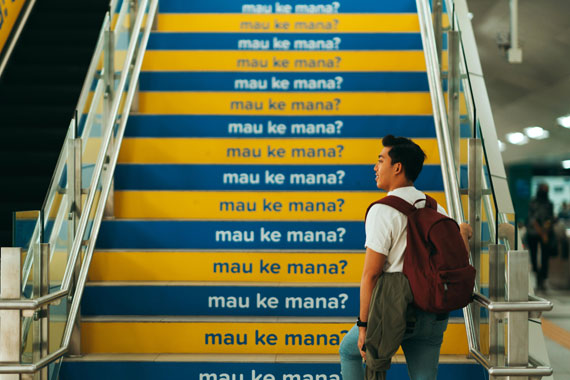
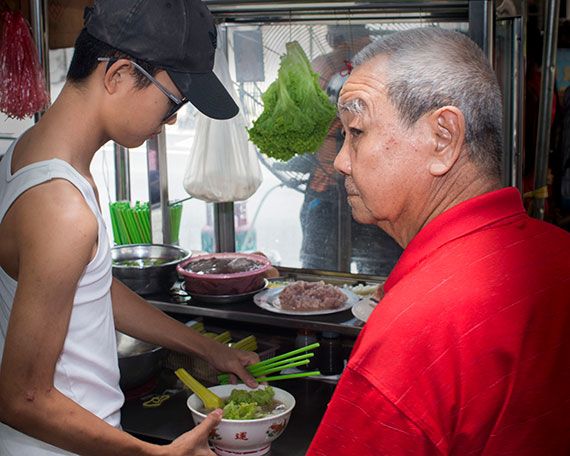
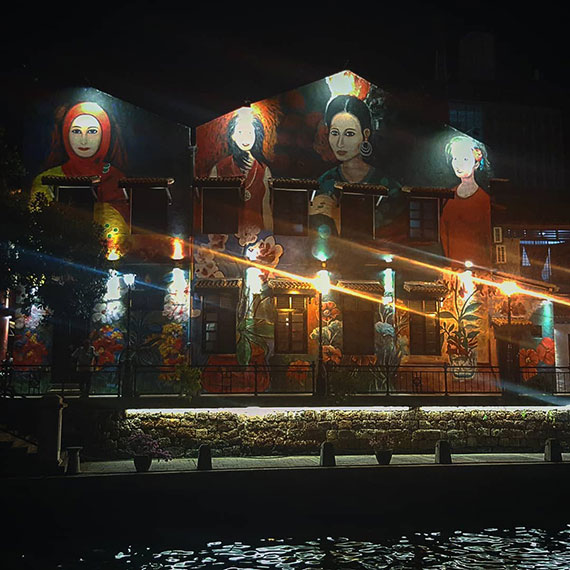
Photo captured by abi ismail; ISO 320, f/2.2, 1/640s, 85mm.

Do Not Remove Your Eye From the Camera After Your Shot

Start off like everyone else. Take pictures of the landmark. Keeping the camera to your eye you can now scan through the crowd for something interesting. As you take pictures, do not remove the camera from your eye even after you have the shot you wanted. Continue to move the camera around pretending to take pictures. Never give away the fact that you’ve taken someone’s picture by removing the camera from your eye after taking the shot.

You may not find anyone worth shooting, but this is an easy way to get started. It shouldn’t be very scary, and you will find that even while standing very close to your subjects you can take their pictures without arousing suspicion. You can employ the same techniques at street fairs, or parades. Just about any crowded area which is filled with tourists is a good place to practice.

Keep Both Eyes Open, Turn Off the LCD

Keep your non-shooting eye open. You should be able to look at possible subjects even with the camera to your eye. Most DSLR cameras have an LCD screen for viewing images on the back. This should always be turned off.

You just don’t want the LCD coming on while the camera is to your eye. It’s annoying and it gives away the fact that you’ve taken a shot, especially in a dark location. Also, if the LCD is off, and you hold the camera a bit in front of your face, you can see the reflection of what’s going on behind you.

Knowing what is happening behind you is useful in a street where people are moving around because you can estimate the distance the potential subject will be when you turn around, and have your camera pre-focused for that shot. Of course you’ll need to gauge how fast they’re walking towards you, and about where you’ll turn around and snap. But again – as you turn keep the camera to your eye as if you are just looking around. You will be surprised at how easy it is to take a picture of the subjects when they are five feet or so from you without them knowing.

Shooting from the Hip Vs. Having the Camera to Your Eye

As a general rule of street photography, if you can get the shot with the camera to your eye, you will get a better shot. I know that there is an entire school of shoot-from-the-hip photography, which you can practice as well, but you will never be able to frame this sort of shot as well as if you put the camera to your eye. (That’s my own opinion and of course open to debate.) There will be times when it is simply impossible to shoot with the camera to your eye, and so shooting from the hip is worth learning. But I don’t think it’s a good way to get started.

steps to good street photography

Photo by Thomas Leuthard; ISO 200, f/2.2, 1/125-second exposure.

You need to make decisions about depth-of-field. A common technique for the street photographer is relying on hyper-focal distance. I don’t think this is as necessary with modern auto-focus cameras, but the idea is that with a wide lens, in the 30 – 35mm range, you can set the lens to f8, if you have enough light, and set the focus at ten feet, and know that everything from approximately 6 feet to 15 feet will be in hyperfocal distance.(I’m not looking at a lens as I write this so the exact distance and f-stop may be off, plus most modern autofocus lenses don’t include a hyperfocal scale. But for older cameras with a hyperfocal scale on the lens, this is a tried and true technique.) I just haven’t found it to be necessary with modern auto-focus cameras.

Pre-Focus

For example, with the Canon and Nikon DSLRs you can assign focus lock to a button on the back of the camera and exposure to the shutter button. You anticipate that you are going to shoot a certain subject, and hold the back button down to focus on them, but maybe you aren’t ready to take their picture yet and they aren’t moving much. You can continue to hold that back button down until you are ready to take the shot, or you can turn the lens to manual focus while holding the button down. Then you can release the button and know that the focus remains the same. Don’t forget to turn autofocus on the lens back on when you’re finished or all your subsequent shots will be out of focus.

Modern cameras have a matrix of focal points. They are a big selling point. But they are not very useful for street photography. I would recommend turning them all off except for the center focal point, which you’ll use to pre-focus with. I don’t like the idea of having the camera decide what to focus on.

Suppose you’re walking down a New York street and you see a bunch of subjects leaning against the building to your right. You know that you are going to turn and face them at take your picture and then walk on. So the distance between you and any building directly to your right is the same. You focus on a building to your right before you arrive at your subjects and lock that focus. Now as you approach your subjects, you turn to your right and take your shot without the need to focus.

Having a Friend Along

This technique goes back a long way in the history of street photography. Walker Evans would bring a woman friend along with him, and stand on a crowded street pretending to take pictures of her. She was a decoy, and he would move the camera so that she wasn’t in frame and take pictures of the people that behind her.

street photography instructions

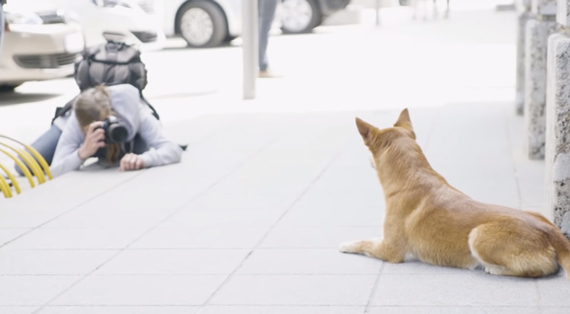
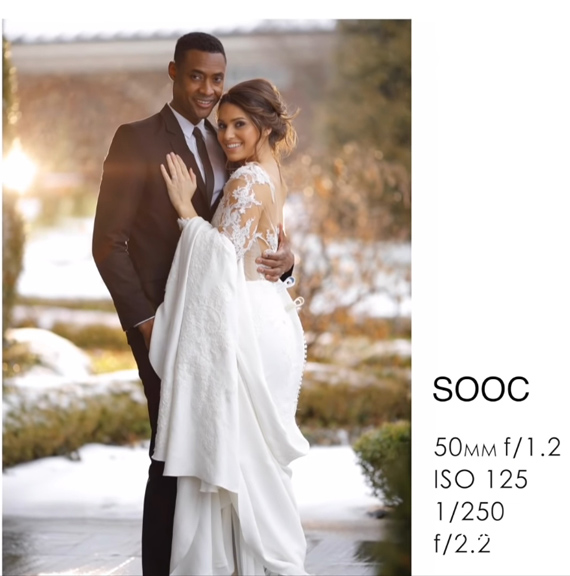
Photo by B.C. Lorio; ISO 400, f/2.8, 1/110-second exposure.

Gadgets

Sneaky camera gadgets have been around for a 100 years. The right-angle attachment on the viewfinder was often used by famous street photographers. It can swivel at various right-angles so that you are looking in a different direction than where the lens is pointed.

A similar device that fits on the end of the lens has a mirror inside. The front of the lens is points straight ahead, but the mirror is pointing to your left or right.

Both gadgets are still made, but they take some getting used to. I haven’t found them necessary, although I’ve experimented with both devices.

Tougher Locations

The subway car is another popular locale for street photographers.

When Walker Evans did his series of subway “portraits,” he used a Rollei Twin Lens camera. You look down at the ground glass to focus and compose. Evans used a cable release which he ran up the arm of his coat. He put the camera on his lap, sat directly across from his subject, and kept his right hand in his pocket to operate the cable release.

He knew ahead of time, what the distance was too his subject. If you are shooting on the same subway line, the trains are always the same dimensions. If you don’t have a camera with auto-focus, you know the distance between different points.

Evans had one problem with his setup. After taking his shot, it was very obvious that he was advancing the film to the next frame. He would usually get up and settle down in another car with a new frame loaded.

Although the subway is a difficult place to shoot, it has one advantage: it’s noisy. There’s always enough noise to drown out the click of the shutter. I have taken thousands of pictures on the subway with the camera to my eye without running into any sort of trouble other than the occasional nasty stare. However, before the camera is raised to your eye it should already be focused. This rule is true for most street shots.

You can focus on your subject when they aren’t looking, set the camera lens to manual and wait for “the moment” if it ever happens.

subway car photo

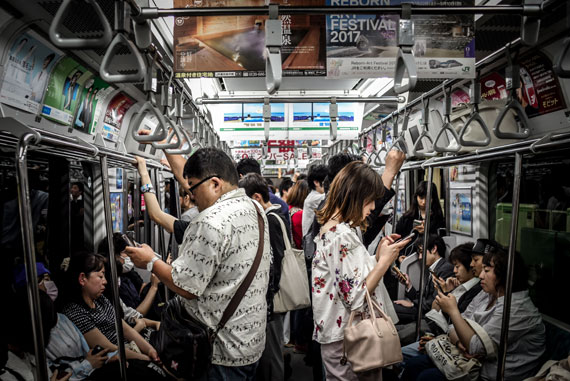
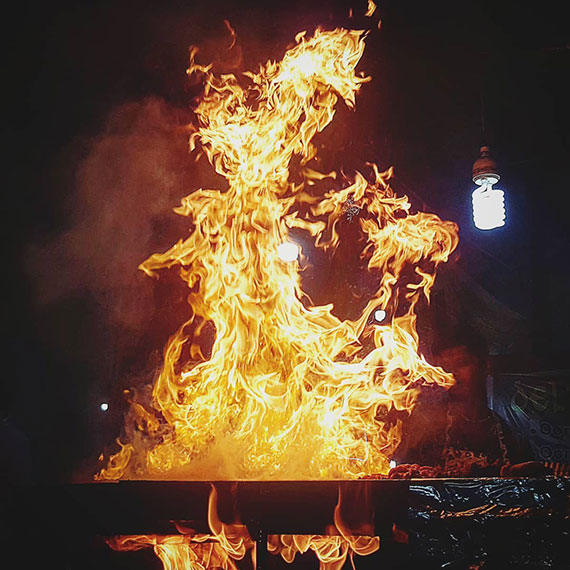
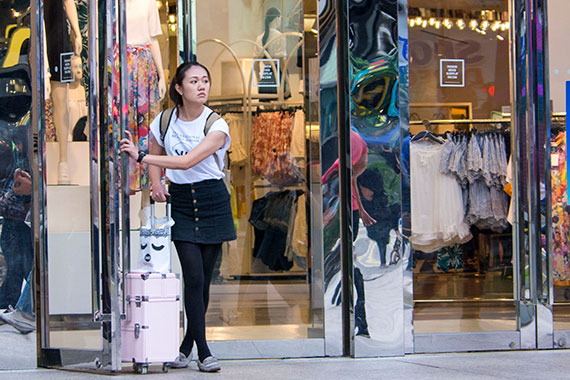
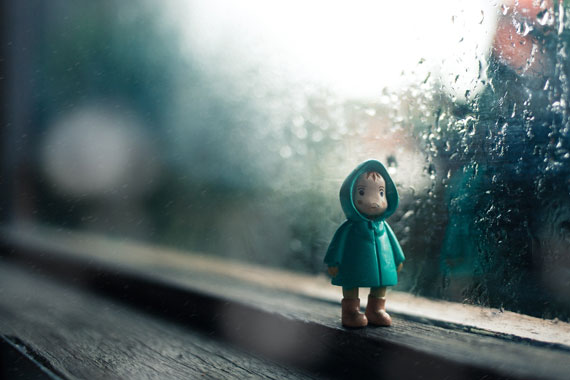
Photo captured by Hugh Han; ISO 1000, f/2.8, 1/200s, 28mm.

Whether on a train, or some other location, the easiest time to shoot is when there is a distraction. For example, when the mariachi band enters the car, everyone will be looking at them. You can shoot other passengers without being noticed.

And even if you are seen, people will understand that you have your camera out if you take a few shots of the mariachi Band as well. This is the same technique as using a landmark as a reason for taking pictures.

Another modern phenomena which makes life easier for the street photographer: everyone, whether on the street or in a subway car, is already distracted by their iPods, cell phones, e-books, and Blackberry devices. One day I was on the train, and noticed that everyone around me had earphones, or were reading their email. Combined with the noise of the train, I was able to take closeup shots of a passenger who was about a foot and a half away from me without being noticed by anyone. I found that amazing. It wasn’t like that ten years ago.

Shutter Speed

As a rule for hand-held shooting, your shutter speed should equal the focal length of your lens. If you shoot with a 30mm lens, your shutter speed should be at least 1/30th of a second. If your shoot with a 90mm lens, your shutter speed should be at least 1/90th of a second to prevent blur due to camera shake.

Some photographers can hand-hold a camera at 1/15th of a second with a 30mm lens and some will have trouble holding the camera steady enough even at 1/30th of a second with a 30mm lens. So this is just a guide. Camera shake is also a property of the camera. An SLR camera, with the slap of the returning mirror, vibrates more than a Point and Shoot camera which doesn’t have a mirror. Many Digital SLRs now feature “Live Mode” where the mirror slap is no longer a factor. So you will need to experiment to find out the lens / shutter speed combination which will prevent camera shake with your setup.

But remember this, camera shake is not the same thing as motion blur. Even if your camera is set on a tripod, with a mirror lock-up, and a cable release, if the motion of the subject is too fast for your shutter speed, you will have a perfectly blur free background (no camera shake) with a blurred subject.

I call this technique The Stutter Step. The object of the stutter step is to be able to freeze your walk, in mid-step if needed, at the same instant you click the shutter, and then continue on as if nothing has happened. If you do it slowly, someone walking briskly behind you may just about bump into you because you have stopped dead in your tracks for an instant while you put the camera to your eye and took a picture of someone walking towards you. For this sort of shooting, where your subject(s) more directly towards you, it is best to have as fast a shutter speed as you can manage.

best street photography advice

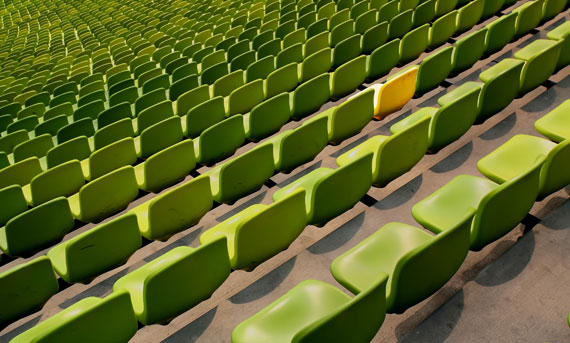
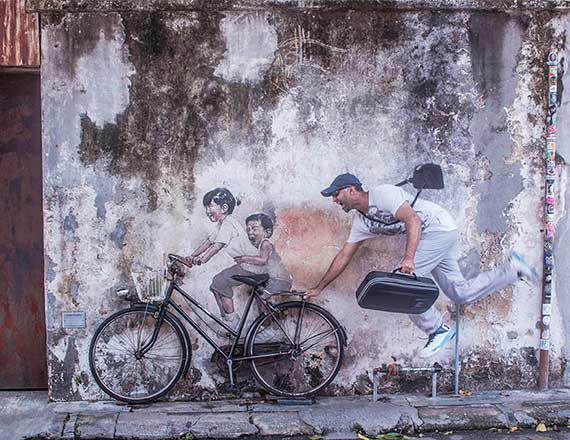
Photo by Miguel Moya; ISO 200, f/5.0. 1/1000-second exposure.

Digital SLR cameras usually have the following settings: P (program mode), AV (aperture mode), TV (shutter speed mode) and M (manual mode). They also have a a bunch of icons representing other situations such as Action Mode, or Portrait Mode, or Night Mode. Don’t use these. Again, you don’t want the camera to make decisions for you.

But it is handy, to set your AV and TV modes so that with the twist of the dial, you are set for aperture or shutter speed priority. In the case where it is a sunny day and you are walking, and expect to be taking pictures of other people who are walking, you can work in TV mode, with your shutter set to 1/1000th of a second. This assumes that you are using a relatively fast lens, and that you can shoot at an ASA (ISO) of at least 800.

But to return to the stutter step. Your camera is hanging around your neck. You are wearing tourist clothes. You see an interesting situation developing ahead of you. Your camera is set to shutter priority of 1/1000th (more if you can manage it), and you must image what distance you will be when you take the shot. Aim your camera at the sidewalk and focus at the distance that you imagine you’ll take your shot and lock that focus in.

Now, just when the situation is right, you halt, sometimes in mid-stride, the camera moves to your eye. You already know whether this is going to be a vertical shot or not, and what the frame will be, and while you are stock still, you take your shot and just as if nothing happened, you continue on your way. Your subjects have passed you. Even if they noticed you, it is unlikely they will turn back to find out why you may have just taken their picture. Maybe you did, and maybe you didn’t.

Which Camera?

A good street camera has the following characteristics: a quiet shutter, interchangeable lenses, fast lenses (F-Stop of F2.0 or lower), no shutter lag, RAW capture mode, the ability to focus well in dark places, usable high ASA, a good viewfinder and lightweight enough to take with you wherever you go. I don’t know of any digital Point and Shoot camera that meets all these criteria. A digital Single Lens Reflex (DSLR) will meet all or most of these properties. The Canon 40D, for example is no heavier than a Leica M, but the fast lenses are larger. The high end Point and Shoot, known as a digicam, has some of these features, but they don’t have interchangeable lenses, and the zoom lenses are not usually faster than F2.8 at the wide end.

The current crop of DSLRs have many features of a good street camera.

So, let’s get to it. Whatever digital camera you use, turn off any beeping the camera makes. Also turn off the immediate playback on the LCD. Do some tests to find out that highest ASA you can use without getting too much digital noise. Again, this is where DSLRs are best. Cameras like the Canon Mark II can allow you to use an ASA as high as 3200 (maybe more) without creating much digital noise in the image. Most point and shoot digital cameras creating noiseless images at much about 200 ASA.

what you need to know about street photography

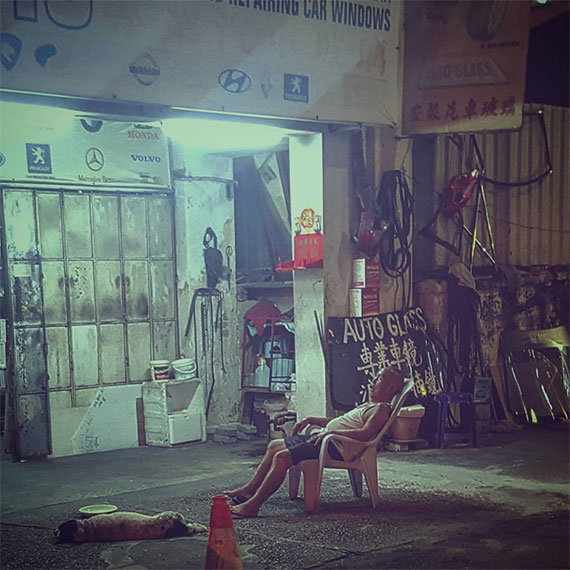
Photo by Chris JL; ISO 3200, f/2.0, 1/80-second exposure.

Most DSLRs depend on a tic-tac-toe matrix of focal points. Keep the center point on, and turn the other focal points off.

For a digital camera with a cropped sensor, a 30mm F1.4 is a good walking around lens. Sigma makes an excellent one though remember, the Sigma f1.4 30mm won’t work with a full-frame sensor). If you are using a full-sized sensor, then a 35mm f1.4 lens, in combination with a 50mm f1.4 is an excellent combination. Having a lens that gives you a good quality shot at F1.4 is very important. And just because a lens opens to F1.4 doesn’t mean that it’s good at that F-Stop, so pick this lens carefully. In the Canon line, the 50mm F1.4 which is for a full sensor, and which works with a cropped-sensor as well, is one of their best lenses and compared to their other F1.4 lenses is cheap.

A DSLR usually has a method for decoupling the exposure from the focal point. It’s a good idea to do this. The Canon 40D and in fact almost all Canon SLRs (going back to the film days) have this feature. You set the focus lock to a button on the back of the camera, and a half-press of the shutter locks exposure. I dwell on this idea because many times you are going to use the button on the back to pre-focus your shot, and do framing as the camera comes to your eye. The idea that you want the camera to take it’s exposure off the focal point doesn’t make much sense. In general, if you are relying on the meter, than it’s better to lock focus, and have the meter do a general reading of what’s in the frame.

Whether it’s a sunny day, or an overcast day – ASA 800 is a good place to start. You almost always want all the shutter speed you can get. If your camera produces very noisy images at ASA 800 than it is not the right camera to use.

Never use a lens cap. Not at any time, for any reason. You should always have a UV filter on the lens, which will protect the lens and make it easy to take a quick shot. You can always tell an amateur if they are using a lens cap.

The Benefit of High ASA

One benefit of modern cameras is the ability to shoot at a high ASA. You may be able to set your walking around shutter speed at 1/4000th of a second, with an ASA of 1600. Some of the newer cameras have usable ASA ratings of 32,000 and higher without causing noise in the RAW image. This opens up a new world to street photographers. With a high ASA you can shoot with a high F-Stop and a fast shutter speed in low light situations like the subway. For example you could use an F11 f-stop with a 1/1000th of a second shutter speed, and still have enough light for a proper exposure on the subway. That is a new development in street shooting.

striking street photography

Photo by Dennis Freeland

Previously, street photographers would push their film or use fast film for shooting. They might use an ASA of 1600 or more, but the resulting negatives would be grainy. As I write this, the Canon Mark II can easily shoot at 1600 ASA with results similar or better than 400 ASA black and white film.

Don’t Throw Anything Away

No matter how you try, and no matter how good your street technique is, most of your shots will be ordinary. You might come back after a day of shooting with nothing to show for it. You may feel non-productive.

Street photography is like fishing. If you enjoy fishing, the catch is important, but the entire experience of getting up early, and making many fruitless casts from your boat isn’t non-productive. You may enjoy the experience whether you return with fish or not. You simply can’t cast your rod and expect to catch a fish every time.

Your best street catches make up for all the uninteresting shots. Unlike fishing, you can’t always tell immediately if you’ve caught a great shot. Many street photographers will let their captures sit for a while before looking at them. What this means is: don’t throw anything away. Make backups of your images, and even if you think they’re not very good – don’t toss them. Given the inability to describe what makes a good street shot, you shouldn’t throw any away. Even an out-of-focus shot might have something interesting in it when you have enough distance to judge it. Your may find something in a shot that seems boring when you look at it again a few years later. This has happened to me enough times so that I never delete digital images.

The Oblivious People

Street Photography is easier then it used to be. People in the city walk around with their senses clogged up. More people are oblivious to what is going on around them than ever before. Music is blasting in their ears, or they’re talking on their cellphone. If they’re not talking on the phone they may walk the streets while reading their email. This makes it easier to photograph a stranger without them noticing you.

Street photography is harder than it used to be. Since we live in an age of urban terrorism and web postings, people and the police are more suspicious than ever. This suspicion extends to landmarks and property. The subways and the streets are filled with video cameras watching your every move. While you take your photographs, most likely you too are being photographed. In New York all major infrastructure contains signs banning photography.

In New York, although it is legal to take pictures on the subway, there is the possibility that you’ll be questioned by the police who think you may be a terrorist. Maybe they don’t know the current laws. You are allowed to photograph on the subway, so long as you don’t use a flash or tripod. However, it is always a good idea to have valid ID with you in case you are stopped. I have been stopped many times while photographing on the subway and usually I just explain that I’m a fine art photographer, working in black and white, and show some ID and that’s enough. If you are going to use a flash, or a tripod, it is still possible to get a permit to photograph in a specific location in the subway.

shoot street photography like a professional

Photo by Roberto Borello

Asking Permission

Photographers who are starting out want to know if it’s a good idea to ask permission from your subject. It would be nice if you could, but it isn’t practical. Once you strike up a conversation with your subject, you are no longer doing street photography. From that point on, the person will strike a pose, and you will be doing what I call street portraits. Should you get a model release? Unless you are doing street portraits, it isn’t practical. On any given day, you may take 100 images only to find one good one (if you’re lucky). It would be impossible to ask each person you photograph to sign a release Many of your shots are of people that rush by you in a fraction of a second.

What to do if you are Caught

At some point, you will be caught, and your subject will approach you. Maybe they say, “Did you just take my picture.”

Honesty is the best policy. The answer is, “yes.” You smile, and try and explain what it was that you found so interesting about them. With a digital camera, you can show the image on the back of the camera. The person may then be annoyed, or they may be flattered. If they are upset, and the picture isn’t that great, then you could offer to delete it for them – and don’t play any tricks. Delete it while they watch. If it’s a great shot and you want to keep it, then you’ll have to win them over. If you were using a film camera you could just shrug it off and say “no.” But everyone knows that you could just show the picture on the back of the digital camera.

Most of the time the person is flattered and wants to know if you would like to take another shot. At this point they almost always strike a pose, and you take the picture knowing that you won’t use it. You aren’t a war correspondent. Very few images are worth getting into a big hassle over. In all my years of shooting, the worst that’s ever happened is that someone asked if I would please delete their photo. I think this happened twice out of ten thousand shots.

Summary

  • Choose an easy locale with lots of tourists when you are first starting out.
  • Turn off any beeping your camera does.
  • If you photographing individuals in a crowd, don’t remove the camera from your eye after you take a shot, but keep scanning the crowd with it.
  • Turn off the instant playback on the digital LCD
  • Use a wide to normal lens. Don’t rely on telephoto lenses
  • Make sure that you are focused and know how you are going to frame the image before the camera goes to your eye.
  • Only shoot from the hip, or without looking through the viewfinder as a last resort.
  • Practice looking for specific literal ideas: irony, juxtaposition, design elements, joy, sadness, emotional moments, things that you find unusual, surprises.

Photo by Roberto Borello

  • Be prepared to take a hundred shots for every good one. And try and understand what a good shot means. (This is outside the scope of this article).
  • Always have a camera with you. You’ll take some of your best pictures during your normal daily routines.
  • Know the laws. You don’t need to get into a big hassle with the police when they stop you from taking pictures in a place where you know it’s legal to take pictures; but it’s important to know your rights.
  • Do not ask for permission or a model release, unless you are doing “portrait” work on the streets. Do not expect that you’re images will be usable for print ads unless the subject is not recognizable (profile, shot from the back etc.)
  • If you are afraid to put the camera to your eye – try to imagine that this is your last day on earth, and that the shot you see before you will be great. In other words, you may need to psych yourself into taking the shot. But there is a balance and if it really is too scary – then don’t force yourself. Your own fear will come across to the subject. When to shoot, and when not to push it, is something you’ll learn with time.
  • Never use a lens cap (have an UV filter on the lens instead)
  • Remember that no matter how many of these techniques you use, you are still invading someone’s privacy. There is no way around that. So you must feel that what you are photographing is worth the effort.

And finally, give yourself time to get used to the experience. Expect to be nervous in the beginning. Also expect that after you’ve been at it for a few years these techniques will become second nature. I think that being nervous is actually a good sign. Anyone with some degree of empathy will be uncomfortable doing street photography in the beginning. If you are the type of photographer that begins by sticking your camera in the faces of strangers, it is doubtful whether you are sensitive enough to be a good street photographer.

About the Author:
Dave Beckerman, a professional photographer in New York for over 10 years. Before that, it was an avocation.


Did you appreciate this newsletter? Please help us keep it going by Joining Our Patreon Supporters

What are your thoughts on this article? Join the discussion on our Facebook Page

PictureCorrect subscribers can also learn more today with our #1 bestseller: The Photography Tutorial eBook

The post 📷 Street Photography Tips and Techniques appeared first on PictureCorrect.


from PictureCorrect https://ift.tt/o80dhUD
via IFTTT