lauantai 30. huhtikuuta 2022

PictureCorrect.com: Capturing Motion with Slow Shutter Speeds

A DSLR camera gives you the power to capture some amazing effects, once you know how to use it. You can develop all the skills of a professional once you understand your manual settings.

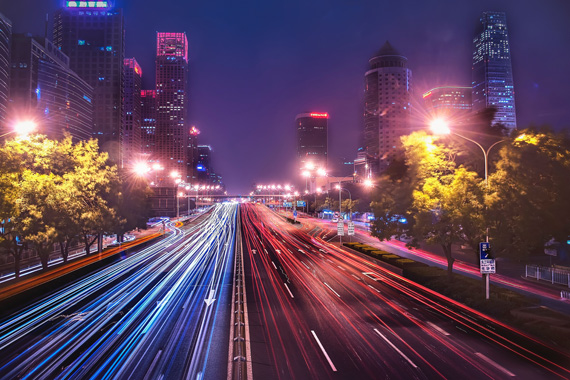
traffic long exposure

Photo captured by zhang kaiyv

If you’ve grown up with a ‘point and shoot’ camera and have just taken the plunge with a new digital SLR, don’t just leave it on auto. That is a waste of good technology; it means you’re still using your equipment as a point and shoot camera. The key to improving your photography is to learn to use your manual settings.

One of these settings is shutter speed. It’s fun to experiment with and easy to see the results in your photos. Although we usually try to freeze our subject with the fastest shutter speed possible, you can get some great effects by using a slower shutter speed to capture movement.

To try this out, you can set your camera to Shutter Priority mode, in which case you set the shutter speed and the camera takes care of the aperture for you. Or, you can go to fully manual mode and adjust both settings yourself. Just remember to keep your exposure balanced by compensating each movement in the shutter speed setting with a corresponding movement of the aperture setting.

Remember to always use a tripod for slow shutter speed photos.

5 Ideas for Long Exposure Photography

Here are five ideas for great capturing great motion effects, simply by slowing down your shutter speed to capture the movement of the subject. If you haven’t tried this before, you’ll have some fun and be thrilled with the results.

1. Waterfalls

This is the obvious first choice. You have certainly seen the silky effects of flowing water in photos, but perhaps you have wondered how it’s done. Just set your camera to a very slow shutter speed—about one second or a half-second—and see the results. The silky slow movement effect is not always your best option. For each waterfall you should try a few shutter speeds to see which one works best for that particular subject.

2. Cars at Night

When doing night photography, you usually need fairly slow shutter speeds anyway. If you try shutter speeds of one second, two seconds, ten seconds, and even longer, you will see some amazing results.

street cars

Photo by Ben; ISO 400, f/6.3, 4-second exposure.

In color photos, the lights of the vehicles will create streams of bright color, stretching away into the distance. The more traffic you see, the more remarkable the effect becomes.

3. Lightning

People often ask me how I take my lightning photos. Some people imagine it takes superhuman reflexes to snap the picture at just the right moment. The truth is, my approach is exactly the opposite.

slow shutter speed lightning

“Windmill and Lightning” captured by Jeremy Weber

First, I wait for a storm (at night) with lots of lightning; in particular, fork lightning that will appear well defined in a photo. I set the shutter to the ‘B’ setting, which lets me open the shutter for any length of time I choose. Then I wait for the lightning to flash. I can capture just one flash of lightning, or several flashes, just by leaving the shutter open for longer.

4. Waves

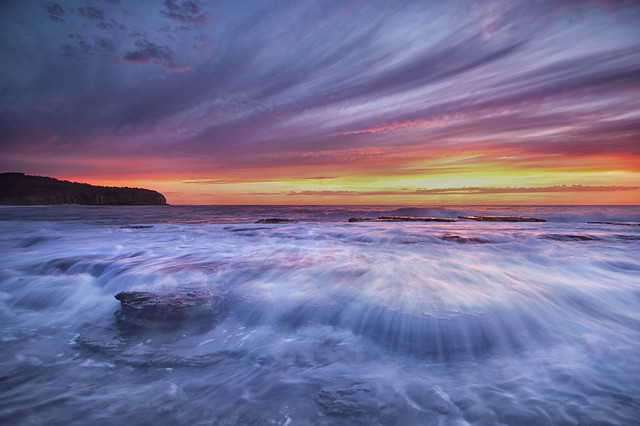
The movement effect of water in a waterfall can also be applied at the beach, although you don’t see it so often in photography. When you visit the beach, experiment with different shutter speeds.

long exposure ocean waves

“Narrabeen Sunrise” captured by Nigel Howe

Sometimes you will find that soft movement effects are just as satisfying as freezing everything with a fast shutter speed.

The misty appearance of fast moving water captured with slow shutter speeds can be most effective where waves are crashing over, or swirling around rocks.

5. Crowds Of People

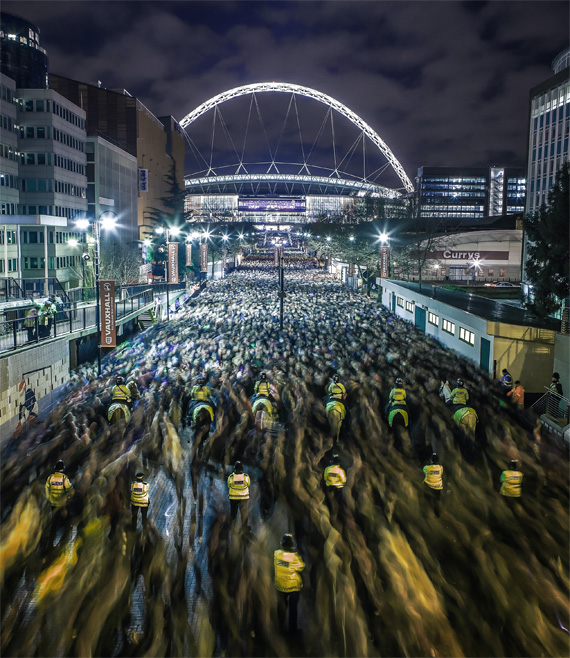
A crowd of people moving in different directions can create a fascinating motion effect in a photo. You don’t need extremely slow shutter speeds to capture some nice results. Photos taken around 1/4 of a second will show substantial blurring, but of course you can exaggerate the effect by going even slower.

For a really impressive image, have a friend stand very still, while everyone around them is moving. Your subject will appear frozen in a sea of moving humanity. Very striking!

crowd long exposure

Photo captured by Jaanus Jagomagi

So there you have some experiments to go out and try yourself. If you haven’t done it before, you are bound to have fun and be excited by the results. And of course it will force you to get to know your camera a little better, which is guaranteed to make you a better photographer.

About the Author:
Andrew Goodall writes for https://naturesimage.com.au/ and is a nature photographer based in Australia. He manages a gallery in Montville full of landscape photography from throughout Australia.


Did you appreciate this newsletter? Please help us keep it going by Joining Our Patreon Supporters

What are your thoughts on this article? Join the discussion on our Facebook Page

PictureCorrect subscribers can also learn more today with our #1 bestseller: The Photography Tutorial eBook

The post Capturing Motion with Slow Shutter Speeds appeared first on PictureCorrect.


from PictureCorrect https://ift.tt/DSYd9ut
via IFTTT

PictureCorrect.com: Interesting Photo of the Day: Mount St. Helens Focus Stack

Have you ever been exposed to harsh conditions just to capture that one photo you were looking for? Landscape photography sometimes tests photographers’ limits! It could be rain, snow, or intense winds that disrupt your session. Photographer Ross Schram von Haupt tested his patience and fortitude waiting to capture this lovely shot of Mt. St. Helens while ash blew around him in 50mph wind:

nature landscape composition foreground background focus detail

“Mt. St. Helens Towering Above Wildflowers During a Beautiful Sunrise” by Ross Schram von Haupt (Via Reddit. Click image to see full size)

He compared it to being blasted with sand while standing on sand dunes in high winds. The blowing ash certainly helps the sunrise’s appearance. The emerging sunlight blends beautiful pastel colors across the background and into the sky. Von Haupt  used five focus-stacked shots to show the sweeping bed of wildflowers leading up to the mountain’s edge. For this image, he used a Nikon D610 with a Nikon 16-35mm f/4 lens. For the foreground, his settings for the five shots were ISO 1000, 16mm focal length and 1/10 second shutter speed. In the background, he used ISO 100, 16mm and 1/6 second. During post-processing, he merged the six images together. Because of the blowing ash, he had to capture the flower pictures the day before. Great work!


Did you appreciate this newsletter? Please help us keep it going by Joining Our Patreon Supporters

What are your thoughts on this article? Join the discussion on our Facebook Page

PictureCorrect subscribers can also learn more today with our #1 bestseller: The Photography Tutorial eBook

The post Interesting Photo of the Day: Mount St. Helens Focus Stack appeared first on PictureCorrect.


from PictureCorrect https://ift.tt/g5WOZmn
via IFTTT

PictureCorrect.com: Nailing Exposure in Film Photography With a Spot Meter

One of the greatest challenges with film photography is that you can’t instantly preview your results to assess exposure. Cameras come with a built in light meter but they can be easily tricked. This is why getting an external light meter can be a great investment if you are into film photography. Photographer Kyle McDougall walks you through how you can use a spot meter to nail your exposure every time:

Learning to use a light meter is not an easy feat in itself. It does take time to understand how you can use it to get the best results. Like with learning anything, you’ll make mistakes, and you’ll just have to learn from those mistakes. Another great thing about learning to use a light meter is that, it not only gives you accurate exposure reading, but also forces you to study light. To be able to fully utilize a light meter, you need to understand light behavior and the tones in the scene.

“It takes practice. And it takes experimenting, making mistakes, and making notes, and learning from those mistakes.”

How a Spot Meter Works

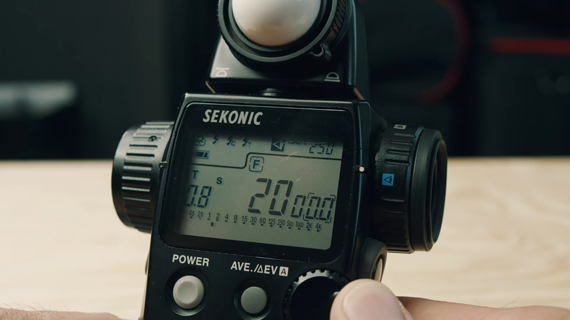
For demonstration purpose, McDougall shows us how he uses his Sekonic L-558R which can be used both as an incident and a spot meter. In this video, he covers how he uses it as a spot meter to take his images.

To use a spot meter, you first input the aperture and ISO. Then, while looking through its lens, point the spot in the middle of the viewfinder to whatever you want to meter. A push of a button will then give you a shutter speed. What you need to understand here is that the exposure that you get will meter the spot for middle grey which is somewhere between pure white and pure black.

using a light meter

What this means is that if you took the meter reading of some bright white snow, the meter reading will make it appear middle grey. In the same way, if you meter a dark street the reading will again make it appear middle grey. It is thus a good idea to take a bunch of meter readings in your scene, and work out the final exposure depending on how you want the tones in your scene to appear.

middle grey in metering

Zone System

“If you have never heard of the zone system or don’t know much about it, take the time to go and do the research and read up.”

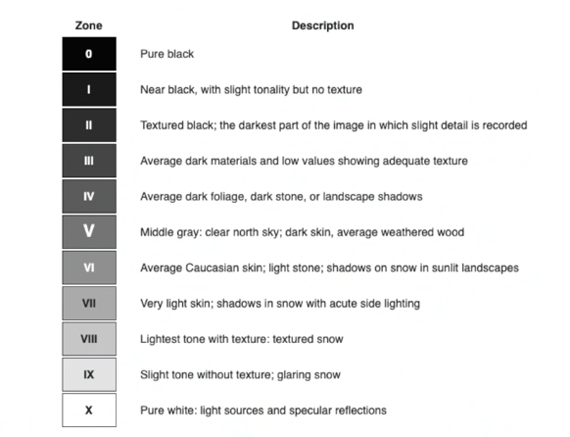
Basically, the zone system is a series of numbers from zero to ten which progresses from zero (pure black) to ten (pure white). Right in the middle, at zone five, is where middle grey lies in the zone system.

zone system in metering

Film needs a good amount of light to record an image properly. So, referring to the chart above, you wouldn’t want the darkest part of your scene to go below zone three. Otherwise, the image will end up losing all the shadow details. However, since film is good at retaining highlight details, you don’t need to worry much about excess light.

Working With a Spot Meter

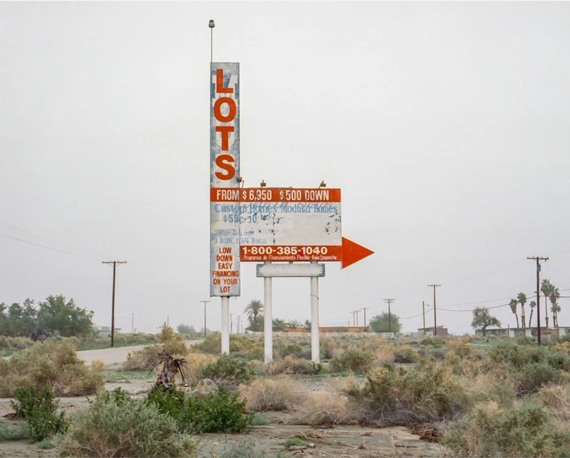
If you’re out on a low contrast overcast day with no bright highlights and deep shadows, look out for areas that are close to the middle grey. You can then get a meter reading off of it and shoot away. McDougall gave the good examples of some pavement or a wet sandy area.

metering a low contrast scene using spot meter

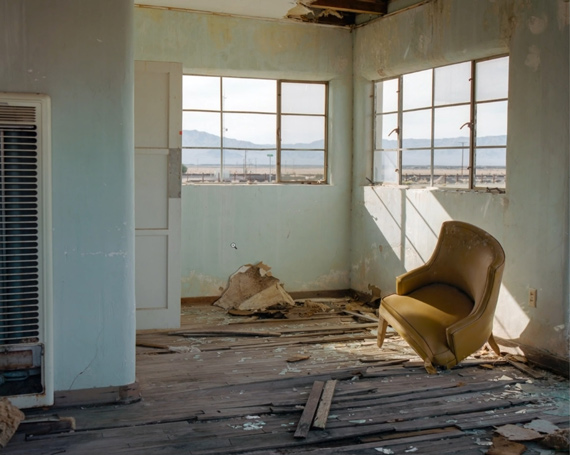
Using a spot meter is, however, different when you’re shooting a high contrast scene. For instance, if you’re shooting indoors on a bright sunny day, you may want to balance the exposure for the outside as well. You’ll be working with a wide range of tones in this kind of circumstance.

metering a high contrast scene using spot meter

The following steps are specific to the Sekonic L-558R. You may want to refer to your light meter’s manual for similar functionality.

  • Start by looking for something that’s close to middle grey and take a reading.
  • Lock the number in the light meter’s memory and then push the average button.
  • Look through the eye-piece to read the different tones throughout the scene. The light meter will tell you how many stops above or below the locked reading those tones are falling.

Then, for instance, if the meter tells you that the darkest scene in your image is 3-stops below the middle grey area (middle grey = zone 5) i.e. zone 3, you can be assured that the shadow details will be retained comfortably. Similarly, if the meter tells you that the brightest scene would be 3-stops over the middle grey i.e. zone 8, you can rest assured that the highlights will remain protected as well.

The key is thus to take a meter reading off the middle grey, then checking with the shadow and the highlight regions to make sure that they are not clipped. Again, with film, you’d want to pay more attention to the shadow regions since film handles highlights pretty well.

“I’m never that worried about where my highlights fall compared to middle grey. That’s because we know negative film deals well with too much light but it doesn’t deal well with not getting enough light.”

Another trick you can use to make sure that the film gets enough light is to set the ISO on the light meter at a lower value than the actual film speed. For instance, if you’re using a Portra 400, set the ISO to 250 in your light meter. The result will make sure that the film gets enough light to expose all the shadows well enough.

If you’ve been struggling with nailing exposure with film photography, get yourself a spot meter (even a used one will do) and try out these techniques. You’ll be amazed with how efficient you’ll get once you’re used to working with the spot meter.


Did you appreciate this newsletter? Please help us keep it going by Joining Our Patreon Supporters

What are your thoughts on this article? Join the discussion on our Facebook Page

PictureCorrect subscribers can also learn more today with our #1 bestseller: The Photography Tutorial eBook

The post Nailing Exposure in Film Photography With a Spot Meter appeared first on PictureCorrect.


from PictureCorrect https://ift.tt/mHuqodU
via IFTTT

perjantai 29. huhtikuuta 2022

PictureCorrect.com: Interesting Photo of the Day: Antelope Canyon Colors

Photo tours around Antelope Canyon in Arizona are quite the experience. While not everyone seems to enjoy it, the same cannot be said about the photos that you end up getting. The natural beauty of the canyon is so mesmerizing that the images come out terrific and surreal. When photographer Giorgio Suighi was there, he was able to capture this brilliant image:

“Oozing Colors in Antelope Canyon” by Giorgio Suighi (Via Reddit. Click image to see full size.)

The textures, patterns, and the interesting shapes of the walls of the canyons are what make this place every photographer’s dream. Who wouldn’t love to be here to photograph the beauty of it? On top of that, what also stands out in the image are the colors.

Maybe it’s the way Suighi has processed the image, or his white balance setting, but the stark contrast in colors between the shadows and the highlights is quite interesting. The dominance of blue tint on the shadows with the bright area outside appearing golden yellow definitely adds a wow factor to the image.


Did you appreciate this newsletter? Please help us keep it going by Joining Our Patreon Supporters

What are your thoughts on this article? Join the discussion on our Facebook Page

PictureCorrect subscribers can also learn more today with our #1 bestseller: The Photography Tutorial eBook

The post Interesting Photo of the Day: Antelope Canyon Colors appeared first on PictureCorrect.


from PictureCorrect https://ift.tt/R7nKdIr
via IFTTT

PictureCorrect.com: Tips to Edit Street Photos in Black and White

Black and white photography is not just about pulling the saturation slider to zero. There’s so much more that goes into the process. Photographs that have the right level of highlights, shadows, and subject interest are the best candidates for black and white photography. And what better genre than street photography that ticks these criteria? In this video, photographer Gareth Danks shares his workflow on editing black and white photos:

Before moving on to the editing process, Danks shares a really interesting point. Don’t decide if an image should be edited in black and white while editing. Do that while composing the image. This way, it won’t be a hit & trial. And when you decide to do so, change the picture profile in your camera to monochrome. This will let you see in black and white, and it will also help to cull out your black and white images easily. The raw files will however remain in color.

“I am always looking for extreme contrast. I want the whites to be white, even if it means losing a slight bit of detail in there.”

Black and white photographs look really good when it’s a high contrast scene. A good mix of light and shadows add so much vibe to the image. So, when you’re editing images in black and white, be sure not to kill the essence. If you follow Danks’s workflow, you’ll see how you can adjust the black, white, contrast, and exposure slider to get the job done. He also shares how you can fine-tune the image using the HSL panel.

Besides the exposure adjustment, also ensure that you get rid of anything that you deem is not important. Crop them out. And keep those lines straight, will you? Nothing screams amateur like tilted lines and horizon.

For further help: The Street Photographer’s Lightroom Presets


Did you appreciate this newsletter? Please help us keep it going by Joining Our Patreon Supporters

What are your thoughts on this article? Join the discussion on our Facebook Page

PictureCorrect subscribers can also learn more today with our #1 bestseller: The Photography Tutorial eBook

The post Tips to Edit Street Photos in Black and White appeared first on PictureCorrect.


from PictureCorrect https://ift.tt/zKe8Vm1
via IFTTT

keskiviikko 27. huhtikuuta 2022

PictureCorrect.com: Capturing Natural Drama in Landscapes & Cityscapes Webinar

For all the landscape & cityscape photographers out there, pro photographer Serge Ramelli is doing a free webinar live from Tuscany with some valuable tips and a free eBook. His 5 Step System To Natural Drama is the easiest-to-understand book ever written on Lightroom. In this book readers will learn the secrets to taking stunning photos in all kinds of lighting and how to create those striking fine art black and whites using Lightroom: Register to Watch

tuscany webinar

Webinar: Landscape & Cityscape Natural Drama Formula

In this special LIVE training event in the heart of Tuscany, he will cover:

Bad Weather Photography

How to take great photos in bad Weather or if you cannot be there for sunset.

Finding Your Own Unique Style

​​What is the fastest way to find your style as a photographer.

The Natural Drama Formula

How to achieve drama without going overboard and not over retouching your photos.

Ending soon: Landscape & Cityscape Photography Webinar


Did you appreciate this newsletter? Please help us keep it going by Joining Our Patreon Supporters

What are your thoughts on this article? Join the discussion on our Facebook Page

PictureCorrect subscribers can also learn more today with our #1 bestseller: The Photography Tutorial eBook

The post Capturing Natural Drama in Landscapes & Cityscapes Webinar appeared first on PictureCorrect.


from PictureCorrect https://ift.tt/grXqTSY
via IFTTT

PictureCorrect.com: Interesting Photo of the Day: Vibrant Night in Saskatchewan

Our modern lifestyle is so hectic that we forget to take a break and enjoy what’s around. It’d be great to pause sometimes and appreciate what nature has to offer. Imagine spending a night by a fire, under the starry sky, with the northern lights dancing around on the horizon. Well, for photographer Curtis Matwishyn it was not a matter of imagination as he got to experience just that at Prince Albert National Park in Saskatchewan:

bright northern lights and fire

“Vibrant Night at Prince Albert National Park, Saskatchewan” by Curtis Matwishyn (Via Reddit. Click image to see full size.)

The image is an 8-second exposure that Matwishyn shot with his Sony A7RIII and 20mm f/1.8 FE lens at f/2.8, and ISO 3200. What’s interesting about this image is how Matwishyn has managed to capture the aurora while the fire’s burning in just a single exposure. That is an indication of how intense the aurora really must’ve been. And the stars on the top are the icing on the cake. Shining like glitter, they subtly add a sense of scale to this image.

“I got lucky with the right intensity aurora to make it all work.”

While the brilliant colors of the northern lights are beautiful on their own, the way the yellow and orange from the fire complement the aurora greens further adds to the beauty of the image.

Wouldn’t you love to enjoy the northern lights in all their glory the way Matwishny has with this shot? Imagine how awesome it would be.


Did you appreciate this newsletter? Please help us keep it going by Joining Our Patreon Supporters

What are your thoughts on this article? Join the discussion on our Facebook Page

PictureCorrect subscribers can also learn more today with our #1 bestseller: The Photography Tutorial eBook

The post Interesting Photo of the Day: Vibrant Night in Saskatchewan appeared first on PictureCorrect.


from PictureCorrect https://ift.tt/ZvGQFfU
via IFTTT

PictureCorrect.com: How to Instruct Non-Professional Models as a Photographer

Working with professional models is always a breeze. It’s fascinating to see how easily they can strike beautiful poses. But what if you’re working with a non-professional model, or one who’s just getting started? In this case it becomes your responsibility to ensure that neither you nor the model end up getting frustrated. In today’s interesting video, photographer Irene Rudnyk shares her top five tips for working with non-professional models:

A rule of thumb when working with non-professional models is to always start with the easy poses and save the difficult ones for the end. That’s because the model will need some time to get used to posing in the beginning. And once they’re all warmed up, the boost in confidence will encourage them to strike poses more effortlessly.

“Encouragement is very important, especially for non-professional models.”

As the photographer, you’ll have a crucial role to play so that the session proceeds as smoothly as possible. Refrain from remaining quiet. Instead, be vocal and point out great poses the model makes. And if the pose isn’t working, politely let them know. Also, don’t make the mistake of only directing the model constantly without giving any feedback. You can notice in the video how Rudnyk constantly communicates and provides feedback to the model.

On the same note, put an active effort to make the work environment as fun-filled and friendly as possible. This will allow the model to open up more easily.

If you have a session planned with a non-professional model, you must watch this video. It will definitely help you and your model to derive the best results from the session.


Did you appreciate this newsletter? Please help us keep it going by Joining Our Patreon Supporters

What are your thoughts on this article? Join the discussion on our Facebook Page

PictureCorrect subscribers can also learn more today with our #1 bestseller: The Photography Tutorial eBook

The post How to Instruct Non-Professional Models as a Photographer appeared first on PictureCorrect.


from PictureCorrect https://ift.tt/xycEvKL
via IFTTT

tiistai 26. huhtikuuta 2022

PictureCorrect.com: Fixed vs Variable ND Filters for Long Exposure Photography

This article is based on concepts from The Advanced Photography Action Cards which are currently 71% off if you want to check them out.

A key piece of gear that is necessary for long exposure photography in bright daylight is the neutral density filter.

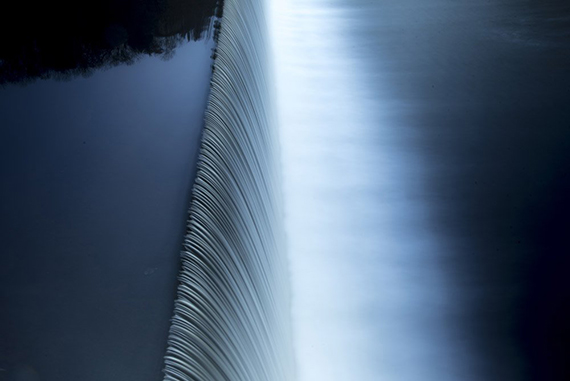
guide to long exposure photography

Types of ND Filters

There are fixed neutral density filters, meaning the amount of light blocked from passing through to the lens is a constant.

There are also variable neutral density filters, meaning the amount of light blocked from passing through to the lens can be adjusted, usually between 2-8 stops of light loss.

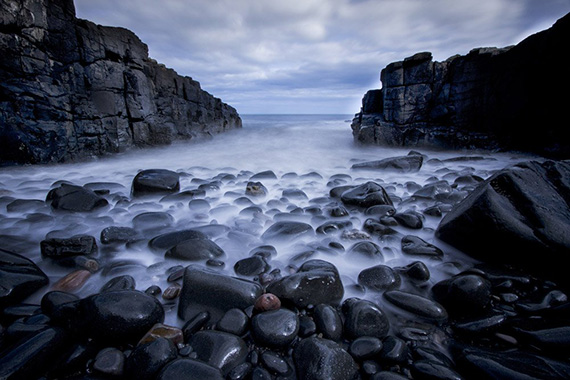
water long exposure

The temptation for purchasing a variable ND filter is convenience. You can get all of that range of exposure options using just one filter which is very nice.

However, there is a downside, and it’s important for you to realize that before you plunk down hundreds of dollars on a new variable ND filter.

  • A variable ND filter typically costs more than a single fixed ND filter.
  • Variable ND filters are round screw-on type filters. Therefore, you would need to purchase one that fits your largest diameter lens (more cost), and then purchase step-down rings so that it would fit onto smaller diameter lenses.
  • Step-down rings are notorious for seizing up and can be extremely difficult to separate.
  • Variable ND filters are thick and they will usually begin vignetting around the edges of the frame with any lens wider than a 28mm focal length.
  • Variable ND filters are known for leaving strange crosshatch looking artifacts in broad open planes of color—most noticeably the sky. This can be a real problem, as your long exposure photographs will often include the sky.

With a rectangular ND filter system, it makes it easy to stack filters (including graduated ND filters), as well as making the task of focusing the camera easier.

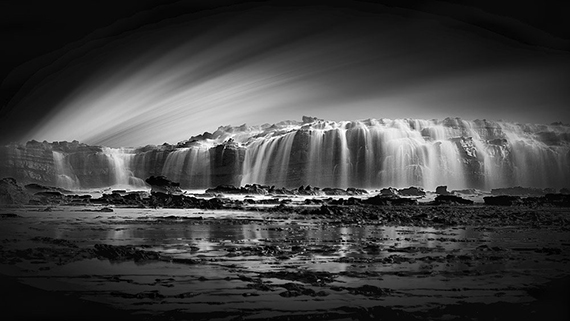
black and white long exposure

If you’d like to learn exactly how to use long exposure techniques in broad daylight, you may want to peruse more lessons on the action cards.

For Further Training:

Introducing 20 printable project sheets, with over 60 new photography assignments to really push and expand your shooting skills. These Advanced Action Photography Cards are currently 71% off for a limited time if you want to check them out.

photo action cards

Advanced Photography Action Cards

These Action Cards discuss a photographic topic, provide you with suggested considerations, and give you specific photographic assignments. They’ll kick you out of the “nest” to go have a personal discovery experience all on your own.

Deal ending soon: Action Photography Cards Advanced Projects at 71% Off


Did you appreciate this newsletter? Please help us keep it going by Joining Our Patreon Supporters

What are your thoughts on this article? Join the discussion on our Facebook Page

PictureCorrect subscribers can also learn more today with our #1 bestseller: The Photography Tutorial eBook

The post Fixed vs Variable ND Filters for Long Exposure Photography appeared first on PictureCorrect.


from PictureCorrect https://ift.tt/sCvMQqh
via IFTTT

PictureCorrect.com: Interesting Photo of the Day: Cruising Through Antarctica

Most of us can only dream of going to Antarctica on a luxury cruise. Even the idea of a cruise to Antarctica, of all places, sounds crazy—right? However, if you’ve got the resources and are willing to take the challenge, you can go to Antarctica for a bit of vacation. To give you a glimpse of what you can experience, here’s an image captured by StartPuzzleheaded673, who happens to be a crew member of a ship going through Antarctica:

“Antarctica from a Luxury Cruise” by StartPuzzleheaded673 (Via Reddit. Click image to see full size.)

It can be frightening to look around and see only ice in every direction. It even has an alien-planet vibe to it—except that there’s a ton of snowy ice everywhere instead of desolate rocks.

Looking at the conditions, it makes one wonder about the reasons why anyone would want to spend their time visiting the barren isolation. But like with any adventure, the memories are worth it—especially when captured in a photograph.

Would you like to go to Antarctica? Let us know in the comments.


Did you appreciate this newsletter? Please help us keep it going by Joining Our Patreon Supporters

What are your thoughts on this article? Join the discussion on our Facebook Page

PictureCorrect subscribers can also learn more today with our #1 bestseller: The Photography Tutorial eBook

The post Interesting Photo of the Day: Cruising Through Antarctica appeared first on PictureCorrect.


from PictureCorrect https://ift.tt/dlRnW9F
via IFTTT

PictureCorrect.com: Watch a Pro Landscape Photographer Edit RAW Images

It is always fascinating to see how pro photographers work with raw files. Many times, the final images come out much better. We’re left wondering how they edit their photos. If you’ve ever asked this, we have the perfect video for you—professional landscape photographer Nigel Danson takes you through his editing process and shows you how you can add life to your raw photos.

The great part about this episode is that the images that Danson edits were not taken by him. They were all sent to him by his social media followers.

Editing an image doesn’t mean you need to spend a ton of time and resources. This might be the best takeaway of the video. Moreover, even the tools Danson uses are fairly simple. It is all about knowing what to use in what circumstances.

As beginners in photography, most of us make the mistake of making global adjustments. One thing you can clearly learn from this video is to make use of the various local adjustment tools. It mostly includes brushes, gradients and masks. They can help you to retouch specific regions in the image.

Also, editing doesn’t always need to be complicated. Sometimes you can get the job done by just cropping it. And in some cases, as Danson suggests, the images could come out a lot better with a stronger composition.

If you’re someone who’s fascinated by the art of editing, or if you’re getting started with editing photos, we highly recommend you go through the video. You’ll get a lot of insights from this one for sure.

For further training: The Fundamental Photo Editing Guide


Did you appreciate this newsletter? Please help us keep it going by Joining Our Patreon Supporters

What are your thoughts on this article? Join the discussion on our Facebook Page

PictureCorrect subscribers can also learn more today with our #1 bestseller: The Photography Tutorial eBook

The post Watch a Pro Landscape Photographer Edit RAW Images appeared first on PictureCorrect.


from PictureCorrect https://ift.tt/gQWRxX1
via IFTTT

maanantai 25. huhtikuuta 2022

PictureCorrect.com: 🌆 10 Tips for Taking Great Cityscape Photos

Cities are not only home to many people’s residences, businesses and offices – they are also full of energy, power and vitality. There are many things that make a city great and capturing the true essence of a city in one single photograph is a very hard thing to do.

how to take amazing cityscape photographs

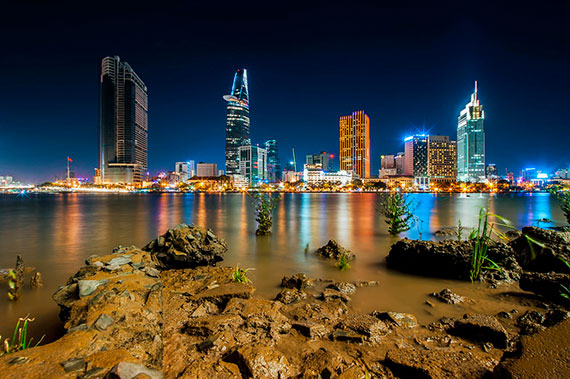
Photo by Vinh Pham

The main thing that encapsulates and defines a city can actually differ depending on the time of the day and even the season. During the morning cities can look peaceful and calm, whilst during the evening or nighttime they can come alive with activity and purpose.

Most of the people that call a particular city home don’t take the time to stop and marvel at the magnificent landmarks and sights that make their own home city such a wonderful place to be a part of. A really good city photograph not only shows off the majestic buildings in the heart of the city center, but should also showcase some of the more enthralling aspects and delights that day to day city life has to offer.

1. Choose an Interesting Subject – Make sure you have an interesting subject for the photo, either in the middle section of the photo or in the foreground.

2. Have a Mix of Foreground & Background – Ensure that you have a good mix of interesting foreground and background areas in the entire photo.

techniques for capturing cityscape photography

Photo by Luc Mercelis; ISO 100, f/4.5, 1/1500-second exposure.

3. Leave Room to Crop – When you are framing up the photo in the viewfinder make sure that there is some room around the edge of the photo to crop the final image.

4. Use a Level Tripod – Before taking the photo make sure that you use a level tripod so that the horizon is straight. Even though you can fix this later in photoshop it is easier to do it right in the first place to save yourself the hassle.

5. Keep the Sun Behind You – Try and keep the sun behind you so that you get the most amount of light on your the city and the sky has a brilliant blue look to it.

6. Choose the Right Time of Day – Try to take photos as early or as late as possible in the day, as these times generally give the best light and produce more shadows and detail on your photos.

7. Use the Correct Exposure – When setting the exposure for a photo make your reading is taken on the brightest part of the photo so that there is no overexposure.

cityscape photography methods

Photo by Kat Northern Lights Man; ISO 1000, f/3.2.

8. Use a Timer or Remote – Always use a timer or remote control to take the photo so that there is not any camera shake caused by you when you depress the shutter button.

9. Try a Polarizing Filter to Reduce Reflections – On your SLR camera use a polarizing filter to reduce the light reflections that bounce off of windows and metal objects.

10. Use a High Quality Wide-Angle Lens – In order to get crisp results from your SLR camera invest in or rent a good quality lens. They may be expensive but it will be well worth the money in the cityscape arena.

By using all of the above tips you are sure to see a noticeable improvement in any photo that you take of city buildings or skylines. Not only will your cityscapes be clearer and well defined, but they will also have a wide spectrum of color and light, which is the sign of a great photo.

take better cityscape pictures with these tips

Photo by Alexey Kljatov; ISO 93, f/2.8, 1-second exposure.

About the Author:
This article was written by Rueben Hird, his site on landscape photography also has a range of city photography displayed from interesting metropolitan areas around the world.


Did you appreciate this newsletter? Please help us keep it going by Joining Our Patreon Supporters

What are your thoughts on this article? Join the discussion on our Facebook Page

PictureCorrect subscribers can also learn more today with our #1 bestseller: The Photography Tutorial eBook

The post 🌆 10 Tips for Taking Great Cityscape Photos appeared first on PictureCorrect.


from PictureCorrect https://ift.tt/x2WHGQA
via IFTTT

PictureCorrect.com: Interesting Photo of the Day: Papua New Guinea Paradise

Papua New Guinea has some of the most rugged, unexplored land in the world. It also has amazingly clear, picturesque ocean scenery, like seen here. This half underwater, half above water photo taken by David Doubilet captures the beautiful, thriving coral and a simple, peaceful local custom:

half underwater photo

Kimbe Bay by David Doubilet (Via Imgur. Click image to see full size.)

Taken at Kimbe Bay, where the coral reef protects the vibrant underwater garden and the fish from storms. Many local fisherman come here to fish, in traditional outrigger canoes. Doubilet captured this traditional custom and scenery perfectly—truly a peaceful paradise.


Did you appreciate this newsletter? Please help us keep it going by Joining Our Patreon Supporters

What are your thoughts on this article? Join the discussion on our Facebook Page

PictureCorrect subscribers can also learn more today with our #1 bestseller: The Photography Tutorial eBook

The post Interesting Photo of the Day: Papua New Guinea Paradise appeared first on PictureCorrect.


from PictureCorrect https://ift.tt/tyJcbRn
via IFTTT

PictureCorrect.com: A Quick Guide to Cleaning Your Camera Sensor

One of the biggest things to consider when owning a camera is maintenance. Not only do you have to take care of the camera when using and when storing it, but every once in a while you have to perform some maintenance tasks to keep it in tip top shape. Toby Gelston addresses one of the most common actions—cleaning your sensor:

After using your camera for a while you’re going to start to see specks popping up on your photos, especially if you use multiple lenses and frequently change between them. Have no fear, as nine out of ten times these are just dust particles on your sensor, and cleaning it is not as daunting of a task as it seems at first.

Check for Dust on Your Sensor

To check your sensor for blemishes, take a photo of a white sheet or piece of paper at a small aperture setting (e.g. f/22) and a low ISO. Take the photo into Lightroom and use the Visualize Spots setting under the Spot Removal Tool. That should immediately bring all the imperfections into focus.

sensor cleaning cameras dslr

Astrophotography? No, just sensor dust. It’s incredible just how simple it is to clean!

Clean Your DSLR Sensor

First off, if the specks of dust are barely noticeable, there are two things you can try:

  1. Use the camera’s internal sensor cleaning feature. Most DSLRs have this setting, and it’s usually very easy to use.
  2. Use an air pump (which you can find at just about any photography store) and just puff some air on the sensor. Make sure you don’t directly touch the sensor!

blow air onto camera sensor

If this doesn’t work, move on to a specialized sensor cleaning kit. If your kit is similar to Gelston’s, all you have to do is wrap the cleaning cloth to the plastic pick, apply the cleaning solution (just a couple of drops, as per the instructions), then gently brush the sensor. It really is that simple!

sensor clean dslr camera

All gone! The air pump alone managed to do away with most of the spots.

As you can see above, the results are surprising for the amount of effort you put into the cleaning process.

Have you ever cleaned your sensor? What were your results?


Did you appreciate this newsletter? Please help us keep it going by Joining Our Patreon Supporters

What are your thoughts on this article? Join the discussion on our Facebook Page

PictureCorrect subscribers can also learn more today with our #1 bestseller: The Photography Tutorial eBook

The post A Quick Guide to Cleaning Your Camera Sensor appeared first on PictureCorrect.


from PictureCorrect https://ift.tt/nH07uIO
via IFTTT

sunnuntai 24. huhtikuuta 2022

PictureCorrect.com: Interesting Photo of the Day: Lion Steals Camera and Tripod

Nature shots in a safari setting feature the most powerful, wild animals that Africa has to offer. Oftentimes, taking photos from a distance is the best way to capture these shots and remain safe. But what happens if your camera is left behind to sit in place and shoot these images for you? The result can be lethal:

Lion steals camera lens tripod

“Lion and photo camera” by Thomas Selig. (Via Reddit. Click image to see full size.)

Photographer Thomas Selig captured this shot of a female lion in Kenya departing with another photographer’s camera setup. He remarked afterwards that the tripod was lost, but they were able to recover the camera and lens. Unfortunately, the lens had been half eaten by the lions and lost function. Apparently, all it took was a long wait before they could go get it back!


Did you appreciate this newsletter? Please help us keep it going by Joining Our Patreon Supporters

What are your thoughts on this article? Join the discussion on our Facebook Page

PictureCorrect subscribers can also learn more today with our #1 bestseller: The Photography Tutorial eBook

The post Interesting Photo of the Day: Lion Steals Camera and Tripod appeared first on PictureCorrect.


from PictureCorrect https://ift.tt/BQmFTct
via IFTTT

PictureCorrect.com: Using High Speed Sync Flash For Studio Portraits (Video Tutorial)

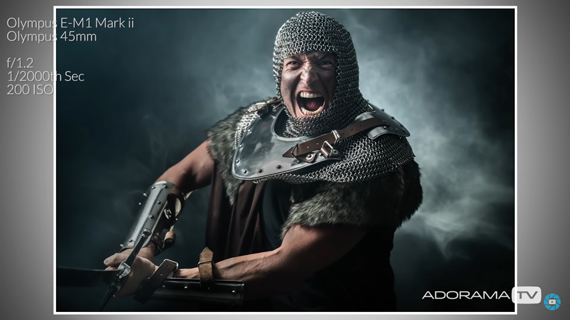
High Speed Sync (HSS) is a quite handy feature in a flash system that allows you to use flash at shutter speeds beyond the camera’s sync speed. This is important as it lets you use a combination of wide apertures and fast shutter speeds to create dramatic portraits. In this video, photographer Gavin Hoey from Adorama demonstrates how you can make setting up HSS really straightforward and take some eye-catching portraits:

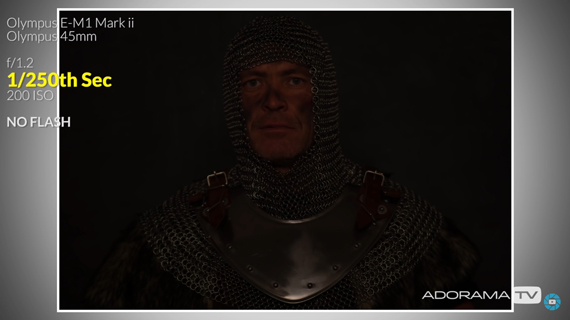
If you have a fast glass, something like an f/1.2, why not shoot it at f/1.2? The challenge however is that you can’t cut off all the ambient light with such a wide aperture and the camera set to flash sync speed. The ambient light can thus affect the final image and potentially ruin it.

portrait at flash sync speed

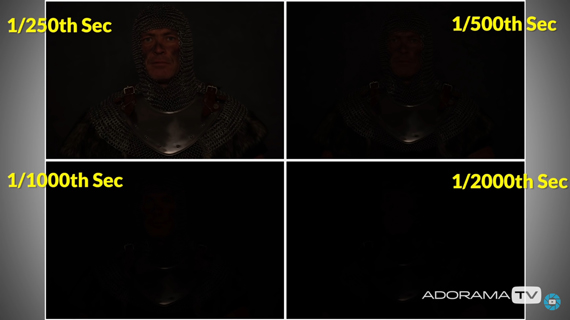
This is where you need to set your shutter speed beyond the camera’s flash sync speed. To determine how fast you need to go, simply take test shots at varying shutter speeds. When doing so, keep an eye out for a black frame. You can then leave the shutter speed to the one that gives you a totally black frame.

determining shutter speed to work with HSS

This is important because from this point onward, the image will only be affected by the light that you add. You can thus have much better control over the final result. Simply set the flash to HSS mode and you’ll be able to work with flash at fast shutter speeds. If the image comes out over or under exposed, change the flash power until you get a proper exposure.

high speed sync portrait

portrait using high speed sync

Don’t limit yourself to working only at the flash sync speed. Try out HSS and explore the possibilities.


Did you appreciate this newsletter? Please help us keep it going by Joining Our Patreon Supporters

What are your thoughts on this article? Join the discussion on our Facebook Page

PictureCorrect subscribers can also learn more today with our #1 bestseller: The Photography Tutorial eBook

The post Using High Speed Sync Flash For Studio Portraits (Video Tutorial) appeared first on PictureCorrect.


from PictureCorrect https://ift.tt/TJhpgzX
via IFTTT

PictureCorrect.com: 🖱️ One Click Photo Editing Improvement in Luminar Neo

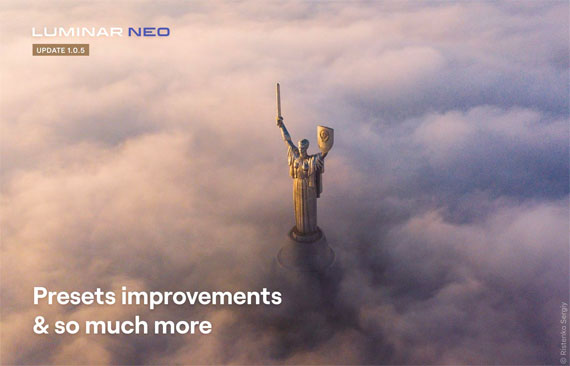
In photo editing news, Skylum just announced a new update to their software. Ukraine is still fighting for its freedom, and the Skylum Team is still working from a war zone. However, it’s incredibly important for them to keep the company going and continue delivering value to their customers. That’s why they are proud to present a new update to their Luminar Neo photo editor! Learn more: Luminar Neo Update 1.0.5

luminar neo presets

Luminar Neo Update 1.0.5

There are lots of improvements to Presets:

  • Access the Presets tab from the top menu bar
  • See all of a Preset’s built-in edits when applying it. Simply apply a Preset and go to the Edits tab. You can then make adjustments to the applied edits as you please.
  • Save your own edits (including all applied Edit tools, Layers, and masking) as a custom Preset for later use
  • Use Undo and Redo when applying a Preset
  • View Presets using the T shortcut (or by selecting View > Presets in the menu)
  • Use the Revert on Preset button (reverts a photo to the state it was in before entering the Presets tab)

Don’t hesitate to try out the new workflow. There’s so much you can achieve by applying Presets!

And many other adjustments:

On top of that, enjoy an improved LUTs workflow in the Mood filter and DCP files in the Develop RAW filter. They’ve added animations, a custom category, and the ability to remove LUTs from the popover.

On macOS, there’s now the possibility to remove a Layer with the Del shortcut. Also, users can export images in higher resolution in Luminar Share.

And they’ve caught and fixed lots of bugs:

To top it all off, they’ve caught 7 bugs that could lead to unexpected results.

On macOS, users now can:

  • Smoothly delete images from Single Image Edits
  • Make and undo edits without encountering the overlapped Discard Edits button
  • Export an image via the Share menu in Luminar Neo, then smoothly use mirroring in Luminar Share
  • Send high-resolution images via the share feature in iMessage

And on Windows, users will see these changes:

  • When applying a Preset, previously added Layers are reset as expected
  • Better performance when reopening a previously edited image and applying tools
  • When using Luminar Neo as a Photoshop or Lightroom plugin, the Cancel and Apply buttons are scaled according to the window size
luminar neo ukraine

Luminar Neo Ukraine

How to update Luminar Neo?

On macOS, select Luminar Neo in the top menu bar and choose Check for updates.

On Windows, select Luminar Neo in the top left-hand corner and choose Help > Check for updates.

See how it works: Luminar Neo v1.0.5 Photo Editor


Did you appreciate this newsletter? Please help us keep it going by Joining Our Patreon Supporters

What are your thoughts on this article? Join the discussion on our Facebook Page

PictureCorrect subscribers can also learn more today with our #1 bestseller: The Photography Tutorial eBook

The post 🖱️ One Click Photo Editing Improvement in Luminar Neo appeared first on PictureCorrect.


from PictureCorrect https://ift.tt/KiMcUmv
via IFTTT

lauantai 23. huhtikuuta 2022

PictureCorrect.com: Tips for Photographing Spirals

This article is based on concepts from The Advanced Photography Action Cards which are currently 71% off if you want to check them out.

In numerous areas of study, many theories examine why the spiral shape is so darn fascinating to us.

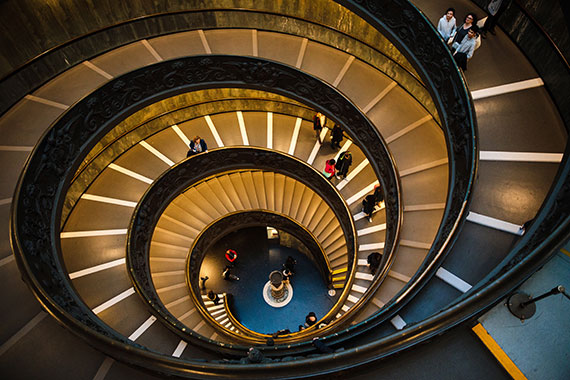
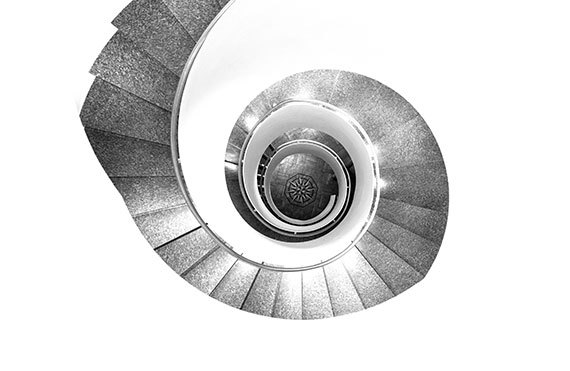
spiral staircase

Photo by Yifei Chen

The use of spiral shapes in architecture and art dates back almost to the beginning of human existence.

It’s true. We’ve had a long love affair with the spiral!

Most of us are spending a lot of time at home these days. We may not currently have the opportunity to photograph a gorgeous architectural spiral, such as this museum staircase.

But that doesn’t mean we can’t go on the hunt for less obvious spiral subjects to photograph. You likely have numerous spirals near you at this very moment.

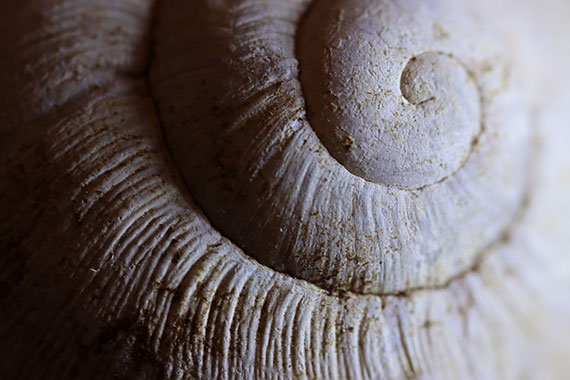
spiral shell

Photo by Rollstein

The spiral can be found in everything from galaxies to snail shells.

In ancient history the spiral was considered a symbol of prosperity as it represented the growth of a vine. (I guess the ancients liked their wine too!)

Today I’ll guide you along on a photo safari to seek out and photograph spirals right in the comfort of your own home.

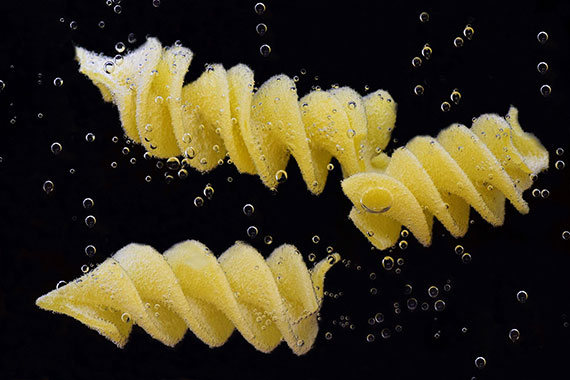
pasta spirals

Photo by ulleo

Let’s Start by Finding Spirals in the Kitchen

Many food-related items contain a spiral. Pasta is a great example.

spirals in cinnamon rolls

Photo by adamkontor

Or how about some cinnamon rolls?

For this spiral project, follow these steps.

  • Gather food items that are spirals by nature.
  • Gather food items that you could twist into a spiral for something more abstract.
  • Scrounge through your cooking utensils. I bet you have a spiral or two in there somewhere (perhaps a corkscrew)!

Push a table near a window. Also gather a couple of other light sources. Select sources that have different types of lighting – a table lamp that provides broad even light could be one source, and a powerful flashlight that creates a spotlight effect could be another. The idea is to create different types of lighting.

Now build your set. You could use simple art paper for a plain background. You could also use a clear glass container to create water effects, such as the pasta photo above. Alternatively, you could create a table setting. In the end, your set building is limited only by your imagination.

Now Let’s Find some Spirals in Other Parts of the House

Idea: Take a look at some of the toys that you may have lying around. A Slinky is one example, but there are lots of toys that incorporate a spiral design.

slinky spiral

Photo by CWilkinson

Lighting: When photographing a spiral, you don’t want to use flat frontal lighting. You want to use lighting that comes from the side or the rear. These directions of light accentuate the shape, which is essential when capturing pictures of a spiral.

If you find that you’re scratching your head in search of spirals around the home, let me share with you how easy it can be.

Let’s Search for spirals in the Garage and Basement

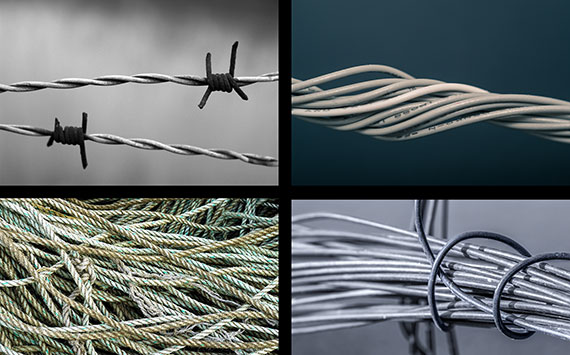
spirals with rope, cords and wire

Top left photo by CarlottaSilvestrini, Top right photo by Steve Johnson, Bottom left photo by MikesPhotos, Bottom right photo by analogicus

Idea: While engaging in your spiral photo safari, don’t just think, “I’m looking for a spiral.” Remember, you can also create a spiral. Two of the images above were found spirals, and two were created spirals.

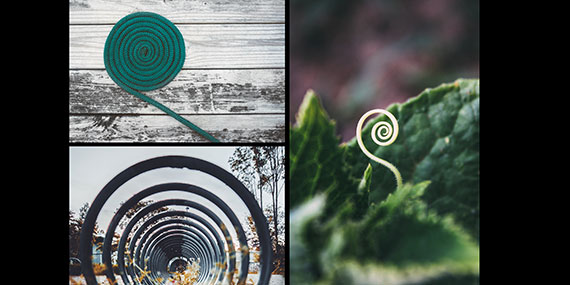
found and created spirals from ribbon, string and paper

Top left photo by JJ Ying, Bottom left photo by Jen Theodore, Right photo by Matheus Frade

How About Checking the Home Office for Spirals

Idea: Paper is an excellent resource for spiral photography. It can easily be molded and shaped into different types of spirals. Remember, you can combine the spiral with other shapes for different effects! You can also combine different spirals made from different materials for exciting juxtaposition.

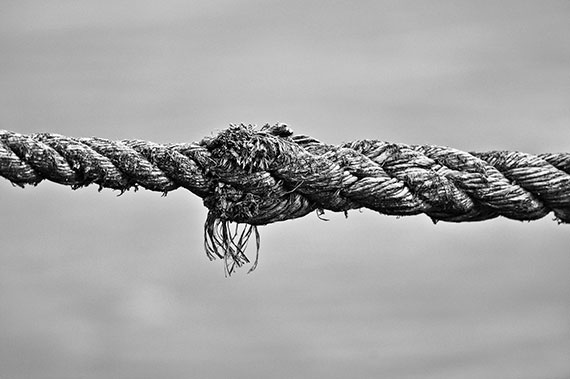
rope spiral

Photo by MabelAmber

Key Thought: A spiral is a shape. A shape is a powerful tool of composition when repeated in a photograph. From a composition point of view, a repetitive form is at its strongest when you introduce an interruption. The picture of the rope depicts how an interruption in flow creates drama. The disruption becomes a focal point to the subject, which is a rope with a spiral!

examples of spirals with interruption in flow

Top left photo by Matt Hagerty, Bottom left photo by Lorenzo Hamers, Right photo by Bogomil Mihaylov

Key Thought: You’ve probably heard of the Fibonacci Sequence. You know – Pi and the Golden Ratio. That idea is best left for another blog post. The reality is that any spiral has the potential to create an exciting and fun photo!

Skill Points:

  • Spirals are found everywhere in nature. However, you may need to get down on your hands and knees to spot them!
  • When photographing your spiral, make sure that it contrasts from the background either by tone or color.
  • The best lighting to capture a spiral shape is either sidelight or backlight. Don’t use front lighting unless you are using multiple light sources.
  • Combining a spiral, or spirals, with other shapes or materials can create interesting juxtapositions.
  • Creating your own spiral out of materials easily found around the home can open up your creativity to an entirely new level. The possibilities are endless.
  • History has proven that the human mind has a unique attraction to the spiral shape. Including a single spiral or more than one spiral within your photo, virtually guarantees added attention.
  • When you’re out and about, you will find spirals everywhere, especially in architecture and other forms of art such as sculptures. Be on the lookout.

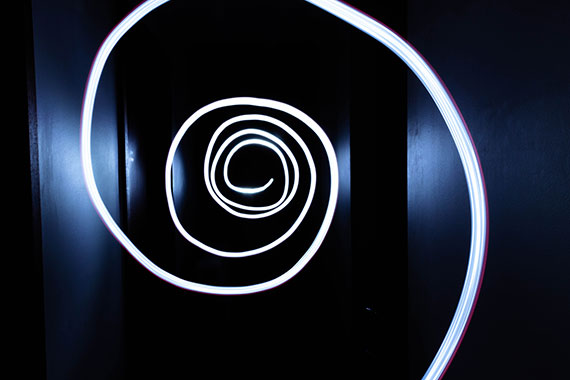
Idea: You can easily create a spiral by attaching a flashlight to a string and swinging it in a circle while standing in a darkened area.

light spiral

Photo by Mitchell

How to Make a Light Spiral:

  1. Locate a dark area. This could be outdoors or inside a room. If you’re outdoors, look around for other light sources that might affect your picture. You could get creative and include those light sources, or you could exclude them and just go for the spiral. If you choose an indoor spot, make sure you have enough space. You don’t want to hit anything with your twirling flashlight.
  2. Use a small, lightweight flashlight to start. As you gain skills, you can try different kinds of lights and mix them up in the same picture. Tie the rear of the flashlight to a sturdy string.
  3. With the lights on, swing the flashlight around for some practice.
  4. To create a spiral, you’ll have to do one or both of two things as you twirl the flashlight. Increase, or decrease, the size of the arc while swinging the flashlight. And/or move closer or away from the camera as you rotate the light during the exposure.
  5. To vary the size of the arc, loosely hold the string in one hand close to the flashlight, and then firmly grab the line with the other hand (2 to 3 feet from the flashlight). As you twirl the light, move the loose hand forward or backward along the string. This will change the diameter of the arc. It might take a little practice.
  6. Try changing the diameter of the arc and also moving forward or backward with your feet at the same time.
  7. Set your camera up on a sturdy surface, preferably a tripod.
  8. Set the shooting mode to manual.
  9. Set the aperture to f/5.6.
  10. Set the shutter speed to bulb or the most extended shutter speed that your camera allows (it should be at least 15 to 30 seconds).
  11. Use either the self-timer, a cable release, or an electronic remote release to fire the shutter.
  12. Start with an ISO of 800. Note: Depending upon the illumination level of your light source, you may have to adjust either the ISO or the aperture.
  13. Set the camera focus to manual and manually focus on an object located where you will stand while swinging your flashlight.
  14. With your shooting location darkened, turn on the flashlight and let it hang on the string. Begin twirling it in a circle. Remember: you have to vary the size of the circular arc and/or change your camera to subject distance to create a spiral. Otherwise, you will simply record a circle.

Post-Processing

using post processing to make creative spirals

Photo by Laurent Perren

You can go another step further with your creative spirals by editing your existing photos using your post-processing software.
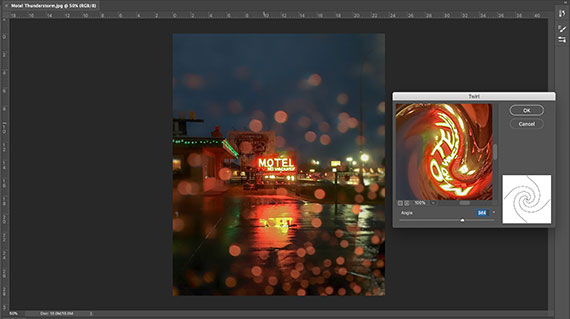
use photoshop to create spirals

In Photoshop, you can create a spiral from any existing photo by using the ‘Twirl’ filter!

example of spiral created in photoshop

Idea: If your desktop editing software doesn’t offer a spiral effect option (such as Lightroom), go looking at the range of mobile phone editing apps. One that comes to mind immediately is PhotoSpiralysis.

phone app for making spiral photography

You can transfer any photo, from any camera, onto your smartphone for editing into a spiral, and then move it back to your desktop suite for more editing options!

Let’s Wrap up this Spiral Talk

In closing, numerous studies have compared the spiral to other shapes, both natural and man-made. The spiral always comes out on top when it comes to attractiveness and viewer retention. That’s powerful knowledge for the photographer who wants his or her photos to be noticed!

How did you do?

  • Were you able to locate spirals inside your home?
  • Did you find spirals outdoors and in your garage or basement?
  • Did you not only find spirals but also create them?
  • Did you have fun making different types of spirals with paper?
  • How many different types of materials did you use to make a spiral photo?
  • Did you mix spirals with other shapes?
  • Were you able to create some spiral photos with food?
  • What types of lighting did you use? Did they all work out equally well?
  • Did you try the spiral light painting technique with a swinging flashlight?
  • Did any of these exercises challenge you in exposure and lighting?
  • Did you create a small portfolio of spiral images that you’re proud of?
  • Did you try to create a spiral in post-processing?
  • What did you learn about spiral photography that you could pass on to the next photographer?

About the Author:
Kent DuFault is an author and photographer with over 35 years of experience. He’s currently the director of content at the online photography school, Photzy.

For Further Training, Deal Ending Soon:

Introducing 20 printable project sheets, with over 60 new photography assignments to really push and expand your shooting skills. These Advanced Action Photography Cards are currently 71% off today if you want to check them out.
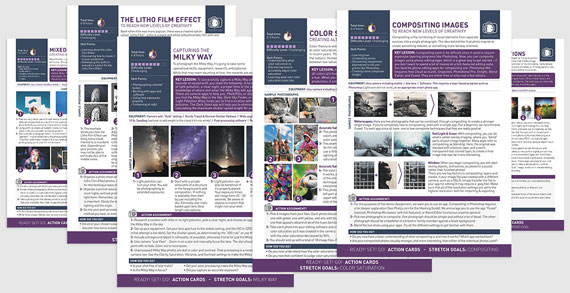
photo action cards

Advanced Photography Action Cards

These Action Cards discuss a photographic topic, provide you with suggested considerations, and give you specific photographic assignments. They’ll kick you out of the “nest” to go have a personal discovery experience all on your own.

Deal ending soon: Action Photography Cards Advanced Projects at 71% Off


Did you appreciate this newsletter? Please help us keep it going by Joining Our Patreon Supporters

What are your thoughts on this article? Join the discussion on our Facebook Page

PictureCorrect subscribers can also learn more today with our #1 bestseller: The Photography Tutorial eBook

The post Tips for Photographing Spirals appeared first on PictureCorrect.


from PictureCorrect https://ift.tt/h79u3CD
via IFTTT
PictureCorrect.com: Interesting Photo of the Day: Fireball Over Mount Rundle

Shooting astrophotography can be full of surprises, both positive and negative. Brett Abernethy experienced the good kind:

meteorite falling over mountain

“Fireball over Banff Rundle Mountain” by Brett Abernethy (Via Imgur. Click image to see full size.)

While he was chasing some aurora borealis, he stumbled upon a meteorite burning in the atmosphere. Luckily he had his shutter open.

“I shot it on a Canon 5D Mark III with a Zeiss 21mm 2.8 lens F4 for 49 seconds. On a tripod obviously. In post all I did was bump up the contrast and saturation a bit – which you have to do when shooting in RAW.”


Did you appreciate this newsletter? Please help us keep it going by Joining Our Patreon Supporters

What are your thoughts on this article? Join the discussion on our Facebook Page

PictureCorrect subscribers can also learn more today with our #1 bestseller: The Photography Tutorial eBook

The post Interesting Photo of the Day: Fireball Over Mount Rundle appeared first on PictureCorrect.


from PictureCorrect https://ift.tt/xbioCWn
via IFTTT
PictureCorrect.com: Left vs Right Camera Exposures (Video Tutorial)

Getting your exposure correct in-camera saves you time from fiddling around in post. And, as you progress your career in photography, it’s one of those fundamental things you need to know how to do. If you haven’t watched part 1 yet, you can watch part 1 here. Setting your display brightness manually, referring to the histogram, enabling the highlight alert, and using a flat picture profile are some of the ways that’ll help you to achieve a correct exposure in-camera. In this video, photographer Pye Jirsa from SLR Lounge takes it a step further and discusses whether you should expose to the left, or to the right:

When you take a photo by exposing to the right, you expose for the highlights. This can land you with images that appear underexposed except at some bright spots. You can recover the underexposed images to some extent in post, but you’ll end up with grainy images with artifacts.

A better alternative is thus to expose to the left. Push the shadow region of your histogram as far to the left as possible without clipping. This allows the camera to make the best utilization of the camera’s dynamic range.

“Having some blown out highlights, that looks okay, that looks natural, that looks normal when we look at it from a viewer stand point.”

Exposing to the left is thus a better method to expose your images. Which technique have you been using?


Did you appreciate this newsletter? Please help us keep it going by Joining Our Patreon Supporters

What are your thoughts on this article? Join the discussion on our Facebook Page

PictureCorrect subscribers can also learn more today with our #1 bestseller: The Photography Tutorial eBook

The post Left vs Right Camera Exposures (Video Tutorial) appeared first on PictureCorrect.


from PictureCorrect https://ift.tt/kANwtYs
via IFTTT
PictureCorrect.com: Night Photography Tips

This article is based on concepts from The Advanced Photography Action Cards which are currently 71% off if you want to check them out.

Night photography is a typical “next step” for many budding photographers.

I have had numerous photographers ask me over the years, “What do I need to get started in night photography?”

My response is always, “What type of night photography do you want to do?”

To which they inevitably say, “I don’t know. I just want to take some cool night pictures.”

Well, it’s a bit more complicated than that. However, it isn’t as complicated as it used to be.

Check this out!

iPhone night photograph

Photo by Kent DuFault

I took this photograph in absolute darkness except for the moon and the holiday lights. Plus—and this is truly amazing—I took it handheld, without a tripod.

How could this be, you ask? I used my iPhone 11 Pro. It was taken at ISO 500 at 1/10th of a second.

It’s tack-sharp, and that’s pretty impressive.

There are three basic things that you need for night photography. From there, your experiences with night photographs will get wild and crazy.

What is necessary?

  1. You need the dark. I’m not trying to be coy here. Many times, we think it’s dark, and it’s not that dark. Some forms of night photography need the scene to be really dark.
  2. You need some form of light. This necessity is where night photography gets exciting, because there are infinite ways to create light. Each one can alter your picture. Think about it. You could have natural light, artificial light, starlight, stray light, sparkling light, colored light, tiny lights, big lights—the list goes on.
  3. You need some way to create a sharp picture. In my example picture above, it was the technology of the iPhone that helped create a sharp image. A more traditional method is a tripod and a remote shutter release mechanism. The gist is that you must devise a way to create sharp, non-blurry pictures.
neon night light photography

Photo by Joel Fulgencio

For this article, we will concentrate on four aspects of night photography:

  • Photographing at night using strictly available light
  • Using moving light sources for creative effects
  • Mixing light sources
  • Capturing a good image with long exposures

We will talk specifically about these scenarios:

  • The nighttime cityscape
  • Using road traffic for composition
  • Painting with light
  • The dusk mixed-light shot

I know some of you will be hoping to capture the Milky Way after reading this article. That’s not going to happen. That takes a bit more instruction than can be included in this blog post. However, I will touch upon it and present you with a few things to consider for future reference.

Photo by James Wheeler

Getting Started

If you’re new to night photography, the cityscape is the most accessible picture opportunity to get you started.

Unless you have a camera like my iPhone 11 Pro, you’re going to want a few specialized equipment pieces.

Equipment:

  • Camera: Any camera with a “bulb” setting and/or a maximum built-in shutter speed of up to 30 seconds.
  • Tripod: You’ll need something sturdy. You can also get by with placing your camera on a sturdy surface, but that will be far less flexible.
  • Remote Shutter Release: You can also get by with your camera’s self-timer, if you aren’t using the bulb setting.
  • Lens: Ideally, a wide-angle or moderate telephoto (14mm-100mm). Depending upon the light level, image stabilization can be helpful.
  • Sandbag: You can use this to further stabilize a tripod or support your camera if you place it on a sturdy surface. There are commercially available sandbags explicitly made for photography, or you can make your own.
  • Miscellaneous items: A flashlight or headlamp will help you figure out camera settings in the dark. A non-reflective 8-by-10-inch matte black card (available at any art store) will let you block light from entering the lens without having to touch the camera (more on this in a minute).
night photography setup instructions

Photo by David Marcu

The Best Conditions for Starting in Cityscape Night Photography

  • Pick a location that provides a beautiful view of the skyline and city lights
  • If possible, include a body of water in the foreground for reflections
  • Arrive at your location and get your gear prepared around 30 minutes after sunset
  • Start shooting while there is still some light in the sky
  • Set your camera to manual mode or aperture priority
  • Set the ISO to 400, or up to 800
  • Set the lens to manual focus
  • Set the metering mode to center-weighted
  • Compose using the rule of thirds
  • If possible, include a focal point
  • Begin shooting as the sky darkens, and the city lights turn on
  • Monitor the shutter speed: be aware of even minor camera movement

Night Cityscape

Pro Tip: Your best shots will occur when the sky is close to the same exposure value as the cityscape. As the sky darkens, you will eventually lose a lot of detail in the shadows.

Using Road Traffic for Composition and Effect

Once you have a few nighttime cityscapes under your belt, the next logical step is to combine a cityscape with road traffic for a special effect.

Remember This: I call these shots cityscapes, but they can be created anywhere there are buildings and lighting.

nighttime long exposure example

Photo by Kent DuFault

This night shot was taken in the town of Key West, Florida, using the same principles outlined above.

Pro Tip: Notice how the sky in the Key West picture has gone entirely dark. If you’re shooting this late, try composing your shot so that some bright object with lighting breaks up the black sky. You can see how I did that with the tree.

long exposure highway example

Photo by Patrick Hendry

To include road traffic in your nighttime photos, follow the previous instructions with the following additions.

  • Pick a location that looks down onto the road (the higher the elevation, the better)
  • Use only manual mode
  • Set the aperture between f/4 and f/8 (you will need to experiment with this)
  • Make sure to set your focus before it gets too dark
  • Take a camera meter reading, and then reduce the exposure from one stop to four stops, depending upon the ambient light surrounding your road; for example, the first road picture in this article would be a reduction of around one stop, while the example photo above would be closer to three or four stops’ reduction
  • Depending on the traffic level, your shutter speed might be anywhere from half a second to 30 seconds. Again, the first example in this article would be closer to half a second because there is a lot of traffic as a light source, while the second example would be closer to 30 seconds because only a few cars were on the road, meaning less light

Painting with Light

Painting with light can take many different forms.

night photography example to dissect

Night Photo

Think of it as an artist with a blank paint canvas. They apply different paints to the canvas, and it comes to life as a complete image.

Crucial Thought: In nighttime photography, it’s dark, and the darkness creates a blank canvas within the camera. Earlier, I alluded to the importance of darkness when you attempt nighttime photography. In many places, it won’t be as dark as you initially believe it is. That’s why in the equipment section, I suggested you include a matte black card in your kit. The card helps you to block any light that you don’t want to enter the camera—without touching the camera. For example, let’s say you’re in the middle of a long-exposure cityscape shot, and a car with headlights on is approaching. You hold the card in front of the lens as the vehicle passes. When it is out of view, you remove the card and continue to expose the picture. This technique is one of the advantages of using the bulb setting instead of automated shutter speeds. You count the seconds with the shutter locked open. You can manually stop the exposure with the card if necessary.

decoded night photography

Light Sources

This photograph has four light sources that are “painting” the black canvas of darkness.

  1. The illumination in the sky is light source number one.
  2. A lantern inside the tent is light source number two.
  3. An electronic flash positioned to illuminate the bushes and the man standing is light source number three.
  4. The headlamp on the man’s head is light source number four.

Key Point: Painting with light is an advanced technique, and here is why. Each light source has a different intensity and requires a different length of time to expose inside the camera properly. This fact is where your black card comes in handy as you can cover the lens as you turn different light sources on and off.

Give it a try!

Try some light painting. Gather two or three light sources. They can be an electronic flash, a flashlight, a plug light, car headlights, etc. Keep things simple to start. Place a model in a dark area and use one light to expose the model and the additional lamps to illuminate the environment around them.

The Dusk Mixed Light Shot

I touched upon the value of having some light in the sky already, but I wanted to add two additional tips.

storm long exposure

Photo by Jean Beaufort

Outside exotic light sources can create other opportunities for nighttime photography.

Lightning can quite literally illuminate an entire landscape. Make sure you are a safe distance away. Follow all of the tips listed for capturing road traffic with these additions.

  • Use a wide-angle lens
  • Set the aperture between f/8 and f/11
  • Lock the camera shutter open using the bulb setting
  • Place your black card in front of the lens
  • When the lightning begins to flash, pull the card away—allow one to three flashes, depending upon how large they are
  • Close the shutter
nighttime photography tips

Photo by Lethu Zimu

When shooting at dusk and on into the night, there may be moments where you don’t have a tripod or cannot use one.

Pro Tip: Use the image stabilization option on your camera, if possible. Also, press your body up against a solid surface as you take the picture. This action will help you hold the camera steady at slower shutter speeds.

how to take starry night photos

Photo by Casey Horner

I mentioned the Milky Way at the beginning of the article.

Many of the tips you’ve read here will help Milky Way photography and other astrophotography subjects.

The difference is that you must learn to locate these celestial bodies within the sky and take your search for darkness to new and higher levels—and that’s a whole other article.

About the Author:
Kent DuFault is an author and photographer with over 35 years of experience. He’s currently the director of content at the online photography school, Photzy.

For Further Training, Deal Ending Soon:

Introducing 20 printable project sheets, with over 60 new photography assignments to really push and expand your shooting skills. These Advanced Action Photography Cards are currently 71% off today if you want to check them out.

photo action cards

Advanced Photography Action Cards

These Action Cards discuss a photographic topic, provide you with suggested considerations, and give you specific photographic assignments. They’ll kick you out of the “nest” to go have a personal discovery experience all on your own.

Deal ending soon: Action Photography Cards Advanced Projects at 71% Off


Did you appreciate this newsletter? Please help us keep it going by Joining Our Patreon Supporters

What are your thoughts on this article? Join the discussion on our Facebook Page

PictureCorrect subscribers can also learn more today with our #1 bestseller: The Photography Tutorial eBook

The post Night Photography Tips appeared first on PictureCorrect.


from PictureCorrect https://ift.tt/5pW1S2R
via IFTTT