This article is based on concepts from The Photography Action Cards if you want to dig deeper for further training.
Street photography is an art form that combines portrait photography with chance encounters, relying mostly on random incidents that happen in public.
People are usually included in a candid street photograph—but not always. That is a debate that will likely never be resolved.
In my opinion, including people isn’t an absolute necessity.
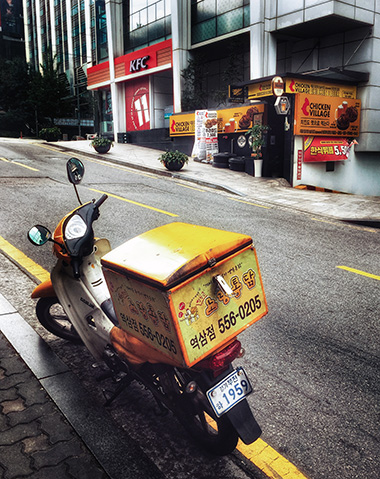
Photo by Kent DuFault
I think an absolute necessity for a successful candid street photo is a sense of story. For my shot above, my intended story was “the little guy versus the big guy.” A David-and-Goliath trope.
There are no people in my shot of those two chicken restaurants, but I think the story comes across.
The number-one problem I see with many candid street images is that they lack a story. They depict a street scene but convey no message, or the message is not clear.
Key Thought: A candid street photograph doesn’t necessarily have to include people. It should, however, convey a story that is discernable by a viewer.
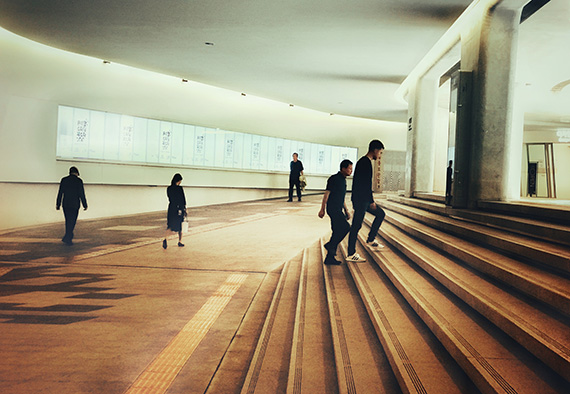
This street candid relies heavily upon composition to create interest and story. (Photo by Kent DuFault)
In this article, I am going to discuss the following:
- The two distinct and different types of street photography
- Equipment recommendations for candid street photography
- Camera settings that work well for this genre of photography
- Overcoming the fear that is inevitable when photographing strangers on the street, especially when you are new to the activity
- A few tips that are specific to those photographers just starting in candid street photography
- Some ideas for storytelling and composition in candid street photography
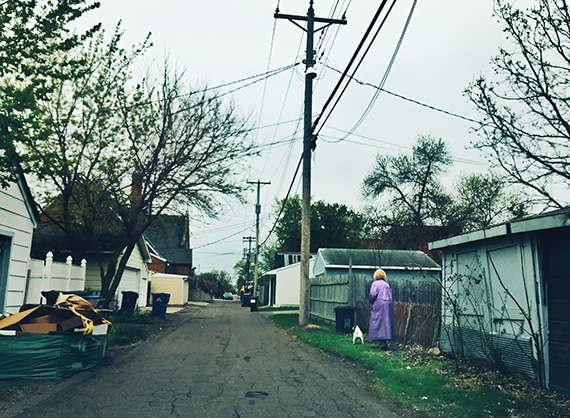
The juxtaposition of a subject against their location can create a compelling visual story. (Photo by Kent DuFault)
The Two Distinct Types of Street Photography
The first type of street photography, the one that we will focus on in this article, is candid street photography. This genre is characterized by photographing chance encounters on the street that are random incidents which tell a story.
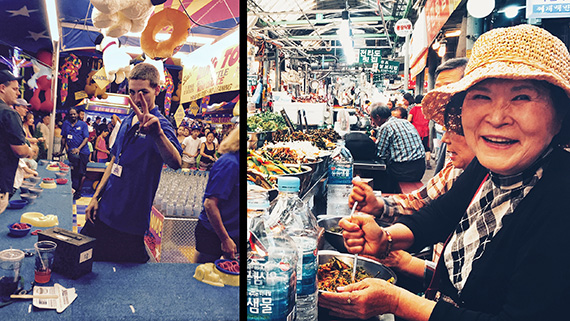
I spoke briefly with both of these subjects before taking their pictures. These are street portraits. (Photos by Kent DuFault)
The second type of street photography is street portraiture. In this genre, the subject is aware that you are taking their photograph. Their dynamic of random and unaltered behavior has been removed. In my opinion, the best street portraits also tell a compelling story.
Some argue that a street portrait is not street photography. I disagree, and I’m sure the debate will rage on long past my time on this earth.
Remember: Uninterrupted action where the subject is unaware that you’re taking their picture becomes a candid street photograph. If you interact with the subject, or the subject becomes acutely aware you’re taking a picture, the image becomes a street portrait.
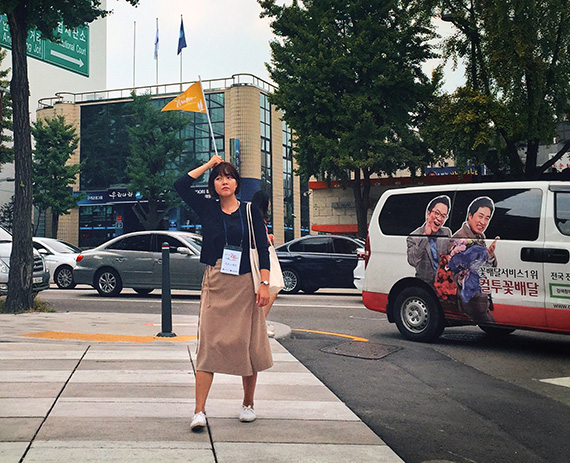
I was standing right in front of this woman as I took her picture. However, she was completely unaware of my presence, and so this is a candid street image. (Photograph by Kent DuFault)
Equipment for Candid Street Photography
A handy skill for the candid street photographer is the ability to blend into the background—to become invisible, or nearly so. Part of that ability is definitely related to the equipment you’re carrying.
I know that there are street photographers out there that walk around with a bag full of gear. I’m not one of them.
I have found that less is more when it comes to candid street photography.
In fact, in recent years, I’ve come to rely mostly on my iPhone camera. It makes me utterly invisible to the general public.
My other camera for candid street photography is a Panasonic Lumix GX-85 mirrorless camera. This camera is also tiny and unassuming. For candid street photography, I leave my Nikon D750 at home.
While a big DSLR rig might create the best technical quality for an image, the sight of it is going to garner you unwanted attention. I also encourage you to leave the zoom lens at home.
A single prime lens is the way to go for this genre of photography, if you have that option.
I would look for a lens that is between a moderate wide-angle and a normal field-of-view lens.
For a full-frame camera, this would be something between 28mm to 55mm.
For an APS-C sensor-sized camera, this would be something between 18mm to 30mm.
A fast lens with a maximum aperture of f/2.8 is suitable for minimum depth of field. However, it’s not an absolute necessity.
If you’re just getting started in photography and all you have is the kit lens that came with your camera, don’t let the above advice deter you from candid street photography.
In that situation, I recommend setting the kit lens to the widest focal length and just leaving it there. Don’t bog yourself down trying to zoom in and out.
Once you become experienced as a street photographer, you can move toward using a smaller zoom lens, if you wish.
Some photographers like having a longer focal length for distant shots. That’s not my style, so I never use one. I believe closer is better.
I would encourage you to minimize your equipment and concentrate on getting close and developing your timing. That’s the nature of candid street photography—close and intimate.
Recommended Gear
- A small body camera that doesn’t scream, “I’m a photographer!”
- A prime lens with a large maximum aperture is preferred. A short zoom lens can work. However, avoid extended zoom lenses that would easily attract attention. A kit lens is fine to start.
- A mobile phone camera is an excellent tool for this genre of photography as it attracts zero attention.
- Don’t use a flash.
- Don’t carry a large kit bag, monopod or tripod. Stay light and blend in with the crowd.
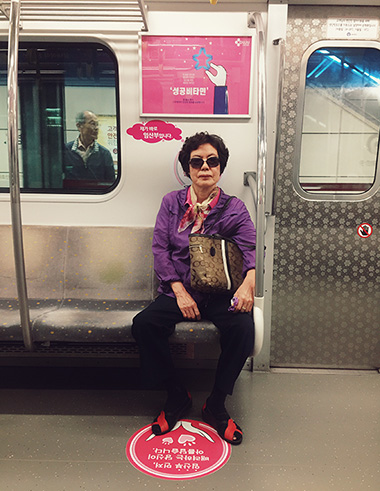
I’m not sure if this woman was aware that I took her photograph, or not. She never moved one inch the entire time I was on the train. I used my “fiddling with my iPhone” technique to shoot the picture. (Photo by Kent DuFault)
Camera Settings
One of the reasons that I genuinely love creating candid street photography using my iPhone 11 Pro is that it relieves me of all thoughts regarding camera settings.
I am free to move around and create at will. I shot some of my very best candid street pictures with my iPhone.
However, as I stated earlier, I also use my Lumix mirrorless camera at times.
When camera settings come into play, these are the ones I have found work best:
- Shooting mode: Aperture Priority. This is one genre where you can completely ignore the manual mode mantra.
- Drive mode: Single shot. I prefer to rely on my sense of timing to catch peak action versus shooting a bunch of frames and hoping that I got something. It will serve you better to shoot one shot or a series of single shots in the long run.
- White balance: Auto. White balance problems are not generally an issue with candid street photography.
- File format: RAW or RAW + JPEG. You most assuredly want the flexibility of RAW for processing candid street photography.
- Aperture: f/5.6 or wider. I almost always shoot at the widest aperture that my lens allows. Closing down to a slightly smaller f-stop, such as f/5.6, would allow a bit more depth of field. I never close the aperture down any further than that.
- Focus mode: AF-S (autofocus single shot). I don’t use continuous focusing. I find that my reflexes work better than camera automation. You may wish to experiment and see what works best for you.
- Focus points: I use a center grouping of nine focus points, three by three.
- Metering mode: I set the meter on my camera to follow my focus points. If your camera doesn’t have that function, I would set the metering mode to center-weighted.
- ISO: I set my ISO to auto with a parameter limiting the ISO to a maximum of 1000. If your camera doesn’t have that function, I would set it to ISO 400 and adjust it as necessary for the conditions.
- Shutter speed: In aperture priority, you want to keep a watchful eye on the shutter speed as displayed inside the viewfinder. Make sure it is fast enough to freeze the action, if that’s your desire.
Overcoming the Fear of Photographing Strangers on the Street
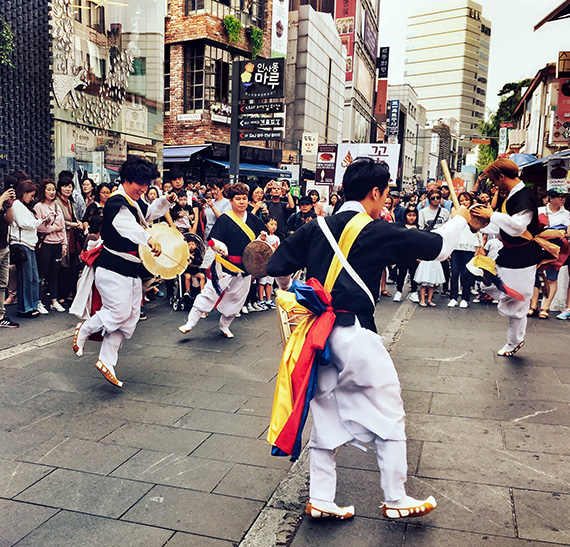
Street performances are an excellent resource for the beginning street photographer. (Photo by Kent DuFault)
Pro Tip: One of the simplest methods for overcoming the inherent fear that comes with candid street photography is, to begin with, crowded areas. This advice refers to festivals or areas with high tourist traffic. In these situations, you can start by photographing public displays (such as in the photograph above) and then slowly point your camera at spectators and passersby. People generally don’t notice photography in these settings, and it’s rare to have someone confront you as a photographer.
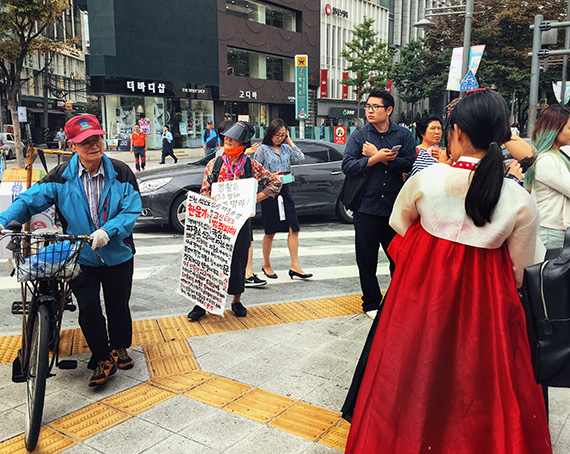
I stood on the corner, appearing confused, and lost. No one paid any attention as I spun around looking like I was trying to get my bearings while taking candid street photos. (Photo by Kent DuFault)
If you study street photography methods, you will hear of the “video camera technique” or the “movie method”. I call it the “on the sly” or the “fiddling with my iPhone” technique, and there are numerous other variations. The main idea is to fool passersby into thinking that you’re not taking their picture, but doing something else—such as shooting a video.
With the movie method, you hold the camera up, use the LCD screen and rotate around as if you’re shooting video—when in reality you’re snapping stills.
Another variation is to act interested in something behind your subject. When you raise the camera, the subject either has no interest or believes that you’re shooting something else.
One of my favorite variations is with the iPhone. I walk along, pretending that I’m texting.
Sometimes I’m taking pictures while I’m walking. Other times, I will stop and fidget with the phone like something is wrong while I’m secretly taking pictures. As I do this, I may look around, swinging my upper body with the phone up by my face, appearing as if I’m lost or looking for something.
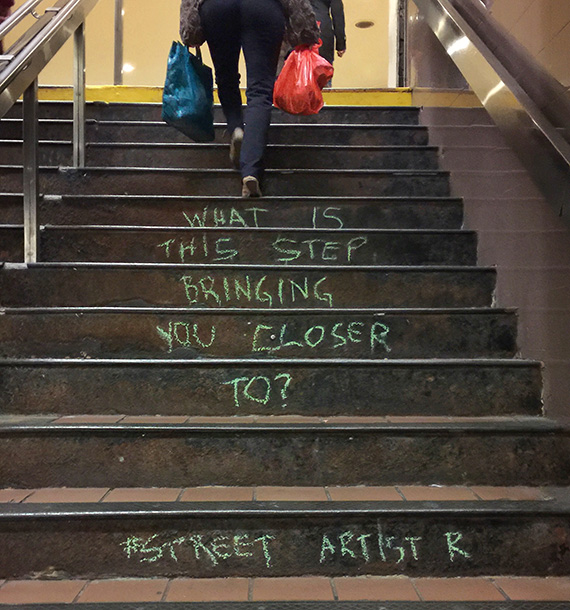
In New York City, I saw this message chalked onto the steps of a subway exit. I waited for someone to come along, or a situation to develop, that would give the written words a story for my image. (Photo by Kent DuFault)
Another way to get past the street-photography jitters is to concentrate on hands, feet and body language.
People tend to get suspicious when a camera is pointed toward their faces. They will pay no attention at all if the camera is pointed elsewhere. Avoid eye contact. Look for exciting juxtapositions of body parts and the street environment.
A Few Candid Street Photography Tips to Get You Started
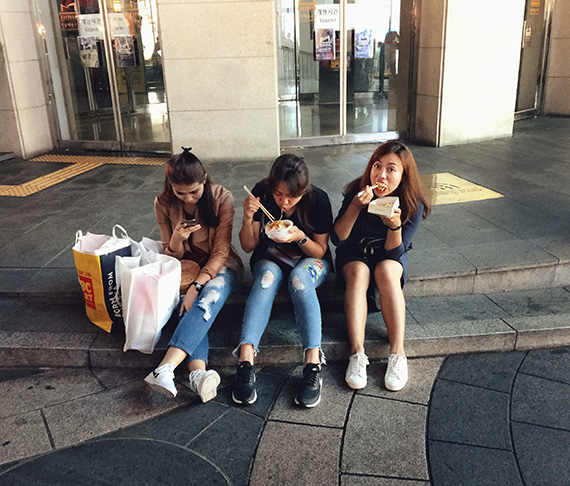
Photo by Kent DuFault
First and foremost, smile and be friendly. Don’t act like you’re hiding something. If someone asks you to delete a picture, do it.
I carry a small card that is about the size of a postcard. It slides into my back pocket. It has four candid street pictures on the front. On the back, it has my name and my email.
If someone questions me, I will pull it out and show it to them—then I will give it to them if they want it. I invite them to contact me if they want a copy of the finished picture. I carry about 10 of these cards when I go out shooting.
In foreign countries, I have a simple message printed onto the cards in the native language.
This openness about my activity almost always diffuses any anxiety of someone I have photographed.
However, if they insist, I will delete any photo. It’s not worth offending someone over.
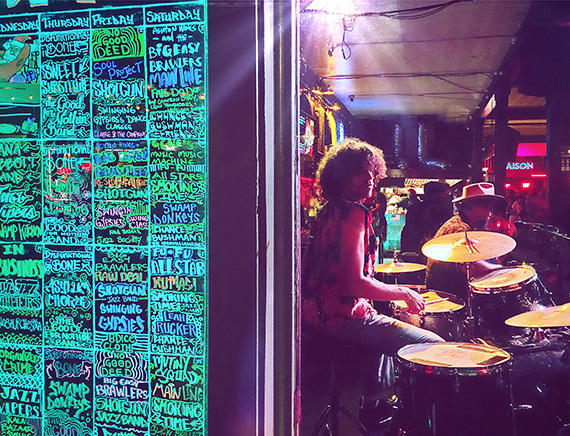
Photo by Kent DuFault
For the photo above, I was in New Orleans and saw this interesting signage on the exterior wall of a bar. I wanted to include it in a street shot; however, I had no real subject. So I waited and watched. After about five minutes, inside the bar, the band took the stage. I hadn’t even really noticed the inside of the bar until they did. It was a bonus that the drummer had such a distinct look!
Find an Interesting Spot and Wait for Something to Happen (a.k.a. Patience)
This concept is known as the “Fishing Technique”. Find your location first, then wait for something interesting to happen.
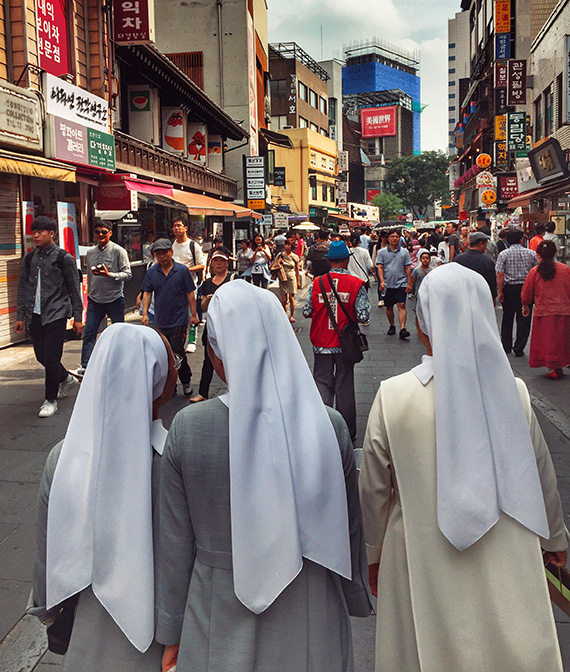
I used the pre-focus method while following these nuns as they walked. I just kept shooting pictures intermittently while waiting for something interesting to happen. (Photo by Kent Dufault)
Pre-focus the Lens and Shoot with Your Eyes Away from the Camera
This tip works best with a wide-angle lens.
- Take your lens off of autofocus.
- Set the focus manually to around 1.5 meters.
- If the lens has an external rotating barrel, use a little duct tape or gaffer’s tape to secure the focus ring to the lens housing so it won’t get bumped off focus, in case you don’t notice.
- Use f/5.6 and set the ISO as necessary to achieve a fast enough shutter speed. This technique is one where the auto ISO feature on a camera is helpful, as you’re not monitoring the shutter speed.
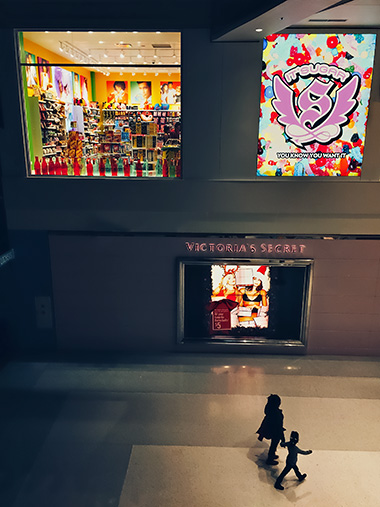
I was using the fishing technique to capture a mother and daughter staring at underwear and candy. (Photo by Kent DuFault)
Key Tips to Remember
- Travel light
- Tell a story
- Start with crowded areas or festivals
- Use a short lens
- Don’t feel you have to include people, especially when starting out
- Pay attention to hand gestures, feet, legs and body language
- Don’t use flash, bulky camera bodies, large zoom lenses, monopods or camera bags that will attract attention
- Try using your smartphone’s camera
- Use the Aperture Priority shooting mode
- Keep an eye on the shutter speed
- Stand on a corner and pretend to take a video while shooting pictures
- Pick a location and try the “fishing technique”
- Make introductory cards and keep them on you
- Always smile and be friendly
- Be unassuming, but don’t sneak. People will always notice someone who is acting like they are trying to hide something
- If someone asks you to delete a picture, do it. There are many more to be taken
A Final Personal Opinion
I don’t think the best candid street photography is created from longer distances using telephoto lenses. Some street photographers prefer this method; however, I find those images lack the emotional connection that being close brings to candid street photography. Practice the tips in this article and keep close. In the end, I think you will be happy that you did.
About the Author:
Kent DuFault is an author and photographer with over 35 years of experience. He’s currently the director of content at the online photography school, Photzy.
For Further Training, Deal Ending Soon:
65 beautifully designed & printable Photography Action Cards are now available that will give you over 200 photography assignments, covering everything you can imagine. They are currently 88% off today if you want to try them out.
These Action Cards discuss a photographic topic, provide you with suggested considerations, and give you specific photographic assignments. They’ll kick you out of the “nest” to go have a personal discovery experience all on your own. P.S. try the coupon code picturecorrect at checkout for even more of a discount which ends soon.
Found here: The Photography Action Cards at 88% Off
Did you appreciate this newsletter? Please help us keep it going by Joining Our Patreon Supporters
What are your thoughts on this article? Join the discussion on our Facebook Page
PictureCorrect subscribers can also learn more today with our #1 bestseller: The Photography Tutorial eBook
The post Candid Street Photography Tips appeared first on PictureCorrect.
from PictureCorrect https://ift.tt/jM7f26W
via IFTTT


0 kommenttia:
Lähetä kommentti