


Have you ever tried replacing a sky in Photoshop?
It’s great practice for honing your skills, learning how to edit and adjust light and color in your landscapes.
It’s also a great way to transform dull and boring shots into something much nicer to look at, as long as you don’t mind being a little “creative” with your processing :-)
That said, even when you’re feeling creative you probably still want a swapped sky to look believable.
Here’s one guest author Steve Arnold processed recently…
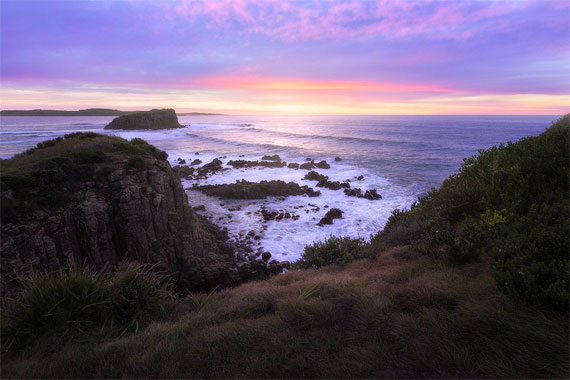
And here’s what the original RAW file looked like:
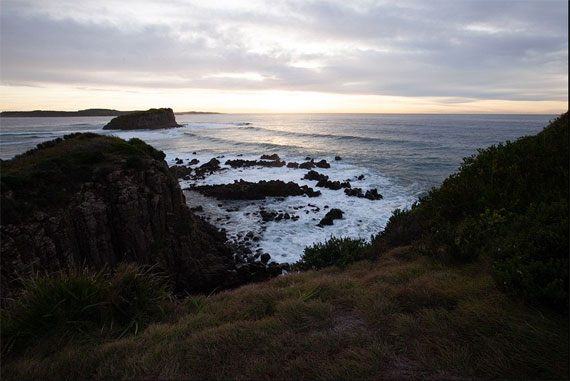
Here are some key tips that will help you create believable looking sky-swaps!
1: Match the colors between the sky and the foreground
The biggest tell-tale sign of a swapped sky is when the colors don’t match between the sky and the foreground.
In my example above, Steve colorized the foreground image with a blue hue to provide a better starting point before pasting the new sky in.
Then he worked several adjustments to match the colors and blend the light from the sky in with the foreground.
2: Balance the light between the sky and the foreground
Then next biggest sign that something is “off” with a sky-swapped image is that the light is different between the sky and the foreground.
It could mean the sky is just too bright or too dark compared to the foreground.
Or that it’s much higher or much lower in contrast.
Or that the light is much softer or much harsher in the sky or in the foreground.
So a big part of the process is matching the light in all aspects between the two elements.
3: Everything must line up correctly
With the image shared above, the sun was in a different position on the horizon in the foreground shot compared to the sky shot.
Simply cutting and pasting the sky in place would have put the sun off center to the right, but its reflection on the water would be dead center.
It wouldn’t have necessarily been obvious to the casual observer, but it would have contributed to the feeling that “something is off about this…”
So when you’re swapping skies in your own images, make sure the light and color from the sky is reflected correctly in the foreground.
To see exactly how Steve created the image above with every step shown in detail, you can check out the Creative section in Module #2 of the Landscape Editing Masterclass:

The Landscape Editing Masterclass (learn more)
We were able to arrange an exclusive 80% discount for our readers for a limited time.
Deal ending soon: The Landscape Editing Masterclass at 80% Off
Did you appreciate this newsletter? Please help us keep it going by Joining Our Patreon Supporters
What are your thoughts on this article? Join the discussion on our Facebook Page
PictureCorrect subscribers can also learn more today with our #1 bestseller: The Photography Tutorial eBook
The post Sky Swapping Tips in Photoshop appeared first on PictureCorrect.
from PictureCorrect https://ift.tt/oTFnuiS
via IFTTT


0 kommenttia:
Lähetä kommentti