torstai 31. maaliskuuta 2022

PictureCorrect.com: 📸 How to Establish Your Photographic Style

OK, you’ve bought all the right camera equipment. You have three camera bodies, 10 lenses, a stack of lighting gear, all the filters and attachments you can think of. You’ve read the manual and gained some experience in taking different types of shots, but you’re still not happy with your results. You’ve even copied other people’s styles but they’re just good photos and they look the same as everyone else’s. They don’t stand out and nobody would instantly recognize them as yours. In other words, you have no distinct photographic style. What is photographic style and how do you establish your photographic style?

photographer style

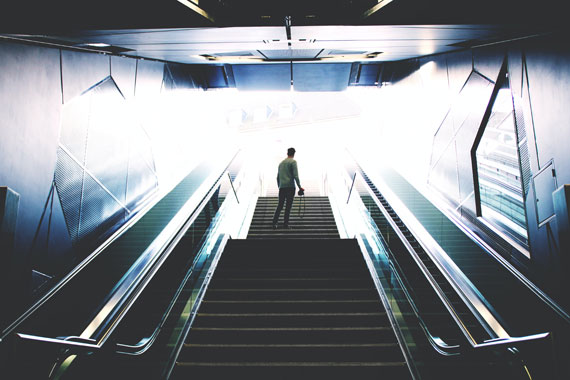
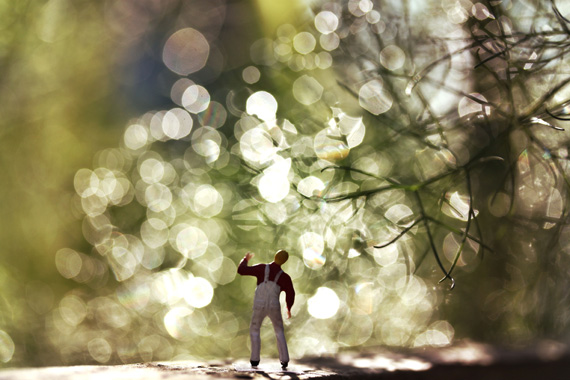
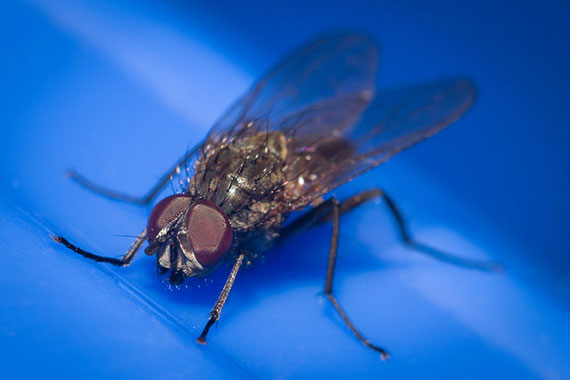
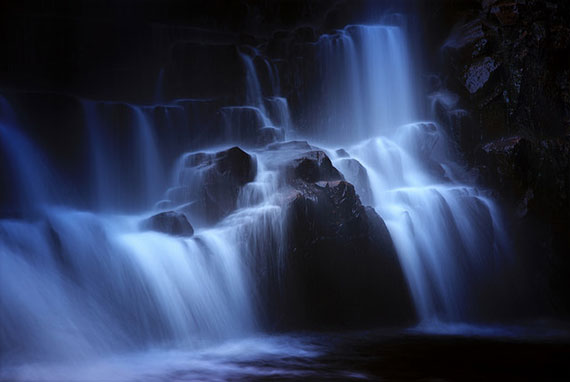
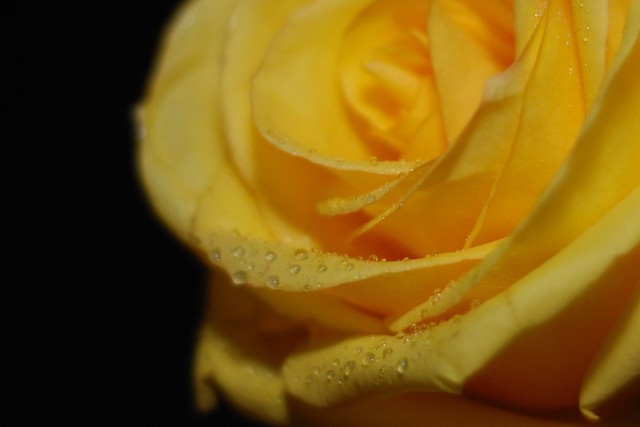
Photo captured by Tom Sodoge; ISO 800, f/3.5, 1/160s.

Photographic style is not a destination, it’s the journey itself. You don’t suddenly develop style. It’s the result of your experiences, an extension of who you are and how you see the world. It’s what you evoke in people viewing your work that makes you unique. Photographic style is not copying someone else’s style, but it’s about making your photography an extension of yourself. In other words, don’t just copy the masters, try to be one!

How do you go about developing a personal style?

  • Discover what you’re passionate about. It’s easy to see which photographers are passionate about their work because it shows in many images they capture.
  • Enjoy your photography for the same reason. It will shine through.
  • Try new and different things to photograph subjects that challenge you. Every new challenge adds more skills and more experiences.
  • Don’t be afraid to fail by taking bad photographs. Overcoming failures by taking better photographs only makes you a better photographer.
  • Assign yourself projects that you have not attempted before, especially those assignments that you’ve never seen done by others before.
  • Be free to express yourself. Ignore the set rules. (Set by whom?)
  • Be inspired. Attend workshops and seminars. Look at photography blogs, magazines and books.
  • Act as your own critic. Look at your own collection of shots and ask yourself how they could be improved. Is your work exciting to you or just another bird photo?
  • Share your work with your friends and family, or go one stage further and sign up with photo web forums. Attend local meet up groups. Treat all negative feedback as a means to learn. Treat positive feedback as being on the right track.
photo meetup

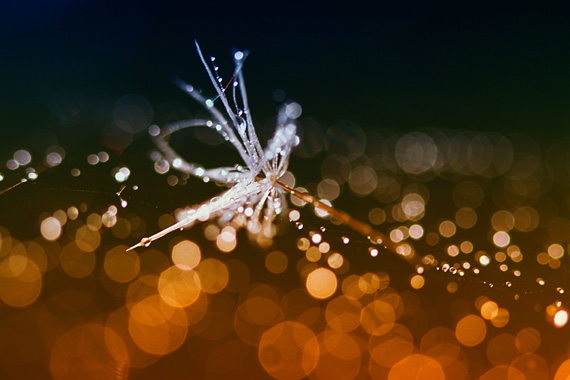
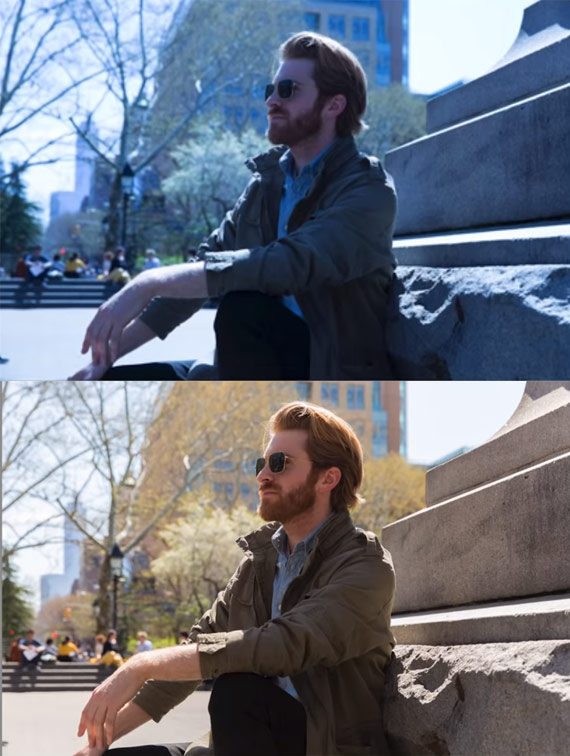
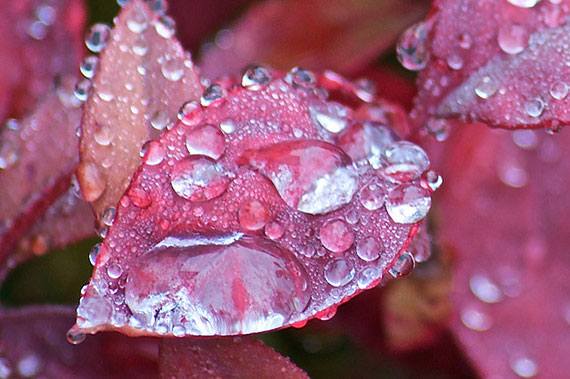
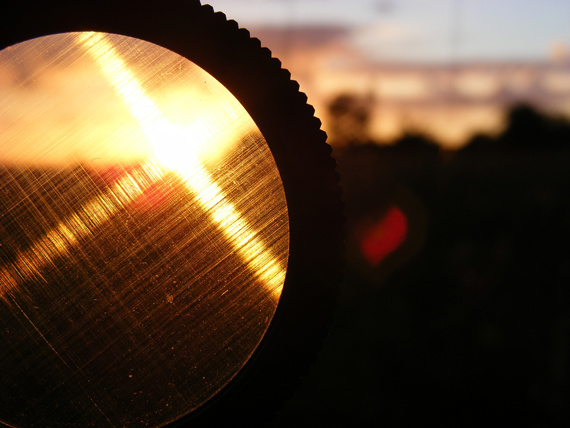
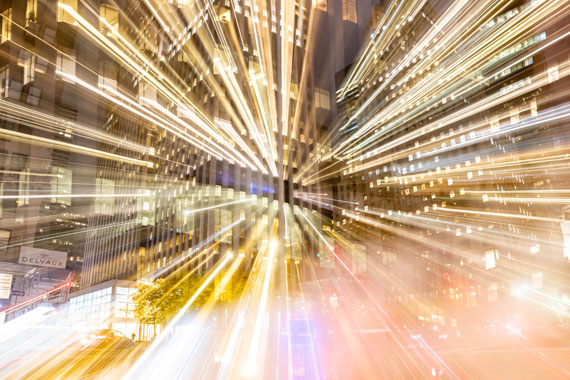
Photo captured by Josh Hild; ISO 1600, f/4.0, 1/15s.

  • Take a camera wherever you go. That one perfect shot is waiting to be captured by you.
  • Specialize on particular genre of photography, but do it differently.
  • Decide on a medium. Do you want to photograph in black and white only? HDR images? Pick one and be consistent —and I mean 90 percent of the time. There’s nothing worse that browsing through someone’s portfolio to see color, black and white, and some HDR. It cries out that you haven’t developed a style yet.
  • Try to describe your style to others. Do you capture the moment, freeze action, tell a story or do you aspire to being a photo journalist? This will help to define your style by telling others.

Eventually, you will come to realize what your style really is. One word of caution: don’t over-process your images. Keep it simple and your work will stand the test of time.

About the Author:
Geordie Parkin keeps a website about wildlife photography, pet photography or general questions about digital photography (photopress brianparkin). Parkin is a photographer based in Forest Lake, Qld in Australia.


Did you appreciate this newsletter? Please help us keep it going by Joining Our Patreon Supporters

What are your thoughts on this article? Join the discussion on our Facebook Page

PictureCorrect subscribers can also learn more today with our #1 bestseller: The Photography Tutorial eBook

The post 📸 How to Establish Your Photographic Style appeared first on PictureCorrect.


from PictureCorrect https://ift.tt/DOBqkUT
via IFTTT

PictureCorrect.com: Interesting Photo of the Day: Barefoot in the City

Photography is about atmosphere. Creating an emotional response is as important as creating a coherent image: shapes of legs, a street, cars, a dangling pair of high heels. Here, we see those things, but it’s their abstraction by silhouette and bokeh that emit a feeling of danger, seduction and mystery:

city rain walking alone photography

(Via Imgur. Click image to see larger size.)

Photographer Piotr Powietrzynski has made a name for himself with such abstractions of humanity. He rarely shows us the full body of his subjects, preferring instead to cloak them in shadows or behind curtains. Here, on top of that, he capitalizes on the recent rainfall to enhance his cityscape: the reflections and glare add to the image’s ambience in a way that dry concrete never could.


Did you appreciate this newsletter? Please help us keep it going by Joining Our Patreon Supporters

What are your thoughts on this article? Join the discussion on our Facebook Page

PictureCorrect subscribers can also learn more today with our #1 bestseller: The Photography Tutorial eBook

The post Interesting Photo of the Day: Barefoot in the City appeared first on PictureCorrect.


from PictureCorrect https://ift.tt/B2RLcpo
via IFTTT

PictureCorrect.com: 10 Practical Street Photography Tips for Better Outings

There’s no shortage of street photography tips out there. Some focus on gear, some on camera settings, some on philosophies. With information so scattered, you’d be forgiven for getting confused. Thankfully, we have an awesome video from photographer Roman Fox who shares the 10 best tips for street photography that’ll last you a lifetime:

In this video, Fox doesn’t focus on camera gear or settings.  Instead, he talks mostly about the behavioral changes that you should make to get better at street photography.

For instance, we buy expensive cameras and lenses, but we don’t think much about our own comfort walking long distances in search of photos. Investing in proper footwear will make street photography a much more pleasurable experience.

Another important personal trait that Fox highlights is learning to observe. Once you start paying attention to what’s going on around you, you’ll develop a gut feeling about what’ll happen next. It’s like you can predict the future. This will help you anticipate and prepare for your shots—a much-needed skill in street photography.

A great point that Fox brings up in the video is how people these days focus on getting that one image right, so it can go viral. But, as he points out, this is the wrong mentality. Instead, aim for a banner album. The images in the album could tell the same story but from a different angle.

In the video, Fox talks about many more unique street photography tips that you can adopt to improve your skills. While technical skills are something you can and should learn, personal development requires greater dedication. So be sure to practice them religiously if you seriously want to take your street photography to new heights.

For help with photo editing: The Street Photographer’s Presets


Did you appreciate this newsletter? Please help us keep it going by Joining Our Patreon Supporters

What are your thoughts on this article? Join the discussion on our Facebook Page

PictureCorrect subscribers can also learn more today with our #1 bestseller: The Photography Tutorial eBook

The post 10 Practical Street Photography Tips for Better Outings appeared first on PictureCorrect.


from PictureCorrect https://ift.tt/2kIJOSq
via IFTTT

keskiviikko 30. maaliskuuta 2022

PictureCorrect.com: How to Use Bokeh in Photography to Isolate a Subject

Ending soon reminder: only 1 day left for the new Macro Photography Guide at 75% Off

In this tutorial, I discuss the technique of isolating the subject matter of your photograph using the focusing technique of bokeh. Bokeh is a Japanese word that roughly translates as the aesthetic quality of the blur. The technique uses depth of field to isolate a subject against a background that is out of focus. The subject matter is in sharp focus thereby emphasizing the subject while hinting at a sense of place without specificity.

“Bokeh-Buffers” captured by Neal Fowler

I often use this technique while photographing outdoors, especially when I want to isolate a flower or plant in an otherwise cluttered environment. Because I want to ‘see’ the subject as the main piece of the photograph, I use any one of several approaches available to me to capture the essence of the subject.

Using Macro Rings

One technique is to extend the placement of the lens relative to the image capture medium using extension tubes. The effect created by extending the lens relative to the ‘film’ is to absolutely isolate the subject against an otherwise blurred background while magnifying the subject to reveal hidden detail. I find using extension tubes and a long lens is ideal for picking up nuanced detail in the interior of flowers, when photographing insects (when they agree to sit still for you) and other subjects where exploded and enlarged detail provides a visual impact that is otherwise missing.

macro rings bokeh

“Dandelion Spiderweb Bokeh” captured by Neal Fowler

When using macro rings, a tripod is an absolute requirement. The front of the lens is place quite close to the subject and your ability to hand hold the camera, focus and shoot is close to impossible. The steady nature of the tripod allows you to do all that is required to make a powerful, engaging image.

Using Depth of Field

Often in the field I shoot with a 28-105mm f/2.8 lens. When choosing to isolate a subject I open the lens up fully and use the longest available focal length. I choose a position that is close to the subject, although I need not be so completely on top of the subject so as to scare away any insect life that might be feeding on the flower. I focus on the subject letting the background fall off into a blurry amalgamation of blended color and a resulting graphic design. Steadying the camera on a tripod is also needed to assure a steady hand.

The difference between the long lens wide open and the extension tubes is one of degree of magnification. With the long lens the subject appears more natural, less magnified if you will. In terms of isolation—the whole purpose of bokeh—there is no significant difference.

bokeh photography tips

Photo by Diego Sevilla Ruiz; ISO 200, f/0.0, 1/60-second exposure.

In terms of impact, either extension tubes or long lens solutions are an interesting way to provide your viewer an experience of isolation of subject matter which, in fact, mirrors what the eye actually sees as we focus on objects close to our eyes. It is my sincere hope that you enjoyed this digital photography tutorial on bokeh.

About the Author:
Roger Passman is an award winning professional photographer located in Northern Illinois. His online store is found at Cool Shots Photography Online Gallery. He often leads creative photo workshops designed for beginning through intermediate amateur photographers.

For Further Training, Deal Ending Soon:

Want the secret to mind-blowing macro photography? For the first time this photographer is sharing her step-by-step method, that will give you a complete practical understanding of macro lighting, for stand-out photography. Covering the ‘What’ the ‘Why’ and the ‘How’ of macro photography lighting. It is currently 75% off until the end of the month, March 31, for the launch sale if you want to check it out.

macro lighting guide

Essential Guide to Macro Lighting (see inside)

If you want to take mind-blowing macro photography, you need to master the key ingredient — LIGHTING! The best way to master macro lighting? Hands-on practice, with step-by-step guidance from someone with both the photography skills AND the teaching talent.

Only 1 day left: The Essential Guide to Macro Lighting at 75% Off


Did you appreciate this newsletter? Please help us keep it going by Joining Our Patreon Supporters

What are your thoughts on this article? Join the discussion on our Facebook Page

PictureCorrect subscribers can also learn more today with our #1 bestseller: The Photography Tutorial eBook

The post How to Use Bokeh in Photography to Isolate a Subject appeared first on PictureCorrect.


from PictureCorrect https://ift.tt/ghq3MQC
via IFTTT

PictureCorrect.com: Interesting Photo of the Day: Colorful Neighborhood at Night

Composition and other technicalities aside, colors play an important role in making an image come to life. We usually get so caught up with composition, light, and shadows that we tend to overlook colors. Capturing the right mix of colors help to set a certain mood to the image. Consider the following image taken by photographer Drew, and see how the aesthetic speaks for itself:

colorful neighborhood

“Colorful Neighborhood at Night” by Drew (Via Reddit. Click image to see full size.)

Drew took the image with his Sony a7RIII, and the Tamron 28-75 f/2.8 lens at 51mm, f/4, 1/15s, and ISO 4000.

As you can tell, the photographer has very wisely used the colors as the focal element of this photograph. The red, yellow, and blur colors all blend very well together to give a moody feeling to the image. If it weren’t for the colors, you can imagine how lifeless this image would have come out. Hats off to Drew for his creative thinking.

“A lot of it had to do with the weather (it was pretty foggy/misty that night), and the rest is a lot of fiddling around with white balance, H/S/L sliders, and RGB curves.”


Did you appreciate this newsletter? Please help us keep it going by Joining Our Patreon Supporters

What are your thoughts on this article? Join the discussion on our Facebook Page

PictureCorrect subscribers can also learn more today with our #1 bestseller: The Photography Tutorial eBook

The post Interesting Photo of the Day: Colorful Neighborhood at Night appeared first on PictureCorrect.


from PictureCorrect https://ift.tt/W2zBASC
via IFTTT

tiistai 29. maaliskuuta 2022

PictureCorrect.com: Using Your Camera Wrong? Here are 8 Common Mistakes

Everyone is guilty of using their camera improperly at some point. Sometimes even the pros make rookie mistakes. But, nobody is to be blamed. The experts over at B&H have compiled a list of eight mistakes that photographers make with their cameras. See if you’ve made any of them:

1. Improperly Holding the Camera

By improperly holding a camera the photographer is not able to distribute the weight properly. This can cause photos to come out blurry. Hold the camera with your right hand in charge of all the controls and your left hand supporting the lens and the camera from below. For better stability, your elbows should be tucked in close to your body. This can vastly reduce camera shake, especially while shooting with low shutter speeds.

correct way to hold a camera

2. Not Cleaning the Lens

During the course of numerous photo shoots, the front element of the lens can collect dust, dirt, and smudges, hugely affecting image quality. Images may appear soft, out of focus, and hazy. It’s thus a good idea to clean the lens on a regular basis using recommended lens wipes and cleaning cloths. A clean lens can also save you from spending hours in post recovering the image.

3. Not Having Enough Batteries or Memory Cards

Imagine how it would feel if you were out in the field for a shoot and your only battery was about to die or your only memory card was full. Professionals cannot risk getting into situations like this. Before heading out for a shoot, makes sure your batteries are fully charged and your memory cards have sufficient space. Pack spare batteries and memory cards in case you run out.

4. Not Adjusting the Focus Point

Many photographers use a traditional method of “focus and recompose” by relying on the center focus point. This method is a bit risky in the sense that while recomposing, if the photographer sways away from the initial plane of focus, the subject will be out of focus in the final image. Instead,  set the focus point on the subject, focus, and take the photo.

5. Shooting in the Wrong Mode

Another mistake is to not know which mode to use in what circumstances.

  • Auto Mode: This is fine if the user doesn’t know much about photography or just wants a quick snap. Beginners should learn to get off of this mode as soon as possible, as this mode allows little room for creativity.
  • Aperture Priority Mode: This mode allows the user to control the depth of field by enabling him/her to change the aperture. Choose a smaller f-value (f/1.8,for example) for shallower depth of field and a larger f-value (f/11, for example) to have more of the frame in focus; the camera takes care of the shutter speed. Changing the ISO is also possible in this mode.
  • Shutter Priority Mode: This mode allows the user to control the shutter speed. Choose a faster shutter speed (1/2000 second, for example)  to freeze the action and a slower shutter speed (1 second, for example) in low light conditions or to capture the trails left by the subject; the camera will automatically choose the aperture. Changing the ISO is possible in this mode, as well.
  • Manual Mode: This mode allows the photographer to have complete control over the camera. The photographer is responsible for choosing the aperture, shutter speed, and the ISO. The photographer thus has a full control over creativity.

Before making the jump from auto mode to manual mode, it’s recommended to go through aperture priority and shutter priority modes so that you have a better understanding of how changes in those variables affect the photograph.

6. Depending Too Much on Auto White Balance

In most situations, auto white balance works just fine. But there are situations when the camera meters a wrong light temperature and the entire photograph seems to have an unflattering color cast. This can be fixed by either using one of the white balance presets or by manually entering the correct temperature. RAW shooters might argue that white balance can easily be fixed in post. While this is true, why not to get it right in camera?

7. Not Shooting in RAW

RAW files have way more information stored in them compared to jpeg files. You can recover details from shadows and highlights, correct the white balance easily, recover an under or over exposed photo, and have lots of flexibility by shooting in RAW. So always shoot in RAW.

raw photo edit

RAW photos have much more flexibility when it comes to editing compared to jpeg files.

8. Not Exposing Properly

By either over or underexposing a shot, we can lose details on the highlights and shadows respectively. If the lighting is very difficult due to a mixture of bright and dark scenes, it is recommended to underexpose, as most cameras do better in recovering shadow information than highlights. Go through your camera manual and understand how the different metering systems work in your camera. Also, if you feel that your camera is constantly under or over exposing in certain scenarios, try to use exposure compensation, which will deliberately over or underexpose the photograph.

So, are you guilty of committing any of these mistakes? Or do know about other common mistakes that photographers make? Let us know in the comments below.


Did you appreciate this newsletter? Please help us keep it going by Joining Our Patreon Supporters

What are your thoughts on this article? Join the discussion on our Facebook Page

PictureCorrect subscribers can also learn more today with our #1 bestseller: The Photography Tutorial eBook

The post Using Your Camera Wrong? Here are 8 Common Mistakes appeared first on PictureCorrect.


from PictureCorrect https://ift.tt/xQMBIYq
via IFTTT

maanantai 28. maaliskuuta 2022

PictureCorrect.com: 5 Ways to Dissolve Your Photoshop Block

Have you felt this before?

You open up a new pic in Photoshop for the first time, excited to start transforming it into something special.

To re-create the beauty of what you saw at the time you captured it.

photoshop block

And to turn the flat and dull RAW file your camera gave you into something less pedestrian.

But a minute or two in and you’re still sitting there, staring at the un-edited RAW file wondering where the heck to start?

Or perhaps you’ve tried a few of your “go-to” technique to see what happens, but nothing seems to be working?

Well – here are a few ways you can overcome that creative block in PS.

1) Have a pre-determined workflow.

Nothing gets you moving faster than knowing exactly what to do every step of the way from start to finish. Especially when it comes to taking that first step, that very first edit in Photoshop…

Over the years I’ve developed an order of doing things which has helped me and thousands of other Photographers by simply making order of the madness!

Every technique I could possibly use to edit an image is assigned to one of 6 stages of my “6 stage editing workflow”.

These 6 stages are:

  • Stage 1: RAW file preparation
  • Stage 2: Create an even exposure
  • Stage 3: Color correction & calibration
  • Stage 4: Contrast & light adjustments
  • Stage 5: Enhance and embellish
  • Stage 6: Resize, sharpen, & export

Feel free to use the above as a guide, or come up with your own order of doing things. The important thing is to have a plan of action before you start every edit. And using a set workflow has the added benefit of developing a level of consistency to your editing that you might not have seen before!

2) Immerse yourself

Take 10 minutes to browse some of the popular photos on your favourite photo sharing site (500px, Flickr etc) if you’re stuck finding your creative “vision”.

photo editing inspiration

Photo captured by Pankaj Patel

Simply immersing yourself in the amazing work of other photographers can be really inspiring – and just the tiniest spark of inspiration might be all you need to get your own juices flowing.

3) Deconstruct an oldie

Go back to one of your own favourite finished shots and deconstruct how you processed it, what you did to take it from RAW to WOW…

And then see if you can use that same roadmap to kick-start the editing process on your new shot.

What techniques worked well? Why? Can you find commonalities between your best and/or most favourite images and how you created them? How can you bring that forward into your future photos?

4) Talk it out

Have a chat in person or online with a fellow photographer. For me, just talking about photography really gets me in the mood for photography… And being “in the mood” is half the battle!

5) Learn something new

Learn something new and put it to use in your next shot. Learning a new method or technique can not only be the sledgehammer that smashes your creative block, but it will keep you moving forwards too.

And if you’re not moving forwards, you’re moving backwards.

So if you’re suffering from “Photoshop-Block” and you want a bit more help busting through it, or if you’d simply like to take a big leap forward with your landscape photography, the Landscape Editing Masterclass may help.

landscape masterclass

The Landscape Editing Masterclass (see what’s covered)

We were able to arrange an exclusive 80% discount for our readers for a limited time.

Deal ending soon: The Landscape Editing Masterclass at 80% Off


Did you appreciate this newsletter? Please help us keep it going by Joining Our Patreon Supporters

What are your thoughts on this article? Join the discussion on our Facebook Page

PictureCorrect subscribers can also learn more today with our #1 bestseller: The Photography Tutorial eBook

The post 5 Ways to Dissolve Your Photoshop Block appeared first on PictureCorrect.


from PictureCorrect https://ift.tt/B7zl9pD
via IFTTT

PictureCorrect.com: Interesting Photo of the Day: Colorful San Diego Sunset

Photographers obsess over the golden hour. And there’s a reason for that. The lighting changes drastically (in a good way) and the sky puts up a dramatic show of its own. Have a look at the following image taken by photographer Jeremy Noyes in San Diego:

red clouds during sunset

“Colorful Sunset at Tourmaline Beach, San Diego” by Jeremy Noyes (Via Reddit. Click image to see full size.)

The image is a long exposure that Noyes took with his Sony A7RIII and Canon 16-35 2.8L II lens with a Sigma converter. Using a Lee 3-stop hard grad filter, he shot a 10 second exposure at 16mm, f/16, and ISO 100.

The palette of colors in this image is truly amazing. Also, while rocks at the bottom of the composition give a calming effect, the motion blur of the clouds makes the image more dynamic. And the reflection of the burning clouds on the water below makes the image even more interesting to look at.


Did you appreciate this newsletter? Please help us keep it going by Joining Our Patreon Supporters

What are your thoughts on this article? Join the discussion on our Facebook Page

PictureCorrect subscribers can also learn more today with our #1 bestseller: The Photography Tutorial eBook

The post Interesting Photo of the Day: Colorful San Diego Sunset appeared first on PictureCorrect.


from PictureCorrect https://ift.tt/ZXzchox
via IFTTT

PictureCorrect.com: Finding Great Photos in Less Than Ideal Conditions

It’s easy to say photographers should wait for the best lighting. but in reality, ideal lighting conditions are rare, and waiting isn’t always possible. A better alternative is to develop your photographic eye and look for a shot that works within the confines of the lighting you’re facing. As photographer Thomas Heaton rightly points out in today’s video, there’s always a shot, no matter the conditions:

As you can see in the video, Heaton comes across two contrasting situations. One day he’s presented with a clear blue sky with harsh lighting. The next day, everything is grey with low-hanging clouds. How can anybody take any decent photographs in these conditions?

With his years of experience, Heaton is clever in his approach. On the clear day, he shoots rocks on a distant hill using a telephoto lens, because whatever light there was in the scene, it was playing well with those rocks. It made a lot of sense to take a detailed shot instead of trying to force a broader panorama.

“We can enhance our photograph with a nice composition.”

On the gloomy day, even though the light was pretty bad, he made an effort to look for the best composition and captured it. In that case, again, his composition compensated for the poor lighting.

Lighting is important, no doubt. But it’s equally important to remember that it isn’t only part in your photographic equation. Look for compositions that stand out. If the lighting is working, great. But if the conditions are horrible, let your composition do the talking. Don’t let a lack of light hold you back.

For further training: The Bad Weather Photography Guide


Did you appreciate this newsletter? Please help us keep it going by Joining Our Patreon Supporters

What are your thoughts on this article? Join the discussion on our Facebook Page

PictureCorrect subscribers can also learn more today with our #1 bestseller: The Photography Tutorial eBook

The post Finding Great Photos in Less Than Ideal Conditions appeared first on PictureCorrect.


from PictureCorrect https://ift.tt/Rr9tSqY
via IFTTT

sunnuntai 27. maaliskuuta 2022

PictureCorrect.com: Macro Photography Equipment Guide and Tips

There are a number of ways to get into macro photography ranging from inexpensive to outrageously expensive. Tough decisions to make, especially for someone who doesn’t make their living from photography.

tips macro photo equipment

Photo by Road Fun; ISO 400, f/5.6, 1/50-second exposure.

If you decide you want to explore macro photography you have a number of options. I have listed these options starting with what I would consider to be the best equipment for the job. This doesn’t mean that buying a dedicated macro lens will always be better than extension rings but in general you will get the best results by going this way.

Important Items to Consider:

  • dedicated macro lenses
  • extension tubes or bellows units
  • reversing rings
  • close up lenses and
  • macro zoom lenses

Dedicated Macro Lenses

Dedicated macro lenses are the ultimate way to go if you’re serious at all about doing this type of work. It doesn’t have to be expensive; I bought a wonderful 50mm Sigma Macro lens used for all of $120 (new about $270) and it’s tack sharp and produces amazing images. My main macro lens is a Sigma 150mm Macro, which cost a whopping $700—the best money I have ever spent. This gives you an idea about the price range available and the sky’s the limit with some highly specialized Nikon macro lenses in the $2,000 range. Why the difference in focal lengths? I’ll get to that soon in another article that I’m working on! If you’re serious about macro photography, buying a lens specifically designed for the purpose is the best way to go. The lens designs are optimized for close focusing and the lenses are also generally flat field (focus in a flat plane) producing sharper corners on flat objects such as pieces of wood or slabs of rock. Flat field may be a term that many have not heard of, and I’ll elaborate later on this as well.

Extension Tubes or Bellows Units

Extension tubes or bellows units are pieces of equipment that put space between the camera body and the lens thus allowing the lens to focus closer. They can work well with certain lenses. For instance, if you have a 50mm prime lens this might be a good option to get into macro work at an affordable cost. Extension tubes often come in sets of three of different lengths (high quality tubes tend to be sold individually) that can be used singly or combined to get the close focusing distance required.

macro tips photography equipment

Photo by Susanne Nilsson; ISO 100, f/5.0, 1/400-second exposure.

Bellows units work on the same principle but are expandable like a “bellows” allowing a great deal of flexibility. There real downside is the expense, and they’re bulky and heavy as well. I expect most people use bellows units for studio work only, as they aren’t terribly practical in the field. One area where extension tubes really shine is for making long focal length lenses like a 300mm focus closer—great for photographing skittish dragonflies and other critters.

Close up Lenses

Close up lenses are clear “filters” that screw onto the front of your lens allowing the lens to focus closer. Quality varies from mediocre to quite acceptable depending on the quality of the filters. This is likely the least expensive way to start shooting macro but does have its drawbacks. A big factor that has to be looked at is the quality of the camera lens you will be using. Inexpensive zoom lenses will likely produce less than stellar results while high quality prime lenses can produce excellent results but none of these will produce tack sharp results like the dedicated macro lenses. The biggest advantage? As these are just fancy filters they are very light, no extra tubes or additional lenses to carry.

Reversing Rings

You don’t hear much about reversing rings anymore and I expect that’s because most people are using zoom lenses that likely wouldn’t work very well. Reversing rings allow you to mount a lens “backwards” on the camera body. When used with high quality prime lenses, the results can be stunning and if you reverse a wide angle lens often you can achieve high magnifications on the order of 2X or more. For people interested in high magnification shooting, this is often the way to go, especially if you are on a budget.

equipment tips macro photography

Photo by ninfaj; ISO 200, f/10.0, 1/200-second exposure.

Macro Zoom Lenses

What about the macro zoom lens that you already own? Many of the new lenses that come as part of a kit are labeled as macro zooms and while they do focus a little closer than normal they are not true macro lenses. My experience has been that most of them are very suspect in terms of sharpness, as these lenses are not designed for this sort of application. In a pinch they will work, but to get in really close to your subject one of the above options would be best.

What are you presently using? Are you pleased with the results?

About the Author:
Kevin Oke is a professional nature and travel photographer with over 30 years experience. When not traveling he writes on his blogs, Nature Travel Photography and Kevin Oke Photography. Kevin is available to answer questions about photography on his photography forum.


Did you appreciate this newsletter? Please help us keep it going by Joining Our Patreon Supporters

What are your thoughts on this article? Join the discussion on our Facebook Page

PictureCorrect subscribers can also learn more today with our #1 bestseller: The Photography Tutorial eBook

The post Macro Photography Equipment Guide and Tips appeared first on PictureCorrect.


from PictureCorrect https://ift.tt/FUNdTHJ
via IFTTT

PictureCorrect.com: Interesting Photo of the Day: Star Trails & Traffic Streaks

Although we don’t feel it, our planet is moving around continuously at great pace. And thanks to long exposure photography, we can record some amazing after effects of the planet’s movement. One of such effects is the formation of star trails. Photographer Marcin Zajac took the following long exposure over the Bixby Creek Bridge in California and it’s nothing short of spectacular:

star trails Bixby bridge

“In Motion” by Marcin Zajac (Via Reddit. Click image to see full size.)

The image is actually a composite of multiple images that Zajac took over a period of 3.5 hours. He achieved the star trails by blending a total of forty exposures, each of which was a 5-minute exposure. And for the car light trails on the highway, he used a relatively short exposure time. He then blended all the images together in Photoshop using the ‘Lighten’ blending mode.

There is no doubt that the image is technically brilliant. On top of that, credit has to be given to the photographer for the gorgeous composition. The way he has composed the image is really amazing. Amazing in the sense that he has captured the light trails of two bodies: one that’s on earth, and the other that’s beyond our solar system, in a single frame. This is really an amazing concept and a beautiful execution by the photographer.


Did you appreciate this newsletter? Please help us keep it going by Joining Our Patreon Supporters

What are your thoughts on this article? Join the discussion on our Facebook Page

PictureCorrect subscribers can also learn more today with our #1 bestseller: The Photography Tutorial eBook

The post Interesting Photo of the Day: Star Trails & Traffic Streaks appeared first on PictureCorrect.


from PictureCorrect https://ift.tt/IZeVu4q
via IFTTT

PictureCorrect.com: Inside The Bag of a Film Photographer

Film photographers, like their digital counterparts, have an arsenal of gear and accessories to help achieve the results they want. Today, we have photographer Kyle McDougall who takes you through his go-to film photography gears including camera, lenses, and other accessories:

McDougall shows us what he keeps in his camera bag he showcases are not exactly what beginners and amateurs would call affordable. They’re definitely not basic ones and are not show-offs either. He owns them for a purpose. For instance, the details and tones that 35mm films capture are not enough for him. That’s why you see him using medium format cameras from Pentax.

An interesting learning from the video is that every gear that you own should ideally have a rationale behind it. Some gears mean business and you get most of your job done using them. Then there are some gears that help you need sometimes to accomplish a specific purpose. And finally, you can also have accessories, like filters in McDougall’s case, that add some creative effect to your work.

In a world where brands try to lure you into buying new cameras, you need to understand your own need first and get yourself the gears accordingly. Get something that suits the type of work that you do.

Be sure to watch the video if you’ve been curious about the gears that professional film photographers use. You’ll definitely get some good insight from what McDougall has in his camera bag.


Did you appreciate this newsletter? Please help us keep it going by Joining Our Patreon Supporters

What are your thoughts on this article? Join the discussion on our Facebook Page

PictureCorrect subscribers can also learn more today with our #1 bestseller: The Photography Tutorial eBook

The post Inside The Bag of a Film Photographer appeared first on PictureCorrect.


from PictureCorrect https://ift.tt/tuZH4yI
via IFTTT

lauantai 26. maaliskuuta 2022

PictureCorrect.com: 📷 Try These Visual Special Effects for Eye-Catching Photography

Although most all photographers are concerned with creating realistic images that copy everything as an accurate representation of a subject, in view of the fact that we are so familiar with these types of photos, when a photographer or graphic designer uses a special effect, the results are far more eye-catching and impressive. Some effects take time and a great deal of technical knowledge to achieve — however, there is much that can be achieved with little to no real technical expertise. As you manipulate photographs to create the effects you want, you will learn and become more confident to try new things.

eye catching visual effects

Photo by limeabeans; ISO 100, f/2.8, 1/200-second exposure.

Changing Perspective

When we look at a subject from an angle that we would not normally view, our brain uses our special awareness to give proportion and scale to the subject. However, when we take a photograph of the subject from the same angle, the result appears odd and even distorted. This is due to the fact that the photograph is a two-dimensional image of a three-dimensional subject. For example, if you take a photograph of a person reclining on a chair with their feet outstretched toward the camera, the feet appear to be oversized and out of proportion to the body; this effect is accentuated when a wide angle lens is used. Normally, we would avoid such a distorted perspective, but it can produce stunning effects and interesting images when the subject material is correct.

Using Reflections

Using reflections is an excellent way of creating simple but eye-catching effects in photography. There are many reflective surfaces that can create interesting and creative images — from still, quiet reflections on a lake to the polished chrome of a motor vehicle. Reflections offer a simple way of making visually interesting photographs.

photography visual effects to try

Photo by Bob Jagendorf; ISO 200, f/4.8, 1/90-second exposure.

Implying Motion

One of the most common problems with photography has always been camera shake. Due to low light conditions and a slow shutter speed, the image produced is blurred. The distortion caused often completely ruins the photograph, but it is possible to use the slower shutter speed to capture an image that is deliberately blurred to create the effect of movement. This is most commonly seen in photographs of waterfalls, where the slower shutter speed gives the illusion of flowing water as opposed to freezing the movement.

visual effects to catch the eye in photography

Photo by ShinyPhotoScotland; ISO 100, f/8.0, 1/6-second exposure.

When photographing a moving subject, such as a runner or a racing car, it is possible to use a slower shutter speed while you pan the camera and track the movement of the subject, thereby creating the illusion of movement, because the background is blurred but the subject remains in focus as the camera tracks its movement.

Using a slower shutter speed in combination with flash can also be useful when photographing a subject at night. For example, if you’re taking a portrait at night and the background is poorly lit, using flash will illuminate the subject, but the background will completely disappear, as there is insufficient light to expose the image’s background. Placing the camera on a tripod and using flash with a slower shutter speed will allow the correct exposure for the foreground with a flash illuminating the subject.

Using Filters

Another simple way of dramatically changing the look and feel of the digital image when using a DSLR camera is the use of filters. There are a range of filters to choose from, and it is worth remembering that filters are by far the most affordable way to extend your creativity. Single and multicolor filters are effective for controlling the appearance of a landscape by dramatically altering its hues to generate a different view. By using filters to change the color and quality of light, you can manipulate the mood of an image without making it look obvious that any kind of manipulation has taken place.

visual effects to try in photography

Photo by Chris Gin; ISO 100, f/8.0, 35-second exposure.

Diffusion filters, neutral density, circular polarizing, starburst or diffraction filters, and UV filters all help to improve or change the look and feel of an image. Graduated filters, with a colored half and clear half, add drama to landscape photos. Filters that radically transform the image need a very careful choice of subject matter to avoid simply looking gimmicky. Filters are not a substitute for creativity; however, with time and practice, they can help you produce creative effects that will enhance your basic subject, from a landscape to a beautiful wedding venue.

A starburst or diffraction filter may enhance the brightness in the reflected light, creating a sense of sparkling. A starburst filter has tiny little groves in it that spread light from the bright highlights into the darker areas of the photo. A diffraction filter is similar to a starburst filter, but instead of stars, those bright points of light are turned into colorful streaks or halos that contain all colors of the spectrum. Different diffractions give different results. The effect you get with these types of filters depends on the focal length of your lens and the aperture you are using. Experiment by taking several different photos using different apertures, and pick one which you think has the most effective overall result.

starburst photo filter

Photo by Fiona Shields; ISO 64, f/4.0, 1/210-second exposure.

Post-Processing

The most common way that people manipulate digital photographs today is the use of special photo editing software, such as Photoshop. There are a number of free software packages available, such as GIMP. The true value of photo editing software will only become apparent as you learn to use the various tools available. There are, however, a number of simple and basic tools that can help enhance your photographs.

It’s easy to change the levels, hue, and contrast, saturation, and sharpness. However, when faced with new software, it can be extremely daunting to begin to use a program that you are unfamiliar with. There are a great number of tutorials that can be watched free of charge on YouTube. YouTube is a greatly underestimated resource for learning new photo manipulation techniques.

Once a photographer has mastered the basics of how to achieve the intended visual effect, there is no limit. As the photographer begins to shape images creatively, it changes the way he or she understands and views the world. As a photographer, I often photograph weddings, and I use both filters and photo manipulation software to change and enhance the original image. By simply changing some basic settings within an image, it can stand out and be both visually appealing as well as a recording of an event that will never happen again. Each photograph captures a moment in time that will never be repeated.

I tell my wedding clients that “the cake is eaten, the flowers wilt, the dress may be worn only once, but the photographs last a lifetime.” It’s because of this simple truth that I believe photographs need to be the very best they possibly can, and for a photograph to be the best it possibly can be, we need to be able to enhance the image to create the best wedding album (or other product) possible.

About the Author:
William Johnston is a professional photographer providing wedding photography and portrait photography throughout Bristol, Bath and Somerset, the South West, Birmingham and the West Midlands, Leicester and Leicestershire, London, and the Home Counties.


Did you appreciate this newsletter? Please help us keep it going by Joining Our Patreon Supporters

What are your thoughts on this article? Join the discussion on our Facebook Page

PictureCorrect subscribers can also learn more today with our #1 bestseller: The Photography Tutorial eBook

The post 📷 Try These Visual Special Effects for Eye-Catching Photography appeared first on PictureCorrect.


from PictureCorrect https://ift.tt/rany61T
via IFTTT

PictureCorrect.com: Interesting Photo of the Day: Road to the Mountains

Nature definitely did not shy away when it came to blessing New Zealand. The landscapes are so beautiful that people visiting the country fall in love with the place immediately. Photographer Ellen Carty’s following image that she took along Mt. Cook Road is a stunning example of the country’s beauty:

Mount Cook New Zealand

“Road to the Mountains” by Ellen Carty (Via Reddit. Click image to see full size.)

Carty took the image with her Canon 6D and a 28mm f/1.8 lens.

The curvy road in the foreground looks like it’ll take you right to the lap of the beautiful Mt. Cook in the background. The clouds make themselves another talking point of this image. It looks like they’re stacked upon one other, and their pinkish tint is a beautiful addition to the overall palette of the image.

Wouldn’t you love to spend some quality time in such a beautiful location?


Did you appreciate this newsletter? Please help us keep it going by Joining Our Patreon Supporters

What are your thoughts on this article? Join the discussion on our Facebook Page

PictureCorrect subscribers can also learn more today with our #1 bestseller: The Photography Tutorial eBook

The post Interesting Photo of the Day: Road to the Mountains appeared first on PictureCorrect.


from PictureCorrect https://ift.tt/qT5gEfF
via IFTTT

PictureCorrect.com: Studio Portrait Lighting: Reflective vs Shoot-Through Umbrellas

Umbrellas are some of the cheapest light modifiers you can get. But while they come in many different shapes and sizes, at the end of the day, they can be categorized into two different types: reflective and shoot-through. These umbrellas not only look different, but the images they produce will look miles apart. In today’s video, photographer Gavin Hoey from Adorama takes two umbrellas—one reflective and another shoot-through, but otherwise identical—and compares the results. The results might surprise you!

Shoot-through umbrellas work as diffusers by partially letting through light, then reflecting some of it back. The reflective umbrellas, on the other hand, reflect almost all the light, thanks to the reflective lining on their inner surfaces.

But that’s not where the differences end. These traits determine the nature and quality of the light that they produce and therefore affect the ultimate look and feel of the images. Hoey does an excellent job of demonstrating the differences by comparing the results in the video.

And in case you’re wondering if we can use both types of umbrellas together: the answer is a definite yes. As you can see towards the end of the video, Hoey uses the reflective umbrella for key lighting and the shoot-through umbrella at low power to fill the shadows.

Which umbrella you should use solely depends on the kind of look you’re going for. For softly lit and “safe” images, shoot-through umbrellas work best. But if you’re after a punchier image with more controlled light, reflective umbrellas are the way to go.

Both of these umbrellas work great in their own way. And thanks to their affordability, you could even get both of them.

Have you used these photography umbrellas? We’d love to hear about your experiences in the comments below.


Did you appreciate this newsletter? Please help us keep it going by Joining Our Patreon Supporters

What are your thoughts on this article? Join the discussion on our Facebook Page

PictureCorrect subscribers can also learn more today with our #1 bestseller: The Photography Tutorial eBook

The post Studio Portrait Lighting: Reflective vs Shoot-Through Umbrellas appeared first on PictureCorrect.


from PictureCorrect https://ift.tt/QcSGK0p
via IFTTT

PictureCorrect.com: How and Why to Diffuse Your On-Camera Flash

I was recently asked a great question about how to diffuse an on-camera flash. This is an important concept to understand—not just how, but why! Today’s photo tip will explain diffusion and how to create and use it.

on camera flash diffuser

“Pitiful” captured by latteda

Here is the question I was asked:

“When using flash inside a room with a low ceiling and white walls I understand how to use the flash to get soft light. But if the ceiling and walls are not white, how do you soften the light without off-camera flash?”

This is a great question because it brings out several issues:

  1. By off-camera flash, he is referring to studio lighting or being able to take the actual flash off the camera. But what if you don’t have any studio lights and your flash either won’t come off the camera, or it will, but you don’t have the necessary gear to use it?
  2. Why would you want to soften the light in the first place, and what do we even mean by softening the light?
  3. How does the color of the walls and ceiling affect the light?
  4. How can we soften it?

If you’re shooting with an undiffused flash—any kind of flash, not just on the camera—it has a tendency to be very harsh. It makes deep shadows on the face and so on.

But, that’s not all, it makes shadows on the walls and ceilings and the color of the light tends to be cold, harsh, and unforgiving.

There are times when this is perfect and just what you’re after, but not usually. Particularly when you’re shooting with a flash unit on your camera.

To soften the light and make it less harsh, we want to diffuse it in some way.

To best illustrate light diffusion, go outside on a bright sunny day and observe your shadow. You’ll notice that it’s dark in color and has a sharp edge. This is caused by the intensity of the light source (the sun) and its size relative to the subject. If you think about it, it’s pretty tiny way up there in the sky!

Now go out on an overcast day, or just wait until a cloud comes between you and the sun. Now the sunlight is entering the top of the cloud and bouncing all over the place. When it comes out the bottom—and hits us—the light is not all coming out in one place. It’s coming out fairly evenly across the whole bottom surface of the cloud. Now our light source becomes the cloud, not the sun. And it’s huge! It’s a lot bigger than the sun was. Possibly from horizon to horizon!

Now look at our shadow. It is no longer such a deep color. It is now more of a gray than black, and it isn’t so harsh. Rather than hard edges, the edges of the shadow are now softer and less defined. They tend to fade away rather than just go from deep black to nothing.

This is diffusion. It softens the light and makes it larger in relation to the subject. That’s why you see studio photographers using softboxes and shooting through umbrellas. It’s an in studio attempt at replicating a cloud.

Back to our on-camera flash…

flash diffuser

“Larry Pollman” captured by Michael Carian

Since most of our problems are being caused by the size of the flash relative to the subject, we need to make it bigger. Thus, higher end flash units have the ability to swivel the flash head while it remains on the camera.

Now, rather than shooting straight at the subject with this tiny, harsh light source, we swivel the head and bounce the light off the wall or ceiling. This makes the light a LOT bigger and solves most of our problems.

But, what if the walls and ceiling are not white?

Don’t bounce off of them. The light will pick up the color and reflect it onto the subject’s face. Either move your model to another location or diffuse the light in another manner.

They do sell tiny softboxes that you attach to your on camera flash or white plastic covers you put over the flash lens, but the easiest and most popular way is to tape some sort of diffusion material over the flash. Tracing paper works well and you can increase or decrease the amount of diffusion by the number of layers of tracing paper you use.

diffused flash for flower photography

“A single rose can be my garden…” captured by Denise Cross

These solutions aren’t ideal; the best way to diffuse a flash is to swivel it and bounce the light into the subject from a wall. But they’ll work in a pinch.

Another bounce option would be to use a large white reflector. Bounce the light off of that rather than the wall.

Using and diffusing on camera flash isn’t difficult, but it is one of those photo tips that just have to be done!

About the Author:
Dan Eitreim writes for OnTargetPhotoTraining. He has been a professional photographer in Southern California for over 20 years. His philosophy is that learning photography is easy if you know a few tried and true strategies.


Did you appreciate this newsletter? Please help us keep it going by Joining Our Patreon Supporters

What are your thoughts on this article? Join the discussion on our Facebook Page

PictureCorrect subscribers can also learn more today with our #1 bestseller: The Photography Tutorial eBook

The post How and Why to Diffuse Your On-Camera Flash appeared first on PictureCorrect.


from PictureCorrect https://ift.tt/YV3w9y0
via IFTTT

PictureCorrect.com: Interesting Photo of the Day: Light Tube Portrait

Some great images are captured when photographers get lucky with the moment and lighting. But to make your images stand out from the rest, it’s essential that you take control of the light. This image by photographer Charles Brooks is an excellent example of how he takes control:

light painting portrait

“Light Painting Portrait” by Charles Brooks (Via Reddit. Click image to see full size.)

Brooks took this photo using a Panasonic GX8 at 14mm with a 2-second exposure in bulb mode. For light painting, he used two 1,000 lumen torches in an orange tube sleeve. While keeping himself well hidden from the camera behind the model, he gave the lights a spin to achieve the beautiful effect.

“I’m standing behind her, carefully aligned so as not to show on camera. I fire the camera with a remote and manipulate the light myself.”

While the main subject looks fascinating, what stands out is the reflection on the water. Brilliant execution, indeed.


Did you appreciate this newsletter? Please help us keep it going by Joining Our Patreon Supporters

What are your thoughts on this article? Join the discussion on our Facebook Page

PictureCorrect subscribers can also learn more today with our #1 bestseller: The Photography Tutorial eBook

The post Interesting Photo of the Day: Light Tube Portrait appeared first on PictureCorrect.


from PictureCorrect https://ift.tt/37jRzng
via IFTTT

PictureCorrect.com: Photo Editing Seamlessly Across Lightroom and Photoshop

Adobe Lightroom and Photoshop are undoubtedly the most popular software among photographers today. While many use Lightroom to make basic adjustments and to catalog their images, Photoshop is widely used to make advanced edits. Thus, there can be circumstances when you want to take your images from Lightroom to Photoshop, and back. The good news is that Adobe has done a fantastic job in integrating these two software to make your editing workflow as seamless as possible. In this video, photographer Phil Steele demonstrates how you can do so without any fuss:

“Lightroom and Photoshop are designed to work hand in hand.”

A basic understanding you need to have is that you’ll get slightly different behavior when editing in Photoshop from Lightroom depending on whether you’re working with jpeg or raw files.

  • With  jpegs, a good idea is to “Edit a Copy with Lightroom Adjustments”. This preserves the original file while carrying over the adjustments you’ve made in Lightroom.
  • When working with raw files, all the adjustments are carried along with the file into Photoshop. That’s because Photoshop cannot directly edit a raw file.

Once you are done in Photoshop, simply save the file (not ‘Save as’) to carry over the changes you’ve made in Photoshop into Lightroom. This saves the file in tif format and Lightroom automatically imports it  into the catalog you’re working in.

In case you need to make multiple round trips between Lightroom and Photoshop, or with a third program in the mix, you really need to be careful. Otherwise you can get caught in a weird situation as Steel demonstrates in the video. So, be sure to follow Steel carefully.

If you find yourself switching between Lightroom and Photoshop on a continuous basis, be sure to go through these steps carefully. This will definitely save you loads of time and make your editing workflow more efficient.

For further training, Phil Steele has in-depth courses on Photoshop Basics for Photographers and another on Lightroom Made Easy.


Did you appreciate this newsletter? Please help us keep it going by Joining Our Patreon Supporters

What are your thoughts on this article? Join the discussion on our Facebook Page

PictureCorrect subscribers can also learn more today with our #1 bestseller: The Photography Tutorial eBook

The post Photo Editing Seamlessly Across Lightroom and Photoshop appeared first on PictureCorrect.


from PictureCorrect https://ift.tt/TnZBgsa
via IFTTT

torstai 24. maaliskuuta 2022

PictureCorrect.com: Photography Zoom Effect: Racking the Lens

A zoom effect, in photography terms, is an effect in an image that looks like the subject is moving either toward you or away from you with lines of motion. It’s also known as racking the lens. The information in this article pertains to creating this look in-camera and not the post production technique (in Photoshop terms, it’s called “radial blur”).

racking the lens

Photo captured by michal dziekonski; ISO 100, f/8.0, 2.5 second shutter.

3 Basic Steps to Achieve the Zoom Effect

  1. Set your shutter speed to a longer exposure.
  2. Compose and focus.
  3. While taking the shot, between when the shutter opens and actually closes, zoom in or zoom out.

As usual, you need a lot of practice in order to capture a nice zoom effect, and that’s what fun about photography.

Tips for Better Results

Shutter Speed. Choose a shutter speed long enough to zoom your lens from one end to another. There is no one standard setting on your shutter speed in order to achieve the effect, but there are a few factors to consider:

  1. Level of available light
  2. Type of lens you are using
  3. Amount of movement from your camera or the subject

Again, always experiment with different shutter speeds. Different settings may result in different levels of effect.

zoom effect

Photo captured by Mick Haupt; ISO 100, f/20.0, 8 second shutter.

Aperture. While your aperture setting is not the most critical to obtain a nice zoom effect, when using a slower shutter speed you might have a problem with overexposure (depending on the overall lighting) as it lets more light into your camera. You can cope with the potential overexposed shot by selecting a smaller aperture (larger f number).

Zooming. To get nice smooth motion lines in your image, you need to zoom smoothly and constantly. Do not speed up at one point and later slow down at another point while zooming.

It does matter if you zoom in or zoom out to get the effect, as zooming in on a subject will give you a different result than zooming out. Try both ways, and you will see the different effects.

Lights. Lights can produce really spectacular effects. On one occasion I captured a photo during a stage performance where the stage was well lit with colorful lighting, while the foreground was dark. In this situation, I fired my flash gun just enough to freeze the subjects in the foreground. During the long exposure, I managed to freeze part of the image—in this case the video crew and the audience—while getting movement behind and around them.

racking the lens in photography

Photo by Bill Gracey; f/22.0, 1/4-second exposure.

Hope this is a useful tip. Keep a look out for more photography tips and tutorials. Remember to practice and keep practicing.

About the Author:
This article was written by Affendy Ahmad, photographer for all occasions.


Did you appreciate this newsletter? Please help us keep it going by Joining Our Patreon Supporters

What are your thoughts on this article? Join the discussion on our Facebook Page

PictureCorrect subscribers can also learn more today with our #1 bestseller: The Photography Tutorial eBook

The post Photography Zoom Effect: Racking the Lens appeared first on PictureCorrect.


from PictureCorrect https://ift.tt/syVPi59
via IFTTT

PictureCorrect.com: Interesting Photo of the Day: Milky Way Panorama

For many photographers, when night hits, the cameras get put up for the night. However, for those working in astrophotography, it is only the beginning. With an entire night of sky to work with, the constant movement of the earth, and a universe filled with amazing phenomenon that can alter our views, astrophotographers like Ottawa based Andrew Leung flock to some of the darkest regions on earth to capture amazing nightlife imagery, like this amazing panorama of the Milky Way:

Milky Way, panorama, Andromeda galaxy

f/4, ISO 3200, 25 seconds (Via Imgur. Click image to see full size.)

Although many digital cameras now offer panorama options to capture landscapes and other scenery, Leung used a Nikon D7100 to create the Milky Way masterpiece using 12 individualized shots. Each of the three rows from his photo shoot at Irvine Lake Airstrip in Ontario, Canada consists of four pictures, with each shot taken, then slightly moving the camera to ensure the entire visible section of the Milky Way was captured.

When asked if he had any tips for those starting out in astrophotography, he suggested keeping the 500 rule in mind for long exposures:

“There’s also the 500 rule for finding out how long to exposure your picture. Take 500 and divide by your focal length. So for example if you’re using an 18mm lens, then 500/18 = 27 second exposure. Also use the widest f-stop number that you can (f/2.8, etc). But most importantly, experiment around and have fun with it!”


Did you appreciate this newsletter? Please help us keep it going by Joining Our Patreon Supporters

What are your thoughts on this article? Join the discussion on our Facebook Page

PictureCorrect subscribers can also learn more today with our #1 bestseller: The Photography Tutorial eBook

The post Interesting Photo of the Day: Milky Way Panorama appeared first on PictureCorrect.


from PictureCorrect https://ift.tt/tI9cVTX
via IFTTT

PictureCorrect.com: Wide-Angle Landscape Photography: 5 Mistakes to Avoid

Taking photos using a wide-angle lens can be tricky. The short focal length means a larger field of view, which allows for more distracting elements to creep into the sides of the frame. Plus, there are many other challenges that come with using wide-angle lenses, which can make new users prone to making mistakes with them. In today’s video, photographer Nigel Danson talks about five mistakes he used to make with his wide-angle lenses. If you’re new to using wide-angle photography or thinking of getting into it, you should definitely watch through it:

“With wide-angle, you can often shoot too much and it can leave less to the imagination.”

The instant realization when using a wide-angle lens is just how much of the view it can fit in the frame. This seems like a good thing for shooting landscapes, but if you’re not careful, your images can appear too busy. In other words, photos will appear distracting. Your primary goal thus should be to reduce the amount of information in your shot.

If you look at the images formed by a wide-angle lens, you’ll realize how elements closer to the lens will appear larger, while background elements will appear tiny. So if you want to exaggerate the foreground element, tilting the camera downward will do the trick. And if you want the background element to appear bigger, don’t be lazy—walk forward a few meters whenever possible. You’ll soon realize how moving even just a little can make a significant difference to your image. So don’t be in a hurry to snap what you see—be sure to move around first.

Using a wide-angle lens also requires a bit more technical know-how. But once you are over the initial hurdles, the creative opportunities are endless.

Be sure to watch the complete video to familiarize yourself with the mistakes you should avoid when starting out with a wide-angle lens. It’ll definitely help you out.


Did you appreciate this newsletter? Please help us keep it going by Joining Our Patreon Supporters

What are your thoughts on this article? Join the discussion on our Facebook Page

PictureCorrect subscribers can also learn more today with our #1 bestseller: The Photography Tutorial eBook

The post Wide-Angle Landscape Photography: 5 Mistakes to Avoid appeared first on PictureCorrect.


from PictureCorrect https://ift.tt/hDVbrcp
via IFTTT

keskiviikko 23. maaliskuuta 2022

PictureCorrect.com: New! Creating Digital Dreamworlds in Photoshop

Have you ever wished you could master Photoshop to the point of creating anything you can imagine with your photography? This new eBook may help you take another step in that direction. It just launched and is currently 80% off today for the first 500 customers if you want to check it out. Learn more: Digital Dreamworlds eBook & Cheat Sheets at 80% Off

digital dreamworlds

New: Digital Dreamworlds (see inside)

This 294-page eBook shows you how to capture 30 digital collages that are out-of-this-world.

This includes merging images, creating see-through shapes, changing textures, adding patterns, and more…

While using photos you already own (or stock photos), with 5-7 simple steps per project in Photoshop.

All you need is the eBook and printable “Collage Challenge Cards” (more on those below).

The only limit is your imagination, and with 30 of the author’s best ideas to choose from… you’ll never be short of inspiration.

With Digital Dreamworlds, you’ll soon discover:

  • 30 unique projects for creating your parallel reality
  • Simple ways to use Photoshop to turn ordinary images into dreamy scenes
  • Easy-to-follow case studies that walk you through each project step-by-step
  • Free ways to source images for your collages
  • How to access your imagination to create surreal digital art

digital collages

The case studies average 7 pages in length, with detailed photos to walk you through every step.

You don’t have to read the book all at once, or even in order.

Pick the image you want to create, read through the tutorial, print off the “Collage Challenge Card”, and start shooting.

How to Get the eBook for a Discount Today:

The Digital Dreamworlds eBook is currently 80% off for the launch sale for the first 500 customers (normally $199, currently $39). They have also thrown in 30 printable cheat sheets and other bonuses including layered photoshop files so you can see exactly how each final result was created. It all comes with an impressive 90 day happiness guarantee so there’s no risk in trying it.

Ending soon: Digital Dreamworlds eBook & Cheat Sheets at 80% Off


Did you appreciate this newsletter? Please help us keep it going by Joining Our Patreon Supporters

What are your thoughts on this article? Join the discussion on our Facebook Page

PictureCorrect subscribers can also learn more today with our #1 bestseller: The Photography Tutorial eBook

The post New! Creating Digital Dreamworlds in Photoshop appeared first on PictureCorrect.


from PictureCorrect https://ift.tt/DHIq65g
via IFTTT