


Milky way season is in full-effect so I thought I’d share a few pointers that I’ve learned about shooting and processing it.
“But Steve, what the heck is milky way season?”
Good question.
It’s the time of year when the galactic core is visible and it runs from Feb/March til around Oct/Nov.
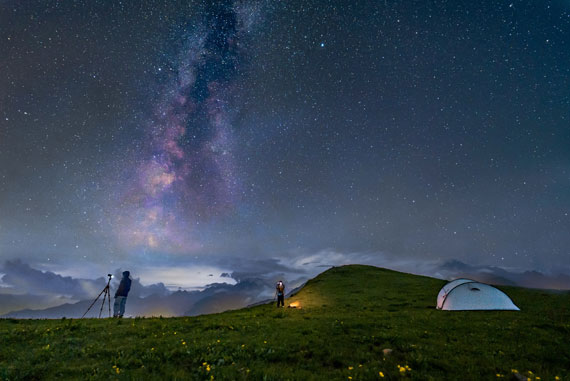
Photo by Nicola Pavan; ISO 12800, f/2.8, 15 seconds.
Us southern-hemispherites are lucky that our season is a couple of months longer than folks in the northern half of the planet.
But wherever you’re reading this, my goal is for you to you be able to get out on a clear night to capture a half-decent shot of it.
I’ll admit though, I’m by no means an expert at shooting the milky way. I know the basics, and I’ve learned a few things (which I’m going to list in a second).
Given that, here’s a list of pointers that I’ve learned, so maybe you’ll find them useful too:
1: Don’t fight the fog
Ideally, we want to shoot on a perfectly clear night. But depending on location, those conditions might be quite rare. When I took the shot below I was by the ocean, air humidity was high and sea mist was lingering.
I started out trying to completely remove the mist in post processing, but decided it wasn’t worth it in the end. Too fiddly (yes, even for me lol). It was redder than you can see in the shot above thanks to the light from the nearby town it was reflecting, so rather than try to eliminate these colours, I went the other way and made them a feature!
2: Don’t over-brighten the milky way.
I’ve processed milky way shots both ways. 1) a glowing milky way against a jet black sky, and 2) the more subtle approach
I prefer the latter. Sure, I’ve made the milky way stand out by adding contrast and a touch of warmth, but the sky is also quite bright in comparison. To me, this looks more natural. Your mileage may vary.
3: Test which of these two shooting methods gives less noise.
A high ISO is usually needed when shooting the milky way because we are restricted to exposure times below 30 seconds (any longer and the sky starts to rotate, and the stars become blurry).
But it’s worth testing whether using a high ISO produces more noise than using a lower ISO and then brightening the shot in post processing.
Depending on your camera, you might notice one of these methods gives less noise than the other in the finished image.
Try both and compare. You might not notice a difference, but it’s worth the test.
4: It’s not ALL about the sky.
I don’t know why, but it’s too easy to forget that a great milky way shot isn’t ONLY about the sky, so we forget the basic rules of composition.
It’s probably the most common mistake I used to make when shooting the milky way and as a result, the images would lack context without at least a good foreground subject.
5: Try not to overexpose the brightest stars in post processing
Most of the stars in the sky will be on the verge of blowing out at any moment, but for some reason it’s easy to miss until the end of your editing workflow. Suddenly you realize half of the stars in the sky are three times their original size and are just big white blobs! lol
It will be unavoidable with some already-large stars, but just remember to keep an eye on it whenever brightening or adding contrast to the sky.
6: Have fun!
Ok this is a cheesy one, but hey, if we’re not having fun then what’s the point, right? Except, sometimes it’s easy to get so caught up in capturing shot after shot that we forget to just look up, take it all in, and contemplate the enormity and wonder of this universe we find ourselves in!
For your reference, here’s what a RAW file looked like before and after processing.
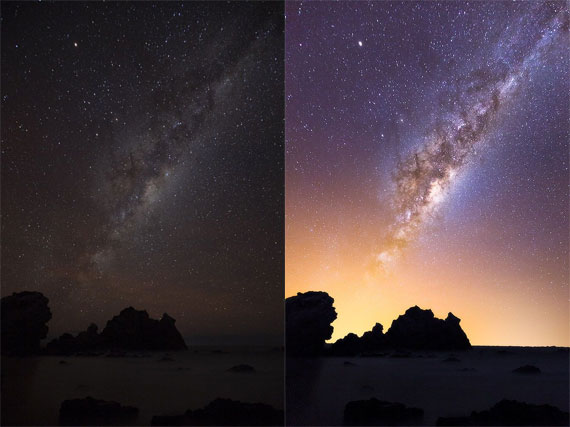
Before and After Post-Processing Milky Way
If you’d like to see the entire editing process I used to transform the RAW file into the glowing finished image, then check out my Landscape Editing Masterclass where you can download the written step by step instructions (with screenshots) in a handy PDF format, and also download the full end-to-end editing video tutorial.

The Landscape Editing Masterclass (see what’s covered)
There is a Beginner and Advanced track for each stage of the processing workflow, where appropriate. So no matter what level you’re currently at, you can still follow along and work through every module. There is currently an exclusive 80% discount for PictureCorrect subscribers.
Deal ending soon: The Landscape Editing Masterclass at 80% Off
Did you appreciate this newsletter? Please help us keep it going by Joining Our Patreon Supporters
What are your thoughts on this article? Join the discussion on our Facebook Page
PictureCorrect subscribers can also learn more today with our #1 bestseller: The Photography Tutorial eBook
The post 🌌 Milky Way Photography & Photo Editing Tips appeared first on PictureCorrect.
from PictureCorrect https://ift.tt/ZeED2Ct
via IFTTT


0 kommenttia:
Lähetä kommentti