tiistai 31. elokuuta 2021

PictureCorrect.com: Major Improvements to Gigapixel Photo Enlarger

In photo editing news, Topaz Labs just announced a new update to Gigapixel AI. Designed to do the impossible with machine-learning-powered image enlargement. Upscale your photos by up to 600% while perfectly preserving image quality. See how it works here: Gigapixel A.I. Photo Enlarger

enlarge photos

Gigapixel A.I. Photo Enlargement

After being trained with millions of sample images to learn how details usually get lost, the algorithm in Gigapixel AI learns to “fill in” information in new images based on what it has learned… effectively adding new detail to your photo. This means that the processed image can be enlarged to fit your needs with crisp, clear detail.

Gigapixel AI v5.6 at a Glance:

  • New Comparison View for convenient AI model comparison – Easily compare three different AI models or the same one using different settings simultaneously.
  • Improved color and tone processing for RAW and DNG files – When available, Gigapixel AI will apply a camera-specific color profile and provide improved overall color accuracy.
  • Overhauled AI model downloads – Improved overall experience when downloading optimized AI model files.
  • Performance and UI improvements – Numerous bug fixes and updated image previewing for an even better user experience.

A.I. GigaPixel is the first desktop application to use the power of Deep Neural Networks to realistically enlarge images, up to 6x.

gigapixel photo

Topaz A.I. Gigapixel (Click to See How It Works)

A neural network analyzes thousands of photo pairs to learn how details usually get lost. The algorithm learns to “fill in” information in new images based on what it has learned… effectively adding new detail to your photo.

How to Get Gigapixel A.I. at a Discount Today:

To celebrate the update, users can get $20 off the brand new Gigapixel AI today, sale ends soon. Our readers can save even more using the coupon code picturecorrect at checkout.

Deal found here: Gigapixel A.I. Photo Enlarger at $20 Off


Go to full article: Major Improvements to Gigapixel Photo Enlarger

What are your thoughts on this article? Join the discussion on Facebook

PictureCorrect subscribers can also learn more today with our #1 bestseller: The Photography Tutorial eBook

The post Major Improvements to Gigapixel Photo Enlarger appeared first on PictureCorrect.


from PictureCorrect https://ift.tt/2utsNT9
via IFTTT

PictureCorrect.com: Interesting Photo of the Day: Space Shuttle Aboard a Boeing

An incredible amount of science and technology goes into constructing and flying a space shuttle or airplane. What happens when you fly them together? In this case, it’s a NASA space shuttle attached to a Boeing plane. It might be some photographers’ dream to witness such a sight and capture it from the ground, especially those that closely follow launch sites and flights. However, NASA has its own photographers that can provide a perspective that others cannot:

space astronomy equipment explore

“The Journey Home” by NASA/Carla Thomas (Via Reddit. Click image to see full size.)

NASA photographer Carla Thomas captured this amazing birds-eye view photo of the Endeavour space shuttle mounted on top of a modified Boeing 747 carrier aircraft. It was flying over the Mojave Desert on its return to the Kennedy Space Center in Florida in December of 2008. This space shuttle was constructed in 1990 and performed its final mission in 2011. It currently resides in the Samuel Oschin Pavilion at the California Space Center near downtown Los Angeles for public viewing.


Go to full article: Interesting Photo of the Day: Space Shuttle Aboard a Boeing

What are your thoughts on this article? Join the discussion on Facebook

PictureCorrect subscribers can also learn more today with our #1 bestseller: The Photography Tutorial eBook

The post Interesting Photo of the Day: Space Shuttle Aboard a Boeing appeared first on PictureCorrect.


from PictureCorrect https://ift.tt/2AR6iLl
via IFTTT

PictureCorrect.com: Wildlife Photography Tips: Backlit Subjects

Back-lighting a subject comes in handy when you want to separate the subject from the rest of the scene. It opens up interesting body features of the subject and makes the image so much better. However, this technique is equally challenging as it requires you to shoot into the sun. Professional wildlife photographer Paul Miguel talks about how you can expose for backlit images in wildlife and bird photography:

Prevent Lens Flare

As you will be shooting into the sun, the chances that lens flare will creep into the shot are high. This can also cause a loss in contrast. It’s therefore a good idea to have the lens hood on. Also, whenever possible, have the sun placed behind the trees or other structure so that direct light from it doesn’t create any problems.

Subjects for Back-lighting

“Anything really that has a translucent quality to it is gonna allow this technique to work for you.”

The important thing to look out for is that light is able to slightly pass through the subject and give a glowing effect. This works well with birds, furry animals, and even insects. The glow on the edges gives a halo effect, and also helps in separating the subject from the surroundings.

Setting Up Exposure for Backlight Photography

If you’re not careful, getting the exposure right can be quite tricky when the subject is backlit. If you’re shooting in a semi-auto mode, like aperture priority or shutter priority, evaluative metering (matrix metering) can be a good metering mode to work with. However, don’t forget to check your exposure and adjust your exposure compensation to ensure that your subject is exposed well.

“What you need to remember is that part of the subject is going to be much brighter than the rest of it.”

Histogram is another handy tool in your camera that you can use to judge your exposure. Ensure that the highlights in your image are closer to the right side while not being clipped.

using a histogram to evaluate exposure

Background

Try and shoot against a dark background to get the best backlit images. The contrast of the bright subject against the dark background will make the subject stand out better and make your image more effective. However, in such situations, the evaluative metering will try and overexpose the shot due to the dominance of the dark background. So, be sure to deliberately underexpose your shots.

shooting backlit wildlife against dark background

“If you’re shooting a backlit subject against a dark background, I’d suggest that you dial in probably minus one and a third exposure compensation.”

If you’re shooting in manual, trial and error is the best way to go. Be sure to refer to the histogram.

Use a Flash

With the light coming in from behind the subject, the part of the subject towards your camera can get underexposed. To overcome this issue, you can use your flash as a fill light to fill in some details in the shadow area.

“You could expose for the highlights, and then you could  use a touch of fill-in flash to fill in the shaded part of the subject.”

Pay Attention To The Surroundings

To take maximum advantage of back lighting a subject, also pay attention to the subject’s surroundings. For instance, if the subject is in water, the chance of capturing backlit water drops increases too.

backlit water droplets

“Snow, rain, sleet, all potentially are going to work well with back lighting to add to the image.”

Have you ever tried back lighting your wildlife subjects? Give this technique a go if you haven’t and see how much more dramatic your photos turn out.


Go to full article: Wildlife Photography Tips: Backlit Subjects

What are your thoughts on this article? Join the discussion on Facebook

PictureCorrect subscribers can also learn more today with our #1 bestseller: The Photography Tutorial eBook

The post Wildlife Photography Tips: Backlit Subjects appeared first on PictureCorrect.


from PictureCorrect https://ift.tt/38sGnsd
via IFTTT

maanantai 30. elokuuta 2021

Star trails over Ramon Crater by noctraeon (500px.com/noctraeon)


Follow me on Instagram -- instagram.com/boris.eliav via 500px https://ift.tt/3toBqKZ

PictureCorrect.com: Photography Tips to Take Good Pictures

A lot of us really don’t have the expertise we’d like to for taking photos that are worth framing. Digital cameras really have come a long way, however, making it quite possible for just about everyone to capture excellent pictures.

tips for taking good photos

Photo by Aftab Uzzaman; ISO 800, f/5.6, 1/50-second exposure.

Today’s cameras do just about everything for you, from recognizing faces to finding out if a flash or no flash might be better, saving you a great deal of work.

However, becoming a better photographer is doable when you have a bit of experience with your camera and a sense of know-how. Grab your camera and have a peek at these tips that will make your photos even better than they used to be:

1. Make eye contact with your subject to get a more interesting photo. Having your camera at the very same level as your subject’s eyes creates a picture that is far less forgettable. When you take pictures of animals and children, be sure to get down to the same level as them. This is much more attractive than shots taken that look down on a subject. Additionally, when a picture is taken at eye level it’s much more personal and welcoming and more likely to draw in the viewer.

2. Accentuate your main focus in the picture by keeping distractions outside of the background. A flagpole which seems to spear your subject through their head will draw attention away from the real subject of the picture. Ensure that you take into account the things surrounding the subject when taking pictures. A common or undecorated setting with virtually no distracting activity is ideal.

3. Know when you should move in closer. When your subject is of smaller size than a vehicle of standard size, move a handful of steps closer to the subject before taking the picture. Or better yet, zoom in. Your objective in doing this is to clearly show little details, like a great set of pearly whites or a grouping of adorable freckles.

how to take good photos

Photo by merec0

4. Find out when you ought to utilize the camera’s flash. Dazzling sunlight can work to create deep shadows in the face. You can get rid of these shadows by using the flash on the camera, even when there is a lot of light outside. This is particularly true if the day is really sunny. If you have a choice between full flash or fill flash, the general rule is to use the fill flash for subjects five feet or closer, and the full flash for the subjects that are farther away than five feet.

5. Understand when you’re too close. While getting close makes for a much better shot most of the time, you should also avoid coming too close. If you’re too close, your pictures will end up blurry. The closest focus distance on the standard digital camera is about a yard, which is roughly one step beyond the lens of your camera. If you move any nearer than this you may not get the nice clear pictures you desire.

6. Put your subject in the middle, but only when they appear best that way. The beauty of the digital camera is that you are able to shoot, shoot, and re-shoot until the shot you are capturing turns out like you want it. Many times, the middle is an ideal position for the subject, but this is not always true. Take a number of shots and compare them to each other to determine what position is best suited for your subject.

tips for taking better photos

Photo by Brian Geltner; ISO 400, f/2.2, 1/80-second exposure.

With a little care and forethought, you can take pictures that are worthy of framing and displaying around your home and workplace.

About the Author:
Autumn Lockwood is from a framing company. Listed on their website are a wide variety of picture frames. Your Picture Frames makes it easy for you to find just the perfect frame.


Go to full article: Photography Tips to Take Good Pictures

What are your thoughts on this article? Join the discussion on Facebook

PictureCorrect subscribers can also learn more today with our #1 bestseller: The Photography Tutorial eBook

The post Photography Tips to Take Good Pictures appeared first on PictureCorrect.


from PictureCorrect https://ift.tt/3gO6bWh
via IFTTT

PictureCorrect.com: Interesting Photo of the Day: Epic Light Painting Self Portrait

Today’s Interesting Photo of the Day is a self-portrait made by Ian Hobson, a UK photographer who specializes in painting with light. All of his effects are done in-camera, without any post-processing enhancement. He uses many types of torches in his work, but this one was done simply with a speedlight and a light stick. With the camera on a tripod and a very long exposure, he held the flash behind his back and set it off, then advanced towards the camera waving the light stick – a wand with 15 small bulbs- in a spiraling pattern. The evenness with which he did this certainly shows his years of experience:

light painting

To create this self-portrait, the photographer fired a flash behind him and used a light stick to create the spiral (click to view full size, imgur)

This is only a recent image in a long, long history of incredibly light paintings. You can view his entire Flickr for more examples, and read some of our past tutorials on the methods behind these electric photographs.


Go to full article: Interesting Photo of the Day: Epic Light Painting Self Portrait

What are your thoughts on this article? Join the discussion on Facebook

PictureCorrect subscribers can also learn more today with our #1 bestseller: The Photography Tutorial eBook

The post Interesting Photo of the Day: Epic Light Painting Self Portrait appeared first on PictureCorrect.


from PictureCorrect https://ift.tt/2pPphn2
via IFTTT

PictureCorrect.com: Street Photography: 10 Sneaky Tips

Street photography is all about capturing the essence of daily life in the streets. It’s a powerful genre of photography that captures a moment as it is. The challenge usually arises when you’re out there pointing a camera at people, which makes them self-conscious and kills the moment. Sometimes you need to be more discrete. In this video, street photographer Samuel Lintaru shares 10 ways to do street photography in a sneaky way:

“I’m not saying that you should hide. Be open about what you are doing but there are techniques that can help you become less of a creep.”

1. Pretend to Shoot Something Else

If you come across someone who has an interesting look or is doing something intriguing, you can pretend you’re shooting something else. Act like you’re photographing something around them, and when you see an opportunity, photograph them as well. Try this when people are indulged in an activity and don’t care about you being around much. Otherwise, it can seem creepy.

2. Pretend to Shoot Video

Seeing photographers peeping through the viewfinder is somewhat more alarming than when they’re using the bigger screen on the back of the camera. The modern vlogging trend has made people used to seeing vloggers walking around taking videos. Using this to your benefit, switch your camera over to live view and pretend like you are shooting a video. Whenever you come across something interesting, snap away.

3. Blend Into the Environment

I’m not saying that you should wear an overcoat, a hat, and dark glasses, but it helps if you wear something that blends in with the environment. Wearing neutral colors is the safest bet as, they don’t draw too much attention.

4. Make Your Friend Complicit

If you happen to have someone with you, you can get some help from them. For instance, you can pretend you’re showing them a picture on the back of your camera, and take a picture of the scene in front of you while doing so.

pretending to show image to a friend

sneaky phot taken in a train

5. Camp at a Spot Until Nobody Cares About You

In street photography, sometimes the action happens in a split second. Other times, you can wait at a particular spot for something to happen. Maybe the light is perfect at some location or there’s a reflecting surface that you can incorporate into your shot. It can be anything. If you come across this kind of location, set up camp there and keep taking photos. Once you remain there long enough, people  won’t even care that you’re there.

6. Turn Around to Shoot

Use this trick if you have someone walking right behind you that you want to photograph. While continuing to walk, take photos (or at least pretend to do so) of people or the scene around you. Then, while you take a quick turn, snap a photo of the subject behind you. You really need to be quick and accurate to nail your focus and composition.

7. Fake a Phone Call

Having your phone up to your ear will give the people the impression that you’re busy with your call. While doing so with one hand, keep on shooting with the other.

8. Shoot Remotely

Modern cameras can easily connect to smartphones allowing you to use the phone as a viewfinder and to take photos. This lets you freely move the camera around without having to look at your camera. Compose by referring to the back of your smartphone and shoot away.

using wifi to take street photos

sneaky photo taken using wifi

9. Shoot From the Hip

This is yet another technique that lets you photograph without having to hold the camera in front of your face. Hold the camera at hip level and take a photo when you come across anything interesting. Having a screen that flips out comes in handy.

shooting street photos from the hip

street photo taken from the hip

10. Play Dumb

Who would be alarmed by someone who looks like they have no idea what they’re doing? Pretend that you don’t know how to use the camera properly and snap some photos whenever you come across an interesting moment.

While some of these tips may be useful to an introvert, it’s always good to be open about what you’re doing. Don’t be afraid to be caught. You’re not doing anything wrong.

“If people see you taking a photo, just smile and say, ‘Thank you.'”

What sneaky techniques do you use to take street photos?

For help with photo editing: The Street Photographer’s Lightroom Presets


Go to full article: Street Photography: 10 Sneaky Tips

What are your thoughts on this article? Join the discussion on Facebook

PictureCorrect subscribers can also learn more today with our #1 bestseller: The Photography Tutorial eBook

The post Street Photography: 10 Sneaky Tips appeared first on PictureCorrect.


from PictureCorrect https://ift.tt/2R0BpNz
via IFTTT

sunnuntai 29. elokuuta 2021

night at the gravel pit by thalerst (500px.com/thalerst)


The gravel pit was lit up by me .. about 15 minutes with a Led Lenser torch! via 500px https://ift.tt/2VODFs8

PictureCorrect.com: How to Get a Shallow Depth of Field

Depth of field is a photography term that refers to the selective focus of the camera lens along a certain plane. This creates a sharp focus for any objects at a specific distance from the lens, while objects further away from that specific distance become increasingly blurry. The more shallow your depth of field is, the more precise your focus becomes, thus leaving objects in front of or behind your subject more blurry. A deep depth of field is the opposite, and all objects are sharper.

tips to get a shallow depth of field

Photo by Cam Miller; ISO 100, f/3.2, 1/100-second exposure.

There are four main factors that affect the depth of field:

  1. Format or frame size. The area of light captured by a camera (signified by the type of sensor in digital photography (i.e. 2/3 CCD, APS-C, etc.).
  2. Aperture. The lower the F-stop number, the more shallow your depth of field will be. Be aware that for video, you may need neutral density filters to help compensate. For still photography, you can usually compensate by increasing the shutter speed.
  3. Lens length (zoom). The longer your lens length (the closer you zoom in), the shallower your depth of field will be.
  4. Physical distance from the lens itself. The closer your subject is to the lens, the shallower your depth of field will be. This is because the depth of field is not linear and becomes more shallow quicker as you get closer to the lens. For example, if your subject is 10 meters away, objects at 15 meters away will appear sharper than objects 5 meters away, even though they are both 5 meters away from your focal point.

As you might guess from these factors, this makes getting clear pictures in macro photography very challenging.

ways to get a shallow depth of field in photos

Photo by Bernd Thaller; ISO 3200, f/18.0, 1/25-second exposure.

In macro photography, the lens is usually either very close to the subject, at a longer zoom length, or both. To mitigate this, there is a technique called “stacking,” in which a subject is shot from the same angle multiple times, each with a different focal point, and the images are digitally combined to create one smooth shot that’s completely in focus.

About the Author:
Lee Michael Johnson (frankfurtphotographer) is a professional photographer and videographer in New York.


Go to full article: How to Get a Shallow Depth of Field

What are your thoughts on this article? Join the discussion on Facebook

PictureCorrect subscribers can also learn more today with our #1 bestseller: The Photography Tutorial eBook

The post How to Get a Shallow Depth of Field appeared first on PictureCorrect.


from PictureCorrect https://ift.tt/3zuna7l
via IFTTT

PictureCorrect.com: Interesting Photo of the Day: Mountain Goat Landscape

As warm days wane slowly into fall, today’s interesting photo truly captures the magic of a late summer evening in one of the world’s most picturesque parks. While the snowcapped mountains that we’re accustomed to seeing out of Glacier National Park are certainly majestic, the wildflowers and vibrant colors of summer seem like something out of a fantasy novel:

glacier national park

A mountain goat graces an epic Glacier National Park vista. (Via Reddit. Click image to see full size.)

Idaho-based photographer Mikey Gribbin‘s passion for landscapes led him to this otherworldly scene. Using a Canon EOS R equipped with an 11-24mm f/4 lens, Gribbin captured this composition in two frames: one for the sky and one for the land. A little bit of sharpening, saturation, and exposure adjustments are all of the outside bits of magic that otherwise went into creating this shot.

The icing on the cake? As Gribbin was setting up his tripod just off the trail, a mountain goat wandered within five feet of the camera. Before the beast meandered away, the photographer managed to grab him perfectly posed just in front of a towering mountaintop.

Whether this composition was born out of patience, dumb luck, or a little bit of both, this is one photograph that’s hard to tear your eyes away from!


Go to full article: Interesting Photo of the Day: Mountain Goat Landscape

What are your thoughts on this article? Join the discussion on Facebook

PictureCorrect subscribers can also learn more today with our #1 bestseller: The Photography Tutorial eBook

The post Interesting Photo of the Day: Mountain Goat Landscape appeared first on PictureCorrect.


from PictureCorrect https://ift.tt/312vcST
via IFTTT

PictureCorrect.com: Funny Flowchart to Help You Decide When & If You Should Take a Photo

What goes through your head before you release your camera’s shutter? Or before you post one of your photos online? Are you convinced your images is worthy of an award? Or are you nervous that no one will like it?

These folks have summed up your anxiety and overconfidence–as well as their own pet peeves–in this tongue-in-cheek photography flowchart:

photography flowchart

Photography Flowchart (Click to See Full Size)

The CLICKittyCAT chart, though humorous, is perhaps a bit harsh. Photography should be fun, after all. However, it does have some merit.

Practically everyone has a camera of some sort–and it shows. The Internet is saturated with blurry pictures, over-processed images, and boring photos. It’s not that good photographers never take bad shots. It’s just that they pick and choose which photos to share and which to trash.

One of the best qualities of a great photographer is his or her ability to be selective. So, by all means, keep on taking pictures if that makes you happy. The more you practice, the better you’ll get at photography. But before you click that “post” button, the makers of the photography flowchart think you should consider whether or not the photo is a keeper.


Go to full article: Funny Flowchart to Help You Decide When & If You Should Take a Photo

What are your thoughts on this article? Join the discussion on Facebook

PictureCorrect subscribers can also learn more today with our #1 bestseller: The Photography Tutorial eBook

The post Funny Flowchart to Help You Decide When & If You Should Take a Photo appeared first on PictureCorrect.


from PictureCorrect https://ift.tt/3zsOWRJ
via IFTTT

lauantai 28. elokuuta 2021

PictureCorrect.com: Backlit Portrait Photography Tips

Use the “halo light” pattern in your photo lighting.

Here is a photo tip I’ve recently read that I disagree with:

“When photographing people, always make sure to avoid direct sunlight in the background of the photo. This will make odd shadows and add an undesirable element to the picture.

Position the people so the sun is to the side, but not shining directly in their face either. This will cause the subjects of your photograph to be squinting uncontrollably.”

photo tips and tricks

Photo by Xiu Xiu.

I’m not against shooting with the sun to the side or even straight into the face, but some of the best and most dramatic portraits I’ve ever done (both humans and animals) were done with the sun at the subject’s back.

Backlighting can be very dramatic and will set you apart from all the “snapshooters” out there! If you do it right.

This does put the face in shadow, which is no problem if you expose for the shadow. Expose for the light on the shadowed face, and you will have a properly exposed shot. Just like you would have had if you exposed for the value of the light if the sun’s light was shining directly into the face.

Here’s a quick flash from the past. In ancient times (with film), we learned to expose for the shadows on film (negative) shots and to expose for the highlights in slide (positive) shots. This had more to do with the limitations of the film than an aesthetic factor, but it still works.

lighting tutorial

Photo by Arif Akhtar.

If you want to get rid of the shadows, you can put a flash on your camera and set it to the same strength as the background light from the sun and eliminate the facial shadows that way and end up with an evenly lit photo.

Or use a reflector to bounce light back into the face; this will be almost identical in strength as the sun.

Or, set your flash unit to a strength that is less than the strength of the light from the sun (or don’t use a flash at all) and expose for the lesser light on the face. This will give you a nicely exposed face, and a rim of brighter light from the sun that surrounds the body.

This is called “rim light” or the “halo light” effect. And believe me, it’s gorgeous!

Be careful not to get any light shining into the lens. That will blow out the image. Either position yourself in some shade or have someone shadowing the lens with a piece of paper or something.

Either shoot early or late in the day for the best results. If the sun is directly overhead it won’t work too well.

photography lighting guide

Photo by Chris Ford; ISO 200, f/2.8, 1/1600 exposure.

That’s your project for the next couple days. Shoot a ton of back-lit (halo light) images. Try it a few times and you will be hooked and always looking for opportunities to shoot this highly dramatic photo lighting pattern.

About the Author:
Dan Eitreim writes for OnTargetPhotoTraining. He has been a professional photographer in Southern California for over 20 years. His philosophy is that learning photography is easy if you know a few tried and true strategies.


Go to full article: Backlit Portrait Photography Tips

What are your thoughts on this article? Join the discussion on Facebook

PictureCorrect subscribers can also learn more today with our #1 bestseller: The Photography Tutorial eBook

The post Backlit Portrait Photography Tips appeared first on PictureCorrect.


from PictureCorrect https://ift.tt/3zuElp6
via IFTTT

PictureCorrect.com: Interesting Photo of the Day: Perfect Reflection at Lago di Carezza

It’s a real challenge to find Mother Nature in her ideal state. And even if the conditions are perfect, you can’t expect it to last for long. However, photographer Joe Clarke got lucky at Lago di Carezza in the Dolomites:

perfect reflection at at Lago di Carezza

“Perfect Reflection at Lago di Carezza” by Joe Clarke (Via Reddit. Click image to see full size.)

Clarke took the image with his Canon 5D Mark III camera and his lens at 100mm f/4.5

“I arrived before sunrise and noticed how perfectly still the water was, hoping it would stay still when the sun hit the peaks behind it. Luckily it did for just a few minutes before the winds picked up and ruined the reflection.”

It’s difficult to distinguish whether the image is of the peak or its reflection if the bottom part of the image is cropped out. It must have been a near perfect, mirror-like experience for the photographer.


Go to full article: Interesting Photo of the Day: Perfect Reflection at Lago di Carezza

What are your thoughts on this article? Join the discussion on Facebook

PictureCorrect subscribers can also learn more today with our #1 bestseller: The Photography Tutorial eBook

The post Interesting Photo of the Day: Perfect Reflection at Lago di Carezza appeared first on PictureCorrect.


from PictureCorrect https://ift.tt/2Yb0zit
via IFTTT

PictureCorrect.com: How to Change a Camera Lens Quickly

How fast can you change a camera lens? In this short demonstration, Jasmine Star, an international wedding photographer, shows how she swaps out lenses on her Canon 5D in about six seconds:

A bag that’s easily accessed seems to be the key to Star’s quick technique. She uses an ONA Brooklyn Camera Satchel, which has top-loading compartments for her lenses. The side bag rests just at hip height, which proves to be convenient.

Star’s other secret is that she does not use lens caps during her wedding shoots. Not having to fiddle with caps frees up precious time that could otherwise mean missing essential moments during a ceremony or reception. Would it be worse to miss an important shot or to get dust on a lens?

change-a-lens-in-six-seconds

While many balk at the thought of not protecting their lenses, others acknowledge that professional gear can take some abuse and say that’s the whole point of spending a little extra on high-quality glass. And, according to Star, she’s worked this way for eight years without incident. She does make sure to have her camera sensor cleaned regularly, and she properly covers her lenses once the wedding is over.

Whether you master the technique of speedy lens changing or prefer to keep two camera bodies around your neck at all times, there’s no denying that weddings require nearly constant shooting. What do you do to avoid missing crucial wedding moments?


Go to full article: How to Change a Camera Lens Quickly

What are your thoughts on this article? Join the discussion on Facebook

PictureCorrect subscribers can also learn more today with our #1 bestseller: The Photography Tutorial eBook

The post How to Change a Camera Lens Quickly appeared first on PictureCorrect.


from PictureCorrect https://ift.tt/3sX5oXR
via IFTTT

perjantai 27. elokuuta 2021

PictureCorrect.com: How to Photograph Motion

Photographs by their very nature capture a split second in time. But often a photographer will want to suggest what comes just before or after the shot by portraying movement. There are some very obvious circumstances when you’ll need to capture motion, for example sports photography, but the same techniques can also be used in other situations to convey a feeling or a mood.

tips for capturing motion

There are several different tricks for shooting moving objects, each of which will result in a slightly different final image. Remember though, no matter how many hot tips you read, photographing motion will always be part technique, part art. Be sure to practice and independently experiment to get the look and feel you’re after.

That said, in my many years working as a professional photographer for both events and creative projects, I’ve learned some tried and tested techniques for capturing motion in photography. Here are the basics:

Freezing (All Crisp)

Motion photography, wake boarding, Hong Kong

One way to capture movement is to freeze the entire field of vision, just as we all imagine a photo does anyway. This works particularly well in images where both the foreground and background are moving, such as a bird flying through a rain storm. For this technique you’ll need to use a very fast shutter speed, at least 1/1000 of a second, I would say.

Nowadays most cameras allow you to capture a scene at 1/8000 of a second or faster, but the exact shutter speed you want will depend on a variety of factors, such as how fast your subject is moving, how much movement you want to convey, and how crisply you want to define your subject. Getting this balance right can result in some really awesome motion shots.

Long exposure (All Blurred)

Motion photography, cyclist

On the contrary, if you want to blur everything in your scene, you’ll need to use a slow shutter speed, otherwise known as long exposure. Blurring everything is risky, but the best scenes will be those that offer bright or highly contrasting colors. Most fully blurred photos are created for artistic, rather than practical, reasons. Remember, however, that when using long exposure times, you run the risk of excess light bleaching out your photos. You can remedy this by reducing your aperture and lowering your ISO setting.

Long Exposure (Moving Subject Blurred)

blurred subject busy market

A lot of photographers use long exposure to blur just the moving subject of the photograph, thereby conveying movement and/or speed. This is often seen with star trails, car headlights and other forms of night photography, as well as busy daytime street scenes and moving water. It’s important to use a tripod for this technique so your camera remains steady. You’ll also need plenty of time to wait for the longer exposures and adjust and correct your settings during the shoot. Obviously the advent of digital photography makes this a whole lot easier!

Panning (Background Blurred)

panning tuk tuk

If you want your subject to remain in focus while your background is blurred, you’ll need to employ the panning technique. Rather than using a tripod to keep your shot steady as in the above method, here you’ll want to follow your subject with the camera during the exposure time. You’ll need to match both the speed of your subject and the direction in which it’s traveling to get the clearest image.

For best results, set up with a clear view of the object approaching and plenty of room to swivel on a parallel axis as it passes by. Follow the subject as it moves through your field of vision and keep tracing their line of motion even after the shot. It takes practice, but this method can result in really cool motion images, especially if you have an unattractive or distracting background.

Zooming

zooming motion casablanca

For more abstract photos of movement, try the zooming technique, whereby you manually change your focal length during a long exposure. Physically rotating the zoom lens creates some really cool effects that work particularly well with night scenes, moving neon signs, and fireworks. The same technique employed during the day can render your subject unrecognizable, but if you’re going for something more abstract, that can be a good thing.

Personally, I think a good photographer should at least be familiar with all these techniques even if they don’t use them all the time, because at the end of the day, it’s good to mix it up sometimes!

About the Author:
Ali Ghorbani (otherwise known as, Ali G) is a luxury wedding, events, corporate, and celebrity photographer based in Hong Kong. You can follow him on Facebook and Instagram.


Go to full article: How to Photograph Motion

What are your thoughts on this article? Join the discussion on Facebook

PictureCorrect subscribers can also learn more today with our #1 bestseller: The Photography Tutorial eBook

The post How to Photograph Motion appeared first on PictureCorrect.


from PictureCorrect https://ift.tt/3Bn6ij8
via IFTTT

PictureCorrect.com: Interesting Photo of the Day: Sunrise in Leavenworth

Nature is dynamic. It continuously changes colors, but the best ones are witnessed only by a few. Have a look at the following image by photographer Maciej Karcz, for instance:

sunrise in Leavenworth

“Sunrise in the Enchantments” by Maciej Karcz (Via Reddit. Click image to see full size.)

Karcz took the image with his Nikon D850 and 70–200mm lens at 200mm at f/10, 1/25 second, and ISO 125.

The image clearly illustrates why photographers are so obsessed with the golden hour. While the mountain has a golden glow to it, the sky looks nothing like we’re used to seeing. Truly a great capture by the photographer!


Go to full article: Interesting Photo of the Day: Sunrise in Leavenworth

What are your thoughts on this article? Join the discussion on Facebook

PictureCorrect subscribers can also learn more today with our #1 bestseller: The Photography Tutorial eBook

The post Interesting Photo of the Day: Sunrise in Leavenworth appeared first on PictureCorrect.


from PictureCorrect https://ift.tt/3DqDgkv
via IFTTT

PictureCorrect.com: Telephoto Lenses: How to Find Your Subject

When working with telephoto lenses, it’s difficult to get your subject in the frame. The task gets even more challenging if the subject moves fast. This struggle can slow you down, often leading to a missed photo opportunity. In this video, photographer Steve Perry presents a simple technique to help you consistently place the subject in the viewfinder:

Keep Your Eyes and Head Fixated on the Subject

Our general tendency is to put the viewfinder up to our eye and then start searching for the subject. This is where things start going wrong. Instead, keep your head and eyes fixated on the subject, and then place the viewfinder over your dominant eye. You should get the subject in the middle of the frame on your first try using this technique.

If you don’t see your subject, wiggle the camera around a bit and it will pop into the frame. Practice this technique for about 10 minutes and you’ll be finding subjects far quicker than before when using telephoto lenses.

Pre-Focus

Pre-focusing your lens to the approximately the subject distance is another way to find your subject quickly. If the lens is focused around its closest focusing distance or at infinity, you will have difficulty seeing clearly through the viewfinder.

blur viewfinder

A blurry view as the lens is focused at a closer distance

Zoom Out, Then Zoom In

If you use a zoom lens, first zoom out all the way. Then, locate your subject and zoom in. The wider field of view when working with the wider end of the focal length will make your work so much easier.

view from the wider end of the lens

When the Subject is Coming at the Camera

If the subject is moving toward the camera, finding it is easy if you follow the first guide. Simply fix your eyes and head on the subject, and place the viewfinder over your dominant eye without moving your head.

focusing a bird flying towards the camera

“Just bring your camera up while you’re looking at it and it’ll be right in the center of your viewfinder. So that part’s easy.”

When the Subject is Moving Across the Frame

It’s a tricky situation when the subject isn’t stationary and is moving across the frame. However, the basic principle remains the same.

Keep your eyes and head fixed on the running animal and place it in the center of your field of vision. To track the animal, keep your head still while twisting your torso. Then, bring your viewfinder up to your dominant eye while continuing to keep the animal in the center of your field of vision. Don’t let the housing of the viewfinder distract you. Keep your eye on the moving animal, no matter what. Even if you get blocked for a while, anticipate the animal’s movement, and keep tracking with your mind.

focusing a bird flying across the frame

“The trick is to keep tracking the animal even though the viewfinder’s housing is temporarily blocking your vision.”

Keep practicing with slower-moving subjects, and you’ll eventually get there with faster subjects.

Working With a Tripod

“In order for this to work real well for you, you’ve got to master the first technique with stationary subjects.”

Try to master the first technique handheld so that you can develop the required instincts. After you’re comfortable with it handheld, this technique that uses a tripod will come much more naturally.

When working with a tripod, have it set up in a way that lets you move the camera freely without the camera and the lens falling down. Then, as with the first technique, track the subject with your eyes and head fixed on the subject. Slowly move your head toward the camera while you align your camera with your field of view. Then, when you look through the viewfinder, you should be able to locate the subject easily.

using a tripod to locate subject

“This does take more practice though. But it’s definitely worth practicing and worthwhile doing.”

If you’ve been frustrated with finding subjects when working with telephoto lenses, definitely consider these tips from Perry.


Go to full article: Telephoto Lenses: How to Find Your Subject

What are your thoughts on this article? Join the discussion on Facebook

PictureCorrect subscribers can also learn more today with our #1 bestseller: The Photography Tutorial eBook

The post Telephoto Lenses: How to Find Your Subject appeared first on PictureCorrect.


from PictureCorrect https://ift.tt/362PAWE
via IFTTT

torstai 26. elokuuta 2021

star trail on the lake by manupgi (500px.com/manupgi)


star trail on the lake via 500px https://ift.tt/2PZ8xnw

PictureCorrect.com: Aperture and Shutter Priority Modes on Digital Cameras

Aperture and shutter speed settings can seem confusing for a new photographer. Luckily your semi-automatic settings, Aperture Priority and Shutter Priority, make them a little easier to understand. Do you know how to use them?

aperture and shutter priority tips

Photo by alcidesota@yahoo.com-O; ISO 200, f/6.0, 1/100-second exposure.

Earlier SLR cameras (film) were fully manual. A photographer needed to understand aperture and shutter speed settings and know how to use them. Then came automatic modes, which let the camera do the thinking for you. This was (and still is) a fairly reliable way of getting a well-exposed picture, but it took creativity out of the hands of the photographer. As time went by, few people learned the manual skills. So as camera technology improved, the quality of most photos actually got worse.

Today we have the best of both worlds. All DSLR cameras and most compact digital cameras have manual and automatic modes, but they also offer semi-automatic modes. That means you can be a little creative, and still allow the camera to control the exposure for you.

If you have Aperture Priority and Shutter Priority on your camera, but never quite understood what they were for, this article is for you.

First up, what are Aperture and Shutter Speed? These are the two mechanisms for controlling the level of exposure in your photos: whether your photo will be overexposed, underexposed, or just right. To explain them properly would take a much more in-depth article, so here is just a quick run-down.

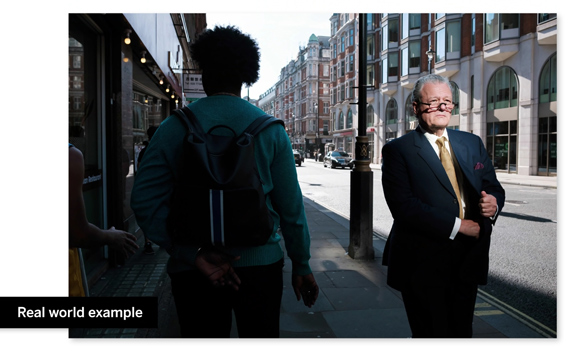
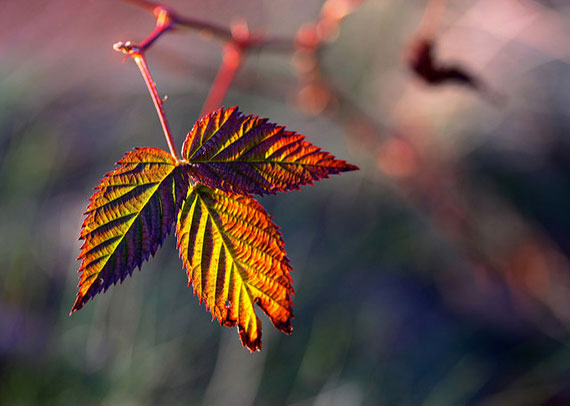
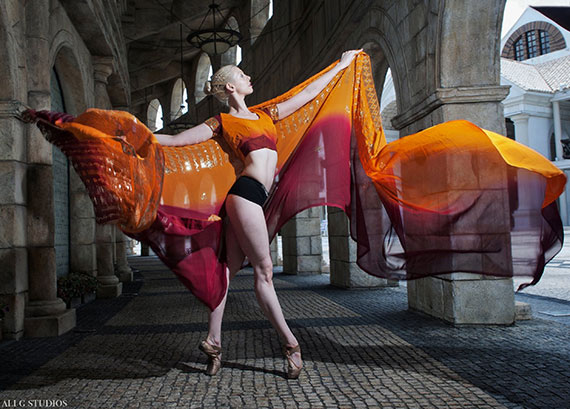
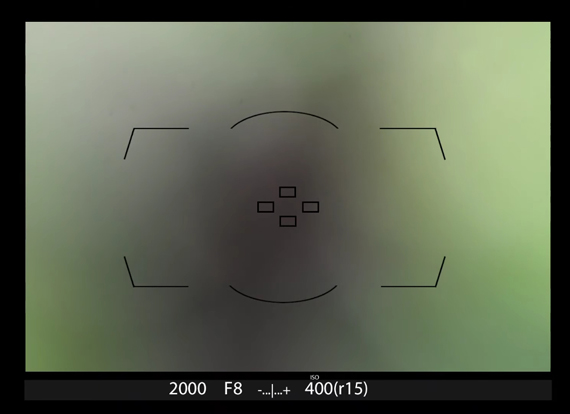
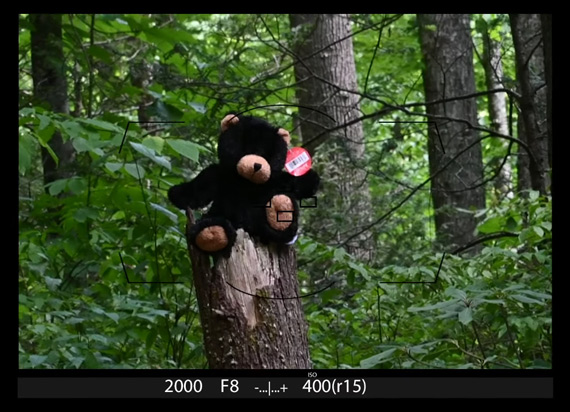
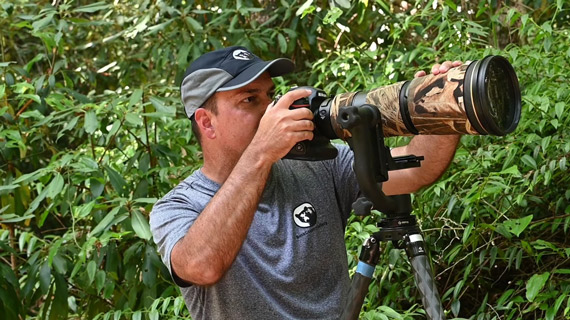
Aperture is the size of the hole that lets the light in on your photo. Think of it like the iris in your eye. As the light gets lower, you open the aperture to let more light in. Aperture also controls depth of field, which affects how much of your picture is in focus. When you have a small aperture, you have a large depth of field, so your subject and the surroundings may be in focus. When your aperture is wide, the depth of field is much smaller, so there is much less area around the subject that will be in focus.

aperture vs iris

photo by Simon Carr

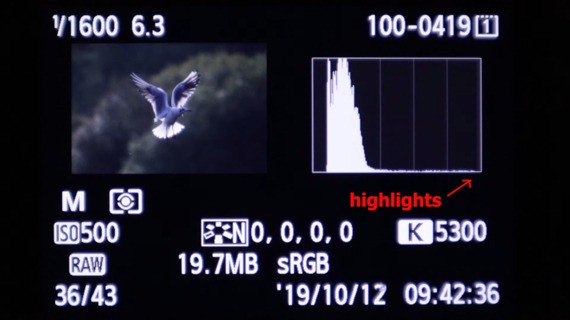
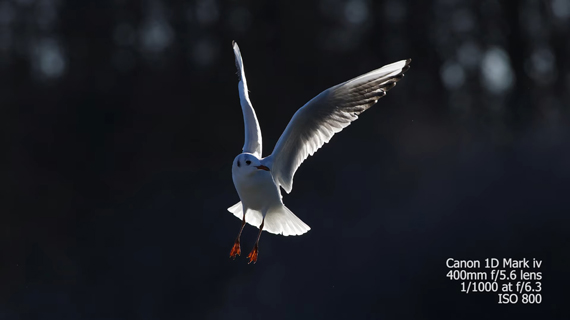
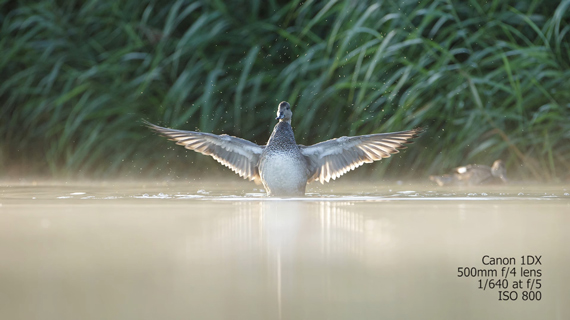
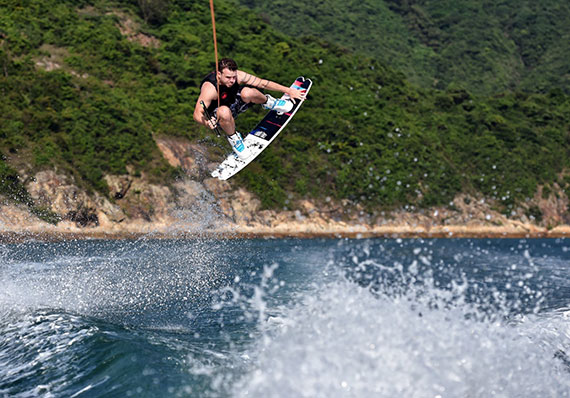
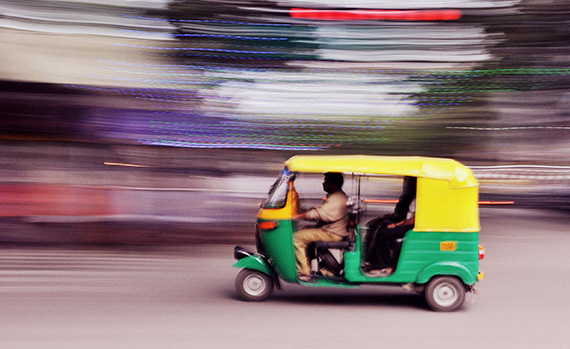
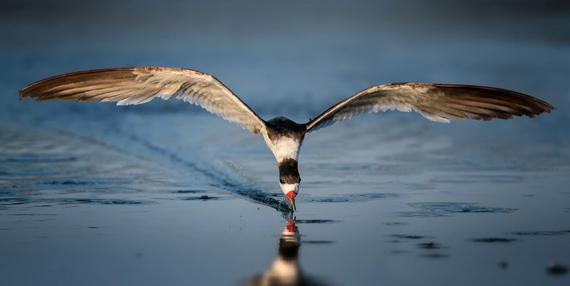
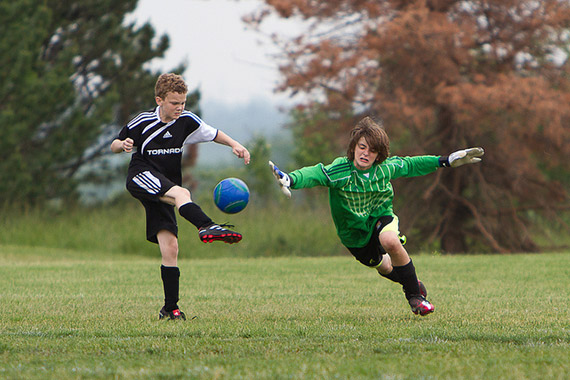
Shutter speed is the duration of the exposure. The shutter must be open to allow the light in; therefore the longer it is open, the brighter the exposure will be. Shutter speed also controls how you capture movement in a photo. If you want to freeze a moving subject, you need to use a fast shutter speed.

The trick is to combine your aperture and shutter speed settings for the best result. If you get the balance right, your photo will be perfectly exposed, and you will have creative control over the look of the image.

motion blur

photo by Scott Swigart

Of course, this is easier said than done. To help you manage the challenge, you now have the option of Aperture and Shutter Priority. These semi-automatic modes allow you to take control of one setting, and the camera sets the other automatically. This lets you have some creative input, with the safety net of knowing the camera will take care of the level exposure. You decide how you want your photo to look, and the camera will make sure it is correctly exposed.

So which do you choose: Shutter Priority or Aperture Priority? Well, it’s all a matter of…priorities.

Remember that aperture controls depth of field. So if the range of focus is the critical element in your photo, choose aperture priority. You can set a small aperture to maximize the depth of field, or a large aperture to concentrate the focus on the subject. Either way, the camera will adjust the shutter speed to give you the best exposure.

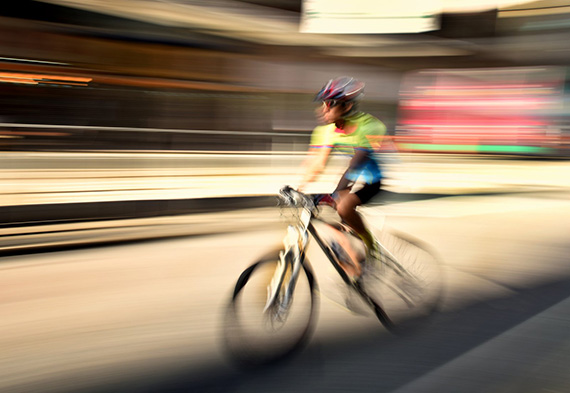
Shutter speed controls movement in a photo. If controlling a moving subject is the critical aspect of your picture, choose shutter priority. This will allow you to set a fast shutter speed to freeze the moving subject, or a slow shutter speed to capture blurred motion. Whichever shutter speed you choose, the camera will take care of the aperture so your photo is correctly exposed.

freeze action

photo by Tom Childers

So your choice of Aperture Priority or Shutter Priority depends on the type of subject you are shooting, and how you want it to look in the final photograph. It really is an ideal marriage of art and technology, allowing you to concentrate on your creative choice rather than on technical issues.

There is so much to this subject; a short article like this can only scratch the surface. However if you have been reading your camera manual and scratching your head (like many people do) this quick introduction in layman’s terms should help you to make some sense of Aperture and Shutter Priority.

About the Author:
Andrew Goodall writes for https://naturesimage.com.au/ and is a nature photographer based in Australia. He manages a gallery in Montville full of landscape photography from throughout Australia.


Go to full article: Aperture and Shutter Priority Modes on Digital Cameras

What are your thoughts on this article? Join the discussion on Facebook

PictureCorrect subscribers can also learn more today with our #1 bestseller: The Photography Tutorial eBook

The post Aperture and Shutter Priority Modes on Digital Cameras appeared first on PictureCorrect.


from PictureCorrect https://ift.tt/32HTySZ
via IFTTT

PictureCorrect.com: Interesting Photo of the Day: An Ant Investigates a Marble

Even the miniscule can be boldly beautiful. Thanks to the macro lens, we can capture the extreme beauty in the tiniest subjects—things that might otherwise be overlooked. This ant seems to be tip-toeing off a water droplet on the surface of a pond:

A curious ant investigates a shiny marble.

“Leave the world 2” by Nunu Rizani (Via Imgur. Click to view full size.)

But not everything is as it seems. A reflective marble sits motionless on the top of a wet garden table, mimicking the look of a falling droplet. Photographer Nunu Rizani captured this moment right in his own backyard in Bandung, West Java, Indonesia.

Rizani used a Canon EOS 7D to take this photograph with these settings: 100mm, f/7.1, 1/100 second, and ISO 800.


Go to full article: Interesting Photo of the Day: An Ant Investigates a Marble

What are your thoughts on this article? Join the discussion on Facebook

PictureCorrect subscribers can also learn more today with our #1 bestseller: The Photography Tutorial eBook

The post Interesting Photo of the Day: An Ant Investigates a Marble appeared first on PictureCorrect.


from PictureCorrect https://ift.tt/2ZKBiaA
via IFTTT

PictureCorrect.com: How Versatile is a 50mm Lens?

The 50mm focal length is one of the most popular focal lengths among photographers. One of the, ahem, prime reasons for this is its perspective: the so-called “nifty fifty” shoots very similarly to how our eyes perceive the world. But how versatile is the 50mm lens? Photographers Becki and Chris try and answer this question in today’s video as they capture some portraits using a 50mm lens.

“50mm is really good for portraits and lifestyle photography. It’s also really good for detailed shots of houses and homes.”

In a full-frame camera, a 50mm focal length is not that wide. It’s more in the telephoto range. So if you’re looking to take portraits indoors in a confined space, using a 50mm lens will be a challenge. However, for lifestyle portraits and interior detail shots, a 50mm lens works wonders. You can see some pretty awesome examples in the video above.

Besides shooting people and lifestyles, you can even use a 50mm lens for food and product photography. The lens performs beautifully when it comes to capturing details. Also, this focal length has minimal distortion, which is essential in these genres of photography.

Another great thing about the 50mm lens is that every camera manufacturer has an affordable version of it. They are light, perform brilliantly and produce high-quality results. This makes the 50mm lens an easy beginner’s lens. However, if you are just starting out, you might want to wait a bit. Go for the nifty fifty once you are comfortable using your kit lens, or else you might feel the fixed 50mm is restrictive.

Are you a fan of the 50mm lens?


Go to full article: How Versatile is a 50mm Lens?

What are your thoughts on this article? Join the discussion on Facebook

PictureCorrect subscribers can also learn more today with our #1 bestseller: The Photography Tutorial eBook

The post How Versatile is a 50mm Lens? appeared first on PictureCorrect.


from PictureCorrect https://ift.tt/3gDtcet
via IFTTT

PictureCorrect.com: Released Today: Getting Off Auto Mode With Your Camera

Do you ever feel like your camera’s Auto Mode is holding you prisoner? There is a common fear behind leaving Auto Mode and taking full control of your camera. Much of that fear is needlessly entrenched in our minds. This brand new step-by-step guide is designed to give you full creative control of your camera. It is currently 71% off today for the launch sale if you want to check it out. Launch sale found here: Getting Off Auto Mode at 71% Off

off auto mode ebook

Master Digital Cameras (see inside)

We all have a photography comfort zone, and it can be quite scary to push out of it. In fact, much of the time, the Auto Mode can do an O-K job — so why should we even bother?

The more control you have over your camera, the better you’re able to translate your vision into a great photo.

Some of the Many Topics Covered (over 250 pages):

  • Confidently capture the moments in front of you without having to fumble with numbers, or worry about calculating the correct settings on your camera.
  • Take full creative control over your images – finally producing photographs with fancy effects just like the pros.
  • Nail your exposures every time instead of just snapping and hoping the camera will capture it the way you want.
  • Get those wonderful blurry backgrounds that you see the professionals create.
  • Be creative with motion subjects. You can create light trails, freeze a falling subject, and even make objects look like they’re floating. The possibilities are endless!
  • Easily deal with difficult shooting scenarios like photographing darker skin tones, shooting snow, creating silhouettes, and shooting against the light, among others.

Walk-through exercises are sprinkled throughout the guide. So keep your camera handy and follow along as you read. Treat the assignments as experiments. Allow yourself to observe the effects of your camera whenever you change settings. The more you familiarize yourself with your camera. The better you get.

How to Get a Discounted Copy Today (With Bonuses):

Currently 71% off which ends soon (normally $100, currently just $29). It also comes with an impressive 365-day happiness guarantee so there’s no risk in trying it. P.S. try the coupon code picturecorrect at checkout for an even larger markdown.

Launch sale ending soon: Getting Off Auto Mode eBook at 71% Off


Go to full article: Released Today: Getting Off Auto Mode With Your Camera

What are your thoughts on this article? Join the discussion on Facebook

PictureCorrect subscribers can also learn more today with our #1 bestseller: The Photography Tutorial eBook

The post Released Today: Getting Off Auto Mode With Your Camera appeared first on PictureCorrect.


from PictureCorrect https://ift.tt/3gTUOw7
via IFTTT