Relevant reminder: only a little while left for Shooting Skies at 80% Off
Lighting plays a crucial role in photography. It can bring a photograph to life, it can generate effects, including spectacular shadows or silhouettes, or it may have a distinctly negative influence by creating unwanted glare and reflections.
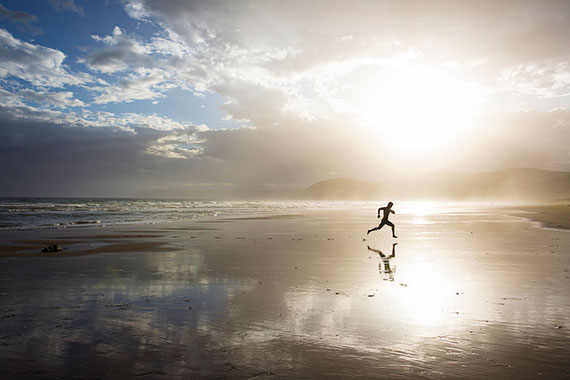
Photo by BMcIvr; ISO 100, f/13.0, 1.200-second exposure.
This is a quick guide to introduce the beginner to one of the most important aspects in photography: lighting. The guide is broken down into three parts. Part 1 talks about hard and soft light, part 2 looks at natural and artificial light, and part 3 examines light intensity and depth of field.
Part 1: Hard and Soft Light
This first section examines one of the most fundamental issues: the difference between shooting in hard and soft light.
Hard light produces well-defined, dark shadows and tends to originate from a single light source, which is usually either small or located far away. By contrast, soft light produces either soft shadows or no shadows at all. It can be generated from several light sources, by diffusing light using some kind of barrier (e.g., a diffuser or even just a sheet of paper), or by reflecting light off of different surfaces so that the subject is hit from various angles. In natural lighting conditions, hard light is produced on a sunny day when there is little or no cloud cover, and when the sun is high in the sky—which is something that is generally to be avoided, particularly by beginners. Shooting in other kinds of weather, such as cloudy days, foggy conditions, or even when there is air pollution, will produce soft light, as the sun’s rays are reflected or diffused by the particles in the air (moisture, pollution, etc.).
In general, the size of the light source is inversely proportional to the hardness of the light, meaning that smaller light sources produce harder light.
Soft light, on the other hand, can be created using reflectors or diffusers:
Reflectors: The action of reflecting light essentially turns the reflector into a secondary light source. All kinds of things can be used as reflectors, whether shooting indoors or outdoors. These include professional reflectors or just sheets of paper.
Diffusers: In natural lighting conditions, clouds are great examples of diffusers. In artificial lighting conditions, any semi-transparent material that diffuses or softens the light can be used. Lamp shades are a great example of light diffusion. When shooting, even a thin white cloth can be used.
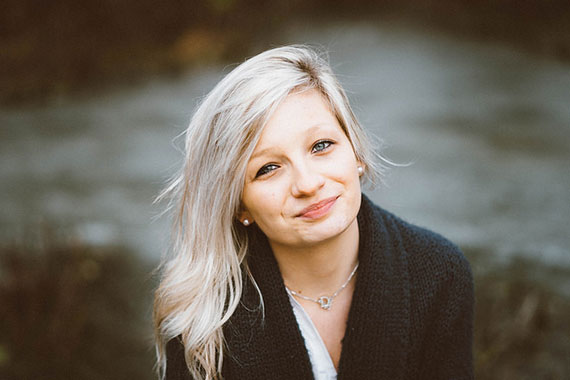
Photo by Antoine Robiez; ISO 200, f/1.6, 1/1250-second exposure.
Both types of light have their own advantages and disadvantages. Hard light can be used to create images with sharp contrast and highlights, emphasizing shape and texture. It can be used to enhance the 3D effect of an image and in general to create dramatic effects. However, hard light is difficult to work with, and it is generally considered unsuitable for many—if not most—situations, particularly when photographing people.
Soft light, by contrast, creates lighting that is more even, which better depicts the colors and shapes of the subject. The choice of which type of light to use depends on the type of photography, the subject, and the desired effect, but soft light is usually the preferred choice, and it is certainly the safest choice for beginners.
Part 2: Artificial vs. Natural Light
Natural light refers to sunlight/daylight, while artificial light refers to all kinds of light sources, including fluorescent lights, electric lights, flash, and so on. I will discuss the differences between these types of light sources below.
Natural light
Natural light is less controllable, and it varies greatly depending on numerous conditions such as time of day, season, weather, and geographical location. To its credit, it does not require any equipment other than anything that you may choose to use as a diffuser, reflector, etc. The choice between using natural or artificial light is obviously more relevant for portrait or still life photography than it is for landscape or wildlife photography (where your choice is usually limited to natural light).
These are some factors that affect natural light:
- Weather. For example, a cloudy day generates soft light and is usually preferred in photography, as mentioned earlier. By contrast, sunny lighting conditions yield harder, brighter light with shadows that are more defined. However, this just scratches the surface. Cloud cover is almost never even, and this leads to varying patterns in the intensity of light, both as it shines on objects and in the sky. Weather phenomena, such as storms and fog, also alter the intensity and color of light. This can create shots that vary from being totally unusable to exceptional images with spectacular effects. By softening the distant segments of an image, water vapor in the air generates a better feel of depth in landscape photography and often improves perspective.
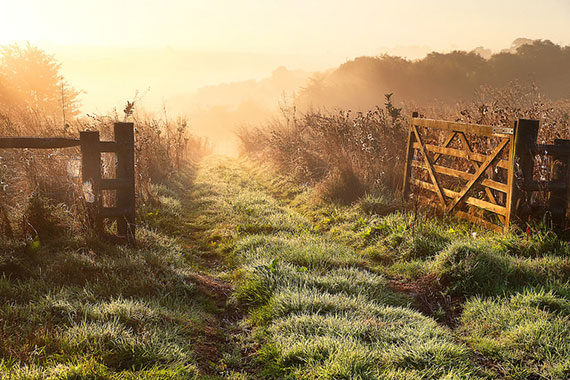
Photo by Tony Armstrong; ISO 400, f/8.0, 1/500-second exposure.
- Time of day. You can usually get softer lighting conditions early or late in the day. This light is generally warmer, producing images with less contrast compared to when the sun is high up in the sky. Sunrise and sunset are often considered ideal times for photography, particularly for landscapes and portraits. This time of day is referred to as the golden hour. During this time of day, the lighting conditions change rapidly, both in terms of intensity and color, and allow for shooting images that are far more varied, often within the space of minutes. Shadows also change in shape and darkness, as the sun sets or rises, becoming longer and lighter as the sun sets and vice versa.
- Location. In general, the further you are from the equator, the more time it takes for the sun to climb or set. Therefore, the soft light conditions found in the early morning and late evening can last much longer in such areas, and conversely, they pass much faster when in close proximity to the equator.
- Air pollution.Similar to mist and clouds, pollution acts as a diffuser of sunlight as the beams of light are reflected and scattered by the airborne particles.
Artificial Light
The challenges of using natural light are quite similar to those faced when shooting in artificial light. You must still understand how various light sources act upon a subject and how to produce the desired effect. Different sources of light can produce soft or hard light when shooting in a studio, but in this case, the photographer has direct control over elements such as hardness, distance, intensity, and angle. Furthermore, artificial light from different sources yields different color heat signatures. For instance, halogen bulbs are colder and produce a light that is blue in color, while tungsten bulbs, being hotter, produce light with a reddish hue.
Keep in mind that when you use different sources of artificial light, these must produce the same color heat signature. The only exception to this is if you’re shooting in black and white.
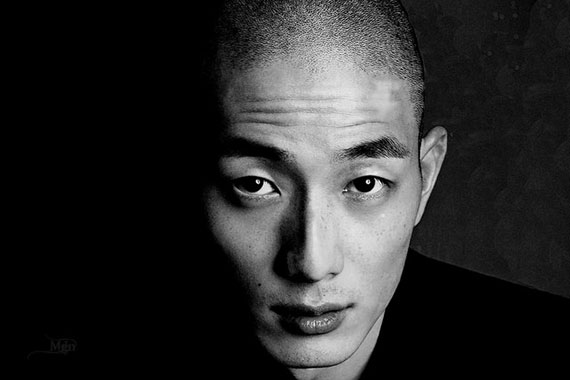
Photo by M.G.N. – Marcel
When it comes down to controlling and manipulating light, there are many options within photography, whether you’re dealing with artificial, natural, soft, or hard light. It comes down to understanding how images are affected by different lighting conditions, setting up the desired lighting environment, adjusting your camera settings (e.g., the white balance), and post-processing your picture in programs such as Gimp or Photoshop.
Part 3: Light Intensity & Depth of Field
In this final section, I will discuss the significance of light intensity in photography and what beginners need to know about it.
When shooting a photograph, a certain amount of light is required by the camera to create a picture on the digital sensor. The ISO (or chip sensitivity), the aperture setting, and the shutter speed determine the amount of light that is required.
You can shoot photos in very different lighting conditions. Shooting landscapes on a sunny day generally means shooting with a high intensity of light. While many beginners tend to think that these are ideal conditions, shooting with high light intensity often yields pictures with low detail and high contrast, which should in most cases be avoided. Conversely, a cloudy day generates diffused light with a lower intensity, which either casts faint or no shadows. It also smooths gradients, improves color accuracy, and preserves texture. When shooting in dark conditions where there is very little light, a high ISO setting (see below) and/or long shutter speed is required.
ISO
ISO is a rating of the light sensitivity of the digital camera’s sensor. In most cameras, this typically ranges from 100-12,800, with these numbers signifying the level of amplification that the sensor applies. Lowering the ISO settings will yield a picture with less “noise,” but it will also require more light, and hence a longer exposure time. Increasing the ISO setting will make the sensor amplify the light, thereby allowing shots to be taken in darker conditions. However, higher ISO settings carry the drawback of producing more noise and leading to a picture that will appear grainy.
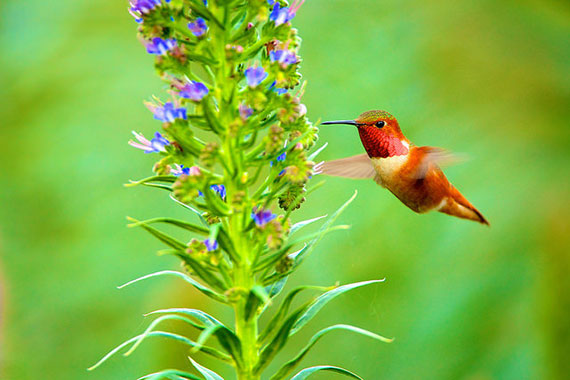
Photo by Danny Perez Photography; ISO 1000, f/4.0, 1/540-second exposure.
The size of the sensor in the camera plays a crucial role, with larger sensors producing less noise and hence better images. However, the cost of cameras with large sensors is also significantly higher.
Shutter Speed
When taking a picture, the shutter in front of the sensor is opened to allow light to reach it. The longer this shutter is left open, the more light will enter. When shooting moving subjects, high shutter speeds are required so as to reduce the amount of movement during the time that the shutter is open. This will enable freezing the object as it is shot and taking hand-held shots.
Long shutter speeds are useful at night when the camera requires more light to create the picture. For this reason, shooting at night will create more noise and therefore is improved by added camera stabilization (such as by using a tripod).
Aperture
Aperture is the opening in the lens through which light travels. The aperture size is varied using a device called the diaphragm. A smaller aperture allows less light through the lens and, conversely, a larger aperture allows more light to reach the sensor. Aperture settings are called f/stops. The smaller numbers (such as f/1.0 to f/3.5) signify the largest aperture opening and allow the most amount of light to the sensor. Conversely, a value of f/22 decreases the aperture size and allows far less light to pass through the lens. Each lens has a different range of aperture settings.
A photo’s depth of field (DoF) is also controlled by the aperture setting. DoF represents the distance between the nearest and the farthest point at which the image appears to be in focus.
Automatic Mode
In fully automatic mode, the aperture/shutter combination is chosen by the camera, based on its perception of the most suitable settings for taking the photo. This can produce decent results, but it is an approximation and rarely on par with pictures taken manually by a proficient photographer. However, for a beginner using this mode, the camera will handle the settings at any given light intensity, and the only challenge left is to stabilize it when shooting in low-light conditions (i.e. using a tripod or monopod).
Taking Control of the Camera
You can use the different camera modes depending on the style of photo that you’re aiming for. The most common are shutter priority, aperture priority, and full manual mode (for more experienced photographers).
The aperture settings can be selected in aperture priority mode, for example, if you wish to capture a certain DoF. In this mode, the correct shutter speed is calculated by the camera. In landscape photography, this is usually the preferred mode.
In shutter priority mode, you choose the exposure time. When shooting moving subjects, such as in sports photography, choosing a high shutter speed is important so as to freeze the subject. When shooting in night conditions, choosing a slow shutter speed is necessary so the sensor is able to collect enough light. It is similarly important when the camera is hand-held.
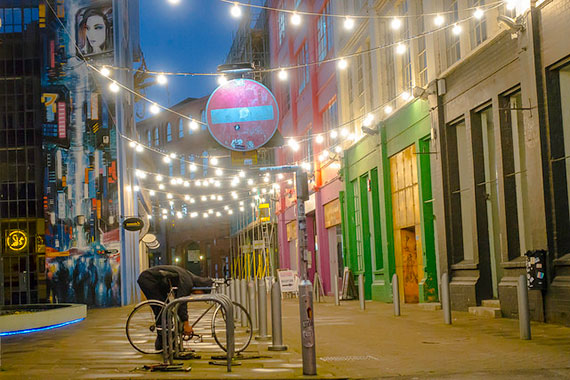
Photo by Damien Walmsley
The photographer has full control of both the shutter and aperture settings in full manual mode. This enables an experience photographer, who understands the effect of these settings, to precisely control the way each image is captured.
About the Author:
I have been a photographer since 1998. In the past, I have worked with commercial photography, photographing products for a local studio. I have also been involved with weddings shoots, and other types of gatherings. I have also shot photos for several sites including: Bluewyle Border Collies, World Sufi Foundation, and Globalphrase Ltd. Currently, I run the Eminent Photo photography blog.
I currently use a Canon 7D with a Sigma DG 120-400mm 1:4.5-5.6 APO HSM lens or a Sigma 28-70mm 1:2.8 EX DG lens.
For Further Training, Deal Ending Soon:
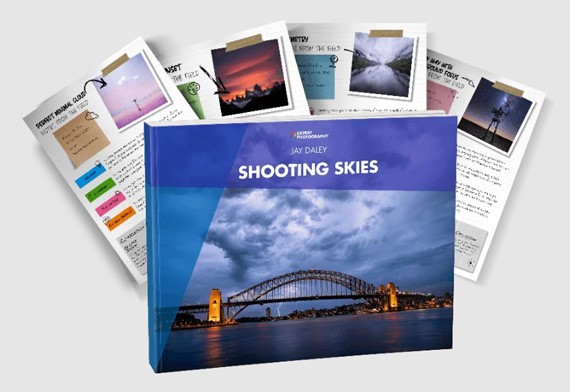
As a photographer, you’ll know how much luck is involved in finding dramatic skies. What if you didn’t have to leave it up to luck to capture frame-worthy shots? This new 172-page eBook shows you how to capture 30 types of stunning sky photos. Tutorials on storms, lightning, reflections, sunsets, the Milky Way, and more. It is currently 80% off today for the first 500 customers if you want to check it out.
You have probably taken hundreds of photos of the sky, but how many of them are good enough to print? You don’t need special locations. You don’t even need to fuss about the gear you have – a basic camera works fine. All you need is a plan. Take a look at these photos.
Launch sale ending soon: Shooting Skies Photo Guide & Cheat Sheets at 80% Off
Go to full article: A Beginning Photographer’s Guide to Light
What are your thoughts on this article? Join the discussion on Facebook
PictureCorrect subscribers can also learn more today with our #1 bestseller: The Photography Tutorial eBook
The post A Beginning Photographer’s Guide to Light appeared first on PictureCorrect.
from PictureCorrect https://ift.tt/2qy1UvP
via IFTTT


0 kommenttia:
Lähetä kommentti