Here’s part two of my series on how to take sharp photos—with more tips on keeping your camera steady.
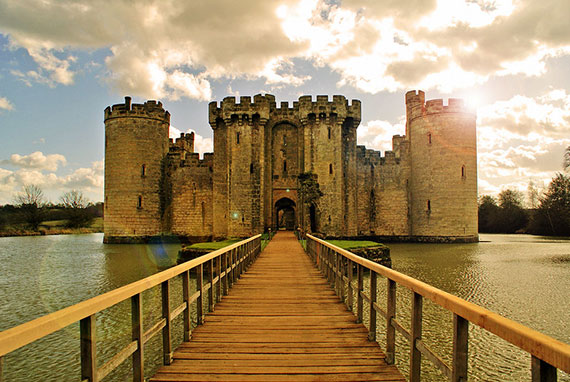
Photo by Mark0380; ISO 100, f/5.6, 1/320-second exposure.
You can support your camera on a tree, a lamp post, or some other stable thing. But what’s next? What if you want more flexibility? Or if you want to position your camera more carefully? What if you want more portability? You must think about camera supports. You’re going to have to carry something with you. It all depends on if you just want some extra help when hand-holding is difficult or if you’re interested in really long exposures of seconds, minutes, or even hours. Let’s look at some extra help first. But before we go further, it’s important to consider a couple of points:
- There’s no point in choosing a camera support that is too heavy, cumbersome, unwieldy, or inflexible to take with you.
- It’s too late when you get to the top of the mountain to know that you’ve left your support behind.
- There’s always going to be a trade-off. The most steady and flexible camera supports tend to be heavier and often more expensive.
So let’s see what you can do. If you go into a well-equipped photo store or online dealer, you’ll find all sorts of gadgets and gizmos to help you keep your camera steady. You’ll find clamps with screws that you can use if there’s some suitable wood around, devices with suction cups that will stick on your car window, mini tripods with fixed legs and some with flexible legs that you can wind around a post, and beanbags that will mold to your camera and provide a steady base.
I have some of these, and they can be useful—I use my beanbag quite a bit, for example. However, none of these will cover all your options, and you can’t carry them all around with you even if you can afford them. They all have specialized uses, and you’ll need to plan carefully which to take with you.
So what are your universal options if you want some extra help? Well, there’s one fact wherever you go, and it’s this: You’ll be standing on something—on the mountain, the street, the bottom of the canyon, the floor in your house even, and here’s where you can look for help. I usually rely on three options.
1. DIY camera support
The first option is easy to pull together with some household items, though there are commercial versions available. You need a piece of strong cord or wire (picture hanging material works well). It should be about as long as you are tall. One end should be fixed to a screw, which you can screw into the bottom of your camera. Then it’s simple: you let the wire dangle onto the ground and tread on it, pull the string taut as you hold the camera in place. This will give you enough support to use a lower shutter speed or stop down a bit. As always, if you can, take a few shots. Some will be steadier than others.
2. Put your camera on the ground
This technique is for taking pictures of ceilings in cathedrals and grand houses.
- Decide on how to focus. Autofocus often works well if there’s nothing like a hanging lamp in the way.
- Make sure that the self-timer is activated.
- Turn on mirror lockup.
- Set the camera to aperture priority, .An aperture of f/8–f/16 works well.
- Use a wide angle, depending on how high the roof is and how much you want to include in the picture.
- Put the camera carefully on the ground with the lens facing up. Position it as carefully as you can, and press the shutter release gently.

Photo by Michael Gabelmann; ISO 3200, f/4.0, 1/50-second exposure.
Then step out of the way and also be careful to stop anyone treading on your camera! The self-timer will blink or buzz, and after a while, the camera will take the picture. Typically the exposure can be a second or more. Now, this is a hit-or-miss technique, and you’ll probably need some computer work after to get the composition right, but it will keep your camera steady.
3. Buy a monopod
A monopod is a collapsing pole that you can use to support your camera. It helps to have a simple ball-and-socket head on top so that you can position your camera vertically and horizontally. There are many monopods on the market. I have one made by Cullman, which collapses to 15 inches, and I can put it in my bag. A monopod like this is small and light enough to take to the top of the mountain. Of course, the time may come when you want more help for longer exposures—then it’s time to buy a tripod.
Using a Tripod
There’s no getting away from it. Sometimes if you want to take super-sharp photos, you must take your tripod. You won’t see many people with tripods, and maybe just thinking of carrying a tripod makes you groan. Yes, it’s a pain, but no pain, no gain, right?
You can be a great photographer and take heaps of great photographs without using a tripod. So let’s ask why you would want to use one and what sort of tripod we’re talking about. If you work in a fixed location in your studio or your house, you can go out and get the biggest, heaviest, highest tripod you can find. If you travel, things become complicated because the tripod that folds up to nothing, weighs nothing, is very tall, and costs little doesn’t exist. It’s all a compromise. When you look for tripods for traveling, they can be quite expensive, especially if they’re made of carbon fiber or other exotic materials. Just for the record, my current travel tripod is the Benro Travel Angel. This is a Chinese-made, carbon fiber model.
Here’s the big question. Why take a tripod? In my experience, there are three areas where a tripod will really help you to take super-sharp photos.
1. Without a tripod, you can’t take a super-sharp picture at all.
A classic example is nighttime photography. Not so long ago, I was in the beautiful city of Budapest taking night shots of the Parliament building, St. Stephen’s Basilica, and the Chain Bridge with traffic streaming across. I might have got some kind of image if I had pushed up the ISO on my Canon DSLR, but no chance of the clear, low-noise, super-sharp pictures that I was looking for. I was also able to choose just the right exposures to capture the light trails of the cars streaming across the bridge.
2. Without a tripod, you can’t get enough depth of field.
You’re outdoors. You’re in daylight. Surely you can get a decent photo. Why would you use a tripod? Well, let’s have an example. Remember, this series is about super-sharp photos, which means a low ISO setting for low noise and a fast shutter speed for no shake. A little while ago, I was in the famous Stone Forest near Beloslav in Bulgaria. There was plenty of light there for handheld pictures, but I soon realized I had a problem. What I wanted was to take my photos so that they were sharp from very, very near in the foreground to very far away in the background.
This meant that I needed the greatest depth of field possible. This meant using the smallest apertures on my lens: f/11, f/16, even f/22. When I did that, I found it meant using quite long shutter speeds—too long for handholding. The solution, of course, was to use a tripod. Using a tripod meant that I could set my camera to aperture priority, set the smallest aperture for super-sharp pictures, and then get the greatest depth of field without worrying about shaking the camera. Of course, it’s a good idea to help all this by using the self-timer, mirror lockup, or remote release self-timer so you don’t move the camera.
3. Without a tripod, you can’t control your camera for creative pictures.
The reason why a tripod is so useful for creative photography is that it has two basic functions. The first, and most obvious, is to keep your camera steady. However, another function is so that you can carefully position your camera for the best composition and focus, and you can take several images with different settings from exactly the same viewpoint. An obvious reason for this is bracketing—that is, taking several photos with slightly different exposures so that you can pick the best one. It’s better if the actual viewpoint doesn’t change.
But perhaps more interesting are the creative possibilities. Let’s look at one vital area: movement. How can we capture movement in a still photograph? There are a number of ways, but one is to use a long exposure—one, two, three seconds, maybe more. If we can keep the camera absolutely still, we will be able to get a photo which contrasts the super-sharp part of the image with blurred areas. If we try to handhold the camera, everything will be blurred. A typical example involves photographing running water—ocean waves, a river, a waterfall. Here, you will set up your tripod, compose carefully, and then you can try different shutter speeds to get the effect you want. In every picture, the rocks, the tree trunks, the shore will all be super-sharp, but the water will blur. You can choose the images you like best.
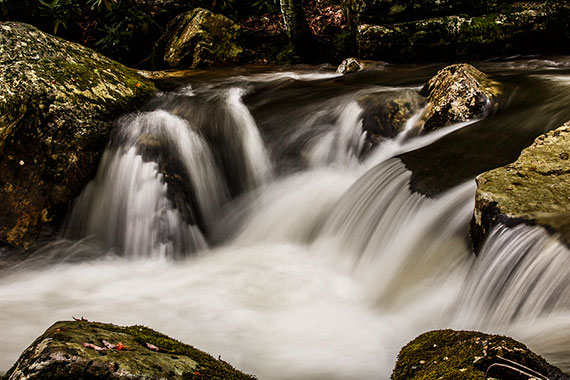
Photo by Richard Ricciardi; ISO 100, f/32.0, .6-second exposure.
There are other reasons for using a tripod, which I’ll touch on later, but a tripod is an essential accessory for the creative photographer. To summarize:
- Some pictures you can’t take at all without a tripod.
- Some pictures you can take, but they won’t be super-sharp without a tripod.
- Some pictures need a tripod if you want certain types of creative effects.
Choosing Lenses
I’m not much given to laying down the law or to providing rules about photography or anything else, but I’m going to tell you now that if you want to take super-sharp photos, you’re going to have to do something about your choice of lenses. I’m going to start with a piece of clear advice. Lenses are more important than cameras. Yes, it’s true. A camera is just a light-tight box attached to a lens. This means that if you want to take super-sharp photos, you must have lenses that you can rely on to make this happen.
Now, if you want to choose your lenses, you’re going to have to take certain factors into account. Are you going to choose a lens that has a camera permanently attached to it? Are you going to choose a lens or lenses that are interchangeable? Are you going to choose lenses with a fixed focal length, sometimes called prime lenses? Or are you going to choose zoom lenses?
Just in case you’re not clear on what these terms mean, a fixed focal length or prime lens has just one focal length: 28mm for a wide angle, 50mm for a standard, 100mm or more for a telephoto, and so on. A zoom lens, of course, is extremely convenient because it makes up a package that can include different focal lengths so you can buy a lens which can go, for example, from 28mm to 200mm.
Before I go any further, I’m going to tell you that it is possible to buy zoom lenses that can help you to take super-sharp photos. But (and there is a but) it is likely that such lenses will be very expensive and rather heavy. There are some exceptions, but you need to choose carefully.
So, let’s have a look at some of the things we’ll have to think about. First of all, every lens has a maximum aperture. So called wide-aperture lenses have a lot of glass and a maximum aperture of somewhere around f/2. There are several reasons for preferring lenses with a wide aperture:
- They allow more light in. This means that you can take sharp pictures when the lighting levels are low.
- It’s much easier to focus with a wide-aperture lens.
- Autofocus systems work better, and if you focus manually, you can see more clearly.
- Wide-aperture lenses give you much more control over depth of field (DOF).
- DOF is very shallow at wide apertures, and this can be vital for some pictures—portraits, for example, where you want the background out of focus.

Photo by WiLPrZ
So, is it better to choose prime lenses or zoom lenses? Let’s have a look at zoom lenses first. Zoom lenses are convenient and have some clear advantages:
- You don’t have to change your lens so often. This means that when the elephant charges toward you, you won’t have to fumble around choosing a different lens, and you’ll get less dust on your sensor if you don’t change your lenses much.
- You can frame your picture in many different ways from the same spot.
This can be a big help sometimes, but I have a special accessory—it’s called a leg. Often, the best approach to changing your composition is to walk. And there’s a problem. The more convenient and flexible a zoom lens is, the harder it is to get a good quality, wide aperture lens that you can afford and carry.
Many popular zoom lenses marketed as super zooms and most kit lenses supplied with many cameras are perfectly suitable for casual use, but they are not going to give you super sharp pictures. I’m saddened when people have spent a lot of money on buying a capable camera, and then use a less than top quality lens. So, if you want to buy a zoom lens, and you want to take super sharp photos, look for a zoom lens with a constant wide aperture and a moderate zoom range.
Like many photographers, I use a zoom for my walkabout lens—a lens I can take with me to the mountains and fields or for a casual strolls. I usually use my full frame Canon 5D Mark II, and for this I have a Tamron 28–75mm SP zoom lens. This is a fine lens, especially when price is a consideration.

Photo by Denali National Park and Preserve; ISO 100, f/4.0, 1/2500-second exposure.
However, if you’re interested in super-sharp photos, it’s worth having a look at prime lenses. Prime lenses have a lot going for them:
- They’re easier to design and simpler to manufacture than zoom lenses.
- Wide apertures come as standard.
- They are less likely to show distortion.
Now, you can pay the proverbial “arm and a leg” for wide aperture, prime lenses as well as zoom lenses, so where are the bargains? First of all, every camera maker has a standard lens—that is a lens of around 50mm focal length. These have been around for a long time and the quality is good. One example in the Canon range is the Canon 50mm f/1.8, often mentioned as the best bang for your buck. But there’s a downside. The construction is, well, a kind word is cheap—it’s plastic almost everywhere. The focusing is pretty old-style and the manual focusing ring is skimpy. But the glass is top-notch, and this lens with its wide aperture is well up to the standard of my full frame DSLR and is a great portrait lens with a crop sensor camera. And it’s very light, so you can carry it all day long and if an accident should happen, you can replace it for about $100.
Using a standard lens makes you take a disciplined approach, and you can use it in many different situations, especially if you’re willing to use your legs. Another way to be sure of getting super-sharp optics is to choose a macro lens. Macro lenses are specially corrected to take 1:1 size pictures of objects such as coins or insects. But they make super-sharp general purpose lenses. I used the Tamron 90mm in my film days and now use the Canon 100mm f/2.8 macro lens. Macro lenses aren’t the cheapest, but they do provide great value for money and extra versatility. A word of warning: check that the lens really is a macro lens. Some companies use the word macro loosely to mean half size or even just fairly close focusing.

Photo by Kamil Porembiński; ISO 100, f5.6, 1/640-second exposure.
So let’s just say it again: Lenses are more important than cameras. And if you want super-sharp pictures, choose a fixed focal length prime lens or a zoom lens with a moderate zoom range, a constant wide aperture, and good glass.
Just to clear up one point, what happens if you want to buy a lens with the camera attached? My personal opinion is that the marketing gurus tend to emphasize the cameras rather than the lenses. Also, modern digital cameras are made by traditional camera makers like Canon and Nikon, and the new kids on the block like Sony and Panasonic, who have great expertise in electronics. Some manufacturers like Sigma and Fuji produce cameras with special wide aperture, high-quality, wide angle prime lenses.
There’s one other point, which is that some of the new companies have teamed up with famous lens makers: Sony with Zeiss, Panasonic with Leica, and I’ve seen HP cameras sporting Pentax lenses. This can be a help, as these famous lens makers won’t put their name to poor lenses. Also, read the reviews and forget the bits about the megapixels and zoom range and concentrate on the comments on lens quality. I like to check DPReviews and the pages from photographer Bob Atkins to get advice on lens quality. Just to finish my advice at this point: Once you have chosen a super-sharp lens, it’s vital to know how to use it.
Using Lenses
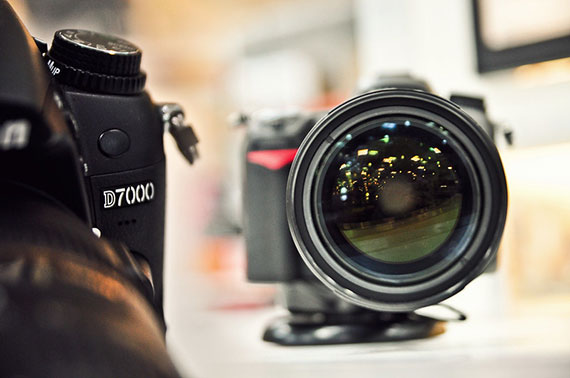
Photo by Cristian Bernal; ISO 640, f/2.8, 1/125-second exposure.
How can we use our lenses to get super-sharp photos? There’s bad news, good news, and even better news. The bad news is that even if you’ve chosen good lenses, you won’t get sharp photos if you don’t use them properly. The good news is that if you use even halfway decent lenses, with proper care you can get sharp pictures, and the even better news is that if you choose and use your lenses wisely, you have a great chance of super-sharp photos. I’m going to be honest. Photography is pretty easy if you just snap on auto everything, but if you want to get to the next level, it takes some effort. Using your lenses is crucial, and I’m going to concentrate on these two vital areas: finding the sweet spot and focusing. The first thing is to have a good look at your lenses and make sure you know what the good and bad points are. Even the best lenses are imperfect.
What is the sweet spot?
The sweet spot is the aperture that delivers the maximum resolution. You can find a sweet spot for every lens. Every lens has a maximum aperture where the lens is wide open and lets in most light and a minimum aperture where the lens is closed down. You won’t get the best super-sharp pictures at either the maximum or minimum apertures. At the maximum aperture, you’ll have a very narrow depth of field (DOF) and because of the limitations of lens design, your pictures will not be sharp at the corners, and the corners will be relatively dark. If you have a good lens, it will still be very sharp in the centre even when wide open, and you can can get a sharp photo if your main subject is in the centre. You might think that the obvious solution to this is to close the lens down as far as you can. The problem is that once you close your lens down to f/16, f/22, f/32, and so on, you’re going to get hit by diffraction.
What is diffraction?
Diffraction is quite a complicated concept, but briefly it means that straight rays of light do not like being pushed through little holes. They react badly, and your pictures will be blurred and soft. All this means that somewhere between the maximum and minimum aperture, there’s an aperture that will give you the best definition. In most lenses, this is two or three stops down from the maximum, so somewhere around f/5.6, f/8, or f/11 will give you the best definition. If you read reliable lens reviews, you’ll probably see a diagram that shows you the sweet spot aperture. This shouldn’t stop you from using other apertures when you need to, but it’s worth understanding that you’ll lose some sharpness.
When it comes to zoom lenses, there’s another factor to take into account. Many photographers use wide angle and telephoto zoom lenses. These can deliver excellent results, but it’s usually the case that they have problems when used at the widest or longest settings. Wide angle zoom lenses usually have maximum distortions at their widest settings and often are softer and darker in the corners. Telephoto zooms are typically poorer at their longest settings. If you have a telephoto lens that goes to say 300mm, you may find that after 250mm or so the performance drops off. You can still use the widest and the longest settings, but again, you might lose some sharpness. Now we need to address one of the central questions of super-sharp photography, focusing.
Focusing
If we can’t focus accurately, we won’t get sharp photos. A camera lens can only focus on one plane. Only objects at the actual distance focused on can be really super sharp. If you focus the lens at 10 ft or 20 metres, only objects at 10ft or 20 meters away can be really sharp. This means than when you see a super-sharp photo, it’s not equally sharp all over. It’s an illusion. This is because the human eye has limited ability to see certain things.
You can easily check this for yourself. As you drive down the road, you’ll see many colorful billboards, which seem sharp and clear. Get up close, and you’ll see that they are blurred and fuzzy. It’s the same with a photo, whether film or digital. You really have to bear in mind the DOF, how big you want your picture to be, the viewing distance, how good the lighting is, and how good the viewer’s eyesight is. There’s no point in judging from your camera’s screen or a small enlargement. You need to think big. A super-sharp picture needs to look good when it’s printed on good quality paper at full or double page size or viewed at 100 percent on a good quality screen. All this means that focusing is crucial, but unfortunately accurate focusing is no easy matter.
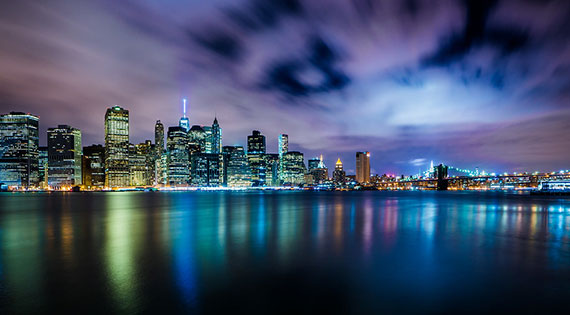
Photo by zaid3000; ISO 100, f/7.1, 30-second exposure.
It’s easy to believe that modern technology is always a matter of improvement. Modern digital cameras often emphasize convenience over accuracy. They have smaller and duller viewing systems than many older designs and are not well equipped for manual focusing. Manual focusing? Surely with autofocus systems, we have solved the problems. In short, the answer is no! There’s a general problem. Auto exposure, focusing, and auto everything just results in auto photos. If you want your photos to be striking and individual, creative, and arresting, you need them to reflect your view of the world. And it’s a sad fact that autofocus works best when you need it least. If you want to be a top photographer, you’ve got to be better than auto.
And then there are inbuilt problems. Are autofocus systems accurate? Often not. This is because modern cameras and lenses are mass-produced and production variations can result in significant inaccuracy. This is why some top end cameras have special settings where you can actually fine tune your focusing system for your specific lenses. This is tricky, and you might have to spend a lot of time and money trying to get it right.
The next problem with autofocus systems is that they rely on autofocus areas or spots. Normally when you look through your viewfinder, you’ll see some autofocus guides, maybe a spot in the center, maybe lights at the edges. It’s not legitimate to expect your camera to focus on anything unless the autofocus spot is directly over it. You might have seen those films where the hitman uses a laser to guide the bullet to the target. The same principle applies. This was one of the classic problems in the early days of autofocus, and it’s still worth thinking about today.
Some years ago, a good friend of mine, a top class middle distance runner, told me he’d bought an autofocus camera. Then he showed me his prints. He had carefully posed his two sons and taken their photo. Why were the boys’ faces blurred and the background pin sharp? Easy, the central focus spot had missed their faces and picked out the wall behind. The lesson is simple: autofocus will only work if you actually focus on the subject you want sharp.
Let’s take a couple of real-world examples. The first one is a portrait. You’re a photographer. Your girlfriend/wife, boyfriend/husband, even your boss would like a portrait. You’re keen to please. You sit them down against a plain background. You have some nice window light. You know that most good portraits are not head on. Besides, your girlfriend wants to show you her best side.
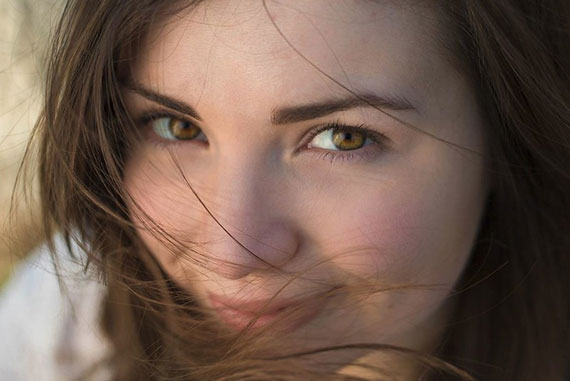
Photo by Gabriel Osorio
So your subject is sitting there, and you know that a portrait needs sharp eyes. But wait a minute, one eye is nearer than the other. Yes, you want the nearest eye to be sharp. You’re not looking for sharp ears, a sharp nose or great details of the wrinkles in your sitter’s neck. No, it’s the eyes that have it. How are you going to make sure that you focus on the nearest eye? Well, you can start with your central focus spot and aim it over the nearest eye. Trouble is that this will mess your composition up. It’s not likely that you want a portrait with an eye bang in the middle. So how can we deal with this? First, and often recommended, is to use your central focus spot, focus on the nearest eye and then lock the focus, perhaps by half pressing the shutter release, and then move the camera so that you can compose the picture properly. This will certainly help, but there are still problems with this approach. In the time it takes to move from focusing to composing:
- You might have moved nearer or farther.
- Your sitter might have moved nearer or farther.
- The fleeting expression you were looking for may have vanished.
- You’ve introduced some camera shake.
It’s really not satisfactory. Another thing you can do is to try using one of your off-center focusing points. It’s just possible that the eye will be exactly where you want it but if not, you’ll still have to move. I think you’ve got a couple of other options depending on your equipment.
One solution works well if you’ve got plenty of megapixels. It’s a tip from the old days of medium format photography, which is to stand well back so that there’s plenty of empty space around your picture. Use your autofocus directly on the nearest eye and take the picture. Your picture will be badly composed, but later on you can crop the photo exactly the way you want in the computer. Using a 21 megapixel camera like my Canon 5D Mk II, you’ll still have 10–15 megapixels to play with which is enough for a great personal portrait. An added bonus is that you can crop your picture several different ways.
The next tip may seem a bit bizarre. Switch your autofocus off and focus manually. Yes, I said manually. If you have a wide aperture lens and a good bright viewfinder that is properly corrected for your eyesight, you might be able to focus fairly well, and your composition problems will be solved.
Now let’s have a look at close-up or macro photography. It’s easy to get stressed out with technique here, but many of us love to take pictures of flowers and butterflies and so on.

Photo by Heidi; ISO 200, f/8.0, 1/160-second exposure.
So, how are we going to focus on a flower? The depth of field close up is very narrow, and if we just aim our camera at the flower and autofocus, we’ll simply get the bit in the middle sharp. For me, this is where using a tripod with manual focus works well. Even better if you have Live View. With Live View, you can compose and focus on the LCD screen of your DSLR. When I first bought a camera with Live View, I didn’t bother with it at all. But here, it’s a great solution. Using Live View, I can compose my picture accurately, move my focus area to exactly where I want, over a stamen or a water drop, and then using manual focus, I can carefully adjust the sharpness using 5x or 10x magnification. In many out-and-about situations, autofocus often works pretty well. But you still might miss some shots. One possible solution is to consider switching off your autofocus and setting your lens to the hyperfocal distance or use focus zones.
What is the hyperfocal distance?
It’s a pretty easy concept to understand: Focus your lens at the hyperfocal distance and everything from from quite near to infinity will look sharp. In practice, it means making sure you have plenty of depth of field. For example, it might mean setting your lens to f/11, focussing on 6m/20ft and then every picture taken between 3m/10ft and infinity will look sharp. The hyperfocal distance is different for every aperture/focal length combination. If you want to use this approach, you might get some tables from the manufacturers, a website or a photobook, or try some tests yourself. If you want to shoot super-sharp pictures, you’ll need to take a critical approach. A variation is to use focus zones.
What are focus zones?
Focus zones follow the same principles, but they don’t include infinity. For example, you might find that if you set the same lens at f/5.6, then everything from 5m/15ft to 15m/35ft will look sharp. Before I finish this section, it’s worth saying a couple of things.
Super-sharp pictures are not necessarily great pictures; they can be super boring as well. Still, I’ve seen lots of well-composed, beautifully coloured or toned pictures that lack the final wow factor because there nothing in them that is super sharp. If we really want to move on and develop our photography, we’ve got to improve in lots of different ways.
Summary
So to recap, to get super sharp photos we need to do the following:
- Use a low ISO to avoid digital grain or “noise.”
- Eliminate camera shake and unwanted subject movement.
- Use a sweet spot aperture.
- Focus our lenses precisely on the main area of interest.
About the Author:
Hi. I’m John Rocha (johnrochaphoto). I’m a British photographer based in Sofia in Bulgaria. Most of my work now involves rights managed and royalty-free stock photography. I’ve made the transition from the darkroom to the lightroom in the last few years but I still experiment with film and non-camera photography.
Go to full article: More Tips on How to Take Sharp Photos
What are your thoughts on this article? Join the discussion on Facebook
PictureCorrect subscribers can also learn more today with our #1 bestseller: The Photography Tutorial eBook
The post More Tips on How to Take Sharp Photos appeared first on PictureCorrect.
from PictureCorrect https://ift.tt/2VUtfpl
via IFTTT


0 kommenttia:
Lähetä kommentti