sunnuntai 31. joulukuuta 2023

PictureCorrect.com: Discussion: What is Your New Year’s Resolution for Photography?

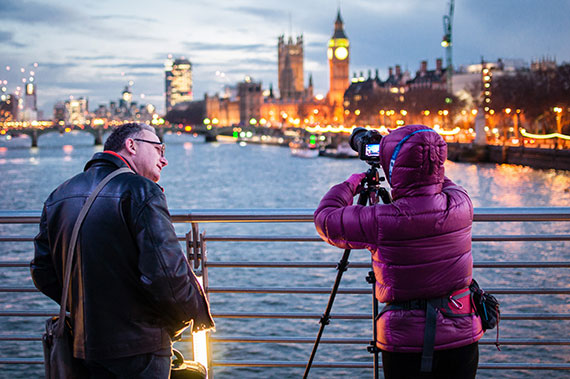
The beginning of a new year is truly a good time to set some goals for what you want to accomplish. Start off 2024 right! What is your New Year’s Resolution for Photography? We started this discussion on Facebook, it’s always great to make friends who are working towards the same goals.

Share & compare yours here: New Year’s Photography Discussion

new year's resolution

What is Your New Year’s Resolution for Photography? (Click to Join the Discussion)

Find the discussion here: What is Your New Year’s Resolution for Photography?

- - - - - - - - - - - - - - - - - - - - - - - - - - - - - - - - - - - - - - - - - - - - - - - - - - - - - - - - - - - - - - - - - - - - - - - - - -

The post Discussion: What is Your New Year’s Resolution for Photography? appeared first on PictureCorrect.


from PictureCorrect https://ift.tt/q0EX9Zk
via IFTTT

lauantai 30. joulukuuta 2023

PictureCorrect.com: Fireworks Photography Settings

Final day: only hours left for the Fireworks Photography eBook at 55% Off

Taking photos of fireworks can be tricky, but with the right camera settings, you can capture some beautiful images. Here are some starting settings you can use and adjust as per your needs:

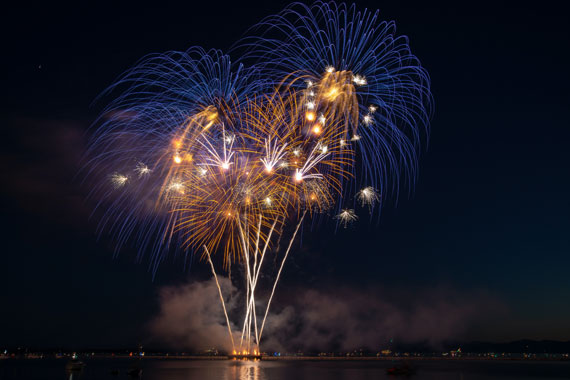
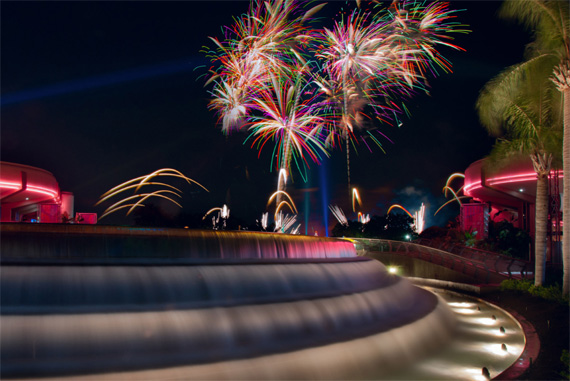
fireworks settings

Photo captured by Kevin Davison

Mode: Manual (M).

Aperture (f-stop): Depending on your lens, an aperture of around f/8 to f/16 should work well. Fireworks are bright, so you don’t need a very wide aperture. If you find that your shots are too dark, you can adjust this to a lower number. However, remember that wider apertures (lower numbers) also result in a shallower depth of field.

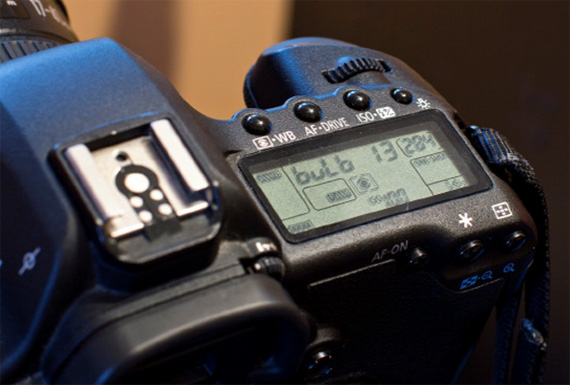
Shutter Speed: Because fireworks move and you want to capture the trail of light, you’ll need a slow shutter speed. Start with a shutter speed of about 1 second and then experiment with longer ones (up to 30 seconds), depending on the effect you’re looking for. You can even use the “Bulb” mode if your camera has this, which allows you to keep the shutter open as long as you hold down the button.

ISO: Start with a low ISO, like 100 or 200. You can increase it if your photos are too dark, but keep in mind that higher ISOs can result in more noise in your photos.

Focus: Auto-focus might struggle in the dark, so it’s usually better to switch your lens to manual focus. If you can, set the focus at infinity.

White Balance: Try starting with Auto White Balance (AWB). You can adjust this later if the colors don’t look right.

Image Format: If possible, shoot in RAW. This will give you more flexibility when you edit the photos later.

Stability: Because you’re using slow shutter speeds, any movement of the camera will result in blur. Use a tripod to keep the camera stable, and consider using a remote shutter release or the camera’s self-timer function to avoid shaking the camera when you press the button.

Remember that these are only starting points. Firework displays can vary in their brightness and color, and you might also want to capture other elements, like the crowd or the landscape. Don’t be afraid to experiment with different settings to get the photo you want!

For Further Training on Fireworks Photography:

With New Year’s Eve celebrations quickly approaching, we have been receiving requests for more training on how to photograph fireworks. Fireworks photography is indeed one of the most daunting types of photography. This in-depth tutorial eBook explains the process from start to finish, everything from gear and camera settings to composition and post-processing to achieve great results with fireworks of any kind. Currently 55% off to help photographers prepare for the New Year’s!

fireworks photography

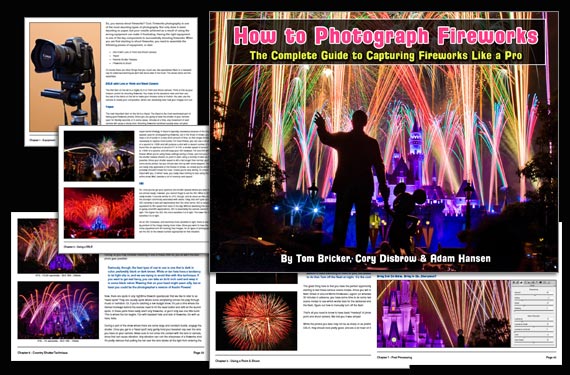
The How to Photograph Fireworks eBook

A common result of photographers new to fireworks photography is capturing nothing but bright white spots instead of colorful bursts. But with the guidance of this eBook in hand, you should be fully prepared to photograph brilliant fireworks displays.

Only hours left: How to Photograph Fireworks Guide at 55% Off

- - - - - - - - - - - - - - - - - - - - - - - - - - - - - - - - - - - - - - - - - - - - - - - - - - - - - - - - - - - - - - - - - - - - - - - - - -

The post Fireworks Photography Settings appeared first on PictureCorrect.


from PictureCorrect https://ift.tt/3WudHFi
via IFTTT

perjantai 29. joulukuuta 2023

PictureCorrect.com: New Year’s Resolutions for New Photographers

Many of us have received or bought ourselves new digital cameras for Christmas, and with this comes the zeal to create great images. Sadly, the chances of this happening are small, as most of us know that a camera doesn’t take great images, the photographer does. So what resolutions can you make that will start your photography journey in the new year on the right footing?

new year's photography

photo by Ricardo Liberato

1. Read your camera manual

Please don’t stop reading this article because I said this. Go back to the box and get the manual out. In order to become a good photographer you need to do just that. Unless you know the basic functions—and specifically, the creative modes—you’re going to struggle to get the good images you see in books and magazines. This is important if you want to proceed to the next resolution. So, at least learn the basic functions if you aren’t up to reading the whole manual.

2. Find a basic photography course

This can be a book, an online course, or a local photography course. Whatever it is, resolve to find something that is going to lay a foundation and teach you the basics. You need to get your foundations right from the get go. If you are a self-starter then find books, magazines, and Internet-based material that you can self-study. Find something that works for you.

3. Plan photography time

Photography is not something you just decide to do when you feel like picking up your camera and taking some shots. You need to plan uninterrupted photography time into your schedule. Not reading or learning time, but finger on the shutter button time. Time dedicated to taking photographs on a daily or weekly basis is so important if you want to go anywhere in your photography journey.

4. Discover your photographic passion

What do you like doing in your life? What are your hobbies or interests? If you are a stamp collector or an extreme sports person, the chances are that you will want to take photos of your passion. This is not always the case but it will help you discover your passion. So sit down, if you don’t already know, and write down what you love doing. Then ask yourself if any of these interests are what you like to shooting. There will be equipment limitations based on your camera and lenses, so work within these restrictions.

new year goals for photographers

photo by Brook

5. Think before you shoot

Put in your mind right at the outset of your photography journey that you are going to think before you shoot. The disease of digital is indiscriminate shooting without a plan, purpose, or thought. It’s like spraying a target with machine gun fire and hoping to hit the bull’s eye. Pretend you are shooting film and only have 36 exposures in your camera. If you can think before shooting rather than hoping that out of a hundred photos a few may be good, you are on your way to becoming a great photographer.

plan your shot

photo by Nick Page

Remember that just because you own a camera it doesn’t mean you are a photographer in the same way owning a box of paints doesn’t make you an artist. Resolve to do these things as you enter a new year with a new camera, and start your new photography journey as you learn. Happy shooting!

About the Author:
Wayne Turner has been teaching photography for 25 years and has written three books on photography. He has produced 21 Steps to Perfect Photos, a program of learner-based training using outcomes based education.

- - - - - - - - - - - - - - - - - - - - - - - - - - - - - - - - - - - - - - - - - - - - - - - - - - - - - - - - - - - - - - - - - - - - - - - - - -

The post New Year’s Resolutions for New Photographers appeared first on PictureCorrect.


from PictureCorrect https://ift.tt/xr4lsbD
via IFTTT

torstai 28. joulukuuta 2023

PictureCorrect.com: Top Cities for New Year’s Fireworks Photography

Related reminder: only a few days left for the Fireworks Photography Guide at 55% Off

As the clock winds down and the old year gives way to the new, cities around the world illuminate the sky with dazzling fireworks displays. For photographers, these moments offer a chance to capture the grandeur of light, color, and celebration. In this post, we’ll explore some of the cities that have historically hosted the largest fireworks shows for New Year’s and offer tips for photographers aiming to capture these magnificent displays.

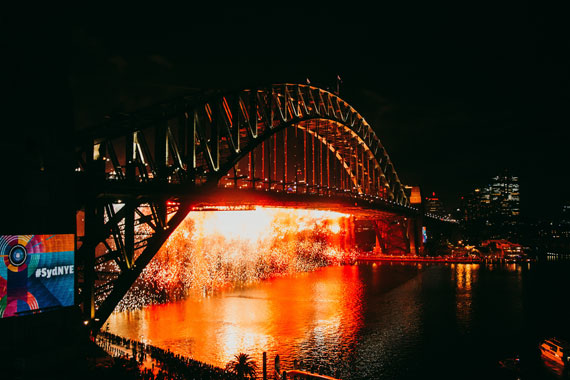
1. Sydney, Australia: A Blaze of Glory Over the Harbor

Sydney often kicks off the global New Year’s celebrations with a bang. The fireworks display over the Sydney Harbor, with the iconic Opera House and Harbour Bridge in the foreground, offers an unrivaled photographic canvas. The vibrant colors and reflections on the water create a mesmerizing scene.

sydney fireworks

Photo captured by Padraig Treanor

Photography Tip: Use a tripod and a remote shutter release to avoid camera shake during long exposures. Try to find a unique angle that includes the city skyline.

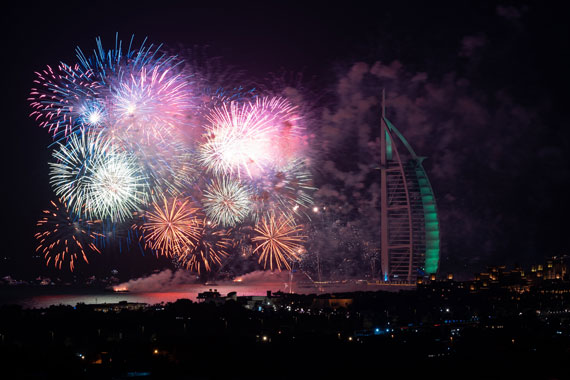
2. Dubai, UAE: A Fusion of Tradition and Modernity

Dubai is renowned for its extravagant display, often centered around the Burj Khalifa, the world’s tallest building. The synchronization of fireworks with the LED lights of the skyscraper creates a futuristic tableau.

dubai fireworks

Photo captured by Mo

Photography Tip: Experiment with different shutter speeds to either freeze the fireworks in sharp detail or capture their motion in a blur, creating an artistic effect.

3. London, England: A Historic Backdrop

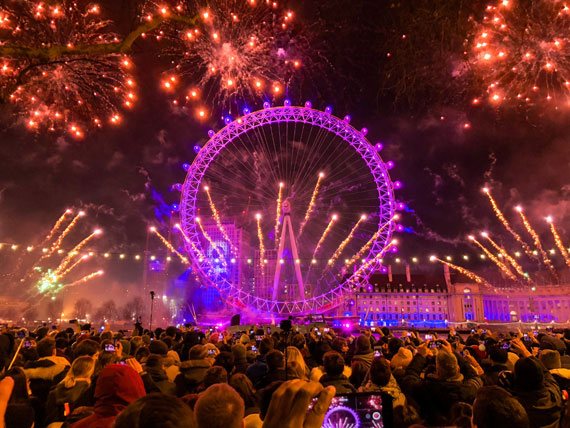
London’s fireworks by the River Thames, with the backdrop of the London Eye and the Houses of Parliament, offer a blend of modern spectacle and historic grandeur. The reflections on the Thames add an extra layer of beauty to the scene.

london fireworks

Photo captured by Kevin Hackert

Photography Tip: Consider a wide-angle lens to capture the breadth of the fireworks and the iconic London skyline.

4. New York City, USA: The Big Apple’s Big Show

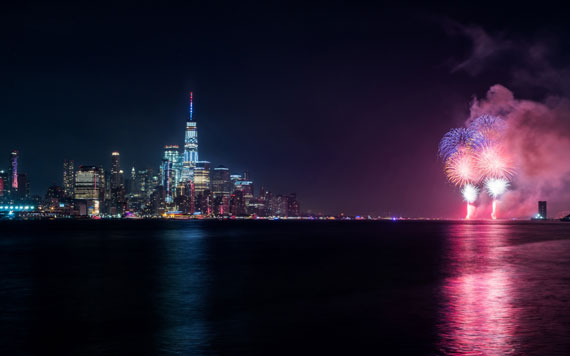
The annual fireworks display in New York City, typically over the East River or Central Park, is a quintessential American celebration. The city’s skyline provides a dramatic backdrop for the vibrant fireworks.

new york fireworks

Photo captured by Jack Cohen

Photography Tip: Scouting your location in advance is key. Look for spots that offer a clear view of the fireworks without obstruction.

5. Hong Kong: A Symphony of Lights

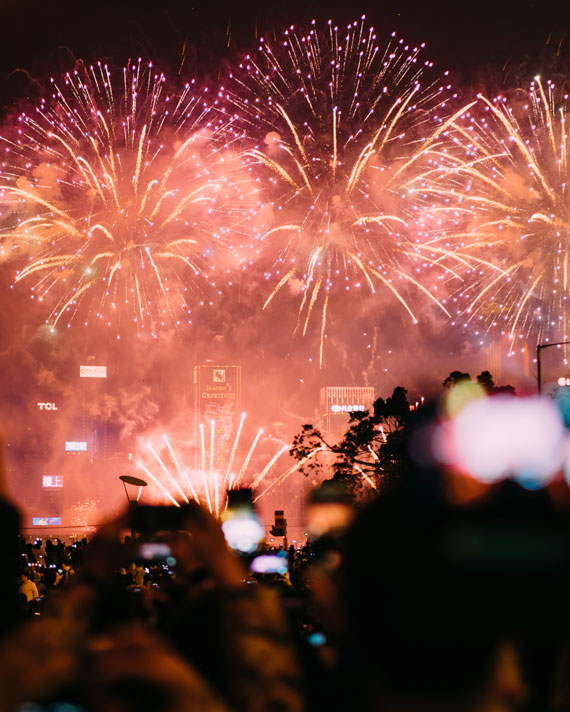
Hong Kong’s Victoria Harbour, surrounded by its famous skyline, presents a breathtaking scene for fireworks photography. The combination of the city lights and the fireworks creates a stunning visual symphony.

hong kong fireworks

Photo captured by Syuichi Shiina

Photography Tip: Play with the composition by including elements like boats in the harbor or the city’s skyscrapers to add depth to your photos.

Photographing New Year’s fireworks in these iconic cities can be a thrilling experience. Remember to check local regulations and access restrictions, especially in crowded public places. With the right preparation and creativity, you can capture the magic of these moments and start the new year with some spectacular shots.

For Further Training on Fireworks Photography:

Fireworks photography is indeed one of the most daunting types of photography. This in-depth tutorial eBook explains the process from start to finish, everything from gear and camera settings to composition and post-processing to achieve great results with fireworks of any kind. It is currently 55% off to help photographers prepare for the New Year’s Eve fireworks shows!

fireworks photography

The How to Photograph Fireworks eBook

A common result of photographers new to fireworks photography is capturing nothing but bright white spots instead of colorful bursts. But with the guidance of this eBook in hand, you should be fully prepared to photograph brilliant fireworks displays.

Deal ending soon: How to Photograph Fireworks Guide at 55% Off

- - - - - - - - - - - - - - - - - - - - - - - - - - - - - - - - - - - - - - - - - - - - - - - - - - - - - - - - - - - - - - - - - - - - - - - - - -

The post Top Cities for New Year’s Fireworks Photography appeared first on PictureCorrect.


from PictureCorrect https://ift.tt/NXb7HnG
via IFTTT

keskiviikko 27. joulukuuta 2023

PictureCorrect.com: Painting with Light: Intentional Camera Movement

Ever since I started taking photographs about 30 years ago, capturing the sense of movement to create abstract images has been a passion of mine, and when I discovered ICM, a whole new world of photography opened up for me.

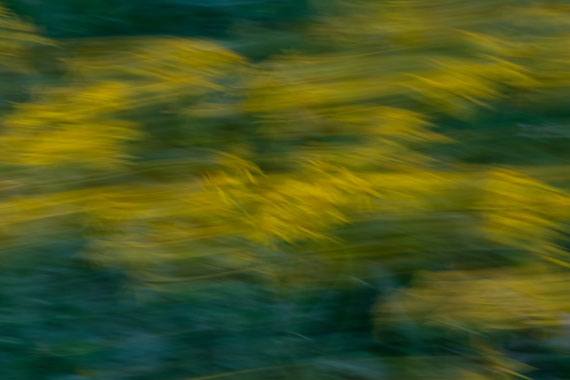
Intentional Camera Movement is the when the camera is moved in horizontal, vertical, diagonal, or random directions while the shutter is open. The resulting image is deliberately blurred and often abstract.

intentional camera movement

Photo captured by Suzanne Walker; f/25, 0.3s, ISO 200

ICM images are not what most people think of as traditional photographs. I describe it to people as “painting with my camera,” because my images are painterly and impressionistic. Others can be more abstract.

Each photographer finds their own process and develops their own style and signature—this is true for all photographers and for those who employ ICM in their work, thus, I offer these tips and techniques aware of our individual approaches to photography. As a photographer interested in ICM, you need to find your own way through the inspiration of others and develop your own style.

Tripod

Using a tripod is the best way to introduce yourself to deliberate camera movement. It’s an invaluable tool to start with by employing long sweeps from right to left and left to right in 2–3 second exposures under low light conditions. You need to be under low light conditions or use neutral density filters to allow you to shoot in daylight. Study your EXIF data after you’ve discovered what you like in your work; it will give you important information about how to set your shutter speed and aperture to achieve the look you’re going for in your photographs.

Shutter Speed

Shutter speed is probably the most important element to control what you want in your photos. I prefer, for my own work, to work between 1/20 and 1/5 of a second. In order to accomplish good results at these fairly fast slow shutter speeds, you need to move the camera very quickly with a strong follow through and camera set on “continuous shoot.” In daylight, setting your camera at its lowest ISO and closing your aperture down will help you get the shutter speed that works for you. I prefer to use aperture priority or bulb mode on my camera to achieve the slower shutter speed, because I’ve found that shutter speed priority will vary as the camera is moved particularly around light and dark areas in the subject matter.

Choosing Your Images

When it comes to choosing your best ICM images, it’s subjective, like all art. However, here are some guidelines to help you see beyond the initial photograph before you delete it! When you choose your images, certain interrelationships within the image you’ll want and others you won’t.

For example, the balance of colors, gradations and tonality— lightness to darkness within the image—will improve your photograph. Looking closely at your photo to find the image within the image is a great skill to develop because you can take an okay image and make it better through cropping—other images just cannot be improved. Interrelationships between light and dark, the “heaviness” in color or darkness needs to be balanced in an image. You do not want an image that is too dark or heavy on one side but rather, is equally weighted visually.

Layers of colors and tones need to be balanced, too. For example, a heavy layer at the top of an image that takes up 2/3 of the space with several smaller layers at the bottom of the image is not the best option because it’s not as pleasing to the eye. Cropping that layer to balance the bottom of the image is an option to consider.

Conclusion

Finally, experiment, experiment, experiment! Find inspiration in photographers you admire who take ICM images and have fun with it—play!! Experimenting with ICM will help you, as a photographer, find your own style, your own way of working with this approach to photography—you don’t want to copy another photographer, but be inspired by them!

If ICM is for you, you will find that your passion for it will grow daily and you’ll need several memory cards because this technique takes up a lot of space!

About the Author:
Article written by Hilary Anne Stephens Photography.

- - - - - - - - - - - - - - - - - - - - - - - - - - - - - - - - - - - - - - - - - - - - - - - - - - - - - - - - - - - - - - - - - - - - - - - - - -

The post Painting with Light: Intentional Camera Movement appeared first on PictureCorrect.


from PictureCorrect https://ift.tt/OExWwTv
via IFTTT

PictureCorrect.com: How to Photograph Fireworks eBook Deal for New Year’s

Fireworks photography is indeed one of the most daunting types of photography. This in-depth tutorial eBook explains the process from start to finish, everything from gear and camera settings to composition and post-processing to achieve great results with fireworks of any kind. It is currently 55% off to help photographers prepare for New Year’s celebrations. Deal ending soon: How to Photograph Fireworks Guide at 55% Off

fireworks photography

The How to Photograph Fireworks eBook

A common result of photographers new to fireworks photography is capturing nothing but bright white spots instead of colorful bursts. But with the guidance of this eBook in hand, you should be fully prepared to photograph brilliant fireworks displays. While the exposure fundamentals of aperture, shutter speed, and ISO are essential to great fireworks, it’s important to also be aware of the right accessories and set up for your shots correctly.

using bulb mode

How to use bulb mode for long shutter speeds

Some of the Many Topics Covered (50 Pages):

  • Equipment & Accessories Needed
  • Using a DSLR for Fireworks
  • Using a Point & Shoot for Fireworks
  • Composition
  • Using a Neutral Density Filter
  • Country Shutter Technique
  • Post Processing
  • Conclusion
fireworks fountain photo

In-depth tutorials on how to photograph fireworks in challenging conditions

Like post processing in general, there are a myriad of ways to approach the post processing of fireworks shots. To start, they describe general tips and explain how they are universally applicable, and then they apply the techniques to example photos, explaining how they change the overall result.

fireworks photography

Pages from How to Photograph Fireworks

How to Photograph Fireworks is a downloadable eBook PDF file, which can be viewed on a number of devices – laptop and desktop computers, iPhone or Android devices, iPads, and other tablets.

How to Get a Discounted Copy Today:

How to Photograph Fireworks is a downloadable eBook PDF file, which can be viewed on a number of devices – laptop and desktop computers, iPhone or Android devices, iPads, and other tablets. It is currently 55% off to help photographers prepare for New Year’s celebrations. It also carries a 90 day guarantee, if you do not find the eBook useful just let us know to receive a full refund. So there is nothing to lose in trying it.

Deal found here: The How to Photograph Fireworks eBook at 55% Off

- - - - - - - - - - - - - - - - - - - - - - - - - - - - - - - - - - - - - - - - - - - - - - - - - - - - - - - - - - - - - - - - - - - - - - - - - -

The post How to Photograph Fireworks eBook Deal for New Year’s appeared first on PictureCorrect.


from PictureCorrect https://ift.tt/TbQkZWD
via IFTTT

tiistai 26. joulukuuta 2023

PictureCorrect.com: This is Why RAW is the Best Choice for Your Photography

I want give you the rock-solid reasons why RAW is your best choice for a camera file format.

Don’t get me wrong: there is a time and place for the trusted and long-used JPEG format as well. I’ll touch on that too.

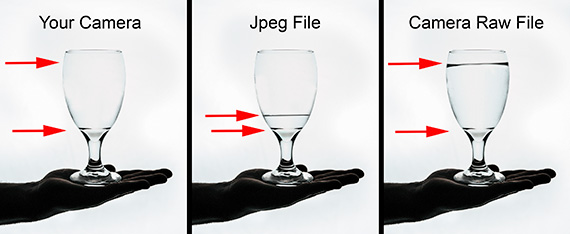
The “glass of water” metaphor

why shoot in raw

Original image by Nolan Simmons

On the left, we have a water glass that represents your camera’s digital sensor. The red arrows illustrate the fantastic capabilities of your camera’s imaging sensor. It is capable of recording a lot of information.

In the center, the glass has water in it. But it’s only about a quarter full. This picture represents what a JPEG file records and transmits to your memory card. It’s quite limited in its abilities, which we will discuss further in a minute.

On the right, we see a full glass that represents what a RAW camera file is capable of recording—virtually everything your camera sensor has to offer.

Think of it this way

  • RAW is a digital negative. In the old days of film, you would take your negative into the darkroom and carefully craft your finished picture. Today, your digital negative is brought into your post-processing software—but you still carefully craft your final image.
  • A JPEG file is summarily processed. It would be the same as if you dropped your film off at the drugstore, and you receive whatever they deliver to you.

The strange world of bits

  • A JPEG is an 8-bit picture file. It displays a maximum of 256 colors.
  • A RAW file is anywhere from 12 bits to 16 bits, depending upon the age and complexity of the camera. It displays anywhere from 68 billion to a whopping 281 trillion colors.

All those extra bits mean more information captured and transferred to the memory card via the RAW digital negative file.

Why do we call a RAW file a digital negative?

First, let’s examine the JPEG file. When you apply settings within your camera menus, those settings are recorded to the JPEG file. After the picture is taken, they cannot be removed.

Those same settings won’t affect the RAW file, which ignores those settings, because it knows you are going to process the negative yourself!

What about TIFF, you ask?

A JPEG is not only just an 8-bit file, it also is compressed in what is known as a “lossy” compression algorithm. This means that over time, a JPEG file slowly deteriorates every time it is opened, altered, and saved.

A TIFF file can be anywhere from 8 to 16 bits, depending on the camera. However, the biggest difference is that a TIFF file is uncompressed. So, there is no loss of quality over time. However, a TIFF file created in-camera also is biased by the presets and these presets cannot be removed after exposure. Plus, TIFF files take up a lot of storage space—more than RAW files.

What you need to know

why shoot in raw

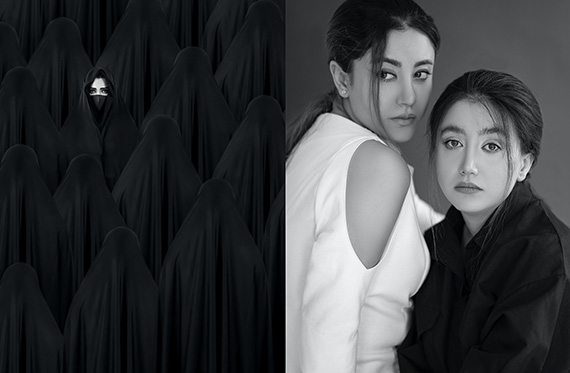
Photos by Shahin Khalaji

Only the RAW format will give all the information that you need to capture every level of tone that your camera is capable of producing in a file size that is manageable.

In a RAW processor (such as Adobe ACR, Lightroom, Luminar or Aurora), you can methodically and precisely set:

  • Exposure
  • Noise levels
  • Shadow details
  • Highlight details
  • Mid-tone details
  • Sharpness
  • White balance
  • Many other options

Let’s talk about white balance for a second

why shoot in raw

Original image by Claudio Schwarz

Some scenes are guaranteed to skew the white balance of a JPEG or a TIFF camera file. Only RAW gives you firsthand non-destructive control over the white balance of your pictures using post-production software—after the picture is taken.

Should you ever shoot in JPEG?

The JPEG format has three things going for it that can be helpful to a photographer—if you can overlook the detriments.

  • It’s the smallest file size. You can fit many more JPEG pictures on a memory card than either RAW or TIFF files.
  • It has the fastest transfer speed from the camera to the memory card. This can be helpful if you’re photographing sports or wildlife. If your camera stops to catch up to the transfer rate—well, consider just shooting JPEG images.
  • A JPEG camera picture file emerges from the camera as a finished product. So, you don’t have to wait on post-processing before uploading it online or passing it along to a client. The JPEG file is a great way to give your client a sneak peek while they wait on your post-processing of the RAW files.

Important: The RAW file provides maximum benefit for photo image quality. However, all RAW files need some post-processing to look their best, because the file was designed to work that way.

why shoot in raw

Photo by Shahin Khalaji

Final thought

If your camera allows it, set it to shoot both RAW and JPEG files at the same time. This provides you with the best of both worlds.

About the Author:
Kent DuFault is an author and photographer with over 35 years of experience. He’s currently the director of content at the online photography school, Photzy.com.

For Further Training:

This in-depth eBook takes you by the hand and leads you step-by-step in discovering photography skills using your DSLR. This eBook is filled with practical exercises that show you exactly what to do AFTER changing your camera settings. A powerful guide produced by TWO master photography teachers. It is currently 65% off if you want to check it out.

dslr crash course

New: The DSLR Crash Course (Click to Learn More)

It was adapted from an in-person photography workshop. Unlike a regular book, it’s designed to quickly get you up to speed with basic photography principles, and provides a platform for you to experiment and refine your techniques.

Deal ending soon: The DSLR Crash Course at 65% Off

- - - - - - - - - - - - - - - - - - - - - - - - - - - - - - - - - - - - - - - - - - - - - - - - - - - - - - - - - - - - - - - - - - - - - - - - - -

The post This is Why RAW is the Best Choice for Your Photography appeared first on PictureCorrect.


from PictureCorrect https://ift.tt/nfJIKhk
via IFTTT

maanantai 25. joulukuuta 2023

PictureCorrect.com: 365 Photo a Day Challenge: Start the Year Right

I like to think of myself as an avid photographer, but there are times when the creativity wanes and the inspiration dries up. The trigger finger stiffens from lack of use and generally, I start to suffer from photographer’s malaise. This is when auto-pilot needs to kick in and get me up and running again. How do I switch on the autopilot? With the 365 Photo Challenge–a photo a day for a whole year.

365 photo challenge

Photo by Luigi Estuye; ISO 400, f/4.0, 1/200s, 42mm.

A photo a day keeps the staleness away. Staleness and boredom with a hobby like photography is a killer. Before you know it, you’re advertising your gear on eBay. I have found a simple way to keep the pot boiling on the stove. All my students know this one. It is simple, and it’s most certainly not time-consuming.

There are two ways to approach this:

  1. The simple photo a day challenge. By this I mean that you allocate yourself a few minutes a day to shoot one image that you like or even dislike, for that matter. Just shoot an image at some point during your day. Carrying your camera with you every day would help. Whatever you do, make sure that you take one photo every day. Even if it is the clock on the wall before you go to bed. Of course, it would help if you make your subjects different each day.
  2. The best photo of the day challenge. This is a variation of the challenge and gives you more leeway, meaning that you shoot as many images as you want but that at the end of the day you will select the best one, the one with most meaning or just a random choice if they are all good.
photo per day

Photo by Fauzan Ardhi; ISO 50, 1/160s.

In order to make this interesting, you can add a touch of variety by choosing a theme or using a common thread. I know of a photographer who took a small beach ball with him wherever he went, and this ball featured somewhere in every photograph. Choose something and add it as a common thread to all 365 days.

With the advent of Instagram, 500px, Flickr, and more you can really make this interesting and even generate regular interest in your images. Change your Facebook profile every day replacing it with your daily 365 Challenge shot. People will eagerly log in every day to see what photo you have loaded. Not only will this make you more enthusiastic but it will generate an interest in your images. The same goes for your blog. Upload a daily image and makes some comments on it. This way you can keep a record of the how, when, why and who of each image. This could actually turn into a form of photo journal in which you document your life over 365 days.

why do the 365 photo challenge

Photo by Evan Sanders; ISO 3200, f/2.8, 1/50-second exposure

This could be the beginning of a really fun experience. The bottom line is that you will keep your creativity, inspiration, and enthusiasm alive while at the same time learning and entertaining others. If you can find a way to make your photography fun and inspiring, it will never die. You will continually shoot photos throughout the year.

One more tip before we go. It’s great to sit down and write down ideas and thoughts about what you will do, what themes to shoot, and how you will display the images. But unless you get out there and just do it you will get nowhere. If you will run with the idea I can guarantee you that in 365 days’ time, you won’t believe the improvement and progress you’ve made as you learn photography.

why it's good to take a photo a day

Photo by Jehane; ISO 64, f/3.7, 1/85-second exposure

What the 365 photos show you is just how you have improved. They become your timeline of growth in creativity and skill.

About the Author:
Wayne Turner has been teaching photography for 25 years and has written three books on photography. He has produced 21 Steps to Perfect Photos, a program of learner-based training using outcomes based education.

- - - - - - - - - - - - - - - - - - - - - - - - - - - - - - - - - - - - - - - - - - - - - - - - - - - - - - - - - - - - - - - - - - - - - - - - - -

The post 365 Photo a Day Challenge: Start the Year Right appeared first on PictureCorrect.


from PictureCorrect https://ift.tt/SNaQfiK
via IFTTT

sunnuntai 24. joulukuuta 2023

PictureCorrect.com: How to Photograph Snow

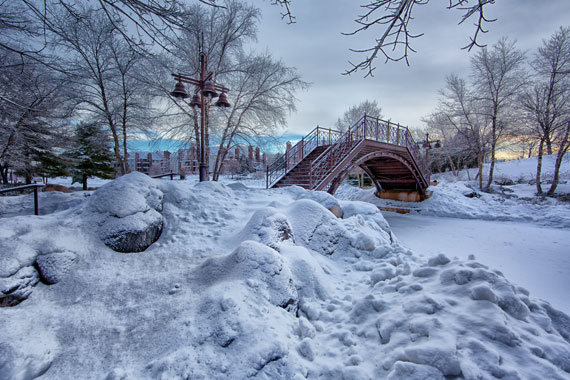
Are you ready to capture stunning winter wonderland scenes with your camera? Whether you’re a seasoned pro or a beginner photographer, snow photography can be a fun and rewarding way to express your creativity. With a little bit of planning and the right camera settings, you can capture breathtaking images of snow-covered landscapes, frosty trees, and sparkling snowflakes. In this tutorial, we’ll show you how to master the art of snow photography, from choosing the right equipment to getting the perfect shot.

photograph snow

Photo captured by Lucas Allman

Here are some tips for photographing snow:

Focus on contrast: Snow can be bright and featureless, so try to find subjects that provide contrast and interest. Look for dark trees, colorful hats or scarves, or other elements that will stand out against the snow.

Try exposure compensation: exposure compensation is a way to adjust the exposure of a photograph by telling the camera to make the image lighter or darker. When you photograph a scene that is predominantly white, like snow, the camera’s meter may be tricked into thinking the scene is brighter than it actually is. This can cause the camera to underexpose the image, resulting in a photograph that is too dark. Try using an exposure compensation of +1 or +2 to start.

Use aperture priority: Aperture priority is a shooting mode that allows you to control the aperture (f-stop) while the camera chooses the appropriate shutter speed. This can be useful when photographing snow because you can choose a small aperture (higher f/stop number) to not allow as much light into the sensor and adjust the depth of field to keep both the foreground and background in focus.

Try setting your white balance manually: Snow appears blue in photographs because it reflects blue light. This can cause the photograph to look cool and unbalanced if the white balance is not set correctly. To correct for this, you can set your white balance to “cloudy” or use a custom white balance. This will warm up the photograph and give it a more natural appearance.

snow white balance

Photo captured by Tobias Bjorkli

Protect your gear: Snow and cold temperatures can be tough on camera equipment. Make sure to keep your gear protected from the elements by using a weather-sealed camera and lens, and consider using a rain cover or umbrella to keep your gear dry.

Handle condensation: If you go from a cold outdoor environment to a warm indoor environment, your camera and lens may become covered in condensation. To prevent this, put your camera in a sealed bag before bringing it inside, and let it gradually warm up to room temperature before taking it out of the bag.

Try a polarizing filter: A polarizing filter is a type of lens filter that helps reduce glare and increase contrast by filtering out certain wavelengths of light. When you photograph snow, a polarizing filter can help reduce the glare from the sun and increase the contrast between the bright snow and the darker elements in the scene. This can help make the photograph more visually appealing and bring out the details in the scene.

Try a lens hood: A lens hood is a piece of equipment that attaches to the front of a lens and helps to reduce lens flare and improve contrast. When you photograph snow, the bright light reflecting off the snow can cause lens flare, which is a type of glare that appears as a series of bright streaks or circles in the photograph. Lens flare can be caused by light entering the lens from an angle, and it can reduce the contrast and overall quality of the photograph. A lens hood can also help to protect the front element of your lens from snow, moisture, and other elements. This can be especially useful when you are photographing in cold, wet conditions.

Get close to your subject: Snow scenes can often appear flat, so getting close to your subject can add depth and interest to your photograph. By getting close to your subject, you can create a sense of intimacy and bring out the details in the scene.

snow landscape composition

Photo captured by Adriaan Greyling

Experiment with different compositions: Photography is all about experimentation and trying different things. When you photograph snow, try shooting from different angles and perspectives, and play with the placement of elements in the frame. This will help you find a composition that works best for the scene you are photographing and create more visually interesting photographs.

We hope these tips have helped you capture beautiful photographs of snow! Remember to have fun and experiment with different camera settings and compositions to find what works best for you. Whether you’re capturing sweeping landscapes or close-up shots of frosty trees, snow photography is a great way to celebrate the beauty of winter. So bundle up, grab your camera, and head out into the snowy wonderland – you never know what amazing shots you might capture!

- - - - - - - - - - - - - - - - - - - - - - - - - - - - - - - - - - - - - - - - - - - - - - - - - - - - - - - - - - - - - - - - - - - - - - - - - -

The post How to Photograph Snow appeared first on PictureCorrect.


from PictureCorrect https://ift.tt/tlbWo0r
via IFTTT

lauantai 23. joulukuuta 2023

PictureCorrect.com: Family Gathering Photography Tips

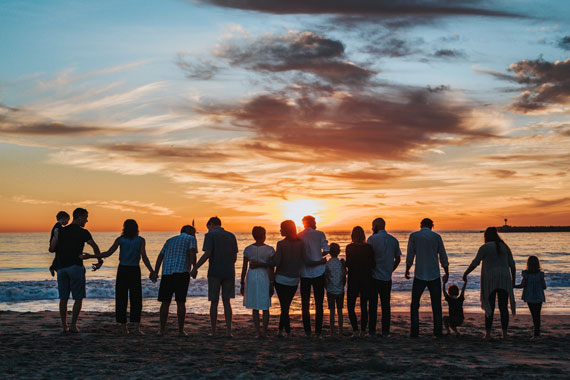
It’s that time of year again – time for the annual family gathering! Whether you’re gathering around the table for Thanksgiving dinner or celebrating the holidays with loved ones, these occasions are always filled with laughter, love, and of course, lots of photo opportunities. Whether you’re a seasoned photographer or just starting out, here are some tips to help you capture those special moments and create lasting memories.

family dinner photo

Photo captured by cottonbro studio; ISO 2000, f/1.4, 1/1250s, 50mm.

Here are some example camera settings assuming an indoor setting with minimal lighting:

  • Aperture: Aperture controls the amount of light that enters the camera through the lens. In low light situations, you might want to use a lens with a wide aperture (e.g. f/2.8 to f/5.6) to let in more light. This can also create a shallow depth of field, which can be a nice effect for portraits.
  • Shutter speed: Shutter speed controls the amount of time that the camera’s sensor is exposed to light. In low light situations, you might want to use a slower shutter speed to allow more light to reach the sensor. Just be aware that using a slow shutter speed can cause motion blur if your subjects are moving.
  • ISO: ISO controls the sensitivity of the camera’s sensor to light. In low light situations, you might need to increase the ISO to allow the camera to capture more light. However, increasing the ISO can also introduce noise (grain) into your photos, so try to keep it as low as possible while still getting a well-exposed photo.
  • White balance: White balance helps to ensure that colors in your photos look natural. Indoor lighting can sometimes cause colors to look yellow or orange, so you might need to adjust the white balance to compensate.
  • Focus mode: In low light situations, it can be more challenging for the camera to focus accurately. You might want to consider using a focus mode that allows you to manually select the focus point, such as “single point” or “flexible spot.”
indoor lighting conditions

Photo captured by Nicole Michalou; ISO 800, f/2.8, 1/160s, 50mm.

Here are some more general tips for capturing the gathering:

  • Get everyone involved: Encourage family members of all ages to take photos, whether it’s with a traditional camera or their smartphones. This will help capture a variety of perspectives and candid moments.
  • Use natural light: Take advantage of natural light by shooting near windows or doors. This will help create soft, flattering light for your photos.
  • Experiment with different angles: Try shooting from different angles to add visual interest to your photos. This might include shooting from above, below, or at eye level.
  • Get close to your subjects: Don’t be afraid to get close to your subjects and fill the frame with their faces. This will help create intimate, emotional photos.
  • Capture candid moments: In addition to posed photos, make sure to capture candid moments as they happen. These types of photos often capture the true spirit of a family gathering.
  • Tell a story: Use your photos to tell a story of the gathering. This might include capturing the details of the decorations, the food, and the activities that took place.
  • Have fun: Above all, remember to have fun! Photography should be enjoyable, so don’t stress too much about getting the perfect shot.
family gathering

Photo captured by Tyler Nix; ISO 250, f/3.5, 1/1250s, 50mm.

With these tips in mind, you’ll be well on your way to capturing beautiful and meaningful photos at your next family gathering. So don’t be afraid to get creative, have fun, and above all, embrace the chaos! These are the moments that make life worth living and the memories that we’ll look back on and cherish for years to come.

- - - - - - - - - - - - - - - - - - - - - - - - - - - - - - - - - - - - - - - - - - - - - - - - - - - - - - - - - - - - - - - - - - - - - - - - - -

The post Family Gathering Photography Tips appeared first on PictureCorrect.


from PictureCorrect https://ift.tt/gDOTRt5
via IFTTT

perjantai 22. joulukuuta 2023

PictureCorrect.com: Night Photography Tips

Night photography is a typical “next step” for many budding photographers.

I have had numerous photographers ask me over the years, “What do I need to get started in night photography?”

My response is always, “What type of night photography do you want to do?”

To which they inevitably say, “I don’t know. I just want to take some cool night pictures.”

Well, it’s a bit more complicated than that. However, it isn’t as complicated as it used to be.

Check this out!
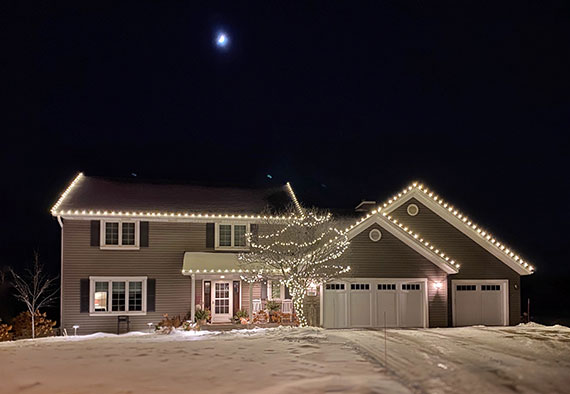
iPhone night photograph

Photo by Kent DuFault

I took this photograph in absolute darkness except for the moon and the holiday lights. Plus—and this is truly amazing—I took it handheld, without a tripod.

How could this be, you ask? I used my iPhone 11 Pro. It was taken at ISO 500 at 1/10th of a second.

It’s tack-sharp, and that’s pretty impressive.

There are three basic things that you need for night photography. From there, your experiences with night photographs will get wild and crazy.

What is necessary?

  1. You need the dark. I’m not trying to be coy here. Many times, we think it’s dark, and it’s not that dark. Some forms of night photography need the scene to be really dark.
  2. You need some form of light. This necessity is where night photography gets exciting, because there are infinite ways to create light. Each one can alter your picture. Think about it. You could have natural light, artificial light, starlight, stray light, sparkling light, colored light, tiny lights, big lights—the list goes on.
  3. You need some way to create a sharp picture. In my example picture above, it was the technology of the iPhone that helped create a sharp image. A more traditional method is a tripod and a remote shutter release mechanism. The gist is that you must devise a way to create sharp, non-blurry pictures.
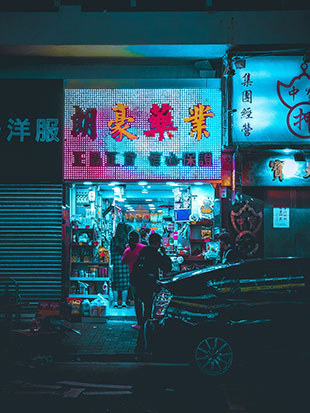
neon night light photography

Photo by Joel Fulgencio

For this article, we will concentrate on four aspects of night photography:

  • Photographing at night using strictly available light
  • Using moving light sources for creative effects
  • Mixing light sources
  • Capturing a good image with long exposures

We will talk specifically about these scenarios:

  • The nighttime cityscape
  • Using road traffic for composition
  • Painting with light
  • The dusk mixed-light shot

I know some of you will be hoping to capture the Milky Way after reading this article. That’s not going to happen. That takes a bit more instruction than can be included in this blog post. However, I will touch upon it and present you with a few things to consider for future reference.

Photo by James Wheeler

Getting Started

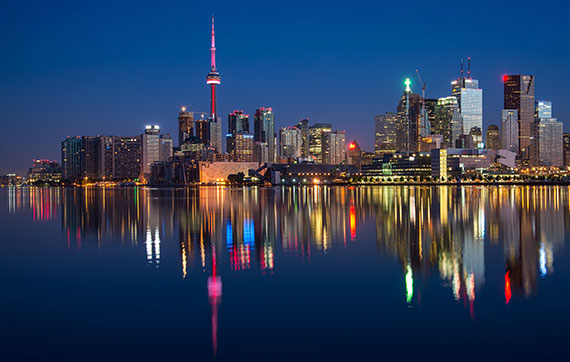
If you’re new to night photography, the cityscape is the most accessible picture opportunity to get you started.

Unless you have a camera like my iPhone 11 Pro, you’re going to want a few specialized equipment pieces.

Equipment:

  • Camera: Any camera with a “bulb” setting and/or a maximum built-in shutter speed of up to 30 seconds.
  • Tripod: You’ll need something sturdy. You can also get by with placing your camera on a sturdy surface, but that will be far less flexible.
  • Remote Shutter Release: You can also get by with your camera’s self-timer, if you aren’t using the bulb setting.
  • Lens: Ideally, a wide-angle or moderate telephoto (14mm-100mm). Depending upon the light level, image stabilization can be helpful.
  • Sandbag: You can use this to further stabilize a tripod or support your camera if you place it on a sturdy surface. There are commercially available sandbags explicitly made for photography, or you can make your own.
  • Miscellaneous items: A flashlight or headlamp will help you figure out camera settings in the dark. A non-reflective 8-by-10-inch matte black card (available at any art store) will let you block light from entering the lens without having to touch the camera (more on this in a minute).
night photography setup instructions

Photo by David Marcu

The Best Conditions for Starting in Cityscape Night Photography

  • Pick a location that provides a beautiful view of the skyline and city lights
  • If possible, include a body of water in the foreground for reflections
  • Arrive at your location and get your gear prepared around 30 minutes after sunset
  • Start shooting while there is still some light in the sky
  • Set your camera to manual mode or aperture priority
  • Set the ISO to 400, or up to 800
  • Set the lens to manual focus
  • Set the metering mode to center-weighted
  • Compose using the rule of thirds
  • If possible, include a focal point
  • Begin shooting as the sky darkens, and the city lights turn on
  • Monitor the shutter speed: be aware of even minor camera movement
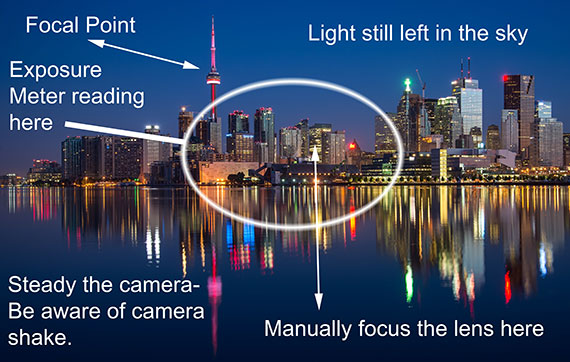
Night Cityscape

Pro Tip: Your best shots will occur when the sky is close to the same exposure value as the cityscape. As the sky darkens, you will eventually lose a lot of detail in the shadows.

Using Road Traffic for Composition and Effect

Once you have a few nighttime cityscapes under your belt, the next logical step is to combine a cityscape with road traffic for a special effect.

Remember This: I call these shots cityscapes, but they can be created anywhere there are buildings and lighting.
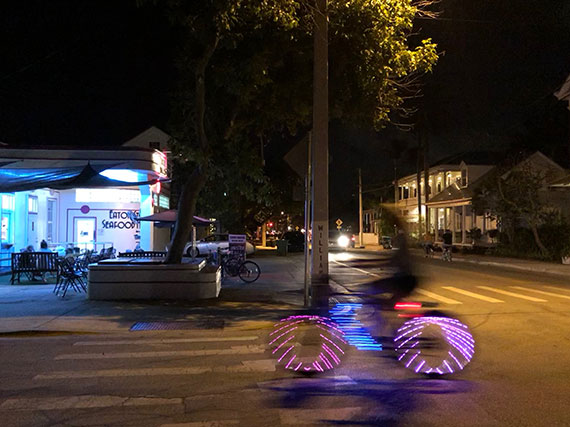
nighttime long exposure example

Photo by Kent DuFault

This night shot was taken in the town of Key West, Florida, using the same principles outlined above.

Pro Tip: Notice how the sky in the Key West picture has gone entirely dark. If you’re shooting this late, try composing your shot so that some bright object with lighting breaks up the black sky. You can see how I did that with the tree.

long exposure highway example

Photo by Patrick Hendry

To include road traffic in your nighttime photos, follow the previous instructions with the following additions.

  • Pick a location that looks down onto the road (the higher the elevation, the better)
  • Use only manual mode
  • Set the aperture between f/4 and f/8 (you will need to experiment with this)
  • Make sure to set your focus before it gets too dark
  • Take a camera meter reading, and then reduce the exposure from one stop to four stops, depending upon the ambient light surrounding your road; for example, the first road picture in this article would be a reduction of around one stop, while the example photo above would be closer to three or four stops’ reduction
  • Depending on the traffic level, your shutter speed might be anywhere from half a second to 30 seconds. Again, the first example in this article would be closer to half a second because there is a lot of traffic as a light source, while the second example would be closer to 30 seconds because only a few cars were on the road, meaning less light

Painting with Light

Painting with light can take many different forms.
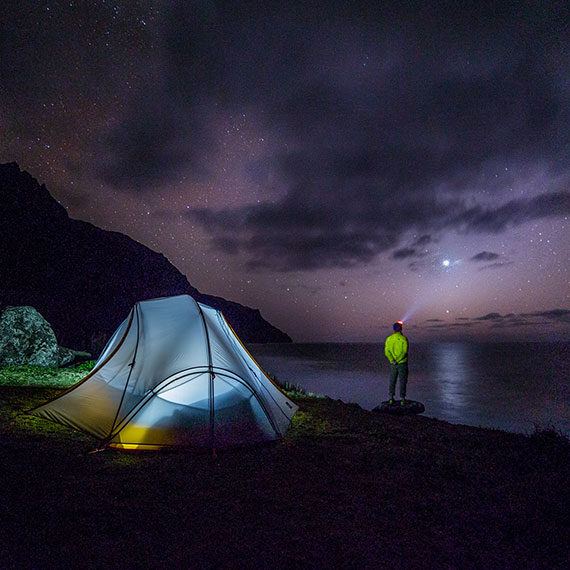
night photography example to dissect

Night Photo

Think of it as an artist with a blank paint canvas. They apply different paints to the canvas, and it comes to life as a complete image.

Crucial Thought: In nighttime photography, it’s dark, and the darkness creates a blank canvas within the camera. Earlier, I alluded to the importance of darkness when you attempt nighttime photography. In many places, it won’t be as dark as you initially believe it is. That’s why in the equipment section, I suggested you include a matte black card in your kit. The card helps you to block any light that you don’t want to enter the camera—without touching the camera. For example, let’s say you’re in the middle of a long-exposure cityscape shot, and a car with headlights on is approaching. You hold the card in front of the lens as the vehicle passes. When it is out of view, you remove the card and continue to expose the picture. This technique is one of the advantages of using the bulb setting instead of automated shutter speeds. You count the seconds with the shutter locked open. You can manually stop the exposure with the card if necessary.
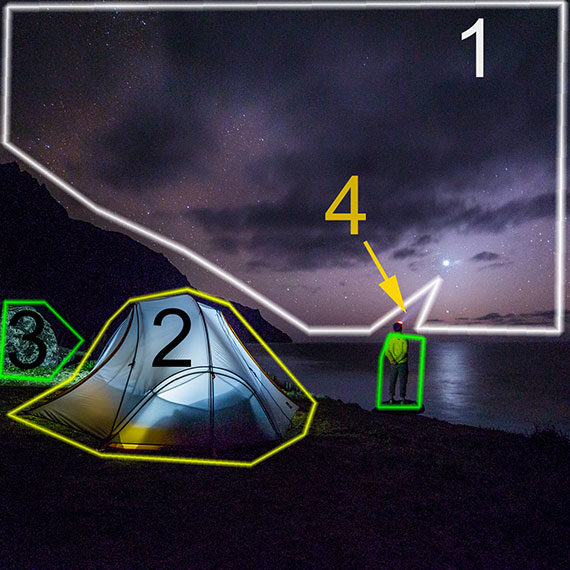
decoded night photography

Light Sources

This photograph has four light sources that are “painting” the black canvas of darkness.

  1. The illumination in the sky is light source number one.
  2. A lantern inside the tent is light source number two.
  3. An electronic flash positioned to illuminate the bushes and the man standing is light source number three.
  4. The headlamp on the man’s head is light source number four.

Key Point: Painting with light is an advanced technique, and here is why. Each light source has a different intensity and requires a different length of time to expose inside the camera properly. This fact is where your black card comes in handy as you can cover the lens as you turn different light sources on and off.

Give it a try!

Try some light painting. Gather two or three light sources. They can be an electronic flash, a flashlight, a plug light, car headlights, etc. Keep things simple to start. Place a model in a dark area and use one light to expose the model and the additional lamps to illuminate the environment around them.

The Dusk Mixed Light Shot

I touched upon the value of having some light in the sky already, but I wanted to add two additional tips.

storm long exposure

Photo by Jean Beaufort

Outside exotic light sources can create other opportunities for nighttime photography.

Lightning can quite literally illuminate an entire landscape. Make sure you are a safe distance away. Follow all of the tips listed for capturing road traffic with these additions.

  • Use a wide-angle lens
  • Set the aperture between f/8 and f/11
  • Lock the camera shutter open using the bulb setting
  • Place your black card in front of the lens
  • When the lightning begins to flash, pull the card away—allow one to three flashes, depending upon how large they are
  • Close the shutter
nighttime photography tips

Photo by Lethu Zimu

When shooting at dusk and on into the night, there may be moments where you don’t have a tripod or cannot use one.

Pro Tip: Use the image stabilization option on your camera, if possible. Also, press your body up against a solid surface as you take the picture. This action will help you hold the camera steady at slower shutter speeds.

how to take starry night photos

Photo by Casey Horner

I mentioned the Milky Way at the beginning of the article.

Many of the tips you’ve read here will help Milky Way photography and other astrophotography subjects.

The difference is that you must learn to locate these celestial bodies within the sky and take your search for darkness to new and higher levels—and that’s a whole other article.

About the Author:
Kent DuFault is an author and photographer with over 35 years of experience. He’s currently the director of content at the online photography school, Photzy.com.

For Further Training, Deal Ending Soon:

Introducing 20 printable project sheets, with over 60 new photography assignments to really push and expand your shooting skills. These Advanced Action Photography Cards are currently 71% off today if you want to check them out.
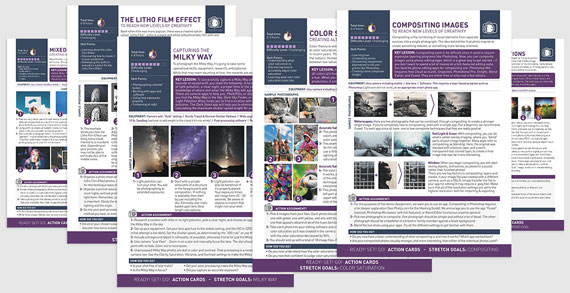
photo action cards

Advanced Photography Action Cards

These Action Cards discuss a photographic topic, provide you with suggested considerations, and give you specific photographic assignments. They’ll kick you out of the “nest” to go have a personal discovery experience all on your own.

Deal ending soon: Action Photography Cards Advanced Projects at 71% Off

- - - - - - - - - - - - - - - - - - - - - - - - - - - - - - - - - - - - - - - - - - - - - - - - - - - - - - - - - - - - - - - - - - - - - - - - - -

The post Night Photography Tips appeared first on PictureCorrect.


from PictureCorrect https://ift.tt/NzAJrWy
via IFTTT

torstai 21. joulukuuta 2023

PictureCorrect.com: Timing in Photography Composition

When we create photographic images, we would like our compositions to be different and eye-catching—even when the subject is common.

We all know that timing is extremely important in photography, as it can make all the difference between an excellent image and one that is mundane.

important of timing in sunset photography

We have the standard timing of sunsets—we have to be on site at the correct time and know when the sun will set.

By the same token, we know at what time the sun will rise if we are looking for sunrise images.

importance of timing in sunrise photography

Both of these are linked to what’s called the “golden hour.”

timing in golden hour photography

Then we have other natural timings to help us capture images we have planned, such as tides:

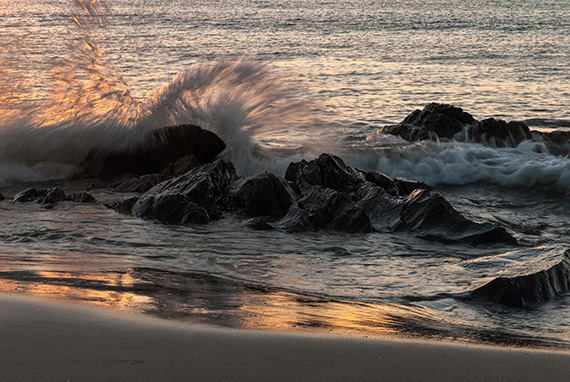
photography timing tips for tides

This also applies to moonrises and sets:

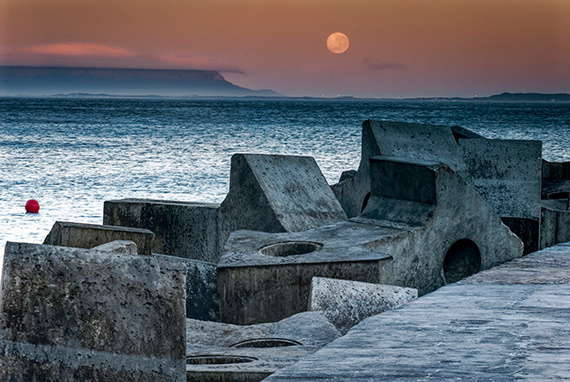
photography timing tips for moonrise

These are all natural events and we have no way of changing the times at which they occur. If we want sunrise images we have to get out of bed early!

What I would really like to highlight, however, is how we, as photographers, can use timing to get unique images that are truly ours. This is not difficult. All it needs is a bit of forethought and patience.

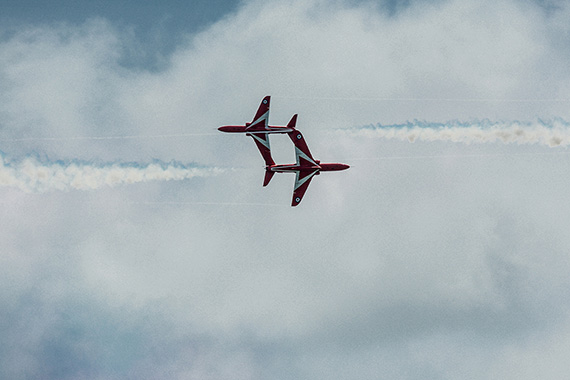
timing tips for airplane photography

Obviously, sometimes a slice of luck can help!

By just taking time to appreciate what is happening in the scene, we can give it a very different perspective. Look for any movement and decide how to somehow incorporate this into your image—but in a way that will complement the subject.

timing tips for street photography

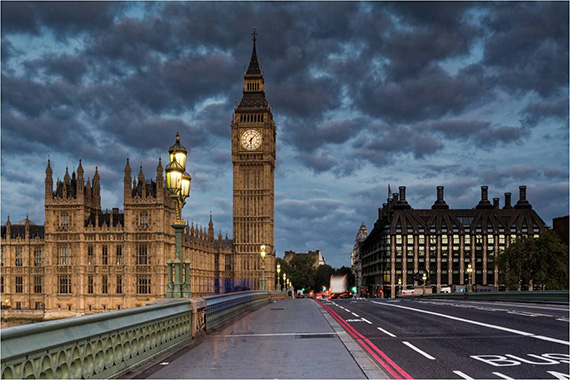
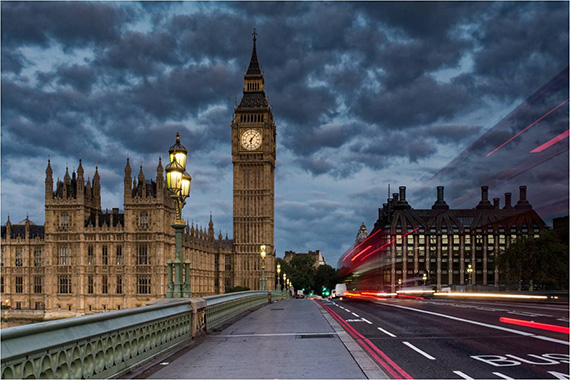
A standard early morning image of Big Ben along Westminster Bridge. If we take the time to wait, we can catch a bus!

timing tips for street photography

The bus makes the image just a bit different.

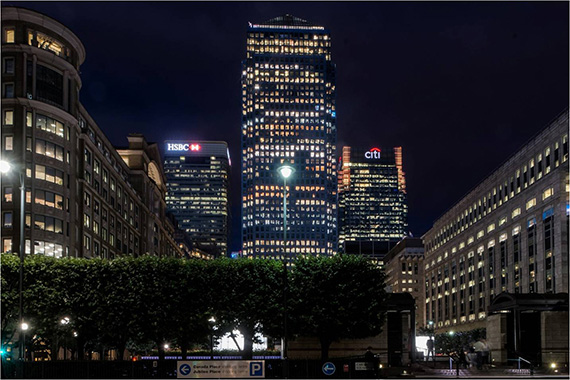
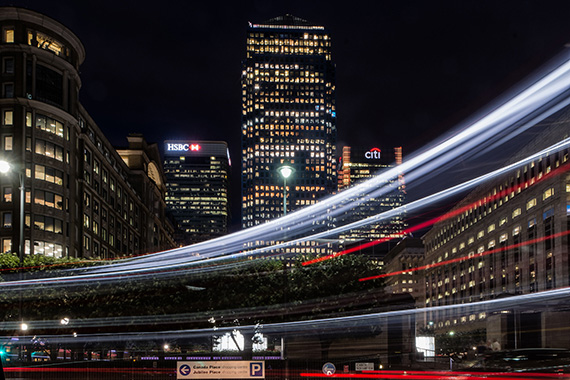
We can try to catch the bus again—this is an interesting night scene as is, but, again, a bit of patience can be very rewarding.

timing tips for city photography

timing tips for city photography

The long exposure of the bus really does change the image!

timing tips for ocean photography

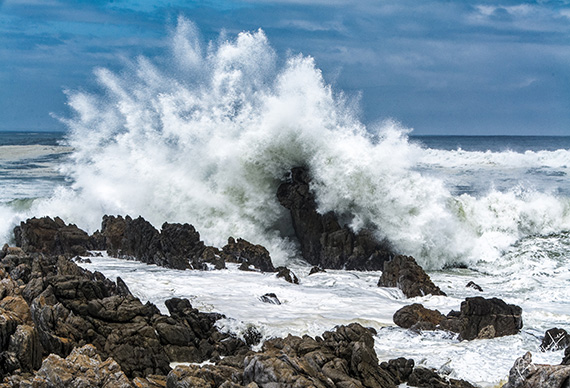
Always wait for the right moment—with good timing, we can create excellent images that are distinctly our own! Shooting in digital makes this all so much easier as we can see immediately if we have captured the image we want. Have fun!

About the Author:
Roger Lee is a Johannesburg based photographer who runs a one day course based on “we don’t want to drown in detail, we just want to know how to use our cameras and enjoy ourselves!” He also does an ebook version of his course.

- - - - - - - - - - - - - - - - - - - - - - - - - - - - - - - - - - - - - - - - - - - - - - - - - - - - - - - - - - - - - - - - - - - - - - - - - -

The post Timing in Photography Composition appeared first on PictureCorrect.


from PictureCorrect https://ift.tt/cawIMxq
via IFTTT