via 500px https://ift.tt/5J9raU8


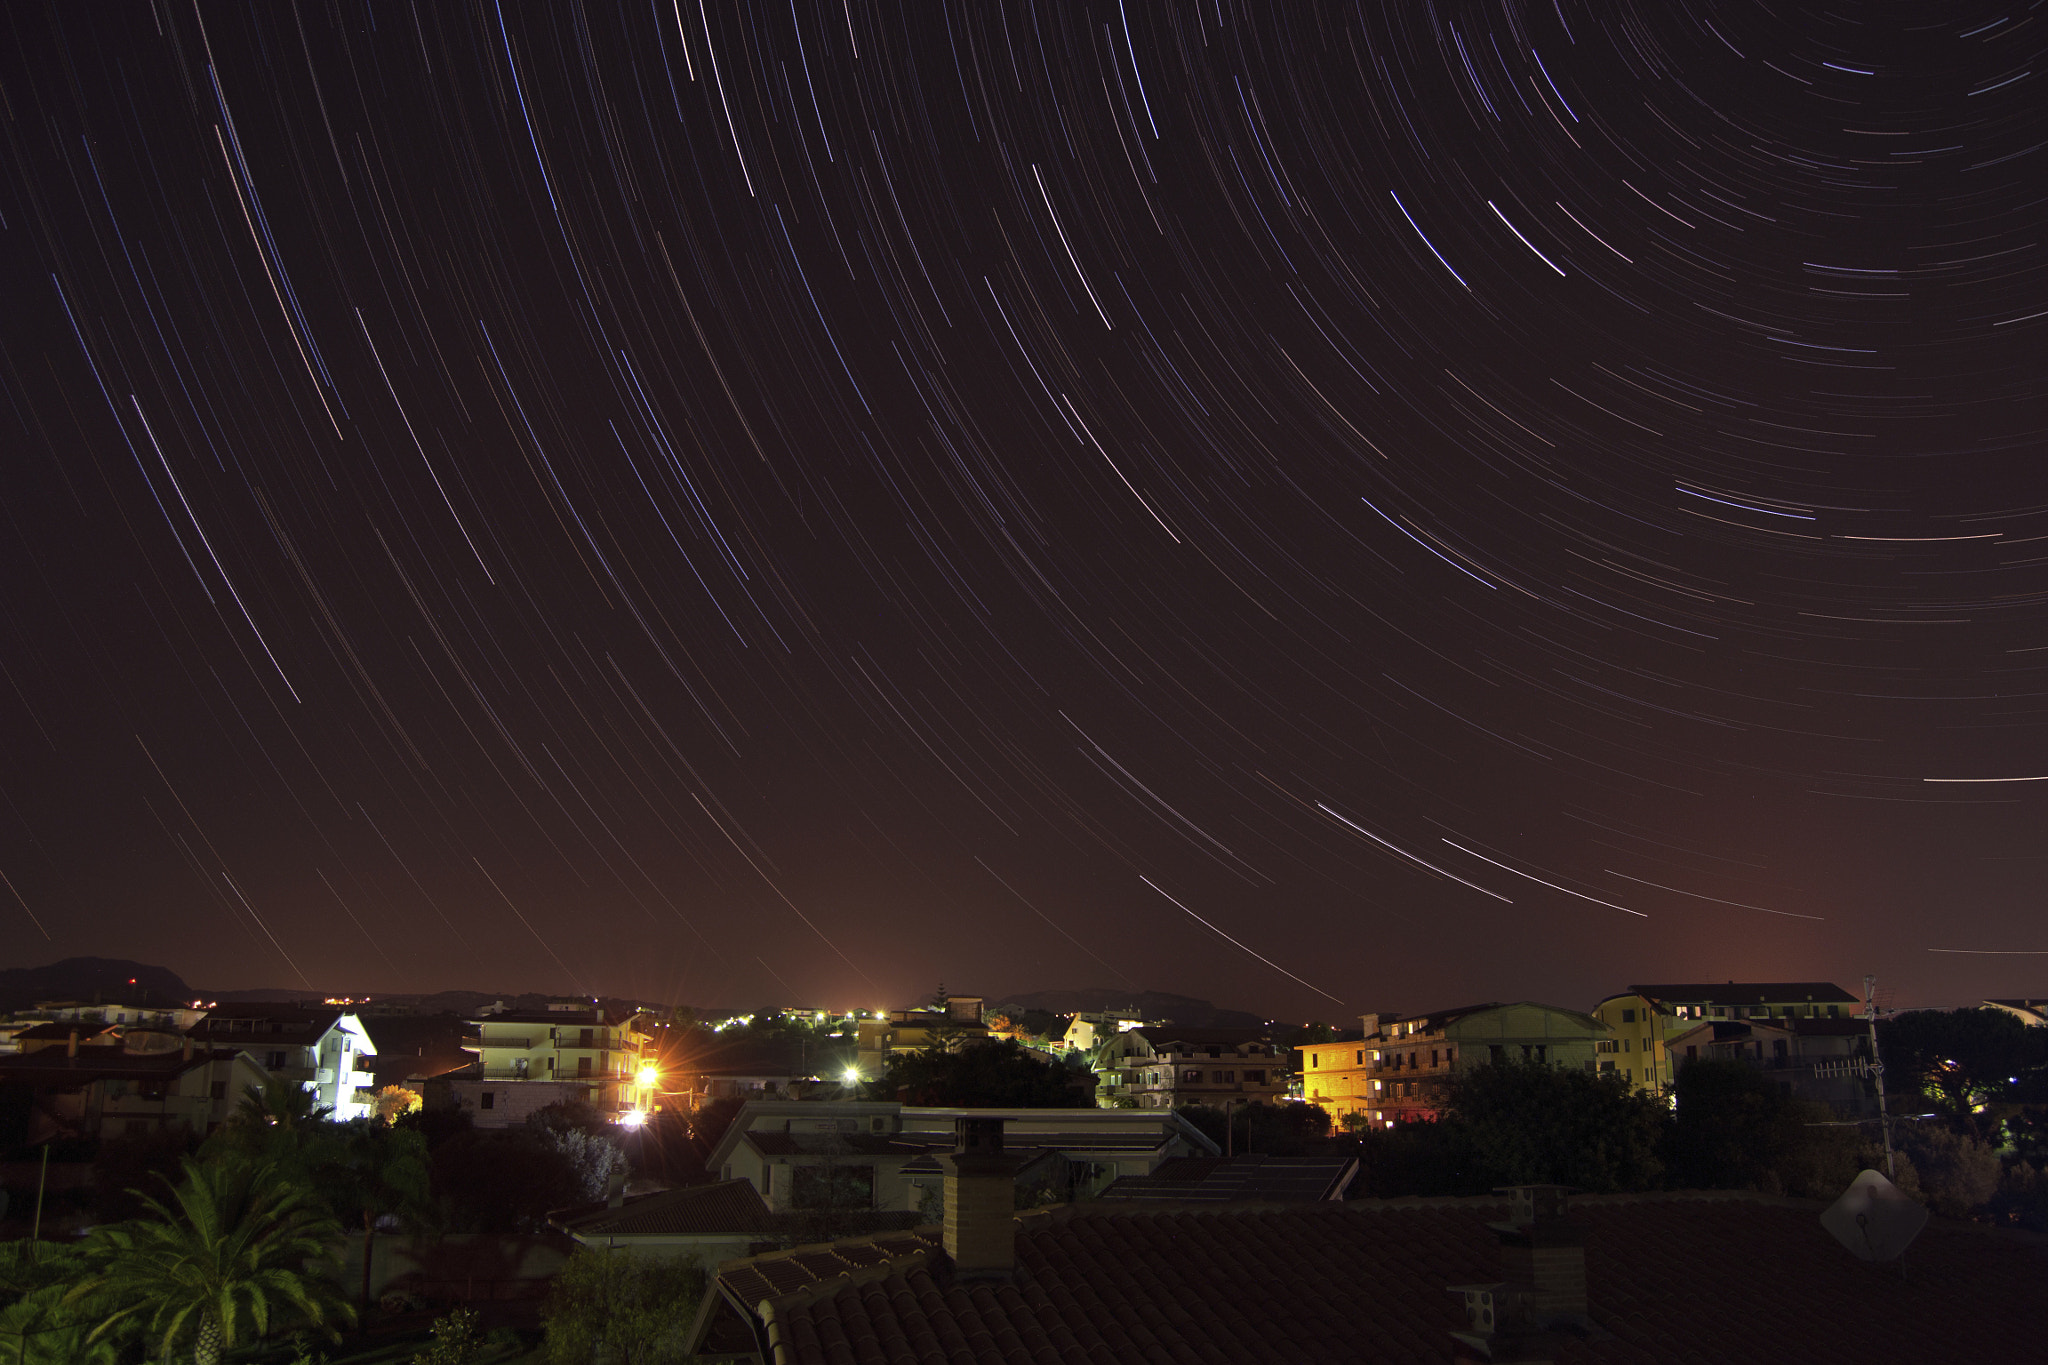
Capture beautiful circular star trails without needing perfectly dark skies or hours of shooting.
This simplified exercise is designed for photographers living near towns or cities where light pollution makes traditional astrophotography difficult.
Relevant note: only a little while left for the Photography Exercises  June Flash Sale
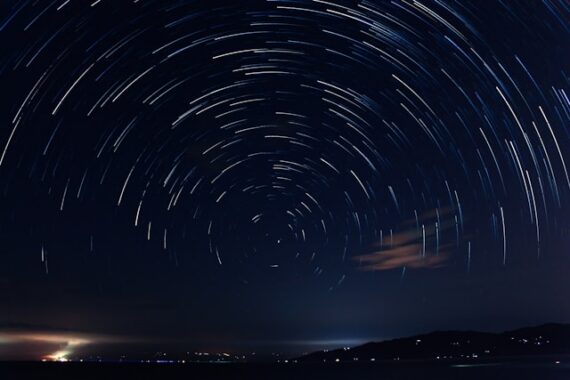
Photo captured by Reign Abarintos
Intermediate
Instead of attempting one extremely long exposure, capture many shorter exposures that can later be combined into smooth star trails.
Your objective is to photograph:
Even under moderate light pollution, you’ll still record plenty of star movement.
Mode: Manual
Turn off autofocus once focus is set.
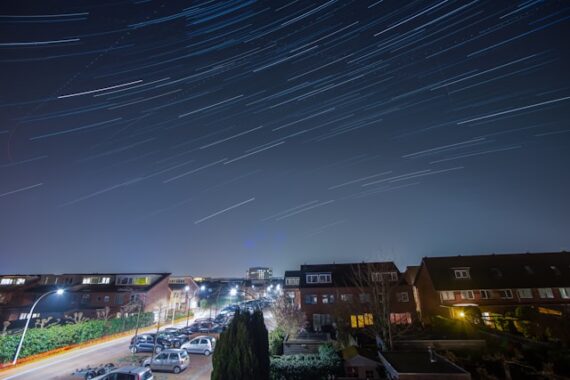
Great star trail photos are really landscape photographs first.
Look for:
The foreground gives viewers something to anchor the image.
If your camera has an interval timer, set it to capture one frame immediately after the previous one with little or no delay.
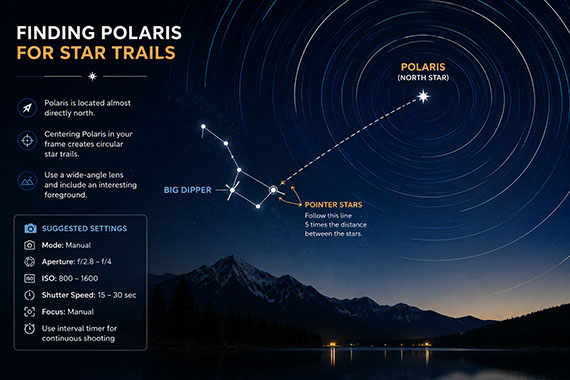
Find Polaris, the North Star, if you’re in the Northern Hemisphere.
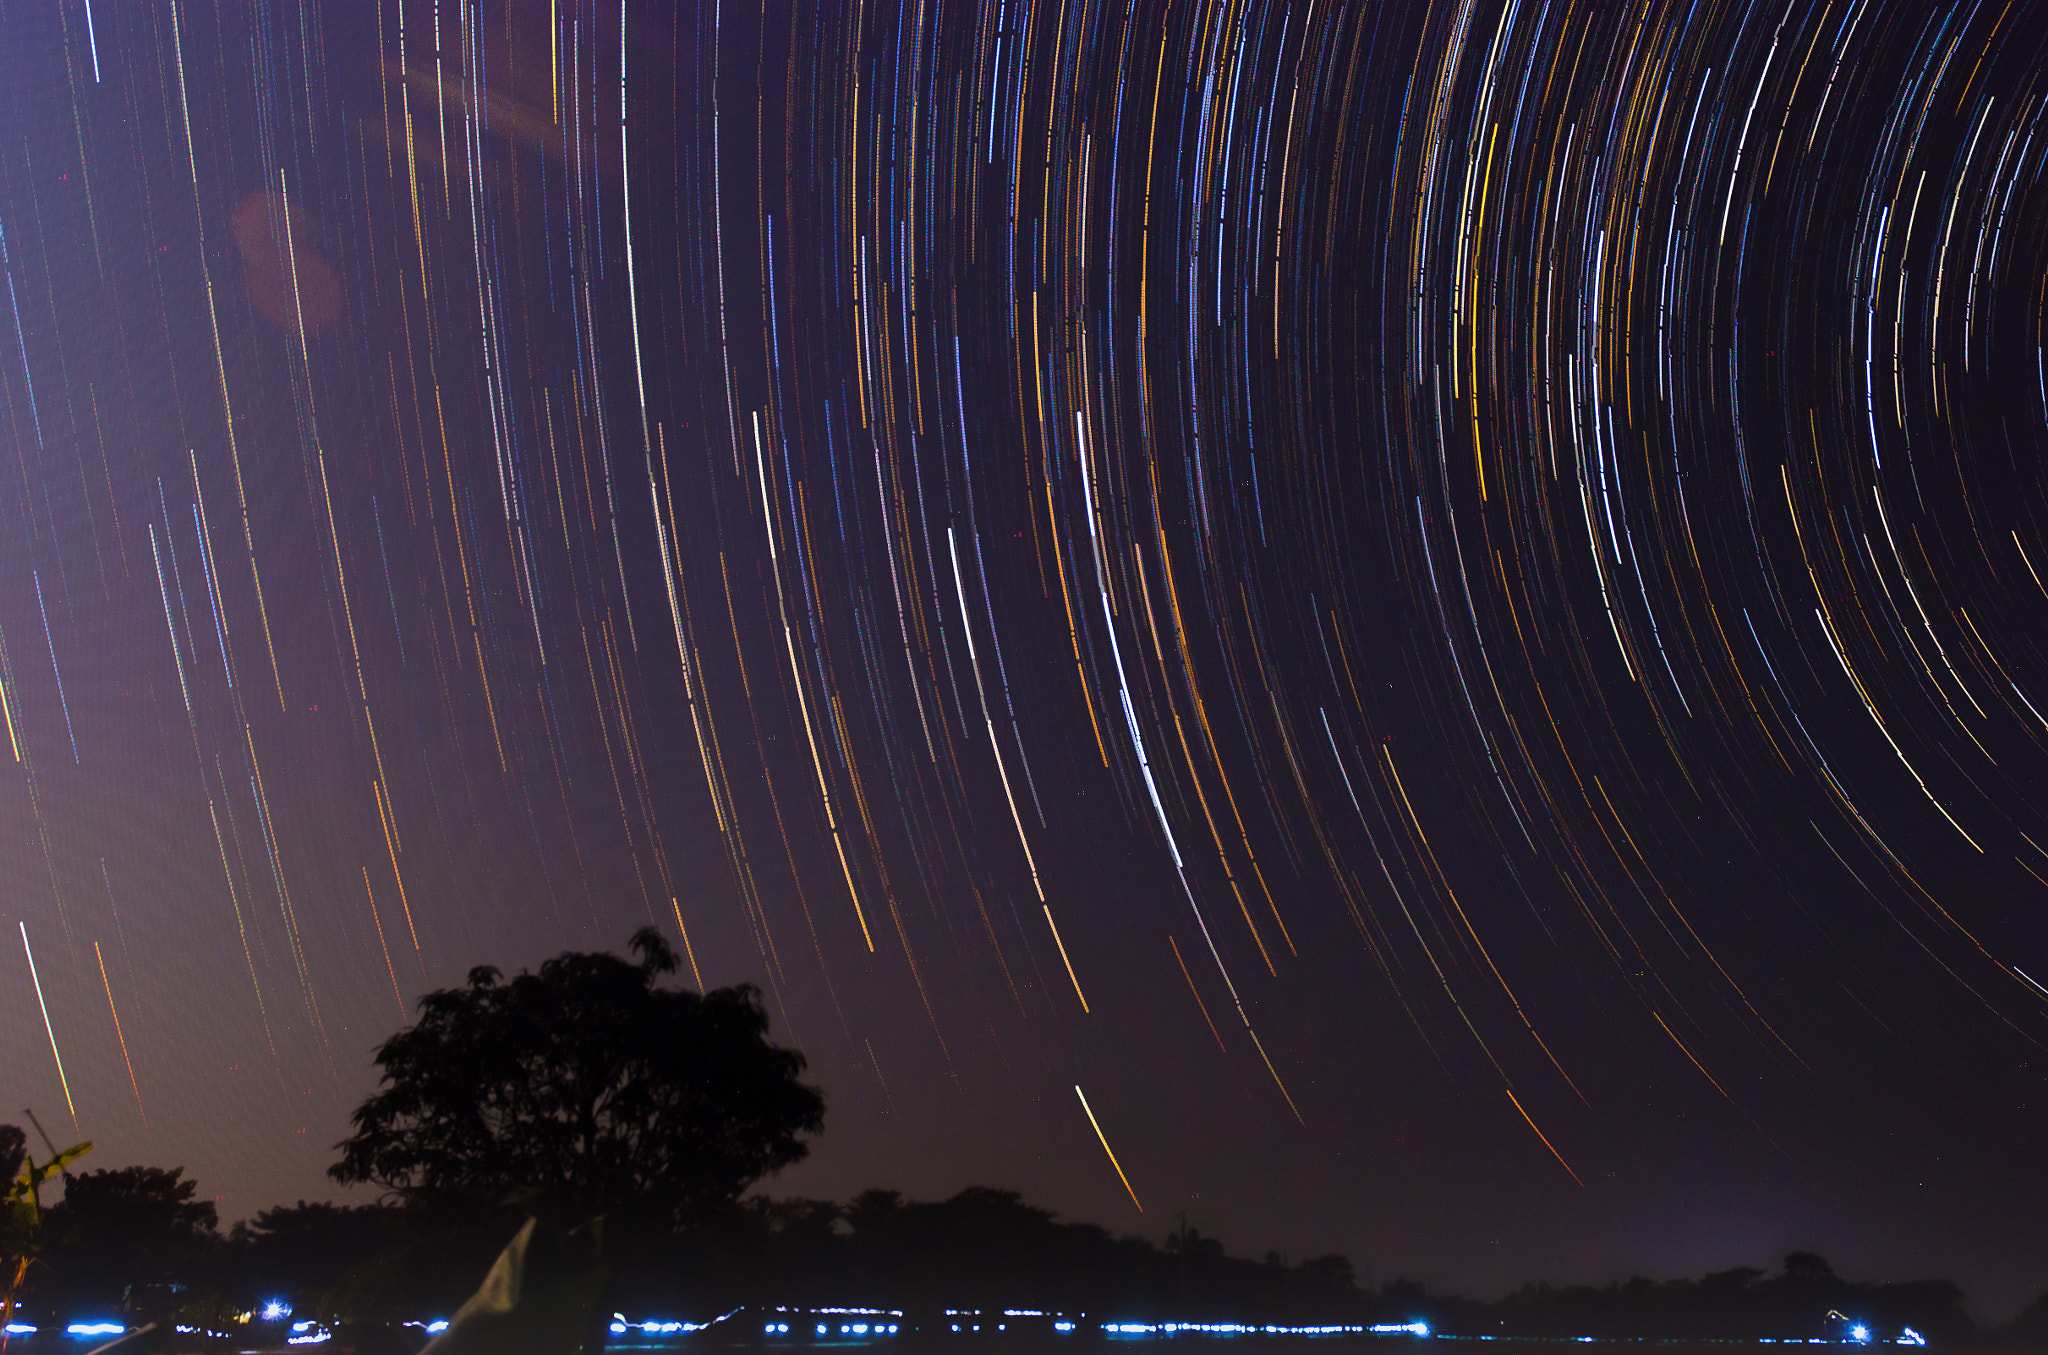
Centering Polaris in your composition creates beautiful circular trails.
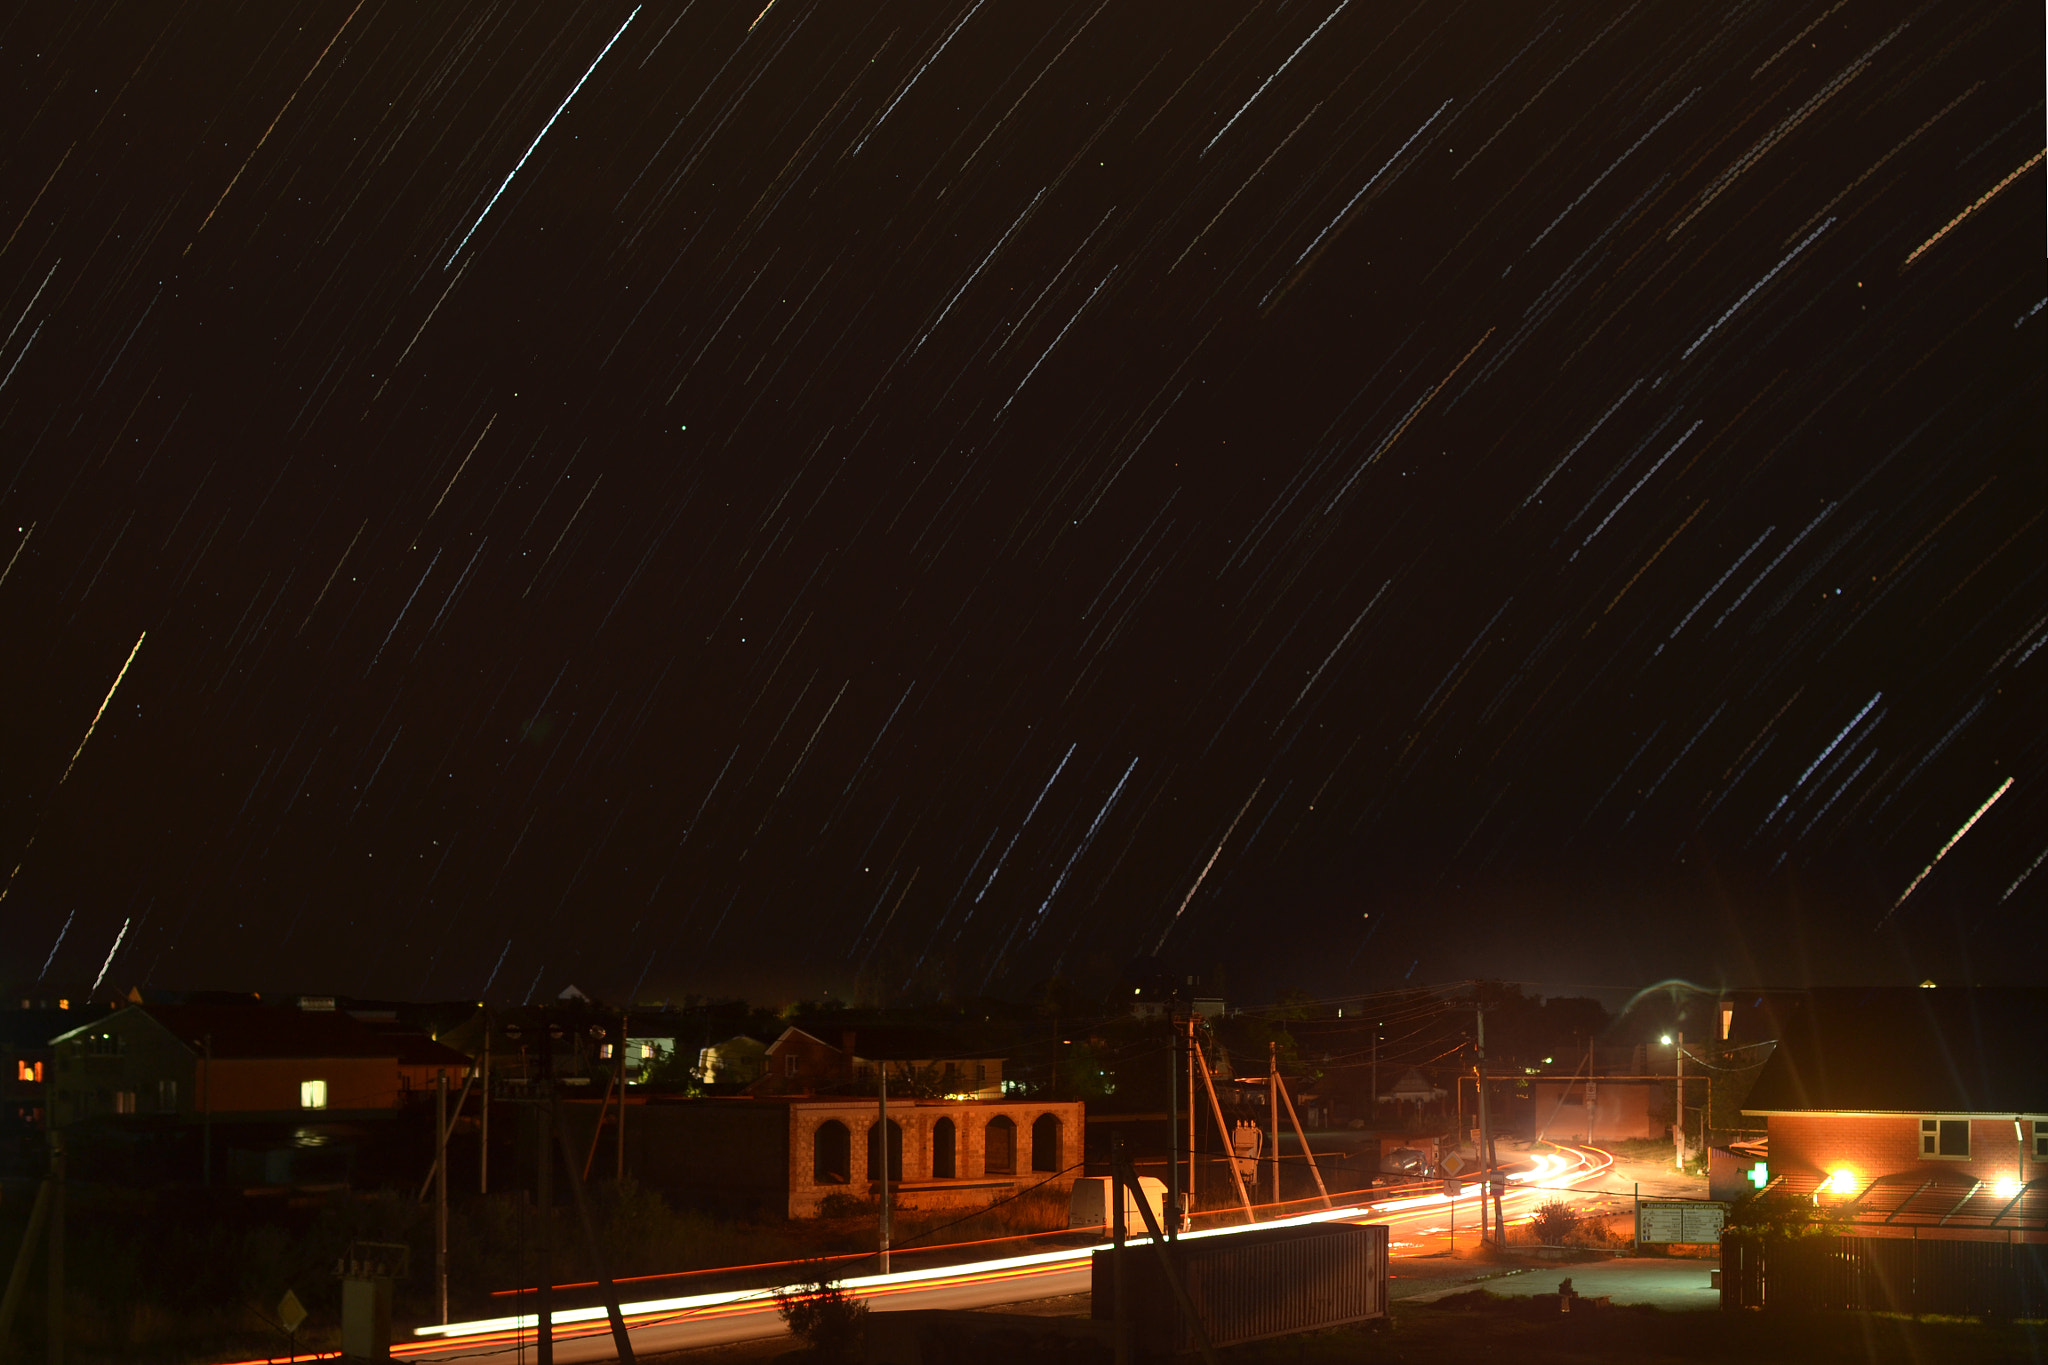
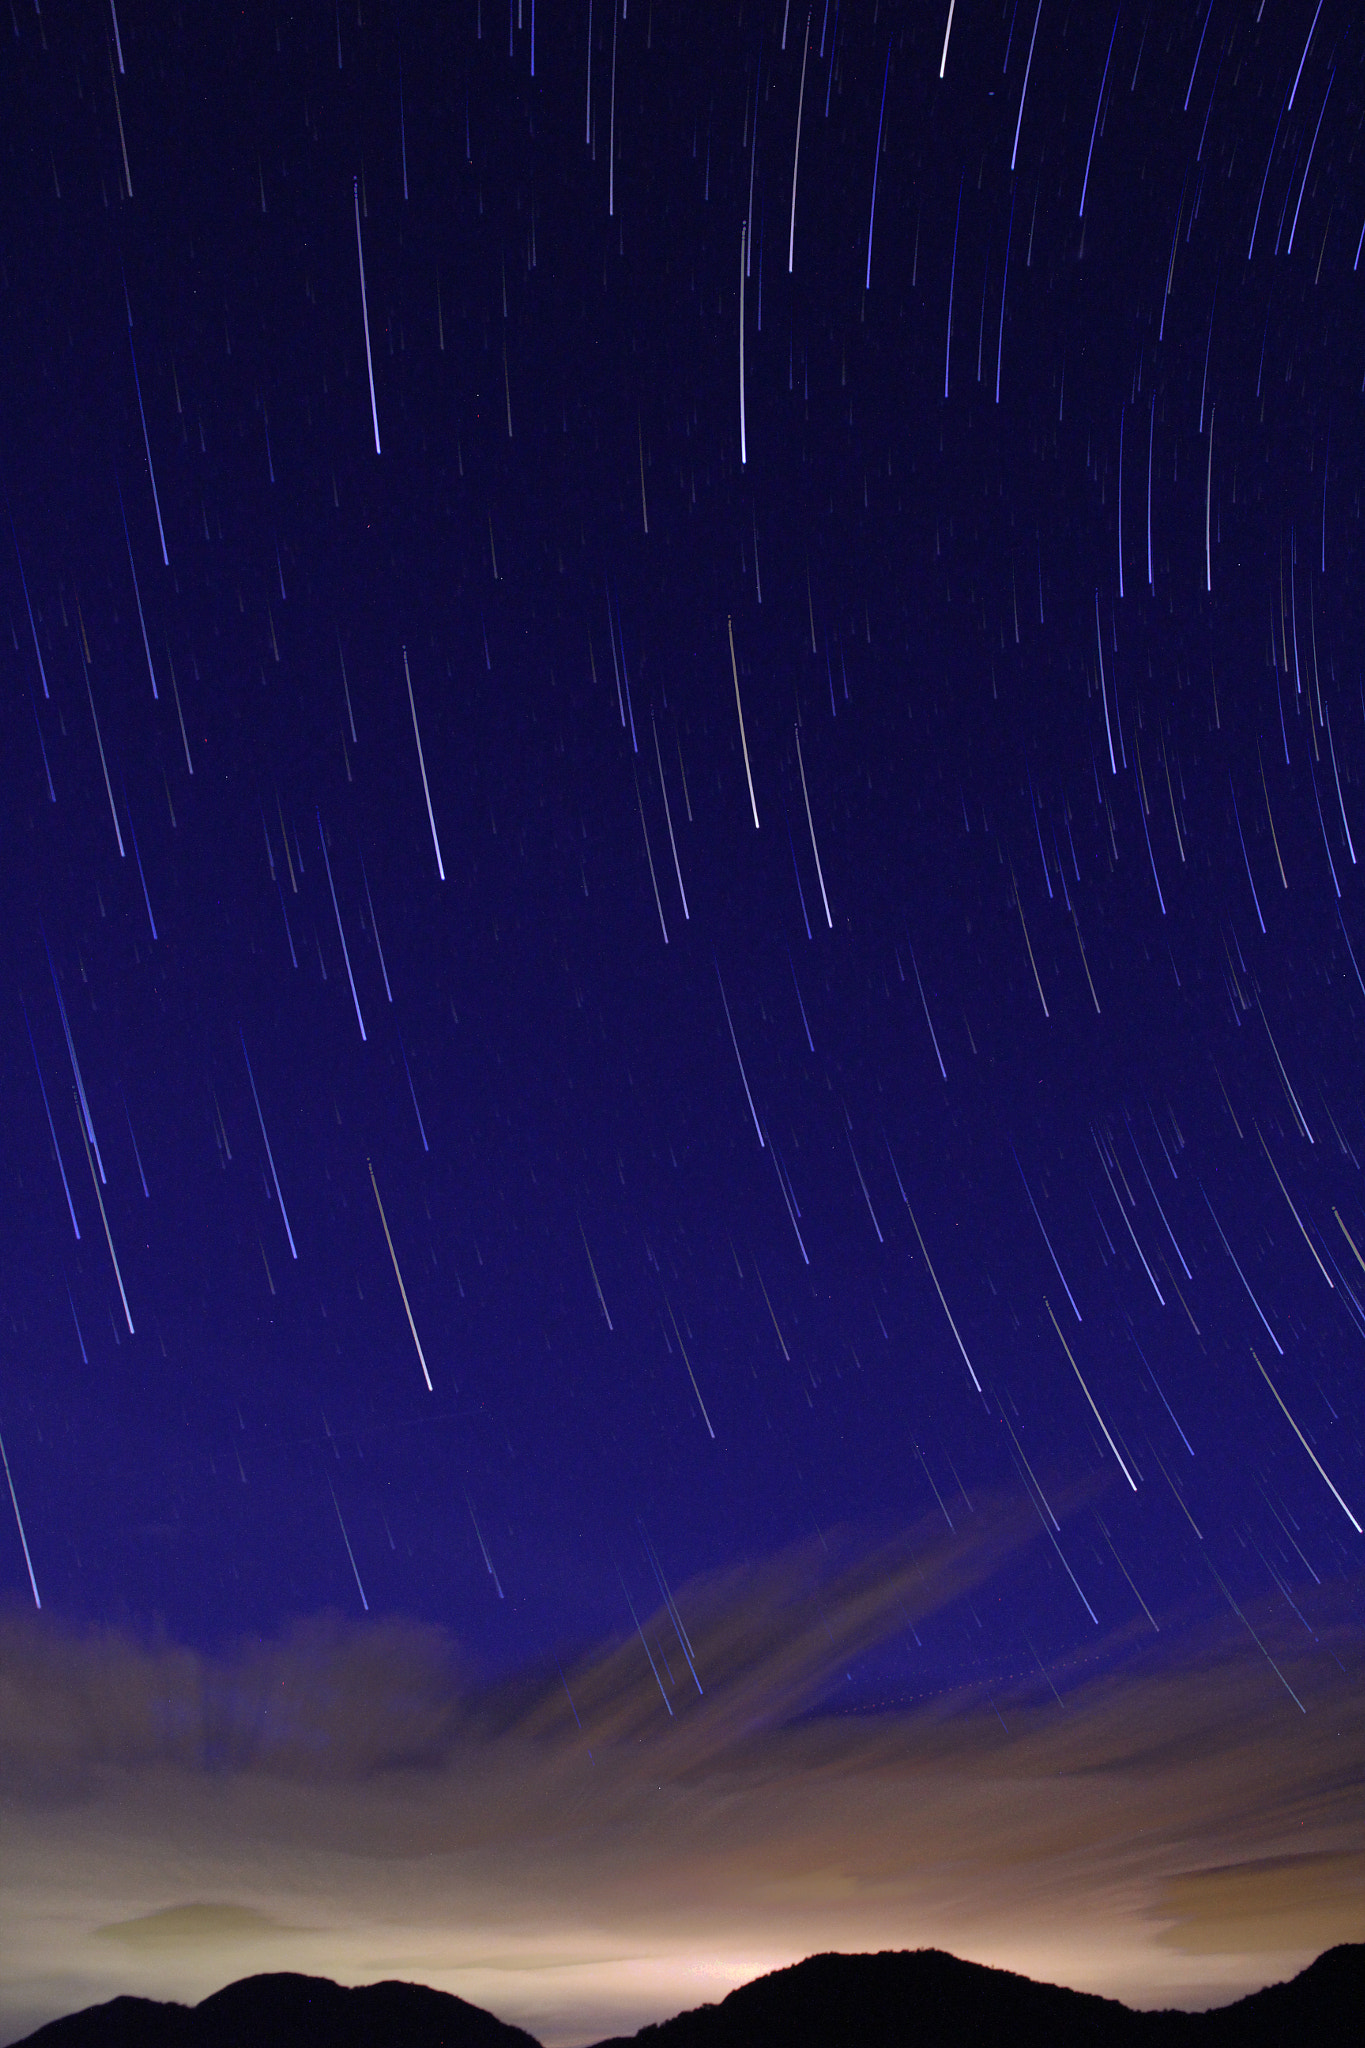
If Polaris isn’t visible, simply point your camera in another direction to create sweeping arcs across the sky.
Ask yourself:
Try repeating the exercise:
You’ll quickly see how shooting direction changes the appearance of the trails.
Many photographers assume they need perfectly dark skies for star trails.
In reality, moderate light pollution often works surprisingly well, especially when the foreground is illuminated by nearby city glow. The combination of bright foreground details and visible star movement can create dramatic images that would be difficult to achieve in complete darkness.
Small improvements in location, composition, and shooting time often make a bigger difference than driving hours to find perfectly dark skies.
If you want more exercises like this—clearly structured, easy to follow, and designed to build real shooting instincts—the June Flash Sale on the Photography Exercises is wrapping up tomorrow. It’s a practical way to keep improving, even when winter limits your time and motivation to shoot.
A practical way to build confidence for challenging shooting situations that often trip photographers up. Each exercise focuses on real-world scenarios—difficult light, motion, exposure decisions, and creative problem-solving—so you learn how to take control instead of relying on auto settings.
Only 1 day left: PictureCorrect Photography Exercises June Flash Sale
For many smartphone photographers, Live Photos are one of those features that get turned on by accident and forgotten about entirely.
After all, if you’re trying to take a still photograph, why would you want a tiny video attached to every image?
The truth is that Live Photos can be surprisingly useful—and even creative—when you know how to take advantage of them.
Instead of thinking of Live Photos as short videos, think of them as a way to capture a few extra moments before and after you press the shutter. Those extra moments can open up several creative possibilities that ordinary photos simply can’t provide.
Relevant: only a little while left for the Smartphone Photography Guide  Summer Sale
Anyone who has photographed children, pets, or groups of people knows how difficult it can be to capture the perfect facial expression.
Someone blinks.
Someone looks away.
A smile appears a fraction of a second too late.
With Live Photos, your phone records a brief sequence of frames surrounding the moment you take the picture. This allows you to choose a different frame afterward if the exact shutter moment wasn’t ideal.
That means you can often rescue a photo that would otherwise be unusable.
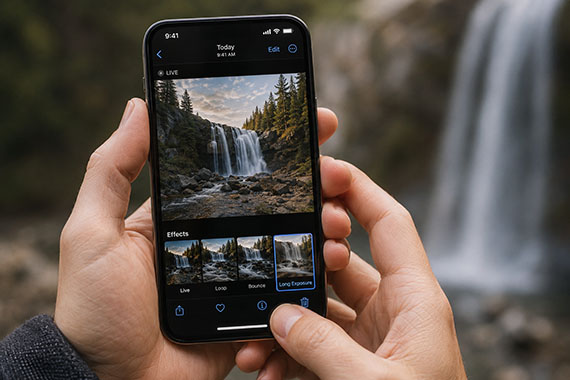
One of the most powerful—and least known—Live Photo features is the ability to create long exposure effects.
When viewed in the Photos app on an iPhone, a Live Photo can be transformed into a simulated long exposure image with a simple swipe and effect selection.
This works particularly well for:
While it won’t completely replace a tripod and dedicated camera setup, it can produce surprisingly attractive results directly from your smartphone.
Sometimes a still image doesn’t fully capture the feeling of a scene.
A flag waving in the wind.
Leaves rustling on a trail.
A child blowing out birthday candles.
A dog excitedly running toward the camera.
These moments often feel more alive when viewed as a Live Photo rather than a frozen frame.
Instead of sharing a traditional image, consider sharing the Live Photo itself when the motion helps tell the story.
Live Photos can also be converted into looping animations.
The Loop effect continuously repeats the captured motion, creating an eye-catching result that often feels more engaging than a static image.
Some subjects work particularly well:
The key is finding motion that naturally repeats itself.
Another creative effect available in the Photos app is Bounce.
Rather than looping continuously in one direction, Bounce plays the motion forward and backward repeatedly.
This effect can create fun and playful results with:
Used sparingly, Bounce can make ordinary moments feel more dynamic and entertaining.
Many photographers treat Live Photos as a safety net.
Because multiple frames are being recorded, you often have a better chance of capturing the decisive moment.
This can be particularly useful when photographing:
Instead of relying entirely on perfect timing, Live Photos give you a small buffer that can help save the shot.
Despite their benefits, Live Photos aren’t always the best choice.
You may want to disable them when:
Since each Live Photo stores additional image data, they consume more storage than traditional still photographs.
Live Photos are often dismissed as a gimmick, but they’re actually a surprisingly versatile creative tool.
Whether you’re rescuing a missed expression, creating long exposure effects, generating looping animations, or simply capturing a little more life in your images, Live Photos can add possibilities that standard photographs can’t.
The next time you’re tempted to turn the feature off, try experimenting with it instead. You may discover that those few extra seconds before and after the shutter click can lead to some of your most interesting smartphone photos.
The Summer Sale on the Smartphone Photography Guide is wrapping up soon, and it’s a great chance to finally unlock what your phone camera can really do.
The guide walks through real, usable techniques—manual controls, motion blur, low-light shooting, and creative effects—so you’re not just relying on auto mode and luck. If this post helped, the guide goes much deeper.
Deal ending soon: Smartphone Photography Guide Summer Sale
Most photographers develop an editing workflow without giving much thought to the order of their adjustments.
Exposure first. Contrast second. Maybe some sharpening. Maybe some noise reduction.
As long as the final image looks good, does the order really matter?
Actually, it does.
Related: only a little while left for the Photo Editing Cheat Sheets  Flash Sale
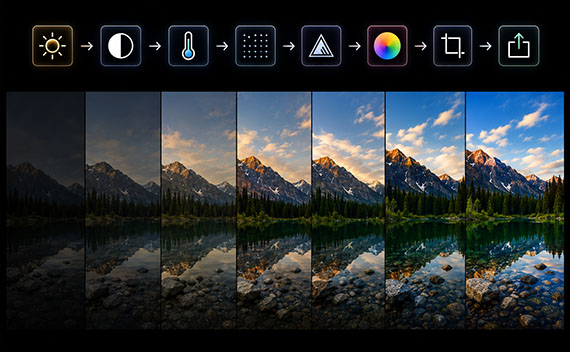
Every adjustment you make changes the underlying data in your image. That means the next adjustment isn’t working with the original photograph anymore—it’s working with a modified version of it. In some situations the difference is minor, but in others it can have a surprisingly large impact on image quality.
Think of a digital photo as a massive collection of brightness and color values. When you increase exposure, you are changing those values. When you add contrast, you’re stretching them apart. When you sharpen, you’re increasing edge contrast between neighboring pixels. Every editing tool is essentially manipulating data.
Because of this, the order of your edits can affect how much information is available to later adjustments.
A good example is noise reduction and sharpening. Noise reduction attempts to smooth unwanted variations in brightness and color, while sharpening enhances local contrast to make details appear crisper.
If you sharpen first, you’re not just sharpening details—you’re also sharpening the noise. Later, when you try to remove that noise, the software has a more difficult job because the unwanted artifacts have already been emphasized.
For this reason, noise reduction is usually most effective before sharpening.
Exposure and contrast adjustments offer another example. Imagine an image that is slightly underexposed. If you immediately apply a strong contrast adjustment, you may push shadow areas even darker. Later, when you attempt to recover those shadows, you may discover additional noise and reduced detail.
By correcting exposure first, you establish a stronger foundation for every adjustment that follows. The software has more balanced tonal information to work with, which often produces cleaner results.
Color adjustments follow a similar principle. White balance affects nearly every color value in the image. If you spend time fine-tuning colors and then make a major white balance correction afterward, much of your earlier work may need to be revisited.
This is why many photographers treat white balance as one of the first creative decisions in the editing process.
This doesn’t mean every photographer must follow an identical workflow. Different images and different creative goals may require a different approach. However, understanding how edits affect the underlying data can help you make smarter decisions when processing your photos.
The next time you’re editing an image, remember that photography isn’t just about choosing the right adjustments. It’s also about choosing the right sequence.
Great editing is often less about the sliders you move and more about the order in which you move them.
Today’s sale on the Photo Editing Cheat Sheets is wrapping up soon, making this a great time to bring clarity to your editing workflow. If editing often feels scattered or uncertain, these cheat sheets provide a clear, repeatable process for tackling exposure, color, masking, retouching, and finishing touches in the right order.

Paired with time-saving keyboard shortcuts, they help you edit faster, stay consistent, and know when an image is truly finished.
Deal ending soon: The Photo Editing Cheat Sheets Flash Sale
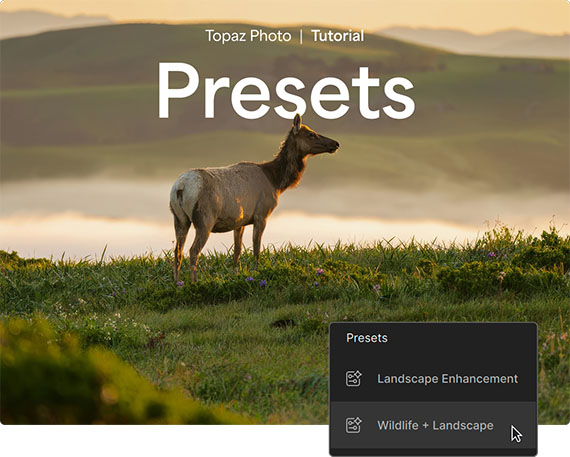
Presets are one of the easiest ways to speed up your photo editing workflow in the Topaz Photo Image Quality Editor.
Instead of rebuilding the same editing stack every time you open a new image, presets let you save your favorite enhancement combinations and reuse them later. This is especially useful when you are editing groups of similar photos, such as high ISO wildlife images, low-light travel shots, fast action photos, or older low-resolution files that need extra help.
With presets, Topaz Photo can save your selected enhancement, model, strength sliders, and selection settings. The best part is that everything remains fully adjustable after the preset is applied, so you are never locked into the original settings.
Many photographers find themselves making similar adjustments over and over again.
For example, you may have a favorite sharpening setup for action shots, a noise reduction combination for high ISO images, or an upscaling workflow for older photos. Instead of recreating those settings manually each time, you can save them as a custom preset.
This can help you:
Here is how to create a custom preset in Topaz Photo.
Open Topaz Photo on your computer and get ready to begin your edit.
Choose a photo that actually needs improvement.
This could be a fast action photo, a high ISO image, a low-resolution file, or a shot that needs sharpening, denoising, or upscaling.
Apply the enhancements that improve your image.
You can stack multiple enhancements together and adjust the sliders until the image looks right. For example, you might combine sharpening, noise reduction, and upscaling depending on the file.
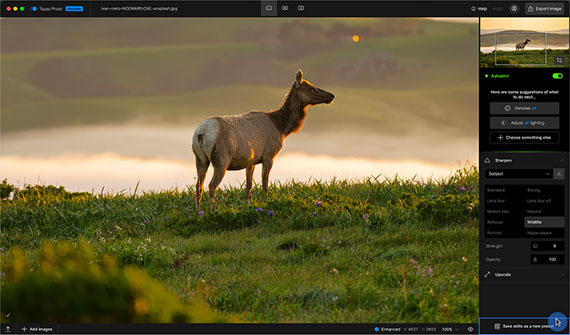
Take your time here because these settings will become the starting point for your preset.
Once you are happy with the edit, scroll to the bottom of the sidebar and click Save edits as a new preset.
Give your preset a clear name so you can recognize it later.
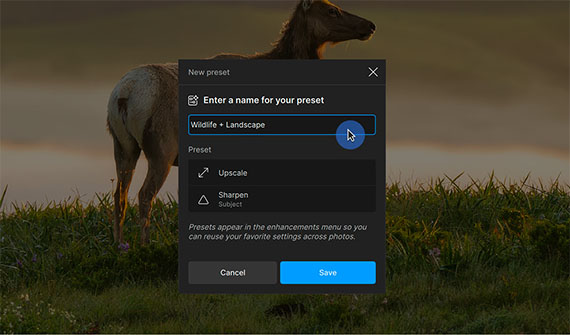
Your preset will include the selected enhancement, model, strength sliders, and selection settings.
After saving, your new custom preset will appear at the bottom of the Select a filter menu list.
From there, you can apply it to other images whenever you want to reuse those settings.
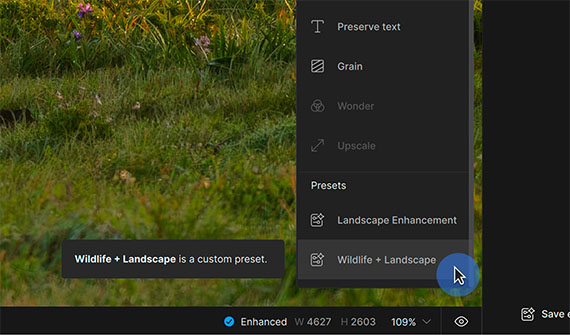
Once your preset is saved, you can quickly apply your favorite settings to other images.
This is especially helpful when working with a series of photos shot in similar conditions. For example, if you photograph a sports event, wildlife scene, concert, or low-light travel location, you may have several images that need the same type of correction.
Instead of starting from scratch each time, apply your preset, review the result, and fine-tune as needed.
Presets in Topaz Photo are a simple but powerful way to make your editing workflow faster and more consistent.
They let you save your favorite combinations of enhancements and settings, while still giving you the freedom to adjust everything after applying them. Once you build a few presets for your most common editing situations, you can save a lot of time and get to your finished images faster.
Found here: Topaz Photo Editor with Presets
How on earth do you find a fresh angle to shoot from when they’ve all been taken? That’s not what I mean. I do not mean discovering a new angle but using new angles you don’t usually shoot from. By changing your angles you’ll add a whole new dimension to your photography.
Related: only a little while left for the Photography Cheat Sheets  Travel Season Sale
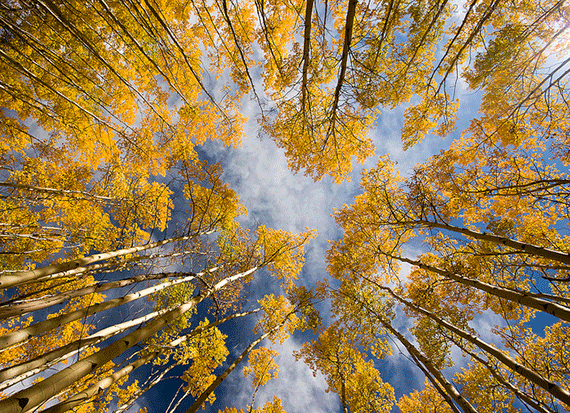
Photo by Sathish J; ISO 400, f/14.0, 1/100-second exposure.
The question I get asked as a photography teacher is how do the pros do it? Why are their images so different from mine? Simple, one of the techniques they use is angles or viewpoints. Implement them in your images and you are one step nearer to a great image. The key here is varying the angles and trying to think outside the box.
Everyone shoots an image from directly in front of their subjects or objects. They line everyone up, tell them to say cheese, and push the shutter button. Then they wonder later why their images all look the same. The reason they all look the same is because most people shoot from eye level, which, on average, is about 1.5 meters or 5 feet above the ground. Boring because everyone does it. So think before you shoot, and use your feet to move around.
How low can you go is the chant when attempting to belly dance under a balancing pole. Get down low on the ground and shoot from that angle looking up at the subject. Immediately the perspective has changed and the image is dramatically different.
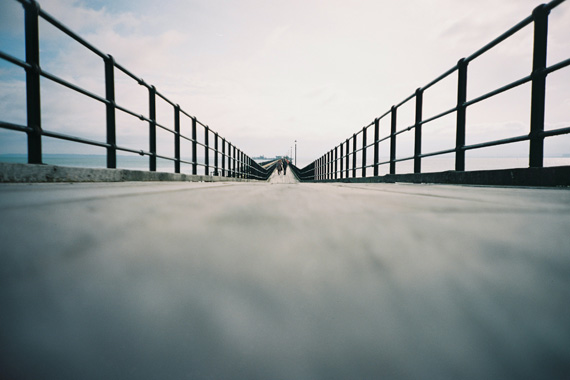
Photo by Nick Page
How many people do you ever see in a tourist spot lying on their stomachs getting a shot. No need to answer. I have never seen one. If you are prepared to forgo embarrassment, then you are the one who will get the unique shot. Logical, isn’t it? But how many people do it?
This is just a little less embarrassing than point two. Using your knees, sitting down, or resting on your haunches all help you to vary your height. More people do this, so it’s not as unique as using your stomach. But, you will still get great images. Do this exercise: Choose a subject and then shoot it from 3 meters on your stomach, sitting on your bum, kneeling, crouching, and standing straight up. Then move in a few feet or a meter and do it all again. Do this until your are as near as you can get. Then view all of your images and see how many of them are better than a normal standing image.
This is a variation of point two. Try lying flat on your back. Try it. It will give you a totally new perspective on life and your photography. Again you never see photographers lying on their backs in public places. Why? Same old reasons: embarrassment and shyness. But, the one who tries this gets the better shot. Ever seen those shots looking up into tall trees? How do you think they were taken? Right! Use this angle more often, and you’ll find that more than half your shots will improve dramatically. You can even try this for family shots to get that unique extra photo that nobody else has.
Now don’t get all dangerous and attempt to climb too high and damage yourself and your gear. Just get a vantage point that is above the normal eye level images that everyone shoots. Get a different perspective. It may be great to get the odd high shot but really all you want to do is get a higher, different viewpoint. Again, something that is unique and not the norm.
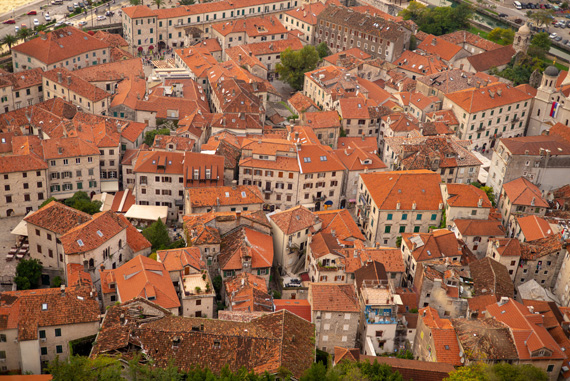
Photo by Geng Sittipong; ISO 200, f/2.5, 1/60-sec.
One of the best pieces of advice I can give you is to use your feet. Forget about zooms and move around. Walk around your subject or the object you’re shooting and find a different viewpoint or angle. Vary your height, lie on your back, get higher or even lower but find something that is different. At the same time though, use your head to visualize the final image and work toward that.
These are just a few tips for shooting more creative images from different angles. I think that this is one the best tips you can use as you learn photography. Don’t be afraid to experiment or get embarrassed. Keep practicing, and before you know it you will be shooting like a pro.
About the Author:
Wayne Turner has been teaching photography for 25 years and has written three books on photography. He has produced 21 Steps to Perfect Photos, a program of learner-based training using outcome-based education.
Some shots are just harder than others. Ever struggled with vacation photos, twilight exposures, or star trails and focus stacking while you’re on the move? The Travel Photography Cheat Sheets (currently 88% off today) are built exactly for moments like that:

Showing you step by step how to dial in settings, avoid common mistakes, and get the shot — even when you’re tired, rushed, or shooting in unfamiliar conditions. Travel-ready, no Wi-Fi required, and designed to be quick to reference so you can spend less time guessing and more time shooting.
Deal ending soon: Photography Cheat Sheets Travel Season Sale