perjantai 31. joulukuuta 2021

PictureCorrect.com: 365 Photo a Day Challenge: Start the Year Right

I like to think of myself as an avid photographer, but there are times when the creativity wanes and the inspiration dries up. The trigger finger stiffens from lack of use and generally, I start to suffer from photographer’s malaise. This is when auto-pilot needs to kick in and get me up and running again. How do I switch on the autopilot? With the 365 Photo Challenge–a photo a day for a whole year.

365 photo challenge

Photo by Luigi Estuye; ISO 400, f/4.0, 1/200s, 42mm.

A photo a day keeps the staleness away. Staleness and boredom with a hobby like photography is a killer. Before you know it, you’re advertising your gear on eBay. I have found a simple way to keep the pot boiling on the stove. All my students know this one. It is simple, and it’s most certainly not time-consuming.

There are two ways to approach this:

  1. The simple photo a day challenge. By this I mean that you allocate yourself a few minutes a day to shoot one image that you like or even dislike, for that matter. Just shoot an image at some point during your day. Carrying your camera with you every day would help. Whatever you do, make sure that you take one photo every day. Even if it is the clock on the wall before you go to bed. Of course, it would help if you make your subjects different each day.
  2. The best photo of the day challenge. This is a variation of the challenge and gives you more leeway, meaning that you shoot as many images as you want but that at the end of the day you will select the best one, the one with most meaning or just a random choice if they are all good.
photo per day

Photo by Fauzan Ardhi; ISO 50, 1/160s.

In order to make this interesting, you can add a touch of variety by choosing a theme or using a common thread. I know of a photographer who took a small beach ball with him wherever he went, and this ball featured somewhere in every photograph. Choose something and add it as a common thread to all 365 days.

With the advent of Instagram, 500px, Flickr, and more you can really make this interesting and even generate regular interest in your images. Change your Facebook profile every day replacing it with your daily 365 Challenge shot. People will eagerly log in every day to see what photo you have loaded. Not only will this make you more enthusiastic but it will generate an interest in your images. The same goes for your blog. Upload a daily image and makes some comments on it. This way you can keep a record of the how, when, why and who of each image. This could actually turn into a form of photo journal in which you document your life over 365 days.

why do the 365 photo challenge

Photo by Evan Sanders; ISO 3200, f/2.8, 1/50-second exposure

This could be the beginning of a really fun experience. The bottom line is that you will keep your creativity, inspiration, and enthusiasm alive while at the same time learning and entertaining others. If you can find a way to make your photography fun and inspiring, it will never die. You will continually shoot photos throughout the year.

One more tip before we go. It’s great to sit down and write down ideas and thoughts about what you will do, what themes to shoot, and how you will display the images. But unless you get out there and just do it you will get nowhere. If you will run with the idea I can guarantee you that in 365 days’ time, you won’t believe the improvement and progress you’ve made as you learn photography.

why it's good to take a photo a day

Photo by Jehane; ISO 64, f/3.7, 1/85-second exposure

What the 365 photos show you is just how you have improved. They become your timeline of growth in creativity and skill.

About the Author:
Wayne Turner has been teaching photography for 25 years. Passionate about photography, radio and video, he is a Radio CCFm producer and presenter in Cape Town.


Go to full article: 365 Photo a Day Challenge: Start the Year Right

What are your thoughts on this article? Join the discussion on Facebook

PictureCorrect subscribers can also learn more today with our #1 bestseller: The Photography Tutorial eBook

The post 365 Photo a Day Challenge: Start the Year Right appeared first on PictureCorrect.


from PictureCorrect https://ift.tt/2Q6wSbT
via IFTTT

PictureCorrect.com: Interesting Photo of the Day: Times Square at Night

Over the past century, Times Square in New York has been the go-to place for music, the arts, and tourists. And with over 50 million visitors a year, it’s no surprise there are countless photos of this amazing hub of activity. Despite the vast amount of attention Times Square receives, photographers have a wonderful way of providing us with an entirely new perspective on things. Take this aerial view. While there are plenty of nighttime shots taken of Times Square, this aerial picture captured by Justin Brown offers beautiful colors and amazing building views many of us would have never had the chance to see:

Times Square, travel photography

1/200, ƒ/2.8, ISO 500 (Via Imgur. Click image to see full size.)

Times Square begins at the junction of Seventh Avenue and Broadway and stretches from West 42nd Street to West 47th Street. Located in Midtown Manhattan, this popular tourist attraction is often considered the heart New York City. However, contrary to popular belief, this section of New York resembles more of a bow tie than an actual square.


Go to full article: Interesting Photo of the Day: Times Square at Night

What are your thoughts on this article? Join the discussion on Facebook

PictureCorrect subscribers can also learn more today with our #1 bestseller: The Photography Tutorial eBook

The post Interesting Photo of the Day: Times Square at Night appeared first on PictureCorrect.


from PictureCorrect https://ift.tt/32zDgkW
via IFTTT

PictureCorrect.com: Discussion: What is Your New Year’s Resolution for Photography?

The beginning of a new year is truly a good time to set some goals for what you want to accomplish. Start off 2022 right! What is your New Year’s Resolution for Photography? We started this discussion on Facebook, it’s always great to make friends who are working towards the same goals.

Share & compare yours here: New Year’s Photography Discussion

new year's resolution

What is Your New Year’s Resolution for Photography? (Click to Join the Discussion)

Find the discussion here: What is Your New Year’s Resolution for Photography?


Go to full article: Discussion: What is Your New Year’s Resolution for Photography?

What are your thoughts on this article? Join the discussion on Facebook

PictureCorrect subscribers can also learn more today with our #1 bestseller: The Photography Tutorial eBook

The post Discussion: What is Your New Year’s Resolution for Photography? appeared first on PictureCorrect.


from PictureCorrect https://ift.tt/31fABMp
via IFTTT

torstai 30. joulukuuta 2021

PictureCorrect.com: Interesting Photo of the Day: Cannon Beach Patterns

Cannon beach in Oregon never fails to make it to the list of best beaches of the world. Besides the sandy and gorgeous shoreline, Haystack rock is another wow factor of this place. When you see it, you get to feel how majestic it really is. Photographer Nathaniel Merz took the following image of the place during sunset, and it surely gives you a hint of how beautiful the beach really is:

“Sunset From Cannon Beach, Oregon” by Nathaniel Merz (Via Reddit. Click image to see full size.)

Merz took the image with his Canon 5D mark IV and the 24-105mm f/4 lens. The interesting patterns on the sand with the sun-kissed dune grass together make for an interesting foreground. The golden glow from the setting sun has really done its magic making even the grass appear interesting. And how can we miss the Haystack rock crowning the sandy beach and standing tall in the background. The dramatic evening sky with a purple tint set as the backdrop to the ocean and the Haystack rock adds to the overall aesthetic of the image.

Have you had a chance to visit the beautiful Cannon beach?


Go to full article: Interesting Photo of the Day: Cannon Beach Patterns

What are your thoughts on this article? Join the discussion on Facebook

PictureCorrect subscribers can also learn more today with our #1 bestseller: The Photography Tutorial eBook

The post Interesting Photo of the Day: Cannon Beach Patterns appeared first on PictureCorrect.


from PictureCorrect https://ift.tt/2O6rPqg
via IFTTT

PictureCorrect.com: In-depth Lightroom Photo Editing Course New Year’s Deal

What if you knew that you could effectively edit hundreds of photos in minutes, not hours; would you find the task less daunting? For those of you working on photo editing or trying to get better at Lightroom, you may be interested in this course that’s currently on sale for New Year’s. Found here: Effortless Editing with Lightroom New Year’s Sale

effortless photo editing

Lightroom photo editing tutorials (see what’s inside)

Some of the many topics covered:

  • The exact workflow the instructors use 100% of the time – (It’s a myth that you have to start at the top and end at the bottom)
  • The best way to fix skin blemishes in just a few clicks
  • How to add life and detail to your raw files by using your histogram and sliders
  • Why most photographers skip the lens correction… and how you can use this tool to your advantage
  • The fastest way to edit all your photos at once
  • The lazy man’s way to create panoramas without exporting to Photoshop or cropping
  • How to save more time by creating and using your own presets
  • Where and how to crop and straighten for maximum results (because YES, cropping is OK!)
  • How to use a ‘surgeon’s scalpel’ to change individual colors
  • The do’s and don’ts of vignetting and dehazing
lightroom shortcuts

Bonus today: Lightroom Shortcuts Cheat Sheet

  • 5 simple edits the instructor never skips (and you shouldn’t either)
  • The hidden preview for your sharpening sliders that professionals always use
  • The only background blur tool you’ll ever need and how to make it easy to use
  • How to transform the perspective of your photo with the click of a button
  • And much more…

How to Get the Course for a Discount Today:

Effortless Editing with Lightroom is currently 50% off for a New Year’s sale. They have also thrown in Lightroom shorcut lists, a Photoshop tutorial, and a set of Lightroom presets. It all comes with an impressive 90 day happiness guarantee so there’s no risk in trying it.

Deal ending soon: Effortless Editing with Lightroom New Year’s Sale


Go to full article: In-depth Lightroom Photo Editing Course New Year’s Deal

What are your thoughts on this article? Join the discussion on Facebook

PictureCorrect subscribers can also learn more today with our #1 bestseller: The Photography Tutorial eBook

The post In-depth Lightroom Photo Editing Course New Year’s Deal appeared first on PictureCorrect.


from PictureCorrect https://ift.tt/3qBlRQP
via IFTTT

PictureCorrect.com: Changing Aspect Ratio In-Camera On Location for Landscapes

Modern cameras are packed with helpful features. However, despite being useful, some features might be buried deep inside the camera menu. Or maybe they might be hiding in plain sight because you don’t pay enough attention to them, or because you’re unaware of the functionality. In today’s video, landscape photographer Mark Denney takes you through a camera feature that’s potentially a game-changer, even though you could have been ignoring it all this time:

“There aren’t many camera settings that I’d consider to be real game-changers, but this is one setting that I’d made an exception for.”

Modern cameras come with an option to let you change the aspect ratio on the viewfinder and LCD. You might want to check whether or not your camera has this feature.

How many times have you tried to crop your landscape image to a different aspect ratio, only to realize that doing so has inadvertent side effects? This usually happens because you have no visual reference to guide you on the field. By enabling and using the feature to change the aspect ratio, you can quickly visualize and conceptualize what different types of crops will look like in post. Referring to the guides, you can quickly recompose the image to include more of the scene that you like.

“It can be very beneficial to actually change the aspect ratio in-camera while you’re on location. It really helps with the overall creative process.”

Deviating from the usual 3:2 aspect ratio of a full-frame or APSC sensor can be a simple yet effective way to freshen up your photography. Be sure to check if your camera supports this feature—if it does, make full use of it.


Go to full article: Changing Aspect Ratio In-Camera On Location for Landscapes

What are your thoughts on this article? Join the discussion on Facebook

PictureCorrect subscribers can also learn more today with our #1 bestseller: The Photography Tutorial eBook

The post Changing Aspect Ratio In-Camera On Location for Landscapes appeared first on PictureCorrect.


from PictureCorrect https://ift.tt/3EI9Zl5
via IFTTT

keskiviikko 29. joulukuuta 2021

PictureCorrect.com: How to Set Prices & Rates as a Professional Photographer

Pricing… you can’t work as a professional photographer for long without getting caught up in the subject of pricing your work (well, you could, perhaps, but you would never make any money). Then there’s the question of not only what prices to charge, but also how to educate your clients about your price list without them bailing out or thinking you’re trying to pressure them.

photographer pricing

Photo by Pedro de Sousa; ISO 200, f/9.0, 1/1250s, 140mm.

In the time that I’ve been running my studio as a professional photographer, I’ve explored different methods of presenting my prices to clients and potential clients, with various degrees of success. These include the usual suspects:

  • Printed price menus
  • Combined price list and brochure
  • Website price page
  • Sending out price lists by email

But, the issue I had with these methods was that sales just didn’t seem to be where I wanted them to be. I would hand out price lists to prospects who requested them, count the accesses to my price list page, or email my list to anyone who asked for it; yet the clients disappeared as quickly as they came, like ghosts. This was a complete puzzle to me, and it didn’t take too much of that to imagine that my prices must be too high.

Looking at my price list, and considering the lack of returning customers, I really did start to think that my prices were too high, so I made the awful mistake of lowering them. Yes, you guessed it; I got just the same result. The moral is that we can get tangled up in a vicious cycle of always fiddling with the fees.

Is any of this familiar? Are you stuck in that wasteland of trying to second-guess your prospects to find out what you think they would easily pay, rather than what you believe they should pay?

You aren’t alone. Just about every professional photographer I know has encountered this painful process. But, there is a solution…

Show, Don’t Tell

The answer to this problem really requires three distinct things.

  1. Decide what your products and services are going to be (i.e. what it is that you’re actually selling).
  2. Decide on your fees, based on your production costs, level of competition and income requirements.
  3. Produce one price list that is yours, and yours alone.

That’s correct, just ONE. No one sees your complete price list unless you personally give it to them, complete with a full sales presentation and in-depth explanation of everything you offer.

I can hear you exclaiming, “that’s the dumbest thing I’ve heard!” but stick with me here for just a moment.

There is a perfectly good explanation for why the other methods don’t work effectively. When a customer looks at a website and finds a price list, they can see how much a portrait or a wedding package costs. But how are they going to compare that with what they’ve seen elsewhere, except by the price?

photographer at work

Photo by Gerson Crespo

All of a sudden, your prospect has been turned into a price comparison shopper! In the mind of most clients, all 8x10s are printed equal, but we know that couldn’t be more wrong. It’s what is printed on the paper that’s critical, not the print itself. But how can we clarify this to the prospect when they’re sitting at home reading a price list?

Wedding photography packages are an even better example. Displaying a price for a collection on a website or in a pamphlet they can take home is only going to make the prospect think, “I get such and such for this price, but that other photographer down the street will give me the same or more for a lower price.” You and I both know that the “other” photographer won’t put as much time into the wedding day as you will, doesn’t have the level of experience you do, won’t deliver as fast, or simply isn’t as professional. But the prospect is only looking at prices.

The same thing goes when the prospect calls you on the phone. The first question is, “how much?” If you answer that question straight away, they’re gone, and we never hear from them after that. Instead, we have to divert our chat away from the price (at least at the beginning of the call) and on to the less logical reasons for the photography they’re looking for. Once we’ve had a chance to educate them about what makes us unique, then we can gently mention pricing, after which we arrange to meet with them personally for a more detailed consultation if the price is within their expectations.

By the time the prospect meets with you for a consultation, they already understand that your prices are affordable.

The Personal Touch

As you might expect, I meet with every prospect before I allow them to book a portrait session or a wedding. This is an opportunity to give my complete sales presentation before showing them my price list. As a salesperson, it is my job to ensure I understand as much about their wants as possible before selling them anything—they won’t care what I know until they know I care about them. If making money is the only motivator for you as a professional photographer, then you’re in the wrong business.

There is one copy of my price list, and I keep it in a leather binder, printed on fine paper. To the prospect, it looks like an official copy, which it is, and nobody has ever asked to take it home.

When I’m meeting with a customer to discuss a wedding or portrait session, it can take 45 minutes to an hour before we ever get to the topic of price. The price list is there in front of them, I’m sure they know what it is, but I don’t open it until I’m ready. If they ask about the price list, and I don’t feel ready for them to see it, I simply say, “I’m so happy you brought that up, and I’ll be glad to go over it shortly. But first…” and then I ask them more questions about the wedding or portrait.

By the time we do get to the price list, we’ve talked about the wedding day, how the couple met, what they like to do together, what’s important to them and their family about the wedding, how many bridesmaids and groomsmen they have, the color scheme, etc. At that point, they understand that I really care about them, and now the topic of price is no longer the main driving force. Obviously, they will have a plan in mind, and there should be a collection that falls within that range, but they are no longer just comparing our prices to everyone else’s. They are making a comparison, but it’s a comparison of things like service, quality, attention to detail, personality, etc.

Selling: Start At The Top!

When I go through the price list, I start with the most expensive choice, even if they’ve already indicated their budget. Doing it like this, I only have to sell down and not up. Selling up is as hard as climbing a mountain—it’s usually much simpler going down than up.

Don’t make the awful mistake of confusing this method for pressure sales, because it isn’t. The reason for selling down is to help them become involved with a package that’s appropriate for them, even if it does happen to be the cheapest one you offer.

The client doesn’t understand as much about creative professional photography as we do, so they may not truly understand which considerations they ought to be most concerned about. Instead, they get stuck on the only thing they can relate to, which happens to be the price. At the end of the day, it’s our job to get them off the price and re-connect them with the real elements of what we do.

photographer rates

Photo by Szabo Viktor; ISO 100, f/1.8, 1/50s, 35mm.

Summary

I just want to make sure that I underline this point:

I have only one printed price list to show to prospective clients.

There are no prices listed on my website, no prices emailed out to those who ask for them, no detailed prices given over the telephone, and no brochure with a few photographs and my prices for them to take away.

I’m not hiding anything from my customers or trying to deceive them—that’s not the way to run a solid photography business. But, it does demonstrate to my prospects that I value them above the prices for my photography. It also helps to screen out the types of prospects I don’t want to work with—the ones to whom price is the main important factor and to whom family, relationships, memories, and emotions are not as valued.

So far, no one has complained about this procedure. My customers now treat my prices with respect, and they understand the context in which they’re given. This encourages better sales and, in my opinion, an overall better experience for the prospect.

About the Author:
Nigel Merrick is a professional photographer, blogger and business coach for other working photographers. Nigel’s blog helps professional photographers find peace in their business, love from their clients, and happiness in their personal lives by clarifying their focus on business and marketing.


Go to full article: How to Set Prices & Rates as a Professional Photographer

What are your thoughts on this article? Join the discussion on Facebook

PictureCorrect subscribers can also learn more today with our #1 bestseller: The Photography Tutorial eBook

The post How to Set Prices & Rates as a Professional Photographer appeared first on PictureCorrect.


from PictureCorrect https://ift.tt/341z0L7
via IFTTT

PictureCorrect.com: Interesting Photo of the Day: Portrait with Light Painting

It’s usually when you think out of the box that you get some mind boggling images. For instance, it’s not everyday that you come across a portrait that was taken with a long exposure. Photographer Adrian Mechocki specializes in the art of light painting and took the following portrait using the technique:

long exposure portrait

“Portrait With Light Painting” by Adrian Mechocki (Via Reddit. Click image to see full size.)

This image is a long exposure of almost a minute that Mechocki took in a completely dark room. The model had to be perfectly still throughout the entire exposure as even the slightest movement would cause the image to be blurry. What’s really interesting is that the image is a sole result of light painting without any sort of post processing.

“I did the light trails by moving the LED lights in the air for a few minutes. The duration depends on what I want to achieve and it differs on every photo.”

The mix of colors along with the intense look on the face of the model gives a really moody look to the image. Also, if you look closely at the light trails, they appear as brush strokes. This further adds to the artistic feel of the image. And not to forget, it’s worth appreciating how still the model appears since there is hardly any noticeable motion blur.

Do you know someone who would be able to stay perfectly still for over a minute?


Go to full article: Interesting Photo of the Day: Portrait with Light Painting

What are your thoughts on this article? Join the discussion on Facebook

PictureCorrect subscribers can also learn more today with our #1 bestseller: The Photography Tutorial eBook

The post Interesting Photo of the Day: Portrait with Light Painting appeared first on PictureCorrect.


from PictureCorrect https://ift.tt/36A4x2q
via IFTTT

PictureCorrect.com: Timelapse: New Year’s Eve In New York City (2014)

Celebrating New Year’s Eve at Times Square in New York City is on many a bucket list. It is one of the largest celebrations of its type–an estimated 1,000,000 people attend the event in person with another 1,000,000,000 (yes, that’s right, one billion) people tuning in worldwide via TV and Internet. The following timelapse video takes viewers right to the heart of the action:

Filmed over the course of 12 hours from the rooftops of two different hotels, the crew used a wide assortment of gear to capture the stunning footage. Here is a sampling of what was inside their camera bags:

  • Three Canon 5d Mark III’s
  • Three Canon 7D’s
  • Two Canon 60D’s
  • Canon T3i and a T4i
  • Two Canon 24-70mm II’s
  • Two 16-35mm II’s
  • Two 70-200mm II’s
  • 24mm Tilt Shift II
  • Dynamic Perception Stage Zero
  • Emotimo TB3 Black
  • Manfrotto 536, 528XB,  535, and 546B 190cx3 tripods
  • Kessler Kwik Release Plates
  •  Hercules 2.0 Head

Can you imagine carrying all that gear around New York City on the most bustling day of the year? It goes to show how much blood, sweat, and tears actually go into making a two and half minute video clip.

nye nyc

new york city new years

Produced by The Timelapse Group, the video was made by compiling over 18,000 still photographs to give the appearance of moving video.

For further training: The Total Timelapse Photography Course


Go to full article: Timelapse: New Year’s Eve In New York City (2014)

What are your thoughts on this article? Join the discussion on Facebook

PictureCorrect subscribers can also learn more today with our #1 bestseller: The Photography Tutorial eBook

The post Timelapse: New Year’s Eve In New York City (2014) appeared first on PictureCorrect.


from PictureCorrect https://ift.tt/3FEYa0h
via IFTTT

tiistai 28. joulukuuta 2021

PictureCorrect.com: 10 Pieces of Advice for New Lightroom Users

If you are new to Lightroom then it can be a bit overwhelming. As an experienced Lightroom user, there are things that I wish I had known when I started using the software. Here’s a list of the ten most important.

lightroom library

“Photo editing” by Hakan Dahlstrom

1. Store All Your Raw Files in a Single Master Folder

Lightroom is designed for organizing and processing Raw files (plus other photo files like TIFF and JPEG). But it helps greatly if your Raw files are well organized in the first place. That means storing them in a master folder (I call mine Raw) containing sub-folders for organizational purposes.

This is a great deal more efficient than keeping Raw files in various folders scattered over different locations.

Ideally, the photos will be stored on a hard drive other than your system drive, either on an external hard drive or a second hard drive in a desktop system. This saves you using up too much space on your system drive, which will ultimately slow your computer down.

This screenshot shows my folder structure.

adobe lightroom organization

Folder Structure

2. Back Up Your Catalog to the Same Drive as Your Raw Files

With Lightroom, all you need for a successful backup is a copy of your Raw files and your Catalog (minus preview files). Any JPEG or TIFF files created by exporting from Lightroom can be created again. Think of Raw files as being like negatives—you will never suffer an irrevocable loss as long as they are safely backed up.

Lightroom saves the Catalog to your system drive, so setting the backup location to a separate hard drive means you always have two copies of your Catalog (as long as you backup your Catalog every time you exit Lightroom).

3. Use a Single Catalog

Earlier versions of Lightroom slowed down as the number of photos in the Catalog grew, but with Lightroom 5 tha’s no longer an issue. Lightroom is for organizing and searching your Raw files as well as processing them, so it makes sense to keep your entire image collection together. You can only have one Catalog open at a time, so if your images are spread across multiple Catalogs you can’t search your entire photo collection in one go.

Note: There are exceptions to this, but they are mainly for high volume shooters like wedding photographers or people who work on their photos away from home on a laptop. But for most photographers, a single Catalog makes sense.

4. Keep a Copy of Your Raw Files and Catalog Off-site

If the worst happens, you’ll be glad you did. That’s another benefit of keeping all your Raw files in a master folder it’s easy to copy them up to a another hard drive for backup purposes.

5. Devise a Rating Plan

Decide how you are going to use star ratings, keywords, color labels and flags from the outset and then stick to it. This isn’t easy, as you’ll probably find lots of different ways you can use these features as you become more proficient with Lightroom. But, the more consistent you are, the easier it is to use these tools to organize and search your photos.

6. Organize Your Images with Collections and Sets

These are the heart of Lightroom and free you from the physical constraints set by the folders containing your Raw files.

You may have noticed that you can only browse photos by folder in the Library module. In the others you only have access to Collections. Adobe wants you to use Collections and Collection Sets as they are the easiest way to organize and collate your images.

lightroom tips

Lightroom Collections

7. Use Smart Collections Sparingly

There are many ways to use Smart Collections. While they may seem useful because they are automated, it’s easy to over-complicate things. Only use them when they will genuinely save you time, or as a way of storing search results.

8. Consider Converting Your Raw Files to DNG

It increases the length of time required to import photos but it’s worth it. The are two main benefits. The first is that DNG files are smaller than your regular Raw files, saving hard drive space.

The second is that using DNG speeds up Lightroom. DNG files contain a preview in a form called fast load data that enables Lightroom to render previews up to eight times faster. This saves you time when viewing and processing images. There’s nothing more frustrating than zooming into an image and having to wait several seconds for the preview to render. Using DNG helps prevent that.

9. Undo is Your Friend

Just about anything you can do in Lightroom can be undone by pressing Cmd-Z (PC: Ctrl-Z), If you’re not sure what effect doing something will have on your photos, just try it. The Undo shortcut is there to help if it doesn’t work out. On the rare occasions that you are about to do something that cannot be undone, Lightroom will warn you.

10. Do as Much Work in Lightroom as Possible

When processing images, do as much as you can in Lightroom. You should only export a photo to Photoshop or a plug-in if you need to do something that Lightroom can’t handle.

Processing images solely in Lightroom whenever you can helps keep your workflow quick and simple. Exporting to other programs or plug-ins uses more hard drive space and means that you end up with additional JPEG or TIFF files to keep track of and backup.

Lightroom will change your life. I’m not exaggerating—you’ll be amazed at how much time having an organized photo collection will save you. If you’re the type that’s always behind on processing, Lightroom will help you catch up.

About the Author:
Andrew S Gibson is author of The Mastering Lightroom series of eBooks that cover everything photographers need to know about Lightroom in order to organize photos and process images beautifully.


Go to full article: 10 Pieces of Advice for New Lightroom Users

What are your thoughts on this article? Join the discussion on Facebook

PictureCorrect subscribers can also learn more today with our #1 bestseller: The Photography Tutorial eBook

The post 10 Pieces of Advice for New Lightroom Users appeared first on PictureCorrect.


from PictureCorrect https://ift.tt/2Z7N0M6
via IFTTT

PictureCorrect.com: Interesting Photo of the Day: Still Leaf

We often assume we must visit distant places to find beauty. In fact, that allows us to overlook the natural beauty that’s right in front of us. Have you ever spent even a minute looking at the leaves? If you have, you know how simple yet complicated they can be. Look at the right one and you’ll realize how insanely beautiful they truly are, even after they’ve fallen and begun to decompose. Their beauty is perhaps best illustrated by this gorgeous image, shot by photographer Filipp Kaba.

beautifully lit leaf

“A Beautifully Lit Crimson Colored Leaf” by Filipp Kaba (Via Reddit. Click image to see full size.)

Kaba shot the image using a Nikon D3300. But more than the gear, it’s the lighting technique that makes the shot stand out. Interestingly, Kaba lit the leaf using a technique that he developed himself a few years back.

“It took me close to 100 photos to tame this beast.”

When you think about it, it’s just a leaf, right? We see them every day. However, this image is on a different level. You want to keep looking at it, even though it’s just a leaf.

With his fantastic lighting, Kaba has made the simple leaf stand out beautifully. All the edges are subtly lit. The backlighting has also brought out the intricacies of the leaf, its veins and contours. And then there’s the reflection on the glass that gives the image an elegant look. Overall, the image looks fiery yet strikingly beautiful. One could even use it as a book cover. What do you think?

It is worth appreciating how the photographer has brought out the hidden beauty and sophistication in an often overlooked everyday object. Hats off to the photographer!


Go to full article: Interesting Photo of the Day: Still Leaf

What are your thoughts on this article? Join the discussion on Facebook

PictureCorrect subscribers can also learn more today with our #1 bestseller: The Photography Tutorial eBook

The post Interesting Photo of the Day: Still Leaf appeared first on PictureCorrect.


from PictureCorrect https://ift.tt/3mHBbdl
via IFTTT

PictureCorrect.com: Key Ingredients for Successful Product Photography

Thanks to digital marketing, the need for good product photography is higher than ever before. If you’re able to take elegant product photos that speak to the general public, you’ll have brands rushing to work with you. But, as you will see in this video by photographer and filmmaker Peter McKinnon, product photography is not only about taking a photo of an object. There are many important dimensions that determine success. In this elaborate video, McKinnon takes you through a step-by-step process that’ll help you create stunning product photos.

Whether you’re new to product photography or have some experience with the genre, we highly recommend that you watch the video. That’s because McKinnon doesn’t just share tips for product photography, but also explains the entire thought process on how you can establish an effective scene that complements the product well.

As you go through the video, you will quickly realize how it’s not just the product that you should be focusing on. The props you use to create an environment around the product, and also the theme that you set, greatly affect the outcome. This is why you see McKinnon spending so much time deciding what props to use and where to place the product. Similarly, when it comes to lighting, it’s not just the product that you want to pay attention to. Notice how the props are being lit. Don’t be afraid to play around with the lighting and placement of the product.

“You build the scene, then you play within the scene.”

If you are able to tell a product story and make the viewers imagine using it, then you can proudly say that your product photography is successful. As McKinnon puts it, the goal is to make the viewers “taste” the photos.

For further training: Products in Focus Cheat Sheets & Guide


Go to full article: Key Ingredients for Successful Product Photography

What are your thoughts on this article? Join the discussion on Facebook

PictureCorrect subscribers can also learn more today with our #1 bestseller: The Photography Tutorial eBook

The post Key Ingredients for Successful Product Photography appeared first on PictureCorrect.


from PictureCorrect https://ift.tt/3sGvmkq
via IFTTT

maanantai 27. joulukuuta 2021

PictureCorrect.com: Using the Bokeh Effect in Child Portraits

“Bokeh” is a beautiful soft effect in which the background of a photograph becomes like circles of blurred, translucent light. As a professional photographer, my lifelong quest has been to consistently capture images of a child’s face in which everything in front of and behind the eye gradually falls out of focus and the background dances with bokeh. The key to this effect, which I like to call, “Bokeh Nirvana,” is in the use of three very basic settings. (Although I have included a smattering of techie translations in italics, feel free to ignore them.)

bokeh-baby-photos

“Ian” by Alex Lupo

Before getting started, find the autofocus settings on your camera’s menu and select the single point autofocus feature. (Techie Note: Avoid automatic face recognition systems. When it comes to capturing the soul of a child, the eyes are everything and the single point autofocus feature is a must.) There is a marking on the ring which encircles the glass indicating, “__ mm.” The higher that number, the more bokeh your lens can produce. If your lens happens to have a range like 15-85mm, your lens zooms in and out like a pair of binoculars. The more you zoom in the more bokeh can be produced if you heed the following instructions.

The first setting is the aperture. Aperture is the bokeh magic-maker. The lower the aperture number (tech translation: the wider the aperture), the more bokeh. When you lower the aperture number it becomes more difficult to achieve sharp focus on your single point, the eye. So, the child needs to be reasonably still. Having the child sit or lean against something works well. The child is not posing. You and the child are interacting and you are ready to capture a natural moment.

The second setting is shutter speed. Any number above 160 should be safe. (Tech info: the higher the number, the faster the camera takes the picture and the blurring of motion is minimized.)

The final setting is the ISO. Set ISO at 200 initially. Raise if necessary for low light conditions.

childrens-bokeh-photography

“Izaro” by Guillermo Alonso

 The Path to Bokeh Nirvana

  1. Set the ISO to 200. Raise if necessary for low light conditions.
  2. Set the aperture number to 2.8 or lower (as wide as possible).
  3. Set the shutter speed number to 160 (1/160 second) or faster. Or have the camera determine the shutter speed automatically.

Look through the viewfinder and find the single point autofocus point. It looks like a dot or a tiny box. Point your camera at your subject and place that dot on the iris of the eye that is closest to the camera. Press and hold the shutter button half way down and the camera will automatically focus on the iris. With the shutter still held half way down, recompose the picture if needed, and then press the shutter button all the way down to take the photograph.

Now look at the photo on the display screen. Is the child’s face too dark? Raise only the ISO number, take another photograph and recheck the face. Repeat this step until you have the correct lighting (tech translation: exposure). Is the child’s face too bright? Raise only the shutter speed number, take another photograph and recheck the face. Repeat this step until you have the correct lighting (tech translation: exposure).

bokeh portrait holiday

Photo by Kate Hliznitsova

Finally, it is important to practice. With practice, your camera will become an extension of yourself. The images you take will capture the child’s unique personality and become a priceless treasure. Welcome to Bokeh Nirvana.

About the Author:
Ellie Graham is a professional photographer and educator who specializes in family portraiture. She and her three children live in Hendersonville, NC. Ellie is also currently enrolled in the Master’s Degree in Entrepreneurship Program at Western Carolina University.


Go to full article: Using the Bokeh Effect in Child Portraits

What are your thoughts on this article? Join the discussion on Facebook

PictureCorrect subscribers can also learn more today with our #1 bestseller: The Photography Tutorial eBook

The post Using the Bokeh Effect in Child Portraits appeared first on PictureCorrect.


from PictureCorrect https://ift.tt/3z3maaM
via IFTTT

PictureCorrect.com: Interesting Photo of the Day: All the World’s Ablaze in this Canadian Mountain Valley

Look away right now unless you wish to be gripped by an irresistible urge to move to Canada immediately. If you choose to continue forward, please also remember that it is impossible to climb through your screen and pitch a tent inside landscape photographer Marc Adamus‘ gorgeous image of this river valley in Yukon’s Ogilvie Mountains at sunset:

canada canadian into the flames ogilvie mountains yukon marc adamus

“Into the Flames” by Marc Adamus (Via Imgur. Click to see larger size.)

The Ogilvie Mountains lie in the northernmost region of Canada’s Yukon territory. Some of the most popular views of the range’s picturesque peaks can be had from Tombstone Territorial Park, an 850 square mile tundra blanketed with black granite, roving caribou, beautiful alpine foliage, and more.

“Even in the hands of a master, a camera alone will never capture Nature as we can observe it with all of our senses,” writes Adamus on his website. “I believe a great photograph is not merely documenting the scene at hand, rather it is about fusing the essential vision of the artist with the landscape… This is nature through my eyes.”

Adamus, who is based in Corvallis, Oregon, discovered this river valley while backpacking through the area one autumn. He captured three different exposures and blended them together to create the image.


Go to full article: Interesting Photo of the Day: All the World’s Ablaze in this Canadian Mountain Valley

What are your thoughts on this article? Join the discussion on Facebook

PictureCorrect subscribers can also learn more today with our #1 bestseller: The Photography Tutorial eBook

The post Interesting Photo of the Day: All the World’s Ablaze in this Canadian Mountain Valley appeared first on PictureCorrect.


from PictureCorrect https://ift.tt/3HhN5T2
via IFTTT

PictureCorrect.com: Is Technology Killing Photography?

Photography has a very close relationship with technology, which means it has evolved at a rather quick pace in recent years. Whether it’s the camera, lens quality or imaging media, photographic technology has improved immeasurably. Certain aspects become obsolete, but there are still different groups of photographers that swear that the old way is the best. In today’s video, photographer Alex Kilbee talks about how photography has evolved through the years and what the future holds for it:

“The history of photography is littered with people arguing against one another trying to say that their way is right, their way is better.”

Every major advancement has made photography more accessible for “common people”. This has made professionals less and less special, as it’s become easier than ever to capture special images.

However, changes are hard to accept. Digital imaging was a disruption, and it took time for digital photographers to find their place. Gradually, many film photographers, too, switched over to digital, with a few still holding onto film. Like Kilbee highlights in the video, even a giant like Kodak tried to hold on to film and failed. Change is imminent. If it’s something that benefits the way you work, why not accept it?

For instance, today we have drones, and look at the way they are transforming photography and videography. You don’t need to hire a chopper to take aerial shots—and the quality is far superior, not to mention how much easier the shots are to take. Even mirrorless cameras are gradually replacing DSLRs, enabling users to do things that DSLRs struggled to do.

It is thus safe to say that technology is not killing photography. It is only taking photography to newer heights. There is no benefit in arguing and holding on to the past.


Go to full article: Is Technology Killing Photography?

What are your thoughts on this article? Join the discussion on Facebook

PictureCorrect subscribers can also learn more today with our #1 bestseller: The Photography Tutorial eBook

The post Is Technology Killing Photography? appeared first on PictureCorrect.


from PictureCorrect https://ift.tt/3pv65r5
via IFTTT

sunnuntai 26. joulukuuta 2021

PictureCorrect.com: Balancing Strobes with Natural Window Light for Photos

A common statement that people make when looking at images taken with flash is about how unnatural the images appear. That happens when the light from the flash is not mixing well with the ambient natural light. When done correctly, natural light and fill flash together can create beautiful images. Daniel Norton from Adorama explains how you can work with natural light and flash to take your flash photography to the next level:

Lighting Setup

Norton has his model stand with the bright windows as her background. In order to balance the light from the windows, he has a Profoto B10 Plus placed to the side of the model. He uses a V-flat to bounce the light off the flash to mimick window light.  Placing the flash with the v-flat on the side and not in front of the model is important so that the lighting doesn’t appear artificial.

lighting setup for natural looking flash photography

Balancing Exposure for Natural Looking Images

In studio flash photography, you’d generally start off by adjusting your settings that you get a black frame first. This way, only the flash affects your photos which is one of the prime reasons why the photos appear artificial. So, for natural looking images, the idea is to start off by exposing for the highlights when using flash.

In his case, Norton first starts off by exposing for the bright windows behind the model. This way, he is able to capture the details on the curtains, while the model appears as a silhouette.

exposing for highlights

Then, he adds in some fill-light by turning the flash on. The key now is to adjust the flash power and aperture settings in a way that the image appears as natural as possible.

image with flash turned on

If you want the image to appear moody, you can try lowering the flash power or increasing the shutter speed. By doing so, the subject will be a bit underexposed, adding a different mood to the image.

moody natural flash photography

If you’re struggling with getting natural looking results when using flash, give this method a try. While it is not rocket science, it will definitely make you images look a whole lot better.


Go to full article: Balancing Strobes with Natural Window Light for Photos

What are your thoughts on this article? Join the discussion on Facebook

PictureCorrect subscribers can also learn more today with our #1 bestseller: The Photography Tutorial eBook

The post Balancing Strobes with Natural Window Light for Photos appeared first on PictureCorrect.


from PictureCorrect https://ift.tt/314ap4Y
via IFTTT

PictureCorrect.com: How To Photograph Fireworks

During celebration periods, such as Independence Day, Christmas and New Year’s, there are many firework shows in many places. Therefore, there are a lot of opportunities to photograph fireworks.

What do you need for taking fireworks photos?

firework photo tips and tricks

Photo by Robert Hensley; ISO 200, f/11.0, 10.3-second exposure.

Camera: One that has “Bulb” shutter speed is preferable.

Wide and normal zoom lens: 10-22 mm, 16-35 mm, 18-55 mm, 24-70mm, etc. Zoom lenses have more flexibility to frame your photos. However, there are no solid rules which focal length should be used because it depends on how far of you and fireworks, how big of the fireworks are, etc.

Tripod: You really need this for long shutter speeds while taking firework photos. You must keep your camera still, otherwise your photos will be blurred.

Remote switch: It helps you to keep your camera completely still while photographing firework shots. When you use Bulb (B) shutter, you should not press directly on the camera shutter button. It causes the camera to be unstable, and you cannot get sharp and clear photos.

These are some optional items that you may want to consider:

Black cap: It’s used for protecting lighting when you want to photograph many fireworks in one shot.

Food and drink: You may wait for awhile before fireworks commence.

Flashlight: It helps you to find anything in the dark.

Small chair: In case you have a long wait.

Umbrella: In case of rain.

When and where should you go to take firework photos?

The best place to photograph fireworks is any tall building around the fireworks area about 0.5-1.5 km from where the fireworks will be displayed. You must be able to pan your camera without any obstructions in your viewfinder. It should be in an upwind direction, too. You must go to your location as early as possible, because there will be a lot of photographers and speculators. Remember that the location is everything for taking fireworks photos. The better the location, the better the photos.

How do you photograph fireworks?

how to take pictures of fireworks

Photo by Steren Giannini; ISO 3200, f/22.0, 2-second exposure.

Before taking fireworks photos, prepare as follows:

1. Be on location as early as possible and select the best location. The best location is the location where you can see the fireworks without any obstructions and there is interesting foreground or background as buildings, bridges, river, lake, etc.

2. Set your camera on a tripod firmly.

3. Set the parameters in the camera as follows:

Mode: M, Manual

Auto focus: Off or Manual

ISO: 100

Shutter speed: Bulb, B

Aperture: vary from f/5.6 to f/11

Focal length: Infinity

File type: RAW is preferred, because you have more flexibility to process your photos later.

Memory Card: Big enough that you won’t lose your opportunity to take photos due to full memory.

White Balance: Auto

4. Set a good composition by including a nice foreground or background, such as building(s), pool(s), lake(s), bridge(s), river(s), etc. Use the rule of thirds to make an interesting composition. There are two ways to frame your fireworks photo: horizontal or vertical. Your choice depends on how the fireworks look. If your fireworks are one big and long shot, you may need to frame your photos vertically. In other words, if you want to capture wide angle of fireworks, you may need to flame your photos horizontally.

5. Set your remote switch with your camera and test its function.

how to take photos of fireworks

Photo by Marv Gillibrand; ISO 450, f/1.8, 1/90-second exposure.

Let’s photograph fireworks:

1. Once you hear an explosion, start to press and hold the remote switch button. Watch the fireworks showing their magic until the burst disappears, and then release the button. Normally, this takes about 5-9 seconds.

If this is your first shot, check it on your LCD to see how the composition and lighting look. You may need to adjust the camera, the focal length, and aperture in order to get the best composition and lighting.

2. If you would like to take many fireworks in one shot, please use the following tips:

2.1 When the first firework is shot, press and hold the remote switch button. When the first one fades out, put the black cap in front of your lens in order to prevent light coming to your photo while you are still pressing the remote switch button. You must not touch any part of your camera so that your photo will not blur due to camera shake.

2.2 When the second firework is shot, take the black cap out and wait until the second firework fades out. After that you put the cap in front of your lens again.

2.3 When you do not want to add any more fireworks in your photo, you just release the remote switch button. You can repeatedly use these techniques in order to take many fireworks in one shot. However, you should be prudent with this tip because if you try to take too many fireworks in one shot, your photo will be over exposed. Normally, I get only 2 to 3 fireworks in one shot.

3. Check your photos periodically. You may have time to check your photos because the fireworks are shot periodically. You may change the composition and/or delete some bad photos in order to reserve the memory space.

These guidelines should help you photograph fireworks. Go out and have fun with fireworks!

About the Author
Suwat Pongtepupathum is a digital photographer who is really fascinated in digital photography. He has a personal photo blog, digitalshuttermania on which he shares his photos, photography techniques, Photoshop CS for digital photography techniques.


Go to full article: How To Photograph Fireworks

What are your thoughts on this article? Join the discussion on Facebook

PictureCorrect subscribers can also learn more today with our #1 bestseller: The Photography Tutorial eBook

The post How To Photograph Fireworks appeared first on PictureCorrect.


from PictureCorrect https://ift.tt/2J4HZgA
via IFTTT

PictureCorrect.com: Interesting Photo of the Day: Snowy Japanese Cedars

For today’s interesting photo feature, we’ll be traveling to a sleepy Shinto shrine resting at the base of a remote mountain. In the dead of winter, not many brave the cold to visit the sacred site. But, as this image clearly illustrates, those that do are rewarded with an unbelievable view.

moon cycle

“A Snowy Forest in Japan” by Benjamin Lee (Via Reddit. Click image to see full size.)

Shot by Australian-based photographer Benjamin Lee with a Canon 5D Mark IV, this incredible photograph actually features the path leading up to the ancient shrine rather than the structure itself. Planted in the 17th century, long rows of hundreds of cedar trees greet guests. As fresh snowfall settles over branches and footprints, a single visitor clad in black highlights the massive size of each towering trunk.

Though the area itself is gorgeous and the photographer lucked out with the weather in this instance, a few artistic choices really tie this shot together. For instance, Lee chose to use a 67mm lens rather than a more traditional wide-angle option. In turn, the path is compressed, emphasizing just how far back the trail runs. We also love Lee’s use of split toning in this shot. By bringing out the reds of the cedar and the blues of the snow ever so slightly, the picture becomes all the more magical and captivating.


Go to full article: Interesting Photo of the Day: Snowy Japanese Cedars

What are your thoughts on this article? Join the discussion on Facebook

PictureCorrect subscribers can also learn more today with our #1 bestseller: The Photography Tutorial eBook

The post Interesting Photo of the Day: Snowy Japanese Cedars appeared first on PictureCorrect.


from PictureCorrect https://ift.tt/2Rx4H5b
via IFTTT

PictureCorrect.com: Photography Perspective

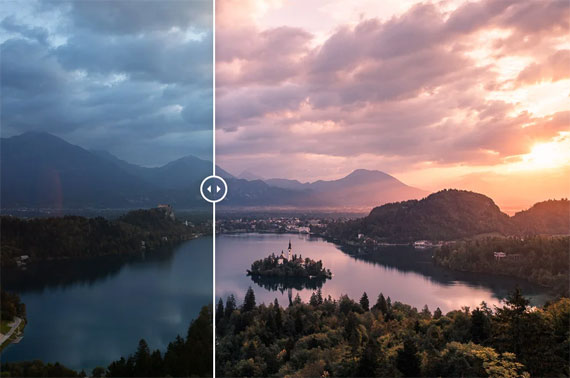
After spending the last four years getting more and more into photography, it has only been recently that I’ve felt I have really become confident in my abilities to make use of perspective to get shots that I’m truly proud of. That may seem like a long time. But I guess you could say I’m somewhat of a perfectionist when it comes to critiquing my own work. I have recently been able to capture some images that really emphasize the sense of depth in the scene. This led me to write this article to share some of those techniques with you.

perspective photo

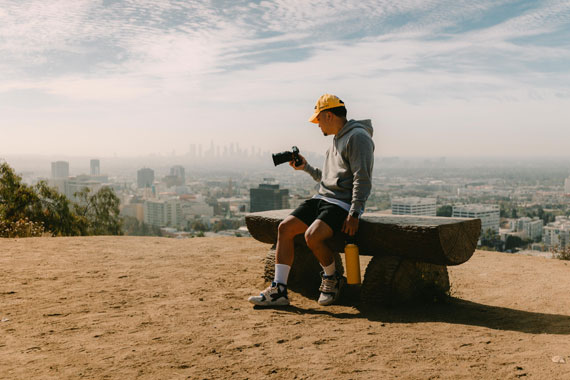
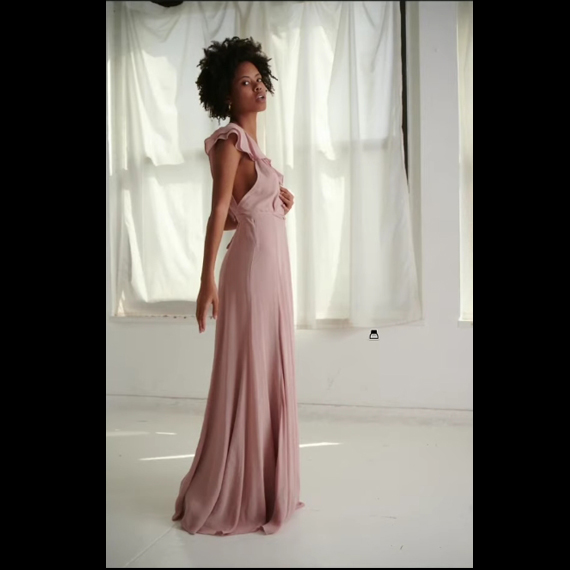
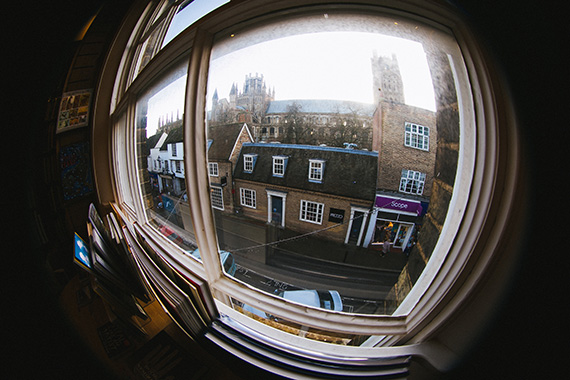
Photo captured by Antonio Idini

If you look at a photograph, whether it be in print or on a screen, it goes without saying that what you are looking at is a two-dimensional representation of a three-dimensional scene. The two-dimensional image is an illusion, and your mind deciphers the information to determine the ‘depth’. As photographers, we can use the concept of perspective to create a sense of depth and scale in photos.

As a photographer, you must be aware of perspective, as it can be a little tricky at times. We must avoid taking pictures that include unintended distortions or that are flat and uninteresting.

We can define perspective as the sense of distance between things and their dimensions in relation to the position of the viewer, producing a sense of depth. Here are my most useful tips on how to use perspective:

Blocking Parts of Subjects

It’s an obvious statement, but when you see one object partially obstructing your view of another object, your brain tells you that the obstructed object is further away than the object obstructing it. By relating their sizes we can get a sense of the depth. We call this overlap perspective.

Relative Size

As an object gets smaller, our brains process the information to let us know that the object is farther away from the spot where the photo was taken. We already know rough sizes of natural objects, like cars, trees, humans, and houses, so upon seeing a person who is five times taller than a house, our brain lets us know that the person is much closer to us than the other object. Our brain works this out based on familiar objects in relation to other objects in the picture to get an idea of the distance and depth of relative objects. This is what we refer to as scaling.

We can use some effective photography techniques by placing several objects at different distances from the viewpoint and create an illusion that they are the same distance from the camera as each other. This can produce some peculiar pictures.

Having a single familiar object in a photo allows us to work out the sizes of everything else in the scene in relation to that one familiar object. Think back to all the pictures you’ve seen of fishermen holding their catch smiling at the camera. You’re able to see how large the fish is compared to the sizes of the fisherman’s body. Think about an image of a person standing among huge leaves in the jungle, which are taller than him. Seeing this stimulates our minds because we’re used to seeing leaves that are smaller than our hands.

leading lines

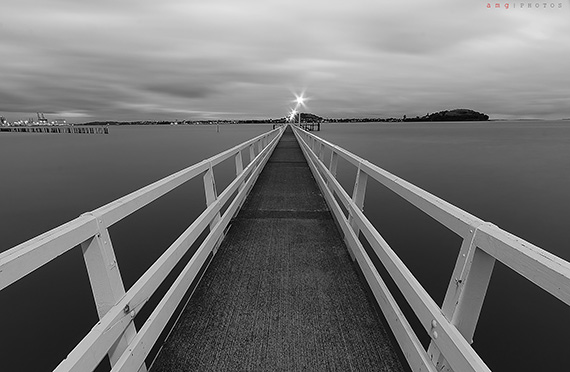
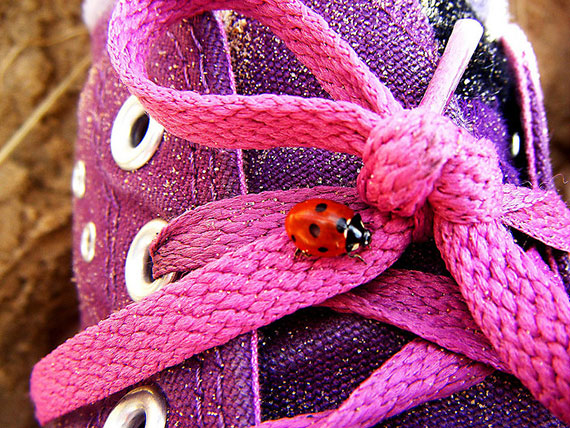
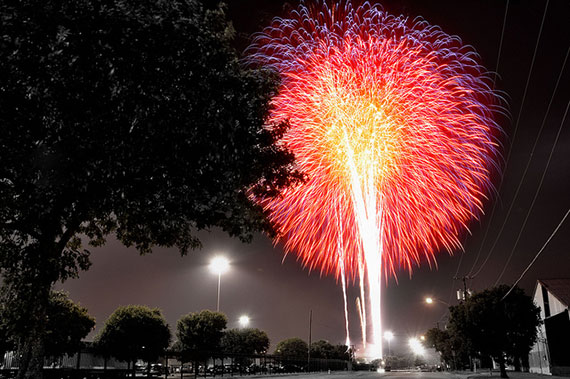
“Mission Bay, Auckland” captured by PictureSocial member Al Michael Genabe

Vanishing Point

The human eye judges distance by looking at how lines and planes converge at a point inside or outside of the picture. This is what we call linear perspective.

Fisheye lenses produce photographs of objects which appear smaller along the edges of the shot than they would look in reality. Conversely, things in the middle of these shots appear a lot bigger than they would in reality.

Parallel lines which move away from the viewpoint in a photo appear to be converging or meeting with each other at a certain point, which is what we call vanishing point. This is very common in photography. A typical example is a photo of railway tracks converging in the distance.

The Lens Axis Level

Horizontal lines moving across the lens axis level appear to be straight, while all other horizontal lines above and below this level appear as curved lines. With rectilinear perspective, the straight lines in the frame are reproduced as straight lines in the picture in the same way that we perceive objects in reality. Regular lenses are rectilinear lenses.

Perspective Projection Distortion

All pictures could be subject to perspective projection distortion. The fisheye and panoramic lenses produce perspectives that are false. They’re used to produce interesting effects deliberately.

perspective in photography

Photo by Phil Hearing

Reduced Color Quality, Definition, and Sharpness

Due to reduced contrast, scattering of light, and other factors, our eyes cannot define objects in the distance as easily. Objects farther away are harder to define because of light scattering and reduced contrast, as well as other factors. Knowing this allows our brains to make more sense of distance. In photography, we can take this knowledge and use it to our advantage to create pictures where objects far away have less definition and contrast. We do this by controlling the depth of field. An easy way to do this is by focusing the camera lens slightly shorter than infinity so that the objects furthest away look blurred. This is what gives the viewer a sense of depth and distances of various objects in the picture.

Objects with reduced brightness and contrast make our brains perceive that we are looking at something further away than the brighter, more vivid objects closer to the foreground.

Before you take a photo, you should decide whether you want to emphasize the depth of the scene or not.

Depth of Field And Focus

The aperture, focus distance, and focal length can be used to control depth of field. Depth of field (DoF) is used to define an area where objects are sharp in the picture. Objects outside of this zone appear blurred. Many beginners try to make everything in the picture look sharp. They often try to maximize the DoF with smaller apertures. Sometimes this can work well, but it is generally not seen as something more seasoned photographers like to do.
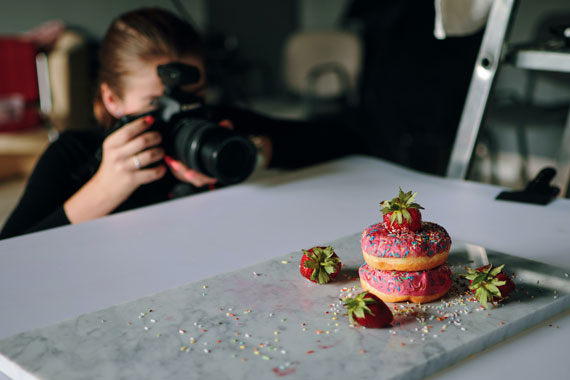
Isolating an Object

One way to get nice effects in photography is to isolate an object from its environment. An example is to use a wide lens, enabling you to divide the scene into different layers. Sometimes you will find that the background is unappealing. You can often resolve this by using a tiny DoF so that everything behind the main subject is out of focus. Background elements are now less significant in the picture.

isolating subject

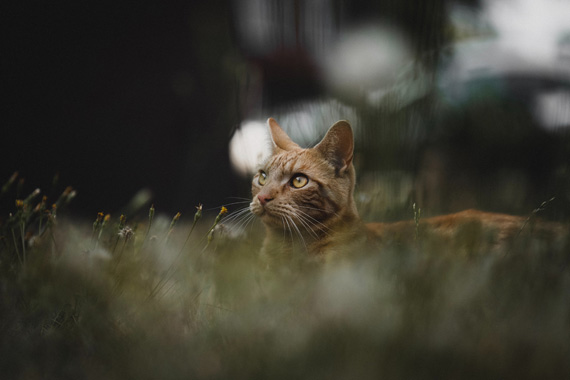
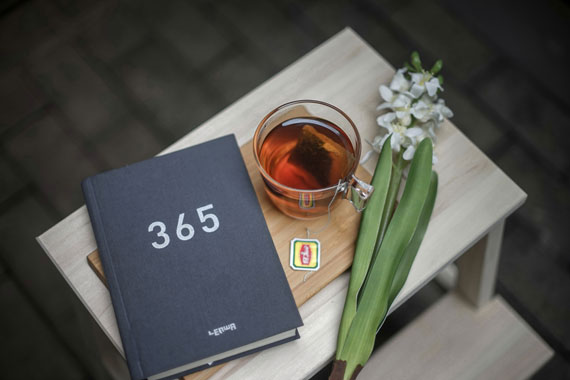
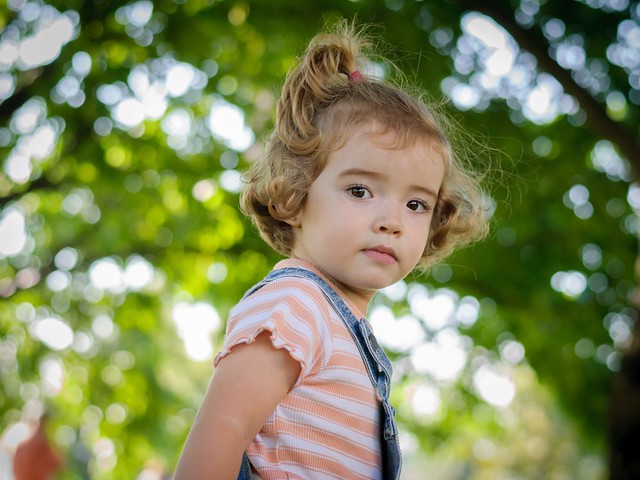
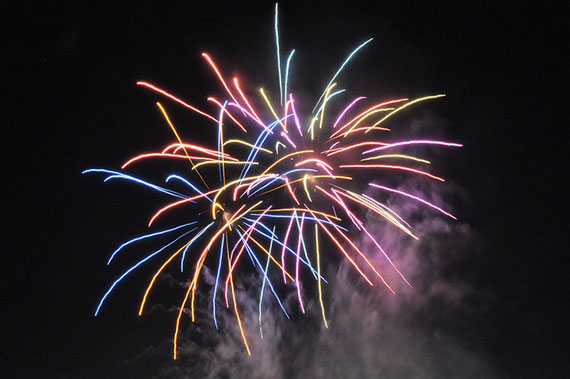
Photo captured by Gijs Coolen

Layers

If you’re interested in landscape photography and enjoy shooting scenes of mountains, a great approach is to use the notion of layers. Mountains are usually the dominating feature of a photo. By including more layers in the foreground and the middle area of depth you can bring your photos to life.

A lack of familiar objects (trees, people, etc.) in a shot makes it hard for the viewer to get a sense of scale. In this instance, you might wait until someone comes walking past to get a shot or ask your buddy to stand in the frame.

Now that we’ve reviewed these tips on working with perspective, let’s look at how we can use it to create some interesting effects. That brings us to the second half of this article.

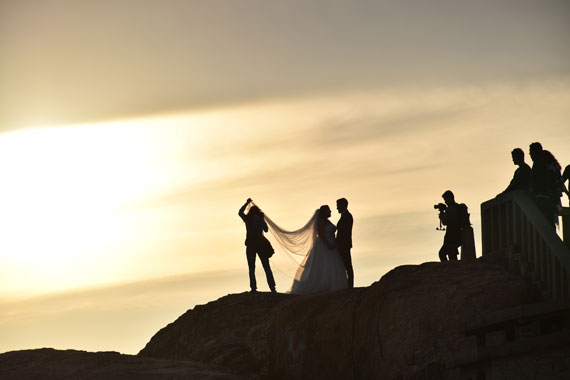
Forced Perspective Photography Tips

Forced perspective photography is a style that uses optical illusions to make a subject seem to be different sizes and distances from the viewer than it actually is. It can be used to create some rather unusual (and often funny) effects.

Let’s examine a few simple techniques for doing forced perspective photography.

As mentioned, it’s possible to deceive the viewer by manipulating perspective. Think about a diamond. Usually, with diamonds, size is the most important factor to determine how much they are worth. The cut and clarity are less important to some extent. When we see a photo of a diamond, we need a reference point to get an idea of its size. We can manipulate photos so that the viewer sees the diamond and the other object as being entirely different sizes or virtually the same size.

You will no doubt have seen the usual ‘holding a building’, ‘leaning on a skyscraper’, ‘holding the sun’ types of pictures, but how can we get some more interesting photos using this technique?

forced perspective

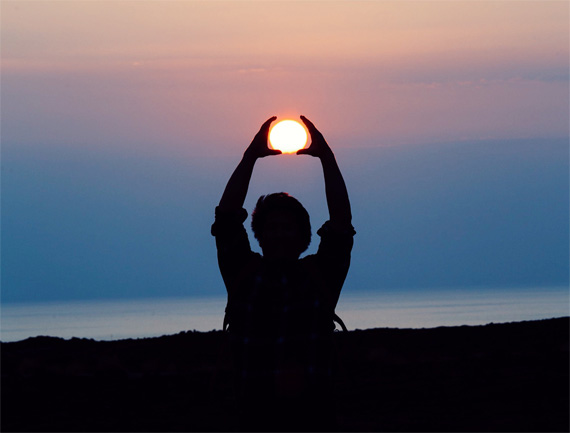
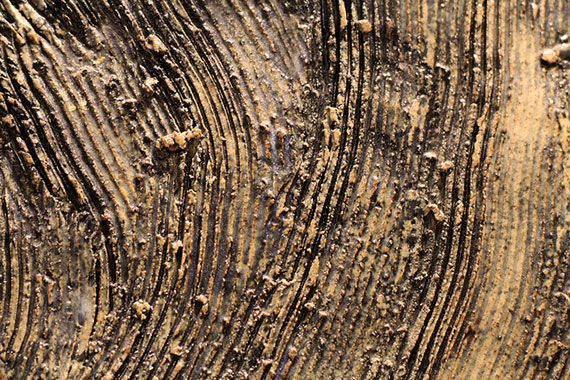
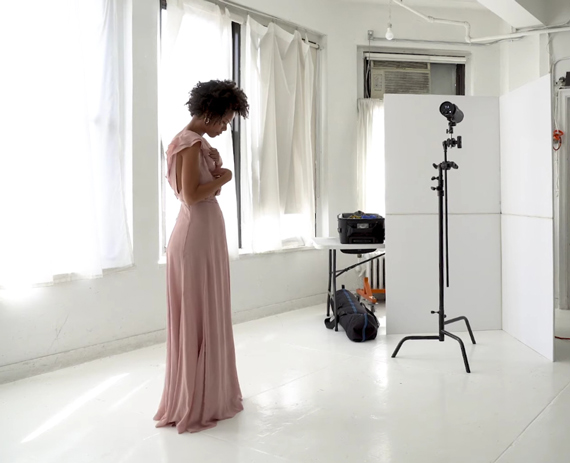
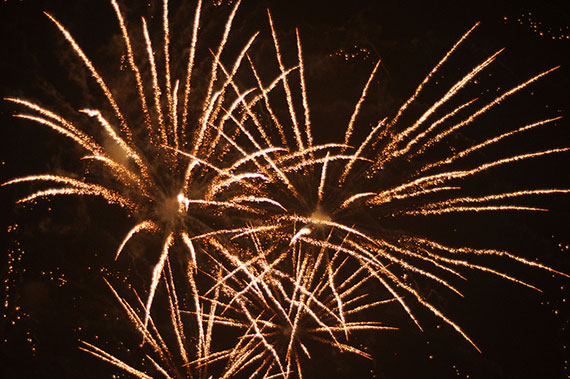
Photo captured by Jason Leung

Below I have outlined three ways for getting forced perspective shots. Everything else is completely your choice. Use your creativity and ride that sucker like a wave for as long as you can until you have no more ideas left!

Size Altering Forced Perspective Photography

A size altering forced perspective picture is manipulating three things: distance, the line of sight, and the depth of field. First, choose the subject that you want to appear smaller. Position this object further away from the camera than the subject you want to make seem larger. How close or how far away the two subjects are will determine their difference in size. More space is needed for larger size differences between the two objects. It’s, therefore, a good idea to do this kind of photography outdoors.

Try using a wide angle lens, around 35mm or 24mm. Set your aperture to a large F-stop value. The F-stop will vary depending on the distance between the two objects. It is necessary to find a setting that allows you to get both of your subjects in focus.

After finding the most suitable focus, the next step is to spend some time lining up the two subjects and working out your camera position–the overall alignment of the photo. Let’s pretend you’re taking a shot where the first subject is a person and he or she has a hand on the other subject. For such a photo you would need to take some time to get the alignment as perfect as you can. You may need to take many shots to get the perfect picture. I would recommend you use a tripod to minimize movement and stabilize the camera position. Consider gaps and overlaps between the two subjects. You need to spend time getting everything aligned perfectly. Think about all of the failed attempts you’ve seen by people trying this technique–more than you care to remember, no doubt.

Zero Gravity Forced Perspective Photos

This technique can be achieved fairly easily by placing the camera on its side or upside down. Ask your model to lie on the ground and put his or her feet against a wall to look as though the ground is actually a wall that the model is leaning against. The model could also lean out from doorways and windows to make it seem like he or she is hanging out from them. One thing to be aware of is the direction in which clothes and hair hang. You could have the subject wear a hat or tuck in his or her T-shirt. It also helps if models wear clothing that fits a little tighter than normal.

Another point to remember with this approach is that when you turn the camera on one side, you need to make sure it is perfectly aligned at 90 degrees or 180 degrees with the horizon or the edges of the building and ground to make the illusion works properly.

Merged Subject Forced Perspective Photos

There has been a growing trend recently to show old photos of a scene in front of a recent photo of that same place. This is an example of merged subjects. What you have to do is get the old picture to line up with the size of the current scene. You’ll be holding the old picture relatively close to the camera, so you’ll need a large F-stop with a wide angle lens so that you can put the two pictures in focus.

I hope that reading this has given you a wide range of actionable approaches and provided you with the basics to step outside and start getting some excellent shots by using perspective. Step outside when you can and enjoy yourself! Thanks for reading and please remember some of the tips I made next time you’re taking photos.

About the Author:
Luke Walkers is a photography enthusiast originally from the UK and lives with his wife in Canada.


Go to full article: Photography Perspective

What are your thoughts on this article? Join the discussion on Facebook

PictureCorrect subscribers can also learn more today with our #1 bestseller: The Photography Tutorial eBook

The post Photography Perspective appeared first on PictureCorrect.


from PictureCorrect https://ift.tt/3dPEKIj
via IFTTT