sunnuntai 30. syyskuuta 2018

PictureCorrect.com: Action Photography: AF Modes for Nikon Cameras

If you get action photography right, it’s extremely gratifying. All those breathtaking images of fast action are pretty intriguing. If you don’t get it right, you end up with a lot of unwanted blur and missed opportunities. In this video, Steve Perry explains some of the tricks that he uses to shoot action photos:

Though these tips are Nikon-specific, you may still be able to use them for other camera makes. Just swap the Nikon specific commands with those from the system you’re using.

Before we get into the main tricks of the video you need to have a good grasp of back-button focusing.

Number of AF Points

Some Nikon cameras have an option to choose how many of the AF points you wish to use with the multi-selector button at the back of the camera.

choosing the number of selectable AF points

Number of AF Points

If your camera comes with 51 AF points, you can choose to either use all of them or only 11 of them—or whatever else your camera allows you to. This is helpful when you want to scroll through one AF point to the other and don’t want to go through all of them, which can make things slow.

Focus Tracking with Lock On

Some Nikon cameras come with the focus tracking with lock on function.

Focus Tracking with Lock On

Focus Tracking with Lock On

This function controls the time lag after which the camera automatically attempts to acquire focus after losing focus on a subject. This is particularly helpful when you’re panning a bird and some sort of obstacle—like a tree or a bush—comes between you and the bird. Normally, a camera will try to immediately correct the focus, in the process locking focus on the tree or bush. But with focus tracking lock on you can control the time lag and thereby “skim” through that obstacle without losing focus.

Single Shot or Continuous AF

Single shot AF is always the right way to go when you are shooting a stationary subject. It allows you to hold the shutter release and recompose, keeping the subject in sharp focus.

continuous AF

Continuous AF

If your subject is moving about, choose continuous auto-focus. This allows you to lock focus on a subject easily, and if it moves the camera will automatically acquire focus as long as there is an AF point at that area. This mode, however, is not suitable for the focus and recompose technique.

AF Priority Selection

Auto-focus priority selection tells the camera whether is should make the exposure only when there is a confirmed focus lock or whether it should take the shot no matter what.

AF Priority Selection

AF Priority Selection

Perry suggests selecting focus priority for AF-S mode and release priority for AF-C mode.

Af-priority

AF Priority

Single Point or Dynamic

Perry’s suggestions are simple.

Dynamic AF

Dynamic AF

For stationary subjects, go for Single Point AF. For moving subjects, go for Dynamic AF.

3D AF

3D auto-focus uses color information for tracking a subject. For wildlife photography Perry says this is not the ideal option, because it can then become confusing for the camera to isolate a subject from its background.

For sports shooters, though, this mode is ideal; by choosing an AF point you’re able to track the subject and maintain focus most of the time as it moves in the frame.

Group AF

Group AF is a much better choice when you’re shooting in low light and low contrast situations.

Group AF

Group AF

In this mode, the camera uses a group of AF points, and they work as a single large AF point.

On the downside, group AF tends to lock focus on anything that is closest to your lens, which means you’re not always likely to lock focus where you intend.

By understanding how auto focus modes work and when to use them, you can get more from your camera—and sharper images.


Go to full article: Action Photography: AF Modes for Nikon Cameras

What are your thoughts on this article? Join the discussion on Facebook

PictureCorrect subscribers can also learn more today with our #1 bestseller: The Photography Tutorial eBook

The post Action Photography: AF Modes for Nikon Cameras appeared first on PictureCorrect.


from PictureCorrect https://ift.tt/2RbdAAl
via IFTTT

PictureCorrect.com: Interesting Photo of the Day: Stop and Smell the Flowers

It’s not every day you bump into someone with the title of Snail Photographer. Vyacheslav Mishchenko is a macro enthusiast with an eye for land dwelling gastropods. Take a look at the adorable image below which is just one of many from Mishchenko’s charming portfolio:

snail-smelling-the-flowers

Stop and smell the flowers. (Via Imgur. Click to see full size.)

Mishchenko also has a penchant for capturing fascinating images of other creatures like frogs, lizards, and butterflies.

“I photograph all insects but snails have touched my heart particularly. I think that snails are simply extraordinary not only in their shape and form but also in their beauty and behavior. They are magic creatures for me. I think they catch the attention of many people, not just mine.”

As far as shooting, he says he never moves the animals for a photograph. He maintains that everything he photographs actually exists in nature and attributes a lot of his success to being in the right place at the right time. His weapons of choice? A Fuji FinePix S200EXR and Nikon D7000 with a Nikkor 105mm f/2.8G Micro lens.


Go to full article: Interesting Photo of the Day: Stop and Smell the Flowers

What are your thoughts on this article? Join the discussion on Facebook

PictureCorrect subscribers can also learn more today with our #1 bestseller: The Photography Tutorial eBook

The post Interesting Photo of the Day: Stop and Smell the Flowers appeared first on PictureCorrect.


from PictureCorrect https://ift.tt/2uh3w0r
via IFTTT

PictureCorrect.com: Contrast and Temperature in Color Photography

Although black and white photography has been the standard for beginning film photography students for a long time, at some point every photographer should learn the basics of color photography. Learning color photography requires a firm understanding of the basic elements of photography, which can be broken down into the following easy to understand elements.

contrast and color in photography

“Baseball” captured by Hector Rodriguez

It Starts with Contrast

In black and white photography, contrast refers to the difference between the lightest and darkest elements of a photograph. In essence, you can think of contrast as “how white is white?” With black and white photography, there are really only three tones: low contrast, medium, and high contrast but with color photography it gets a little more complicated. Color photography has color contrast compared to the tonal contrast of black and white.

Color contrast is determined by the way each of the colors interact with the colors surrounding it. While the contrast can still be adjusted to push the bright to dark ratio, the colors in a photograph appear different depending on what’s around them. For instance, think of a baseball sitting in bright green grass—that image has high color contrast because the bright white of the baseball stands out against the cool green of the grass.

Color Temperature

Any time you’re taking pictures in color, you have to pay attention to the temperature of the colors. Different lights result in different color temperatures, in the same way that the sun looks different at various times of day. Although there are lots of technical measurements of color temperature, the simplest way to think of it is in terms of tint.

Tint and color temperature are actually referred to as “white balance” in photography. Film and sensors are developed with a certain kind of light in mind, and any time photos are shot in different lighting circumstances it affects whether or not white looks truly “white.” For example, if you take a picture underneath a fluorescent light, it always has a green tint to it because that’s the color temperature of those lights.

white balance settings

“Playing with white balance” captured by Tom Check

Using Temperature

Any time you shoot, you want to understand which tint or color temperature is best for your picture. Reddish, warm tints such, as those provided by a sunset are flattering to most human skin tones, while cooler, bluish tints are best for neutral product photography.

You can adjust your white balance several different ways; you can do it with your camera, filters, or photo editing software. Similar to aperture and shutter speed, if you’re not shooting in RAW, it’s usually a good idea to take a photograph several times with different white balance settings to give yourself the most flexibility after the shoot is over.

color temperature in photography

“Color: San Francisco Sunrise in Blue” captured by Eugene Kim

Learning how to master colors is a skill that takes lots of practice. Designers often take several courses on color as part of their education, and there is no shortage of competing opinions on how color can be used best to achieve certain goals.

If you’re just starting off learning to use color, then your first goal is to accurately capture the image the way you see it. Once you can do this reliably with color photography, you can start working to manipulate these colors to add to the narrative of your photographs. And as usual, find what works works best for you and have fun doing it.

About the Author
Autumn Lockwood is a writer for Your Picture Frames. Shop online and see our selection of silver leaf picture frames in a wide variety of styles and sizes. Visit our website and see our selection of custom silver leaf picture frames online or call 1-800-780-0699.


Go to full article: Contrast and Temperature in Color Photography

What are your thoughts on this article? Join the discussion on Facebook

PictureCorrect subscribers can also learn more today with our #1 bestseller: The Photography Tutorial eBook

The post Contrast and Temperature in Color Photography appeared first on PictureCorrect.


from PictureCorrect https://ift.tt/2y6hOAu
via IFTTT

lauantai 29. syyskuuta 2018

PictureCorrect.com: How to Choose the Correct Aperture, Shutter Speed, and ISO

The previous article in this four part series about moving beyond the P Mode on your DSLR explained what your camera assumes about the quantity of light when being used in Program mode and that combinations of shutter speed and different apertures can result in the same amount of light reaching your DSLR’s sensor. This article explains how to choose the ideal combination of shutter speed and aperture. It also introduces ISO, which allows you to vary the sensitivity of your DSLR’s sensor.

aperture shutter speed

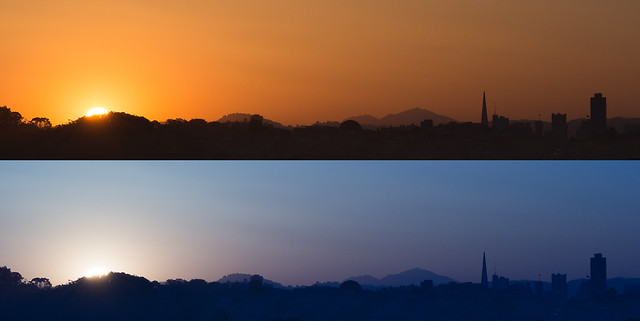
“Panorama” captured by PictureSocial member myvista

Imagine two very different scenes you want to photograph: your son standing resolutely in the mountains, a backdrop of glorious scenery, and your daughter dancing at a party, a distracting background of chairs and tables behind her.

In the photo of your son, the mountains behind are sharp whilst in the photo of your daughter, the distracting background is a blur.

What is your camera assuming about the importance of the background in P Mode so it can decide whether or not to blur the background? Your camera generally has no idea about what’s in the background. Depending on the model, a camera may have thousands of images of scenes, and the ideal shutter speed and aperture for each of those scenes, stored in its memory and will try to match your scene with its memory so it can then impose the ideal shutter speed and aperture. This ‘memory’ approach can never match what you know about the scene. So once you have decided whether or not you want the background, how do you communicate this to your camera?

You control how much of the background will be in focus by changing the aperture of your camera. The larger the aperture (e.g., f/5.6 instead of f/11), the more the background will be blurred. In the two photos imagined above, your son’s photo has an aperture of f/16 while your daughter’s photo has an aperture of f/4.

Why does your camera give you so many apertures when you only need f/4 and f/16? The answer is complex – aperture essentially affects the plane of focus or how much is in focus in front of and behind your subject and different lens lengths and your distance from the subject will affect the plane of focus. For the purpose of this article, which is written for anyone seeking to move beyond the P mode, use the largest aperture possible when you want to blur the background and use either f/11 or f/16 when you want to preserve the details of the background.

girls dancing blurred background

“Salsa OpenAir 2014 Cherkassy Ukraine” captured by Vladimir Pustovit

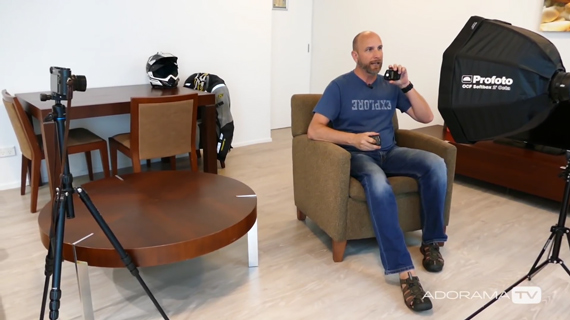
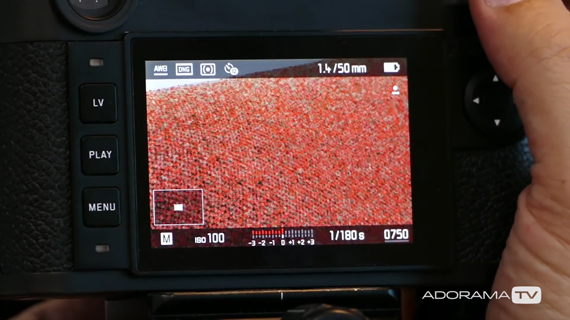
But how do you change the aperture on your camera? The answer is to change your DSLR’s command dial from P to A (Aperture priority) and once you have done this, you simply dial in the aperture you want; the camera will automatically select the appropriate shutter speed. This sounds so easy, and it would be if we didn’t have to worry about shutter speed. With a very small aperture, only a tiny amount of light is able to register on your camera’s sensor, which means you have to keep the shutter open for longer than you would if you had used a very large aperture. In the two photos imagined above, the boy is stationary so the actual shutter speed of 1/180 second is not a problem, but the girl is dancing and had I used a shutter speed of 1/180 second, she would have been blurred. In actuality I used a shutter speed of 1/1500 second. So what shutter speeds will give you the best results?

If you are photographing a landscape, your shutter speed should be 1/60 of a second or faster (e.g., 1/250 of a second). If you are photographing a stationary person in a landscape, then your shutter speed should be at least 1/180 of a second or faster. If you are photographing a dancing girl in a landscape, then your shutter speed should be 1/500 of a second or faster. If you want to be artistic when photographing a running girl and want her to be blurred, you should ensure the shutter speed is about 1/15 of a second.

man in front of mountain depth of field

“mountains” captured by Dima Viunnyk

Say you want to take a photo of your daughter dancing in the mountains. In Aperture priority mode, you select a very small aperture, say f/11, to make sure the mountains behind her aren’t a blur. But disaster—your camera’s read out indicates the camera has selected a shutter speed of 1/125 of a second, which is nowhere near fast enough since it is only a third as fast as what you need (1/500 of second is twice as fast as 1/250 second, which is twice as fast as 1/125 of a second), so what to do? You could increase your aperture to f/5.6 (remember from the first article that f/11 lets in half the amount of light that f/8 does, which in turn lets in half the amount of light that f/5.6 does).

But a f/5.6 aperture would make the mountains blurred. What to do? Ask your daughter to stop moving and somehow make her dance in Photoshop when you get home? No, what you need to do is make your camera’s sensor more sensitive to light. If you make it three times as sensitive, then at f/11, your shutter speed will be what you want—1/500 of a second.

But how to make your camera’s sensor more sensitive? In the dark era before DSLRs, you would use a faster film in your camera. Films were rated on their sensitivity to light with an 800 ISO (ISO is also known as ASA) film being twice as sensitive as a 400 ISO film which in turn was twice as sensitive as a 200 ISO film. This meant that an 800 ISO film required only a third of the light required by a 200 ISO film to register the same amount of light information on the film.

So why is this relevant in the digital era? Because you can easily change the sensitivity of your DSLR’s sensor ‘mid-roll’ so to speak. Going back to wanting to photograph your dancing daughter on the hillside, if your camera’s ISO was 200 when you found out the camera selected 1/125 second when you selected f/11, all you have to do is increase the ISO from 200 to ISO 800 and your daughter will be beautifully sharp as will be the mountains behind her.

So why don’t cameras use a very high ISO all the time? The faster the camera’s ISO, the more ‘noise’ there is—little dots start appearing in the darker or shadow areas of the picture where there shouldn’t be any dots, and this isn’t aesthetically desirable. Furthermore, sometimes you want a combination of slow shutter speed and small aperture.

In summary, for a given ISO, a large aperture will blur the background and require less light than a small aperture which will preserve detail in the background but requires more light. Increasing the ISO will make your DSLR’s sensor more sensitive to light, which will then allow you to use an appropriate shutter speed for a desired aperture.

The next article will explain how your camera focuses in P mode and what you need to know to ensure your subject is perfectly in focus.

About the Author:
This article was written by John Slaytor. “I find it difficult to narrow my photographic interest. This inattention to detail gives me plenty of subject matter. My range of work includes Macedonian Weddings and Christenings, Nigerian 21st Birthday parties, Presbyterian and Catholic funerals, Indian and Greek family portraits, Chinese and Ghanaian football supporters, Auschwitz-Birkenau concentration camps, and Sydney Opera House.

I live and work in Sydney but can and do travel anywhere for my vocation. I would like to think I have been positively influenced by Werner Bischof for his quiet humanistic vision, Jane Bown for her minimalist approach to technology, Eve Arnold for her compassion and Peter Dombrovskis for his pristine imagery. After visiting Auschwitz I came across Michael Kenna whose work has helped me understand how buildings can have mood.

(I avoid formality and artificial lighting believing these things draw far too much attention to the process of photographing people. I have no qualms about making buildings endure long exposures with a tripod.)

I use Nikon cameras and process my images (RAW only) using DXO. I print with an Epson 4800. My computer is a Mac and my screen is an Eizo.”


Go to full article: How to Choose the Correct Aperture, Shutter Speed, and ISO

What are your thoughts on this article? Join the discussion on Facebook

PictureCorrect subscribers can also learn more today with our #1 bestseller: The Photography Tutorial eBook

The post How to Choose the Correct Aperture, Shutter Speed, and ISO appeared first on PictureCorrect.


from PictureCorrect https://ift.tt/2OlfD6h
via IFTTT

PictureCorrect.com: Interesting Photo of the Day: Orangutan in the Rain

Here’s a heartwarming photo of an orangutan shielding himself from the rain with a taro leaf. This picture, taken by Andrew Suryono, is so incredibly cute. The orangutan doesn’t look put out or sad, he’s just peacefully sitting there watching the rain, perhaps enjoying the rhythmic and soothing pitter-patter of the warm drops:

orangutan covers himself from rain

Orangutan in the Rain by Andrew Suryono (Via Imgur. Click image to see full size.)

Suryono is a travel photographer from Indonesia, and this photo was taken in Bali. It was been nominated for Sony’s World Photography Competition.


Go to full article: Interesting Photo of the Day: Orangutan in the Rain

What are your thoughts on this article? Join the discussion on Facebook

PictureCorrect subscribers can also learn more today with our #1 bestseller: The Photography Tutorial eBook

The post Interesting Photo of the Day: Orangutan in the Rain appeared first on PictureCorrect.


from PictureCorrect https://ift.tt/2uO6V7u
via IFTTT

PictureCorrect.com: Self Portrait Tutorial in the Chiaroscuro Style

As a photographer don’t you just hate it when you’re stuck indoors due to bad weather? Well, being indoors doesn’t necessarily mean that you can’t get your creative juices flowing. Using a simple equipment setup and modeling by yourself can be a good way to pass time effectively when you’re stuck indoors. In this video, photographer Mark Wallace from Adorama shows you how you can take a chiaroscuro self portrait:

What is Chiaroscuro?

Chiaroscuro is an Italian term that means light dark. If you’ve come across images or paintings where some areas are well highlighted by light while other areas are very dark, then it is based on the chiaroscuro principle. This creates a very contrasty and a dramatic looking portrait.

Lighting Setup for Chiaroscuro Self Portrait

For the lighting setup, here’s what you will need:

  • an artificial light source (Mark uses the Profoto B2)
  • a softbox
  • a grid

Wallace controls the light by setting it up in the following way:

  • Place the light at almost 90 degrees from the camera.
  • Cover the light with a sofbox with a grid to avoid any spilling. Place the entire lighting setup very close (less than a foot) to where you’ll be sitting.
  • Meter the camera for the light coming from the light source only and not the ambient light. Wallace points the light meter toward the Profoto B2 from the position where he will be sitting for the self portrait.

dark self portraits

The entire point of placing the light source close to the subject is to obtain chiaroscuro using the inverse square law. According to this law, the light intensity falls off pretty rapidly from one point to the next. So if one area is brighter, the brightness will fall off rapidly as we move a bit farther away from that area. This enables us to achieve the light dark look that we are aiming for.

Camera Setup for Chiaroscuro Self Portrait

Wallace uses a wireless transmitter on his camera to trigger the flash. To expose for the flash, he sets his aperture at f/11, ISO at 100, and shutter speed at 1/180 second.

When it comes to focusing, he uses the manual focus mode with a feature that is quite common in mirrorless cameras these days know as focus peaking, which overlays the areas that are in focus with some color. Using this feature he determines that the entire chair where he will be in focus, which means that he will be in focus, too.

And finally, he sets a self timer of 12 seconds so that he gets ample time to get himself ready for the shot. He takes a couple of shots with varying poses to make sure that he has a handful photos to work with later.

focus peaking

Editing Chiaroscuro Self Portraits

After he is done taking his self portraits, Wallace uses Adobe Lightroom to edit them. When editing a chiaroscuro image, Wallace’s primary objective is to remove any light spills that may be seen in the image, and make some adjustments so that the image packs some punch.

To get rid of the light spill, Wallace simply paints over it with the adjustment brush with the exposure set to -4.

Next, he opens up the image in Adobe Photoshop and crops the image in a 16:9 ratio so that he is not dead centered.

After he’s done cropping, he goes back to Lightroom and opens the same file using Analog Efex Pro 2 to add some punch to the photo. If you are not familiar with Analog Efex Pro 2, you can play around with the contrast and color adjustment layers in Adobe Photoshop to obtain a grungy look in the final image.

Finally, he does a tighter crop to the image to draw attention to his face.

high contrast self portrait photography

And well, that’s about it. The important thing about taking chiaroscuro images is that you need to make sure that the area you want to highlight in the image is well lit while the rest of the image is totally dark. By keeping this simple idea in mind, you can easily obtain the light dark look in your images.


Go to full article: Self Portrait Tutorial in the Chiaroscuro Style

What are your thoughts on this article? Join the discussion on Facebook

PictureCorrect subscribers can also learn more today with our #1 bestseller: The Photography Tutorial eBook

The post Self Portrait Tutorial in the Chiaroscuro Style appeared first on PictureCorrect.


from PictureCorrect https://ift.tt/2xO2PvH
via IFTTT

perjantai 28. syyskuuta 2018

PictureCorrect.com: How to Use Photography Metering for Vivid Images

Most digital cameras share common features like exposure modes and focus settings. Various metering modes are found in all DSLRs. They offer different ways of reading the light values coming into a camera and determining the proper expsoure. Metering mode can also be defined as “the area in the viewfinder that is metered.”

metering in photography

“Sunset” captured by PictureSocial member Kimberly Hamers

In the early photography days the TTL (through-the-lens) method was used. Today’s digital cameras use much more refined methods of evaluating the light.

How a Camera Evaluates Exposure

  1. A digital camera first gathers certain information to use for its exposure decision. Light conditions that affect the frame play the major role for this decision.
  2. Then the camera enters the evaluation process. Using the gathered information and certain rules, the camera calculates the exposure value.

(The range of light is measured with low numbers being darker, i.e., exposure value 1, with high numbers assigned to the lightest i.e., exposure value 12.)

Metering Modes

Center-Weighted, Evaluative, Spot and Multi-Area are among the different metering modes.

All cameras have some form of Center-Weighted and Evaluative modes. Some DSLRs also include Spot and Multi-Area modes.

Center-Weighted metering takes its measurement from the center of the viewfinder. This mode gets an accurate reading from a critical point and works well when there is an even range of light values.

Center-Weighted Average is useful when you want to emphasize your subject since the exposure is averaged around the center.

Certain cameras offer a Center-Weighted Evaluative option where the entire image is considered. However, when calculating exposure, the middle point of the image still gets more attention.

Evaluative Metering works by dividing the image into sections. The number of these segments varies from one camera to the next. The meter reads the light value coming in from each of these segments and calculates the best exposure.

Spot Metering measures a spot or very small area of the image to base the exposure on. Spot metering is useful when the surrounding area is either darker or lighter than the subject itself. This method is preferred when working in difficult lighting situations and it works well when you have a specific area of the image that is critical for exposure.

Multi Area provides an additional type of metering which measures light values around the detail areas of your subjects. This type of metering delivers better lighting results.

Metering Tips for Vivid Captures

  • Bright Areas and White Objects. Point the Spot Metering at the brightest area of the scene. Check the suggested exposure and close down the f-stop by 1. This technique is suitable when shooting a bright sandy beach, a sunset, or a snowy scene.
  • Dark Areas. Point the Spot Metering at the darkest area. Check the suggested exposure and increase the aperture setting by 1. This technique will get correct tones.
  • Mid-Grey Areas. To capture details of a mid-gray area, set the camera for the “suggested exposure.”
camera settings metering

“Fog Shrouded” captured by PictureSocial member Debra Vanderlaan

Using various metering modes allows you to understand how the camera evaluates light in various metering modes. Experimenting with different metering modes will allow you to capture vivid colors and will add to your photography skills.

About the Author:
Article written by Zoe Shaw from digitalphotoworks. She is a computer programmer and graphic designer.


Go to full article: How to Use Photography Metering for Vivid Images

What are your thoughts on this article? Join the discussion on Facebook

PictureCorrect subscribers can also learn more today with our #1 bestseller: The Photography Tutorial eBook

The post How to Use Photography Metering for Vivid Images appeared first on PictureCorrect.


from PictureCorrect https://ift.tt/2DG1n3W
via IFTTT

PictureCorrect.com: Interesting Photo of the Day: Mirror in a Salt Flat

Australian photographer Murray Fredericks is known for his breathtaking images of Lake Eyre, an expansive salt lake in the South Australian Outback. About every eight years, the normally dry basin fills with salt water, creating a mirror-like effect with the sky so that on calm days it’s hard to tell where they even separate. Fredericks has been shooting the landscape of Lake Eyre for nearly two decades and when the water is shallow enough, he takes pictures of the vast, beautiful scenery with a mirror he drags out into the lake:

salt flat mirror photo

Vanity – Lake Eyre by Murray Fredericks (Via Reddit. Click image to see full size.)

Fredericks created his “Salt” series, which captured the serene and expansive landscapes around the salt flat. But with this one he took it one step further with “Vanity” and introduced a mirror into the landscape. As he says,

“Rather than reflecting our own image, the mirror is positioned to draw our gaze away from ourselves and into the environment, encouraging us to engage with light, colour and space.”


Go to full article: Interesting Photo of the Day: Mirror in a Salt Flat

What are your thoughts on this article? Join the discussion on Facebook

PictureCorrect subscribers can also learn more today with our #1 bestseller: The Photography Tutorial eBook

The post Interesting Photo of the Day: Mirror in a Salt Flat appeared first on PictureCorrect.


from PictureCorrect https://ift.tt/2vUg4aV
via IFTTT

PictureCorrect.com: Tutorial on How to do Dark Food Photography

In order to keep the viewer engaged with the main subject in the photo, one approach that a photographer can take is to play with light and shadows. By illuminating the main subject and by keeping the rest of the scenario under shadow to give a dark and moody look, a photographer can direct the viewers’ eyes towards the subject. This trick can be applied in food photography too. Photographer Aaron Lyles demonstrates how you can achieve a dark look for food photography with simple things that you may have lying around at your house:

What You’ll Need

  • 3 black foam boards to place behind and at the sides of the food to be shot
  • spring clamps to help you hold the foam boards in place
  • a sturdy tripod 
  • a level to ensure that you get your lines straight
  • tethering cord if you want to get a larger view on your computer monitor
  • window for natural light
  • light stands & transparency paper to hold and modify any additional light (optional)
foam board setup food photo

Foam Board Setup

Once you have these basics in place, you’re ready for some dark food photography.

Settings for Dark Food Photography

As far as settings are concerned, go with the base ISO of the camera as we are aiming for dark food photography. This will also help you get cleaner images.

Make sure the aperture is not too wide, as the food can get out of focus. Lyles uses f/3.2 in the video demonstration and a shutter speed of 1/30 second  at 70mm. As he uses a tripod, a relatively slower shutter speed isn’t an issue. Also, an aperture of f/3.2 allows him to get sufficient light for the dark shot, with most of the subject in focus and good bokeh.

Editing Dark Food Photos

To enhance the dark look of the image, you can add some vignetting.

post processing food photography

Also, you can use local adjustment tools like the brush tool to add exposure to the main subject (the food), and make other areas go darker.

dark food photography with edits

Have you tried this style of food photography?


Go to full article: Tutorial on How to do Dark Food Photography

What are your thoughts on this article? Join the discussion on Facebook

PictureCorrect subscribers can also learn more today with our #1 bestseller: The Photography Tutorial eBook

The post Tutorial on How to do Dark Food Photography appeared first on PictureCorrect.


from PictureCorrect https://ift.tt/2Qgbgqt
via IFTTT