torstai 30. syyskuuta 2021

PictureCorrect.com: Interesting Photo of the Day: Fields of Indian Paintbrush

The Eastern Sierra in California is well known for its scenery. Photographer Elliot Hawkey shot this beautiful image of Indian Paintbrush at sunrise while hiking in the region’s Ansel Adams Wilderness:

field of indian paintbrush at sunrise

“Fields of Indian Paintbrush at Sunrise” by Elliot Hawkey (Via Reddit. Click image to see full size.)

Hawkey shot the image handheld at 24mm, f/6.3, 1/200 seconds, and ISO 800 with his Canon 6D body and Canon 24–70 2.8 Mark I lens. The Banner Peak in the background is seen wrapped by the morning light while the flower field is yet to be sun kissed. The way Hawkey has composed this shot by using the flowers to create a leading line toward the peaks is really interesting.

“…decided to head down to California on a spontaneous four day backpacking trip through the Ansel Adams Wilderness in the Eastern Sierras. Roughly 35 trail miles, more lakes than I could count on two hands, a weird case of heat exhaustion, hundreds of mosquito bites, and some of the most beautiful views I’ve seen to date. The wildflowers in the photo are called Indian Paintbrush, with Banner Peak towering in the background at 12,936 ft, and just at the end of the field are the gorgeous waters of Thousand Island Lake.”


Go to full article: Interesting Photo of the Day: Fields of Indian Paintbrush

What are your thoughts on this article? Join the discussion on Facebook

PictureCorrect subscribers can also learn more today with our #1 bestseller: The Photography Tutorial eBook

The post Interesting Photo of the Day: Fields of Indian Paintbrush appeared first on PictureCorrect.


from PictureCorrect https://ift.tt/2OELIma
via IFTTT

PictureCorrect.com: New: Wonderful Wildlife Photography Guide

This new 172-page eBook walks you through everything necessary to take spectacular photographs of wildlife. From choosing the right destination, gear and settings. Through composing – and shooting – breathtaking images. Author Nick Dale even reveals how he makes money from his wildlife shots! It is currently 80% off today for the first 500 customers if you want to check it out. Launch sale found here: Wonderful Wildlife at 80% Off

wonderful wildlife ebook

Wonderful Wildlife (see inside)

Have you ever dreamt about photographing wild animals in their natural habitats? Birds in your garden, bears in the woods, elephants in Botswana, tigers in India. The great thing about wildlife photography is that you can do it anywhere in the world. You don’t have to go on an expensive African safari to capture great photos, you can also find wildlife much closer to home.

Step 1. Gear

The gear you use is really important for wildlife photography.

If you’re shooting animals in their natural habitat, it’s vital that you don’t disturb them… this means you can’t get close.

Nick shoots almost exclusively with a 400mm and an 800mm lens. And these aren’t cheap.

BUT… you can rent gear, you can use teleconverters to increase your focal length, and you can use crop sensors to get closer.

This eBook covers the gear you need for almost any wildlife situation.

Step 2. Location

Nick is lucky to have shot on every continent in the world over the past ten years.

This means he has insights into the best nature reserves, parks, and natural habitats.

wildlife photos

Somes of the images from the tutorials (see more within)

Whether you’re looking to shoot in your local area, or you’re planning a trip to Africa…

Nick’s insights will save you time and money.

Step 3. Settings

When you’re shooting at 800mm, with a maximum aperture of f/5.6… your settings start to get quite tricky.

You have to work within the limitations of your gear, while still capturing perfectly sharp images.

Fortunately, Nick has photographed hundreds of wild animals and he has great advice on how to make your camera work in tough conditions.

Camera settings won’t always be complicated, but it’s important to know what to prioritize.

Step 4. Composition

Great composition can make ordinary scenes look remarkable… just imagine if you could apply that to wildlife photography!

Whether you’re using the rule of odds, eye lens, repetitions, or juxtaposition… the right composition can transform your scene.

photographing animals

Photo by the Author (see more within)

Nick covers his favorite tips to add depth and context to his wildlife images.

Step 5. Capturing The Moment

Wildlife photography is about more than capturing photos of animals… it’s about capturing their lives.

When you study an animal’s movement, you can predict their actions and be ready to capture stunning action shots.

Whether that’s a jaguar killing a caiman, a bear catching a salmon, or an elephant blowing dust.

With Nick’s advice, you’ll be ready for them all.

Bonus #1 – 30 Global Wildlife Case Studies (Value $99)

Do you want to go behind the scenes of 30 of Nick’s most famous photos?

In this bonus, Nick shows you the exact process he used to capture photos in 13 countries, across five continents.

wildlife photo case studies

Wildlife Photography Case Studies (see camera settings & details)

Not only are these exciting to read, but they’ll help you to be prepared for the same shooting situations when your time comes.

Along with the settings he uses, he also tells detailed stories of how the images were captured.

How to Get Wonderful Wildlife for a Discount Today:

Wonderful Wildlife is currently 80% off for the launch sale for the first 500 customers (normally $99, currently $19). They have also thrown in 30 bonus case studies and wildlife camera FAQ’s. It all comes with an impressive 90 day happiness guarantee so there’s no risk in trying it.

Launch sale ending soon: Wonderful Wildlife eBook & Cheat Sheets at 80% Off


Go to full article: New: Wonderful Wildlife Photography Guide

What are your thoughts on this article? Join the discussion on Facebook

PictureCorrect subscribers can also learn more today with our #1 bestseller: The Photography Tutorial eBook

The post New: Wonderful Wildlife Photography Guide appeared first on PictureCorrect.


from PictureCorrect https://ift.tt/3F9dmmg
via IFTTT

PictureCorrect.com: Landscape Photographer Carries Extension Tube as Backup Plan

A catch in landscape photography is that you have no control over how the conditions are going to be. Weather can seem ideal one moment and difficult the next, or you might reach your destination and realize the conditions aren’t cooperating. A similar thing happened to photographers Gareth Danks and Roman Fox. They hiked up a mountain expecting to photograph an iconic scene, but, unfortunately, they could see nothing from the top. Luckily, Danks had a backup plan—thanks to a secret weapon he had in his bag.

The item Danks had in his bag to save the day: an extension tube. If you’re not familiar with an extension tube, it’s nothing more than a small piece of plastic that fits in between the lens and the sensor. By increasing the distance, the lens is now able to focus much closer and shoot like a macro lens.

Therefore, without adding significant weight to your backpack, you have an “extra lens” with you. It helps that extension tubes are very cheap. They can help when the weather isn’t great. You simply pop on the extension tube and take some close-up shots of vegetation, rock formations or other details. Even simple things that we easily tend to ignore look amazing in macro shots. This also acts as a refresher and can push your creative boundaries.

You’ll need to be careful, however, as your lens will lose its auto focus ability when using an extension tube. You will also need to set your exposure manually. Be mindful on these fronts, and you should still be able to take some amazing shots.


Go to full article: Landscape Photographer Carries Extension Tube as Backup Plan

What are your thoughts on this article? Join the discussion on Facebook

PictureCorrect subscribers can also learn more today with our #1 bestseller: The Photography Tutorial eBook

The post Landscape Photographer Carries Extension Tube as Backup Plan appeared first on PictureCorrect.


from PictureCorrect https://ift.tt/3CZ3wl8
via IFTTT

Startrails by chris-rin (500px.com/chris-rin)


Compsed of about 300 individual photos over a timespan of about 3-4 hours. via 500px https://ift.tt/3kRHgU1

keskiviikko 29. syyskuuta 2021

PictureCorrect.com: 6 Tips for Controlling Depth of Field

Depth of field (DOF) is one of the most important factors in determining the look and feel of a photograph. It’s also the most overlooked for photographers moving from a point-and-shoot camera to a DSLR camera. With a DSLR, you have a huge amount of control over depth of field, and you should know how to utilize that control.

how to control depth of field

Photo by Attila Siha; ISO 400, f/1.8, 1/60-second exposure.

What is Depth of Field?

Depth of field refers to the distance (depth) from the focus point that a photo will be sharp, while the rest becomes blurry. A large, or wide, depth of field results in much of the photo in focus.

6 tips for controlling depth of field

Photo by Brad Carlson; ISO 400, f/9.0, 1/40-second exposure.

A small, or narrow, depth of field results in much more of the photo out of focus.

narrow depth field

Photo by Tommaso Pecchioli; ISO 100, f/2.0, 1/1000s.

Neither approach is better or right, and which depth of field to use is up to you. You may have different reasons for choosing a certain depth of field, including artistic effect, bringing attention to a subject, or crisp representation of a scene.

There are four main factors that control depth of field: lens aperture, lens focal length, subject distance, and sensor size. Your sensor is pretty well set, so you won’t have much luck changing that. Your focal length and distance to the subject are usually determined by your choice of composition. So the lens aperture is your primary control over depth of field.

Before I get to the tips, let’s get a few things straight:

BIG APERTURE = SMALL F-NUMBER = SMALL DEPTH OF FIELD
SMALL APERTURE = BIG F-NUMBER = BIG DEPTH OF FIELD

Aperture Control

Large apertures (small f-numbers) cause a narrow DOF, while small apertures (large f-numbers) cause a wide DOF. To bring attention to a subject by blurring a background (selective focus), shoot with f-numbers like f/2.8, f/4, or f/5.6. To bring the whole scene into focus, shoot with f-numbers like f/16 or f/22.

Avoid Excess DOF

If you want to bring an entire scene into focus and keep it sharp, use a small aperture. But be careful not to go too small. Lens sharpness starts to deteriorate at the smallest apertures. Use enough to get what you want, and no more. You may have to experiment a bit to get a feel for how your camera and lenses work at different apertures.

Focus Point

The DOF extends behind and in front of the point of focus. It usually extends further behind than in front, though. So keep this in mind when choosing your focus point; you’ll want to focus about a third of the way into the scene rather than halfway.

best ways to control depth of field

Photo by Pietro Bellini; f/2.8, 1/30-second exposure.

Use a Tripod

As you stop down the lens for greater depth of field, you’re also letting less light into the camera. To compensate for this and maintain correct exposure, you’ll need to either use longer shutter speeds or a higher ISO. The ISO can only be increased so much before noise artifacts become an issue, so you’ll most likely want to lengthen your shutter speed. If your shutter speed is too long, you’ll need a tripod (or some type of stabilization) to deal with this.

DOF Preview

When looking through the viewfinder of a DSLR camera, you’re seeing the world through the lens. You can easily see your resulting composition and point of focus, but the depth of field you’re witnessing is a little false. You’re seeing the resulting depth of field for the largest aperture of the lens, no matter what f-number you’ve chosen. Most newer cameras have a feature called DOF Preview that allows you to stop the lens down to the chosen aperture so you can see the true depth of field.

dof camera

Photo by desire rukundo

Focal Length

As I mentioned, your focal length is usually determined by your choice of composition, but you should know how it affects your depth of field. Longer focal lengths (200mm) have less depth of field than shorter focal lengths (35mm). Just keep this in mind when you’re trying to achieve a certain depth of field—you may need to alter your focal length in addition to your aperture.

So there are your basic tips for controlling your depth of field when taking photographs. The best way to learn how to control DOF is to set your camera to aperture priority mode and go take some pictures. Photograph the same subject many different times while altering the aperture, point of focus, and focal length (if you have multiple lenses or a zoom lens). Either write down the settings you used for each picture or use software to view your camera’s settings while you look through the pictures on your computer. You’ll begin to see how these different factors affect your photos.

About the Author:
Brian Auer is from Epic Edits, which is a resource and community for photography enthusiasts of all experience levels.


Go to full article: 6 Tips for Controlling Depth of Field

What are your thoughts on this article? Join the discussion on Facebook

PictureCorrect subscribers can also learn more today with our #1 bestseller: The Photography Tutorial eBook

The post 6 Tips for Controlling Depth of Field appeared first on PictureCorrect.


from PictureCorrect https://ift.tt/324AiPJ
via IFTTT

PictureCorrect.com: Interesting Photo of the Day: Sunset over Ceahlau

Photographer Lazar Ovidiu has managed to make a frozen landscape look almost warm in this magical shot of a sunset over Romania:

red winter sunset romania

“Red Code” by Lazar Ovidiu (Via 500px. Click image to see full size.)

Ovidiu captured this photograph on the Ceahlau Massif, a mountain in the Carpathians, using a Canon 7D and Tokina’s 12-24mm ultrawide lens.


Go to full article: Interesting Photo of the Day: Sunset over Ceahlau

What are your thoughts on this article? Join the discussion on Facebook

PictureCorrect subscribers can also learn more today with our #1 bestseller: The Photography Tutorial eBook

The post Interesting Photo of the Day: Sunset over Ceahlau appeared first on PictureCorrect.


from PictureCorrect https://ift.tt/2rjbbIu
via IFTTT

PictureCorrect.com: Tips to Capture More Photos Worth Keeping

Taking photos is fun and all, but when it’s time to pick the keepers, many of us struggle. Not every photo you will be a masterpiece, but it’s always easier to have a high rate of “keepers”—the ones worth keeping on your computer. This improves efficiency and thereby saves a lot of time. Today we have photographer James Popsys sharing some tips to make sure that you come home with the photos that you envisage:

Most of us are used to spending at least a couple minutes (if not hours) trying to find the best composition once we reach a location. But as Popsys rightly points out, conditions can get worse. So it’s a good habit to capture at least a couple images as soon as you reach a location. If the conditions do get worse, you will at least walk away with something. And while you’re at it, quickly shoot get a couple of variations before you dig deep for the best composition. You will have a greater basket size to choose from this way. Once you have some photos in your basket, then you can start scrutinizing your composition and go on for refinement.

Exposing incorrectly is another big reason why we miss out on good photo opportunities. While tools like the histogram and zebra stripes can help you nail exposure, Popsys suggests a simpler method. Start by eyeballing the exposure and bracket the shot. This drastically increases your chances of not having to miss the exposure.

“It is always good to have your camera out and ready to fire. You never know what is around the corner.”

Lastly, a very important tip by Popsys is to be always ready to capture the moment. Watch the video, and towards the end, he shares how he keeps himself ready to shoot using custom profiles and by keeping the camera on his shoulder.

How many keepers do you come away with after a typical shoot?


Go to full article: Tips to Capture More Photos Worth Keeping

What are your thoughts on this article? Join the discussion on Facebook

PictureCorrect subscribers can also learn more today with our #1 bestseller: The Photography Tutorial eBook

The post Tips to Capture More Photos Worth Keeping appeared first on PictureCorrect.


from PictureCorrect https://ift.tt/2ZIxN9z
via IFTTT

tiistai 28. syyskuuta 2021

PictureCorrect.com: Color vs. Black and White Photography

When processing your photos it can be difficult to decide whether you should settle with color or black and white.

Are there particular indicators to help you decide when to use either one?

In this post, we will discuss the benefits of color and black and white photography and provide hints to help you decide when to use each option.

Benefits of Color Photography

Color adds a sense of warmth to a photo. If you are taking a photo during golden hour, a photo taken at the right angle will make the viewer almost feel the warmth of the sun’s rays.

sun over ocean waves

The use of color can also be used to evoke a particular emotion from an observer.

For example, bright popping colors will make a viewer feel positive and joyful, especially when coupled with smiling faces.

smiling faces

Conversely, a cold tone (blue and purple overlays) will evoke a feeling of sadness and melancholy.

Color can also be used to help the viewer ascertain the time of day or particular season the photo was taken.

Sunlight seems to colorize an environment in a lighter more subtle way during dawn compared to the deeper and darker hues at dusk.

Similarly, seasons are characterized by their corresponding flora coloration; it would be difficult to conclude whether or not a black and white photo was taken in autumn.

If the aim of your photography is to have the viewer seamlessly contextualize the time of day and/or seasonal period of a photo; color photography will represent this information in a way black and white photography simply cannot.

When to Use Color Photography

As mentioned above, color photography is the ideal choice if you wish to communicate the time of day and season a photo is taken.

But if you are still uncertain whether or not you should be choosing color, ask yourself this question:

What is the key element of your story?

Whenever a photographer takes a photo, the aim should be to tell an entire story in one single frame.

If a photographer takes a photo of a basketball player shooting the ball during a game, by focusing on the face of the player the photographer is telling the story of concentration, intensity, and grit.

If a photographer takes a photo of a newly married couple kissing, the story of love is being told.

Each of these ‘stories’ includes a key element—the prominent features of the photo:

The basketball player.
The married couple.

In the former example, it would be important to use color when taking a photo of the basketball player because it will help the viewer identify the basketball player’s team by the colors on his jersey.

In the latter example, color is not a necessity because it will not make the key element (the married couple) more prominent.

Another example of when to use color is when taking photos of fruit or flowers.

The vibrant colors of fruit and flowers are characteristic of their identity; a black and white photo of a strawberry will not represent its ripe juiciness as effectively as a color photo would.

strawberries color photo

So, if color helps define the key elements of your story, definitely choose color photography.

Benefits of Black and White Photography

Black and white photos are difficult to date. It’s hard to tell the time of day, let alone the era the photo was taken.

The benefit of this ambiguity is the timeless factor of black and white photos.

Since the only two elements defining a black and white image are light and shadows, black and white photos seem much more dramatic.

Because of this strong dramatic influence, if the intent of the photographer is to elicit a feeling of joy, a black and white photo will not have the same effect as a vibrant colorful photo.

Black and white photos are therefore best suited for more serious storytelling because they transmit emotions like sadness, nostalgia, and anger a lot more effectively than color photography.

When to Use Black and White Photography

Just like color photography, the purpose of black and white photos is to tell an eternal story in a single frame.

And like any photographic story, there is always a key element.

If the use of color distracts the viewer from the key element of the story being told, a black and white scheme is a better option to choose.

Notice how in this photo, the key element is the embracing hands. Color, in this instance, might distract the viewer from focusing on the hands.

hands in b and w

Black and white photos create a picture consisting of light shades, texture, and contrast which makes black and white photography a great option if your intention is to capture the texture of your subject.

dandelion black and white

Keep in mind that black and white photos look the best when there is a wide dynamic range of shades.

For example, if you take a black and white photo of scenery that is primarily populated with a single shade of grey, it will be difficult to identify the key element and the overall photo will look bland and visually boring.

If, however, your scenery has a wide tonal range, it will be much more visually appealing.

Here is an example of a photo with a narrow tonal range. Notice how the photo lacks impact and how viewing it is not an enjoyable experience:

narrow tonal range

Now compare that photo to this one with a higher tonal range. Notice how prominent the key element is and how much more impactful this photo is:

higher tonal range

Important Photography Tip

When taking photos we recommend that you set your camera to capture photos in a raw format.

Taking photos in a raw format will save their color presets, so when processing your photos you will have the luxury of deciding whether you would like to make them black and white or color.

If you were to take a black and white photo in a JPEG format on your camera, you will not be able to revert it to color if you choose to do so.

So, as a safety net, take your photos in color and in a raw format in order to have the option of transforming it into a black and white image if needed.

Conclusion

If you want to evoke a sense of warmth and joy, take photos in color.

If, however, you want to emphasize on light, shadows, and texture, black and white photos would be a better option.

Now go out there and tell your unique story, one photo at a time.

About the Author:
Matt Fey writes for PrintingCenterUSA, an online printing and mailing service provider.


Go to full article: Color vs. Black and White Photography

What are your thoughts on this article? Join the discussion on Facebook

PictureCorrect subscribers can also learn more today with our #1 bestseller: The Photography Tutorial eBook

The post Color vs. Black and White Photography appeared first on PictureCorrect.


from PictureCorrect https://ift.tt/3unqUG4
via IFTTT

PictureCorrect.com: Interesting Photo of the Day: Sunrise in Haleakala Crater

You know it’s a good picture when you have to stop and ponder if it’s even real or not. And the image below of the Haleakala Crater in Maui, HI, USA seems to fall on the same league; it’s that surreal. The name Haleakala in Hawaiian translates to “house of the sun”, and in this image taken by photographer Tanmay Sapkal, it seems he has captured the essence of the crater’s name:

sunrise from Haleakala

“Epic Sunrise from the Haleakala Crater” by Tanmay Sapkal (Via Reddit. Click image to see full size.)

“It’s perhaps one of the most beautiful and other worldly landscapes I have ever seen to date.”

This image is a 7 shot wide panorama that Sapkal shot with the Sony A7RIII camera and the Tamron 28-200mm lens at 28mm. He shot this image during the sunrise and the drama that’s going on in the image is just mindblowing.

The way that Sapkal has compose the image is just spectacular. The layers and how every layer has something to say is noteworthy. For instance, the debris of the erosion on the foreground works beautifully as a powerful leading line and draws us right into the image. The rocky and the uneven terrains covered in the morning haze in the midground appear mystical and make us question reality. Then there’re the beautiful colors and the interesting cloud patterns on the sky. They work as the icing on the cake and complete the image.

Had you ever imagined how something such barren and rocky could appear so beautiful as well?


Go to full article: Interesting Photo of the Day: Sunrise in Haleakala Crater

What are your thoughts on this article? Join the discussion on Facebook

PictureCorrect subscribers can also learn more today with our #1 bestseller: The Photography Tutorial eBook

The post Interesting Photo of the Day: Sunrise in Haleakala Crater appeared first on PictureCorrect.


from PictureCorrect https://ift.tt/2WkgDO3
via IFTTT

PictureCorrect.com: Monochrome Studio Portrait Setup & Tips

Black and white portraits can be very powerful when they feature bold shapes and a wide range of tones. But that depends on your knowledge of monochrome photography. The absence of color means your contrast has to be on point. A common mistake that many photographers make is not planning to shoot in monochrome beforehand. Just removing the colors in Photoshop won’t cut it. By planning to shoot in monochrome, you can make many decisions that will maximize the contrast in your photo. In today’s video, photographer Gavin Hoey from Adorama takes you through how you can visualize and plan for some breathtaking black and white portraits.

“If you’re going to shoot black and white portraits, the best you can do is to plan for that right now, ahead of the shoot.”

Hoey shares with you how he uses three different backgrounds to create three different looks using the same lighting setup. For high-contrast images, you can see that pure black and pure white backgrounds work very well. They emphasize the subject best. Conversely, as he demonstrates in the video, the beauty of using a grey background is its versatility. By varying the distance between the grey background and light, you can control easily control its look.

“When it comes to monochrome black and white images, don’t be afraid of the shadows.”

Black and white images should convey a certain mood, and shadows play a pivotal role in defining that. It is therefore very important that you pay attention to where and how you place your lights. Placing the light right in front of the subject gives a flat look to the image. But place it sideways and you’ll see the magic happen. And if the image demands, you can also use a kicker light to create a separation between the subject and the background.

Be sure to watch the complete video for some practical examples. You’ll see how easy it is to produce some mind-blowing black and white images by paying attention to some basics.


Go to full article: Monochrome Studio Portrait Setup & Tips

What are your thoughts on this article? Join the discussion on Facebook

PictureCorrect subscribers can also learn more today with our #1 bestseller: The Photography Tutorial eBook

The post Monochrome Studio Portrait Setup & Tips appeared first on PictureCorrect.


from PictureCorrect https://ift.tt/3EYoXEP
via IFTTT

maanantai 27. syyskuuta 2021

PictureCorrect.com: 5 Simple Technical Tips to Make Candid Street Photography Easier

Street photography simultaneously tests your hand-eye coordination, your ability to see and frame interesting moments as they quickly unfold before you, your ability to see light, your technical abilities with your camera, and your ability to be comfortable capturing strangers.

make street photography easier

Prince and Broadway, 1/320 at f/8, ISO 800 (24mm)

It is so much to do at the same time, let alone to think about an image conceptually.

While there is no substitute for experience, the goal of this article is to help get your technical abilities and camera settings up to par in order to make things so much easier for you. When you get good at these skills, with some practice, it will almost feel as if the camera isn’t there. When done well, it feels like it is just your eyes and the scene in front of you.

However, to make that happen can require some specific ways of shooting.

1. Camera Settings and Shutter Speed Priority

I have noticed when teaching that way too many people shoot in Aperture Priority mode in every single circumstance. Aperture priority mode is a great way to shoot for things like landscapes, architecture, when you want a shallow depth of field, or for portraiture. If you’re good enough with either Aperture, Shutter, or Manual mode you can use them for any situation. However, for street photography, I suggest that you consider shooting in Shutter Priority Mode. The toughest thing to do is to freeze motion in a scene and to make the important elements sharp, and you need to have the right shutter speed settings to do this.

To freeze motion on the streets, my go-to setting is Shutter Priority at 1/320 of a second. If it is very bright out I will go to 1/500, and in darker situations I will go down to 1/160.

Manual settings can work, but I prefer to let the camera do the work to set the corresponding aperture. While you want to have control over the settings of your camera, you do not want to have to change them every single time you change your direction. If you are pointed into the sun one second and into the shady side of the street another, it can become a nuisance to change the settings each time. However, if you are in a situation with very consistent lighting, manual can be a great mode to use.

camera settings for street photography

Canal Street, Chinatown. 1/400 at f/16, ISO 800 (28mm)

2. High ISO

I also prefer to photograph with a high ISO for street photography. There is a common misconception that you need to photograph with low ISOs, when in fact, shooting with a high ISO will often yield a photo with better technical qualities, besides the added grain.

Getting the focus correct and freezing fast moving scenes is extremely tough, and shooting with a high ISO will allow you to photograph with a faster shutter speed and a larger aperture, from f/8 all the way to f/16, creating a larger range of sharpness in an image. Should you miss the focus a bit on the main subject or have multiple subjects at different depths, there is a better chance that they will still come out acceptably sharp. This can be especially important with zone-focusing, which will be talked about below.

I generally alter my ISO settings between 400 and 3200, with 800 and 1600 being the most used. Newer digital cameras tend to create images with fantastic grain at higher ISOs, so for a lot of cameras this will not be a worry. For older digital models this might be too high, so test your camera at these settings. This way of shooting is not for landscapes, scenes without any moving subjects, or for any tripod or studio work where you have a lot more time to set up your scene and get the focus perfect. This is for street photography.

You will quickly see that your images, while grainier, will be crisper and sharper and will look better.

choosing a lens for street photography

1/400 at f/5.6, ISO 800 (35mm equivalent) – Fuji X100S

3. Use a Wide-Angle, Prime Lens

It can feel more comfortable to shoot street photography with a zoom lens from a distance and there are some photographers who do this well. However, I implore you to try street photography with a wide-angle prime lens. You might not go back to that zoom.

A wide-angle lens will open up the scene since you will have to capture people from a closer distance. It will allow you to capture more of the surrounding area itself, while having a prominent subject large and in the foreground. When using a wide-angle lens it almost feels like the viewer is immersed in the scene and not separated from it at a distance.

In addition, using a wide-angle perspective will allow more of the scene to be sharp and when mixed with a smaller aperture (f/8 to f/16), will allow for a very large range of sharpness in the scene.

The final reason to use a wide-angle prime lens is that they are often lighter and easier to maneuver. This will allow you to photograph more freely. Since the camera will be smaller without a heavy zoom lens, it will be easier to get closer. Also, over time you will get so used to that focal length that you will begin to see the potential framing before you even start to frame the scene and look through the viewfinder. Having to alter the zoom before taking a shot can get in the way of spontaneous shooting.

My preferred wide-angle lenses are 35mm and 28mm on a full frame. That would be close to a 23mm or 20mm on an APS-C sensor camera.

street photography zone focus

Camera zone focused at a couple feet away. 1/250 at f/5, ISO 1600 (35mm)

4. Zone Focus

Zone focusing involves turning your camera to manual focusing, setting it the focus point to a specific focus distance (I often prefer 10 or 8 feet away) and then photographing your subjects around that distance from the camera.

This is done best in bright areas where you can use a small aperture, but it can be done in darker situations if you get good at it. If you are photographing on a bright day with a 28mm lens at f/16 and your focusing is set to 10 feet away, not only will people at 10 feet be tack sharp, but everything from 4 feet away to the background will be very sharp. This makes photographing a breeze. With zone focusing and a prime lens all you have to do is see something, get in place, frame, and click. If you like to hip shoot (shoot without looking through the viewfinder) then this is the best way to do it since you can still get the focus correct. When the light gets lower and you have to use larger apertures, such as f/5.6 or even f/2.8, it becomes much harder to zone focus, however with practice you can still do this well.

Also, don’t forget that you are just a switch away from turning the autofocus back on. When I zone focus, I will still turn the autofocus on quickly when I need to, which happens fairly frequently.

street photography with iphone

Dancer, Pharmacy. Shot with iPhone.

5. Try a Smaller, Lighter Camera

You can do this type of photography very, very with well with a DSLR and a prime lens. However, there is no question that a smaller camera is an advantage. There is nothing like street photography with a smaller camera, and there are many fantastic lines of smaller cameras to try these days, both mirrorless and micro 4/3.

I use and love the Fuji X100 line (and the entire line of smaller Fuji cameras is good), but Ricoh, Sony, Olympus, and of course Leica (if you can afford it) all make incredible smaller cameras that are a joy to use and make it easy to take everywhere. What is the point of having a great SLR if you don’t enjoy taking it with you on a daily basis? Even an iPhone can work as long as it gets you to photograph consistently.

So put on a 35mm prime lens, set your camera around a shutter speed of 1/320 at ISO 800 or 1600, turn it to manual focusing at 10 or 8 feet away, and forget that it is even there.

About the Author:
James Maher is the author of Essentials of Street Photography, which covers everything about the genre even down to specific post processing techniques that can bring the best out of street scenes.


Go to full article: 5 Simple Technical Tips to Make Candid Street Photography Easier

What are your thoughts on this article? Join the discussion on Facebook

PictureCorrect subscribers can also learn more today with our #1 bestseller: The Photography Tutorial eBook

The post 5 Simple Technical Tips to Make Candid Street Photography Easier appeared first on PictureCorrect.


from PictureCorrect https://ift.tt/2sy5Ldo
via IFTTT

PictureCorrect.com: Interesting Photo of the Day: Drone Halo Long Exposure

In photography, unplanned photos often turn out to be the best. Take for instance the following image by photographer Rudy Ramirez. His initial plan was to shoot the Milky Way, but the following image ended up being his best from the night. How about that?

halo made by a drone

“Halo Created by a Drone above a Church” by Rudy Ramirez (Via Reddit. Click image to see full size.)

Ramirez shot the image with his Sony A7R3 camera and a 24mm GM lens. This is a 10-second exposure that he shot at 24mm, f/1.4 and ISO 250.

If you are curious about the halo-like appearance above the church, you might be surprised to know what it really is. It is in fact a Mavic 2 drone carrying an additional light. The drone operator moved it in a circular path during the 10-second exposure, which resulted in this fantastic light painting. It is indeed a clever use of tech to create the effect. Don’t you agree?

“I can’t take credit for the drone! I was just at the right place at the right time.”

Interestingly, this image was not even planned for. Somebody else at this meetup brought their drone and Ramirez requested them to fly it around the church. The result is pure heavenly beauty. Besides the halo, the blue lighting inside the church adds so much to the image. In a way, the blue light completes the photo.


Go to full article: Interesting Photo of the Day: Drone Halo Long Exposure

What are your thoughts on this article? Join the discussion on Facebook

PictureCorrect subscribers can also learn more today with our #1 bestseller: The Photography Tutorial eBook

The post Interesting Photo of the Day: Drone Halo Long Exposure appeared first on PictureCorrect.


from PictureCorrect https://ift.tt/3ifaEBX
via IFTTT

PictureCorrect.com: Longevity in Photography

If you had to choose the most important factor in your photography, what would it be? Your camera? Lens? Lighting? Settings? Most of us would choose something like that. But photographer Mads Peter Iversen has a different idea. What he suggests is entirely different—it’s totally abstract, yet very powerful. Let’s see what he has to share:

“For how long do you like your own work?”

For Iversen, what matters most is longevity. The length of time that you keep enjoying what you are doing is truly important, and requires so much introspection and honesty. If you feel happy and satisfied with your own work, then there are no forces that can derail you and avoid you from reaching your goal. Longevity will be your greatest source of inspiration and will keep on driving you and your enthusiasm.

Trends come and go. You may even be drawn to try out new trends. But what matters most is that when you look back at your photos, you still love them. This may not be true for every other, and so it’s essential that you develop your own photography style and keep on polishing it with time. This way, you ensure that your images are timeless.

How long have you been photographing what you photograph and are you proud of it? And do you see yourself working in the same direction in the years to come? Be sure to drop your comments below. We’d love to go through them.

For further training: The Photography Tutorial eBook


Go to full article: Longevity in Photography

What are your thoughts on this article? Join the discussion on Facebook

PictureCorrect subscribers can also learn more today with our #1 bestseller: The Photography Tutorial eBook

The post Longevity in Photography appeared first on PictureCorrect.


from PictureCorrect https://ift.tt/3zJwjrJ
via IFTTT

sunnuntai 26. syyskuuta 2021

PictureCorrect.com: Common Mistakes in Wildlife and Nature Photography

Wildlife photography is both rewarding and frustrating, even for experienced photographers. While a great photo is something to treasure, the challenges of wildlife photography can leave beginners feeling a little lost.

horse wildlife photo

Photo by Fabian Burghardt

“It was wonderful to be there, but this photo doesn’t really do it justice.” Does this sound familiar? Too often we have a great experience in nature, and even though we have our camera at the ready, we fail to get the shot. This is not because the camera lets us down; it is because in our rush to get a photo–any photo–we fall victim to a number of mistakes that can ruin a good wildlife photography opportunity.

Wildlife Photo Mistakes and Tips to Overcome

1. Fail to Get Close Enough to the Subject

This is probably the most obvious mistake you can make. You may see a bird in a tree, but your photo turns out to be all tree and no bird. In wildlife photography, the ‘less is more’ approach is often best. Ask yourself what is important for your photo, and eliminate everything else. In most cases, it’s best to get as close as possible to the subject and/or zoom in with your largest lens. This eliminates the distraction of the background so that the viewer’s attention is entirely on the subject itself.

2. Distracting Depth of Field

This is closely related to mistake #1. When you set your camera to automatic, you allow it to set your aperture and shutter speed settings for you. To get the best results, you need to make these decisions for yourself. If you take your photos on a small aperture setting, you increase the depth of field around the subject, allowing the background to become more of a distraction. You are better to set the widest aperture setting you can. This narrows the depth of field, concentrating the focus on the animal. As an added bonus, it will also allow a faster shutter speed, which helps to freeze a moving subject.

3. Get Too Close to the Subject

When the opportunity arises to get a good close-up, some people go a little too far. A good wildlife photo wants a little space around the subject, otherwise, your composition can look cramped, with the animal squashed into a space where it doesn’t quite fit.

In these situations, try zooming back just a little to allow a little head room around the animal. There should be at least a small amount of space above the head and on each side. If the animal is facing to one side, adjust your composition so that there is a little more space in front of the subject than behind it. That way the animal will be looking into the picture, not at the edge of the frame.

4. Bad Timing

Animals move, they blink, they turn their heads, they flap their wings. Sometimes it seems they are on a mission to foil your best attempts at a good photo.

In every wildlife encounter, there are a thousand opportunities to take a bad photo and maybe one or two opportunities to take a good photo. A nature photographer learns to be ready for that perfect moment.

This is a matter of patience and perseverance. You need to spend as much time as possible with your subject and take a lot of photos. Expect most of them to be rubbish, but take delight in the good ones because they are hard to come by. In particular, watch the animal’s movements and behavior. The trick is to try to catch a moment that expresses something unique to set your photo apart from millions of others. You won’t get that perfect shot every time, but when you do it is a moment to treasure.

5. Poor Lighting

We all love to get out and about on sunny days, but these are not necessarily the best conditions for a good photo. Bright sunshine produces shadow where you may not want them, in particular across your subject’s facet. In the middle of the day when the light shines from above, you can find that most of the face and all of the underside of the subject is lost in dark shadow.

The solution? If it is a sunny day, take your photos early in the morning or late in the afternoon, when the sun is at a lower angle. You will also find lower contrast and warmer color in the light, adding character to the whole photo.

snowy wildlife photo with space around subject

Photo by Jonatan Pie

In many cases, it’s best to take your photos on a cloudy day, when the light is even and the contrast is low. This light can work best for some subjects by completely eliminating glare and heavy shadow.

About the Author:
Andrew Goodall writes for https://naturesimage.com.au/ and is a nature photographer based in Australia. He manages a gallery in Montville full of landscape photography from throughout Australia.


Go to full article: Common Mistakes in Wildlife and Nature Photography

What are your thoughts on this article? Join the discussion on Facebook

PictureCorrect subscribers can also learn more today with our #1 bestseller: The Photography Tutorial eBook

The post Common Mistakes in Wildlife and Nature Photography appeared first on PictureCorrect.


from PictureCorrect https://ift.tt/3kGQW3v
via IFTTT

lauantai 25. syyskuuta 2021

PictureCorrect.com: Aperture: Get Creative

Focusing on Aperture

The primary purpose of the aperture setting is to regulate the amount of light that passes through the lens. Along with the shutter speed, it determines the quantity of light that reaches the camera’s sensor (or film) and forms a third of the ‘exposure triangle’. But, of more interest to most photographers is the creative potential of the aperture and shutter speed settings. I wrote about shutter speed a few weeks ago and today I’m going to explore some ways of making the most out of aperture.

getting-creative-with-aperture-1

Using aperture as a creative tool

Aperture and Depth of Field

I realize many readers are aware of this already, but let’s recap. The creative aspect of aperture is that it controls depth of field:

  • A wide aperture setting (such as f/2 or f/4) reduces depth of field.
  • A narrow aperture setting (such as f/11 or f/16) increases depth of field.

There are other factors that affect depth of field, too. Keep them in mind as you read the article and you will start to see how they have affected the photos that illustrate it:

  • The closer you get to your subject, the less depth f field you get. This is probably the biggest single factor.
  • Focal length. The longer the focal length of the lens, the less depth of field there is at any given aperture. This is partly to do with the perspective of the lens and the size of the subject within the frame, but it holds true most of the time.
  •  The larger your camera’s sensor, the less depth of field there is at any given focal length and aperture. That’s why photos taken with full-frame cameras tend to have limited depth-of-field while photos taken with compact cameras (most of which have very small sensors) have lots of depth of field.
getting-creative-with-aperture-2

Wider apertures give a shallow depth of field.

Portraits

Now, let’s take a look at how you can put these principles into action. One of my favorite techniques is to use a wide aperture to throw the background out of focus when I’m taking portraits.

This is called ‘selective focus’. The idea is to focus on the subject’s eyes, select a wide aperture so that the eyes and part of the face are in focus and the rest goes out of focus.

getting-creative-with-aperture-3

Selective focusing draws the eye to the subject and gives a nice bokeh effect.

These two photos show the effect of using wide apertures. The one on the left was taken with an aperture of f/5.6. This is the widest aperture available on most kit lenses. I used an 85mm lens on a full-frame camera. If you have an APS-C camera and a kit lens you’ll get a similar result by using the 55mm end of your lens.

The photo on the right was taken with the aperture set to f/1.8, the widest available on my 85mm prime lens. You can see there is a big difference. It explains why 85mm prime lenses are so good for portraits. The focal length gives a flattering perspective and the wide aperture lets you take photos with lots of lovely bokeh (this word describes the quality of out of focus areas in the photo).

Primes have wider maximum apertures than zoom lenses. If you don’t own any prime lenses it’s worth considering buying one for this reason alone; the creative potential of those wide aperture settings will open your eyes to a new way of seeing and taking photos. If you’re on a budget, then most manufacturers have an inexpensive 50mm prime lens available.

I love my 85mm lens for taking portraits. A 50mm prime lens on an APS-C camera is also a great portrait lens.

If you have a zoom lens, you can still get good bokeh with this tip:

Get in as close to your subject as you can, and move them as far away from the background as possible. This will help you keep depth-of-field as shallow as possible with your lens.

getting-creative-with-aperture-4

When using a zoom lens, move in close to the subject to help separate it from the background.

Close-Up Photography

You may remember that depth of field decreases as you get closer to your subject. This has real implications for close-up and macro photography. Depth of field is so narrow when you get up close that it’s unlikely (fancy post-processing techniques such as focus stacking aside) you will not be able to get the entire frame in focus even at f/22.

getting-creative-with-aperture-5

When the camera is close to the subject it becomes difficult to keep the entire subject in focus.

That’s okay. I prefer it that way as it lets me take photos with lots of out of focus areas. I even like using wide aperture settings so that only a small part of the subject is sharp. The two photos above were both taken with prime lenses for this reason (the top one with an 85mm lens and the bottom with a 40mm lens).

Alternatively, you can stop down to create images with more depth of field.

getting-creative-with-aperture-6

Use a narrow aperture if you want more of the background to stay in focus.

Landscape Photography

In landscape photography you often take the opposite approach to focal length and aperture selection. Most landscape photographers use wide-angle lenses and narrow apertures such as f/11 or f/16 to ensure that the entire scene is in focus.

This has an interesting side effect when you consider that the best landscape photos are taken in low light (the quality of the light is better) and with low ISOs (for maximum image quality). This invariably means that you need a slow shutter speed to obtain the correct exposure (and a tripod to support the camera).

Slow shutter speeds are also a great way to get creative (the photo above was taken with a shutter speed of 400 seconds). The aperture selection isn’t very exciting, but the potential of what you can do with shutter speed is. Don’t forget, you can read more about using shutter speed creatively here.

Aperture Priority

As we’ve seen, aperture is about far more than controlling the amount of light that passes through the lens. It’s a creative tool that good photographers use to create beautiful images.

A good exercise is to consider the effect of using different aperture settings when you take a photo. With digital cameras it’s easy to experiment with different aperture values and look at the results right away on the LCD screen. This helps you decide which setting is most effective for the subject that you’re shooting.

Aperture Priority Mode

Aperture Priority Mode

The easiest way to control aperture is to use the aperture priority mode on your camera (represented by the initials Av on the Mode dial of my EOS camera). This is the one I use whenever I am taking portraits, landscapes or close-up photos. In aperture priority, you set the aperture and ISO, and the camera sets the shutter speed for you automatically (if you need a faster shutter speed, you can raise the ISO).

Hopefully, this article has helped you appreciate the creative potential of the aperture setting.

About the Author:
For further training, Andrew Gibson’s ebook, Mastering Photography: A Beginner’s Guide to Using Digital Cameras, introduces you to digital photography and helps you make the most out of your digital camera. It covers concepts such as lighting and composition, as well as the camera settings like Programmed Auto you need to use to become a creative photographer.


Go to full article: Aperture: Get Creative

What are your thoughts on this article? Join the discussion on Facebook

PictureCorrect subscribers can also learn more today with our #1 bestseller: The Photography Tutorial eBook

The post Aperture: Get Creative appeared first on PictureCorrect.


from PictureCorrect https://ift.tt/2D7xHXR
via IFTTT

perjantai 24. syyskuuta 2021

PictureCorrect.com: How to Photograph Great Seascapes

The late great Galen Rowell once advised us to look to the edges of environments, and there we would find many successful images.

Where the land meets the sea must be by far
one of our most fertile hunting grounds.

Ever since we were children, given a bucket and spade, a long summer’s day and a dripping ice cream, the seaside has been a draw, filling our lives with some of our fondest memories.

As adults, I believe much of this draw has to do with nostalgia, the sense of exploration, rich air, and occasionally, just a little hint of danger. Certainly, as photographers, we flock to the seashore with as much enthusiasm as we ever did, and being so popular for family vacations, a few quiet hours before dawn are usually possible, even allowing for the most hectic of itineraries.
seascape photography alister benn

Solid Air — Spain

In many respects, a list of how to make great seascape images can appear very obvious, but as a professional landscape photographer, I know well the need for methodical preparation, anticipation, and a willingness to experiment. I also appreciate the need to have the reassuring framework of a process, something I call The Creative Cycle.

VISION | CAPTURE TECHNIQUE | PROCESSING

Every photograph ever made starts with an event, an interaction between a photographer and the landscape. Something stimulates you; a shape, pattern or color combination. Equally, on a more subtle level, that stimulus can be emotional, and it is more how we feel about a place that prompts us to take our camera out the bag and make the decision to take a photograph.

Thus begins a process of arrangement, organization, capture and processing that in some way aims to strike a chord with another viewer, uniting them from there space in front of a computer thousands of miles away, with our little spot by the beach as the sun went down.

1. Be Inspired

I do not believe that many, if any photographers are born brilliant. Everyone has to put the time into their art and craft to develop a technical understanding of the possible (and the impossible), and the artistic ability to see the world in a grain of sand. Seeing creatively is a skill, it can be learned.

seascape photo by alister benn

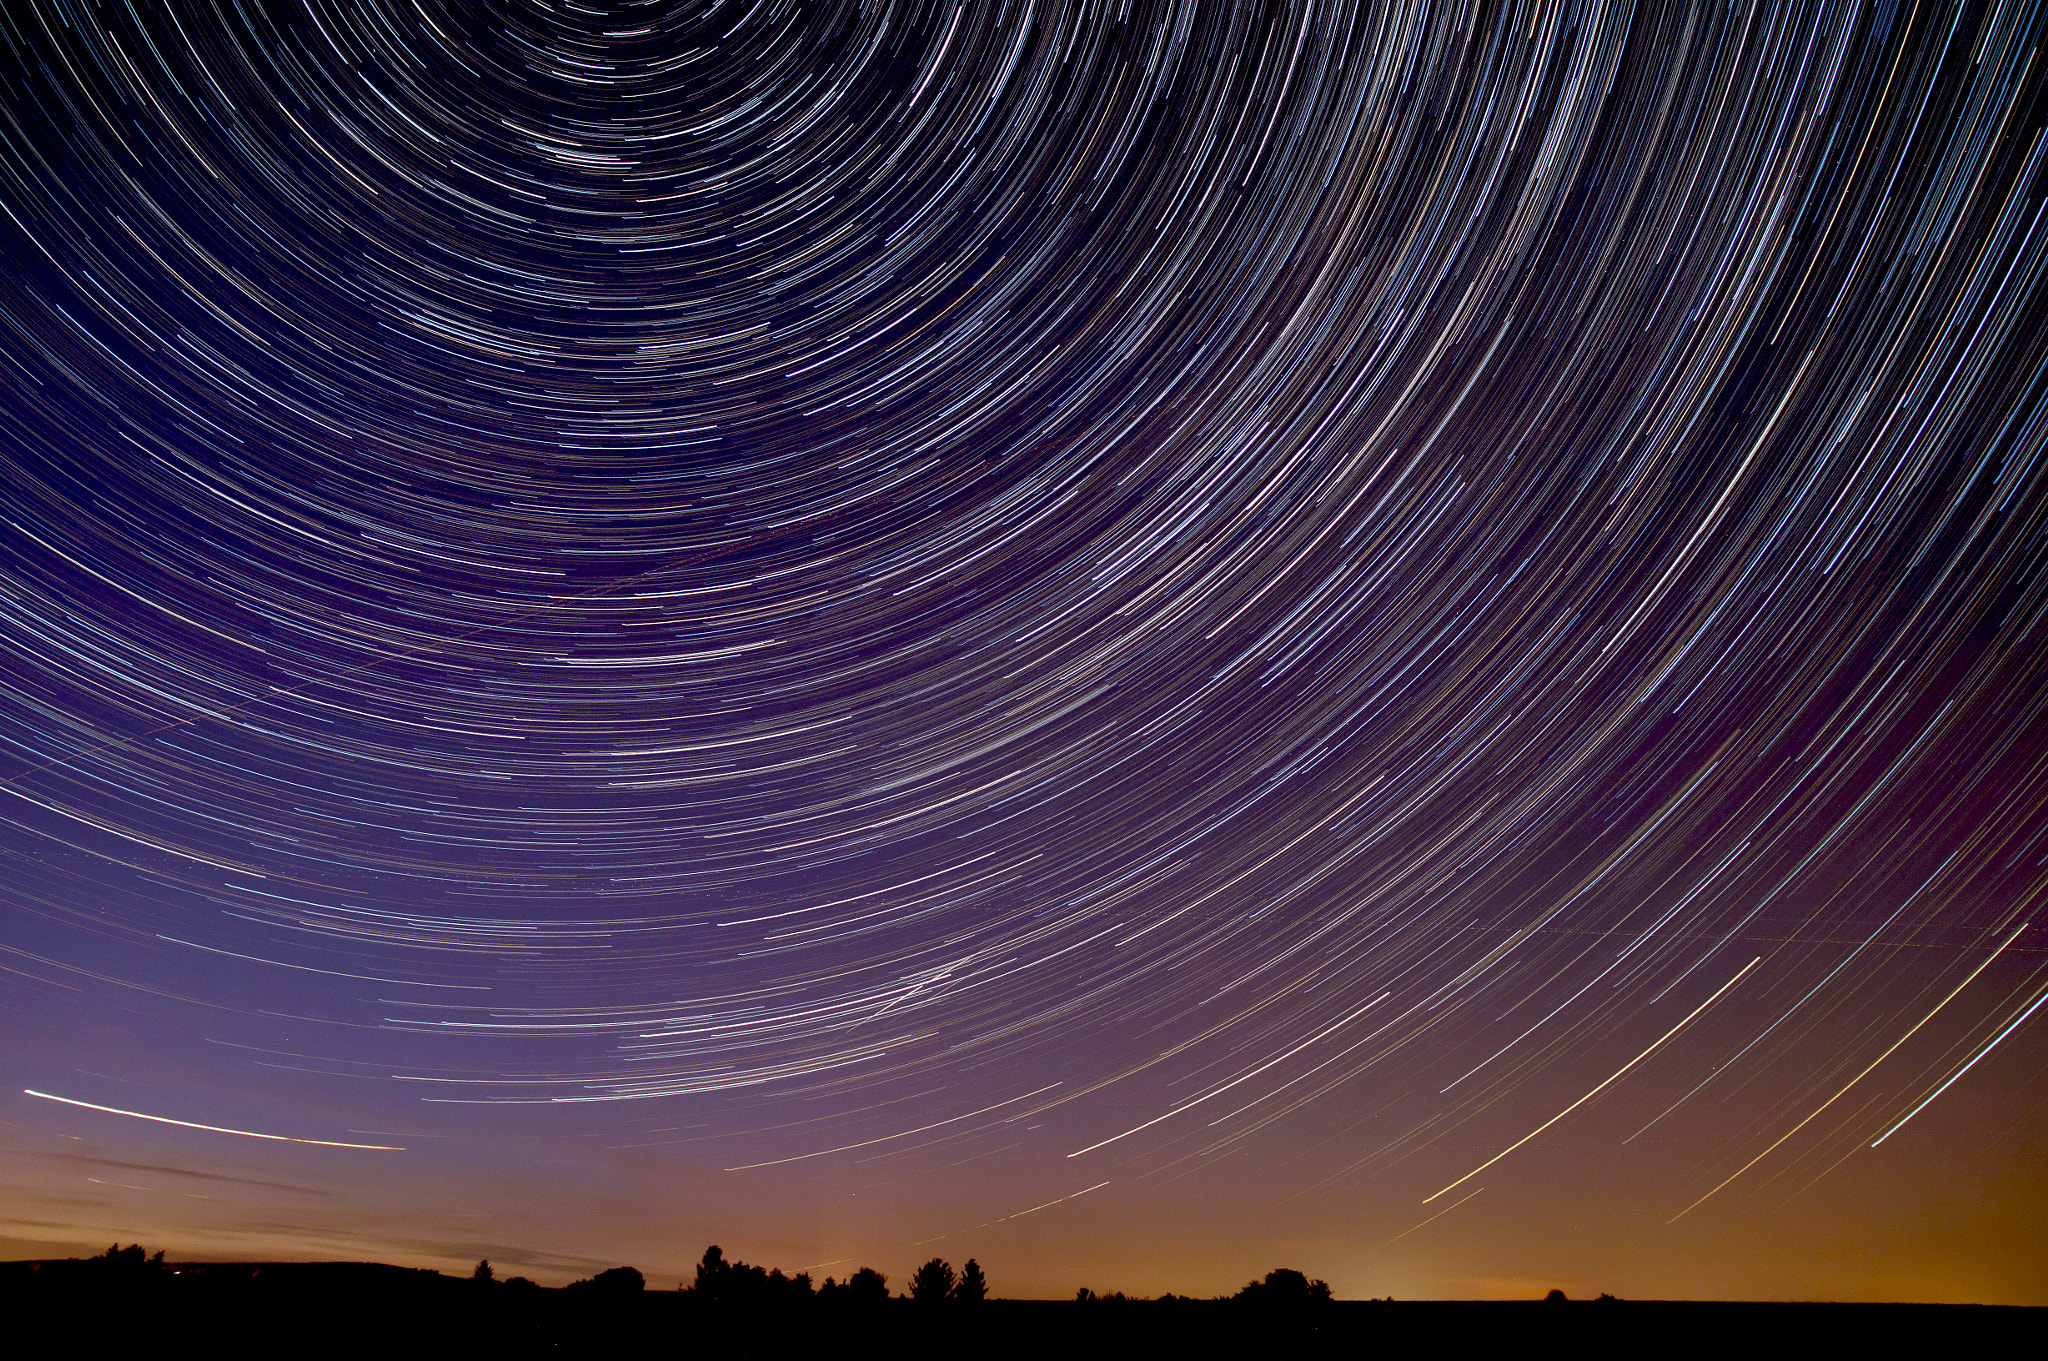
Moonrise with Ice — Iceland

However, it is a discipline that takes time, and I feel a very rapid shortcut to it is to surround your self with excellence. Nobody lives in a creative vacuum anymore; we are constantly looking at and being exposed to images.

Every day I find new images on there that inspire me to re-evaluate my concept of the possible and help me see the world in fresh and exciting ways. Art is a community, with healthy cross-pollination between all its manifestations. It doesn’t matter if you are picking up a camera for the first time or a hardened veteran, viewing inspiring images allows you to evaluate your skills objectively and determine a likely course for your development.

2. Develop Your Personal Style

Plagiarism is all well and good, and initially helps us develop our necessary skill sets and technical abilities. It is natural to see the work of someone who inspires you and want to make images in that style. I am sure we’ve all been there—I know I have.

When I first saw the images of Galen Rowell, they impacted me hugely, and a lot of my earlier work from the Himalaya of Nepal, SW China and Tibet were inspired in part by the work of Galen.

seascape ice alister benn

Alien Space Diamond — Iceland

A time does come though, when you realize that they are not your images any more, but copies—technically proficient clones of someone else’s vision.

However, what I did find by surrounding myself with inspiring excellence was to find what type of images, subject matter, style, and look and feel I was visually drawn to. I like big mountains in great light, the sun sparkling on wet sand at sunset, and especially the look of the ocean under moonlight. These visual clues triggered a progression in my own work that led me throughout the Himalaya and the coasts of Spain, Indonesia and Thailand, back to my own home country and the rugged northwest coast of Scotland.

Your empathy with certain environments and visual messages will lead you on your own photographic journeys.

3. Raise Your Bar

We are all unique; we have varying levels of motivation, dedication, perseverance, free time, financial capability, creativity, and inspiration.

It is important for us to manage our own expectations and evaluate our capabilities, strengths, weaknesses and ambitions in a realistic manner. Photography is progressive in nature—development in certain fields relies upon layers of understanding from a solid foundation up.

Regardless of your current capability or starting point however, we can all benefit from setting the bar just a little higher than we think we can reach. In this way, if we fall a little short, chances are we have still exceeded our initial expectations! Don’t you just love motivational psychology?

clouds and sea by alister benn

Troll & Lenticular — Iceland

4. Know Your Gear

I love teaching; I get a real thrill from explaining my philosophy, inspirations, passion, and techniques with people who are really keen to learn. I would say that one of the most common barriers to people finding their true creativity is their relationships with their gear.

To me, cameras, lenses, cable-releases, and filters are all just tools—they do one job and one job only. They get light recorded on a digital sensor (or film). The purpose of any photographic trip to the coast is to get light in the can—RAW Files.

I strip my shooting down to a minimum of fuss. I don’t worry about metering modes, accurate white balance, or some insignificant auto-focus preset.

I want my images to be exposed, focused, and most importantly of all—well composed. Great images are a product of great compositions; great light comes a distant second place.

The Histogram and the Preview Screen at the back of the camera are my only tools to successful exposure and knowing how to quickly add or subtract a stop or two of light in Manual Mode constitutes the must know section of point 4.

All the techniques in the world are just solutions to the problems we encounter every day we’re out with a camera. Have the techniques in your toolbox, but don’t let them lead the show; composition is always King!

alister benn seascape photography from iceland

Lava Nightmares — Iceland

5. Look for the Flow

In the same way that water streams back down a beach with each receding wave, the eye moves through the frame looking for visual signals and anchors. In seascape photography, flow can be both literal and implied.

We can use the path of water flow to lead the eye, or the lines of rocks on the beach; everything within an image is related to everything else, including the four walls of the frame. How all the subjects within the frame relate to each other and the frame itself is the whole point of the discipline of composition.

Be critical of your compositions; look for the flow, how your eyes move through the scene, and how all the elements interact with the sides of the frame. It’s never a great idea to cut important subjects with the frame edges; give them space to breathe.

seascape photography alister benn iceland

Moonrise Over Eagle Rock — Iceland

6. Find the Mood

One of my very favorite topics is Creative Vision—the act of looking at a scene and having an idea of how it will look in a final image. Some of those points may involve post processing, which we will come to later. More immediately, we can consider the implications of the Mood Mode, or TV as most people call it.

I have stopped thinking about photography in terms of Apertures and Shutter Speeds, instead, preferring a more intuitive way with Depth and Mood.

APERTURE = DEPTH
SHUTTER SPEED = MOOD

Simply put, fast shutter speeds freeze motion, making static, energetic, detailed, sparkling, and tenser images.

Slow, drawn out shutter speeds of many seconds create flow, calm, simplicity, and harmony.

Your choice of shutter speed, aperture, and ISO are creative decisions that must be made at the time of capture—between them they dial in the necessary exposure.

It is vital to find the creative combination of the three variables that can expose the frame correctly and at the same time allow the depth and mood you are looking for from a creative perspective.

7. Mind the Tides

Every year people die at the coast because incoming tides catch them out, getting stranded on rocks or otherwise cut off from a safe escape route. Safety is paramount by the sea, with no image being worth crazy risks.

From a creative point of view, low tides and high tides offer quite different shooting opportunities.

Low tides are great for finding intimate details on the beach to use as foregrounds, whereas high tides tend to work well with simple compositions involving nothing more than a few rocks or a sea stack.
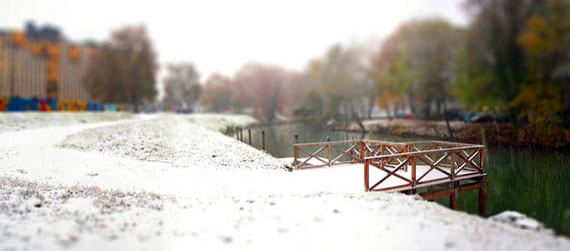
spain seascape photography

The Fang — Spain

I would advise people visiting a new beach to go at high tide and shoot as it recedes. This way you can explore down the beach without fear of being caught out. The tides are predictable and most places around the world have tide time resources online to be checked before a planned trip.

The minimum information you must have before any coastal photo trip is whether the tide is falling or coming in. BE SAFE.

8. Become Familiar

They say familiarity breeds contempt, but I prefer content. In coastal surroundings, once you are familiar with the layout of a beach, the locations of key compositional elements, and the height and period of the tides, it is easier to relax the mind and create more simple and deconstructed images.

I agree there is a lot to be said for spontaneous creativity and responding to a new location in a dynamic way, but with time I have developed a slower, more reflective pace, which allows me to immerse myself in a location far more and feel something of the place, rather than a continuous bombardment of overpowering stimulation.

alister benn tips for seascape photos

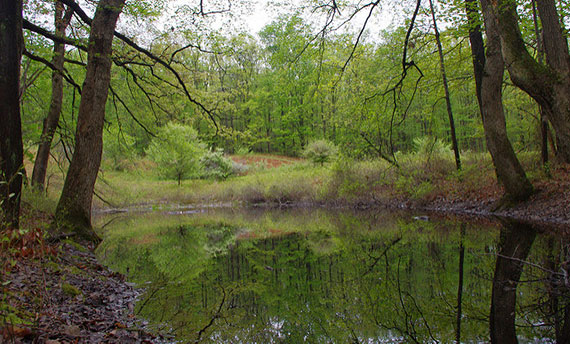
River Mouth — Indonesia

9. Time & Timing

Having spent years shooting by the seas of the world, it fascinates me to this day to see photographers packing their bags the second the sun drops below the horizon. Personally, this is when I am getting out the car and preparing to shoot.

I love Blue Hour—the time between sunset and astronomical darkness—the time when the sun no longer has any impact on the atmosphere.

It presents a few more technical challenges, but nothing too demanding, and the longer shutter speeds that come with lower light levels tend to produce images that are very ethereal and calm.

It is a time of simple compositions, flowing clouds and smooth water. Even the most savage of waves becomes nothing more than a gentle mist, kissing the rocks in an endless soft caress.

Timing is a very different concept; it is about when you click the shutter button to capture a waves movement over the shore. Waves interact with the land in very intricate ways and the textures, shapes, patterns and flow of the water are variable between every frame you take. Timing is a key part of Creative Vision and the development of style.

10. Processing

This is the Pandora’s box of contemporary landscape photography, with vocal opinion on both sides of the fence, but as I am writing the article, I get to say what I think and how I work.

It is a myth that the great landscape masters of old made images that were perfect in-camera. Ansel Adams himself regularly spent 200+ hours in the darkroom to tease details from shadows and highlights using chemicals, masks, and other alchemy to achieve his goal. Images were processed then, and they need processing now. What Ansel aimed for was a good exposure—and that is what I aim for now. The definition has changed, and digital sensors are not the same as film—times have changed.

I believe getting it right in camera was perpetrated in the days of color slide film, when photographers had little or no control over processing, which was carried out by specialized labs with expensive machines.

Now, we have personal computers in almost every home, containing more processing power than was used to put Armstrong and Aldrin on the Moon.

The processing that took Adams 200 hours in the dark room can be accomplished in a matter of minutes in programs such as Adobe Lightroom and Photoshop. We have plugins from companies such as Topaz Labs that can bring depth, character and emotion to our images, adding to their expressive nature and communicating powers.

Indeed, it is my opinion that all the technique in the world out in the field is just a tool to bring a moment of creative vision we experience in nature, to a reality of expression in a photograph.

We see, we harvest light and we work the RAW files in such a way as to make them communicate to someone else where we were, how it was, what it looked like and how we feel about it.

Just as Shutter Speed is the Mood Mode in Creative Capture, so Processing is the Emotion Dial with which we add our feelings to our work. A RAW file by its very nature is flat and dull, reality is not.
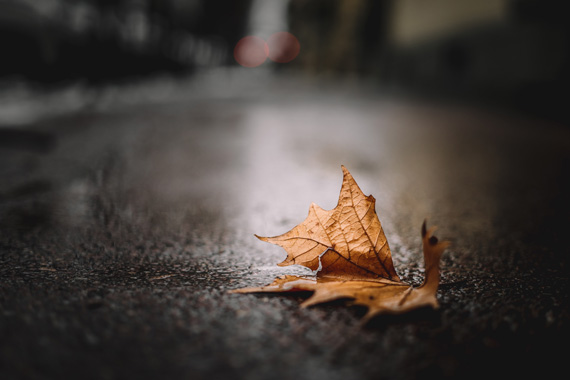
landscape photography in england

Marbles — England

If we reflect now on our three Disciplines of the Creative Cycle—

VISION | CAPTURE TECHNIQUE | PROCESSING

Each of them is as important as the other, and we should aim to be proficient in all, without focusing too heavily on one or the other. A deficit in one or more is placing a glass ceiling on your creativity, expression, and effectiveness as a landscape photographer.

The sea is calling—the beach swept clean by the latest tide, sculpted by waves and wind, a virgin wilderness fresh for exploration and adventure.

About the Author:
Alister Benn is a professional landscape photographer and author. He lives in the Highlands of Scotland with his wife Juanli Sun, with whom he manages their company Available Light Images Ltd.


Go to full article: How to Photograph Great Seascapes

What are your thoughts on this article? Join the discussion on Facebook

PictureCorrect subscribers can also learn more today with our #1 bestseller: The Photography Tutorial eBook

The post How to Photograph Great Seascapes appeared first on PictureCorrect.


from PictureCorrect https://ift.tt/3CLNKKo
via IFTTT

torstai 23. syyskuuta 2021

PictureCorrect.com: How to Bounce a Flash: Professional Guide

So… you get pretty good results shooting in natural light, but every time you use your flash, you suck. Washed out faces and dark backgrounds, yuck! You know it’s time to master flash lighting, but who can afford expensive studio lights, soft boxes, backgrounds, etc.?

bounce flash

Three Speedlights Used: 105mm lens, F7.1 x 1/200 sec., ISO 400, WB 6000K. 3 speedlights bounced off of 3 white plastic 4’ x 4’ DIY reflectors attached to 3 walls of the baby’s bedroom. One is behind the camera, one left and one right of camera, slightly behind the baby.

You don’t need all that stuff to get professional results. Bounce your speedlights on location. Almost any quality of light can be produced when you know how.

Bouncing light usually softens it. (Bouncing into mirrors and shiny surfaces are the exceptions.) Softness or hardness of the light is determined by the size of the surface the light is bounced off of. The larger the surface, the softer the light is.

speedlight flash photography

One On-Camera Speedlight Used: 150mm lens, F5.6 x 1/100 sec., ISO 400, WB 6000K. On-camera speedlight bounced against a 4’ x 4’ white plastic DIY reflector attached to a wall, left of subject. A small mirror close to subject created the bright highlight on the baby’s head.

This article demonstrates the following techniques:

  • Bouncing one speedlight
  • Bouncing multiple speedlights
  • Light modification and control
  • Lighting in tight quarters
  • Creating a lighting ratio
  • Dragging the shutter

Keys to Effective Bouncing

  1. Neutral color – Avoid nasty color shifts
  2. Create a lighting ratio – Not just flat, boring light
  3. No hot spots in the image area (blown out white areas where the direct flash is striking)

Neutral Color

Bouncing works wonderfully when the bounce surface is neutral in tone, preferably white. Unfortunately, with modern construction there are few white walls available. Avoid bouncing light off of colored surfaces. The light you create will be the same color and probably cause you post-production nightmares.

Ceilings are usually white, but just bouncing off the ceiling can cause shadowed eye sockets (raccoon eyes). You need some light to strike your subject from a lower angle. Seek out the white areas of interiors, such as doors, window shades, etc. You can also drape a door or tall furniture with a white sheet to bounce light off of.

A white reflector on a stand is a better solution; position it anywhere. In tight quarters attach DIY plastic reflectors to walls. The camera should usually be 3–10 feet from the bounced surface. Rotate the speedlight’s head to the perfect bounce angle (similar to a bank shot in billiards). Remember, the closer the distance between speedlight and bounced surface, the harsher the light will be.

DIY Lightweight Plastic Reflector

flash bounce reflector

4’x4’ white plastic DIY hanging reflector (only weighs 5 oz.)

  1. Buy a large rectangular 54” x 108” plastic table cover (under $2.00) at a party supply store.
  2. Fold it in half and tape together with two-sided heavy duty tape (carpet tape).
  3. Temporarily attach it to a wall with the same stuff – careful not to do any damage! Remove slowly!

Lighting a Subject with a Complicated Background

The best way to evenly light a background is by bouncing light off a white ceiling.

complicated background flash lighting

Five Speedlights Used. See Setup Details Below

Use snoots to shield direct light from striking your subject(s) and visible background.

diagram for bouncing flashA. On camera “Master” speedlight (set on manual) rotated and bounced off a white reflector for fill light. Light set at ½ power.

B. Speedlight placed into an Umbrella Softbox for the main light. Set at ½ power.

C.D.E. Speedlights were positioned out of camera frame with short snoots attached and aimed upward bouncing light off the white ceiling. Lights provided background and accent lighting. All three lights set at full power.

-100mm lens, ISO 400, WB 6000K, f/7.1, 1/200 sec.

Lighting Ratio

A lighting ratio is the comparison of the main light to the fill light. The light from your speedlight can be either. When the flash is brighter than the existing (ambient) light it becomes the main light and the ambient light is the fill. When your flash is less bright that the ambient the reverse happens (flash = fill ; ambient = main).

A photograph is more dramatic when the main and fill light are not the same brightness. The greater the difference between the two, the higher the lighting ratio (more contrast).

Bouncing light usually creates a large light source. Sometimes too large! Super large light sources can create flat, boring light (like an overcast day). Move your flash closer to the bounce surface to increase the contrast (higher lighting ratio).

Don’t bounce your flash directly behind you, except for fill light. Angle it to your left or right, side lighting your subject.

Lighting in Tight Quarters

flash lighting in tight quarters

One On-Camera Speedlight Used: 16mm lens, f/8, 1/50 sec., ISO 800, WB 6000K. Light bounced behind the camera into a 4’ x 4’ white plastic DIY reflector. Shutter dragged @ 1/50 sec. to back light the subjects. Built- in wide panel pulled over front of flash head for maximum light spread.

No Hot Spots

Another problem (especially noticeable when shooting with a wide angle lens) is hot spots in the image area (blown out white areas where direct flash is striking). The simplest solution is to crop them out of the photograph. This is easier to do when using medium and longer focal length lens.

Dog-gone-it! Sometimes you just have to shoot wide. Wide angle shots can be very dramatic. The problem is that lots of background shows in the frame. How do you hide the hot spots? The answer is to control the shape of the light you are creating.

You can zoom your flash to its longest focal length, flag the light with something opaque or snoot your speedlight. The best solution is usually snooting. Zooming is less precise and flagging requires cumbersome equipment and takes forever (unless you just flag the speedlight.)

A snoot is a tube shaped light control device placed on the end of your speedlight. It creates a circle of light with defined edges. Snoots are easy to make. Buy 2 mm thick black craft foam and give it a try. The longer the snoot, the smaller the circle of light. It needs to be loose enough to slide up and down but tight enough not to fall off easily.

Speedlight Modifiers Used in Sample Photos

flash speedlight modifiers

Left – DIY Snoot; Middle – white/silver 60” pop-open reflector; Right – umbrella softbox

Dragging the Shutter

dragging the shutter

Two Speedlights Used: 70mm lens, F6.3 x 1/60 sec., WB 6000K

  • Off camera speedlight bounced off ceiling behind subject. Speedlight set to ¼ power. It created background & hair light.
  • On-camera speedlight rotated and bounced into light gray wall behind the subject. Speedlight set to 1/8 power. It created the fill light. No color cast since the wall was gray.
  • Slow shutter speed (1/60 sec.) correctly exposed the x-rays and created the highlights on the doctor’s face and hand. This is “dragging the shutter”.
  • Camera attached to a monopod for stability.

Creating a Lighting Ratio in Flat Open Shade

flash lighting ratios

One On-Camera Speedlight Used: 155mm lens, f/5.6, 1/160 sec., ISO 400, WB 7000K

A. Pop-open white reflector was leaned against a light stand approximately 6 feet from the cat.

The on-camera speedlight was set to ETTL+1, head rotated and aimed at the reflector. A 4 ½” snoot was attached to prevent direct light from striking the cat.

bounce lighting diagram

The bounced light created a nice lighting ratio adding interest to the flat lighting of open shade.

About the Author:
John Rogers is an award winning photographer in Boise, Idaho and owner of ProLightSecrets.


Go to full article: How to Bounce a Flash: Professional Guide

What are your thoughts on this article? Join the discussion on Facebook

PictureCorrect subscribers can also learn more today with our #1 bestseller: The Photography Tutorial eBook

The post How to Bounce a Flash: Professional Guide appeared first on PictureCorrect.


from PictureCorrect https://ift.tt/2MmAgOC
via IFTTT