tiistai 31. toukokuuta 2022

PictureCorrect.com: Street Photographer Shares Tips to Present a Relaxed Demeanor

Street photography isn’t everyone’s cup of tea. Many new and even experienced street photographers worry about being confronted by passersby on the street. This fear can eventually act as a barrier between the photographer and their art. So how do you overcome this fear surrounding street photography? In today’s video, photographer Sean Tucker and his friend Joshua K. Jackson bring you some great advice on overcoming your fears when heading out for a street photography shoot.

In the video, Jackson emphasizes two aspects that can help you overcome your fears: body language and intention.

A brilliant insight he shares is how body language can tell you a lot about the people around you. How you, as a photographer, present and “behave” matters a lot. This is what dictates whether people take you as a threat or act like you don’t exist.

For instance, it’s best to keep moving, constantly studying your surroundings and anticipating interesting moments that could unfold. However, spending too much time around a particular spot will trigger a sense of consciousness to the people nearby.

“When you plant yourself in one particular location, you draw attention to yourself.”

Another interesting idea that Jackson shares is to think of yourself of as a tourist. Just think—do you ever get intimated by tourists taking photos? Rarely. You can use this idea to your advantage and act like you’re a tourist in a new place taking photos. This will give you a mental excuse to act freely.

There are various other psychological hacks that Jackson shares in the video. If you don’t have malicious intent, you have no reason to worry about being confronted.

If you love street photography but cannot gather the courage to get out there taking photos, we strongly urge you watch the complete video.  You’ll definitely find more than one tip to help you improve.

If you have other ideas to get rid of the fear that surrounds street photography, be sure to share them. We’d love to hear from you.


Did you appreciate this newsletter? Please help us keep it going by Joining Our Patreon Supporters

What are your thoughts on this article? Join the discussion on our Facebook Page

PictureCorrect subscribers can also learn more today with our #1 bestseller: The Photography Tutorial eBook

The post Street Photographer Shares Tips to Present a Relaxed Demeanor appeared first on PictureCorrect.


from PictureCorrect https://ift.tt/x1lUwe5
via IFTTT

maanantai 30. toukokuuta 2022

PictureCorrect.com: How to Use Focus Stacking for Tack Sharp Photographs

Due to limitations of our lenses, getting tack sharp exposures in which the foreground and background are both in perfect focus can sometimes be difficult. Fortunately, the clever folks behind Adobe Photoshop have implemented a very helpful tool into the popular image editing software. Using Photoshop’s stacking tool allows you to stack multiple images into one, giving the resulting image an incredible depth of field. Take a look at the following video tutorial for a quick lesson on focus stacking:

When taking the initial photographs, remember to use a tripod and take a few more shots than you think you’ll need–it never hurts to have some extra options when it comes time to edit. Set your camera up on a tripod and take four or five shots of the same scene, adjusting the the depth of field for each exposure. As Gavin Hoey explained in the video, you’re trying to get a handful of the same image all with varying depths of field. Once you have those, it’s time to import them into Photoshop.

Hoey selects his top three frames and opens them all in Camera Raw first. Here, he makes all his minor adjustments such as tone, cropping, and white balance. After editing the first photo, he selects the remaining frames and applies the same adjustments to each using Camera Raw’s synchronize feature.


Now that Camera Raw has sent the edited photos to Photoshop, Hoey selects all three frames and clicks Load Files Into Stack. This creates a brand new image which consists of the original files each as a separate layer.


Now, select the layers, making them all active. Run the Auto-Blend Layers function in Photoshop and let the software do it’s thing.


Then, voilà! You should have a finished portrait with a really deep depth of field like this one:


Gavin Hoey does an excellent job making the instructions easy to follow,  just as Photoshop does an excellent job making the task at hand carry out rather seamlessly.


Did you appreciate this newsletter? Please help us keep it going by Joining Our Patreon Supporters

What are your thoughts on this article? Join the discussion on our Facebook Page

PictureCorrect subscribers can also learn more today with our #1 bestseller: The Photography Tutorial eBook

The post How to Use Focus Stacking for Tack Sharp Photographs appeared first on PictureCorrect.


from PictureCorrect https://ift.tt/5XJxM4T
via IFTTT

PictureCorrect.com: 2 Horizon Photo Tips For Better Landscape Photos

Landscape photographs are among the most beautiful photos you can produce. But it isn’t easy! To get decent results, you have to know, understand — and follow — tons of rules. Individually, none of them are a very big deal, but they combine to create powerful landscape photos. Today’s two photo tips are each another of those little steps to greatness.

1. Make Sure Your Horizon Is Straight

This seems so basic as to be almost unworthy of mention, but it is amazing how often the horizon line is not straight. True, when you’re shooting a mountainous scene (with hills, valleys and so on), it can sometimes be difficult to determine just where the horizon is. But you have to find it and make it level. It becomes more obvious when you’re looking at a photo of the ocean. That horizon absolutely must be level, and frequently, it isn’t. It’s a bit disconcerting to see it sloping to one side. Is the ocean pouring out of the frame?

crooked horizon

Photo captured by Laib Khaled

It only takes a second; double check and make sure your horizons are level.

2. Make Sure Your (Straight) Horizon Is Not Dead Center

You need a “star” for the viewer’s eye to settle on. This rule is easier to violate than the level horizon one — and it is violated right and left! Having the horizon in the center of the frame feels right, while having it off center is counter intuitive. But it’s a compositional must. When the horizon divides the photo in half, it’s very static and boring. There is no excitement or drama. The viewer doesn’t know what’s important and what they should focus their attention on. The sky or the ground? Where should they look?

Any contest-winning photograph needs a “star.” In this case, what is the star? Is it the sky? Did you want to show the viewer the dramatic clouds with golden light kissing the bottom? If so, lower the horizon to about the bottom third of the frame and make the sky the star.

tips for taking pictures of the horizon

Photo by Markus; ISO 800, f/7.1, 1/60-second exposure.

Is the star the ground? Did you want to draw attention to some natural feature or possibly a placid lake? Raise the horizon to about the top third of the frame and accent the ground.

tips for horizon and landscape photography

Photo by Amateur with a Camera; ISO 100, f/2.8, 1/125-second exposure.

There was something that caught your eye when you decided to take the shot. What was it? Make sure to raise or lower the horizon to make it the star, then make sure the horizon is level. These two photo tips will help you become the best landscape photographer in your area.

About the Author:
Dan Eitreim writes for OnTargetPhotoTraining. He has been a professional photographer in Southern California for over 20 years. His philosophy is that learning photography is easy if you know a few tried and true strategies.


Did you appreciate this newsletter? Please help us keep it going by Joining Our Patreon Supporters

What are your thoughts on this article? Join the discussion on our Facebook Page

PictureCorrect subscribers can also learn more today with our #1 bestseller: The Photography Tutorial eBook

The post 2 Horizon Photo Tips For Better Landscape Photos appeared first on PictureCorrect.


from PictureCorrect https://ift.tt/kg2iwDA
via IFTTT

PictureCorrect.com: How to Shape Light with a Gobo for Portraits

Gobo in photography is something that comes in front of a light source. It could basically be anything. The only requirement is that it needs to pass some light through it while blocking the rest. By doing so, it creates a pattern of light and shadows and that is what we seek when using a gobo. Photographer Mark Wallace from Adorama demonstrates how you can create interesting patterns on a white background using a DIY gobo for some beautiful looking portraits:

Building An Interesting Background

You can make a portrait appear more interesting by creating a unique looking background. And using a gobo is one of the ways to do so. What’s great is that you don’t require any fancy equipment do so either. Like Wallace demonstrates in the video, you can take a small sheet of Aluminum and cut some holes on it. Then, simply place it in front of a light source and point the setup towards a white background.

“The point with this is that you’re gonna have to play and experiment, because to get something that looks good using this technique can sometimes take a long time.”

One thing you need to keep in mind is that the setup won’t just work with any normal light. You’ll need to use a grid to restrict the light so that it doesn’t scatter everywhere.

grid to work with gobo

Another interesting thing about using a gobo is that you can change the patterns formed on the wall by simply changing the distance between the aluminum foil and the light source. You can also do so by cutting in different patterns on the foil itself.

Adding Key Light

Normally, when taking a portrait, you would have the key light somewhere at a forty five degree angle to the camera. However, this can create a problem when working with a background that’s lit by a gobo. The light from the key light can totally overpower the patterns being formed by the gobo and result in a boring image.

A simple trick to overcome this overcome this challenge is to turn the key light away from the background. By turning the key light at a ninety degree angle to the camera, and having the model turn more towards the key light, you can see that the image comes out much better.

model turned towards keylight

The image looks far more interesting. The only problem with the image is that the back of the model looks a little too dark. You can even that out by simply placing a reflector so that some light from the key light is bounced off to illuminate the dark side.

If a boring background is something that has been tiring you, how about giving this DIY trick a try. You’ll definitely love the results.


Did you appreciate this newsletter? Please help us keep it going by Joining Our Patreon Supporters

What are your thoughts on this article? Join the discussion on our Facebook Page

PictureCorrect subscribers can also learn more today with our #1 bestseller: The Photography Tutorial eBook

The post How to Shape Light with a Gobo for Portraits appeared first on PictureCorrect.


from PictureCorrect https://ift.tt/TiezQOg
via IFTTT

PictureCorrect.com: Interesting Photo of the Day: Crater Lake Milky Way

With a depth of 1,949 feet, Crater Lake is the deepest lake in the United States. The depth causes the lake to appear deep blue and the water clarity further adds to the lake’s beauty. Fun fact, the Crater Lake was formed some 7,700 years ago when volcano Mt. Mazama collapsed. As if the lake itself is not magnificent enough, photographer Matt MacPherson photographed the Milky Way from the lake and the image appears truly out of this world:

astro photography at crater lake

“The Milky Way Over Crater Lake” by Matt Macpherson (Via Reddit. Click image to see full size.)

The image is a composite of a series of images that MacPherson took. For the foreground, it was a 30-second exposure at ISO 100 that he took during the blue hour. Next, 3 hours after sunset, he took 12 exposures for the Milky Way, each for 30 seconds and at ISO 6400. He then blended the 12 exposures using an app called “Starry Sky Stacker” to align the stars, eliminate light trails, and reduce noise. Later, he blended the output from the software with the foreground image in Photoshop to get this final image.

The Milky Way with all the fantastic colors in the sky appears simply breathtaking. Apart from that, the way MacPherson has composed the image is really thoughtful. The dead tree to the side and the curve of the lake’s bank both act as subtle leading lines. They do a great job of drawing us into the main subject of this image: the Milky Way. The blue tone and the dead tree also do a good job of adding a sense of spookiness. It’s perfect to chill the spines and add to the drama of the image.


Did you appreciate this newsletter? Please help us keep it going by Joining Our Patreon Supporters

What are your thoughts on this article? Join the discussion on our Facebook Page

PictureCorrect subscribers can also learn more today with our #1 bestseller: The Photography Tutorial eBook

The post Interesting Photo of the Day: Crater Lake Milky Way appeared first on PictureCorrect.


from PictureCorrect https://ift.tt/f2MnoIO
via IFTTT

lauantai 28. toukokuuta 2022

PictureCorrect.com: 5 Steps to Better Smartphone Photography

There is photography, there is videography, and now there is iPhoneOGRAPHY! Compared to DSLRs, iPhones are less bulky and more convenient to carry around. We always carry our phones around nowadays. Be it iPhone, Android, or Samsung, most phones now have a good quality camera for us to play around with. Who says iPhones cannot shoot unique photographs?

iphone photography

Captured by Fatma M.

Today, I am going to give you a few tips on iPhoneography.

1. Keep your photos simple

“Simplicity is the ultimate sophistication.” – Leonardo da Vinci

Do not over complicate things by having too much going on in the background. Simplicity is key. Keep things simple. Watch out for distracting objects on the camera screen. You will be surprised by how sophisticated your photos will turn out in the end.

iphone photo

“Drive Thru” captured by Davidag on an iPhone

2. Have a theme

You often hear people saying, “A picture speaks a thousand words.” Every picture tells a story. What does your picture say?

iphone travel photography

“Poznan, the Old Town” captured by Michał Koralewski on an iPhone

3. Shoot from a different perspective

Shoot the same thing a few times! Try to shoot from different angles; it gives you different perspectives. Be creative! Try different compositions. Shoot both horizontally and vertically. When you go back and review the photos you took, you will be amazed by how different shots give people different opinions and emotions. One of your pictures of the same object, shot from a different angle, may be that award-winning photograph. Let your creativity take flight!

creative iphone photography

“Tøyen” captured by Geir Tønnessen on an iPhone

4. Do not use the digital zoom

Only use optical zoom, no digital zoom. Zooming in beyond the smartphone’s optical range will produce grainy and pixelated pictures—chances are, pictures produced this way will be shaky and low quality. So, if you want to take a close-up shot of the object, my recommendation is that you move closer to the object (zoom with your feet) and click.

smartphone photography

“Antizyklisch” captured by eagle1effi on a Nokia Lumia 800

5. Share your photos

All of my iPhone pictures are posted on Instagram. One good thing about Instagram is that you can process your photos. Play around with the filters.

Instagram photography

“Instagram’d” captured by Darren Shilson on an iPhone and edited in Instagram

You can also use other more comprehensive photo editing apps. Edit the temperature, the brightness and contrast, blur the background to make your objects stand out—these are some of the many things you can do. And part of the magic of iPhoneography is that a “shot gone wrong” can be transformed into something extraordinary. You can transform it into something artistic just by playing with the buttons in the app.

What are you waiting for? Grab that iPhone and shoot some photos now! Try to shoot at least one photo a day. Remember, practice makes perfect! And experience is the best teacher.

About the Author:
This article was written by See Sher Lyn who blogs about correcting photography mistakes.


Did you appreciate this newsletter? Please help us keep it going by Joining Our Patreon Supporters

What are your thoughts on this article? Join the discussion on our Facebook Page

PictureCorrect subscribers can also learn more today with our #1 bestseller: The Photography Tutorial eBook

The post 5 Steps to Better Smartphone Photography appeared first on PictureCorrect.


from PictureCorrect https://ift.tt/Ul6Z9wV
via IFTTT

PictureCorrect.com: Interesting Photo of the Day: The Pencil Nebula

In the universe we have uncountable nebula that form new stars and galaxies. Simply speaking, a nebula is a collection of a tremendous amount of gases at a very high temperature and pressure. Some of them have extraordinary shape making it stand out from others. What astro-photographer Liam has captured below is the Pencil Nebula which gets its name from its long linear appearance:

astro photography

“The Pencil Nebula” by Liam (Via Reddit. Click image to see full size.)

Liam took the image with the ZWO ASI 1600MMC PRO camera mounted on the GSO 8″ F/4 telescope. As this kind of image requires a very long exposure to be taken, he used a EQ6-R mount for tracking. For this image, Liam has invested a total of 40.15 hours over 12 nights. Talk about dedication.

What’s interesting is that the Pencil Nebula is actually a very small part of the Vela supernova remnant. While this Pencil Nebula is about 800 light years away and 5-light years long, the Vela remnant itself is about 100 light years in diameter. What we can derive from this is that the scale of the universe is just unimaginable. Further, if you look at the background, the number of deep space bodies give a hint of the vastness that lies beyond. To the left of the image you can notice a faint layer of gases which makes it seem like the nebula is vaporizing. Fascinating!

We should really consider ourselves lucky to be living in an age where we can take such detailed images of interstellar objects from our backyard.


Did you appreciate this newsletter? Please help us keep it going by Joining Our Patreon Supporters

What are your thoughts on this article? Join the discussion on our Facebook Page

PictureCorrect subscribers can also learn more today with our #1 bestseller: The Photography Tutorial eBook

The post Interesting Photo of the Day: The Pencil Nebula appeared first on PictureCorrect.


from PictureCorrect https://ift.tt/snz1UKN
via IFTTT

PictureCorrect.com: Top Ways to Avoid Stock Photography Rejections

It’s always a good idea to have multiple sources of income. For many photographers, stock photography is a reliable source of passive income. However, in today’s market, stock photography is not easy at all. For one, the market is saturated with untold numbers of photographers; and two, the standard that stock photography agencies demand is very high. This means a lot of images get rejected. In today’s video, photographer Zdenka Darula shares some of her tricks to help you avoid rejections when submitting stock photographs:

Darula covers some of the basic technical reasons that are usually the root causes for agencies to reject stock photos. She elaborates on the aspects of focus, noise and composition. And toward the end of the video, she also briefly talks about how you can manage your colors and exposure.

Focus is the first thing anyone looks for in a stock photo. It’s vital that the key elements of the image are tack-sharp. Keep in mind the tiny screen on the camera can be tricky; what seems sharp on the back of the camera screen may not be so when viewed on a larger screen. Darula shows how you can use the power of Photoshop to extract details from out of focus areas, and also shares some shooting techniques to ensure you nail your focus.

When composing your images, pay special attention to how you frame the subject. Think from your client’s point of view and leave appropriate negative space accordingly. Negative space makes for great spots where clients can add text and logos. But if the subject appears nicely right in the middle, don’t hesitate to place them there.

Noise is the next reason why agencies tend to reject images. When you use the noise reduction tool globally, it essentially takes away the details from your entire image. Darula shows us a neat trick using the blur tool to get rid of noise without compromising the details on the image.

If you’re feeling down with agencies rejecting your stock photos, definitely watch this video. Darula’s tips will surely help you improve your acceptance rate significantly.


Did you appreciate this newsletter? Please help us keep it going by Joining Our Patreon Supporters

What are your thoughts on this article? Join the discussion on our Facebook Page

PictureCorrect subscribers can also learn more today with our #1 bestseller: The Photography Tutorial eBook

The post Top Ways to Avoid Stock Photography Rejections appeared first on PictureCorrect.


from PictureCorrect https://ift.tt/v9xeNSD
via IFTTT

perjantai 27. toukokuuta 2022

PictureCorrect.com: Simple Yet Effective Photography Tips

If you’re new to photography and looking for some simple ways to get your photos looking better, this article will give you 7 useful tips.

simple yet effective photo tips

Photo by Trina Alexander; ISO 400, f/2.8, 1/80-second exposure.

These tips are all composition-based and help you use your “eye” more when taking photos.

Tip #1 – Avoid the Center

The rule of thirds is what they call it in the photography books. Basically this advises people taking photos to avoid the center when photographing subjects or objects. This is a great tip to start following with your photos. Simply avoid placing people, animals, or anything of interest dead center. Instead, move it to the left or right, or even to the top or bottom.

An example of this is when you take a picture of a person. The main point of interest is their eyes. So, simply avoid placing their eyes dead center. Place them somewhere else!

Tip #2 – Use Lines to Lead the Viewers

Lines are everywhere. It’s just a matter of noticing them and using them to create dynamic and more interesting images. This is actually the first of two more tips just with using lines!

The way to use lines to lead the viewers is simple. Simply find your subject and look for lines around. Then move to a position where the lines point to your subject. This can be subtle or obvious. An example of this is having your subject stand near a wall and positioning yourself so the lines of this wall point to your subject. This prevents us from standing straight in front of the subject and taking a picture, reducing the depth. By using these lines, the depth of your shots will become much more expansive.

Tip #3 – Use the Horizon

Horizontal lines are very peaceful and relaxing. Just think of a sunset over a flat field of grass in the summer. The flat lines with very few vertical lines make the photo more tranquil. You can use this technique when you want to make your photo more “relaxing”. Simply look around and see if your photo has lots of vertical or horizontal lines. If it has too many vertical lines try moving back or positioning yourself so the horizontal lines outweigh the vertical lines.

There are common examples of photos with lots of vertical lines but the horizontal line is stronger, making the photo peaceful. Think of a shot of a forest with thousands of vertical trees. The horizon that connects all the vertical lines dominates and makes the scene less “energetic”.

Tip #4 – Use Vertical Lines

The opposite can also be used with vertical lines. Instead of photographing a scene where the forest has a large horizontal line, get up close to one tree and use the height of the tree as a large dominant vertical line. Now the entire feel and energy of the picture has changed.

simple yet effective tips for photography

Photo by Hernán Piñera

This is also effective for skyscraper shots. A shot of many buildings with a large horizon line makes the scene look more mellow. Get close and shoot up at one particular building (augmenting the vertical lines) and suddenly the photo has lots of energy.

Tip #5 – Use Empty Space

One very effective technique to use for photography is empty space. Many times people that don’t know anything about photography try to fill the entire image with stuff. This often creates cluttered and images that are not pretty.

Solution: Use space. Don’t be afraid of leaving empty space around your subject.

simple photo composition tips

“Windows Molde Norway abstract” captured by Les Haines

Tip #6 – Isolate

Very similar to the last tip, isolating your subject also can make photos quite interesting. Most people that take photos just take snapshots of everything. They don’t take time to get up close or zoom into a particular object/subject and isolate it from the surrounding environment. Try this: next time you’re taking photos somewhere pick a few objects and isolate them. Then, be sure the background is not cluttered. This can be done by using a shallow depth of field or simply positioning yourself so the background has empty space. Often times getting lower works great for this as you make the background the clear blue sky (plenty of empty space).

Tip #7 – Shoot During Sunset and Sunrise

One of the most useful tips that can get your photos looking great is shooting your photos only during sunset or sunrise until you start getting better. During these times the light outside is crisp. The atmosphere gets a nice atmospheric glow of colors in the sky that makes it pretty hard not to take a decent landscape shot.

effective simple photography tips

Photo by Lukas Hofstetter; ISO 100, f/22.0, 4-second exposure.

Try only taking photos in the afternoon and in the morning. Avoid shooting when the sun is directly overhead. This produces harsh shadows that don’t work well for most average scenes. Of course, overhead lighting is great for certain scenes and accentuates details…but that’s for another post!

About the Author:
Simon Takk, creator of phototechniques, shows others how to open their eyes to the breathtaking photo opportunities all around them.


Did you appreciate this newsletter? Please help us keep it going by Joining Our Patreon Supporters

What are your thoughts on this article? Join the discussion on our Facebook Page

PictureCorrect subscribers can also learn more today with our #1 bestseller: The Photography Tutorial eBook

The post Simple Yet Effective Photography Tips appeared first on PictureCorrect.


from PictureCorrect https://ift.tt/h2xXO1Y
via IFTTT

PictureCorrect.com: Interesting Photo of the Day: Great White Shark Breaching at Sunset

Wildlife photography can involve an element of danger or surprise from the unpredictability of animals in their natural habitats. In this case, ocean wildlife photographers are permitted to drag seal decoys through the water during peak Great White season. They lure them into breaching so that they can photograph these immense creatures and their impressive power leaving the water. If you need some reference for their strength, imagine trying to get your entire body out of the water by jumping without a push off:

shutter speed exposure wildlife ocean

“Great White Shark” by Chris Fallows (Via Imgur. Click image to see full size.)

Photographer Chris Fallows captured this amazing shot of a Great White Shark jumping out of the water with a seal decoy in its teeth. He used a Canon Mark IV camera with a 70-200mm f/2.8 lens at 135mm, an aperture of f/5.6, shutter speed at 1/4000, and ISO 500. When photographer sharks, he uses a seal decoy to convince the shark to ‘breach’ (i.e. leave the water to either lunge at the decoy or leap into the air) for shots such as this one. Fallows only has a fraction of a second to capture this moment and must be ready at all times for it! The ideal aspect of using seal decoys is that he can position himself to frame his photograph with ideal lighting and backgrounds. All he needs after that is an active Great White to breach for him.


Did you appreciate this newsletter? Please help us keep it going by Joining Our Patreon Supporters

What are your thoughts on this article? Join the discussion on our Facebook Page

PictureCorrect subscribers can also learn more today with our #1 bestseller: The Photography Tutorial eBook

The post Interesting Photo of the Day: Great White Shark Breaching at Sunset appeared first on PictureCorrect.


from PictureCorrect https://ift.tt/n1lAsgt
via IFTTT

PictureCorrect.com: Should Photographers Give RAW Files to Clients?

If you’re a member of any online photography forums or social media groups then you occasionally come across people asking whether or not they should hand over RAW files to clients who ask for them. Photographer James Windsor has a simple answer to this common question:

Windsor puts forward the following five reasons why you shouldn’t hand over RAW files to your clients.

1. People Don’t Know What RAW Files Are

Many people don’t really understand what RAW files are and liken the whole editing process to slapping an Instagram filter on the photo. They don’t understand the complexities behind handling and editing a RAW photo. They might not even have the tools capable of handling RAW files.

2. RAW Files are Huge

RAW files, by definition, contain a huge amount of uncompressed data. The file size is just huge. For comparison, while a JPEG file size ranges to about a few hundred KBs, a RAW file can take up at least 20–25MB. So sending over all the RAW files from a session to a client means handling gigabytes of data, and that can be troublesome for both the photographer and the client.

3. RAW Files Don’t Look Right

RAW files are unfinished products. Just as uncooked food doesn’t taste good, it is likely that a RAW file wouldn’t look good. As a photographer you might sometimes need to under or overexpose a photo as your creative choice; a photographer can have a vision that a RAW file cannot express. Clients will take RAW photos for bad photos as they do not understand what you can do to it; they do not understand the extent you can go with the RAW files to achieve your vision. RAW photos can thus give an impression to the clients that you are a bad photographer, and you do not want them to think so.

unedited raw file

A RAW file underexposed for a creative purpose

jpeg after edit

The underexposed RAW file after editing

4. RAW Files Can Damage Your Reputation

Photography is actually a process of taking a photo, editing it, giving it a particular look, making use of technical abilities. Editing is a big part of photography and this step can either make or break the photos. A RAW image that looks dull has the potential to be turned into something brilliant, a masterpiece perhaps. Contrarily, someone who doesn’t have the same vision as the photographer, and who has no understanding of the editing process, can edit a RAW photo and make a garbage out of it. The latter case can absolutely put an unrecoverable dent in your reputation as a photographer.

5. People Are Selfish

Windsor has had some bad experiences with clients who”promise” not to put the RAW files out on the internet—but they do it ultimately. Contractual agreements mean nothing to them, and would you really care to take legal actions against them?

“A RAW file is an unfinished piece of art. You do not give it out. It is not finished yet. It is not done. A band does not release a new pop song before it has been in the studio. It’s the same with photography.”

There will always be clients who will ask for RAW photos. Now that you understand what impact it can have in the wrong hands, just be firm and say NO. While there are some instances where handing over RAW files will be a part of the job (e.g., professional clients like publications), but for others take your stand against handing out RAW photos.


Did you appreciate this newsletter? Please help us keep it going by Joining Our Patreon Supporters

What are your thoughts on this article? Join the discussion on our Facebook Page

PictureCorrect subscribers can also learn more today with our #1 bestseller: The Photography Tutorial eBook

The post Should Photographers Give RAW Files to Clients? appeared first on PictureCorrect.


from PictureCorrect https://ift.tt/GCnFRJA
via IFTTT

torstai 26. toukokuuta 2022

PictureCorrect.com: ☀️ Summer Sale: iPhone Photo Academy at 90% Off

I thought I knew a lot about iPhone photography, wow was I ever wrong! This training program has been catching attention across the industry and is currently 90% off for their summer sale for those interested. If you’d like to take better photos with your iPhone than most people can take with a DSLR, this might be the most important page you’re going to read in a long time. Deal found here: The iPhone Photography Academy at 90% Off

iphone photo academy

New: The iPhone Photo Academy at 90% Off (Click to Learn More)

iPhone Photo Academy is an in-depth online course that will show you how to take incredible iPhone photos. With the right knowledge an iPhone can be used to take photos that are so good that most people would never even believe that they were taken with a phone!

The best camera is the one that is always with you. But having the iPhone with you is only half of the equation. The other half is knowing how to use it to take outstanding photos.

Some of the Many Topics Covered:

  • How to take sharp high-quality iPhone photos even in the middle of the night
  • How to get full manual control of your iPhone camera (just like you can on a DSLR)
  • How to use focus and exposure lock to take perfectly sharp and well-exposed photos
  • 5 different ways to release the iPhone’s shutter (and when you should be using each)
  • The secret behind dreamy waterfall photos, and how you can take them with your iPhone
  • The difference between compression and resolution (and how they affect image quality)
  • When you should adjust shutter speed manually for taking perfectly sharp photos
iphone photography

Example iPhone photos from the tutorials

  • The correct settings for taking perfect HDR photos using the Pro HDR X app
  • Why you should never use the zoom of your iPhone (and what you should do instead)
  • One little-known technique for accurately setting focus on small subjects in the distance
  • Understanding AE/AF Lock (and how to use it in tricky photography situations)
  • Trick for taking action photos in which a person appears more than once (no editing required)
  • Secrets for using directional light to take beautiful high-quality photos with your iPhone
  • How to take stunning iPhone photos during the Golden Hour and the Blue Hour
  • How to get started with iPhone street photography (and what to do if you get caught)
  • The most common iPhone landscape photography mistake that ruins so many photos
  • My all-time favorite iPhone photography technique (and everything you need to know to take outstanding iPhone photos using this simple trick that leaves everyone speechless)
  • And much much more

Anyone can become an excellent iPhone photographer by applying these techniques.

iphone photo tutorials

iPhone Photography Tricks (Click to See More Examples)

With technology changing faster and faster, it’s not always easy to keep up, especially if you’re out there on your own. The iPhone in particular goes through huge changes every year with software updates and occasionally hardware updates. But that’s the beauty of the iPhone Photography Academy, members get new tutorials sent to them covering any updates for as long as Apple keeps making the iPhone.

How to Get a Discount Today:

The iPhone Photo Academy is currently 90% off for their summer sale for a limited time. It also includes a full happiness guarantee, if you are satisfied with iPhone Photo Academy for any reason simply let them know for a full refund – so there is no risk in trying it.

Deal ending soon: The iPhone Photography Academy at 90% Off


Did you appreciate this newsletter? Please help us keep it going by Joining Our Patreon Supporters

What are your thoughts on this article? Join the discussion on our Facebook Page

PictureCorrect subscribers can also learn more today with our #1 bestseller: The Photography Tutorial eBook

The post ☀️ Summer Sale: iPhone Photo Academy at 90% Off appeared first on PictureCorrect.


from PictureCorrect https://ift.tt/wZKQ3b6
via IFTTT

PictureCorrect.com: Interesting Photo of the Day: Chicago Long Exposure

Long exposure photography is amazing. It has the potential to capture an image in a way that a human eye cannot see naturally. Combine the technique with an amazing composition and you have the recipe for an engaging and fantastic image:

illinois train long exposure

“Long Exposure Photo of a Train in Illinois” (Via Reddit. Click image to see full size.)

Captured by mmeyers76 with a Sony Alpha a7 II, the photograph is of the brown line between the Chicago and Merchandise Mart stops. Besides the blurred out train, what makes this image interesting is how the beautiful S-curve leads the viewer’s eye from the darker part of the image toward the brighter part. The sun is low on the horizon, and the lighting on the sky and the train is just captivating.

Judging by the composition, the timing, and the technique used by the photographer, it really seems like a lot of planning went into it!


Did you appreciate this newsletter? Please help us keep it going by Joining Our Patreon Supporters

What are your thoughts on this article? Join the discussion on our Facebook Page

PictureCorrect subscribers can also learn more today with our #1 bestseller: The Photography Tutorial eBook

The post Interesting Photo of the Day: Chicago Long Exposure appeared first on PictureCorrect.


from PictureCorrect https://ift.tt/9NOZeyU
via IFTTT

PictureCorrect.com: Why Use a Lens Hood?

Lens hoods: do they really make a difference? Actually, there are many benefits to using one. David Bergman from Adorama shows you how lens hoods work and why he uses them all the time:

Reasons to Use a Lens Hood

  • It reduces lens flare and improves contrast. Lens flares appear as random bright spots or streaks of light and are caused when a direct light hits the front of a lens at certain angles. Lens flare can also cause the final image to look washed out and flat. A lens hood prevents the light from directly striking the front element of the lens and can help in reducing or eliminating lens flare and improving contrast.
lens flare without lens hood

Lens flare causes the image to look faded and washed out.

  • Lens hoods offer lens protection. While you’re walking around, your camera sometimes bumps into things. The lens hood can act as a shield for the lens and protect it from any possible damage.

lens hood protects

Reasons to Remove a Lens Hood

  • To use lens flare creatively. If you want to use lens flare creatively, take the hood off and angle the lens just right to get some lens flare or a washed out look.

using lens flare creatively

  • When using a pop-up flash. Lens hoods can sometimes block the light from the pop-up flash to the subject and create a shadow in the middle-bottom section of the image.

Bergman suggests that you put the lens hood on to the lens and let it be. It has almost no disadvantages.


Did you appreciate this newsletter? Please help us keep it going by Joining Our Patreon Supporters

What are your thoughts on this article? Join the discussion on our Facebook Page

PictureCorrect subscribers can also learn more today with our #1 bestseller: The Photography Tutorial eBook

The post Why Use a Lens Hood? appeared first on PictureCorrect.


from PictureCorrect https://ift.tt/kU04X2I
via IFTTT

keskiviikko 25. toukokuuta 2022

PictureCorrect.com: Timeless Photography: How to Take Photos that Stand the Test of Time

There are those individuals throughout history that seem to possess something that most of us lack. The innate ability to be in the right place at the right time. Somehow they know that what they are doing is important, not only to themselves, but also to millions upon millions of people in future generations.

Mathew Brady was just such an individual. During the Civil War, he made it his quest to photograph as many battles of the Civil War and war events as he possibly could. Could he have known his images would last so long and touch so many lives in such a profound way? When you look at a Brady image today, what do you feel? What thoughts and emotions do the images evoke? For each of us, these emotions are different. That’s the beauty and wonder of photography.

historical photo

Mathew Brady Civil War-era photograph (flickr/The U.S. National Archives)

Modern cameras are so sophisticated that taking excellent photographs is reasonably easy. However, the true beauty of the images is possible only because of the artistry of the photographer using the camera. The abilities and insights of the photographer are what make the images timelessly memorable. The camera is only the tool that makes accomplishing the task possible.

Images created by the real masters of the device can evoke a wide range of emotions in each of us depending on our viewpoint of the scene and our connection to that point in history. Some photographs inspire us while others can cause severe emotional distress. Some pictures remind us of things we would rather forget. All these emotions are possible because of the photographer’s ability to record that particular moment in time.

Taking truly memorable photographs requires a lot of both luck and skill. To capture timeless images, you must give some thought to what you want the image to say to those that view it. Think of it this way. If someone were viewing your photograph 100 years from now, what would the image say? Does the picture tell a story or is it just a randomly shot image with no meaning?

ways to make your photos stand the test of time

Photo by Linh Nguyen; ISO 400, 1/320-second exposure.

Will you ever take a photograph that will be viewed 100 years from now? It’s possible! But there’s one way to guarantee that you will never take that really memorable picture. Not being prepared when the opportunity arises. So here are some tips to better increase your odds:

Always Have Your Camera with You

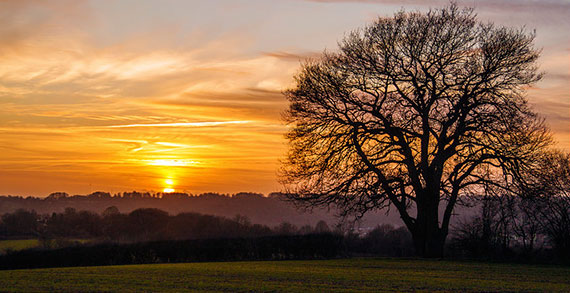
I was driving home from work one evening and there had just been a huge thunderstorm. Large clouds were hovering to the west, but the sun managed to peek out for just a few minutes. As I approached a clearing in the trees, across this huge field to the east was the most gorgeous double, completely arched rainbow I had ever witnessed. The sky was a royal deep blue and the grass of the field was a shimmering emerald green. And guess what? I didn’t have my camera with me; I missed the shot of a lifetime.

how to make your photography stand the test of time

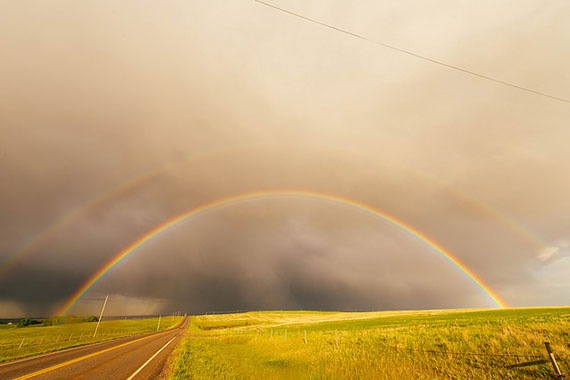
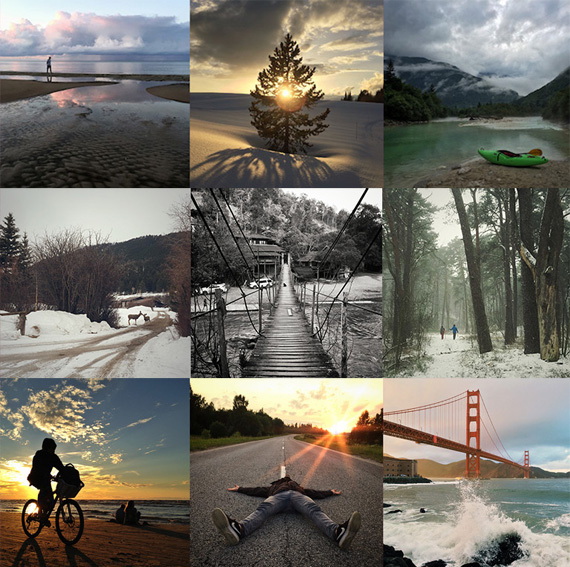
Photo by Just Me; ISO 100, f/8.0, 1/250-second exposure.

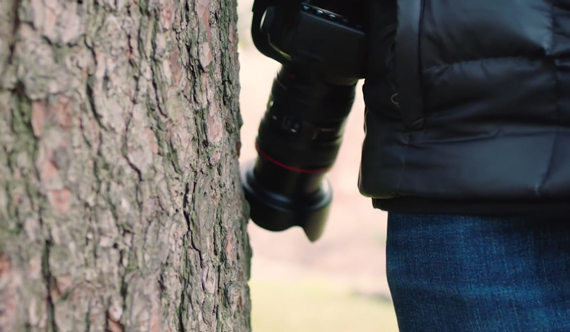
Know Your Equipment Intimately

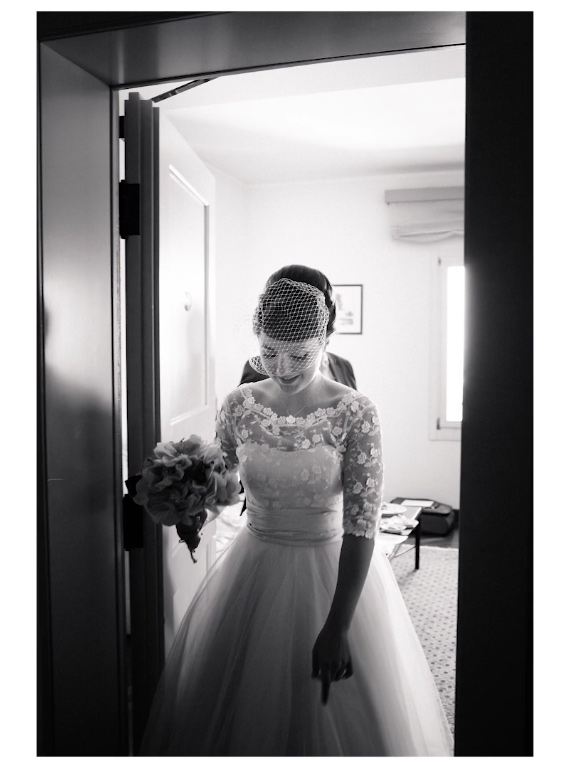
I was hired to photograph a wedding several years ago. The cameras I was using at the time were Olympus OM-10 film cameras. I had several of the same model cameras in my case, each with a different lens, so I didn’t have to stop and change the lens for different shot lengths. As the scenes changed, I switched cameras to make sure I didn’t miss a special moment during the event. When I got the prints back from the processors, the pictures from one particular camera were all blurred. After several days of testing, I finally realized the glide rail on the film door had fallen out of the camera, thus preventing the film from being held tightly against the shutter frame. What was the moral of the story? I didn’t see what should have been an easily recognizable flaw with my equipment, because I wasn’t familiar enough with the camera.

tips to make photos stand the test of time

Photo by laura burns

Know Your Subject Matter

If you routinely photograph children, you should know they are very unpredictable. You can be prepared for their antics if you know and understand their behavior. Nature photography requires that you know the normal habits and traits of the animal or bird you intend to photograph. Photographing the elderly sometimes requires as much patience as photographing children, and the results can be just as rewarding, if you understand the traits and characteristics of the individuals.

techniques for photos to stand the test of time

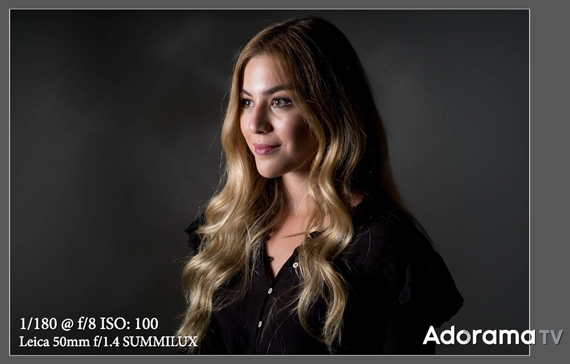
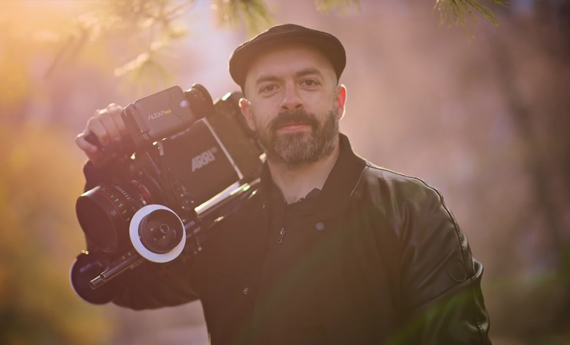
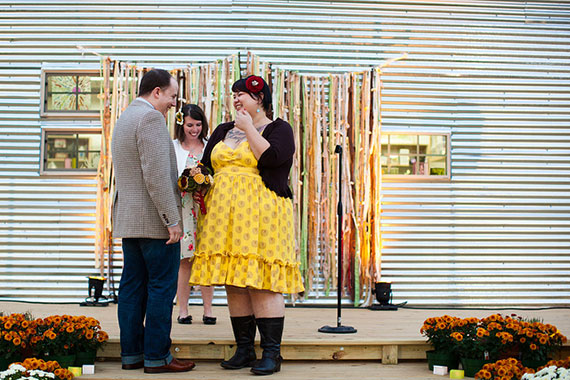
Photo by -JosephB-; ISO 125, f/2.2, 1/80-second exposure.

Recognize Opportunities

Was Mathew Brady just lucky enough to be at the right place at the right time? I don’t believe that to be the case at all. I believe he knew what he wanted his images to say to the masses, both then and in the future. He made it his business to be in the right place when the action was going on. I believe he knew that what lay before him was historic and he was compelled to capture it for posterity.

Document the Event

Sometimes photographs are not enough to tell the whole story. Very old antique family pictures with no written records inspire us to wonder who these people were, how they lived, what they felt, and what was important to them. Pictures are all that is left of them. When all the people who knew and loved them are no longer living, even their memories are gone. That makes the image all the more important in the lives of those who possess it.

timeless photography

Antique family photo, circa 1923 (flickr/John Atherton)

These types of photographs need to have a written record of the event kept with the photographs at all times. The old adage, “A picture is worth a thousand words,” won’t hold true for photographs that are so content-focused that the image explains nothing at all. Look at the image and decide if the picture does indeed tell the entire story. If not, document the event in writing and keep the documentation with the image.

One excellent way of doing this is through online digital photo processing labs. You can assemble a collection of photographs into a hard cover book complete with the entire story behind each image. The cost is very reasonable for a single copy of the book, so this option makes an attractive way to document multiple photographs in a single binding.

Be Prepared

Keep extra batteries and keep them all fully charged. Keep your lenses clean and functioning properly. Keep extra lenses with the camera at all times. If you do specialty types of photography that requires you to change settings on your camera, set those functions back to normal before you turn the camera off each and every time.

I regularly photograph artwork using a tripod and the timer function on my digital camera. If I forget to turn off the timer function when I’m finished with a session, the next time I take a photograph it is going to take 10 seconds for the shutter to actuate. Always set the camera back to your normal shooting mode after specialty photographic sessions.

So the next time you point your camera at something or someone, think about what impact the picture you are about to take may have. You never know what the picture could mean.

About the Author:
Randy Brown is from MVB Digital Cameras, providing camera reviews and image editing tips.


Did you appreciate this newsletter? Please help us keep it going by Joining Our Patreon Supporters

What are your thoughts on this article? Join the discussion on our Facebook Page

PictureCorrect subscribers can also learn more today with our #1 bestseller: The Photography Tutorial eBook

The post Timeless Photography: How to Take Photos that Stand the Test of Time appeared first on PictureCorrect.


from PictureCorrect https://ift.tt/IElr8H7
via IFTTT

PictureCorrect.com: Interesting Photo of the Day: Self Portrait from Another Time

We photographers are so in the habit of pointing the camera towards others that taking a self-portrait can be really intimidating. The most that majority of us do is take a cellphone selfie. But if you’re willing to do it, taking a beautiful self-portrait can be an amazing learning experience. And by looking at the work of photographer Derville, it really seems like she’s a master at the art. Check out her beautiful self-portrait that is no less than an amazingly done oil painting:

classic style self portrait

“18th Century Inspired Self Portrait” by Derville (Via Reddit. Click image to see full size.)

Derville took the image with her Canon EOS 6D Mark II and 50mm f/1.4 ISM lens at f/5, 1/160s, and ISO 200. While the overall portrait is a fantastic one, what’s also inspiring is that Derville did the costumes all by herself. What an absolute talent!

“I sewed this costume 7 years ago, when I dedicated myself to the creation of costumes and accessories. I take advantage of the confinement to shoot the forgotten outfits.”

The lighting that she has used for this image has given a fierce mood to the image. The darker tones, her eye contact, and even her expression give a feeling that something intense is about to happen.

“I am not really comfortable with the pink-girly-princess-Disney style. I much prefer the dark atmospheres and Cersei style which puts up a little discomfort.”

Absolutely an amazing job by the photographer.


Did you appreciate this newsletter? Please help us keep it going by Joining Our Patreon Supporters

What are your thoughts on this article? Join the discussion on our Facebook Page

PictureCorrect subscribers can also learn more today with our #1 bestseller: The Photography Tutorial eBook

The post Interesting Photo of the Day: Self Portrait from Another Time appeared first on PictureCorrect.


from PictureCorrect https://ift.tt/ig90CB4
via IFTTT

PictureCorrect.com: Grey Sky Landscape Photography Tips

The sky is a vital part of most of the landscape photographs. Whether it be colorful skies during sunrise and sunset or cloud patterns, landscape photographers always look to include these elements in their photographs. But nature is ever changing and one cannot expect the sky to be breathtaking every time. So what can you do if the sky presents you with a challenging situation? Landscape photographer Michael Breitung shows three ways to deal with flat, grey skies in landscape photography:

Shoot During the Blue Hour

When conditions are challenging (or just dull), Breitung likes to shoot during the blue hours after sunset or before sunrise. During blue hours, light gets even softer than during a cloudy day, which allows him to take photographs with an even longer exposure time.

Emphasize Mood

To take further advantage of cloudy and foggy conditions, he plans to take gloomy photos with a mystic feel. Emphasize the land structures while making sure that you don’t blow out the highlights in the sky. You can check your histogram to make sure this doesn’t happen. This is important because even if the RAW photo might look flat, the cloud structures can be revealed in post by applying some contrast.

recovering cloud structure in post

Cloud structure can be revealed in post if you make sure not to blow out the highlights.

Use a Polarizing Filter

Cloudy conditions create diffused light which is a soft kind of light that doesn’t create harsh shadows. This can allow you to create photos with a moody atmosphere and dreamy look. Harsh sunlight creates a high contrast scenario and makes the color appear washed out, whereas on a cloudy or a rainy day, you can make colors pop by using a polarizing filter.

Using a polarizing filter is an especially great way to enhance your landscape photos if you have wet surfaces in the frame. Reflections of the grey or nearly white sky on the wet surface can be distracting and can be eliminated by using a polarizing filter. But sometimes by turning the polarizing filter, the reflection can be maximized to enhance the look of the photo.

Photograph Forest Scenes and Waterfalls

Cloudy, rainy, and foggy conditions can also be used to your advantage, since they reduce the visibility of the background and put more emphasis on the main subject. Breitung suggests that while preparing the itinerary for your next trip, be sure to include some forest and waterfall areas so that you can take good photographs even if the sky conditions aren’t favorable.

dreamy photograph on a cloudy day

Photograph False Sunrise or Sunset Colors

This technique is particularly important when you want to create a colorful photo with glowing sky even if there is no real sunrise or sunset color. To use this technique, Breitung utilizes the artificial light of a nearby town or city. For this, you will need to identify an interesting scene close to a city. Breitung suggests that you shoot roughly between 45 and 90 minutes before sunrise or after sunset. During these time slots, you can achieve a balance between the artificial orange light and the natural blue light. If you go for a very long exposure, you can even photograph the glowing orange sky transitioning into cooler colors.

photographing false sunset

To use this technique, Breitung suggests to use the following gear and settings:

  • A sturdy tripod
  • A cable release to be used with the camera’s bulb mode. Use manual bulb timing so that you have a control over the exposure in case the lighting changes.
  • Long exposure noise reduction to fix hot pixels when exposing for a longer duration

Thanks to Breitung and his tips, you won’t return empty handed even if you don’t find the best conditions after investing a lot of time in chasing good light. Use what is presented to you and embrace the challenge instead of running away from it!


Did you appreciate this newsletter? Please help us keep it going by Joining Our Patreon Supporters

What are your thoughts on this article? Join the discussion on our Facebook Page

PictureCorrect subscribers can also learn more today with our #1 bestseller: The Photography Tutorial eBook

The post Grey Sky Landscape Photography Tips appeared first on PictureCorrect.


from PictureCorrect https://ift.tt/b3ezSjT
via IFTTT

tiistai 24. toukokuuta 2022

PictureCorrect.com: 📷 Finding Fresh Angles in Photography

How on earth do you find a fresh angle to shoot from when they’ve all been taken? That’s not what I mean. I do not mean discovering a new angle but using new angles you don’t usually shoot from. By changing your angles you’ll add a whole new dimension to your photography.

fresh angles for better photos

Photo by Sathish J; ISO 400, f/14.0, 1/100-second exposure.

The question I get asked as a photography teacher is how do the pros do it? Why are their images so different from mine? Simple, one of the techniques they use is angles or viewpoints. Implement them in your images and you are one step nearer to a great image. The key here is varying the angles and trying to think outside the box.

1. Don’t stand in front of your subject

Everyone shoots an image from directly in front of their subjects or objects. They line everyone up, tell them to say cheese, and push the shutter button. Then they wonder later why their images all look the same. The reason they all look the same is because most people shoot from eye level, which, on average, is about 1.5 meters or 5 feet above the ground. Boring because everyone does it. So think before you shoot, and use your feet to move around.

2. Use your stomach not your head

How low can you go is the chant when attempting to belly dance under a balancing pole. Get down low on the ground and shoot from that angle looking up at the subject. Immediately the perspective has changed and the image is dramatically different.

low angle bridge

Photo by Nick Page

How many people do you ever see in a tourist spot lying on their stomachs getting a shot. No need to answer. I have never seen one. If you are prepared to forgo embarrassment, then you are the one who will get the unique shot. Logical, isn’t it? But how many people do it?

3. Vary your height

This is just a little less embarrassing than point two. Using your knees, sitting down, or resting on your haunches all help you to vary your height. More people do this, so it’s not as unique as using your stomach. But, you will still get great images. Do this exercise: Choose a subject and then shoot it from 3 meters on your stomach, sitting on your bum, kneeling, crouching, and standing straight up. Then move in a few feet or a meter and do it all again. Do this until your are as near as you can get. Then view all of your images and see how many of them are better than a normal standing image.

4. Out cold

This is a variation of point two. Try lying flat on your back. Try it. It will give you a totally new perspective on life and your photography. Again you never see photographers lying on their backs in public places. Why? Same old reasons: embarrassment and shyness. But, the one who tries this gets the better shot. Ever seen those shots looking up into tall trees? How do you think they were taken? Right! Use this angle more often, and you’ll find that more than half your shots will improve dramatically. You can even try this for family shots to get that unique extra photo that nobody else has.

5. Bird’s eye view

Now don’t get all dangerous and attempt to climb too high and damage yourself and your gear. Just get a vantage point that is above the normal eye level images that everyone shoots. Get a different perspective. It may be great to get the odd high shot but really all you want to do is get a higher, different viewpoint. Again, something that is unique and not the norm.

birds eye view

Photo by Geng Sittipong; ISO 200, f/2.5, 1/60-sec.

6. On the move

One of the best pieces of advice I can give you is to use your feet. Forget about zooms and move around. Walk around your subject or the object you’re shooting and find a different viewpoint or angle. Vary your height, lie on your back, get higher or even lower but find something that is different. At the same time though, use your head to visualize the final image and work toward that.

These are just a few tips for shooting more creative images from different angles. I think that this is one the best tips you can use as you learn  photography. Don’t be afraid to experiment or get embarrassed. Keep practicing, and before you know it you will be shooting like a pro.

About the Author:
Wayne Turner has been teaching photography for 25 years and has written three books on photography. He has produced 21 Steps to Perfect Photos, a program of learner-based training using outcome-based education.


Did you appreciate this newsletter? Please help us keep it going by Joining Our Patreon Supporters

What are your thoughts on this article? Join the discussion on our Facebook Page

PictureCorrect subscribers can also learn more today with our #1 bestseller: The Photography Tutorial eBook

The post 📷 Finding Fresh Angles in Photography appeared first on PictureCorrect.


from PictureCorrect https://ift.tt/20yxamh
via IFTTT

PictureCorrect.com: Interesting Photo of the Day: Detailed Composite of the Moon

The moon is our closest outer-space neighbor, and this familiarity may be why we aren’t as amazed by it as we are with other celestial bodies . What seems like a simple white spherical mass has in fact many interesting stories to tell. All we need to do is have a closer look. And don’t worry if you’re lacking the right equipment. Astro-photographer Semeione took the following 56 panel mosaic of the moon so we can see some of the incredible details the moon exhibits:

“Detailed Composite of the Moon” by Semeione (Via Reddit. Click image to see full size.)

Semeion took the image with the ZWO ASI120MC-S camera mounted on the GSO Newton 8″ f/5 telescope. He then mounted the camera and telescope combo on the SkyWatcher EQ5 Pro Go-To Synscan mount and took this spectacular image.

The level of detail that we can see opens up a whole new perspective of the moon. It’s not just a shiny white surface after all. The multiple craters that we see are reminiscence of its age and what it’s gone through throughout the years. Also you can see the surface varies in color. This is an indication of the surface’s difference in mineral composition.

Surely, the facts behind the details of the image are endless and fascinating. It’s photos like these that let you see the moon in a whole new light.


Did you appreciate this newsletter? Please help us keep it going by Joining Our Patreon Supporters

What are your thoughts on this article? Join the discussion on our Facebook Page

PictureCorrect subscribers can also learn more today with our #1 bestseller: The Photography Tutorial eBook

The post Interesting Photo of the Day: Detailed Composite of the Moon appeared first on PictureCorrect.


from PictureCorrect https://ift.tt/i6VByUx
via IFTTT

PictureCorrect.com: 3 Reasons Why Spot Metering is a Bad Idea for Wildlife Photos

If you’re familiar with spot metering, you know that in this mode the camera meters for less than 5% of the frame to determine the exposure. You can use this metering mode when nailing the exposure in-camera is of utmost importance. However, since this mode considers a very small section of the frame, you need to consider a few things. Otherwise, you run the risk of ruining your photo. This is why photographer Janine Krayer is not so fond of using the spot metering mode for her wildlife photography. In today’s video, she shares her top three reasons why:

Not all animals have uniform tones throughout their body. In fact, many have contrasting dark and light patterns. So, when you’re using the spot metering mode, based on where you’re metering off your subject’s body, you run the risk of clipping either the shadows or the highlights. You’ll face a similar challenge when the subject is side-lit.

“Spot metering is too volatile to be a steady companion when it comes to wildlife photography.”

Another downfall with using spot metering mode is that not all cameras allow you to link the spot-meter with the focusing point. So, if your camera model is one of them, you will be forced to meter the subject by placing it at the center of the frame. You might think that having to focus and recompose isn’t a big deal, but remember that in wildlife photography, we usually use continuous focus mode (or AI – servo). This will cause the camera to change the metering values once you recompose. So, most of your shots will end up having the subject in the center.

If you want to get creative and take low or high key images, spot metering alone won’t be enough. For perfect results, you will still need to use the exposure compensation feature. As Krayer demonstrates in the video, you’ll still need to underexpose by more than a stop to crush the background.

The point of this video is not to roast the spot-metering in your camera. It is in fact a great tool, but just not that well suited for wildlife photography. A good idea is to stick with a metering mode of your choice and get used to its characteristics.

What metering mode do you prefer to use and how do you get around these issues? Let us know in the comments.


Did you appreciate this newsletter? Please help us keep it going by Joining Our Patreon Supporters

What are your thoughts on this article? Join the discussion on our Facebook Page

PictureCorrect subscribers can also learn more today with our #1 bestseller: The Photography Tutorial eBook

The post 3 Reasons Why Spot Metering is a Bad Idea for Wildlife Photos appeared first on PictureCorrect.


from PictureCorrect https://ift.tt/C0Gesoy
via IFTTT