lauantai 31. heinäkuuta 2021

PictureCorrect.com: Photography Rules Are Made to Be Broken (Sometimes)

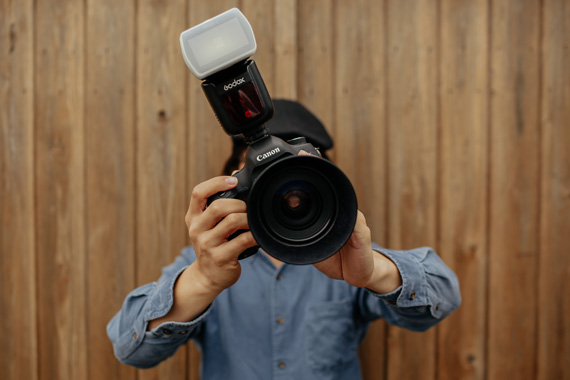
Creative photography is a mix of many ingredients: art and technology, skill and patience, cold mechanical know-how, and individual flair.
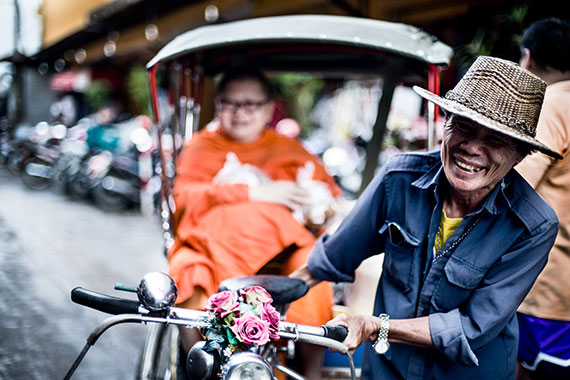
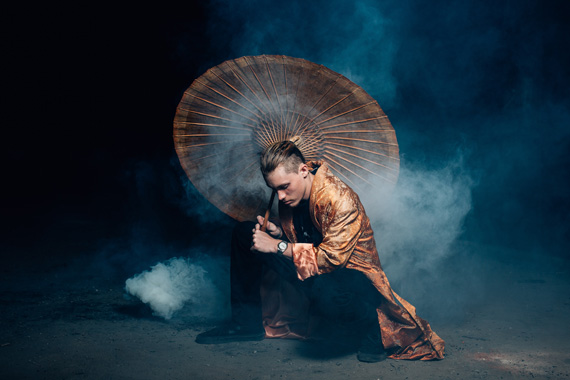
bullseye composition

photo by Max Rempel

As a beginner, wouldn’t it be nice if the whole thing could be explained with a simple set of rules that were easy to understand? Surely someone could just tell you what aperture to use in a given situation, or how to structure a composition to get the best results every time.

Photography is a lot like learning to drive. With a car, you need to know the road rules, and you need to know the basic skills of steering, accelerating, and braking. These can be learned easily with a bit of practice. But even when you have mastered the essentials, you still need to get to know your car, because each car is a little different. Then you need experience with night driving, wet-weather driving, off-road driving…

What you must understand is that following the rules will only take you so far. In photography, you will find that rules help you in the beginning, and some rules will stay with you throughout your career. The trick is to understand when the rules don’t apply, or when you should choose to ignore them. This is the type of knowledge that can’t easily be taught. It comes with experience, and it’s what gives you individuality as a photographer.

Below are just a few of the rules that, for an experienced photographer, are made to be broken.

Take Photos During Early Morning or Late Afternoon

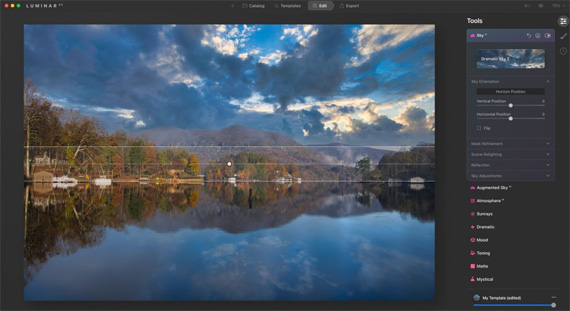
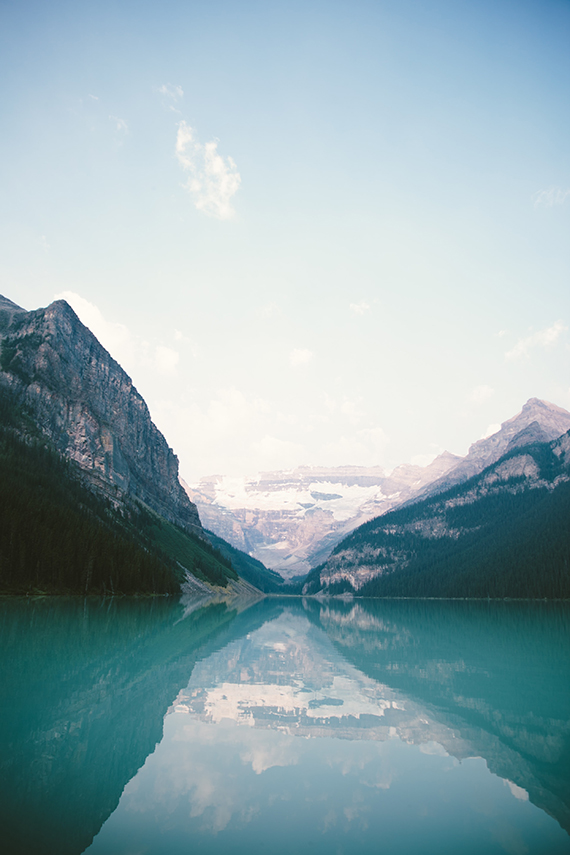
This is one of the first principles of landscape photography, and it can be applied to almost any outdoor photography. The softness and warm color of the sunlight at these times adds beauty and character to almost any scene. It also creates much lower contrast, allowing you to avoid harsh shadows and over-exposure of the highlights in your photos.

When can you break this rule? I can think of two situations immediately.

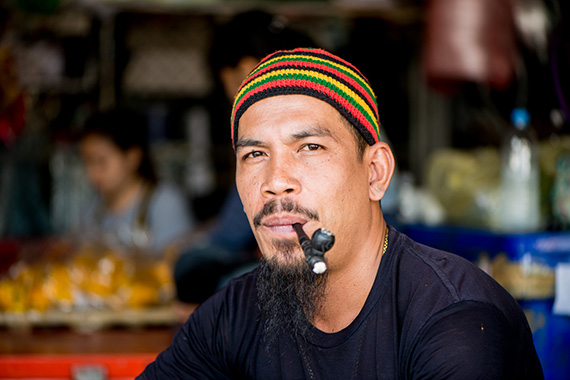
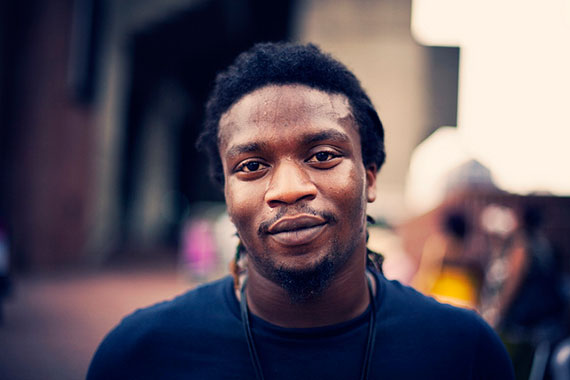
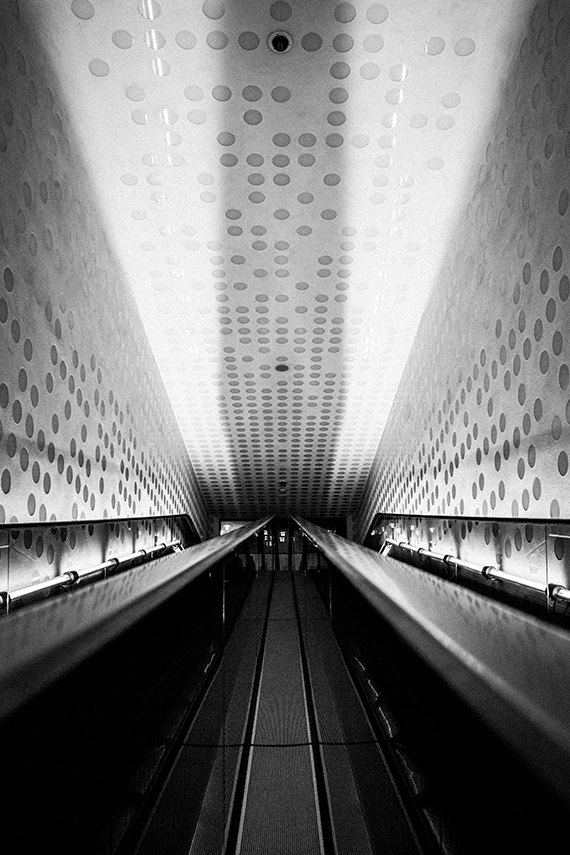
Black and white photography is defined by contrast rather than by subtle color, so you often want stronger shadows to create the best image. For this reason, black and white photos are often best taken closer to the middle of the day when the light is stronger.
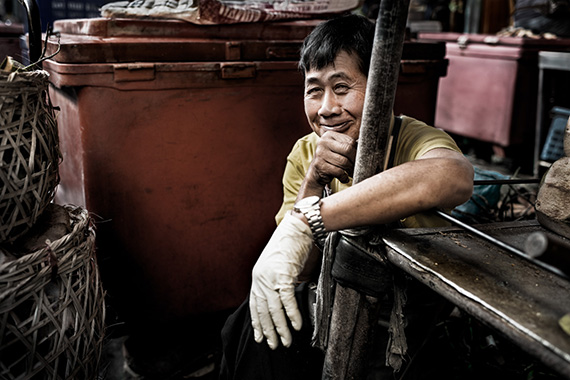
black and white midday portrait

photo by damon jah

Rainforest photography is also best in the middle of the day, but this time you don’t want bright sunlight; you want cloudy weather to create an nice even light throughout the forest. Otherwise the patches of light coming through the canopy will create ‘hot spots’ all over your image.

Use the Rule of Thirds

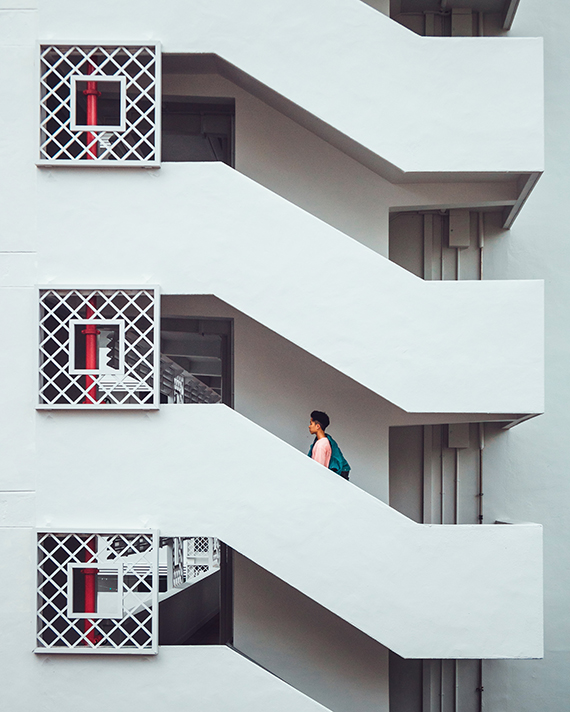
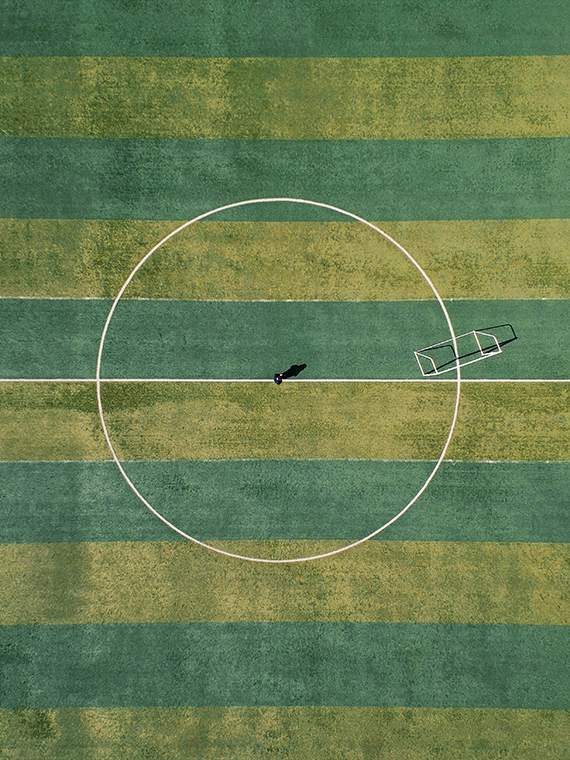
The rule of thirds is an excellent guide for a beginner learning about composition. In simple terms, it divides your photo into three parts, vertically and horizontally. The dividing lines are the best places to position long objects in a photo (like trees and horizon lines). The points where the lines intersect are the most effective places to position smaller objects for most impact.

Photos that are taken according to the rule of thirds appear balanced. They satisfy our natural sense of visual order and simply look “right.” Unfortunately, the world is not so easily organized as the rule, so it is impossible in nature to take every photo this way. Moreover, sometimes you may decide to ignore the rule, giving more impact to the photo by shaking up the normal balance of the composition.

When can you break this rule? Here is one obvious example, but I’m sure you can think of many more.

mirror reflection no rule of thirds

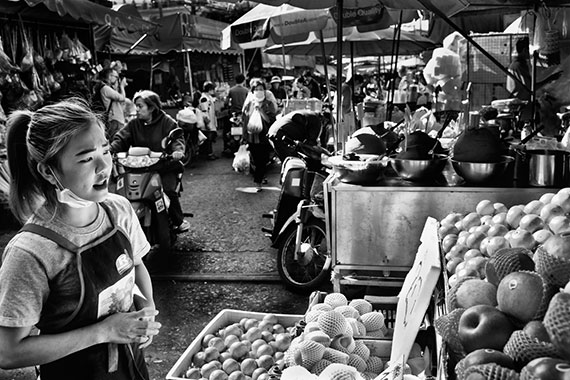
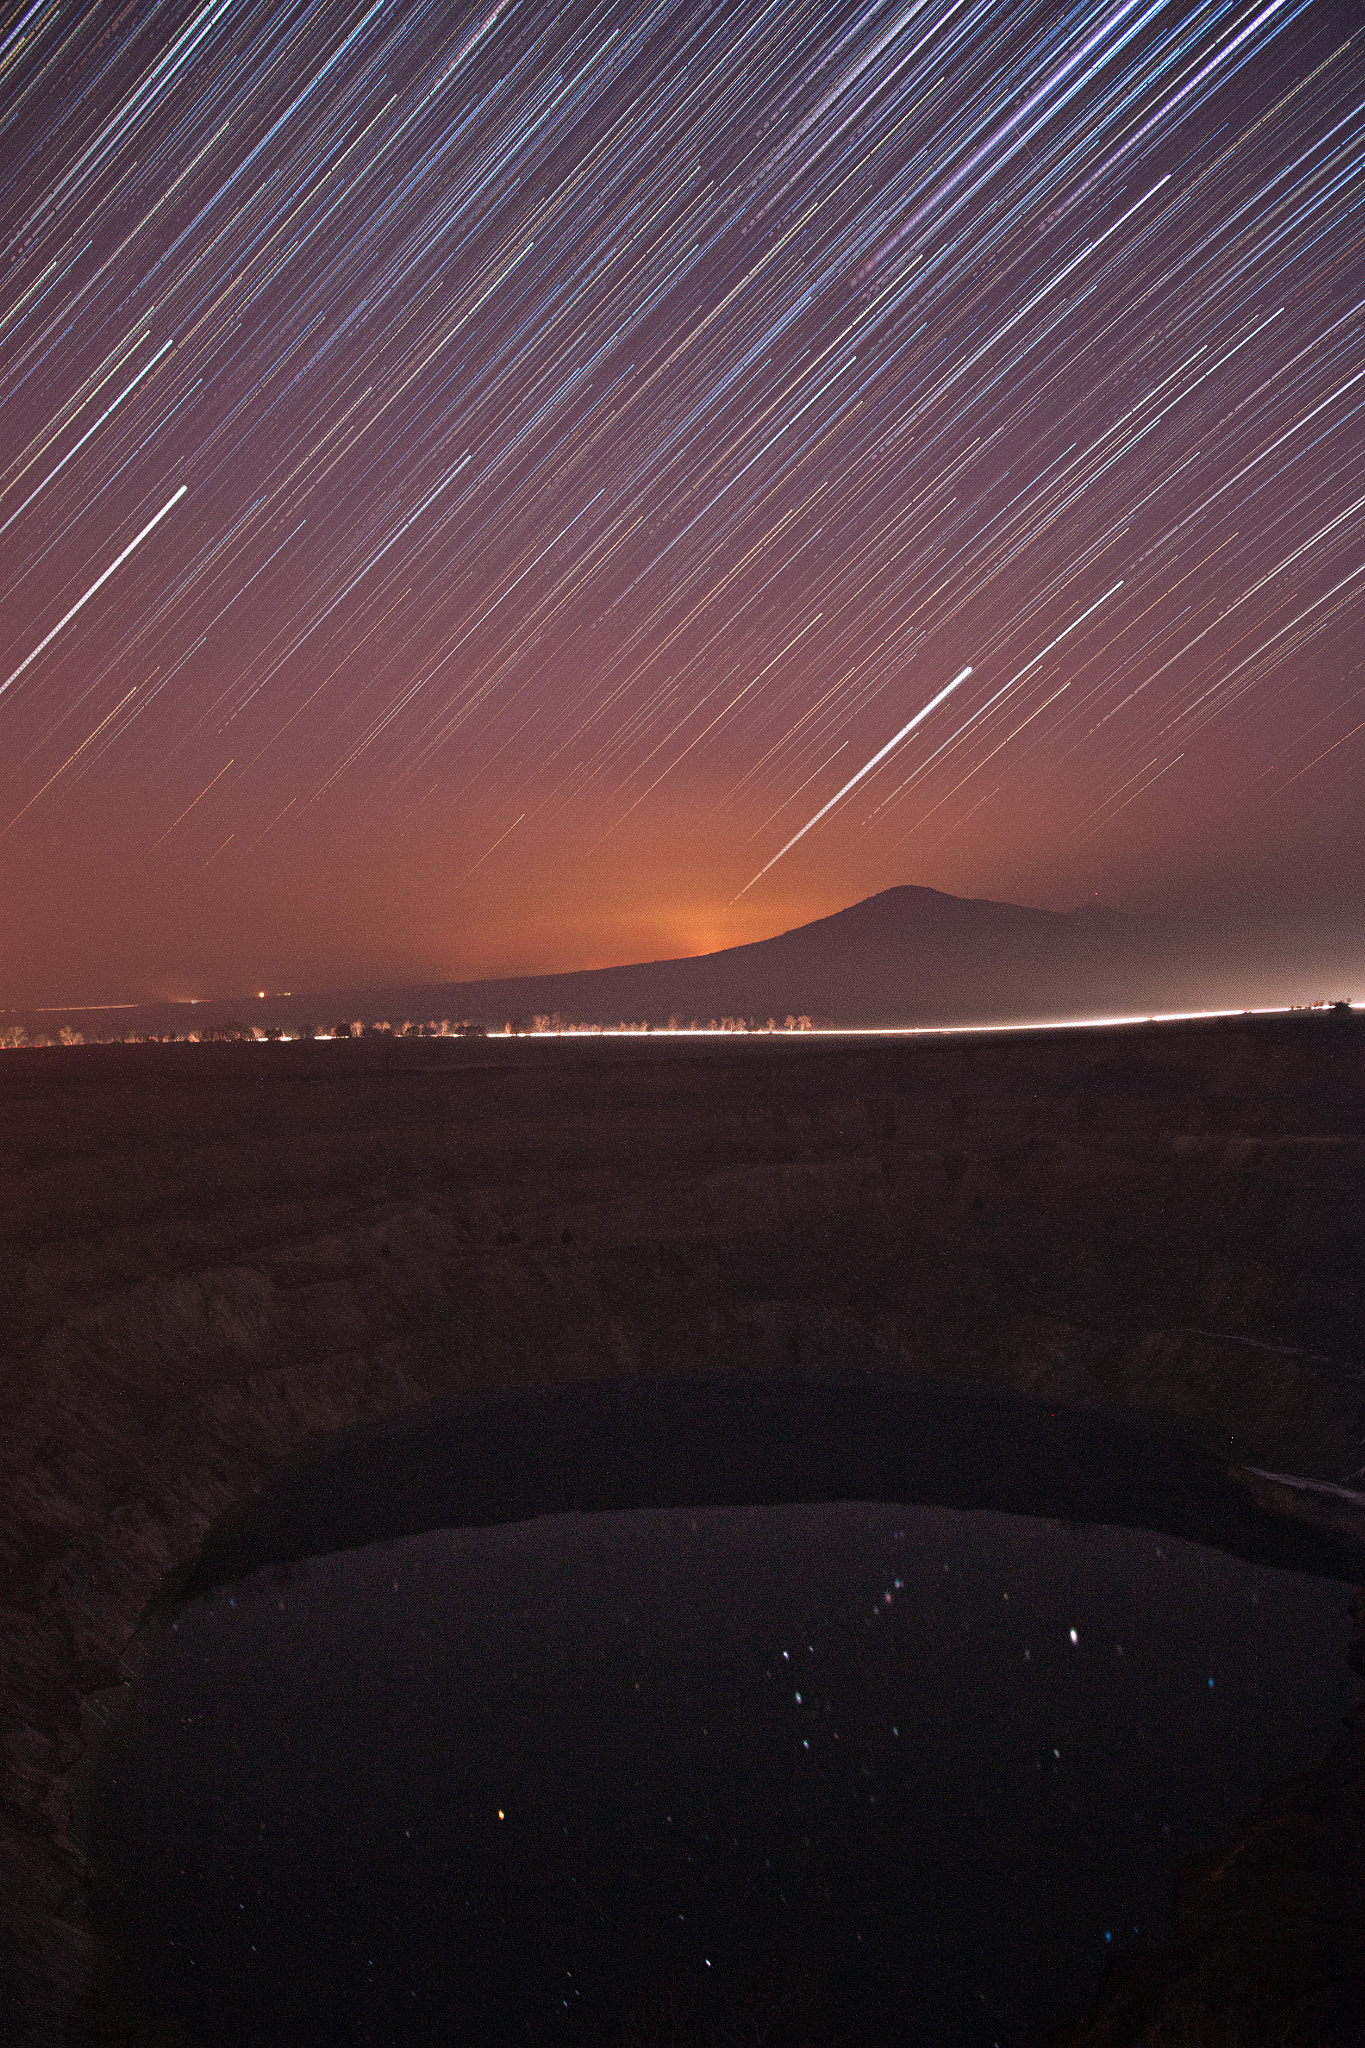
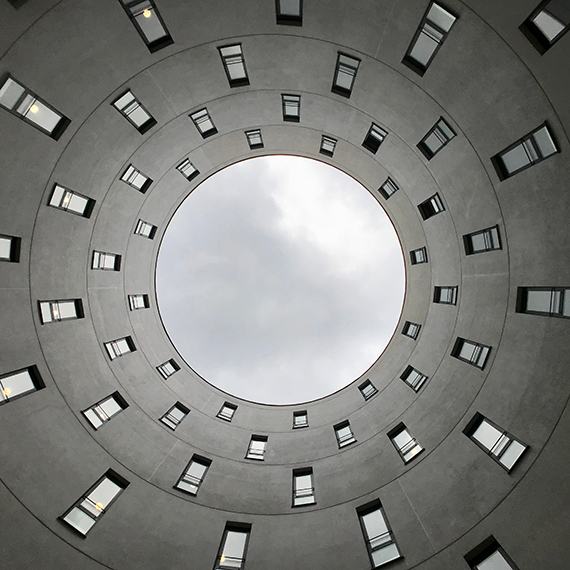
photo by Soumei Baba

Sunset photos feature colorful skies and silhouettes in the foreground. If you have a truly spectacular sky, it doesn’t make sense to fill a third of the picture with empty blackness. You may choose to tilt the camera up to make a feature of the sky and reduce the area filled by the foreground.

Your Light Meter is Always Right

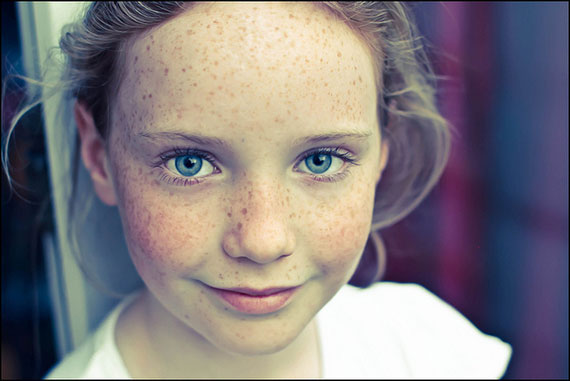
Most of the time you can trust your light meter. If it indicates your photo is well exposed, it probably will be…but not always. When can you break this rule? When there is a big difference in the level of light between the subject and the surroundings.

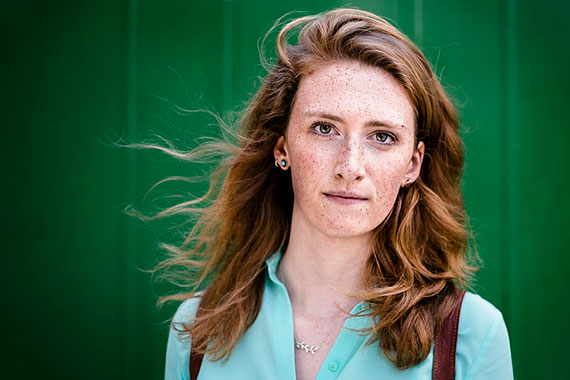
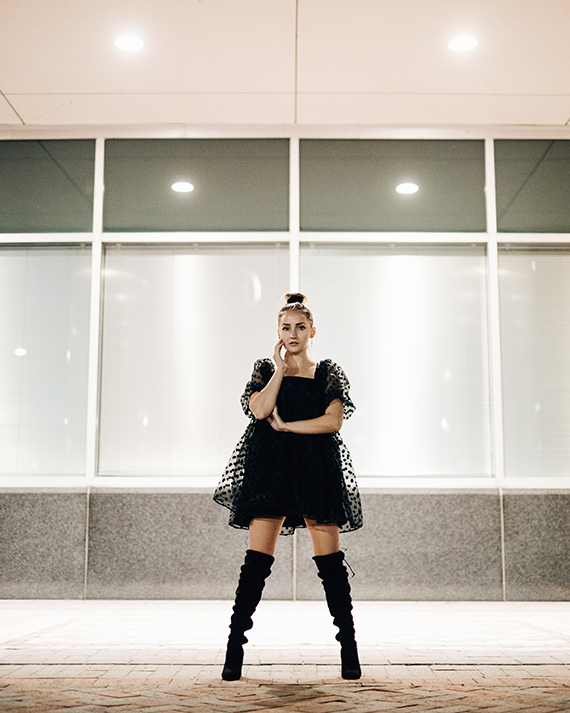
You may be photographing a person, an animal, a flower, etc. in full sunlight, but the background is shady. This is a very effective way of making your subject stand out from the surroundings. In this situation, the different levels of light are bound to trick the light meter. In fact, if you take your photo on auto, your subject will most likely be overexposed. The best approach is to switch your camera to manual mode, and adjust your aperture or shutter speed until the photo is underexposed by one or two stops. This will darken your background and bring the subject into perfect exposure.

flower on dark background

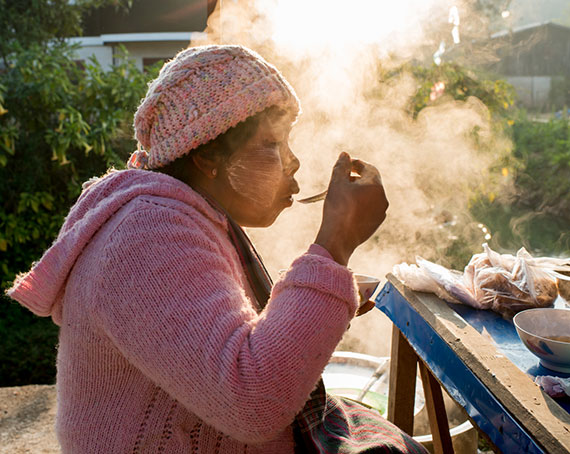
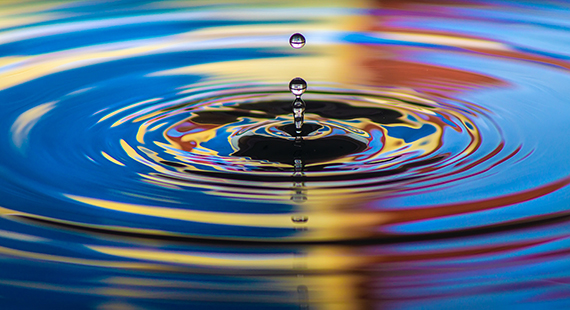
photo by photophilde

Can you see a pattern developing here? Rules are there for a reason, and your skills will improve in leaps and bounds if you learn them and practice them.

But having done that, you’re ready to take the next step. Start experimenting outside the rules and see where it takes you. Knowing and following the rules will make you a good photographer. Choosing how and when to break them will make you even better.

About the Author:
Andrew Goodall writes for https://naturesimage.com.au/ and is a nature photographer based in Australia. He manages a gallery in Montville full of landscape photography from throughout Australia.


Go to full article: Photography Rules Are Made to Be Broken (Sometimes)

What are your thoughts on this article? Join the discussion on Facebook

PictureCorrect subscribers can also learn more today with our #1 bestseller: The Photography Tutorial eBook

The post Photography Rules Are Made to Be Broken (Sometimes) appeared first on PictureCorrect.


from PictureCorrect https://ift.tt/2FsNl6k
via IFTTT

PictureCorrect.com: Interesting Photo of the Day: Vibrant Sunset in Kyrgyzstan

When the conditions are right, some places appear so otherwordly that you begin to question reality. Kyrgyzstan is blessed with many amazingly beautiful places that are sure to blow your mind if you ever saw them in person. Take for instance the following image taken by landscape photographer Albert Dros. Many would find it hard to believe that this is an actual photo of an actual location, but that’s what you get when the perfect scene meets skillful hands during the perfect conditions:

magical sunset in Kyrgyzstan

“A Magical Sunset in Kyrgyzstan” by Albert Dros (Via Reddit. Click image to see full size.)

Dros shot the photo on the south shore of Issyk-Kul lake in the northern region of Eastern Kyrgyzstan.

“The tree is actually quite small. I shot it with a 28mm and went very close to the ground so the top was separated from the horizon line. And of course, I was lucky with this beautiful sunset that gave the whole scene magic.”

We can learn a lot from the way he shot this photo. He didn’t settle for what was in front of him. By taking the time and effort to shift his perspective so the tree had a magical sky behidn it, he was able to elevate this image into something special. This also allowed him to get the dandelion and the beautiful blue flowers in the frame that add to the vibrance to the scene.

The shape of the tree, too, is an interesting aspect. While some see a figure of a person sitting on a chair, others see a person trying to balance a huge hat. What do you see?


Go to full article: Interesting Photo of the Day: Vibrant Sunset in Kyrgyzstan

What are your thoughts on this article? Join the discussion on Facebook

PictureCorrect subscribers can also learn more today with our #1 bestseller: The Photography Tutorial eBook

The post Interesting Photo of the Day: Vibrant Sunset in Kyrgyzstan appeared first on PictureCorrect.


from PictureCorrect https://ift.tt/3C62t3o
via IFTTT

PictureCorrect.com: Teleconverters: Things Photographers Should Know

A teleconverter is a small secondary lens unit that is placed between the camera body and the lens. It is useful to increase your reach as it increases the apparent focal length of your lens. This is great for those who cannot afford long lenses, or those who shoot primarily wildlife. However, there are a few things you should be aware of before purchasing a teleconverter. In today’s video, photographer Jared Polin sheds some light on the matter:

“Where most people go wrong with teleconverters is they don’t realize the cause and effect it has on their settings.”

Brands market teleconverters by promising they will help increase your lens’s reach. But what they won’t tell you is that there are a lot of downfalls to this. A lens is a great piece of engineering designed with the intention of projecting the clearest image on the sensor. Introducing any optical element, either in front of the lens or in between the lens and the sensor, can only hamper the quality.

Like Polin demonstrates in the video, the first thing you will immediately notice is a loss of light. For instance, a 2x teleconverter means a 2-stop loss of light. And this is just the beginning. To compensate for the loss, you will need to increase your ISO, which will invariably introduce noise. So if you’re thinking of getting a teleconverter for some fast-action sports or wildlife photography, you seriously need to consider all of these variables.

Moreover, the setup’s performance will also take a hit as the loss of light causes the lens to focus slower. As Polin clearly shows in the video, there is a clear loss of sharpness. If image clarity is critical, you’d be better off avoiding a teleconverter and cropping the image instead.

“Don’t waste your money on a teleconverter thinking it will give you great results—because it won’t.”

For an in-depth analysis of how teleconverters can affect your photography, be sure to watch the complete video. And if you use teleconverters for your photography, we’d love to hear your experience as well.


Go to full article: Teleconverters: Things Photographers Should Know

What are your thoughts on this article? Join the discussion on Facebook

PictureCorrect subscribers can also learn more today with our #1 bestseller: The Photography Tutorial eBook

The post Teleconverters: Things Photographers Should Know appeared first on PictureCorrect.


from PictureCorrect https://ift.tt/3lgDcNL
via IFTTT

perjantai 30. heinäkuuta 2021

PictureCorrect.com: Street Portrait Photography Tips

Street photographers often shy away from making portraits because they don’t want to impose on people. Creating remarkable street photography portraits isn’t as scary as you may think. By making a stranger’s portrait you may also make their day.

tricycle taxi with monk

Be confident in yourself. Know your camera intimately. These are two of the most important aspects of becoming a successful photographer. No matter what you choose to photograph. Having a strong belief in what you do is far more important than having the latest camera equipment. Knowing how to use the camera in your hands is far more important.

A balance between having a solid intention and a plan will help you capture more impressive images. Know the type of portraits you want to create and go out and make them. Study what it takes to make this happen and be consistent about how you do it.

street vendor

Know Your Camera and Focus on Your Subject

Don’t just focus your lens on your subject, give them your attention. It’s one thing to be able to create nice, sharp portraits, but unless you’re truly concentrating on your subject you will often miss your mark.

Have an intimate relationship with your camera. Know the settings you most need to use intuitively and forget about the rest. This happens with frequent use. Picking up your camera every day and taking a few photos will help you grow in familiarity with it. You will also become more confident.

Study your camera. Understand how it works and what you can achieve with it. Don’t be wowed or distracted by all the extras, but do know how to focus it and set the exposure well. Once you’ve got these two things down, you’re well on your way to creating more interesting photographs.

shopping for fruit

When you come to make a portrait of someone, be ready to give them your attention. Don’t have your head down fiddling with your camera. This is not going to help your subject have confidence in what you’re doing.

Before you approach someone, get your settings right, or as close as possible. Check your exposure settings before the person is even aware of you. If you use manual mode, take a light reading from your subject using your spot meter and make the necessary adjustments. Using an auto mode, make sure the camera will set the exposure for your subject.

Beware of bright light behind your subject. This is the most common occurrence that will throw your exposure off. Compensate so the camera will record good detail in the person’s face and not be influenced by the bright backlighting.

If you can, preset your focus by using manual focus or holding down the focus lock button. This may not be completely accurate if you’re not in position. At least you will be in close proximity to the right distance when you approach your subject.

porter

I photographed this porter in a local market. I saw him leaning on his hand truck from my position across the street. I figured he may let me take his photo if I asked. I wanted to get in close, as I only had my 35mm prime lens and wanted to show the traditional tattoos on his arms. I also thought I may not have much time when I approached him.

I made a spot meter reading from his face and took a test exposure without him being aware of me. I also set my focus roughly to the distance I thought I would be from him.

Approaching him, with my camera plainly visible, I asked if I could take his picture. He agreed, but at the same time dropped his arms down by his side. As I indicated to him I would like him to stand as he had been, a few of the market vendors nearby started to tease him and tell him to smile.

I managed just one frame before he became uncomfortable with the attention and pushed his hand truck away. My camera settings were correct and the one photograph I captured was in focus and well exposed. The next time I saw him I had a print of the picture to give him. He always smiles and says hi to me each time I’m back at the market.

Knowing your camera well will enable you to be more focused on your subject. Had I approached him and spent the precious moments setting my camera, I would not have been so successful with my portrait.

Anticipate the Action

Thinking ahead to what may happen when you approach your subject is important. If you’re prepared in your mind you’re less likely to be taken by surprise.

hot street breakfast

Not everything will go as planned every time, but you may be surprised at how often it does. Work on anticipating the action and build this skill.

Capturing a remarkable street portrait requires a certain amount of planning and often a good dose of luck. Without planning, the luck doesn’t happen so frequently.

Particularly for candid street portraits being able to anticipate the action will result in a higher success rate. Look at these things:

  • Lighting
  • Background
  • Distracting elements
  • Movement

Is your target subject in good lighting? This will make or break your portrait. If the light is not so good, can you somehow compensate for it?

Do you need to move to avoid a very bright or distracting background? Strong light behind your subject can be challenging to deal with. If it’s what you prefer, then be careful to set your exposure well.

pipe smoker

Distracting elements in your composition will detract from your subject. Make sure that you fill your frame only with what’s relevant or come in tight so you are only photographing your subject.

Will people or passing traffic interrupt your photo by moving into your frame? Time your photos well to avoid these things.

Candid or Posed?

Many photographers prefer a candid approach to street photography. This avoids interacting with their subject. Fear of imposing is the most common reason my workshop participants have for not photographing people.

smiling man street photo

Learn to be bold. Don’t be pushy or abrasive, but pleasantly approach people and ask if you can photograph them. Be prepared for a little friendly interaction when you do. You will be surprised at how often people will feel blessed by the attention you’re giving them.

Spend a little time chatting and putting them at ease. Explain what you’re doing and why you want to take their photo. Having a photography project you are working on and can tell them about will often raise their interest and put them at ease.

Engaging with your subject in this way will often produce a portrait with more feeling than candid portraits do. Don’t be shy; be confident. It will be difficult and even a bit scary at first, especially if you’re naturally introverted. I am, but I love making connections with the people I photograph in the streets.

When I see someone engrossed in what they’re doing, I often prefer to make candid portraits, though. Their concentration can make a more interesting portrait than if they’re posing uncomfortably.

Practice Your Style Consistently

Going out once and plucking up the courage to approach strangers in the street to make their portraits will rarely build lasting success. The first time you do you will probably fail. Don’t give up. Try again and refine your methods.

posed street photo

You will learn to read people and perceive who will enjoy being photographed and who will refuse you. This is not a science. At times you will get it wrong and be met with rejection. The more you practice approaching people the easier it will become and the more remarkable street portraits you will be able to take.

About the Author
Kevin Landwer-Johan is a professional photographer, photography teacher, and filmmaker with over 30 years of experience. Originally from New Zealand, he has made his home in northern Thailand since 2002. His passions are people and documentary photography.


Go to full article: Street Portrait Photography Tips

What are your thoughts on this article? Join the discussion on Facebook

PictureCorrect subscribers can also learn more today with our #1 bestseller: The Photography Tutorial eBook

The post Street Portrait Photography Tips appeared first on PictureCorrect.


from PictureCorrect https://ift.tt/3lfsWVW
via IFTTT

PictureCorrect.com: Interesting Photo of the Day: Afternoon Rays of Light

Many photographers believe that capturing landscapes only works when the sun is hanging low on the horizon. Well, sure, shooting during the golden hour is great—it makes the landscapes appear magical and makes your work a whole lot easier. But don’t let this keep you from shooting during the afternoon, when the sun is high. If you want to develop your skills as a photographer, getting results in diverse scenarios is what matters most. The following image by landscape photographer Rob Phillips is a beautiful example of this concept:

afternoon light in Grand Teton and Snake River

“Afternoon Rays in Grand Teton and the Snake River” by Rob Phillips (Via Reddit. Click image to see full size.)

“I’ve always struggled to grab an interesting shot from Snake River Overlook in Grand Teton so it’s fitting that the one I like the most from the last trip is a non-golden hour image.”

Phillips shot the image on a Sony A7RIII with a Sony 24-105mm f/4 lens at 73mm, f/11, 1/400th of a second and ISO 50. He shot it at the Grand Teton National Park in Wyoming. The image features the Teton range in the background and the Snake River in the foreground. If you’re feeling like you’ve seen this image somewhere before, you could be recalling “The Tetons and the Snake River,” one of the best-known and critically acclaimed works of famed landscape photographer Ansel Adams.

We can clearly make out that the clouds are playing a crucial role in making the image work. The sun rays tearing their way through the scattered clouds add a dreamy look, and the way the river and the landscape in the midground are highlighted with patches of light adds further interest. In fact, those light patches draw our eyes from the beginning, starting from the river right towards the mountains.

Did this image remind you of Ansel Adams? Or is it bursting with originality? Let us know in the comments.


Go to full article: Interesting Photo of the Day: Afternoon Rays of Light

What are your thoughts on this article? Join the discussion on Facebook

PictureCorrect subscribers can also learn more today with our #1 bestseller: The Photography Tutorial eBook

The post Interesting Photo of the Day: Afternoon Rays of Light appeared first on PictureCorrect.


from PictureCorrect https://ift.tt/2WG2JWr
via IFTTT

PictureCorrect.com: Is Your Landscape Photography Cautious or Improvisational?

Based on how landscape photographers use their gear, you can categorize them into two broad types. The first is someone who always carries a tripod and filters with them and spends a lot of time preparing their shots. The second is more into freestyling, shoots everything handheld and doesn’t use filters. Today, photographer Jonny Keeley talks about a third kind—one he believes falls beyond those categories, which represents himself. Let’s see what differentiates his work style from the other two types of photographers:

The meticulous ones cannot leave their homes without carrying a tripod and filters. When it comes to composing a shot, they are happy to invest a good chunk of their time. You can see them very carefully lining up their compositions and using the appropriate filters to get the image right. This is sort of a perfectionist approach.

If you are not used to working this way, you may feel tripods and filters slow you down. You want to go with the flow and try out different compositions and perspectives, shot after shot. You’re happy to spend a bit more time looking at images on your computer and pick out the best ones.

But, as Keeley explains, he falls into a third category—somewhere in the grey area. He doesn’t like to walk around with tripods and filters; he, too, feels that these additions to the camera slow him down. He carries this gear anyway, however, because he likes to use them when shooting water bodies. A neutral density filter can block the light from entering the camera allowing you to take long exposures even during broad daylight and gives a silky effect to the flowing water. A tripod allows you to keep the camera steady. When executed properly, this can give an ethereal vibe to your image.

Which category do you fall into? To gear, or not to gear? Let us know in the comments below.


Go to full article: Is Your Landscape Photography Cautious or Improvisational?

What are your thoughts on this article? Join the discussion on Facebook

PictureCorrect subscribers can also learn more today with our #1 bestseller: The Photography Tutorial eBook

The post Is Your Landscape Photography Cautious or Improvisational? appeared first on PictureCorrect.


from PictureCorrect https://ift.tt/37cNrdE
via IFTTT

Startrails 2 by extremalen (500px.com/extremalen)


Startrails above abandoned mine. Different edit without the star spikes plug-in. via 500px https://ift.tt/2UGkP5X

torstai 29. heinäkuuta 2021

PictureCorrect.com: Flash Photography: Taking Photos With vs. Without Flash

Without flash: When taking photos without flash, you’re relying on the image sensor being sensitive enough to capture as much information about the scene as possible, based upon the available light—whether that’s ambient light from the sun, whether the sun is shining directly or being diffused through cloud cover.

no flash portrait

Without flash, ISO 250, 1/125 sec, photo by Ansel Edwards

The larger the sensor, the more data can be recorded, and this helps, to a degree, when taking photos in low light conditions, particularly indoors. However, with the more sophisticated, modern DSLR cameras, there are a few settings adjustments you can make to help improve both the amount and the quality of light that go into making a nice looking photo.

Adjusting the ISO Setting = Adjusting the Sensor’s Light Sensitivity

One of the things you can do to improve the light recording capability of your DSLR is to adjust the light sensitivity of the sensor. This is done by adjusting what is known as the ISO (pronounced “EYE-so”) setting. This is a numerical value and the higher the ISO number, the better your camera’s sensor will deal with low light conditions—to a point! You see, there is a trade-off for this wizardry; the higher you push the ISO setting, the grainier your photos will turn out. This graininess is referred to as “noise” and it lowers the overall quality of the image.

high iso noise

ISO 3200, photo by suman roy choudhury

A general principle is to keep the ISO setting as low as possible for the best possible quality in your images. Get to know your camera’s lowest “native” ISO setting. What I mean by this is that on some of the more sophisticated DSLRs, you get the option to select Extended ISO from the camera’s menu and this allows you to digitally take it below the manufacturer’s natural or “native” ISO setting, which is where the camera’s sensor performs at its best. For instance, on the Panasonic GH4, you can turn on the Extended ISO feature and this will allow you to take the ISO down to either 100 or 80. Turn off the Extended ISO and the lowest you can get to is ISO 200—this is the Panasonic GH4’s lowest native ISO setting.

Adjusting the Aperture Lets More Light in Through the Lens

Another thing you can try to adjust is the aperture of the lens. This works like the iris of a human eye: the wider it opens, the more light can enter, so the scene looks lighter and brighter; with a narrower aperture, less light can enter the lens, so the image will be darker.

If your images are looking too dark when you review them on the LCD screen of your camera, you can try and open up the aperture. This will require dialing down to a lower f-stop number. For instance, f/2.8 is a wider aperture than, say, f/8. If, on the other hand, your images are too bright and detail is being lost because of the brightness, you can try to dial a higher f-stop number, to close the aperture down and make the image darker.

shallow depth of field

photo by Joel Olives

However, notice that in both instances I said “you can try”? This is because adjusting the aperture impacts on the overall image by adjusting how much of the scene is in clear focus and how much will be blurred. Basically, lowering the f-stop number (widening the aperture of the lens), increases how much of the background will be blurred (focus on a subject in the foreground and stuff in the background will become defocused/blurred), and you might not want this; you might want everything in the image in clear, sharp focus. The way to do this is to increase the f-stop number (narrowing the aperture of the lens). But, in doing so, you’re going to reduce the amount of light that can come through the lens, so you’ll once more encounter darker images.

Adjusting the aperture, to employ what’s called “selective focus”—where you deliberately blur out background subjects in order to make foreground subjects stand out more clearly, helping direct the eyes of those looking at your photos to precisely your chosen subject—is a key part of helping your photos tell a story, so you may not want to adjust your aperture in order to brighten up your image. It depends. If your image doesn’t suffer from the wider aperture, then do so to help aid the image sensor in grabbing as much of the available light as possible.

Adjusting the Shutter Speed Allows More or Less Light to Be Recorded by the Sensor

If you’ve decided you’ve got the right aperture for your photo and don’t want to alter it any further, then adjusting the shutter speed is another way to increase or reduce the amount of light that can be recorded onto your digital image.

Basically, when you select a faster shutter speed, you’re reducing the time that the shutter stays open and, as a result, less light can reach the sensor, so this will make images darker. Conversely, when you select a slower shutter speed, you’re keeping that shutter window open for longer, exposing the image sensor to more and more light. For all the time the shutter is open, the sensor will record every scrap of light it detects. Keep it open for long enough and you will end up with an overexposed image, to the point where you just have a totally white photo, which has lost all of its detail because you allowed the shutter to stay open too long—light rays get recorded on top of light rays, and you end up with a washed-out image. So, you play about with the shutter speed, increasing and decreasing it until you have the shutter staying open just long enough to capture the perfect amount of light detail, resulting in a nicely exposed photograph.

However, there may be times when you don’t want to adjust your Shutter Speed any further. For instance, you may deliberately want a slower Shutter Speed, because you’re trying to capture movement of, say, a car as it passes with its lights on, and you want to add a sense of motion to your still image, by capturing the light trails as the vehicle whizzes by.

Taking Photos With Flash

What do you do when you’ve adjusted your ISO and don’t want to risk introducing any noise into your images; and when you’ve adjusted your aperture to get the right amount of depth of field; and when you’ve adjusted your shutter speed as fast or slow as you want it and you’re still not getting enough light onto your sensor to expose your photo(s) properly? Well, that’s when you need to add some flash into the mix, preferably from an external flash (as you can control direction, as well as the power of the light, to get that perfect balance of light hitting your subject when you take the shot).

camera flash

photo by Tom Pumford

The pop-up flash on your camera is better when you’re able to turn down the power, so you’re just “kissing” subtle light onto your subject to fill in what would otherwise be lost to shadows. But because it’s facing your subject directly, it tends not to give the most flattering look, especially when taking photos of people. If you can get hold of an external flash unit, you will improve the look by taking the flash off to the side (at an approximate 45-degree angle from your subject).

Depending on the external flash unit you get, you will be able to change certain settings on the flash, to add sufficient light when you don’t want to make any further changes to your camera settings.

Settings that top of the range flash units allow you to adjust, include:

  • Flash Power. This will be a feature of virtually all external flash units, allowing you to keep the ISO on your camera low, by increasing the power of the flash output.
  • Flash Zoom. If this is an option on your flash, you’ll be able to select a wide angle setting, to spread the light wider in the foreground; or you can zoom the flash to get it to spread deeper into the scene (but at the expense of how wide the light will spread – the further out you zoom the flash, the narrower the beam).

And Don’t Forget to Experiment With Bounce

When I first got my external flash for my Panasonic FZ1000, I was a bit disappointed with the results. No matter how much I changed the flash power and zoom settings—higher or lower—it made no difference; the photos just didn’t look very good. And then, just pratting about out of sheer frustration, I turned the flash head so it was pointing up toward the ceiling, and with that one change, I got instant improvement with my photos. As the light from the flash hits the ceiling, especially if it’s a light colored ceiling, it spreads out and is then redirected back down. As it comes back down, it spreads out. The force of the direct flash is softened and this helps to give a much nicer spread of light down onto your subject. Direct flash (when the flash is pointed “directly” at your subject) tends to be a bit too hard, but when you bounce the light off a surface (it can be a side wall; it doesn’t just have to be the ceiling, so experiment!), the softer light just has a nicer look to it against your subject.

photo by Kyle Cleveland

One thing you’ll need—particularly with the ceiling bounce—is to find a way to project some of the light forward. If  it all goes straight up to the ceiling, this is when you’ll likely get unpleasant shadows, particularly under people’s eyes, nose, chin (basically, anything that protrudes that will block the fall of the light as it comes down off the ceiling). The flash unit I bought came with a white strip of plastic that you pull out and this helps to project some of the light forward. It’s okay, but I found the white diffuser cap, which also came with my Panasonic flash and fits over the flash head, helps to soften the light coming out of the flash, as well as projecting slightly more light forward, even when doing a ceiling bounce. Other products that seek to enhance this forward spread of light, are Gary Fong’s Half Cloud, and Rogue’s Flash Bender, both of which increase the area the direct flash light hits as it leaves the flash head, thus throwing even more light toward your subject than a basic diffuser cap, helping to fill in more of the shadows. So far, I’m happy with the results I’ve been getting with a simple diffuser, but I am considering experimenting with those other two flash attachments, and that’s possibly something you’ll want to consider, too.

About the Author:
Graham Wadden created and maintains the Creative Commons photography website, WaddenCCPhotography, specializing in creating stock photography primarily for home educators and those in education.


Go to full article: Flash Photography: Taking Photos With vs. Without Flash

What are your thoughts on this article? Join the discussion on Facebook

PictureCorrect subscribers can also learn more today with our #1 bestseller: The Photography Tutorial eBook

The post Flash Photography: Taking Photos With vs. Without Flash appeared first on PictureCorrect.


from PictureCorrect https://ift.tt/2NqCFpF
via IFTTT

PictureCorrect.com: Interesting Photo of the Day: Milky Way Island

The Pacific Northwest is renowned globally for its incredible beauty and striking landscapes. Photographer Kevin Shearer has trekked out to some of the most remote coasts of the region in order to fully grasp all that the nature has to offer. Based on the results Shearer managed to capture in just a few exposures, it’s easy to come to the conclusion that the hike was well worth the effort:

Oregon Milky Way Nightscape

Samuel H. Boardman State Park, OR (Via Imgur. Click image to see full size.)

More reminiscent of a colorful fantasy than anything we’re able to see with the naked eye, this image was made with a simple Nikon D810 equipped with a 12-24mm lens. Using a long exposure paired with corrective software, Shearer captured the fine details of the night sky without any light pollution interference.

Regardless of whether this image underwent heavy digital manipulation or advanced HDR processing, one thing is for sure – today’s inspiring picture is all the motivation any person needs to get out of town and explore what sort of small treasures the planet has to offer.


Go to full article: Interesting Photo of the Day: Milky Way Island

What are your thoughts on this article? Join the discussion on Facebook

PictureCorrect subscribers can also learn more today with our #1 bestseller: The Photography Tutorial eBook

The post Interesting Photo of the Day: Milky Way Island appeared first on PictureCorrect.


from PictureCorrect https://ift.tt/2F5Dezb
via IFTTT

PictureCorrect.com: Wildlife Photography: DSLR vs Mirrorless Cameras

Many photographers were reluctant to try out mirrorless cameras when they debuted. Some even mocked their performance. But today, mirrorless cameras have had a couple of generations out in the market, and the technology has proven itself a worthy adversary to standard DSLR. The progress has been so impressive that traditional DSLRs have been struggling to keep up, and the whole industry is now leaning towards mirrorless cameras.

But what is it that makes the mirrorless cameras so much better? In today’s video, photographer Villiers Steyn puts two great mirrorless and DSLR cameras into the race, comparing them in how they fare specifically for wildlife photography, and shares his experiences.

For the purpose of this video, Steyn puts the Canon 5D Mark IV DSLR camera with a 100-400mm II lens against the Canon R6 with a 100-500mm RF lens and compares the overall experience and results. Both of these setups are hugely popular with wildlife photographers, so his comparison makes a lot of sense.

While we don’t like to make photographers fret over which piece of hardware they own, wildlife photography is uniquely demanding. Having some top-notch features always helps capture animals in the wild. And from Steyn’s experience, he also accepts that the advanced features of the mirrorless camera should improve his efficiency.

While there was a time when mirrorless cameras focused slower than DSLRs did, that is not at all the case now. The R6’s auto-focus beautifully keeps birds sharp. The DSLR, on the other hand, struggles whenever there’s anything in front of the subject. Similarly, the frame rate is equally important for wildlife photography. And this too is an area where the mirrorless is unbeatable. With the ability to shoot up to 20 frames per second—silently—it means that there’s a greater chance that you will capture the decisive moment.

But it does come with a catch. The fast performance of the mirrorless means there is a greater chance you’ll take lots of photos. In the video, you can see that Steyn’s friend, with a mirrorless camera, ended up taking more than three times as many photos as Steyn, who used a DSLR. This means spending a lot more time going through photos afterward, and spending more money on buying storage. You might want to be careful on this front.

When it comes to image quality, however, the difference is insignificant. When Steyn compares the images taken under the same conditions by the two cameras, he sees no difference at all. The only notable difference is that the R6 has a better noise performance at a higher ISO. This is expected, considering that the R6 was released some four years after the 5D Mark IV.

Are you a DSLR user or a mirrorless user? Do you like how it performs? Let us know in the comments.


Go to full article: Wildlife Photography: DSLR vs Mirrorless Cameras

What are your thoughts on this article? Join the discussion on Facebook

PictureCorrect subscribers can also learn more today with our #1 bestseller: The Photography Tutorial eBook

The post Wildlife Photography: DSLR vs Mirrorless Cameras appeared first on PictureCorrect.


from PictureCorrect https://ift.tt/37b0fRM
via IFTTT

keskiviikko 28. heinäkuuta 2021

PictureCorrect.com: New! Advanced Bokeh Photo Editing in Luminar AI Update 4

In photo editing news, today Skylum released Luminar AI Update 4. The fourth update brings an all-new tool and important usability upgrades. With this update, Skylum continues to deliver on its promise to make it easier for artists of every skill level to achieve incredible results with their photos. They are having a sale today to celebrate the update if you want to check it out. See how it works: Luminar AI Update 4

luminar bokeh

Portrait Bokeh Editing in Luminar (see how it works)

Complete focus control with Portrait Bokeh AI

This new Portrait Bokeh AI tool taps into several amazing technologies. Using artificial intelligence, Luminar AI can recognize people in a photo –  even groups of people, and people posed in unusual positions. This combines with 3D depth-mapping technology which can calculate distances in a photo. This allows you to create beautiful background blur in seconds – adding realistic and dreamy 3D bokeh effects to your portraits.

Creative control

While the bokeh is automatically generated, it is entirely controlled by the artist with a single Amount slider. Be sure to experiment with different settings as well as try out the Background controls to get the desired look.

luminar bokeh portrait

Any lighting; any lens

Traditionally, creamy bokeh requires expensive cameras and lenses. It also can be difficult to capture in bright outdoor lighting.  Now you can use Portrait Bokeh AI to enhance the existing bokeh you’ve already captured or create it from scratch. Portrait Bokeh AI works on just about any portrait.

Intelligent mask creation

As soon as you move the amount slider, a mask is generated automatically when Luminar AI identifies people in a photo. In most cases, a perfect mask is created to separate the subjects from the background.

For additional control, use the * Brush Control to set the areas that are in Focus or that will be blurred (Defocus).

  • Press the left or right bracket keys ([ or ]) to change the size of the brush.
  • Press Shift + a bracket key to adjust the softness of the brush.
  • Press the X key to toggle between Focus and Defocus.
  • Press the / (forward slash) key to toggle the visibility of the mask.
  • Use the Restore brush to paint back in the original mask.

*Tip: Don’t worry about perfection. You often don’t need to worry about a perfect mask … try adjusting the Amount and Depth Correction sliders first. You also may want to try a lower Opacity brush when editing and build up your strokes.

Refined backgrounds

In addition to adjustable bokeh, artists can further refine the background using sliders to adjust multiple visual properties.

  • Brightness. Adjusts the exposure of the background to lighten or darken it to taste.
  • Highlights Glow. Adds a specular glow to the brighter areas of the background.
  • Warmth. Warms or cools the background’s color temperature.
  • Depth Correction. Adjusts where the in-focus area of the photo ends; effectively moving the blur closer or further away based on a 3D-depth mapping of the photo.
  • Edges Correction. Expands or contracts the mask. Useful for fine edges like hair.

*Tip: Stunning subjects. With the background made perfect, be sure to explore our other AI-powered Portrait Tools — FaceAI, SkinAI and BodyAI — to really make subjects stand out in the frame.

Improved Textures with visual preview

The ability to add transformable texture overlays with the Texture tool was first introduced with Update 2. This added the ability to use transparent PNG files or traditional JPEG files for creative results in the Local Masking controls.

With Update 4, the improved Textures tool gives you incredible new possibilities. You can now visually browse Textures in the dropdown list and instantly have an idea of what your final result might look like. The tool is similar to how SkyAI and Augmented SkyAI works.

  • Custom Textures are also now shown right after various default selections in the visual dropdown grid. Flares and Sparklers are included by default.
  • Need more Textures for your photos? Click Get More Textures below the dropdown menu and quickly browse textures in the Luminar Marketplace.
  • If you want to load your own textures (or even folders of textures) just choose Show Custom Textures… from the category drop-down list. Any folders that you add will show as new categories in the group list.

To explore adding textures to your photos, follow these steps:

  1. Switch to the Local Masking controls.
  2. Click the +Add button and select Textures.
  3. Click the Texture Selection drop-down menu to browse all of your loaded texture overlays
  4. Be sure to use the Place Texture and Blend controls to refine your texture’s appearance.

Precise Horizon Control in Sky AI

A new on-screen tool makes it even easier to control positioning of new skies when performing sky replacements with the Sky AI tool. In the Sky Orientation controls three sliders have been replaced by a single, intuitive Horizon Position control which makes accurate sky alignment easier for artists of every experience level.

To explore the new Horizon Position control within Sky AI, follow these steps:

  1. Open the Sky Orientation panel.
  2. Click the Horizon Position button to open the new on-screen adjustment tool. There are three controls offered to refine the position of the sky.
  3. Vertical Positioning. Grab the center-line of the pin to Shift the new sky vertically. You can freely position your new sky and place it exactly where you want it in the scene.
  4. Horizon Blending. Click and drag the line to smooth the transition between the current horizon and the new one. Since there is often a soft transition, using a higher value often results in a more photo-realistic look.
  5. Z-Axis Rotation. Move the pointer to the outside of the line until it becomes a curved arrow for Rotation. You can rotate the new sky on the Z-axis for perfect placement.
    More Features, Bug Fixes and Minor Enhancements

Bug Fixes and Minor Enhancements

They’ve fixed more than 50 bugs, including 7 major bugs on both macOS and Windows; preventing potential crashes or unexpected results.

macOS

  • Open and edit in LuminarAI as a Photos for macOS extension without errors.
  • Add transparent PNG Textures to your photos without encountering artifacts.
  • View the Custom Textures that load right away, even upon leaving and returning to the Texture overlays.
  • Find the controls for placing Sky Objects and Textures in the correct location instead of in the bottom-left corner of your photo.
  • Crop a photo in CompositionAI to a small ratio and use SkyAI or Augmented SkyAI without a hitch.
  • Smoothly work with masking in Show Mask mode.
  • Use the Shift + ] and Shift + [ hotkeys to smoothly adjust the Softness slider when in a Masking mode.

Windows

  • Add transparent PNG Textures to your photos without encountering artifacts.
  • Use LuminarAI as a Photoshop or Lightroom plugin and see the right-side Templates and Edit tabs without a hitch.
  • Enjoy better disk space optimization.
  • Export files in a raw format without experiencing crashes.
  • Work in Augmented SkyAI, SkyAI, and AtmosphereAI without experiencing memory leaks and crashes.
  • Open Templates created in LuminarAI on a macOS system.
  • Export multiple photos while retaining the original resolution.

To celebrate the update, the company is having a sale today if you want to check it out.

Deal ending soon: Luminar A.I. Photo Editor Update Sale


Go to full article: New! Advanced Bokeh Photo Editing in Luminar AI Update 4

What are your thoughts on this article? Join the discussion on Facebook

PictureCorrect subscribers can also learn more today with our #1 bestseller: The Photography Tutorial eBook

The post New! Advanced Bokeh Photo Editing in Luminar AI Update 4 appeared first on PictureCorrect.


from PictureCorrect https://ift.tt/2AKbz83
via IFTTT

PictureCorrect.com: Interesting Photo of the Day: Salton Sea Swing

Every now and then, we come across images that make us question reality. The image could be of a real place with no manipulation, but it looks so beautiful that you cannot believe your eyes. Today’s image by photographer Jeremy Ybarra is one of these. He took the following image in Bombay Beach, California, and it looks absolutely mesmerizing:

a swing at colorful sunset

“A Swing By the Salton Sea, California” by Jeremy Ybarra (Via Imgur. Click image to see full size.)

Good photography is not just about addition, but also subtraction. In this case, Ybarra has executed this concept beautifully. By capturing just the swing surrounded by the Salton Sea and the vibrant sunset colors, he has created a perfect minimalist image with an ethereal vibe. Many could argue over how much time he spent in post, but that doesn’t seem to be the case.

“This was taken at sunset. Most of the colors in the sky were present when I took the photo, just not as punchy and saturated.”

The vibrant colors, still water, minimalist composition and the swing’s reflection all give a tranquil feeling to this image. Everything gels together perfectly and makes it look like some kind of alternate dimension—something out of a dream.

Wouldn’t you love to spend some time in this place and enjoy the sunset?


Go to full article: Interesting Photo of the Day: Salton Sea Swing

What are your thoughts on this article? Join the discussion on Facebook

PictureCorrect subscribers can also learn more today with our #1 bestseller: The Photography Tutorial eBook

The post Interesting Photo of the Day: Salton Sea Swing appeared first on PictureCorrect.


from PictureCorrect https://ift.tt/3BUnJsq
via IFTTT

PictureCorrect.com: One Major Mistake to Avoid in Woodland Photography

Woodland photography is a great opportunity for you to create beautiful breathtaking images. And unlike “regular” landscape photography, it isn’t that complicated, either. But in case you’re just starting out with woodland photography, there’s something you should definitely look out for, lest those mistakes haunt you. If you are struggling with woodland photography, today’s video by photographer Christian Irmler is for you:

We cannot underestimate the importance of planning in photography. This is even more crucial in landscape photography, as most conditions are beyond our control. But as you can see in this video, having a plan alone isn’t helpful. Moreover, focusing only on the plan can have an undesired effect of blurring your vision, thereby causing you to miss out on opportunities that are right in front of you.

Irlmer goes out with the objective of photographing some wild garlic in a local forest. He tries his best to make the composition and lighting work, but at the end of the day, his best image turns out to be the one without any wild garlic in it. Had he been solely focused on photographing the garlic, he would’ve easily missed that beautiful photo opportunity. Thankfully, he was quite aware of his surroundings.

“Expectations are poison for getting images in woodland.”

So when you’re out to photograph in woodland, especially somewhere where you’re going for the first time, it’s better if you do not plan your shots beforehand. You cannot simply plan for woodland photography when you visit the location for the first time and expect it to work. Just photograph what attracts you and appreciate what nature has to offer. You will be surprised to see how your mind works when it is left open.


Go to full article: One Major Mistake to Avoid in Woodland Photography

What are your thoughts on this article? Join the discussion on Facebook

PictureCorrect subscribers can also learn more today with our #1 bestseller: The Photography Tutorial eBook

The post One Major Mistake to Avoid in Woodland Photography appeared first on PictureCorrect.


from PictureCorrect https://ift.tt/3iUUWM0
via IFTTT

night at the gravel pit by thalerst (500px.com/thalerst)


The gravel pit was lit up by me .. about 15 minutes with a Led Lenser torch! via 500px https://ift.tt/2VODFs8

tiistai 27. heinäkuuta 2021

PictureCorrect.com: Tips to Improve Your Portrait Photography in No Time

This article is intended for the casual shooter who is just starting out or has been shooting for a while, but has room for improvement. Capturing portraits, especially good portraits, is no easy task by any stretch of the imagination. However, making very small changes to your shooting habits will result in immediate improvements to your portraits.

street portrait

“Stranger Portrait No. 42” captured by Chris Zerbes

There are some very basic things that most people simply ignore when they shoot, and these very basic things make all the difference. First, let me say this:

The difference between a photograph of a person and a portrait is the background.

The main subject of every portrait is the face, and it should be the element given most attention. I will explain what I mean in more detail, so read on.

Use a Wide Aperture

OK, I know I am not exactly discovering a new planet here, but if you are using a point-and-shoot camera, or are just starting out with a DSLR camera, instead of using the Full Auto setting, switch over to Portrait mode. Why? Because the camera will adjust settings; it will set the lens to a wide aperture size. A big aperture is best for shooting portraits, because the background blur is increased. We almost always want our subject to stand out from the background, not blend in with it.

take better portrait photos with our tips

Photo by Elvin; ISO 500, f/2.8, 1/100-second exposure.

Get Closer

While this may sound silly, this is one of the most important aspects of capturing a good portrait. There are several reasons for getting closer to your subject, no matter who you are shooting. Remember, because the face is of primary significance in your photograph, it will occupy most of the frame. Getting close will let you fill the frame, even if you are shooting with a small point-and-shoot camera that does not offer a telephoto capable zoom.

close portrait

“Portrait – Color” captured by Jimmy Baikovicius

More importantly, when you come in close, instead of using a zoom, you decrease the depth of field, which, in simple terms, is the length between your focus point and some point in the distance that is in focus. What this means is that when you come in close, you capture the face in sharp focus, but the closer you get the shallower the depth of field becomes. This, in effect, blurs out the background, and because our eyes always look for features that are in focus, the facial features immediately stand out; the background is no longer distracting.

Choose a Better Background

This is a no-brainer, but how often do we see otherwise good portraits shot against distracting or garish backgrounds? Do not make that mistake. While you can blur out the background quite a bit by getting close to your subject, a background that is uncluttered and does not appear distracting offers a better portrait.

Look for solid color backgrounds. Consider a background that is complementary to your subject’s skin tone, or if you are shooting a full body shot, and a torso shoot, look for colors that complement your subject’s clothing.

methods for improved portraiture photography

Photo by barbasboth; ISO 400, f/1.8, 1/2000-second exposure.

Look for texture. Textures improve the image overall and add a feel of dimensionality. Try to keep your subject far enough from the background to throw it sufficiently out of focus. Use the LCD on your camera to see whether the background is too distracting. If it is in sharp focus, move your subject further away from it, if possible, or get closer yourself.

best tips for better portrait photography fast

Photo by David Salafia

Look for backgrounds that are not too dark or too bright. Too dark is always better than too bright, so if your choices are slim, opt for darker backgrounds.

With these very simple tips, you will no doubt improve your portraits quite a bit. Remember, there are always more things that you can do to improve, so do not stop here. These are just a few simple solutions to help you address some common problems. In time, this will become second nature, and you will be looking for more advanced techniques.

About the Author:
Written by Professional Photographer Sam Zaydel, who recently started an Online Photographer Community (worldonpaper), to allow photographers freedom to share their most favorite shooting locations, regardless of the subject matter and place. Consider joining this community, if you would like to contribute your favorite locations, as well as discover new places from other members.


Go to full article: Tips to Improve Your Portrait Photography in No Time

What are your thoughts on this article? Join the discussion on Facebook

PictureCorrect subscribers can also learn more today with our #1 bestseller: The Photography Tutorial eBook

The post Tips to Improve Your Portrait Photography in No Time appeared first on PictureCorrect.


from PictureCorrect https://ift.tt/2mwwLu5
via IFTTT

PictureCorrect.com: Interesting Photo of the Day: View from the Mast

One brave photographer climbed to the top of the mast of a boat to capture this dizzying shot. We can’t decide whether this is a gorgeous shot of the sail boat below or a nauseating shot for those with a fear of heights. However this photo makes you feel, I think we can all agree that it’s quite a unique point of view:

photo from ship mast

Photo captured by Edina Szalai (Via Imgur. Click image to see full size.)

Check out those gorgeous Caribbean blues and the sea floor beneath the water. Imagine the climb down—or maybe even a jump with a waterproof camera? To what heights will you go for that perfect shot?


Go to full article: Interesting Photo of the Day: View from the Mast

What are your thoughts on this article? Join the discussion on Facebook

PictureCorrect subscribers can also learn more today with our #1 bestseller: The Photography Tutorial eBook

The post Interesting Photo of the Day: View from the Mast appeared first on PictureCorrect.


from PictureCorrect https://ift.tt/2qwVUTq
via IFTTT

PictureCorrect.com: Why Sports Photography Matters – Especially at the Olympics

What do you think of when somebody says “sports photography”? Most of us relate sports photography to photojournalism: a medium to freeze moments that make it to the news. And this belief is somewhat accurate. But we’d be so wrong to limit the scope of sports photography there. On a grand stage like the Olympics, it is not just about who wins or loses, but it also has a lot to do with emotions. This mix of emotion into the equation is what takes sports photography to the next level. It makes the genre of photography much stronger. In today’s video, we have photographer Alex Kilbee who talks about the real strength of sports photography:

When players participate on a global stage, it is not just a matter of winning or losing. It also becomes a matter of national honor and pride. The participants at that stage commit themselves to the pursuit of a goal. This is why emotions run high and so the feelings of joy, anguish, triumph and defeat become more meaningful. For a sports photographer, this is an opportunity to capture a precious moment in history and present it to the rest of the world and possibly future generations.

“For a brief moment in time, we get to share in the way it must feel to these athletes as they push themselves to the very limits of their capabilities in pursuit of a dream.”

Also, if you’ve ever thought about it, sports photographs tell us quite a lot. You may have never played or watched a particular sport, but the images of them convey the mood and tone. Such photographs not only tell us about the winners but also capture humanity and emotions. Kilbee shares some brilliant examples of such instances.

Have you ever tried sports photography and ended up capturing a powerful photo? We’d love to hear about it in the comments.—


Go to full article: Why Sports Photography Matters – Especially at the Olympics

What are your thoughts on this article? Join the discussion on Facebook

PictureCorrect subscribers can also learn more today with our #1 bestseller: The Photography Tutorial eBook

The post Why Sports Photography Matters – Especially at the Olympics appeared first on PictureCorrect.


from PictureCorrect https://ift.tt/37blHpH
via IFTTT

maanantai 26. heinäkuuta 2021

PictureCorrect.com: Using Symmetry and Patterns to Create Stronger Photographs

This article is based on concepts from A Modern Approach to Photographic Composition which is currently 50% off if you want to dig deeper for further training.

Patterns and symmetry surround us, and our brains are naturally programmed to look for them. But incorporating symmetry and patterns into photography can be intimidating.

It’s important to understand both concepts of symmetry and patterns, and how to incorporate them to create stunning photos. This tutorial will discuss the best ways to create eye-catching compositions by using both symmetry and patterns.

Let’s get started.

Symmetry in Photography

Symmetry in photography refers to images where the two halves hold the same visual weight. Such images stand out because people are naturally drawn to symmetrical proportions and visuals that reflect harmony. So a simple photo with a small subject, such as fruit, can turn into a masterpiece if captured using symmetry.

Types of Symmetry

There are different types of symmetry in photography. Here are some of the most common ones you’re bound to find when you’re out and about with your camera.

symmetry examples in photography

Vertical Symmetry

Vertical symmetry is the most common and straightforward type of symmetry that can be achieved by simply keeping both sides of your photo symmetrical. You can imagine a vertical line that divides your composition straight from the center. Vertical symmetry is commonly used in architecture photography, as in the example above.

symmetry examples in photography

Horizontal Symmetry

Instead of imagining a vertical line separating your subject, place the line or visual separation horizontally using the same rule. You’ll then achieve horizontal symmetry. It’s most commonly used in landscape photography.

symmetry examples in photography

Radial Symmetry

You’ll love this type of symmetry if you like to shoot circular shapes. Radial symmetry deals with photos with shapes around a central point, such as ripples, wheels, domes and many types of flowers.

symmetry examples in photography

Reflective Symmetry

This type of symmetry, as the name would suggest, is about reflections that can be found on buildings, glass surfaces, water and other reflective materials or surfaces. If you’ve ever seen trees reflected in a very calm body of water such as a lake, then you’ve witnessed reflective symmetry.

symmetry examples in photography

Patterns in Photography

Patterns are essentially repetitive elements either found in nature or human-made structures or arrangements of objects. Our brains are wired to find patterns pleasing.

Incorporating patterns in your photos is a great way to grab attention. Being a photographer, you probably like to use lines and shapes to make unique compositions. You can also repeat those lines and shapes to create patterns. You can also take them to the next level to develop attractive textures.

The best thing about patterns is that you can use them in all types of photography in subtle and obvious ways. All you need to do is to learn ways to recognize them. The best strategy is to start finding repetition and capture them in your photos in an innovative manner that draws your viewers’ eyes.

symmetry examples in photography

Where to Find Patterns and Symmetry

As a general rule (which you can always break), to create symmetrical photos, you can duplicate a part of your picture and position it in a way that our minds can predict. Some examples include arches and doorways in a building, long views of a straight roads, the curve in a snail’s shell, petal arrangements in flowers and landscape reflections in water.

You can also capture symmetrical photos by capturing repeating patterns that any collection of similar objects makes. It can be natural or human-made, e.g., tidal patterns made by sand, roof clay tiles, logs in a woodpile, eggs in a basket or an aerial view of human heads.

Best Ways to Find Symmetry

You just need to look around, and you’ll find symmetry in countless things. Here are some great ideas to get you started.

symmetry examples in photography

Symmetrical Lines

Symmetry doesn’t only exist in nature. In fact, you can create symmetrical photos any time you want. All you need to do is have a background with a couple of solid colors and place an object right in the center where the colors meet. The line that divides the colors can be vertical or horizontal. Now you’ll need to capture the object by framing it right in the middle.

Some everyday objects are more symmetrical than others, but it’s always OK to break the rules and inject a little bit of creativity into your images.

symmetry examples in photography

Symmetrical Portrait

Symmetrical photography isn’t only about capturing non-living objects. It can also be achieved by including people in your photos. You can even capture self-portraits that reflect an element of symmetry.

All you need to do is grab a remote release and a sturdy tripod and head toward a peaceful location with a clear horizon at sunset. Now you’ll need to place yourself right in the middle of the frame at a little distance, preferably so that the camera only captures your silhouette.

Another option is to capture a portrait right in the center of the frame and place the subject’s hair and other accessories in a way that is symmetrical. Even though the human face is rarely perfectly symmetrical, it can still give a sense of a symmetrical composition. Another option is to step back and place your subject in front of a symmetrical structure or background.

Finding Symmetry in the Wild

Many animals and birds have almost perfectly symmetrical shapes, such as butterflies, elks, etc. If you love shooting wildlife, then you’ll find tons of opportunities to incorporate symmetry in your photos. But keep in mind that it’s incredibly difficult to work with animals, and you’ll need to be extra careful and stealthy. However, it will help you refine your symmetrical as well as overall photography skills.

Best Ways to Find Patterns

You can find patterns in colors, geometric shapes, lines, buildings, fruits and more. All you need to do is look for repetition, and it can be achieved whether you’re home or out in the wild. Here are some of the best ways to incorporate patterns in your photos.

symmetry examples in photography

Have Different Perspective

Most photographers capture photos from eye-level, and that can of course generate great images. But when it comes to patterns, capturing scenes from a different perspective allows you to open doors to a vast array of opportunities.

You can shoot down to find patterns in floor tiles. In the same way, you can consider shooting up in a building with a fancy ceiling to find beautiful patterns. Sometimes clouds also make a beautiful repeating pattern that you can incorporate in your photos.

Bear in mind that having a different perspective doesn’t only mean looking down or up. You can also find patterns by getting closer to objects and capturing macros, for example. On the other hand, you can also move farther and capture layers of a forest.

symmetry examples in photography

Fill the Frame

Filling the frame with repeating objects allows you to maximize the pattern effect. Moreover, it also helps you eliminate all distracting objects from the scene.

symmetry examples in photography

Break the Pattern

When dealing with patterns, it’s perfectly fine to break them by including something attractive or disruptive. It undoubtedly alters the pattern’s continuity and rhythm, but at the same time, it can add more character, scale or context to your photos. It’s a great way to produce a beautiful contrast with the complexity, shape or color of the patterns. For example, a single apple in the basket of oranges can create a strong focal point.

Final Words

Symmetry and patterns enable you to add mode clarity, vibrance and depth to your photos. You don’t necessarily need to pursue these concepts all the time, but you should try them at least once.

Incorporating symmetry and patterns in your photos can help you to improve your photography skills, but the key is to keep practicing.

For Further Training:

How do we make our photographs more powerful, more pointed? Learn all about photographic composition & express yourself through effectively composed photographs with the help of this new guide. We were able to negotiate an exclusive 50% off discount for our blog readers which ends soon if you want to check it out.

composition guide

New: Modern Approach to Photographic Composition

This eBook is broken down into 10 chapters that contain 90+ pages packed full with theory, techniques, concepts, advice, and tips & tricks to help you master composition.

Deal ending soon: Modern Approach to Photographic Composition at 50% Off


Go to full article: Using Symmetry and Patterns to Create Stronger Photographs

What are your thoughts on this article? Join the discussion on Facebook

PictureCorrect subscribers can also learn more today with our #1 bestseller: The Photography Tutorial eBook

The post Using Symmetry and Patterns to Create Stronger Photographs appeared first on PictureCorrect.


from PictureCorrect https://ift.tt/3l5fQe5
via IFTTT