torstai 29. helmikuuta 2024

PictureCorrect.com: 6 Post-Processing Secrets for Photographers

In the realm of photography, understanding and mastering post-processing techniques can significantly elevate the quality and impact of one’s work. The upcoming webinar titled “Six Post-Processing Secrets You Cannot Live Without” offers a unique opportunity for photographers of all levels to deepen their knowledge and enhance their skills in using Lightroom and Photoshop.

post processing secrets

Post-Processing Secrets Webinar (see what’s covered)

An Insightful Learning Experience

Led by Jon Phillips, a seasoned photographer and educator with over a decade of experience in the field, this webinar aims to demystify the post-processing techniques that can transform average images into stunning artworks. Jon, the founder of Contrastly and co-founder of DailyPhotoTips, brings a wealth of knowledge and a passion for teaching to this 60-minute online class.

Key Takeaways from the Webinar:

  • Efficiency in Editing: Participants will learn techniques to speed up their editing process without compromising the quality of their images, a valuable skill for both amateurs and professionals.
  • Artistic Enhancement: The session will delve into advanced features of Lightroom and Photoshop, helping attendees unlock creative possibilities and develop a distinctive artistic style.
  • Image Transformation: The webinar will provide tips on how to elevate the visual appeal of photos, turning ordinary shots into extraordinary pieces of art.
  • Problem-solving Strategies: Common post-processing challenges will be addressed, offering solutions to enhance workflow and overcome hurdles faced by photographers.
  • Practical Demonstrations: Real-time editing demonstrations will offer a practical perspective, allowing attendees to see the application of techniques discussed during the webinar.
  • Resource Access: Attendees will gain access to exclusive tools and presets designed to streamline the editing process and inspire creative exploration.

Educational Value for Photographers

This webinar is structured to provide a comprehensive learning experience, emphasizing practical skills and actionable insights. It’s tailored not just for those seeking to learn the basics but also for experienced photographers aiming to refine their skills and explore new artistic avenues.

Instructor Expertise

Jon Phillips brings his extensive experience and a pragmatic teaching approach to the webinar, ensuring that the content is accessible to photographers at different skill levels. His background in education and community building in the photography world adds a layer of depth to the insights and tips shared during the session.

Who Should Attend?

  • Budding Photographers: Newcomers can find a solid foundation in post-processing techniques, helping them start on the right foot.
  • Experienced Practitioners: Seasoned photographers will discover advanced tips and new perspectives to enhance their existing skills.
  • Photography Students: Individuals in academic or self-directed learning paths can benefit from the real-world expertise and practical advice offered.

By providing a blend of technical knowledge, artistic insight, and practical advice, this event aims to equip photographers with the tools and understanding necessary to bring their creative vision to life. Whether you’re looking to streamline your workflow, enhance your artistic expression, or simply learn from experienced professionals, this webinar offers a rich resource for personal and professional growth in the field of photography.

Found here: Six Post-Processing Secrets for Photographers

- - - - - - - - - - - - - - - - - - - - - - - - - - - - - - - - - - - - - - - - - - - - - - - - - - - - - - - - - - - - - - - - - - - - - - - - - -

This post 6 Post-Processing Secrets for Photographers appeared on PictureCorrect.


from PictureCorrect https://ift.tt/8Kz1f5N
via IFTTT

keskiviikko 28. helmikuuta 2024

PictureCorrect.com: When to Use Black & White for Landscape Photography

Final day: only hours left for the Complete Landscape Photo Guide at 58% Off

Black and white photography can add a timeless, classic feel to landscape images, emphasizing textures, shapes, and contrasts without the distraction of color. Here are some scenarios and reasons when you might choose black and white for landscape photography:

black and white landscape

Photo captured by Erico Marcelino

Emphasizing Textures and Shapes: When your landscape contains intriguing textures or shapes, converting your photo to black and white can enhance these elements. Without color, the viewer’s eye is drawn to the lines, forms, and textures of the scene.

High Contrast Scenes: Black and white photography can be particularly effective in high-contrast situations, such as when you have very bright and very dark elements in the same scene. Converting to black and white can make such scenes more striking and visually appealing.

Moody Atmosphere: Black and white can convey a range of moods, from somber and dramatic to serene and calm. If you’re aiming to capture a landscape in a way that feels moody or atmospheric, removing the color can amplify this effect.

Simplifying Busy Scenes: In some cases, color can be a distraction, especially in busy or cluttered landscapes. Removing the color can simplify the scene, helping to guide the viewer’s focus to the intended subject or composition.

Bad Weather Conditions: Overcast skies, fog, or mist can sometimes mute colors in a landscape, making them look flat and unappealing. Black and white conversion can turn these conditions into an advantage, emphasizing the subtleties of tone and light.

Timeless Quality: Black and white images have a timeless quality that can make your landscape photographs feel classic and enduring. This can be particularly effective for iconic or well-known landscapes, adding a sense of permanence and continuity.

monochrome

Photo captured by Mick Haupt

Artistic Expression: Ultimately, the choice to use black and white is also an artistic one. It allows you to express your vision in a different way, focusing on elements like light, shadow, texture, and form without the influence of color.

When deciding whether to shoot a landscape in black and white, consider what elements you want to emphasize and what mood you wish to convey. Sometimes, the decision is best made in the field, while at other times, you might choose to convert a color image to black and white during post-processing, depending on what you feel best captures the essence of the scene.

For Further Training:

If you are looking for more help with your landscape photography, you may want to check out this in-depth guide while it is currently 58% off until the end of the month, February 29. It contains 237 pages jam-packed with training, illustrations, and assignments for photographers seeking to take better landscapes.

landscape photography guide

New: The Complete Landscape Photography Guide

It covers everything you need to know to take consistently great landscape shots – lens and gear help, developing your own style, post-processing guides, composition tips, how to get unique images, and much more.

Only hours left: The Complete Landscape Photo Guide at 58% Off

- - - - - - - - - - - - - - - - - - - - - - - - - - - - - - - - - - - - - - - - - - - - - - - - - - - - - - - - - - - - - - - - - - - - - - - - - -

This post When to Use Black & White for Landscape Photography appeared on PictureCorrect.


from PictureCorrect https://ift.tt/3IGvhiA
via IFTTT

tiistai 27. helmikuuta 2024

PictureCorrect.com: Capturing the Cosmos: Essential Tips for Star Trail Photography

Star trail photography captures the apparent motion of the stars across the night sky due to Earth’s rotation. This genre of photography requires patience, precision, and a keen eye for detail. Here are some essential tips to help you capture stunning star trail images.

Related reminder: only 1 day left for the Complete Landscape Guide at 58% Off

star trails

Photo captured by Javier Esteban

Choose the Right Equipment: A camera capable of manual mode, a sturdy tripod, and a wide-angle lens with a wide aperture (f/2.8 or wider) are essential for star trail photography. A cable release or an intervalometer to control your camera’s shutter remotely can also be highly beneficial.

Scout Your Location: Find a dark location away from city lights to minimize light pollution. Use apps or maps to identify areas with low light pollution and interesting foregrounds to add depth to your images.

Plan Your Composition: Use apps like PhotoPills or Stellarium to plan where the stars will move in the sky and how they’ll align with your foreground. Composition is key in star trail photography; consider how the trails will interact with the landscape.

Focus Manually: Autofocus is unreliable in the dark. Use manual focus and set your lens to infinity. You can also use live view mode to zoom in on a bright star and manually focus until the star is sharp.

Use the Right Settings: Start with a wide aperture (f/2.8 to f/4), a low ISO (200-400 to reduce noise), and long exposure times. You can either do a single long exposure (up to 30 minutes or more) or stack multiple shorter exposures (2-5 minutes each) to create the star trails in post-processing.

Long Exposure Noise Reduction: Turn on Long Exposure Noise Reduction (LENR) in your camera settings to minimize noise. Note that this will double your exposure time since the camera takes a second “dark frame” to identify and subtract noise.

Take Test Shots: Before committing to a long shoot, take shorter test shots to check composition, focus, and exposure. Adjust as necessary before starting your final sequence.

Shoot in RAW: Shooting in RAW format allows for greater flexibility in post-processing, enabling you to adjust exposure, white balance, and other settings without losing image quality.

Post-Processing: Use software like Adobe Photoshop or StarStaX to stack your images if you’re using the stacking method. This software can align and blend your images to create the final star trail effect.

Patience and Practice: Star trail photography can be challenging and requires patience. Don’t get discouraged if your first few attempts don’t turn out as expected. Practice makes perfect, and each session will teach you something new.

By following these tips and continually practicing, you’ll improve your skills in star trail photography and be able to capture breathtaking images of the night sky.

For Further Training:

If you are looking for more help with your landscape photography, you may want to check out this in-depth guide while it is currently 58% off. It contains 237 pages jam-packed with training, illustrations, and assignments for photographers seeking to take better landscapes.

landscape photography guide

New: The Complete Landscape Photography Guide

It covers everything you need to know to take consistently great landscape shots – lens and gear help, developing your own style, post-processing guides, composition tips, how to get unique images, and much more.

Deal ending soon: The Complete Landscape Photo Guide at 58% Off

- - - - - - - - - - - - - - - - - - - - - - - - - - - - - - - - - - - - - - - - - - - - - - - - - - - - - - - - - - - - - - - - - - - - - - - - - -

This post Capturing the Cosmos: Essential Tips for Star Trail Photography appeared on PictureCorrect.


from PictureCorrect https://ift.tt/HhUXqsg
via IFTTT

maanantai 26. helmikuuta 2024

PictureCorrect.com: Photographing Patterns in Cityscape Compositions

Patterns are an important element of photography composition because they add visual interest and rhythm to an image. When used effectively, patterns can create a sense of movement and draw the viewer’s eye around the frame.

Related reminder: only a few days left for the Complete Landscape Guide at 58% Off

window patterns

Photo captured by dylan nolte; ISO 800, f/2.8, 1/125s.

Capturing patterns within a city can be a fun and rewarding way to photograph the world around us. Here are some tips to help you capture stunning patterns in urban environments:

Look for repeating elements: Patterns are made up of repeated elements, so one of the first things to do when looking for patterns in a city is to scan the scene for anything that repeats. This could be architectural details like windows or balconies, or it could be natural elements like trees or bushes.

Look for contrast: Patterns often stand out more when there is a high level of contrast between the elements that make up the pattern. For example, a row of white buildings against a blue sky can create a strong visual pattern.

Experiment with different compositions: Once you have found a pattern, experiment with different compositions to capture it in the most interesting way. Try framing the pattern with other elements in the scene, or shooting it from different angles to create a unique perspective.

Use leading lines: Leading lines are lines within a scene that draw the eye towards the subject. In the case of using patterns in cityscape photography, you can use leading lines to draw the viewer’s eye towards the repeating elements and help to emphasize the pattern. Leading lines could be a row of trees, a line of buildings, or even a sidewalk.

Pay attention to the light: The way light interacts with the patterns in a scene can greatly affect the final image. Look for patterns that are lit in a way that creates interesting shadows or highlights, as this will add depth and texture to the photograph.

Experiment with composition: Patterns can be photographed from a variety of angles, so don’t be afraid to experiment with different compositions to find the one that works best for the scene. Try shooting from above to create a bird’s-eye view of the pattern, or get close to the ground for a more abstract perspective.

aerial city pattern

Photo captured by Logan Armstrong

Play with the exposure: Adjusting the exposure settings on your camera can help to bring out the details in a pattern and create a more striking image. Try using a slower shutter speed to blur any moving elements within the scene, or a higher ISO to capture patterns in low light conditions.

Use a wide-angle lens: A wide-angle lens will allow you to capture a larger scene, which can be helpful for showing the repetition of elements within a pattern. This can give your photo a sense of depth and scale, and can help to emphasize the pattern. However a telephoto lens can also work to zoom in on certain scenes.

Here are a few places where you might find interesting patterns within a city:

  • Sidewalks and streets: Look for patterns in the arrangement of tiles on sidewalks, or the lines and markings on streets.
  • Buildings: The repetition of windows, doors, and other architectural elements can create interesting patterns on the facades of buildings.
  • Public spaces: Patterns can be found in the arrangement of benches, planters, and other elements in public squares and parks.
  • Transportation: Look for patterns in the arrangement of cars on a busy street, or the repeating shapes of train tracks or subway stations.
  • Nature: Even in the midst of a bustling city, you can find patterns in the growth of plants and trees. Look for repeating shapes in the leaves of a tree, or the arrangement of petals on a flower.

These are just a few examples of the many places where you might find interesting patterns within a city. Keep your eyes open and you’re sure to discover many more!

bridge pattern

Photo captured by Norbert Braun; ISO 100, f/4.0, 1/80s.

In conclusion, capturing patterns within a city can be a fun and rewarding way to photograph the world around us. Whether you’re looking for repeating elements on the streets, interesting architectural patterns on buildings, or the beauty of nature within the city, there are endless opportunities to find and photograph interesting patterns. So grab your camera, get out there, and start exploring!

For Further Training:

If you are looking for more help with your landscape photography, you may want to check out this in-depth guide while it is currently 58% off. It contains 237 pages jam-packed with training, illustrations, and assignments for photographers seeking to take better landscapes.

landscape photography guide

New: The Complete Landscape Photography Guide

It covers everything you need to know to take consistently great landscape shots – lens and gear help, developing your own style, post-processing guides, composition tips, how to get unique images, and much more.

Deal ending soon: The Complete Landscape Photo Guide at 58% Off

- - - - - - - - - - - - - - - - - - - - - - - - - - - - - - - - - - - - - - - - - - - - - - - - - - - - - - - - - - - - - - - - - - - - - - - - - -

This post Photographing Patterns in Cityscape Compositions appeared on PictureCorrect.


from PictureCorrect https://ift.tt/RwDN8zY
via IFTTT

sunnuntai 25. helmikuuta 2024

PictureCorrect.com: 5 Tips to Add Flavor to Landscape Photography

Landscapes can have a magical impact on people. Depending on the location, a landscape may instill a feeling of serenity or natural turmoil; it might imply lush development or continuous erosion; green with life or dim, gray, and lifeless. A talented photographer can leverage these features to create pictures that are simultaneously captivating, poignant, and beautiful.

landscape flavor

Photo captured by Gianluca Bei

However, this seldom occurs by chance.

In this post, we’ll provide five tips that can bring essence to your landscape photography. Several of the following suggestions may appear instinctive while some might be unexpected. In the long run, you’ll have the ability to utilize these tips to create landscape pictures that seize the curiosity of your audience.

1. Use A Tripod to Eliminate Camera Tremble

In order to catch a broad, deep portion of the landscape, you’ll want to employ a smaller aperture to improve your depth of field. A smaller aperture generally requires a longer shutter speed to make up for a reduction in light. But a lengthier shutter speed can make camera shake more probable, which leads to blurring. Use a tripod to eliminate the issue.

2. Use the Foreground as an Intro to the Photo

Suppose your shot comprises of a field of gaily-hued blossoms in the front with snow-capped hills etched into the backdrop. One approach to bring your audience into your photo is to use the foreground as an intro.

For example, place your camera lower so the flowers are shot up close at eye level. The field will stretch into the distance toward the mountains in the background to generate a graphic experience that makes it simpler for your audience to work with your scenery.

3. Use Depth of Field

If you’re an experienced shooter, you might need to play with a much more shallow depth of field to generate unique effects. That said, amateur photographers should select as deep a depth of field as possible when shooting landscapes to permit objects at varying distances from your camera to enter into focus.

As pointed out previously, think about utilizing a tripod since a smaller aperture normally needs a lengthier shutter speed.

4. Show Action

Landscape photography is typically thought of as capturing stillness. However, you can bring a unique result to your pictures by capturing particular kinds of surroundings in a way that implies movement. For instance, water lapping a close-by shore, trees swaying in a soft wind, a group of gulls slicing lazily through the air. These components animate your pictures. They attract the individual seeing the picture to the scenery’s action.

action in landscape photography

photo by tommy@chau

5. Integrate the Sky, Clouds, and Sun

The atmosphere may make your pictures sparkle. In fact, if you allow additional components of your landscapes to command the top part of your photo, the end result may be less than fulfilling to your viewers. The key is to make sure there are contrasting features that draw the eye.

For instance, strips or teams of clouds may split an otherwise clear blue sky. The clouds add flavor.

If you’re photographing near dusk, a setting sun can splash colored light. Splotches of red and yellow thrown through a light cloud cover can generate startlingly beautiful photos.

foggy sunset photography

photo by Paolo Terraneo

Photographing landscapes is an opportunity to present the environment in a manner that draws your audience into your arrangement. Many photographers—both beginners and pros—squander the occasion.

Employ the tips above to introduce elements into your photos that show nature at its most exciting and stunning.

About the Author
PosterBrain’s only passion is printing posters (and, for some reason, hair). They have searched the world for the finest paper, printers, and inks to give you an incredible artwork experience.

For Further Training:

If you are looking for more help with your landscape photography, you may want to check out this in-depth guide while it is currently 58% off. It contains 237 pages jam-packed with training, illustrations, and assignments for photographers seeking to take better landscapes.

landscape photography guide

New: The Complete Landscape Photography Guide

It covers everything you need to know to take consistently great landscape shots – lens and gear help, developing your own style, post-processing guides, composition tips, how to get unique images, and much more.

Deal ending soon: The Complete Landscape Photo Guide at 58% Off

- - - - - - - - - - - - - - - - - - - - - - - - - - - - - - - - - - - - - - - - - - - - - - - - - - - - - - - - - - - - - - - - - - - - - - - - - -

This post 5 Tips to Add Flavor to Landscape Photography appeared on PictureCorrect.


from PictureCorrect https://ift.tt/spAFQ69
via IFTTT

lauantai 24. helmikuuta 2024

PictureCorrect.com: The Most Popular Focal Length for Landscape Photography

When it comes to landscape photography, choosing the right focal length is crucial for capturing breathtaking and expansive scenes. The most popular focal lengths for landscape photography typically fall within the wide-angle range, as they allow photographers to include as much of the scene as possible within the frame. Here’s a look at why certain focal lengths are favored and how they impact landscape photography.

The 24mm focal length has become the gold standard in landscape photography for several reasons, contributing to its popularity among enthusiasts and professionals alike. This preference stems from its ability to provide a wide field of view, capturing vast landscapes in a single frame without the extreme distortion often found with wider lenses. It offers a natural perspective that closely mirrors the human eye, making scenes appear expansive yet true to life.

Related reminder: only a little while left for the Complete Landscape Guide at 58% Off

24mm lens

Photo captured by Jakob Owens

Photographers favor 24mm because it excellently balances foreground interest with the depth of the background, creating dynamic and engaging compositions. Its versatility in various settings, from mountain ranges to urban landscapes, further cements its status as a preferred choice. The 24mm lens, by offering this unique blend of wide-angle perspective and minimal distortion, has become an indispensable tool for capturing the beauty and grandeur of the natural world, making it a clear favorite in the landscape photography community.

Wide-Angle Lenses (24mm to 35mm)

Within the wide-angle category, lenses ranging from 24mm to 35mm are particularly beloved for their versatility. These focal lengths capture a broad field of view, making them ideal for including sweeping vistas and dramatic skies in the composition. A 24mm lens is especially favored for its balance, as highlighted above, but even moving towards 35mm can offer a slightly tighter composition while still retaining a wide perspective.

Ultra-Wide Lenses (14mm to 24mm)

For photographers aiming to capture an even wider perspective, ultra-wide lenses ranging from 14mm to 24mm are the go-to choice. These lenses excel at emphasizing foreground elements and creating a profound sense of depth and scale. However, they may introduce noticeable distortion, which can either be used creatively or need to be corrected in post-processing.

Standard to Short Telephoto Lenses (50mm to 100mm)

Beyond the realm of wide and ultra-wide lenses, standard to short telephoto lenses (50mm to 100mm) offer a unique perspective in landscape photography. A 50mm lens provides a view close to that of the human eye, offering compositions with minimal distortion and a natural feel. Lenses in the 70mm to 100mm range are excellent for isolating subjects, compressing scenes, and highlighting specific features of the landscape, offering a different approach to capturing nature’s beauty.

Summary:

The choice of focal length for landscape photography depends greatly on the photographer’s vision, the landscape being captured, and the desired outcome. While wide and ultra-wide lenses are popular for their capacity to envelop expansive scenes, longer focal lengths provide unique perspectives and compositional opportunities. The 24mm lens, in particular, stands out for its unparalleled ability to balance the vastness of landscapes with realistic perspectives, making it a favorite among landscape photographers. Experimentation with different focal lengths can unlock new and exciting ways to depict the natural world, continually enriching the art form of landscape photography.

For Further Training:

If you are looking for more help with your landscape photography, you may want to check out this in-depth guide while it is currently 58% off. It contains 237 pages jam-packed with training, illustrations, and assignments for photographers seeking to take better landscapes.

landscape photography guide

New: The Complete Landscape Photography Guide

It covers everything you need to know to take consistently great landscape shots – lens and gear help, developing your own style, post-processing guides, composition tips, how to get unique images, and much more.

Deal ending soon: The Complete Landscape Photo Guide at 58% Off

- - - - - - - - - - - - - - - - - - - - - - - - - - - - - - - - - - - - - - - - - - - - - - - - - - - - - - - - - - - - - - - - - - - - - - - - - -

This post The Most Popular Focal Length for Landscape Photography appeared on PictureCorrect.


from PictureCorrect https://ift.tt/5JqtQe0
via IFTTT

perjantai 23. helmikuuta 2024

PictureCorrect.com: 7 Keys for Creating Stunning Urban Landscape Photography

When thinking of landscape photography, what often comes to mind are photographs of mountainsides or desolate beaches, but landscape photography is not limited to the wilderness. With a little preparation and forethought, great landscape photographs can also be taken in urban settings. Here’s a quick primer to get you on the right track.

"Bow Bridge at Dusk" captured by James Maher

“Bow Bridge at Dusk” captured by James Maher

1. Foreground, middleground, and background

Treat urban landscape photography just like you would traditional landscape photography. You need to think about how a viewer’s eyes will flow through a scene, and the eyes often flow best when there is a clear foreground, middleground, and background. A landscape photographer will find an incredible background and then survey the area for a complementary foreground. Do this same thing in the city and don’t focus solely on the incredible architecture in the background. In the photo above, notice how the eyes start on the flower urn, are brought into the scene by the middleground of Bow Bridge and then end up in the background of the trees and building.

"Fire Hydrant and Weeds, Brooklyn" captured by James Maher.

“Fire Hydrant and Weeds, Brooklyn” captured by James Maher

 2. Make everyday objects beautiful

In traditional landscape photography maybe it’s a flower, a river, a tree, or a mountain that gives a photograph its primary interest. In urban landscape photography, it’s not only about buildings. Figure out ways to make advertisements, textures, graffiti, soda cans, shop windows, cars, and umbrellas beautiful. There are an incredible amount of objects that can be captured in this way, and if you think of them in the same way that you might think about capturing streams or flowers, then you open yourself up to a whole new world of beautiful content to photograph.

 3. Color!

When many people think of urban photography they think of classic black and white, or sepia toned photographs of buildings and street corners from the past. I do too. But ditch that! The world was colorful back then and if photographers had access to color film many would have used it. You can still create black and white photos, but don’t ignore the beautiful colors all around the city.

"Fire Escapes, Chinatown" captured by James Maher.

“Fire Escapes, Chinatown” captured by James Maher

 4. Light is key (and always pay attention to the location of the sun)

When you’re walking around a city, the quality of light changes constantly depending on where you are. One second you could be in the bright sun while the next second you could be in the shadows with a small stream of light peeking through. Even reflective buildings and signs can completely change the quality of light surrounding you. It is important to pay attention to where the sun is in the sky and how it is reacting in the environment.

Don’t only notice what’s in the scene, notice the quality of light on it as well.

"Grand Central Station and Chrysler Building" captured by James Maher.

“Grand Central Station and Chrysler Building” captured by James Maher

 5. Photograph at night

The quickest and easiest way to improve your urban photography is to go out at night. Don’t just take advantage of the golden hours; continue on into the night as the artificial lights take over. The city takes on a completely new atmosphere, with romantic, classic, or ominous moods. Bring a tripod of course and watch buildings that were boring by day take on a completely new feel.

Also, not as many people photograph at night as during the day, so it is any easy way to make your images stand out.

"Old Door and Pizza Menu, Florence" captured by James Maher.

“Old Door and Pizza Menu, Florence” captured by James Maher

 6. Mix the old and the new

Above is a shot of an old door in Florence with a bright orange pizza delivery menu sticking out of it. If you are in a city with a lot of old architecture, don’t only try to capture photos that seem like they were taken hundreds of years ago. That’s been done already and the modern photos are what will be the most unique in the future. In addition to capturing the architecture in classic ways, try to figure out ways to capture the old architecture with a modern twist.

"Three Cooks, Doyer’s Street, Chinatown" captured by James Maher.

“Three Cooks, Doyer’s Street, Chinatown” captured by James Maher

 7. Create a relationship between people and the background

Often photographers shy away from including people in their landscapes. In many cases I can understand why, but often they are missing out. People add interest and help us connect with the scene. They add an element of life that would otherwise be lacking. Frame an interesting background and wait until the right people enter and complete the scene. Don’t just wait until anybody enters the scene; wait until the ideal person enters. Be picky. An incredible background will only be made worse with an uninteresting looking person added to the frame, there has to be a connection between the two.

About the Author:
James Maher is the author of Essentials of Street Photography, which covers everything about the genre even down to specific post processing techniques that can bring the best out of street scenes.

- - - - - - - - - - - - - - - - - - - - - - - - - - - - - - - - - - - - - - - - - - - - - - - - - - - - - - - - - - - - - - - - - - - - - - - - - -

This post 7 Keys for Creating Stunning Urban Landscape Photography appeared on PictureCorrect.


from PictureCorrect https://ift.tt/GfUljBD
via IFTTT

torstai 22. helmikuuta 2024

PictureCorrect.com: Milestone in Photo Editing: Luminar Neo 2 Year Anniversary

In the ever-evolving world of digital photography, Luminar Neo has marked its 2nd anniversary as a significant milestone. This period has seen Luminar Neo grow from a promising photo editing software to a mature platform that has significantly impacted the way photographers approach their craft.

luminar anniversary

Luminar Neo (see how it works)

Evolution Driven by Innovation and Feedback

Luminar Neo’s journey is a story of continuous improvement, fueled by a deep understanding of photographers’ needs and the latest technological advancements. The software has been refined through user feedback, leading to performance enhancements and a more intuitive user interface. This approach has not only made photo editing more accessible but has also earned Luminar Neo several prestigious awards, including the Red Dot Brands & Communication Design award and TIPA World Awards.

Key Features Introduced

Over the past two years, Luminar Neo has introduced a variety of features that have enriched the photo editing experience:

  • Onboarding and Information Button make it easier for beginners to start and for all users to access help and tutorials.
  • Presets and Preview on Hover offer more control and efficiency in editing.
  • Panorama Stitching allows for the creation of stunning panoramas, and Studio Light and Blur Tool provide advanced effects for professional-looking results.
  • Neon & Glow effects, along with Tilt Shift, open up new creative possibilities.
  • AI-driven features like GenErase, GenSwap, and GenExpand offer powerful tools for editing photos with precision and creativity.

These features are a testament to Luminar Neo’s commitment to making professional-grade editing tools accessible to a wide range of users, from novices to seasoned professionals.

The Impact of Luminar Neo

Luminar Neo’s development over the last two years reflects a broader trend in digital photography towards more intuitive, AI-enhanced photo editing tools. By focusing on ease of use without sacrificing depth and flexibility, Luminar Neo has positioned itself as a key player in the photographic community, offering solutions that cater to the evolving needs of photographers around the world.

Looking to the Future

As Luminar Neo celebrates its 2nd anniversary, the focus remains on innovation and meeting the changing needs of photographers. With a user-centric approach, the future of Luminar Neo looks promising, with plans to introduce even more advanced features and improvements.

Luminar Neo’s journey is a clear indicator of the dynamic nature of digital photography and the continuous need for tools that adapt and evolve. As we look forward to what the next year brings, Luminar Neo is poised to remain at the forefront of this evolution, shaping the future of photo editing.

Anniversary sale ending soon: Luminar Neo Photo Editor

- - - - - - - - - - - - - - - - - - - - - - - - - - - - - - - - - - - - - - - - - - - - - - - - - - - - - - - - - - - - - - - - - - - - - - - - - -

This post Milestone in Photo Editing: Luminar Neo 2 Year Anniversary appeared on PictureCorrect.


from PictureCorrect https://ift.tt/Ro0TVB7
via IFTTT

keskiviikko 21. helmikuuta 2024

PictureCorrect.com: Illuminated Peaks: How to Photograph Alpenglow

Alpenglow, the rosy light of the setting or rising sun seen on high mountains, is a dream spectacle for photographers. This magical moment, when the mountains seem to catch fire with hues of pink, orange, and purple, offers a fleeting opportunity to capture nature’s sublime beauty. Here’s how you can immortalize this enchanting phenomenon through your lens.

Relevant reminder: only a little while left for the Complete Landscape Guide at 58% Off

Understanding Alpenglow

Before setting out, it’s crucial to understand what alpenglow is and when it occurs. Unlike the direct light of golden hour, alpenglow is an indirect glow that lights up the mountain tops even before the sun crosses the horizon or after it has set. This phenomenon is most vivid when the sky is clear, and it typically lasts for just a few minutes during twilight.

alpenglow

Photo captured by Andrea Belussi

Planning Your Shoot

  1. Location Scouting: Research locations known for their alpenglow sightings. High vantage points that overlook mountain ranges facing east or west are ideal. Apps and websites that track sun position can help you plan the timing of your shoot.
  2. Timing is Everything: Since alpenglow is a transient phenomenon, knowing the sunrise or sunset times is vital. Arrive early to set up and be prepared to capture the fleeting moments of alpenglow.
  3. Weather Watch: Clear skies are crucial for alpenglow. Monitor the weather forecasts closely and be ready to seize the moment when conditions are right.

Gear and Settings

  • Camera: Any camera can capture alpenglow, but those with manual settings will give you more control over the outcome.
  • Lens: A wide-angle lens is ideal for capturing expansive landscapes, while a telephoto lens can help isolate distant peaks bathed in alpenglow.
  • Tripod: Use a tripod to stabilize your camera, especially in the low light conditions of twilight.
  • Settings: Start with a low ISO to reduce noise, a small aperture (around f/8 to f/16) for depth of field, and adjust the shutter speed accordingly. Bracketing exposures is a good strategy to ensure you capture the dynamic range of the scene.

Composition Tips

  • Foreground Interest: Include elements in the foreground to add depth and scale to your compositions.
  • Rule of Thirds: Position the mountains along the intersections of the grid to create a balanced composition.
  • Leading Lines: Use natural lines, such as rivers or paths, to guide the eye towards the glowing peaks.

Post-Processing

Subtlety is key when editing your alpenglow photos. Enhance the natural colors without oversaturating them, and adjust the shadows and highlights to reveal detail in both the dark and bright areas of the image.

Summary:

Photographing alpenglow is about capturing the fleeting moments of nature’s grandeur. With the right preparation, equipment, and technique, you can freeze this ethereal glow in time, creating images that resonate with the beauty of the natural world. Remember, the journey and experience of chasing alpenglow are as rewarding as the photographs you take.

For Further Training:

If you are looking for more help with your landscape photography, you may want to check out this in-depth guide while it is currently 58% off. It contains 237 pages jam-packed with training, illustrations, and assignments for photographers seeking to take better landscapes.

landscape photography guide

New: The Complete Landscape Photography Guide

It covers everything you need to know to take consistently great landscape shots – lens and gear help, developing your own style, post-processing guides, composition tips, how to get unique images, and much more.

Deal ending soon: The Complete Landscape Photo Guide at 58% Off

- - - - - - - - - - - - - - - - - - - - - - - - - - - - - - - - - - - - - - - - - - - - - - - - - - - - - - - - - - - - - - - - - - - - - - - - - -

This post Illuminated Peaks: How to Photograph Alpenglow appeared on PictureCorrect.


from PictureCorrect https://ift.tt/CTVtYE0
via IFTTT

tiistai 20. helmikuuta 2024

PictureCorrect.com: Avoiding Common Landscape Photography Mistakes

Landscape photography, with its promise to capture the grandeur and beauty of the natural world, is a path many photographers walk with enthusiasm and anticipation. However, this journey is often fraught with mistakes that can detract from the potential of your images. Recognizing and avoiding these pitfalls can significantly enhance the quality of your landscape photos. Here are some of the most common mistakes made by landscape photographers and practical tips on how to sidestep them.

Related reminder: only a little while left for the Complete Landscape Guide at 58% Off

landscape photo mistakes

Photo captured by Ryan Ancill

1. Not Planning Ahead

One of the gravest errors in landscape photography is failing to plan. The allure of spontaneity should not overshadow the importance of preparation. Researching your location, understanding the sun’s position during golden hours, and checking weather conditions can make or break your shoot.

Tip: Use apps and tools to track weather patterns and sun positions. Visit your location beforehand if possible, or study it through maps and photos online to plan your compositions.

2. Overlooking Composition

Many photographers get caught up in the beauty of a scene and neglect the rules of composition. Without thoughtful composition, even the most stunning landscapes can result in lackluster photographs.

Tip: Employ the rule of thirds, leading lines, and foreground interest to create depth and guide the viewer’s eye through the image. Take your time to find unique perspectives and compositions.

3. Ignoring the Light

Light is the soul of a photograph, especially in landscape photography. Shooting in harsh midday light often leads to flat images lacking dimension and drama.

Tip: Aim to shoot during golden hours—just after sunrise or before sunset—when the light is soft and warm. Also, consider overcast days for even, diffused lighting that can accentuate colors and reduce shadows.

4. Not Using a Tripod

A common oversight is not using a tripod. Handheld shots can result in unnecessary blur, especially in low light conditions or when aiming for long exposures to capture motion in water or clouds.

Tip: Invest in a sturdy tripod to enhance sharpness and detail in your images. It also allows for more intentional framing and composition.

5. Forgetting to Focus on Details

While wide, sweeping landscapes are breathtaking, neglecting the smaller details can mean missing out on unique and compelling images.

Tip: Dedicate time to explore and photograph details like textures, patterns, and elements of nature. These shots can add variety to your portfolio and tell a more comprehensive story of the landscape.

6. Misjudging the Horizon

An uneven horizon is a distracting and amateurish mistake that can easily be avoided. It can make your image feel unbalanced and disorienting.

Tip: Always ensure your horizon is straight in-camera to avoid unnecessary cropping during post-processing. Use your camera’s built-in level or the grid feature to help align your shots.

7. Overprocessing Images

In the quest to make landscape photos pop, there’s a temptation to overdo it in post-processing. Oversaturation, excessive contrast, and overuse of HDR can make images appear unnatural and garish.

Tip: Practice restraint in editing. Aim for enhancements that bring out the natural beauty and realism of the scene. Remember, subtlety is key.

Landscape photography, rich with its challenges and rewards, is a continuous learning journey. By being mindful of these common mistakes and applying the tips to avoid them, you can improve your craft and capture the true essence of the landscapes before you. Remember, every mistake is an opportunity to learn and grow as a photographer. Keep shooting, keep learning, and let the beauty of the world inspire you.

For Further Training:

If you are looking for more help with your landscape photography, you may want to check out this in-depth guide while it is currently 58% off. It contains 237 pages jam-packed with training, illustrations, and assignments for photographers seeking to take better landscapes.

landscape photography guide

New: The Complete Landscape Photography Guide

It covers everything you need to know to take consistently great landscape shots – lens and gear help, developing your own style, post-processing guides, composition tips, how to get unique images, and much more. P.S. also try the coupon code picturecorrect at checkout.

Deal ending soon: The Complete Landscape Photo Guide at 58% Off

- - - - - - - - - - - - - - - - - - - - - - - - - - - - - - - - - - - - - - - - - - - - - - - - - - - - - - - - - - - - - - - - - - - - - - - - - -

This post Avoiding Common Landscape Photography Mistakes appeared on PictureCorrect.


from PictureCorrect https://ift.tt/KXgH6ot
via IFTTT

maanantai 19. helmikuuta 2024

PictureCorrect.com: The Complete Landscape Photography Guide at 58% Off

For those of you working on landscape photography, you may want to take a look at this in-depth guide while it is on sale today. It contains 237 pages jam-packed with training, illustrations, and assignments for photographers looking to take better landscapes. Landscape photography is indeed challenging. It takes certain steps to create compelling, eye-catching photographs. Learn more: The Complete Landscape Guide at 58% Off

landscape photography guide

New: The Complete Landscape Photography Guide

Have you ever wondered why a scene, that looked SO gorgeous in person, now looks flat and uninteresting in your photograph?

Have you returned from vacation feeling dissatisfied because your images did not capture the natural beauty that you witnessed with your own eyes?

If you answered, “Yes”, to either of those question… then you may want to take a look at this guide.

Some of the Many Topics Covered:

  • How to choose the right camera and lenses for Landscape Photography… (This is EXTREMELY important)
  • How to Find (and capture) the unique images that nobody else gets…
  • How to choose a STYLE for your landscape photography. (Developing a unique style is one of the most important things for your artistic journey)
  • How YOUR chosen POV, can make, or break, your image
  • How a pro shoots AND post-processes their images for art gallery quality!
  • How your color balance setting can completely alter the mood of an image.
  • Specialized gear that can make your landscape photography easier- and the results more effective…
  • Equipment considerations SPECIFIC to landscape photography! These are very important.
  • How to properly use that equipment. (There is a right way and a wrong way.) HINT – Most photographers are using their equipment the wrong way…
  • Composition tips, SPECIFIC to landscape work…
  • An in-depth presentation on the art of depth-of-field. So you can use this skill to really make your landscapes ‘POP’!
  • How to shoot landscape photography at night! Including how to capture beautiful star trails
landscape guide pages

Take a Peek Inside

  • How to Read the Light, and How to Choose the Best Metering Method for a SUPERB Original File
  • Safety Concerns You May Not Even Have Thought of! And why they are so important if you take your landscape photography seriously
  • Tools that can help you determine the position of the sun BEFORE it gets there!
  • How to PROPERLY use graduated filters…for spectacular results
  • We’ve even included the often-forgotten little things, like Gearing up for Bad Weather…
  • And so, SO much more…

How to Get it for a Discount Today:

It is currently 58% off which ends soon (normally $70, currently just $29). It also comes with a generous 365-day, happiness guarantee so there’s no risk in trying it.

Deal ending soon: The Complete Landscape Photo Guide at 58% Off

- - - - - - - - - - - - - - - - - - - - - - - - - - - - - - - - - - - - - - - - - - - - - - - - - - - - - - - - - - - - - - - - - - - - - - - - - -

This post The Complete Landscape Photography Guide at 58% Off appeared on PictureCorrect.


from PictureCorrect https://ift.tt/G9VNm7x
via IFTTT

sunnuntai 18. helmikuuta 2024

PictureCorrect.com: Understanding Profiles vs. Presets in Lightroom

In the world of photography, the magic often happens in the editing room. Adobe Lightroom, a staple in the photographer’s toolkit, offers a myriad of features to enhance and transform your images. Among these features, Profiles and Presets stand out as fundamental tools for photographers looking to streamline their editing process and achieve consistent results. But what sets them apart, and how can you use them to their fullest potential? This post dives deep into the world of Profiles and Presets, helping you to understand their differences and how to leverage them in your workflow.

Also keep in mind that the sale on Lightroom Editing Mastery is ending soon.

profiles vs presets

Understanding Profiles:

Profiles in Adobe Lightroom serve as a starting point for your editing journey. They apply a foundational adjustment to your image without affecting the basic editing sliders. Think of Profiles as the underlying character of your photo, setting the tone and atmosphere before you dive into more detailed adjustments. Adobe Lightroom offers a variety of built-in Profiles, ranging from Camera Matching Profiles, which aim to mimic the color science of your camera, to Creative Profiles, designed to add a unique stylistic touch to your images.

Key Features of Profiles:

  • Non-destructive adjustment layer
  • Affects the image globally without altering slider values
  • Provides a base look upon which further edits can be made
  • Includes both technical adjustments (Camera Matching) and creative enhancements (Artistic, B&W)

Exploring Presets:

Presets, on the other hand, are predefined adjustments that affect various editing sliders in Lightroom. With a single click, you can apply a complex edit to your image, adjusting everything from exposure and contrast to color grading and sharpening. Presets are incredibly versatile, allowing you to either apply comprehensive edits or target specific aspects of your image. They are perfect for achieving consistency across a series of photos or for quickly applying your signature style.

Key Features of Presets:

  • Apply a set of adjustments to the editing sliders
  • Can target specific adjustments (e.g., color grading, exposure corrections) or provide comprehensive edits
  • Save time by applying complex edits with a single click
  • Enable consistent style across multiple images

Profiles vs. Presets: Knowing When to Use Each:

The choice between using a Profile or a Preset depends on your editing goals. Profiles are best used at the beginning of your editing process, setting the overall mood of your image. They’re particularly useful for ensuring consistency in color rendering across different camera models. Presets come into play once you’ve established your image’s foundational look with a Profile. They allow you to fine-tune your edits or apply a signature style across multiple photos efficiently.

Practical Tips for Using Profiles and Presets:

  1. Start with a Profile: Begin your editing process by selecting a Profile that matches your vision for the final image.
  2. Customize with Presets: Once your Profile is applied, use Presets to adjust the finer details and apply your personal touch.
  3. Create Your Own: Both Profiles and Presets can be customized and saved, allowing you to build a library of your favorite looks.
  4. Organize and Manage: Keep your Presets and Profiles organized by categorizing them according to their use case or style.

Summary:

Profiles and Presets in Adobe Lightroom are powerful tools that, when used effectively, can significantly enhance your photo editing workflow. By understanding the unique roles they play, you can make informed decisions about how to apply them to your images. Remember, the best approach is one that complements your creative vision and workflow. Experiment with both Profiles and Presets to discover the endless possibilities they offer in transforming your photographs.

For Further Training:

In the digital age, capturing a photo is only half the battle; the true magic happens in post-processing. This is where Lightroom Editing Mastery, an online course meticulously designed for both budding and seasoned photographers, steps in to transform the way we enhance our photographs.

lightroom mastery

Lightroom Editing Mastery (see what’s included)

For a limited time, “Lightroom Editing Mastery” is available at a significantly discounted rate, making professional-grade photo editing skills more accessible than ever.

Offer ending soon: Lightroom Editing Mastery at 80% Off

- - - - - - - - - - - - - - - - - - - - - - - - - - - - - - - - - - - - - - - - - - - - - - - - - - - - - - - - - - - - - - - - - - - - - - - - - -

This post Understanding Profiles vs. Presets in Lightroom appeared on PictureCorrect.


from PictureCorrect https://ift.tt/R8NYkaJ
via IFTTT

lauantai 17. helmikuuta 2024

PictureCorrect.com: Are You Making These 10 Common Street Photography Mistakes?

When looking at the work of street photographers, it’s often a common thought that, “I could do that if only I were there.” However, when you finally go out into the world with your camera it can be shocking to find that it’s not quite that easy. There’s a reason that the best street photographers are so dedicated: it’s necessary.

mistakes in street photography

Smiley Face, SoHo, NYC

When you first start out, it’s so easy to make technical mistakes and it’s surprisingly difficult to figure out what makes for an interesting photo. These are things that are developed through time and experience, but to help you along, here is a list of the ten most common mistakes that beginning street photographers make.

1. Using a slow shutter speed and shallow depth of field

Whenever I teach, about eight or nine out of ten photographers come to me shooting in Aperture Priority mode. This can be great to do, however, if you are not experienced enough technically, it can also cause you a huge problem.

black and white cell phone street photo

Cellphones, NYC

For street photography, a fast shutter speed is necessary to freeze the motion in people. I primarily use 1/250 of a second. If it’s sunny out, then I will shoot a little faster and if it is darker, I will go to 1/160 or even 1/125 of a second. This big problem when you shoot on Aperture Priority mode is that it’s easy to forget to pay attention to the shutter speed the camera is choosing for you. If you set your camera to f/8 in then sun and then suddenly go into a darker area, you could all of a sudden be shooting at 1/20 or 1/10 of a second without noticing. The image may still look sharp on the back screen of the camera, but then when you bring it into your computer suddenly all your images will be a little blurry.

In addition, while it’s often necessary to shoot with a wide-open aperture because of the light, shooting with a smaller aperture (f/8 or above) can be very beneficial. Context and background is key in a lot of street images and having a larger depth of field can help everything stay in decent focus. If multiple subjects pop up at different depths, then it will be easier to keep them both in focus as well. Finally, if you happen to miss the focus on the subject slightly, which is very easy to do in the fast moving world of street photography, then there will still be a good chance that you will get them in focus.

To achieve all of this, you will have to raise your ISO. I rarely shoot lower than ISO 400 in sunlight and am usually between ISO 800 and 3200. At night, I usually use ISO 6400. Test out your camera, but don’t be afraid to take some grainy images.

2. Walking too fast

When you go out shooting, it is common to think that you have an endpoint that you need to get to. You don’t. Every step of the way you are somewhere. Even when the images are not obvious, they are there.

street photography black and white

SoHo, NYC

It’s a common mistake to walk very quickly. It almost seems like some people think that the faster they go, the more interesting moments they will come across. But this is not the case. The same number of moments will occur whether or not you are standing and waiting for them or walking fast to find them. The problem is that by walking fast it becomes much easier to miss the moments. The slower you go, the easier it is to look around and to be ready to capture the moment when it happens.

When you go for a walk, find interesting locations to linger and wait for the right moment to happen in front of you, ready with your camera.

3. Only photographing the flashiest people

Flashy people can be wonderful to photograph. Interesting hats, hair, clothing, tattoos, and jewelry can make for one heck of a beautiful photograph. However, these people only make up a small part of the population.

common errors in street photography

Businessman, NYC

The people that aren’t as flashy are not any less interesting. They show the same emotions and can make for even more interesting images than the flashy people. Most other people are out there searching only for the flashy. Try to photograph all different types of people when you are out.

4. Not shooting enough, not looking, and being impatient

The world isn’t just going to hand you moments. It is all too common for me to go out with someone and for him or her to look around frustrated like nothing is happening. They expect it to be easier. You have to work to find the best moment and you need to figure out what makes an interesting image.

street photo construction workers

Construction Workers, NYC

An elephant isn’t just going to fall from the sky every five minutes. You have to put in the time and effort for those moments to occur. In addition to that, sometimes you have to find and create those ‘elephants.’ Sometimes the most interesting moments are the subtle ones that fly right beneath your nose. Looking and noticing the potential for good photographs is a skill that is developed over time.

The common theme that exists between all great street photographers is that they spent the time out in the world with a camera to catch those moments. They didn’t just go out on Sundays for an hour. They photographed and photographed and kept a camera with them constantly. Try to shoot on a more frequent basis. Instead of being a weekend warrior, try to find 15 minutes on a more frequent basis, wherever you are. If you don’t want to bring your camera with you, consider getting a smaller camera to take around the rest of the time, or use a phone camera. Fifteen minutes every day will make a gigantic difference and it will give you a good excuse to take a fun break and go for a walk.

5. Being too sneaky

I can be pretty sneaky with a camera when I need to be. I can look like a tourist excited by the city or someone trying to figure out how to use their camera. I can pretend to photograph a building behind a subject like the best of them. I will shoot without looking through the viewfinder sometimes. However, if I can look through the viewfinder and take a proper shot without getting punched, that’s what I’m going to do.

black and white street photo crowd nyc

SoHo, NYC

Sometimes you have to just look through the viewfinder and take the damn image. Shooting haphazardly without looking through the viewfinder can work, but it can also become a crutch. Force yourself to look through that viewfinder and take a steady, composed shot of a good moment. Then if you missed it you at least gave your best effort. There’s always next time.

Also, there is usually no reason to take twenty photos of the same person. If a situation develops, then hang around and wait for the moment to develop. But it is one thing to take a photo of someone and then wait for the situation to develop and it is another to point your camera at them for a minute straight while shooting constantly and waiting for something else to happen. That just makes things uncomfortable for everyone involved.

6. Only shooting outdoors and in busy places

Busy places are my favorite areas for photography. I love to be surrounded by all different types of people and if you have a limit amount of time, more moments will happen in a shorter time period in a busier area.

But the rest of the world is just as interesting to photograph. Go to quiet areas without as many people. Take photos with less going on. Find ways to make the quieter areas look unique and interesting. Take images without people in them. If you stick to only shooting in the busiest areas then you’re cutting out a majority of the world. Street photography does not just mean shooting on a busy street corner.

7. Not shooting close to home

On a similar note, try to take some images close to home and even in your home. The most interesting candid images can be the most personal. In addition, you will know the area better. If your neighborhood is quiet, then take quiet images that show it. Try not to take your neighborhood for granted. If you took someone from a different part of the world or even a different time period and parked them where you live, they would probably find so many weird and interesting aspects of the surroundings and would capture a lot of scenes that you might take for granted and overlook. What is something that might look normal to you but is actually pretty special?

8. Trying to photograph classic images

Street photographs are like wine; they get more interesting with age. However, it’s hard to figure out the aspects of them that will become the most interesting. Everyone gets frustrated that you cannot take a photograph these days without people staring at their phones, but that’s probably the most interesting sudden change that has happened, and who knows how long that will last for?

do you make these photography mistakes

iMac, Yosemite, NYC

The images you take now that look like they are classic or old end up usually just being images that copy the look of previous photographers, back when those moments were modern. The more modern the photo you take, the more classic it will feel to someone in the future.

9. Not spending the time to organize your archive

One of the most vital and most overlooked aspects of being a good street photographer is how you edit. You need a good system for organizing your images. If you are like any good street photographer, you will shoot frequently and your archive will grow quickly. After 10 years of shooting, what do you think will happen?

rose behind a fence

Red Rose, NYC

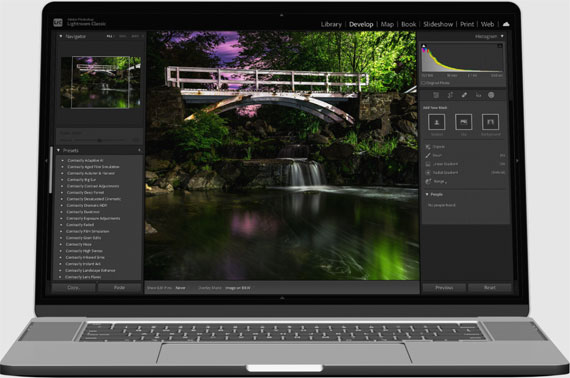
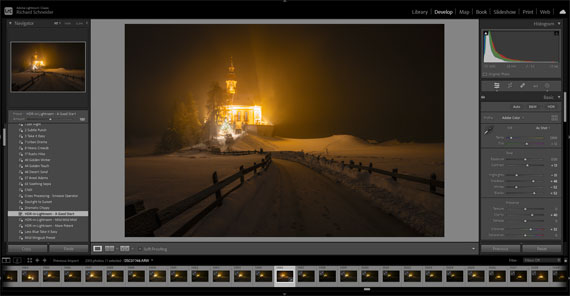
I highly suggest using Lightroom, because one of its most important features is its incredible organizational system. After a session, import your photos into your archive through Lightroom immediately and do a very quick edit. You can and should come back to them another time after the hype from the day has subsided, but you also need to create a system where you don’t get overwhelmed by a messy archive of thousands of photos.

I will immediately go through a day’s shoot after I import the images and star every decent image as three stars and every image that I love as five stars. Once a year, I will do a spring cleaning of my archive and get rid of the terrible images, but I will also make sure to go back through all of the three stars images to see if there are any gems that I missed or to lower the five star images that I no longer love. By doing this after each time you shoot, you will easily be able to go through a months of your images, click to only show the five or three star images, and will have a much more manageable group of images to evaluate.

In addition, use Lightroom’s Collections to your advantage. Collections allow you to group your photos together without having to move their physical locations on the computer. Think about the different ways that you might want to show your images together. As you grow these collections, they will start to help you think more about you are photographing and will help you find more content when you are out shooting.

10. Not printing your work

This goes for all types of photography, but in my experience particularly street photography. Street photography images are not usually classic images that people think about putting on their walls, but that does not mean that you should not print them (or put them on your walls).

tips for street photographers

A large photography cork board from the Container Store

Street photographs can work well alone but often they work great in groups. Create a group of your street images that work together and put them next to each other on a wall. Another fun idea is to purchase a cork board and fill it up with your street images. You should also consider printing out a lot of 5×7 images, sequencing them, and storing them in a nice box or place for your friends and family to see. Or use Blurb to create a book of your images to display. These images deserve to be shown in places other than a website or blog. They deserve to be printed just as much as a beautiful landscape.

About the Author:
James Maher is the author of Essentials of Street Photography, which covers everything about the genre even down to specific post processing techniques that can bring the best out of street scenes.

- - - - - - - - - - - - - - - - - - - - - - - - - - - - - - - - - - - - - - - - - - - - - - - - - - - - - - - - - - - - - - - - - - - - - - - - - -

This post Are You Making These 10 Common Street Photography Mistakes? appeared on PictureCorrect.


from PictureCorrect https://ift.tt/CVPNyZF
via IFTTT

perjantai 16. helmikuuta 2024

PictureCorrect.com: Pro Tips for Accelerating Lightroom Performance

Creating an efficient workflow in Adobe Lightroom can significantly enhance a photographer’s productivity and creative output. Here are several tips aimed at helping photographers speed up their Adobe Lightroom performance on their computers:

lightroom performance

1. Optimize Catalog Settings

  • Create Smaller Catalogs: Working with smaller catalogs can boost Lightroom’s performance. Consider archiving older projects and only keeping active ones in your current catalog.
  • Optimize Catalog Regularly: Use the “Optimize Catalog” feature under the File menu periodically to improve efficiency, especially after large editing sessions or before starting a new project.

2. Leverage Smart Previews

  • Use Smart Previews: Smart Previews allow you to edit images without accessing the original files, which can be particularly useful for editing large RAW files. You can build Smart Previews upon import or later, and choose to edit from these previews to speed up the process.

3. Adjust Preferences and Performance Settings

  • Increase Camera Raw Cache: In the Performance tab of Lightroom’s Preferences, increase the Camera Raw cache to at least 20 GB if your hard drive allows. This stores recently accessed images for quicker loading.
  • Use GPU Acceleration: Ensure that Lightroom is set to use your computer’s GPU (Graphics Processing Unit) for image processing and display. This can be adjusted in the Performance tab.

4. Manage Your Storage Wisely

  • Store Catalogs on an SSD: Solid State Drives (SSDs) have faster read/write speeds than traditional hard drives. Keeping your Lightroom catalog and previews on an SSD can significantly improve performance.
  • Archive Images on External Drives: Keep your working drive clear by archiving older projects to external or network-attached storage. Just make sure Smart Previews are available for any files you might need to access.

5. Simplify Your Workflow

  • Cull Before Import: Review and cull your images using a faster, lightweight tool before importing everything into Lightroom. This reduces the catalog size and the amount of data Lightroom needs to manage.
  • Use Presets and Templates: Develop presets for repetitive tasks and adjustments. This not only speeds up the editing process but also ensures consistency across your work.

6. Keep Lightroom Up to Date

  • Regular Updates: Adobe frequently releases updates for Lightroom that can include performance improvements, bug fixes, and new features. Keeping your software up to date can ensure you’re getting the best performance possible.

7. Optimize Hardware Configuration

  • Expand RAM: Lightroom is memory-intensive. Having 16GB of RAM or more can significantly improve performance, especially with large catalogs or high-resolution images.
  • Consider a Dedicated Graphics Card: For desktop users, investing in a dedicated graphics card can enhance Lightroom’s performance, particularly for tasks like rendering previews and applying complex adjustments.

Summary:

Improving Adobe Lightroom’s performance on your computer involves a combination of optimizing software settings, managing files and catalogs efficiently, and ensuring your hardware is up to the task. By implementing these tips, photographers can enjoy a smoother, faster workflow that lets them focus more on the creative aspects of their work rather than waiting on their software to catch up.

For Further Training:

In the digital age, capturing a photo is only half the battle; the true magic happens in post-processing. This is where Lightroom Editing Mastery, an online course meticulously designed for both budding and seasoned photographers, steps in to transform the way we enhance our photographs.

lightroom mastery

Lightroom Editing Mastery (see what’s included)

For a limited time, “Lightroom Editing Mastery” is available at a significantly discounted rate, making professional-grade photo editing skills more accessible than ever.

Deal ending soon: Lightroom Editing Mastery at 80% Off

- - - - - - - - - - - - - - - - - - - - - - - - - - - - - - - - - - - - - - - - - - - - - - - - - - - - - - - - - - - - - - - - - - - - - - - - - -

This post Pro Tips for Accelerating Lightroom Performance appeared on PictureCorrect.


from PictureCorrect https://ift.tt/lwQW7c1
via IFTTT

torstai 15. helmikuuta 2024

PictureCorrect.com: Why Black & White is a Good Place to Start in Photography

Black-and-white photography is the place to start if you’re serious about becoming a better photographer.

Go back to the dark ages before digital. Dinosaurs ruled the Earth, and the equivalent of Adobe Lightroom was a small piece of card on the end of a wire.

The first thing beginner photographers would learn is to shoot, develop, and print a roll of black-and-white film. We can go back to those roots today to solidify our skills.

These are the benefits to learning to shoot without color with your digital camera.

Start Simple

If you wanted to learn music as a child, you probably started with a recorder. You didn’t get handed a double-headed guitar and a book of Zeppelin riffs. Learning photography is very similar. Start with the simplest form of the medium, and as you master those elements, add things. A standard lens and black-and-white images are as simple as it gets.

black and white photography 101

Photo by B .Y; ISO 200, f/3.2, 1/100-second exposure.

You Learn to Pre-Visualize

By disregarding color, you have to work a lot harder to create great pictures. A beautiful, sandy beach in tropical sunshine? An easy shot in color becomes just expanses of grey. In monochrome, you have to find subjects that fit the medium and think about what you shoot before you click the shutter. This pre-visualization is perhaps the most valuable skill a photographer can develop.

black and white photography techniques

Photo by Natesh Ramasamy; ISO 100, f/5.6, 1/2500-second exposure.

Composition and Form Become Much More Important

Without color, composition and form are your essential tools for making a good photo. Learning to see shapes and form in abstract helps you compose better pictures later on. Learning is all about creating good habits, and black and white helps you do that. Photographers who started by shooting in this way tend to be very strong on composition, because that is your main tool for creating strong photos. You can’t use strong color to catch the eye.

photography in black and white

Photo by Michelle Robinson; ISO 32, f/2.2, 1/2026-second exposure.

Evaluating Exposure Is Much Easier

Blank shadows or blown-out highlights are much easier to spot in grey scale. In color, sometimes it’s hard to tell the difference between a color cast and bad exposure, and you can tie yourself in knots trying to work out what to correct and in what proportion. Making mono images with detail from the highlights to the shadows is a good way to sharpen your exposure skills, and that makes it easier to deal with color later on.

basics of black and white pictures

Photo by Giuseppe Milo; ISO 800, f/4.0, 1/320-second exposure.

Conclusion: Adding Skills to a Solid Base Is the Best Way to Make Steady Progress

Once you have started to master the simple things, you then have a solid base to build on. You can try to master different lenses, add color, or start using flash knowing that you have learned the basics.

Studying anything is like building a house. You have to start with solid foundations, and making great black-and-white images is the best foundation any photographer can have.

About the Author:
Tobias Key is a professional photographer from Chichester, West Sussex UK.

- - - - - - - - - - - - - - - - - - - - - - - - - - - - - - - - - - - - - - - - - - - - - - - - - - - - - - - - - - - - - - - - - - - - - - - - - -

This post Why Black & White is a Good Place to Start in Photography appeared on PictureCorrect.


from PictureCorrect https://ift.tt/9eRVTlW
via IFTTT