keskiviikko 31. tammikuuta 2018

PictureCorrect.com: The Creative Bonus of Digital Photography

Some years back I was on a road overlooking Carcassonne, that delightful French medieval city. It was sunset and I, with my new digital camera and tripod, was enjoying capturing images as the golden light gradually changed.

There was another photographer close by also with a digital camera and tripod. He waited and waited, then captured his single image, packed up, and departed. This was either wonderful self control or a wasted opportunity to capture the stunning images that then developed as the sunset took place.

carcassone sunset

In the days of film photography, his approach may have made sense if he was on a limited budget. Each image cost money which tended to make people a bit frugal. Also there was the factor that one didn’t know how the captured image had turned out immediately.

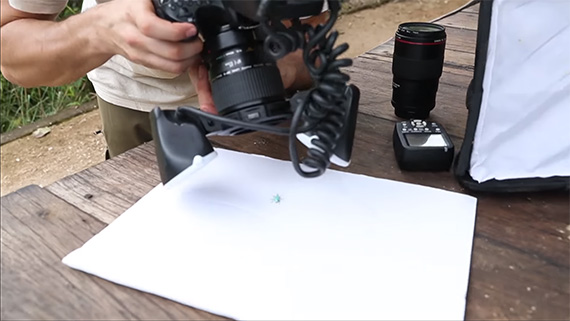
Today we are all well aware of the benefits of digital photography. See the captured image immediately and at no cost (ignoring the capital cost of equipment!) apart from the photographer’s time.

ferrari window reflection photo

The first creative bonus of digital is the obvious one: we can see the result immediately and, if necessary, amend the settings to improve it until we are happy.

cathedral interior

The more subtle second bonus, which many people ignore, is the removal of all constraints on creativity. See it, shoot it. Don’t like the result? Change your approach or delete it. Move on. Like the result? Bonus benefit if it’s an image that is so different to your normal take.

digital photography creativity

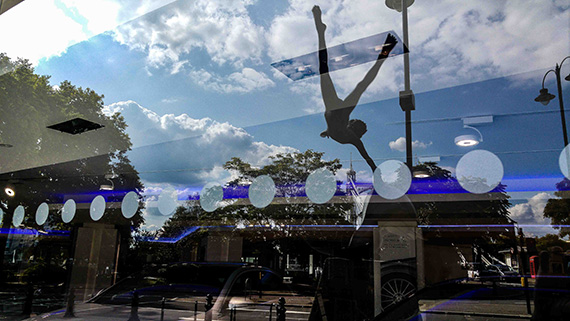
The freedom of digital allows us to capture images that can be just so different from our usual style, and I am not talking about just blowing off hundreds of images in the hope that there will be one or two gems amongst the chaff.

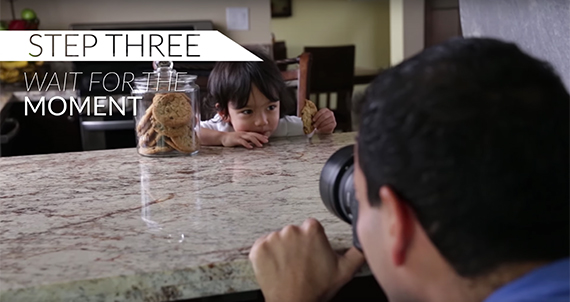
There are literally thousands (millions?) of mindless images taken and uploaded every day. As photographers, this is not what we would want to do. Before every image that we take, we should just ask ourselves: Why am I taking this? Not a big in-depth personal discussion but just a quick “think about” before pressing the shutter button.

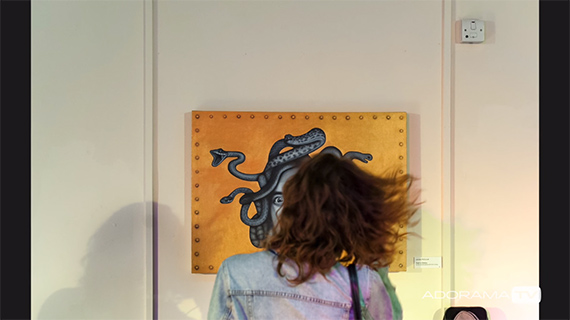
So, as we walk around with our cameras at the ready, we should have a completely open mind about subject matter. Anything that strikes us as being interesting, quirky, or just different is worth capturing for later review.

abstract creative photography

creative motion blur

Don’t let anything that you’ve read or been taught about composition act as a constraint. This is digital with total freedom to create (and delete!). It’s a licence to have total fun with your camera. These are not images for club competitions; these are images for you to enjoy and, hey, some of them might even be worth entering in a competition.

creative photography of everyday objects

photographer shadow selfie

Just take time to experiment with this approach. No rule of thirds, no straight horizons, etc. Just what you feel like taking for you. You may find that it brings a whole new breath of fresh air into your photography.

This is what I call the second digital bonus when you are actually capturing fascinating experimental images.

traffic blur

This article obviously ignores all the benefits of post processing which is a whole different subject.

statue reflection

However, unless you have actually captured some really fun images to start with you will have nothing to post process!

About the Author
Roger Lee is a Johannesburg based photographer who runs a popular one day course based on “we don’t want to drown in detail, we just want to know how to use our cameras and enjoy ourselves!” He also does an ebook version of his course.


Go to full article: The Creative Bonus of Digital Photography

What are your thoughts on this article? Join the discussion on Facebook

PictureCorrect subscribers can also learn more today with our #1 bestseller: The Photography Tutorial eBook

The post The Creative Bonus of Digital Photography appeared first on PictureCorrect.


from PictureCorrect http://ift.tt/2FzqOQG
via IFTTT

PictureCorrect.com: Interesting Photo of the Day: Frozen Lake Sunset

Time and time again, photographers prove that it’s worth it to go outside in wintry conditions. ClashIdeas recently shared another example: this sunset image of Abraham Lake in western Alberta, Canada. The bright orange and pink hues of sunset with the frozen sheets of ice on the surface make this an amazing photograph:

abraham lake in winter

Sunset on Abraham Lake (Via Reddit. Click image to see full size.)

Abraham Lake is a man-made lake that was formed when the Bighorn Dam was constructed. The lake demonstrates a peculiar phenomenon known as frozen bubbles. Methane gas released by the decomposing flora underneath the water rises up in the form of bubbles, which are visible under the frozen ice sheets. On top of that, its blue color makes Abraham Lake a photographer’s attraction.


Go to full article: Interesting Photo of the Day: Frozen Lake Sunset

What are your thoughts on this article? Join the discussion on Facebook

PictureCorrect subscribers can also learn more today with our #1 bestseller: The Photography Tutorial eBook

The post Interesting Photo of the Day: Frozen Lake Sunset appeared first on PictureCorrect.


from PictureCorrect http://ift.tt/2DRNZJN
via IFTTT

PictureCorrect.com: Tutorial: Insect Photography White Background in the Field

As a whole, humans are quick to write insects off as hideous, filthy creatures that serve little purpose beyond being a nuisance. However, one tropical entomologist is on a quest to slowly but surely change that notion. An old saying claims that beauty is in the eye of the beholder, and Phil Torres does everything in his power to prove just how beautiful a lowly bug can be. Torres explains to viewers just what goes into making a stunning insect macro in the field:

The first step? Finding the right subject. In this case, that happens to be Compsus Benoisti, a critter that looks more like a brooch than a living, breathing entity. Stored safe inside of a vial, the weevil can be left unattended for up to 24 hours without any risk of harm. Once the subject is found and secured, it’s back to the outdoor “base,” where Torres keeps his gear.

Torres switches between two lenses when photographing his specimen: a Canon 100mm f/2.8 macro and an MP-E 65mm macro. However, there’s gear to consider that goes beyond the camera. Having a diffused light source is equally important to the lenses and camera bodies at play, Torres explains.

He utilizes two options in this particular shoot. First, a simple speedlite equipped with a pop-up mini softbox is employed. Later on, he puts away the speedlite in favor of a Canon MT-24EX macro twin light, which attaches directly to the end of the lens.

macro lighting

For those just beginning to take on insect photography and work with new pieces of equipment, Torres stresses the importance of practicing with a slow or stationary object. That way, there won’t be much of a need for adjustments when working out in the field.

There’s one more important piece of equipment to consider: a backdrop surface. Above all, it’s important to find material that’s completely smooth—a piece of paper or foam generally won’t do. Because the macro lenses are so strong, any sort of patterns, scratches, or bumps on a backdrop will show up. Torres generally opts for 1/4″ opaque or glossy white acrylic, sized appropriately for travel.

Once the materials have been gathered, the main challenge is getting a subject to cooperate. Should you need to calm down your specimen, try storing it in a dark place prior to the shoot. If the insect is anxious to crawl away before you get your shot, simply flip it onto its back. As it struggles to get right-side-up, you’ll have a few seconds to really focus in and perfect a composition.

glitter weevil photography

exoskeleton details

At first, the key to success above all is patience. It takes time to develop and master an effective technique. With practice, a little bit of luck, and the implementation of Torres’ tips, you’ll be sure to grab a shot in time that totally alters the way you look at beetles, spiders, ants, and slugs of all shapes and sizes!

“When hiking in the rain forest of Ecuador, you see some incredible things, whether it be a giant leaf, a hummingbird, or an amazing view. But nothing prepared me for this little guy.”


Go to full article: Tutorial: Insect Photography White Background in the Field

What are your thoughts on this article? Join the discussion on Facebook

PictureCorrect subscribers can also learn more today with our #1 bestseller: The Photography Tutorial eBook

The post Tutorial: Insect Photography White Background in the Field appeared first on PictureCorrect.


from PictureCorrect http://ift.tt/2E3412B
via IFTTT

tiistai 30. tammikuuta 2018

PictureCorrect.com: Luminar 2018 Photo Editor January Update Released

Skylum just announced a new update to the Luminar 2018 photo editor! The 1.1.1 update includes numerous features enhancements and bug fixes for the Windows and Mac versions.

neptune luminar photo editor

Photo Editing in Luminar 2018

The update is completely free to all Luminar 2018 users, and here is the instruction how to get it:

On Mac: Please, launch Luminar 2018, on the Top Menu Bar choose Luminar 2018 > Check for updates.

On Windows: Please, launch Luminar 2018, on the Top Toolbar choose Help > Check for updates.

Below you can find the list of fixes and updates.

Luminar 2018 1.1.1 version for Windows:

  • Added support for the following languages:
  • English
  • German
  • Spanish
  • French
  • Portugal
  • Chinese
  • Korean
  • Russian
  • Japanese
  • Added shift + scroll hotkey for brush size adjustment
  • Curves filter improved
  • Merge layers feature released
  • Saving cropped image to document issue fixed
  • Fixed several issues with Adobe Photoshop, Lightroom plugins usage
  • Sidebar UX improvements

Luminar 2018 version 1.1.1 for MAC:

  • Fixed issues with Photos Extension
  • RAW Develop support improved, added Leica Monochrome .DNG , HEIC formats, fixed support for Hasselblad and several other cameras.
  • Fixed several issues with Adobe Photoshop, Lightroom plugins usage
  • Fixed issue with Dodge & Burn mask from documents created on windows

More about the Luminar Photo Editor:

The new Luminar 2018 photo editor delivers a breakthrough photo editing experience for photographers on Mac & Windows with new filters, tools, non-destructive editing, major speed boosts, and a digital asset management platform.

luminar editor

New: Luminar 2018 Photo Editor

Luminar 2018 has been updated to offer everything a modern photographer needs for photo editing, including new filters powered by artificial intelligence, major speed improvements, and a dedicated RAW develop module. And, importantly, Luminar now works on both Mac and Windows-based desktop computers.

Found here: Luminar 2018 Photo Editor


Go to full article: Luminar 2018 Photo Editor January Update Released

What are your thoughts on this article? Join the discussion on Facebook

PictureCorrect subscribers can also learn more today with our #1 bestseller: The Photography Tutorial eBook

The post Luminar 2018 Photo Editor January Update Released appeared first on PictureCorrect.


from PictureCorrect http://ift.tt/2DJgHs7
via IFTTT

PictureCorrect.com: 3 Simple Rules for Better Photographs

Life behind a camera lens is a constant journey toward improvement. Style, technique, and equipment are always in flux; photographers looking to excel in their craft must be adaptable, above all else. But, because there are so many moving parts, it’s easy to lose sight of what’s most important in the image making process. SLR Lounge offers three straightforward focal points that will always remain integral to creating a fantastic photograph:

1. Stick to a Singular Subject

Many photographs suffer from overload. When a picture has too much going on, it quickly becomes confusing for the human brain to process. Between all of the elements, audiences are left unsure of where to focus their attention. And often times, that leads to the photograph’s message being lost entirely. When you’re composing a shot, consider which elements you want to be front and center. Everything surrounding that focal point should be there to complement, not compete.

Singular subject

2. Seek Out a Unique Perspective

Once you’ve identified your subject matter, the next best step often involves putting the camera down for a minute. If you can afford it, take some time to explore your environment physically. More often than not, finding the best composition involves moving around, experimenting with angles, and adjusting your position in relation to the subject. Though it’s easy to rely on catch-all composition strategies, such as the rule of thirds, strong image makers step outside the box and actively challenge themselves.

Finding perspective

3. Wait for the Right Moment

No matter what situation you find yourself in, patience is key. A bad expression is a bad expression, no matter how great the light or composition paired with it happens to be. Don’t just snap wildly without any sort of direction. Watch your subject and surroundings closely, and you’ll eventually stumble into the perfect frame.

Waiting for the moment

To some, these tidbits may seem like simple applications of common sense. Many have likely had this advice hashed out to them by mentors past. But that doesn’t make each of these points any less important. Trends wear out their welcome in time, and even cutting edge gear eventually becomes obsolete. These three points, on the other hand, can aid photographers of all backgrounds for the entirety of their shutterbug careers.


Go to full article: 3 Simple Rules for Better Photographs

What are your thoughts on this article? Join the discussion on Facebook

PictureCorrect subscribers can also learn more today with our #1 bestseller: The Photography Tutorial eBook

The post 3 Simple Rules for Better Photographs appeared first on PictureCorrect.


from PictureCorrect http://ift.tt/2BEqLAI
via IFTTT

maanantai 29. tammikuuta 2018

PictureCorrect.com: Interesting Photo of the Day: Starlings Form Giant Bird

Starlings are famous for putting on a wonderful display—known as murmuration—when they flock together. They do this for a variety of reasons, including to confuse predators, create warmth at night, or exchange information. Photographer Daniel Biber sought out starlings in order to capture this amazing formation:

Photographer captures amazing bird formation created by murmuring starlings

A murmuration of starlings assumes the shape of a bird mid flight by Daniel Biber. (Via Reddit. Click image to see full size.)

A flock of starlings formed this beautiful figure of a flying bird while they were probably trying to evade a predator.

Biber captured the shot in Costa Brava in Spain after four days of scouting locations and observing thousands of birds. I’d say the image is well worth the time spent and pain undertaken. Wouldn’t you agree?


Go to full article: Interesting Photo of the Day: Starlings Form Giant Bird

What are your thoughts on this article? Join the discussion on Facebook

PictureCorrect subscribers can also learn more today with our #1 bestseller: The Photography Tutorial eBook

The post Interesting Photo of the Day: Starlings Form Giant Bird appeared first on PictureCorrect.


from PictureCorrect http://ift.tt/2rNVwnb
via IFTTT

PictureCorrect.com: Aspects of Composition When Framing a Photograph

Composition is the cement that binds a photo together. Without composition your images are nothing more than a bunch of elements scattered across the frame. Photographer Marcin Lewandowski touches on some important aspects of this most critical element of photography:

One of the things that you have to deal with in your photography on an everyday basis is how much space to leave at the top and bottom of the frame. This applies to most types of photography but is critically important when shooting landscapes. Most importantly, this is applicable when shooting breathtaking skies and interesting elements in the ground all in the same frame.

elements of photographic composition

Sometimes the best solution is the most obvious one. Divide the photograph in half down the horizon line (split the image equally between the sky and the ground). This works especially when the sky and the ground both have interesting elements that should have equal importance in the image.

composition tips

Sometimes, though, the sky (or the ground as the case may be) demands more attention. In those situations, keeping the horizon line closer to the bottom of the frame (or the top of the frame) makes more sense, because it allows you to capture more of the breathtaking beauty of the sky.

But how do you know when to use which? To some extent, you will need to use your gut feeling and look for visual clues. The rule of thirds is a good starting point. It helps to create a balance in the composition. But it doesn’t always work.

Framing with a Cross

photography composition rules

An interesting way of composing is to use a strategically placed cross—something which you can move around. This can be used for a wide variety of photographic scenarios.Find something in the frame that is vertically placed—a light pole, a human figure, anything—and then juxtapose that with anything that is horizontally placed. The result will be a cross.

Placing the Subject in the Middle of the Frame

While centering your subject goes against the concept of the rule of thirds, it’s frequently used by photographers when shooting portraits and headshots.

composing photos

For the best effect, use something in the background that is interesting but not taking the focus of attention away from the subject.

Building the Background

Building the background of your image is somewhat underrated. A good background adds to a photograph just as well as a good composition binds everything together. Lewandowski stresses two major ways of doing this: symmetry and building your photos from the outside in.

Using Symmetry

Our brains are hotwired to look for symmetry. But that doesn’t mean you always need to capture a mirror image. Even the semblance of symmetry will do.

how to compose a photo

Composing the Background from the Outside In

Choose the elements of the background carefully. Lewandowski proposes doing this from the outside in.

better composition

You need to know what to include just as well as you need to know what to exclude. This will allow you to not only to add aesthetics to a photograph but also create a strong context for the subject of the photograph.

Keeping these concepts in mind when you’re composing photos will help take your work to the next level.

For further training: The Advanced Composition Guide


Go to full article: Aspects of Composition When Framing a Photograph

What are your thoughts on this article? Join the discussion on Facebook

PictureCorrect subscribers can also learn more today with our #1 bestseller: The Photography Tutorial eBook

The post Aspects of Composition When Framing a Photograph appeared first on PictureCorrect.


from PictureCorrect http://ift.tt/2DKPa9Q
via IFTTT

sunnuntai 28. tammikuuta 2018

PictureCorrect.com: How to Capture Starbursts in Your Photos

Starbursts render a magical effect in landscape compositions, especially when the technique is done correctly. A lot of photographers capture starbursts accidentally, but if you know the exact process, you can recreate the magic at will. In this video, John Greengo describes the trick behind the effect and how to control and enhance it for stunning images:

What Causes the Starburst Effect?

A starburst is lens flare from the sun’s rays shaped into a starburst pattern. The best and easiest way to capture starbursts in your photos is to stop down to an aperture between f/11 and f/22. You can stop down even further—the more you stop down the easier it is to capture this effect—but keep an eye out for lens diffraction.

Tips for Perfecting the Starburst Effect

It helps if you can partially obscure the sun (or the light source) behind a solid object. For example, if you are shooting a sunset try to use a tree branch or a mountain or even a house to partially obscure the sun. The effect will be enhanced as a result.

starburst-lens-flare

The darker the surrounding area, the livelier the starburst effect, as can be seen in the image above.

Another tip that’s useful to know is that wide-angle lenses tend to be better in terms of composition compared to telephoto lenses.

aperture bladed affect starburst

The number of aperture blades affects the starburst’s shape.

One thing that you may notice when looking at different starburst images is the number of star points; they tend to be different in different images. This is relative to the lens that you are using. More specifically, it depends on the number aperture blades there are in the lens. If it has even number of blades it will produce the same number of star points as blades. If it has an odd number of blades, it will produce double the number of star points as blades.

starburst comparison

Comparison of the starburst effect captured with different lenses

Let’s say a lens has five aperture blades; it will produce 10 star points. If it has six, it will produce six star points, and if it has seven blades, it will produce 14 star points. However, the optical formula of the lens as well as how well it controls lens flares also contributes to the actual effect. Greengo prefers the Canon 16-35mm f/2.8L II lens for a beautiful, clean starburst.


Go to full article: How to Capture Starbursts in Your Photos

What are your thoughts on this article? Join the discussion on Facebook

PictureCorrect subscribers can also learn more today with our #1 bestseller: The Photography Tutorial eBook

The post How to Capture Starbursts in Your Photos appeared first on PictureCorrect.


from PictureCorrect http://ift.tt/2igAPvJ
via IFTTT