perjantai 30. syyskuuta 2022

PictureCorrect.com: Garden Bird Photography Tips

The great thing about photographing garden birds is that it’s much easier than going out to a reserve or park, and therefore much simpler for beginners. When starting out with bird photography, you want to minimize expensive equipment until you know that you enjoy it and are capable enough to pursue it.

Bird photography at home can be as simple as sitting in a lounge chair and firing away until you get your shot. But really, you will get as much out of your photography as you put into it. So careful planning is going to go a long way in getting those beautiful shots, even if it is in your own garden. Here are the basics of getting into garden bird photography.

garden bird photography basics

Photo by ☼☼ Jo Zimny Photos☼☼; ISO 3200, f/5.6, 1/400-second exposure.

1. Attract the Birds

If there is one task you need to perform successfully with this genre of photography, it’s attracting birds. If you have a garden that is bird-friendly, then you are ready to start. This is where good research begins. Either buy a local guide to garden photography, find someone else doing it from a local bird club, or use the Internet to locate some of the great websites dedicated to this genre. You need to understand what type of food the birds like and where they like to hang out together. This means going further than putting out their favorite food by planting the vegetation they like and even growing the food they seek out. Another tip here is to grow the vegetation near to where you will be shooting from. Create a dedicated area in your garden or outside a window.

2. Establish Your Location

This can be as simple as shooting from a window in your home, or it could mean building a hide somewhere in your garden near all the best perches and food. It’s up to you as to how much effort you put into it. I have found that for people starting out, a simple location is a bedroom or living room window looking onto a garden with plenty of foliage and vegetation. This is a place where there is good potential with great lighting and places to perch.

3. Create the Setting

This step is vital because you want the place where the birds will perch to be as close to the window or hide as possible. Ensure that there are places high enough for the bird perch and survey its surroundings for danger. Add an intermediate perch before the food source and have the food source at a reasonable height in order to shoot your images. Light is important. The better the lighting, the less artificial light you’ll need, and, of course, using a flash will disturb the birds. Be very aware of your backgrounds, as these will make or break your final image. Getting the setup right is a large part of the final image.

tips for photography garden birds

Photo by Dennis Church; ISO 3200, f/6.3, 1/640-second exposure.

4. Create the Hide

As I said, this is as simple as a bedroom or lounge or as complex as a purpose-built hide. To begin with, I suggest using a room in the house. The glass forms a natural barrier and allows you to shoot freely most times, as the reflection hides you from the birds. Just make sure that the glass has been cleaned on both sides so that you don’t have dirty or blurry images. Inside the hide, make sure that you have a comfy chair, because you will probably have to wait a while until you know what the feeding and perching patterns are. Whatever happens, you’ll need a fair amount of patience. Remember that when you move around inside to do so slowly; the birds might not see you clearly but will react to flashes of movement. Turn any lights off and close any other curtains to limit the light inside the room.

5. Set Up Your Equipment

Of course in this situation you aren’t really limited by your equipment because most cameras will shoot reasonable images when you are close to the birds. What I mean by this is that the lenses won’t necessarily need to have huge focal lengths. Even most bridge or prosumer cameras will have sufficient focal length. Compacts may be a little wanting in this situation. Whatever your equipment, a tripod is essential and, if possible, a cable release or your shutter set to timed release of two to ten seconds in order to minimize camera shake. Another vital action to ensure success is to pre-focus your camera, using the manual focus setting, on a well-used perch or branch, the bird feeder, or feeding platform you have set up. This increases the chance of getting your shot instead of focusing wherever a bird lands and hoping for the best. Again, planning is a big part of a successful bird images.

6. Keep Shooting

Don’t wait for the perfect shot. Just shoot as much as you can. The key at this stage is to get as many good shots as possible. You can always crop the image later, because you want good clear photos of the birds. If you focus on perfect composition, the chance of getting good images will be reduced. Remember that this is the beginning of you bird photography journey and there is lots of time to improve. There’s an old saying that says “nothing breeds success like success”. You need to be getting the shots to keep you motivated.

introduction to photographing birds

Photo by George Thomas; ISO 400, f/5.6, 1/500-second exposure.

These are some simple steps to get you going with bird photography in the easiest and simplest possible way. The bottom line is to have fun and continue having fun. I can assure you that when you start getting those great images you will not stop, so make sure your bank balance is full; the expense starts here. Happy shooting!

About the Author
Wayne Turner has been teaching photography for 25 years and has written three books on photography. He has produced 21 Steps to Perfect Photos, a program of learner-based training using outcomes based education.

- - - - - - - - - - - - - - - - - - - - - - - - - - - - - - - - - - - - - - - - - - - - - - - - - - - - - - - - - - - - - - - - - - - - - - - - - -

Did you appreciate this newsletter? Please help us keep it going by Joining Our Patreon Supporters

What are your thoughts on this article? Join the discussion on our Facebook Page

PictureCorrect subscribers can also learn more today with our #1 bestseller: The Photography Tutorial eBook

- - - - - - - - - - - - - - - - - - - - - - - - - - - - - - - - - - - - - - - - - - - - - - - - - - - - - - - - - - - - - - - - - - - - - - - - - -

The post Garden Bird Photography Tips appeared first in the Photography Tips category on PictureCorrect.


from PictureCorrect https://ift.tt/lQS36RX
via IFTTT

PictureCorrect.com: Interesting Photo of the Day: Iceberg Off the Rocky Coast

Some images look like a scene from a movie. And maybe since Jake Dicks is a cinematographer himself, his image of an iceberg in northern Newfoundland has a similar vibe:

iceberg in Newfoundland

“Iceberg Off the Rocky Coast” by Jake Dicks (Via Reddit. Click image to see full size.)

He shot the image with his Fujifilm X-H1 camera using the 16–55mm lens at 55mm, 1/500 second, f/5.6, and ISO 200.

The rocks in the foreground create contrast with the bright sky and the white iceberg. The orange jacket makes the woman stand out, making her the focal point of the composition.

With the sense of scale that Dicks has used in this image, you can imagine how huge the iceberg must have been.

- - - - - - - - - - - - - - - - - - - - - - - - - - - - - - - - - - - - - - - - - - - - - - - - - - - - - - - - - - - - - - - - - - - - - - - - - -

Did you appreciate this newsletter? Please help us keep it going by Joining Our Patreon Supporters

What are your thoughts on this article? Join the discussion on our Facebook Page

PictureCorrect subscribers can also learn more today with our #1 bestseller: The Photography Tutorial eBook

- - - - - - - - - - - - - - - - - - - - - - - - - - - - - - - - - - - - - - - - - - - - - - - - - - - - - - - - - - - - - - - - - - - - - - - - - -

The post Interesting Photo of the Day: Iceberg Off the Rocky Coast appeared first in the Photography Tips category on PictureCorrect.


from PictureCorrect https://ift.tt/k4ifVG7
via IFTTT

PictureCorrect.com: Image Sensors Explained in Under 6 Minutes

There’s no argument that digital photography has become standard to our modern way of living, with smaller, more compact cameras that deliver amazing picture quality entering the market every day. But what makes this possible? The secret is in the image sensor. This episode of Techquickie with Linus Sebastian provides a quick, to-the-point explanation of image sensors:

What Are Image Sensors?

Image sensors artificially mimic the transduction process of a biological eye. OK, wait, you say, what is transduction? It’s the action or process of converting energy into another form.

So, in photography, image sensors provide us the ability to capture high quality images and videos more directly into a digital format for easy usage.

Here’s Sebastian’s condensed explanation:

In the human eye, rod and cone receptors work in combination with ganglion cells to convert photons into an electrochemical signal which the occipital lobe in your brain can then process.

digital sensors photography

In the case of an image sensor, photons are captured as charged electrons and silicon and converted to a voltage value through the use of capacitors and amplifiers, then later transferred into digital code which can be processed by a computer.

digital camera image sensor

While this can be done in different manners, most sensors pretty much operate in a similar way. The big difference that separates them is the way in which they process stimuli. There are two more readily available and mature forms of sensors: CCD (Charge Coupled Device) and CMOS (Complementary Metal Oxide Semiconductor).

As Sebastian explains, CCD sensors work by registering photon rays in silicon which contains a grid array of pixels. After electron charges are captured in this pixel array, they are then processed from the bottom to the top of the grid into a serial shift register and pushed out a single charge at a time to be converted into an analogue voltage that is then transformed into coding by way of an analogue to digital converter.

ccd image sensor

Since these sensors operate by processing charges individually across the lines of an array, this system needs quite a bit of power to function. But, that also means there will be less noise because of the minimized use of voltage amplifiers. For this reason, CCD sensors are better for certain types of photography like aerial or space.

CMOS sensors are what you will typically find in consumer grade products. The difference between CMOS and CCD is that instead of shuffling electron charges along an array to then be modified, CMOS sensors adds extra circuitry to each pixel, allowing it to pretty much do all of the processing individually with the signal, then sending it directly down the line to the CPU.

cmos image sensor

This eliminates gridlock, which reduces power usage and increases processing speed.

CCD and CMOS Image Sensors Compared

CCD:

  • More expensive
  • Use more power
  • Less digital noise
  • Better in low light

CMOS:

  • Less expensive
  • Use less power
  • More digital noise
  • Rolling shutter issues

That was a nice, compact explanation and comparison of CCD and CMOS image sensors. We hope it cleared a few things up for you and helped you understand how your camera works just a little bit more.

- - - - - - - - - - - - - - - - - - - - - - - - - - - - - - - - - - - - - - - - - - - - - - - - - - - - - - - - - - - - - - - - - - - - - - - - - -

Did you appreciate this newsletter? Please help us keep it going by Joining Our Patreon Supporters

What are your thoughts on this article? Join the discussion on our Facebook Page

PictureCorrect subscribers can also learn more today with our #1 bestseller: The Photography Tutorial eBook

- - - - - - - - - - - - - - - - - - - - - - - - - - - - - - - - - - - - - - - - - - - - - - - - - - - - - - - - - - - - - - - - - - - - - - - - - -

The post Image Sensors Explained in Under 6 Minutes appeared first in the Photography Tips category on PictureCorrect.


from PictureCorrect https://ift.tt/fP48oKw
via IFTTT

torstai 29. syyskuuta 2022

PictureCorrect.com: How to Create Intense Portraits in Lightroom

Many times when you are processing portraits in Lightroom or Photoshop you are working towards a soft, pleasing look. However, with some portraits you may be after a more dramatic and intense look. In this tutorial we’ll take a quick look at how you can create an intense portrait in Lightroom, and we’ll also showcase some before and after images to show how the effect can impact photos.

For this tutorial we’ll be working with this sample photo:

man in romania

photo by jackmac34

And here is a quick preview of the effect that we will be creating:

portrait of man edited in lightroom

Dragan-Style Portrait

To get started, we’ll apply the following settings in Lightroom’s Develop module:

  • exposure: +0.36
  • contrast: +65
  • highlights: -65
  • shadows: +45
  • whites: -60
  • blacks: -60
adobe lightroom develop module

Basic Settings in Lightroom

The settings to highlights, shadows, whites, and blacks will give the photo and HDR-like appearance with a strong black point for deep blacks. We’ve also significantly boosted contrast and increased the exposure a little bit to avoid letting the photo get too dark with the changes that we are making. Adjust the exposure as needed for the particular photo that you are working with.

Next, make the following changes to the settings:

  • clarity: +100
  • vibrance: +60
  • desaturation: -60
control panel in lightroom

Clairty, Vibrance, Saturation

Increasing clarity to the maximum at +100 will add mid-tone contrast and give the photo a sharpened look.

Next, edit the following settings for sharpness:

  • amount: 120
  • radius: 2.2
  • detail: 60
  • masking: 0

And use these settings for noise reduction:

  • luminance: 30
  • detail: 50
  • contrast: 25
  • color: 30
  • detail: 50
  • smoothness: 15
sharpening and noise reduction in lightroom

Sharpening and Noise Reduction

Adjust the sharpening and noise reduction settings as needed for the specific photo that you are working with.

And the last step we’ll take is to add a vignette with the following settings for post-crop vignetting:

  • amount: -20
  • midpoint: 50
  • roundness: 0
  • feather: 50
  • highlights: 0
lightroom vignette settings

Post-Crop Vignetting

And now we have our finished product.

portrait of man edited in lightroom

After

These same settings work on all sorts of portraits, see how it looks and then adjust the settings from there to fit various situations.

About the Author:
Marc Andre is the editor of PhotographyPlanet, a website that offers downloadable products like Photoshop actions, Lightroom presets, photo overlays, textures, and print templates.

- - - - - - - - - - - - - - - - - - - - - - - - - - - - - - - - - - - - - - - - - - - - - - - - - - - - - - - - - - - - - - - - - - - - - - - - - -

Did you appreciate this newsletter? Please help us keep it going by Joining Our Patreon Supporters

What are your thoughts on this article? Join the discussion on our Facebook Page

PictureCorrect subscribers can also learn more today with our #1 bestseller: The Photography Tutorial eBook

- - - - - - - - - - - - - - - - - - - - - - - - - - - - - - - - - - - - - - - - - - - - - - - - - - - - - - - - - - - - - - - - - - - - - - - - - -

The post How to Create Intense Portraits in Lightroom appeared first in the Photography Tips category on PictureCorrect.


from PictureCorrect https://ift.tt/CKn0vur
via IFTTT

PictureCorrect.com: Ghosting: Combining Long Exposures & Flash Photography

While using long exposures in the field, have you ever captured a ghost within your photographs? While you may not be haunted by spiritual specters, objects in motion often appear transparent and obscured by blurring when the shutter is opened for an extended period of time. While some individuals aim to create dramatic results by obscuring their subjects, others find ghosts to be problematic. Photographer Mark Wallace explains why this effect occurs and what can be done to stop it:

Why do long exposures produce ghosts?

The most important principle to understand is the simple fact that shutter speed directly impacts the way in which the camera’s sensor records motion. When photographing an object in motion, your subject may only stay in one spot for a moment or two—not enough time to create a proper exposure. When the subject moves out of a specific spot, the camera continues to allow light to trickle into a scene. So, when dealing with movement around the frame, the camera will capture details of backdrops and surrounding details within the area once occupied by the subject. Hence the “transparent” look that’s unique to objects subjected to slow shutter speeds

What can be done to freeze ghosts?

Freezing an object in motion is not as difficult as it seems. All that’s required is a strong strobe or speedlight. Regardless of shutter speed, these tools can freeze motion because the bright light that’s produced is enough to instantly expose a subject in a fraction of a second. However, if the subject in question continues to move around, the transparent effect will still be produced; the ambient light that’s captured by the sensor will continue to record details in the spot once occupied by the subject.

Is it possible to utilize long shutter speeds without producing ghosts?

Absolutely. The easiest way to avoid ghost is to eliminate the ambient light within a scene. That way, the only objects captured by the camera’s sensor are those illuminated by the light of the flash. It’s also possible to mix ambient light and flash to create unique results without ghosting, so long as the subject can remain relatively still for the duration of the exposure. This is because the singular photograph contains two separate exposures from the surrounding ambient light as well as the powerful split second flash.

eliminating ghosts

Once a photographer understands the proper ways to harness light and how incoming light effects an image, a window of opportunities is pried open. Freezing objects in motion as well as capturing motion blur each provide their own aesthetics. With a basic understanding of what each element provides and how it can be attained, figuring out which details to include or omit lies entirely in the artist’s power.

“To help you understand this, I have a normal glass here and some water. If you think of this water as light and you think of this [glass] as exposure, what you’re trying to do is get just enough light so that it fills up your glass all the way to the top.”

- - - - - - - - - - - - - - - - - - - - - - - - - - - - - - - - - - - - - - - - - - - - - - - - - - - - - - - - - - - - - - - - - - - - - - - - - -

Did you appreciate this newsletter? Please help us keep it going by Joining Our Patreon Supporters

What are your thoughts on this article? Join the discussion on our Facebook Page

PictureCorrect subscribers can also learn more today with our #1 bestseller: The Photography Tutorial eBook

- - - - - - - - - - - - - - - - - - - - - - - - - - - - - - - - - - - - - - - - - - - - - - - - - - - - - - - - - - - - - - - - - - - - - - - - - -

The post Ghosting: Combining Long Exposures & Flash Photography appeared first in the Photography Tips category on PictureCorrect.


from PictureCorrect https://ift.tt/GCHOTg4
via IFTTT

keskiviikko 28. syyskuuta 2022

PictureCorrect.com: Interesting Photo of the Day: Dreamy Long Exposure of an Ocean Cove

There’s perhaps nothing more dreamy than a well-crafted long exposure of a body of water at sunrise or sunset. We’re even more convinced of that fact after viewing this stunning photograph of Abalone Cove, which was taken by landscape photographer Matthew Nurre:

cove long exposure

Abalone Cove, Rancho Palos Verdes, CA” by Matthew Nurre (Via Imgur. Click image to see full size.)

Well known for its teeming tide pools and beautiful bluff- and ocean-level views, Abalone Cove is one of two protected beaches that make up the 64-acre Abalone Cove Ecological Reserve in Rancho Palos Verdes, California.

Nurre created the image using his Canon EOS 5D Mark II camera, Rokinon 24mm f/1.4 lens, and 0.9 (3 stop) neutral density filter with settings of: ISO 100, f/8 and 10 seconds.

- - - - - - - - - - - - - - - - - - - - - - - - - - - - - - - - - - - - - - - - - - - - - - - - - - - - - - - - - - - - - - - - - - - - - - - - - -

Did you appreciate this newsletter? Please help us keep it going by Joining Our Patreon Supporters

What are your thoughts on this article? Join the discussion on our Facebook Page

PictureCorrect subscribers can also learn more today with our #1 bestseller: The Photography Tutorial eBook

- - - - - - - - - - - - - - - - - - - - - - - - - - - - - - - - - - - - - - - - - - - - - - - - - - - - - - - - - - - - - - - - - - - - - - - - - -

The post Interesting Photo of the Day: Dreamy Long Exposure of an Ocean Cove appeared first in the Photography Tips category on PictureCorrect.


from PictureCorrect https://ift.tt/LDH5aVR
via IFTTT

PictureCorrect.com: How to Fake the Golden Hour for Portrait Photography

Everybody loves soft golden hour light. Portraits shot during the golden hour always have that something extra. But the problem with golden hour photography is that the window of opportunity is small. Depending on the latitude and the season, you get about an hour to shoot at the most. But what if you could extend the golden hour? Or at least have its effects last a little bit longer? Mark Wallace from Adorama shows us how:

Gear for Faking the Golden Hour

  • An external light. It doesn’t matter if it is a speedlight or a strobe. Wallace uses a Profoto B2 head.
  • A CTO gel. This will turn the strobe into a warm 3200 degree Kelvin light.
  • A fast lens (f/2.8 or faster)
  • Variable neutral density filter

The external light mimics the golden hour sun. The composition has to be spot on so that the light and the light stand are not in the frame. You need the effect in the image not their physical presence of the light source. The flare of the light will, however, be welcome.

The key to faking the golden hour light is in using a CTO gel and then dialing in the right white balance. Wallace picked up a CTO gel, which when used on the B2 strobe produced a warm tungsten light reminiscent of the golden hour sun. He set is white balance to daylight so the effect of the CTO gel wasn’t cancelled out.

how to mimic the golden hour

CTO Gel

A fast lens is advised is because it helps in achieving that soft, mushy bokeh effect for the background. This is commonly used in golden hour portraits, and as the results will reveal, it looks quite beautiful.

The final tool is the variable neutral density filter. If you’re using a wide aperture like f/2.8 (or faster), you risk overexposing your images in bright conditions An ND filter helps you balance the exposure.

How to fake golden hour

A ND filter allows you to shoot with a wide aperture.

Camera Settings

Set the light on full power to produce some highlights around the model’s hair and shoulders. Dial in the desired aperture value. Then dial the variable ND filter so that the built-in meter says that the image is slightly overexposed. Expose for the model’s face.

This is Wallace’s result:

tips on faking the golden hour

Faking the golden hour

Of course, it’s a lot simpler to shoot a portrait during the golden hour, but when conditions aren’t quite right, this technique for faking it could do the trick!

- - - - - - - - - - - - - - - - - - - - - - - - - - - - - - - - - - - - - - - - - - - - - - - - - - - - - - - - - - - - - - - - - - - - - - - - - -

Did you appreciate this newsletter? Please help us keep it going by Joining Our Patreon Supporters

What are your thoughts on this article? Join the discussion on our Facebook Page

PictureCorrect subscribers can also learn more today with our #1 bestseller: The Photography Tutorial eBook

- - - - - - - - - - - - - - - - - - - - - - - - - - - - - - - - - - - - - - - - - - - - - - - - - - - - - - - - - - - - - - - - - - - - - - - - - -

The post How to Fake the Golden Hour for Portrait Photography appeared first in the Photography Tips category on PictureCorrect.


from PictureCorrect https://ift.tt/kJVUg0r
via IFTTT

tiistai 27. syyskuuta 2022

PictureCorrect.com: Style and Vision: What Makes One Photographer Different From Another?

In the artistic community much is said about style and how that style is more often than not linked to some innate talent. The style side is mostly true. Each artist, irrespective of their specific discipline, brings their own voice and vision to their chosen art. That which is internal to the intellect of the artist, is unique and independent of external training.

develop photo style

Photo by Paul Minami

It would be convenient for us to instantly associate a photographer’s work as that of their own signature style. Were it only this easy, but alas, it is not so transparent. Theoretically, most well known artists have an inherent recognizability; for example, in a room full of impressionistic paintings one instantly knows which images are van Goths’. Yes, but not always.

The question is are van Gogh’s paintings all so unique they will always be instantly recognized or is it that we have been so widely exposed to them that most his work has been seen by us before? My experience would suggest the latter. Before anyone starts writing me, give this just a bit of thought and perhaps a personal visit to the van Gogh museum in Amsterdam. Think of Pablo Picasso, his work is instantly recognizable right? Well, maybe not… that is only true through prior exposure to his paintings. If my art history courses are remembered correctly, his work is usually divided into 7 sections or time periods. The first three are very different from that of the later sections. If you see representative examples of all seven periods together, one quickly recognizes distinctive transitions and minor elements that are thematically carried through from one phase to the next. If you did not know, or had never seen a selection of his work from all these periods, you would be hard pressed to identify them succinctly.

The point is that Picasso and van Gogh both developed unique and distinctive styles over the course of time. To that end, the photographer is no different, perhaps just a little subtler. For the purpose of this essay, we are keeping “photographic” tricks and “darkroom” magic between minimal and intermediate levels. Extreme manipulations, while artistic, slip into the world of graphic art and many would argue, lose their place as purely photographic art.

In photography, we find the same kind of pseudo-recoginition. When we examine the portraits of Karsh or the landscapes of Adams they are often mentioned in the literature as being both distinctive and fundamentally unique to the inherent style of the photographer. Both are responsible for creating truly iconic images which now have a universal recognizability. In this way, they share a common thread to the works of van Gogh and Picasso in their notoriety. However, I have seen portraits with every bit of Karsh’s style and vision, that are every bit as well done, but were done by others and predate Karsh, forcing the viewer to question the assumptions being made. Now I am a big Karsh fan and have been since I was a boy. In a room full of his work, that one might find at the Chicago Art Institute, the style simply screams at you. Similarly, I have taken black and white stills of Half Dome at Yosemite and if you didn’t know better it would be impossible to say which was mine and which was Adam’s. I did not copy Adams in any way, except for the general subject matter. I have one of his famous images on the wall of my office too. It is hanging there as a sort of inspiration, a reminder if you will of what constitutes a great image and a truly creative vision.

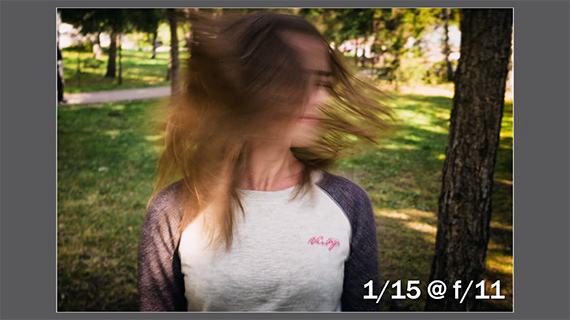
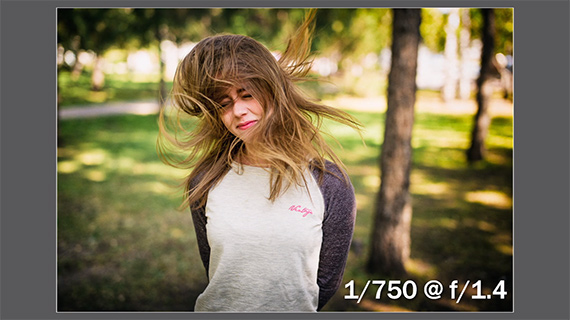
We photographers are often faced with a minor dilemma; we often know exactly what we want. That does not mean we will have the right conditions to create it. I am talking non studio images here. The studio is a different thing. Every bit as creative, it is a control of conditions inside or lack of control outside, that makes the difference. You can go the same place, at the same time of day, a thousand time and never completely reproduce the exact conditions of any previous encounter. That is the challenging situation the photographer faces every time they picks up a camera. I believe that it is in how the photographer overcomes this challenge that defines their own personal style. It is how our unique vision of the world interacts with how the world is being presented, that produces that personal style. I must warn the reader that the style differences among many photographers is subtle and at times barely discernible to the naked eye.

There are those that say it can be learned and talent is not required. There are those who say the opposite. There are others, I among them, who say that learning hones an innate talent. Every one of us has a unique vision of the world and not everyone wishes to express it and fewer still wish to express it via photography. None of us can ever be a Karsh or Adams or any number of other well known or lesser know photographers of the past or present. I often photograph with a fellow photographer. We stand side by side and use essentially the same equipment, yet our images are different and although we recognize it instantly most viewers would be hard pressed to tell whose was whose. On the other hand, if one were to examine our respective body’s of work the comparison reveals individual uniqueness in our distinctive styles.

Ultimately, both the famous and the anonymous photographers offer something worth learning. Wikipedia publishes a list of famous photographers. I never pass up a visit to any museum of art or any collection of high quality images. I would like to think I have developed one of those individual, instantly recognizable styles. I find it rather impossible to look seriously at any photograph and not learn something about image making and presentation.

My personal philosophy is quite simple. I try to present my subject in the best possible way, given the prevailing conditions. This is however, highly subjective and purpose dependent, resulting in the occasional failure or lack luster outcome. When that happens one of three thing seems to have influenced the objective: the light conditions were poor, or I lost a crisp focus on the subject and/or purpose, or I lacked the skills and necessary equipment to deliver the vision I set forth to create. The reality is I am good at what I do and when compared to others I possess a unique view of the world, but is it instantly recognizable? Why, not at all.

develop vision and style as a photographer

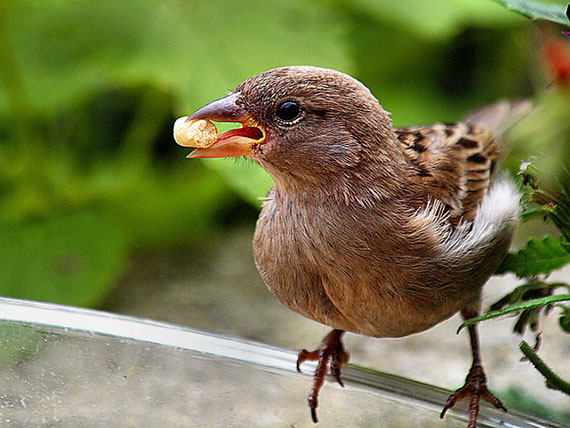
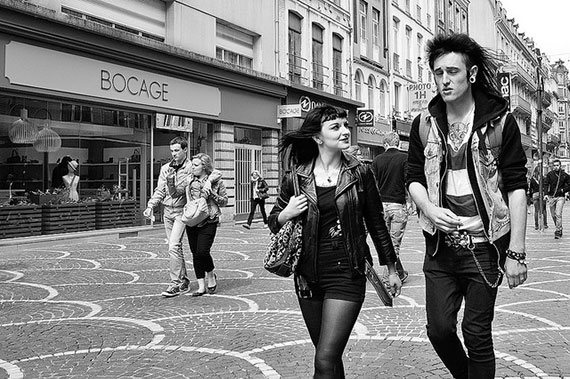
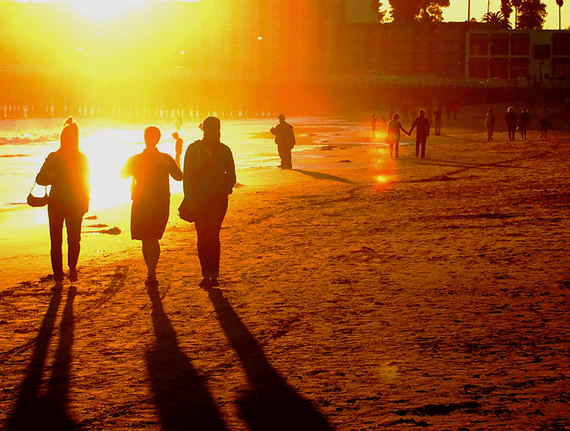
Photo by Hitchster; ISO 160, f/4.0, 1/500-second exposure.

You can do what I have done, continue to hone your individual skills and express your unique vision.

Dennis’ tips for revealing your unique vision escape (in no specific order):

  • Subject Focus: You could select a few subjects that you feel passionate about. If you have knowledge of the subject it is often easier to see past the superficial and bring out the deeper meaning and emotions. Not all subjects cary deep emotions or have any truly deeper meaning, but that does not mean they lack the challenge of making the mundane interesting. It is what gives you satisfaction and intellectual pleasure that counts most.
  • Style: Style comes down to how you express your vision. It is some combination of methodology, technique and technology. This is a function of: the technology chosen, post exposure processing, your over all approach, the subject and conditions. It is making choices and maximizing the results.
  • Learning: Be open to learning from others as well as from your own experiences. I never discard a poor image without first examining it closely to see why it failed. I suspect that I am like most of you and only like about 10 % of the total images I generate. Sometimes I don’t like any of them because they simply fail to properly represent the subject. If possible, go back and try again, applying your knowledge of what went wrong until you have captured the essence of your initial vision. Keep in mind the original purpose of making the images. It is nice to take pictures of your child’s birthday party and if some qualify as high art, all the better. If the purpose is to record the event for relatives, future nostalgia trips or to embarrass the child later in adulthood then high art is simply not necessary.
  • Rules: Rules in photography are not so much absolutes as they are guidelines. Lets face it, if we did not set them aside from time to time, originality would be lost. On average, the “rule of thirds” applies aptly, but when it comes to presenting a certain subject the best possible way, at a given moment in time, then maybe not. Simply put, experiment, try it all! Today multi-media is so inexpensive that all other costs are greater. It is more expensive to travel even a short distance than to fill your reusable flash card. Unlike the days of chemicals, film and paper that made us careful and aware of the cost of each frame, today’s digital photos are, in and of themselves, freebies and 100% recyclable.
  • Critic: You are your own worst critic, as every artist is. It is critical to be honest with yourself and with others. We all know this, but more often than not, we are more honest with others and less honest with ourselves. The best way is to look at all our images critically, but not despairingly. Apply a critical eye to which images work and do not work and evaluate honestly why that is so. A great image of someone or something you detest is still a great picture. Understand why. You are not forced to show it to anyone else. If you find anything that is not quite right understand that too. It is back to the learning thing, isn’t it?
show vision and style in your photos

Photo by double : zanzo; ISO 100, f/3.5, 1/160-second exposure.

  • Inspiration: We all need it. Some of us thrive on it. Some of us inspire others. All of us are inspired by someone or something. It is that inspiration that turns the ordinary into the extraordinary. Let it work for you. I carry a pocket camera with me almost all the time because sometimes I find a unique moment and point and shoot. They are not all great. Most are just ordinary, but every once in a while I get inspired to go back with my SLR and do it right. We all need to be open to the idea that inspiration occurs when and where we find it or when and where it finds us. Once, my wife and I were touring a 15th century cathedral and I was inspired to photograph the vaulted ceiling. I laid on the floor and did just that, much to her embarrassment I must add, but the results were outstanding.
  • Practice: Don’t always wait for moments to find you, sometimes you need to go exploring with an active eye. Keep lookout for anything new, different, and hopefully, exciting. If I have learned anything living in Alberta, it is the prairies and mountains are never the same. You can travel the same path 100 times and easily get 500 different images! Practicing is just as important in photography as it is in music or any other endeavor. I am convinced that I have trained my eye to see what the lens sees. I know, from experience, that I can size up and compose an image two to three times faster than most. By the time I get the lens cap off, I know what I am going to shoot, at what focal length and from what position. I would like to think this is raw talent; the truth is that it is 50 years of practice.
  • Self Expression: Why do we take pictures or make images? For me, it is my form of artistic expression. For others they sing or play an instrument, draw, sketch or paint, while others act or write. For me, photography is my most important self expressive activity. If you choose photography as your expressive medium, you are also choosing to share your unique vision of the world with that world.

Lastly, it is chance, pure and simple that often has the greatest influence on our work. It is what we make of those chances that ultimately defines our individual vision of the world and culminates in the expression of our unique style. Most forms of self expression are directed outward from ourselves towards others. Some would say photography is not just self expression, it expresses or even defines who we are. I think I am still trying to define myself and so for me, photography expresses what and who I am at any randomly given point in time although I am not sure that it ever captures any real totality of my existence.

photography style and vision techniques

Photo by Stéphane Réthoré; ISO 100, f/2.8, 1/1000-second exposure.

I have often said, “Some day I will grow up. When I do, I’ll let you know.” I strongly suspect my epitaph will read something like this: “He always said he would let us know when he grew up. He finally did

About the Author:
Dennis Nikols writes for As I Found It. Dennis blogs on photography, how we understand what we see, and how to make and use images.

- - - - - - - - - - - - - - - - - - - - - - - - - - - - - - - - - - - - - - - - - - - - - - - - - - - - - - - - - - - - - - - - - - - - - - - - - -

Did you appreciate this newsletter? Please help us keep it going by Joining Our Patreon Supporters

What are your thoughts on this article? Join the discussion on our Facebook Page

PictureCorrect subscribers can also learn more today with our #1 bestseller: The Photography Tutorial eBook

- - - - - - - - - - - - - - - - - - - - - - - - - - - - - - - - - - - - - - - - - - - - - - - - - - - - - - - - - - - - - - - - - - - - - - - - - -

The post Style and Vision: What Makes One Photographer Different From Another? appeared first in the Photography Tips category on PictureCorrect.


from PictureCorrect https://ift.tt/qIQgcJb
via IFTTT

PictureCorrect.com: Interesting Photo of the Day: Mount Shasta at Night

Deep within the Shasta-Trinity National Forest of California resides a beautiful snow-capped mountain that helped name the forest. Mount Shasta is named after one of the Native American tribes, and the white mountain is the fifth highest peak in the state. What may look like a peaceful mountain at first is actually a volcano in disguise. A sight to see, for sure, it has become a stunning scene to shoot for many landscape photographers. This image by Victor Carreiro shows a cool, crisp Mount Shasta against a clear twilight sky:

mount shasta night sky

Mount Shasta by Victor Carreiro (Via Imgur. Click image to see full size.)

Such a beautiful background, totally worth the trek to find a foreground that could compliment it. A fallen, dead, withered tree serves as a guide, all the way to Mount Shasta and beyond to the stars! Sometimes when you search hard enough, your efforts are rewarded with incredible scenery like this.

- - - - - - - - - - - - - - - - - - - - - - - - - - - - - - - - - - - - - - - - - - - - - - - - - - - - - - - - - - - - - - - - - - - - - - - - - -

Did you appreciate this newsletter? Please help us keep it going by Joining Our Patreon Supporters

What are your thoughts on this article? Join the discussion on our Facebook Page

PictureCorrect subscribers can also learn more today with our #1 bestseller: The Photography Tutorial eBook

- - - - - - - - - - - - - - - - - - - - - - - - - - - - - - - - - - - - - - - - - - - - - - - - - - - - - - - - - - - - - - - - - - - - - - - - - -

The post Interesting Photo of the Day: Mount Shasta at Night appeared first in the Photography Tips category on PictureCorrect.


from PictureCorrect https://ift.tt/Bc3fHC5
via IFTTT

PictureCorrect.com: How to Use a Manual Lens

Manual lenses are becoming more popular as adapters make it easier to use whatever lens you like. But surprisingly, they also have the added benefit of making you a much stealthier photographer. Mark Wallace gives us a tutorial on how to set up your manual lens and throws in some practical tips for when and where a manual lens can be best utilized:

All lenses used to be manual before digital photography came along; it was the norm to manually set your aperture and manually focus your shot. A lot of cameras coming out now have the ability to accept adapters that allow you to put on whatever lens you like, though this means you lose the ability to auto focus or set the aperture through the camera itself. Similarly, manual lenses are becoming more popular as they have some added benefits.

Set Your Aperture

First, set your aperture value. On a manual lens you can twist a dial for your aperture and select whether you’d like to have a shallow depth of field or a photo with a lot in focus.

shallow depth of field

Only the model in front is in focus because the depth of field is shallow.

The model in front is only in focus because the depth of field is shallow.

f/16 deep depth of field

With an aperture setting of f/16, almost everything is in focus, so you can clearly see both models.

Use the Depth of Field Guide

Wallace shows us that after selecting your aperture you can also set your focal distance and then see your depth of field range.

If you know you want to shoot a subject that is 8 feet away at f/8, set your focal distance, and the set of numbers on the bottom ring will show you that the subject will be in focus between 3.5 feet and beyond infinity.

lens settings

Street Photography

A fun application of this tool is that you can preset your lens before going out and have a pretty good idea of what will be in focus without even looking through your viewfinder. If you were to set your lens as it is above, you’d know that anything around 8 feet away would be in focus.

street photography

You could walk around with your lens pre-set and snap away while holding your camera at hip height and no one would even know you were taking their photo. Sometimes this can result in a more candid shot.

Whether this technique is for you or not, mastering the use of a manual lens will help you better understand your camera and can come in handy if you’re ever using a lens adapter that limits the use of anything automatic.

- - - - - - - - - - - - - - - - - - - - - - - - - - - - - - - - - - - - - - - - - - - - - - - - - - - - - - - - - - - - - - - - - - - - - - - - - -

Did you appreciate this newsletter? Please help us keep it going by Joining Our Patreon Supporters

What are your thoughts on this article? Join the discussion on our Facebook Page

PictureCorrect subscribers can also learn more today with our #1 bestseller: The Photography Tutorial eBook

- - - - - - - - - - - - - - - - - - - - - - - - - - - - - - - - - - - - - - - - - - - - - - - - - - - - - - - - - - - - - - - - - - - - - - - - - -

The post How to Use a Manual Lens appeared first in the Photography Tips category on PictureCorrect.


from PictureCorrect https://ift.tt/K86vUxy
via IFTTT

maanantai 26. syyskuuta 2022

PictureCorrect.com: How to Avoid Blurry Photos

I’ve heard too many new photographers telling me that they were often frustrated with blurry photographs being captured. They did not know what the reasons were, nor were they able to resolve this issue effectively.

avoid blurry photos

Photo captured by hiva sharifi

We always understand that knowing the source of a problem can help in problem solving. In this article, I’m going to share with you some key issues that cause blurry photographs. After helping you better understand the problem, I will go on to share how to capture sharp photographs like a professional photographer.

Focus Settings

One of the common reasons for blurry photographs is having a wrong focusing point. It’s important that you know exactly where to focus before composing the frame and pressing the shutter button. For example, when photographing portraits, professional photographers will typically focus on the model’s eyes. It’s very important that your model’s eyes are sharp and in focus. This is especially so if you’re using a wide aperture where depth of field is shallow.

Instead of using matrix focusing, 51 point focusing, or other fanciful technology, I strongly recommend using single point focus. It must be the photographer telling the camera where to focus, rather than having the camera make this important decision for us.

focus point

Photo captured by Chris Reyem

Although technology advances in leaps and bounds, a camera’s intelligence is still unable to read a human’s mind. The camera will not know exactly where or which area in the frame we want to focus on. Therefore, always reserve the right to make this important decision yourself.

Setting a Fast Enough Shutter Speed

Another key reason causing blurry photographs is having a shutter speed that is too slow. A slow shutter speed will likely cause “camera shake”, especially when you’re holding the camera without any sturdy support.

The general rule of thumb to prevent camera shake, is to have the denominator of the shutter speed 1.5 times greater than the focal length. In other words, if your focal length is 50mm, your shutter speed shall be at least 1/80 seconds to avoid blurry photographs. If your focal length is at 100mm, your shutter speed shall be at 1/160 seconds or faster.

Using a Tripod

The other get around is using a tripod for enhanced stability. This technique is good for landscape photography or photographing static objects. Pressing the shutter button may potentially cause camera shake, too. As such, it’s a good habit to use a remote shutter or the camera’s self-timer with your camera is mounted on a tripod.

using tripod

Photo captured by Micah Tindell

Firmly Holding the Camera

When not using a tripod, ensure you are holding your camera using the correct technique. If you’re holding your camera to shoot, your left hand acts as a support and your right hand serves to adjust the settings and press the shutter button.

With the above information, I’m sure you now understand who the main culprits for blurry photographs are. More importantly, you know how to resolve the problem. With that, what are you waiting for? Grab your camera, start shooting, and have fun!

About the Author:
Yong Sak is a passionate Singapore freelance photographer who enjoys taking photographs and sharing his knowledge on photography. He owns a photography portal that houses many basic photography fundamentals which are essentials for those who are new to photography and are hungry for more information.

- - - - - - - - - - - - - - - - - - - - - - - - - - - - - - - - - - - - - - - - - - - - - - - - - - - - - - - - - - - - - - - - - - - - - - - - - -

Did you appreciate this newsletter? Please help us keep it going by Joining Our Patreon Supporters

What are your thoughts on this article? Join the discussion on our Facebook Page

PictureCorrect subscribers can also learn more today with our #1 bestseller: The Photography Tutorial eBook

- - - - - - - - - - - - - - - - - - - - - - - - - - - - - - - - - - - - - - - - - - - - - - - - - - - - - - - - - - - - - - - - - - - - - - - - - -

The post How to Avoid Blurry Photos appeared first in the Photography Tips category on PictureCorrect.


from PictureCorrect https://ift.tt/T9fYoEO
via IFTTT

PictureCorrect.com: Interesting Photo of the Day: Touching the Milky Way

The Milky Way has long captured photographer’s hearts — and been captured itself. Shooting it, or even landing the right conditions to, is no easy feat, though. So, when photographer slash iOS developer Guillermo Gutierrez saw the opportunity to do so, he grabbed it. Or should we say, his wife did (literally)! The photographer shared the unique snap he took of his wife seemingly “invoking” the power of the Milky Way:

“ITAP of my wife and the Milky Way” by Guillermo Gutierrez (Via Reddit. Click image to see full size.)

As hinted by the depth of color, clarity, and the number of stars in the sky, the image is a long exposure. What makes it truly interesting is the battery-powered LED bulb his wife holds. Out of which, the Milky Way seems to “shoot” like a lightning bolt. Of course, he didn’t get the perfect shot in one go, nor was it easygoing for his SO.

…to make sure the lightbulb aligned with the Milky Way, it was a trial and error process… she was suffering and didn’t want to do it, but I’m pretty sure that if I invite her again, she will come…

For this shot, Guillermo used his Sony A7 III mirrorless camera body and Sigma 14-24mm f2.8 lens. He also employed a tripod — an absolute necessity for long-exposure photography, along with a slower shutter speed of 30 seconds. For his other settings, he set his lens to 14mm with an aperture of f2.8 and ISO 6400.

- - - - - - - - - - - - - - - - - - - - - - - - - - - - - - - - - - - - - - - - - - - - - - - - - - - - - - - - - - - - - - - - - - - - - - - - - -

Did you appreciate this newsletter? Please help us keep it going by Joining Our Patreon Supporters

What are your thoughts on this article? Join the discussion on our Facebook Page

PictureCorrect subscribers can also learn more today with our #1 bestseller: The Photography Tutorial eBook

- - - - - - - - - - - - - - - - - - - - - - - - - - - - - - - - - - - - - - - - - - - - - - - - - - - - - - - - - - - - - - - - - - - - - - - - - -

The post Interesting Photo of the Day: Touching the Milky Way appeared first in the Photography Tips category on PictureCorrect.


from PictureCorrect https://ift.tt/UZ8fGy7
via IFTTT

PictureCorrect.com: Lion Photography Tips

Wildlife photography can be, well, wild — especially if you’re photographing the king of the jungle in its domain! Lions are ferocious predators, known to hunt in pride’s, taking down small to large prey like wildebeest and buck. While a photo of a male lion and his resplendent mane can certainly be impressive, lionesses, their cubs, and antics also make stunning subjects. In this YouTube video, Janine Krayer of Pangolin Photo Safaris offers her advice on shooting lions in the wild.

Be Ready for The Action

Lions can move very fast, meaning you need to have your camera set up and settings sorted. Yes, they do sleep most of the day (around 16-18 hrs). However, when awake, lions tend to be quite active, interacting with each other, pouncing, and butting heads. As such, Janine says it’s a good idea to keep your shutter speed fast — a minimum of around 1/2000 of a second. Additionally, opt for a smaller aperture for group lion photos (around F8-F10).

It can be difficult to shoot cubs as lionesses keep them safe and out of view until a few weeks of age. For these subjects, Janine says it’s better to use a large-aperture prime lens of F2.8 to F4.

Lions are most active in the early morning and dusk hours, making low-light conditions a problem. To remedy this, Janine suggests an ISO of 6400 while adjusting your shutter speed to 1/6000 and aperture to F5.6. Alternatively, a slower shutter speed of 1/800 with an aperture of F5.6 — or F8 and 1/650 — if the lion stationery. And remember, even grainy high-ISO images look great in black and white.

Keep Safe

Lions can run up to 80kmph, are powerful, and have rather ferocious jaws and claws. As such, you need to be careful when shooting them. A pride can consist of up to 40 individual lions, but even a handful of lions approaching can scare the majority of sightseers. It’s a good idea to stay in your vehicle and follow your guide’s instructions.

Know The Best Lion Poses

Some of the best poses are when a lion walks towards you, yawns, looks up at the sky, or hunts. The pre-hunt chase, ideally, if you’re a little squeamish — or photos taken from the intact side of the prey after the kill. Shots of post-feeding and inter-species interaction and fights with scavengers can also strike gold. For portrait shots, Janine suggests you use a wide-open aperture (<F5.6). Then, focus on the eye using single-point focus.

Another fun composition is when lions interact with water, which they hate. Better areas to take water shots include those with lots of rivers, like the Okavango Delta, where lions need to cross regularly. Or when they drink at a watering hole, preferably after they’re finished drinking, droplets streaming down their faces. Lions often fight, too, even killing each other for dominance. Some of the biggest and oldest males have several scars and disfigurations, making them unique subjects.

lion photo

Lion photo captured by Wade Lambert

Don’t Forget Those Eyes

This leads me to my third favorite thing about lions… their eyes… those yellow eyes are gorgeous and can send shivers down your spine…

One of a lion’s most beautiful features has to be its yellow eyes, but these can be difficult to capture. Particularly when they’re relaxing, as they’re often semi-shut, and their lashes create a dark shadow in the midday sun. The best time to photograph their eyes is in the evening or morning. If the lion turns its head towards the sun, it will illuminate them perfectly. The more elevated the lion, the better, or you can shoot anytime on an overcast day.

Support Conservation Efforts

Wild lions are on the vulnerable species list, with their numbers continuing to drop all over Africa. Safaris may seem intrusive, but safari tourists do support local parks with invaluable income. These funds are used to conserve the land, hire game rangers, protect wildlife from poachers, and more.

If you have your reservations, it’s best to go with a reputable, well-established safari company. Lion prides that have grown up with tourists visiting regularly are more socialized, therefore less disturbed by tourists. Viewing these lions is also more likely to result in a more relaxed, up-close encounter. Perfect for taking that snap.

Conclusion

Shooting wildlife is another world compared to in-studio photography. Not only do you need to venture into the wild, but you may experience once-in-a-lifetime encounters with wild animals. Lions are the king of the jungle for a reason, making majestic subjects. Janine has a wealth of experience in capturing their best side, which she’s shared in this informative tutorial video.

- - - - - - - - - - - - - - - - - - - - - - - - - - - - - - - - - - - - - - - - - - - - - - - - - - - - - - - - - - - - - - - - - - - - - - - - - -

Did you appreciate this newsletter? Please help us keep it going by Joining Our Patreon Supporters

What are your thoughts on this article? Join the discussion on our Facebook Page

PictureCorrect subscribers can also learn more today with our #1 bestseller: The Photography Tutorial eBook

- - - - - - - - - - - - - - - - - - - - - - - - - - - - - - - - - - - - - - - - - - - - - - - - - - - - - - - - - - - - - - - - - - - - - - - - - -

The post Lion Photography Tips appeared first in the Photography Tips category on PictureCorrect.


from PictureCorrect https://ift.tt/wbZyRCo
via IFTTT

PictureCorrect.com: Interesting Photo of the Day: Night and Day in Portland, ME

You’ve most likely seen timelapse videos that show the transition from day to night or the other way around. But imagine how cool would it be to see the night stars and the rising sun in the same frame. Night sky photographer Mike Ver Sprill shared this fine example:

Portland Head Lighthouse

“Night Watch” by Mike Ver Sprill (Via Reddit. Click image to see full size.)

The starry night sky on the left, the colorful dawn sky in the right, along with the popular Portland Head Lighthouse and the dreamy ocean water all combine to form a beautiful composition. The image is a result of stacking multiple exposures and then masking out selected regions in Photoshop.

“I woke up around 4am to head over to Portland Head Lighthouse. I wanted to capture a ‘night to day’ type photograph, unfortunately the skies were not cooperating too well. I definitely want to go back on a clear night to make another attempt, but I’m still pleased how this image turned out.”

  • Nikon D810 14-24 at 19mm F11 ISO 64 Shutter 6 images that varied between 2 – 4 minutes and then stack.
  • Nikon D810 14-24 at 19mm F3.2 ISO 6400 Shutter 1 second – about 10 photos stacked for light beams
  • ISO 3200 Shutter 20 seconds for stars

The Portland Head Lighthouse is one of the most photographed lighthouses in the US. But that doesn’t make this image any less amazing!

- - - - - - - - - - - - - - - - - - - - - - - - - - - - - - - - - - - - - - - - - - - - - - - - - - - - - - - - - - - - - - - - - - - - - - - - - -

Did you appreciate this newsletter? Please help us keep it going by Joining Our Patreon Supporters

What are your thoughts on this article? Join the discussion on our Facebook Page

PictureCorrect subscribers can also learn more today with our #1 bestseller: The Photography Tutorial eBook

- - - - - - - - - - - - - - - - - - - - - - - - - - - - - - - - - - - - - - - - - - - - - - - - - - - - - - - - - - - - - - - - - - - - - - - - - -

The post Interesting Photo of the Day: Night and Day in Portland, ME appeared first in the Photography Tips category on PictureCorrect.


from PictureCorrect https://ift.tt/JqlxmsN
via IFTTT

PictureCorrect.com: Equivalent Exposures Tutorial

You’re likely familiar with the terms exposure and exposure value. But are you familiar with the term equivalent exposure? Equivalent exposure can be explained briefly as several combinations of shutter speed,  aperture, and ISO that produce the same exposure. In other words, ISO, aperture, and shutter speed combinations that collect a similar amount of light. In this video, Mark Wallace from Adorama explains the term in further detail and also explains when to use which combination:

To demonstrate equivalent exposures, Wallace uses a series of portrait exposures taken at different combinations of aperture and shutter speed. The underlying rule in this is the inverse relationship between aperture and shutter speed.

equivalent exposure

These three images appear more or less the same. However, they are not the same. If you look closer you will notice the first image has a shallow depth of field—almost all of the background is blurred. The background in the second image appears a bit clearer. The final image has a large depth of field, evident from the sharp background.

The exposures in these images are the same, but the combination of shutter speed and aperture used to arrive at that equivalent exposure is different. The first one uses an aperture of f/1.4 with a fast shutter speed. The second one uses a relatively ‘slow’ aperture of f/4 and the consequent shutter speed. The final image uses a small aperture of f/8 and a slow shutter speed to balance the exposure.

The most common question at this stage is which combination of shutter speed and aperture to use in a certain situations, or more specifically, which combination is ideal and for which situation.

Here’s the thing. If you need a shallow depth field, you will need to use the combination of a wide open aperture and a fast shutter speed to balance it out. This will melt the background away and produce that nice out of focus background effect.

exposure triangle

On the other hand, if you need to incorporate the background in your images, use a small aperture and a slow shutter speed to balance it out.

equivalent exposure tutorial

The role of the shutter speed in all these is that it is controlling motion. If your subject is standing still you can experiment with a slow shutter speed. But if your subject is moving about you will have to use a fast shutter speed to prevent blur.

aperture shutter speed combinations

With a fast shutter speed things are much sharper and crisper.

how to choose camera settings

In a nutshell, your preferred combination of shutter speed and aperture will depend on your shooting preferences. Do you want a shallow depth of field or a large depth of field? Do you need motion blur or a crisp image where everything is frozen? Depending on the answer to those questions, you will need to choose the right combination.

- - - - - - - - - - - - - - - - - - - - - - - - - - - - - - - - - - - - - - - - - - - - - - - - - - - - - - - - - - - - - - - - - - - - - - - - - -

Did you appreciate this newsletter? Please help us keep it going by Joining Our Patreon Supporters

What are your thoughts on this article? Join the discussion on our Facebook Page

PictureCorrect subscribers can also learn more today with our #1 bestseller: The Photography Tutorial eBook

- - - - - - - - - - - - - - - - - - - - - - - - - - - - - - - - - - - - - - - - - - - - - - - - - - - - - - - - - - - - - - - - - - - - - - - - - -

The post Equivalent Exposures Tutorial appeared first in the Photography Tips category on PictureCorrect.


from PictureCorrect https://ift.tt/2TNPFlp
via IFTTT

sunnuntai 25. syyskuuta 2022

PictureCorrect.com: Step-by-Step Guide to Better Sunset Photography

Having a DSLR or mirrorless camera to use is the ultimate thrill for a budding photographer. Taking great sunset shots should be easy with such a great tool, right? This article suggests steps you can take to optimize your camera for sunset photographs.

steps to better sunset pictures with your camera

Photo by Howard Ignatius; ISO 400, f/11.0, 1/25-second exposure.

1. Shooting Mode

Many compact cameras have a setting for sunsets, yet many DSLRs don’t, so you have to take control of the situation. Turn off your fully auto, or basic shooting modes, and use your creative zone modes of P (program mode), Tv (shutter priority), Av (aperture priority) or M (manual) so that you have full control over the camera’s parameters.

2. White Balance

Auto White Balance can neutralize a sunset’s glow, so switch to manual White Balance and choose a setting of Cloudy or Shade.

instructions for better sunset photography

Photo by Rennett Stowe; ISO 100, f/13.0, 1/160-second exposure.

3. ISO

Set your ISO at the lowest setting of ISO 100. There’s usually plenty of brightness in the sky, so this is fine. Sunsets can suffer from grainy images with higher ISO settings.

4. Metering Mode

Exposure is important in any sunset shot. It’s best to switch to partial metering mode and take a manual meter reading. This can be a difficult aspect of digital photography for beginners, so I’ll explain how to do this.

Once in partial metering mode, point the camera at a bright area of the sky, directly above the setting sun. Press the star button on the back of the camera to take a light reading and to set the exposure. Then compose your shot and press the shutter release to drive the autofocus and capture the image.

5. Composition

step by step instructions to taking beautiful sunset photos

Photo by darwin Bell; ISO 200, f/9.0, 1/250-second exposure.

Consider your composition. Silhouetted objects and figures in the foreground will add interest. Reflective surfaces, such as lake water, the sea, or wet roads will bring added color to the shot.

Beware—once the sun starts to near the horizon, it sinks surprisingly quickly. This also happens to be the optimum moment when you will catch the strongest shots, yet it can come and go in an instant. Be prepared—make sure all your settings are in place well before this time.

sunset photography advice and tips

Photo by Lukas Schlagenhauf; ISO 100, f/8.0, 1/40-second exposure.

When the sun has disappeared, it doesn’t mean you should. For another thirty minutes or so, there can often be some amazing color across the sky, so keep looking for more opportunities for great photos.

learn to take amazing sunset photography

Photo by Vincent Hou; ISO 100, f/11.0, 15-second exposure.

I hope this step-by-step sunset guide for beginning photographers has been helpful and that you can catch some beautiful sunset photos in the future. They truly are wonderful shots to look back on.

About the Author:
Article written by Paul Summers from PhotographyCourseOnline.

For Further Training:

Currently on sale, The Sunrise/Sunset Recipe Cards, are like having a professional landscape photographer by your side, telling you exactly what to do to get the perfect shot. Proven, step-by-step recipes for 22 different types of sunrise & sunset photo opportunities, so you get the perfect photo every time. Print and carry in your camera bag, or simply save to your phone for quick reference any time.

sunset recipe cards

New: The Sunrise/Sunset Recipe Cards (Click to Learn More)

They contain the distilled secrets of 16 years of sunrise and sunset photography experience, presented in easy-to-follow, quick-glance bullets. Each card is easy to print, laminate, and carry in your camera bag for quick reference in the field. Currently 65% off for a limited time if you want to check them out.

Deal ending soon: The Sunrise/Sunset Recipe Cards at 65% Off

- - - - - - - - - - - - - - - - - - - - - - - - - - - - - - - - - - - - - - - - - - - - - - - - - - - - - - - - - - - - - - - - - - - - - - - - - -

Did you appreciate this newsletter? Please help us keep it going by Joining Our Patreon Supporters

What are your thoughts on this article? Join the discussion on our Facebook Page

PictureCorrect subscribers can also learn more today with our #1 bestseller: The Photography Tutorial eBook

- - - - - - - - - - - - - - - - - - - - - - - - - - - - - - - - - - - - - - - - - - - - - - - - - - - - - - - - - - - - - - - - - - - - - - - - - -

The post Step-by-Step Guide to Better Sunset Photography appeared first in the Photography Tips category on PictureCorrect.


from PictureCorrect https://ift.tt/WCaRBEw
via IFTTT

lauantai 24. syyskuuta 2022

PictureCorrect.com: How to Photograph Steam

Have you ever tried photographing steam, smoke, or vapor and been really disappointed with the lackluster results? The steam just isn’t showing up like you imagined it—all billowy and thick; instead, it’s barely visible. Well, the trick to capturing great looking smokey shots is in the lighting. Daniel Norton of Adorama shows us how to capture the steam from a hot cup of coffee to produce a moody, morning feel:

To get steam to be visible in your shot, it needs to be lit and the best way to do that is to back light it and have a relatively dark background. In this tutorial, Norton uses a medium grey background and a softbox with a grid to direct the light away from the backdrop to make it appear black. The setup is simple: just the background, softbox, and a fill card to add nice shadows, but with a soft light wrapping around.

photographing steam lighting setup

When the light comes through the steam from the coffee, it lights it up and provides great contrast between the white vapor and the dark background.

steamy coffee photo

Advantage of the Black Background

Not only does the black background provide a nice contrast, it makes it easier to edit the image in Photoshop later. Say you like the model’s expression in one shot, but there’s not enough steam showing up, you can always copy some of the steam from other images and add it into the one you like.

backlighting steam photo

Tip: Heat up the coffee in the microwave right before shooting so you can capture the most steam possible. The steam will peter out as you go, so you want to shoot it while it’s piping hot to get the best puffs of steam.

- - - - - - - - - - - - - - - - - - - - - - - - - - - - - - - - - - - - - - - - - - - - - - - - - - - - - - - - - - - - - - - - - - - - - - - - - -

Did you appreciate this newsletter? Please help us keep it going by Joining Our Patreon Supporters

What are your thoughts on this article? Join the discussion on our Facebook Page

PictureCorrect subscribers can also learn more today with our #1 bestseller: The Photography Tutorial eBook

- - - - - - - - - - - - - - - - - - - - - - - - - - - - - - - - - - - - - - - - - - - - - - - - - - - - - - - - - - - - - - - - - - - - - - - - - -

The post How to Photograph Steam appeared first in the Photography Tips category on PictureCorrect.


from PictureCorrect https://ift.tt/dhUxeoQ
via IFTTT