perjantai 30. marraskuuta 2018

PictureCorrect.com: Interesting Photo of the Day: Change of Seasons in Patagonia

Max Rive‘s breathtaking image of Patagonia could very well be passed off as a painting. Look closely and you’ll be surprised at the incredible amount of detail that this image offers. The lovely, vibrant colors of the forest, interrupted abruptly with the snow-clad mountains tell a contrasting story. And the sun streaking through the branches completes the picture:

patagonian landscape

“Change of Seasons” by Max Rive (Via Imgur. Click image to see full size.)

The peak seen in the distance is Cerro Torre in the El Chalten range. While most people might prefer visiting El Chalten in November, this particular image was shot in late August when the weather is incredible and there are fewer hikers in the area.


Go to full article: Interesting Photo of the Day: Change of Seasons in Patagonia

What are your thoughts on this article? Join the discussion on Facebook

PictureCorrect subscribers can also learn more today with our #1 bestseller: The Photography Tutorial eBook

The post Interesting Photo of the Day: Change of Seasons in Patagonia appeared first on PictureCorrect.


from PictureCorrect https://ift.tt/2iSMCRh
via IFTTT

PictureCorrect.com: New: Rich & Vibrant Color Photography Guide

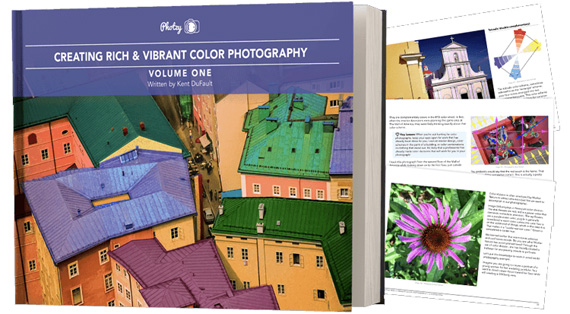
It’s a photographer’s secret weapon! Color photography can actually change the emotional state of a person viewing a particular photograph. In this new in-depth eBook, you’ll uncover the true ‘story’ behind memorable, fascinating, & impressive color photography. We were able to negotiate a 71% discount for our readers today if you want to check it out. Deal found here: The Rich & Vibrant Color Photography Guide

color photo guide

New Educational Photography eBook (Take a Peek Inside)

Properly executed – color photography can influence a viewer in a subconscious, ingenious, and an undeniably amazing way.

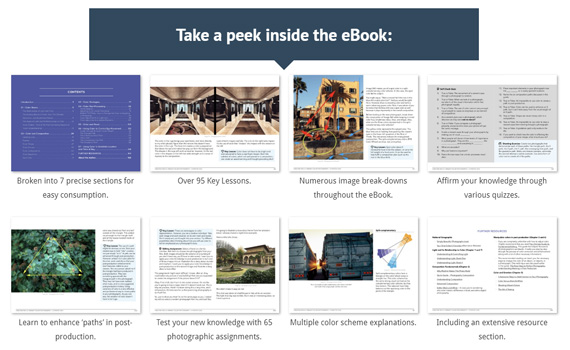
It’s fun to learn by doing. This 165 pages practical guide is packed with Assignments, Key Lessons, and Self-Check Quizzes!

  • It includes 65 assignments (when you complete them- you won’t even remember the photographer that you once were!)
  • There are over 95 Key Lessons
  • Numerous Self-Check Quizzes
  • Extensive Additional Resources Section
  • They’ve also included 3 videos. Each provides a specific message and training.

Some of the Many Topics Covered:

  • Understanding the relationship of color and light, and how to use this to your advantage
  • How to use the angle of light to maximize color effect-
  • Color models – What are they? How can they help you?
  • How to work with color in the traditional composition tools: leading lines, focal points, frames, repetition, juxtaposition, and shapes…
  • What are color ICC profiles?
pages color guide

Pages from the Rich & Vibrant Color Photography Guide

  • Using color strategies to guarantee that your photos get noticed!
  • How to change the color of any object in a photograph-
  • How color controls eye movement…
  • Putting mood into your images through color.
  • Working with color photography at a professional level!
  • Why an aperture like f/4 can give you great background blur- Or not!
  • Discover how it is possible to get background blur even at f/22.
  • How to mastermind all of the different components that contribute to background blur.
  • The Secret behind why background blur can make your photographs better!
  • Everyone talks about depth of field. But what is it really?
  • The boundaries of depth of field- where are they- and how to make them work in your favor—
  • Learn about shallow depth of field, wide depth of field, and everything in-between.
  • How to “create” shallow depth of field with any lens!
  • How to change the color of any object in a photograph…
  • What are the ‘Building Blocks’ of a powerful color photograph
  • How color can create a ‘path’ through a photograph.
  • Why all color wheels are not created equally!
  • Using color shapes to put some pizazz into a composition-
  • How to us color to tell the specific story you want to convey…
  • And much, much more!
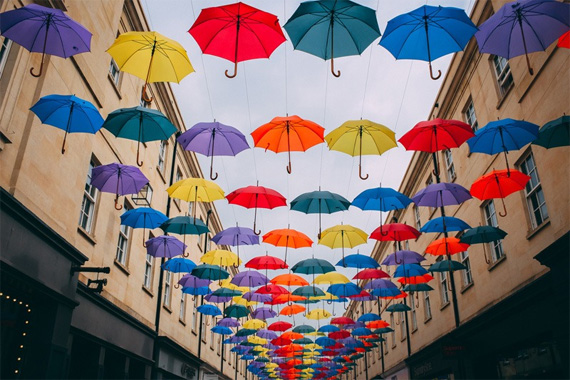
vibrant umbrella colors

The relationship between color and light.

The goal of this premium guide is to pull you along to a better, more complete, and a thorough understanding of color photography and color strategy, as it relates to creating ‘Unforgettable & Memorable” color photographic images!

How to Get a Discounted Copy Today (With a Bonus):

We were able to negotiate a 71% discount for our readers today which ends soon (just $29, total value $100). Right now it also includes bonus photoshop video tutorials. All of it also carries an amazing 365 day happiness guarantee so there is no risk in trying it.

Deal found here: The Rich & Vibrant Color Photography Guide at 71% Off


Go to full article: New: Rich & Vibrant Color Photography Guide

What are your thoughts on this article? Join the discussion on Facebook

PictureCorrect subscribers can also learn more today with our #1 bestseller: The Photography Tutorial eBook

The post New: Rich & Vibrant Color Photography Guide appeared first on PictureCorrect.


from PictureCorrect https://ift.tt/2RwgO1m
via IFTTT

PictureCorrect.com: Useful Composition Tips for Still Life Photography

Technicalities aside, it’s composition that defines an image. Your viewers probably don’t care what settings or equipment you used, or how you took the image. They are more concerned about what they see, and what they see is composition. In still life photography, composition is even more important. Creating visually interesting photos out of everyday objects can be a challenge. Photographer Ed Verosky shares some useful tips for still life composition in this video:

Rule of Thirds

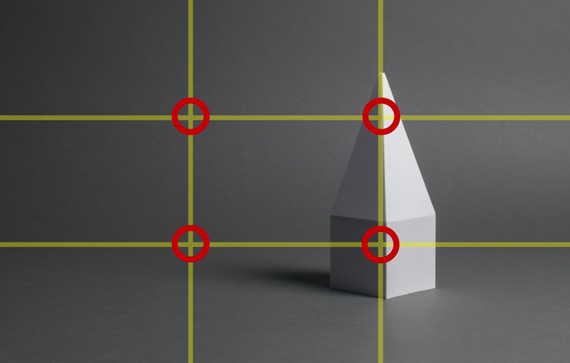
This is one of the most popular, easy to understand, and powerful composition guides used in visual art. According to the rule of thirds, you divide the frame into nine equal segments using two vertical and two horizontal lines. The points where the vertical and horizontal lines intersect are considered the focal points. Try placing important elements on these points. You can also align the horizon in your image with one of the horizontal lines on the grid instead of having it dead center.

rule of thirds

This composition guide helps in shifting the balance of your composition to one side and allows the viewers’ eyes to move around your image. If you have a hard time visualizing the rule of thirds grid, see if your camera can overlay it for you.

Rule of Odds

This composition technique suggests that an odd number of objects is interesting to look at compared to an even number of objects. Try to avoid making a composition that’s too symmetrical. Play with the visual balance—perhaps imbalance.

Leading Lines

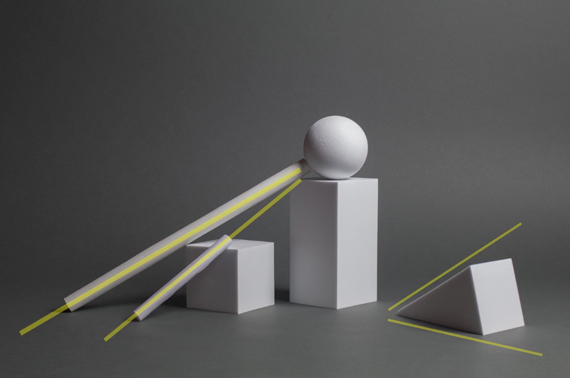
Leading lines work as guides to drive the viewers’ attention to one part of the image to another. While leading lines can be very powerful in landscapes and environmental portraits, they can get a little subtle when it comes to still life.

Leading lines in composition

Groupings

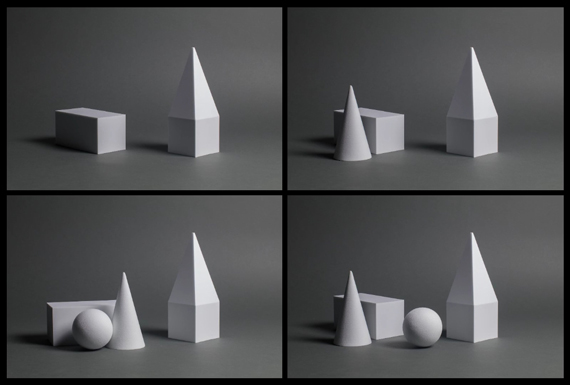
Groupings help viewers determine the relationship between your subjects. How you choose to group objects in a frame can either create tension or harmony. The way you choose to group objects thus becomes a vital part of your composition.

groupings in composition

L-Shape Structure

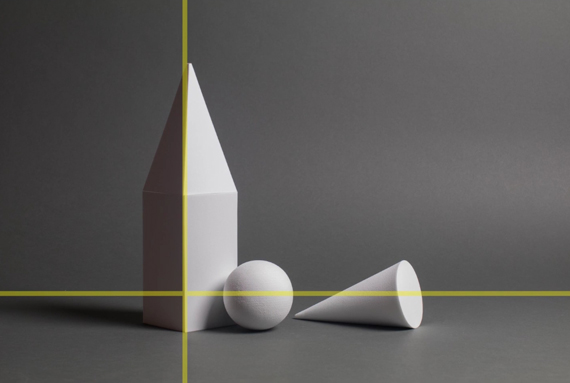
For still life photography, Verosky suggests that composing in L-shape can be the best choice, as it lets you compose along a horizontal plane. This concept is also in agreement with the rule of thirds.

l shape structure in composition

“You start with your taller object on one of the vertical grid lines in one side of the image. And then you build up the rest of the supporting objects along the base.”

Other Composition and Design Elements

Besides these rules and guides, there are other factors you need to consider when setting up your composition. You need to have a holistic view of the tone and contrast, pattern and rhythm, color, and texture, among other factors. Pay attention to how the elements complement each other and work together.

Again, don’t be awestruck with all these rules. Take them as guidelines and use them as supports to improve your learning. There is no need to always stick by the rules. Try out your own style and use these rules as a reference.


Go to full article: Useful Composition Tips for Still Life Photography

What are your thoughts on this article? Join the discussion on Facebook

PictureCorrect subscribers can also learn more today with our #1 bestseller: The Photography Tutorial eBook

The post Useful Composition Tips for Still Life Photography appeared first on PictureCorrect.


from PictureCorrect https://ift.tt/2PdgWAK
via IFTTT

torstai 29. marraskuuta 2018

PictureCorrect.com: How to Set Up a Photography Studio: 6 Tips

Setting up a home photography studio might seem like a straightforward option at first. All you should need is some lights and a background. Sounds easy, doesn’t it? The reality is once you start looking, the options can be overwhelming, as well as the price tag. Creating a successful studio to help you deliver great shots is a matter of learning exactly what you will need to make the setup perfect for your space and needs.

gear for home studio

To create a successful studio you must take the time to understand the advantages and disadvantages of your space. Is the room too cramped? Is the ceiling too low? Are the windows facing north or south? Do not feel pressured to buy everything straight away, before fully understanding what you are working with. Read the following tips to learn how to creatively and economically make the most of your studio space.

1. Camera and Lenses

For studio work, a lens range from 24mm to 85mm works the best. For full body shots, shooting at a distance of 20 feet is ideal, but less than 15 feet deep there will not be enough room for shooting full body length. In a small space avoid using a wider lens, as distortion can become an undesirable issue. A good lens to start with is to stick with the classic top choice for photographers: a 50mm prime lens. It’s perfect for low light, creative framing, and beautiful bokeh.

2. Basic Lighting Setup

After learning the basic lighting configurations, a simple but versatile light setup requires at least three strobes (prices range from $300 to $3000 per unit), light stands or heavier C-stands, and wireless synchronization to link the strobes to the camera. Speedlights are a good starting option as they are small, light, portable, affordable, and run on batteries. A studio strobe is much larger, runs on AC power, and has faster wait time between flashes but it’s a costlier option. Continuous lights can be better for beginners to see the results immediately, but they do put off a lot of heat.
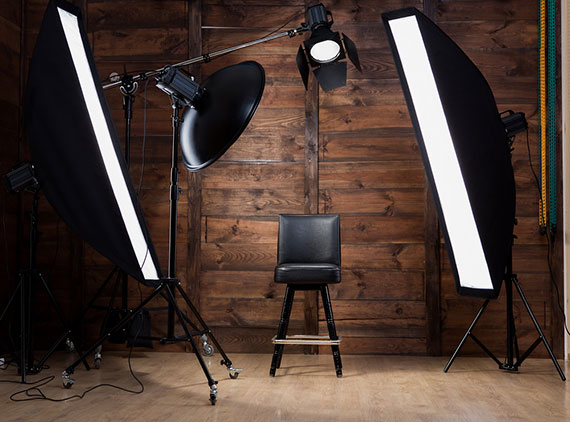
softboxes

3. Light Modifiers

Modifiers are important to enhance creativity, diffuse the light, and control mood. What you are illuminating, with your style and budget in mind, play a big role in choice. Umbrellas are a good place to learn the basics. They create soft, forgiving light that is flat and even. Scrim panels are the most versatile modifier for large areas of diffused light and are an easy DIY project. Once you’ve mastered the basics, experimenting with softboxes, octaboxes, gels, grids, and any mixture of them brings your creativity to life.
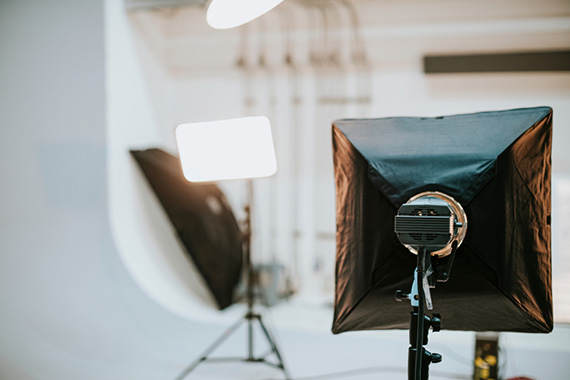
light modifiers

4. Backdrops

Perfect for removing distracting backgrounds, a good backdrop allows you to have control over your photos. A good start is a seamless paper or vinyl backdrop. These backdrops are affordable, easy to set up, and come in a big choice of colors. Fabric backdrops are more expensive and require cleaning but are durable and come in a huge variety of choices. A good trick is to use a simple gelled light to change the color of a simple solid backdrop.
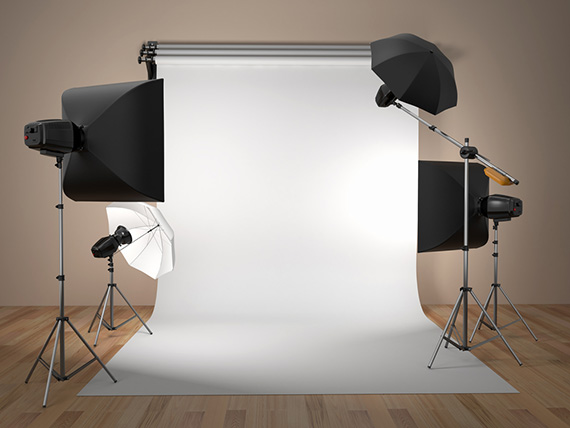
white backdrop

5. Reflectors, Tripods, and Stands

A reflector is a great simple tool that gives you fast control in varied light conditions and allows you to experiment and shape your light. Used in a number of ways, they can fill in shadows, add light from a window, or create a rim light. A 5-in-1 reflector is the most useful. It collapses down and has interchangeable surfaces in white, silver, gold, and black. It can also double as a diffuser panel.

A tripod or stand is needed for reflectors and other studio equipment, and it is always useful to have at least five around the studio. Tripods are perfect for your camera for extra sharp images, lighting, and other equipment. Stands are much more sturdy to support and protect heavy and expensive equipment.
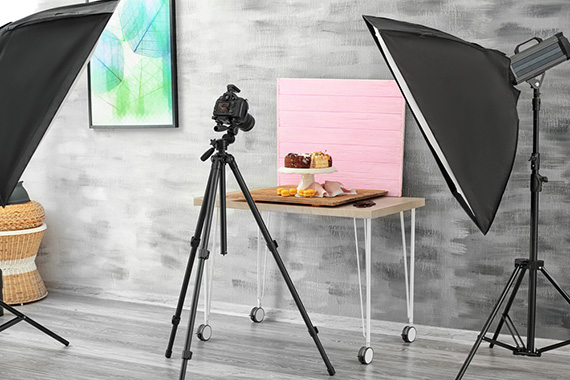
tripod

6. Props

All sorts of props can be useful around the studio from fans and chairs to fabric and accessories. They add a new and interesting element to your photos. Props can quickly get repetitive and overused in your shots, so try mixing it up. Start collecting things for your prop collection from garage sales, the attic, thrift stores, flea markets, hardware stores, estate sales, craft stores, or even Etsy and Craigslist. Use your imagination and you can add the right spice to your photographs!
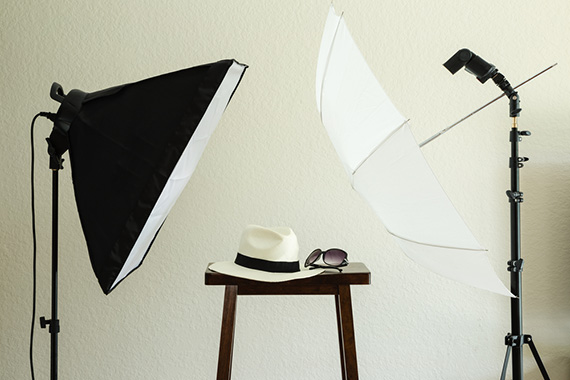
umbrella

Planning a studio is a great step for attracting clients and growing your photography business or simply having a lot of fun. Making it work in your space can be tricky but with the right knowledge and planning, you can make a controlled environment to practice your craft. Don’t get trapped on what makes the ideal studio. Let your creativity and motivation make the most of what you can afford and work with it.

About the Author:
Sergey Kostikov is a fashion photographer and the owner of FD Photo Studio, a studio rental company that offers affordable photography rental spaces complete with equipment in 30 studios across Los Angeles and New York. The company also hosts specialized events and workshops to help aspiring photographers hone their skills.


Go to full article: How to Set Up a Photography Studio: 6 Tips

What are your thoughts on this article? Join the discussion on Facebook

PictureCorrect subscribers can also learn more today with our #1 bestseller: The Photography Tutorial eBook

The post How to Set Up a Photography Studio: 6 Tips appeared first on PictureCorrect.


from PictureCorrect https://ift.tt/2E5dHdB
via IFTTT

PictureCorrect.com: Interesting Photo of the Day: Fly-By Drinking

Grabbing a drink of water for this grey-headed flying fox can be more challenging than you might think. Photographer Ofer Levy waited patiently in over 40° C (104° F) weather while also standing chest deep in the water hoping one of these creatures would swoop low enough to be photographed. The animal drinks by swooping down into the water and getting itself wet, then licking the water off of itself:

bat over water

“Fly-By Drinking” by Ofer Levy (Via Imgur. Click image to see full size.)

Levy made his passion into his career and mainly does wedding photography but also loves being outdoors. He says,

“Later on in life I became especially interested in wildlife photography. This passion persists and I spend a lot of time and effort in the field, honing my skills, and enjoying the ongoing challenges that this area of photography demands.”

Levy is the recipient of multiple photography awards and is living his dream. You would have to really love the grey-headed flying fox to stand in that hot weather for three hours a day waiting for the right moment!


Go to full article: Interesting Photo of the Day: Fly-By Drinking

What are your thoughts on this article? Join the discussion on Facebook

PictureCorrect subscribers can also learn more today with our #1 bestseller: The Photography Tutorial eBook

The post Interesting Photo of the Day: Fly-By Drinking appeared first on PictureCorrect.


from PictureCorrect https://ift.tt/2gfaP2X
via IFTTT

PictureCorrect.com: What is the ISO Camera Setting and How to Use It

ISO is considered one of the three fundamental aspects that control the brightness of an image. Aaron Nace of Phlearn explains how ISO works:

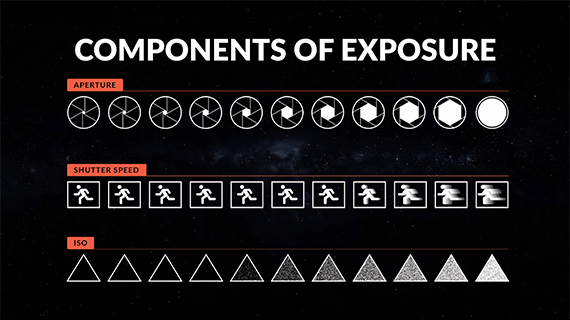
The exposure triangle is made up of aperture, shutter speed, and ISO.

exposure components

Aperture

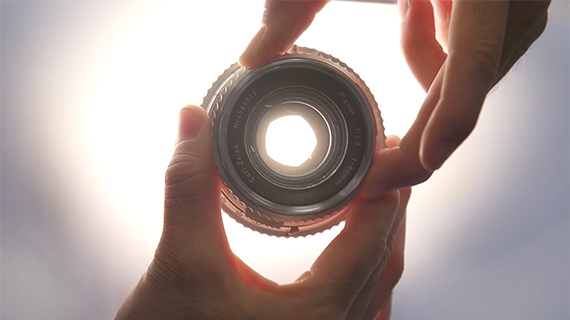
Aperture relates to the opening on your lens that allows light to enter the camera.

aperture

Aperture

Shutter Speed

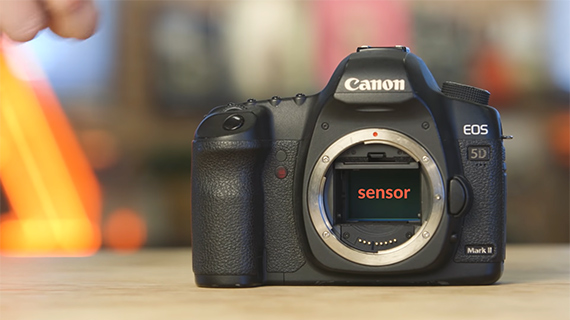
Shutter speed is the length of time that your sensor is exposed to light.

shutter speed

ISO

ISO has nothing to do with increasing the amount of light that enters the camera. It deals with what happens after the light enters the camera. ISO takes into account the shutter speed and aperture and then uses integrated software to brighten up the exposure. So, ISO is like in-camera processing.

ISO Numbers

doubling iso

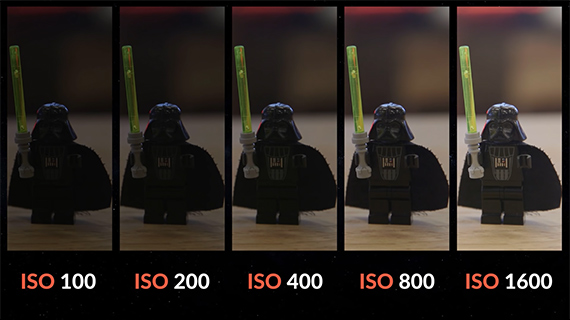
ISO numbers are always expressed as whole numbers. The least is usually 100 on most cameras. Each number (refer to the chart above) doubles the brightness. So, moving from ISO 100 to ISO 200 doubles the brightness, and so on.

The Catch

It all sounds pretty straight-forward. All you have to do is raise the ISO number and you get a bright picture. But there is a catch and that is noise.

You can compare the process of increasing the ISO number with that of recording with a microphone. To increase the sound of a recording, you have to increase the microphone levels. But this brings in ambient and electronic noise.

downsides of high iso

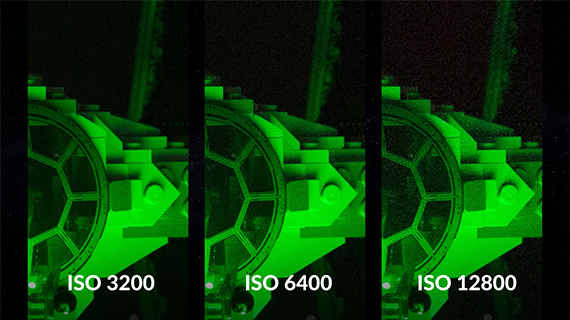
This is just the same with ISO. When you increase ISO to make a picture brighter, you also bring in signal noise, known as grain. Additionally, you will also likely see a loss of colors, dynamic range, and detail. So how do you avoid this?

The solution is in using the native ISO of the camera, which is the lowest ISO value it can shoot without tweaking anything (ISO 100 on most cameras). ISO 100 to about ISO 400 on most cameras should produce clean images. Anything above that and you will start to notice some noise.

When to Use High ISO

Shooting with a high ISO number is warranted when you need a large depth of field and there isn’t enough light to use a small aperture. Plus, in a situation where there is some amount of movement, using a slower shutter speed to compensate for the lack of light is not possible either. In both these situations, a higher ISO number solves the problem. You can always accept some noise but never a blurry image.

Post-Production Tip

If noise is really bad and sticks out like a sore thumb, try converting your images to black and white. Noise in a black and white image often looks acceptable.

high iso black and white

How do you choose which ISO to use?


Go to full article: What is the ISO Camera Setting and How to Use It

What are your thoughts on this article? Join the discussion on Facebook

PictureCorrect subscribers can also learn more today with our #1 bestseller: The Photography Tutorial eBook

The post What is the ISO Camera Setting and How to Use It appeared first on PictureCorrect.


from PictureCorrect https://ift.tt/2FLS5Vm
via IFTTT

keskiviikko 28. marraskuuta 2018

PictureCorrect.com: Snow Photography: 5 Quick Tips

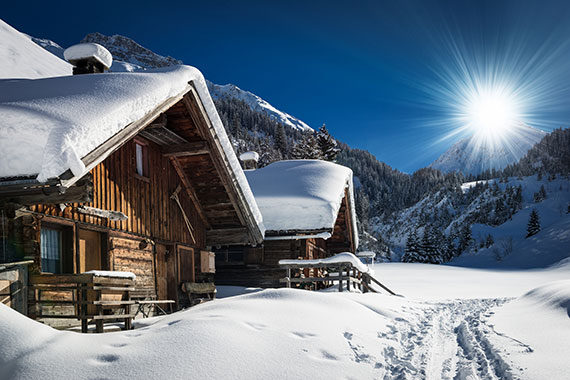
Winter is on its way with snow already falling across the country. There is nothing more serene than a fresh snowfall, but capturing a winter landscape full of white can be challenging to get right. Here are a few tips to help you ace those snowy shots.

winter cabin

1. Expose to the Right… A Lot

Snow means a lot of white, and white can trick the auto balance in your camera and lead to underexposed images. The metering system of your DSLR will try to expose white snow to middle gray. You want to overexpose your image to make sure white snow is, indeed, white. Be sure to constantly check and adjust your exposure.

2. Keep Your Palette Minimal

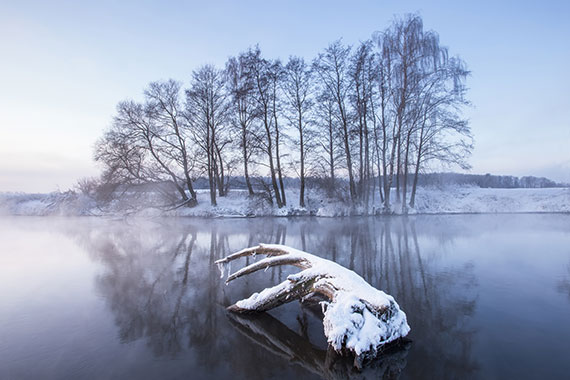
Winter scenes are often meant to be calming and do not need too many colors or over editing. Stick with “winter colors” like whites, blues, and greens to keep your images simple. If you’re trying to evoke Christmas, then feel free to break out the red!

snowy landscape

3. Shoot Any Time of Day

In the winter there is no need to limit yourself to shooting at sunset because the sun will stay much lower in the north and south and the days are often overcast. This makes a large majority of the day a viable option for photography.

4. Check Your Metering Mode

Metering is how your camera determines the correct shutter speed and aperture based on the amount of light that goes into the camera. Most DSLRs are automatically set in matrix metering or evaluative metering mode, which divides the camera into zones to determine the correct exposure. In the snow, you don’t want to leave your camera in this mode because it will average the image and expose for grey. Instead, try spot metering the brightest part of the snow.

5. Stay Warm

The best piece of advice for shooting in the winter is to be well protected from cold weather and dress warmly. If you’re not comfortable you cannot enjoy the photo and you won’t get a good memory. Be sure to dress warm and wear waterproof clothing.

If you plan to take to the snow, don’t forget to follow these easy tips. A warm outfit and special attention to your settings will go far and result in amazing shots for your holiday card, portfolio, or Instagram.

About the Author
Francesco Carucci from Dreamstime is a travel and landscape stock photographer outside of his daily desk job, spending most of his spare time chasing the light.


Go to full article: Snow Photography: 5 Quick Tips

What are your thoughts on this article? Join the discussion on Facebook

PictureCorrect subscribers can also learn more today with our #1 bestseller: The Photography Tutorial eBook

The post Snow Photography: 5 Quick Tips appeared first on PictureCorrect.


from PictureCorrect https://ift.tt/2ShEfeq
via IFTTT

PictureCorrect.com: Interesting Photo of the Day: Are These Shooting Stars or Satellites?

Dubai-based landscape and astrophotographer Siddharth Prem captured this beautiful photograph of the Northern Lights and several others during his travels in Lofoten, Norway—sparking a debate about whether the light streaks near the top center of the image are shooting stars or satellites:

northern lights satellite shooting star aurora starry sky astrophotography night long exposure

“Waves In The Sky” by Siddharth Prem (Click image to see full size.)

Prem initially labeled the light streaks as “shooting stars,” but several experienced night photographers on Reddit quickly stepped with a clarification: the uniformity of the streaks and their parallel direction in relation to one another indicates that they are satellites. Shooting stars notoriously fade in and out.

Prem captured the 30-second exposure using a Canon 6D and 16-35mm f/4 wide angle lens set at f/4. He edited the image in Adobe Camera Raw and Lightroom.

“I’ve always been fascinated with space and astronomy,” wrote Prem on his website. “The moment I realized I could learn my way around the night sky with a DSLR [and] long exposures, it sparked my interest in photography.”


Go to full article: Interesting Photo of the Day: Are These Shooting Stars or Satellites?

What are your thoughts on this article? Join the discussion on Facebook

PictureCorrect subscribers can also learn more today with our #1 bestseller: The Photography Tutorial eBook

The post Interesting Photo of the Day: Are These Shooting Stars or Satellites? appeared first on PictureCorrect.


from PictureCorrect https://ift.tt/2QpKi3s
via IFTTT

PictureCorrect.com: Wide Angle Portraits and the Lens of Honesty

When it comes to portrait photography, professionals suggest that you use a lens at the telephoto end of the spectrum. For instance, 85mm has been established as an ideal focal length for portraits. Some photographers use a 200mm lens for portraits because of the nice compression and the background separation this focal length can provide. But Tony & Chelsea Northrup have a different idea. In the following video, they discuss wide angle portraits and why 24mm is the lens of honesty:

Wide angle lenses force you to be close to your subject and be intimate with them. There’s no hide and seek, so the expressions are pure.

“I think 24mm is the focal length of honesty. It’s the focal length of your friends.”

Why? That’s because most smartphone cameras use a 24mm equivalent standard lens; the images that you post of yourself, your family, your pets, and your friends on social media are all taken at 24mm. It has no association with commercial production but has a friendlier touch.

Telephoto lenses got popular because they were mostly used in commercial broadcasting. Movies, TV shows, and the news were all shot with telephoto lenses, and people got used to that perspective. Telephoto lenses provide a commercial vibe while wide angle lenses produce a natural, honest, and friendly feeling.

You might argue that you can’t get a professional look with a blown out background using a wide angle lens. That’s true to some extent, but lens manufacturers have come out with lenses like the 24mm f/1.4 that can create great background blur, especially when shot from a closer distance. Heavy background blur is a trend that is fading away, anyway, according to the Northrups.

wide angle casual photo

If you haven’t tried wide angle lenses for portraits yet, go ahead and challenge yourself. Get closer and try to make photos that are casual instead of overly professional and polished. You’ll get much more genuine photos with a wide angle than you would with a telephoto. Are you up for the challenge?


Go to full article: Wide Angle Portraits and the Lens of Honesty

What are your thoughts on this article? Join the discussion on Facebook

PictureCorrect subscribers can also learn more today with our #1 bestseller: The Photography Tutorial eBook

The post Wide Angle Portraits and the Lens of Honesty appeared first on PictureCorrect.


from PictureCorrect https://ift.tt/2P8S50M
via IFTTT