sunnuntai 31. maaliskuuta 2024

PictureCorrect.com: 8 Ways to Become More Comfortable with Your Street Photography

I know many people who mention that they would like to get involved in street photography, but they can’t get over the initial hump, because they are too afraid to capture strangers candidly in the street.

This is a shame, because it is a wonderful and creative form of photography that everyone should try. If you are one of those people, here are eight tips to help you become more comfortable getting involved with street photography.

bike-lane-skateboarder

1. Ethics

I am not going to go into a long analysis about whether street photography is ethical. Both sides of the issue have valid arguments, and I understand the points of the many people who are against it. Some countries do not even allow it in public spaces.

Use your personal ethics when capturing strangers. If you do not feel comfortable capturing a person, do not capture them. I know photographers who don’t photograph homeless people and photographers who do. Everyone has a different level of ethics.

However, keep this in mind: when you look at images of the past, what are your favorite images? I bet most of you are going to say that they are images with people and culture shown in them. These are my favorite type of image, as well. These images have a place in history and society, and they teach us about ourselves. They are very important to capture, both for the present and for the long term.

Think about street photography with this frame of mind, and you will feel more comfortable.

woman-street-photography

2. Let People Enter Your Space

It is so tough to walk up to someone, enter their personal space, and take their photo without their permission. A lot of photographers do it, but it’s tough, especially at the beginning. The true key here is to pick a spot and let people enter your space.

Pick a location with foot traffic and wait there with your camera ready. The same amount of moments will occur around you whether you are walking or stationary, but it is easier to see and capture them if you are waiting in place. Most important is that by letting the subject enter your space you will feel much more comfortable capturing them.

3. Smile and Look Confident

I cringe sometimes when I see how sneaky photographers can be. I take sneaky shots and shots without looking through the viewfinder when it is necessary, but I always try to look happy, calm, and comfortable.

If you look like you are doing something wrong, people will pick up on that and feel uncomfortable. If you look like you are confident in what you’re doing, people are more likely to ignore you.

If I’m in a situation where I want to put the camera to my eye and take a candid shot and I know the person will notice, I make sure to smile after. Sometimes I’ll comment on how interesting the subject looks. A majority of the time, however, they will not notice or will just keep walking.

woman-with-cigarette-street-photography

4. Disarm Them with Enthusiasm and Kindness

It’s so rare that I have ever had a bad situation from taking a candid photo of a stranger. Sometimes people will come up to me and ask me if I took their photo and why. I tell them that I am a photographer doing a project on interesting New Yorkers; I thought they looked amazing and had to capture them. I will often shake their hand, look them in eye, and ask what their name is.

If you are complimentary and enthusiastic, they will most likely feel flattered. I’ve made a lot of people’s days by telling them this. Of course, occasionally someone will ask you to delete the photo, but after you sound so enthusiastic, they will do so nicely and will thank you when you do. Apologize and move on.

5. Bring Business Cards

For the people who stop you, it can help to have a business card printed up with your email and a link to your photography portfolio, even if you are not a professional photographer. This makes you more legitimate, and it’s a great way to further break the ice. Hand them your card and tell them that you will email the photo if they contact you.

skateboard-street-portrait

6. Try Street Portraiture

Portraiture on the street is different from candid street photography, but it is a great way to take a step toward getting over your fear. Make a point to ask one or two strangers to take their portrait at the beginning of each photography session. Some people will say no, of course, but don’t let that get to you.

The more people you ask over time, the more comfortable you will become, and this comfort will follow into your traditional candid street photography.

woman-in-car

7. Go to the Same Locations Over and Over Again

This is important for so many reasons, but becoming comfortable with the location will make you more comfortable capturing the people there. In addition, the regulars will begin to get to know you and will eventually stop noticing you all together.

street-photography-woman

8. Look at the Works of Other Street Photographers

This is my favorite tip. Look through the work of famous street photographers for inspiration. There is nothing better for building your confidence than seeing other people do this work well. They were once beginners, too, but they pushed through the problems at the beginning. Spend 20 minutes looking through the work of your favorite photographers before you walk out the door, and you will find that you will become much braver and more enthusiastic on the street.

About the Author:
James Maher is the author of Essentials of Street Photography, which covers everything about the genre even down to specific post processing techniques that can bring the best out of street scenes.

- - - - - - - - - - - - - - - - - - - - - - - - - - - - - - - - - - - - - - - - - - - - - - - - - - - - - - - - - - - - - - - - - - - - - - - - - -

This post 8 Ways to Become More Comfortable with Your Street Photography appeared on PictureCorrect.


from PictureCorrect https://ift.tt/8fgZTjd
via IFTTT

lauantai 30. maaliskuuta 2024

PictureCorrect.com: Tips for Better Flower Photography

Final day: only hours left to get the Flower Photography Guide at 68% Off

Flowers are naturally beautiful, and easy to find in the warmer months of the year, and so make a great subject for a photo. This article covers the top tips to get great photos when photographing flowers in their natural surroundings.

flower photography tips

Photo by Wade Brooks

Choose interesting angles

If you want your flower photos to stand out from the crowd, try taking photos from unusual angles, such as looking up.

Generally when taking natural flower photos, you will want to take the photo at slightly above eye level with the flower, ensuring that the centre of the flower can be seen. This will mean crouching down, or for smaller flowers getting the camera right down at ground level.

When photographing flowers at ground level you may need to flatten or remove blades of grass or leaves that would otherwise be in the way between the camera and the flower.

Use natural light and a tripod if needed

For taking photos of flowers in their natural environment you will be best using natural light, and not flash. Natural light will generally give less harsh shadows, and should also ensure that the background behind the flower is lit well.

The best time of the day for photographing flowers is early morning or late afternoon, where the light will be warmer and less harsh than it gets later in the day. The wind is also generally lower at the start and end of the day, meaning you are less likely to get the flower blowing about while you try and take photos of it.

Depending on how well your flower is lit (e.g. if you’re shooting a bluebell in woodland then it’s probably relatively dark), then you may need to use a tripod to stabilise the camera. When placing the tripod try to be careful not squash other nearby flowers and not to knock the flower you are wanting to photograph. You don’t want to find the perfect flower and then knock all its petals off while trying to position your tripod!

For taking photos of flowers during the daytime, try shooting when there is hazy cloud, as the cloud helps diffuse the sunlight. This makes the shadows less harsh and produces a more pleasing photo.

Use a diffuser to diffuse harsh light

If you’re trying to photograph a flower under bright daylight, you can use a diffuser to soften the light, and reduce harsh shadows / highlights on the flower. A diffuser is just a thin piece of material or paper that spreads harsh direct light out over a larger area.

You can buy commercially produced diffusers, or make your own. You need some white translucent material, like a plastic bag, tissue paper, or an old T-shirt. Stretch the material over a frame (an old coat hanger bent into a diamond shape works well), and attach it securely.

When photographing the flower, hold the diffuser between the sun and the flower. You should immediately see the reduction in harsh shadows and highlights on the flower.

Landscape style flower photography

When you find a large area covered with flowers, you’ll probably want to take a photo of the whole scene. The same rules as standard landscape photography apply here. Try and include some foreground, middle-ground, and background to create a sense of depth and scale. Try and use leading lines and the rule of thirds when composing the photo too.

If it is windy, make sure you set the camera to use a fast enough shutter speed to avoid the flowers coming out blurry.

Dew covered petals

Flowers covered in early morning dew make an attractive photo, but if you missed the early morning, or there wasn’t any dew, you can create your own. If you have a misting bottle or spray bottle, you can use this to create a false dew on the flower.

Flowers are a popular subject for photographs, but how can you take good photos that really show off the beauty of a flower? Continuing on from part 1, this article covers several more tips to help you take amazing flower photos. The tips cover photographing flowers in their natural surroundings, rather than photographing flowers in a vase or a flower arrangement, which is quite a different affair.

Use a reflector or flash to fill in shadows and help light the flower

If you are photographing a flower where the front of the flower isn’t directly lit by sunlight, you can use a reflector or a small amount of fill-flash to help light the flower. You can purchase commercially made reflectors, or make your own by sticking a large sheet of kitchen foil to a piece of cardboard.

Place the reflector so that it reflects light back onto the flower. As well as helping to light the flower, since the light will be reflected from a different direction to the main light, it can help fill in harsh shadows on the flower.

As an alternative to a reflector, or in addition, you may also consider using fill-flash to help light the flower and fill in dark shadows. Make sure you have your flash set at low power, as you only want the flash to contribute a small amount of light to the scene, not become the main light source.

Get in close

If your camera has a macro mode, or you have a DSLR with a macro lens, try getting in close and filling the frame with the flower. And then try getting even closer to isolate just part of the flower. You can find some great abstract compositions when focusing on only a very small part of a flower.

When taking close-ups or macro photographs of flowers, you may need to use flash or long shutter speeds to illuminate the flower. At these very close distances, flash will usually appear relatively soft, and more like natural light.

Prevent the wind from ruining your photo

A big problem when taking photos of flowers is that they blow about in the wind. This can cause problems in composing your photo if the flower is constantly moving about. And it will also result in a blurry photo if your shutter speed is not high enough to freeze the motion of the flower.

One thing you can do is to set up a wind break between the flower and the wind. You don’t need to lug a full size wind break around with you though. If you have a tripod and diffuser or reflector with you, you can place the tripod between the flower and the wind, and then rest the diffuser or reflector up against the tripod’s legs. So long as you’re not photographing a tall flower, this should act as a decent windbreak.

Another thing you can do is to secure the flower using an accessory known as a plamp (short for plant clamp). This is a small bendable arm with clamps on both ends. One end clamps to your tripod leg, and the other end clamps onto the flower. This stops the flower blowing about in the wind.

Use backlighting to your advantage

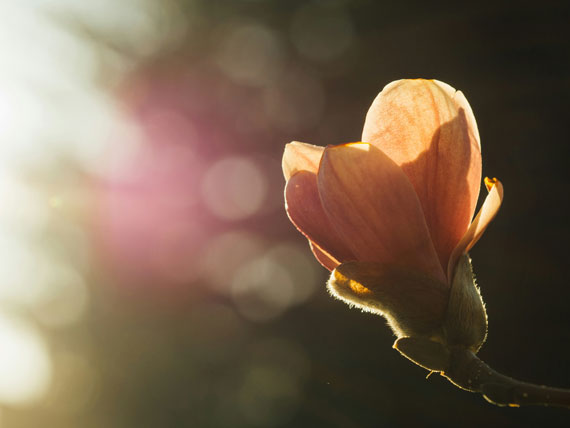
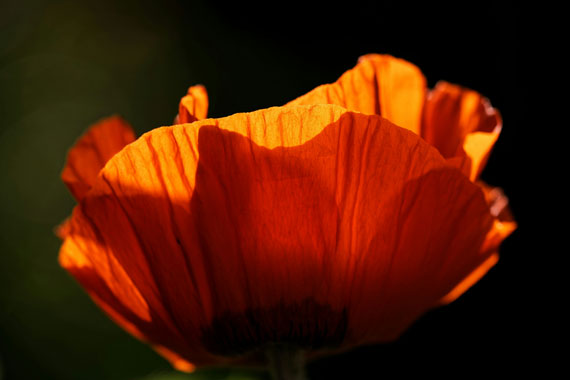
The large majority of flowers have relatively thin petals, and so can make a great photo when backlit. The light shines through the petals, giving them quite a different look to a standard photo.

Look at the flower condition and remove any distractions

There are exceptions to everything, but in the large majority of cases, a photo of an undamaged flower will look nicer than that of a damaged one. If you are in an area with lots of the same flowers, take your time to look at a few of the flowers and try to find the one that is in the best condition.

better photography flower tips

Photo by Valerie

Pay attention also to what is surrounding the flower, and try to avoid including other elements (such as a random blade of grass) that distract from the flower. Sometimes you may be able to change the angle you are photographing at to remove the distracting elements.

Other times you may need to squash down or remove the distracting elements. If you are photographing outside of your garden, be careful what you are removing though.

Isolate the flower from its surroundings

Set your camera / lens to use a large aperture (e.g. f/2.8) when photographing the flower to help throw the background out of focus. If the space permits, also try using a lens with a longer focal length or zooming in on your camera, and taking the photo from further away. This change in perspective helps to isolate the flower from the rest of the scene.

About the Author:
Dave Kennard writes for DiscoverDigitalPhotography covering all aspects of photography, from landscape photography to portrait photography.

For Further Training:

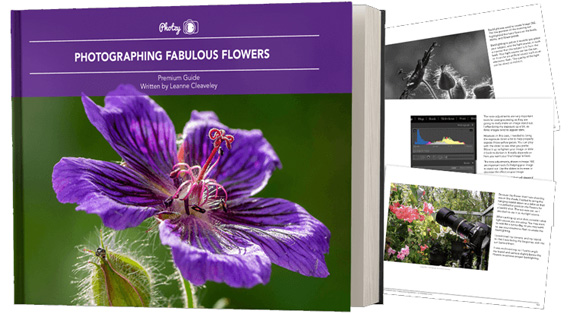
Have you ever wondered how amazing flower photographs are created? I wondered as well… And then, I found this amazing, and gifted, flower photographer- who not only knows HOW to create dynamic flower photography- she also knows how to TEACH those tricks and techniques to other photographers through this in-depth eBook. It is currently 68% off until the end of the month, March 31, with all the flowers blooming for Spring if you want to check it out.

flower photo guide

Flower Photography Guide (Take a Peek Inside)

156 page practical guide packed with Assignments, Key Lessons, and Self-Check Quizzes! (15 assignments, 26 key lessons, & 70 self-check questions!) With this guide, you’re getting a complete system for producing beautiful flower photographs. And, it’s at a fraction of the cost of an in-person workshop. Plus you can re-read the material anytime you want, whenever you need a quick refresh.

Only hours left: Photographing Fabulous Flowers at 68% Off

- - - - - - - - - - - - - - - - - - - - - - - - - - - - - - - - - - - - - - - - - - - - - - - - - - - - - - - - - - - - - - - - - - - - - - - - - -

This post Tips for Better Flower Photography appeared on PictureCorrect.


from PictureCorrect https://ift.tt/WZ2MJPn
via IFTTT
perjantai 29. maaliskuuta 2024

PictureCorrect.com: Avoiding Common Pitfalls in Photo Printing

Crafting a captivating print of a photograph involves more than just selecting a high-resolution image and clicking “print.” Here are some common pitfalls photographers encounter when printing their work and tips on how to avoid them:

Relevant reminder: only a little while left to get Gigapixel Version 7 at $20 Off

printing pitfalls

1. Neglecting Image Resolution and Size

One of the most prevalent mistakes is ignoring the resolution and size of the image. Printing a low-resolution image can lead to a pixelated and blurry print. It’s crucial to ensure that the image has enough pixels per inch (PPI) to produce a sharp print at the desired size. A good rule of thumb is to have at least 300 PPI for high-quality prints.

Tips:

  • Always check the resolution before printing.
  • Upscale the image using specialized software if needed, without compromising quality.

2. Overlooking Printer and Paper Compatibility

Different printers and paper types can dramatically affect the outcome of a print. Using paper that’s not compatible with your printer can result in poor ink absorption and color representation. It’s essential to match the printer’s capabilities with the right type of paper.

Tips:

  • Consult your printer’s manual or manufacturer’s website to find compatible paper types.
  • Experiment with different papers to see which yields the best results for your work.

3. Ignoring Color Calibration

Colors on your monitor might not match what gets printed, leading to unexpected results. This discrepancy often stems from uncalibrated devices. Ensuring that your monitor and printer are color calibrated is crucial for color accuracy in your prints.

Tips:

  • Use a monitor calibration tool to ensure color accuracy on your screen.
  • Perform regular printer calibrations and use ICC profiles for precise color output.

4. Disregarding the Importance of Editing for Print

Editing for print is different from editing for digital display. Prints often require higher contrast and sharpening to compensate for the softening that can occur during the printing process.

Tips:

  • Adjust your edits specifically for printing, considering how details and colors translate onto paper.
  • Make test prints to fine-tune your editing choices.

5. Overlooking the Proofing Process

Skipping the proofing process is a recipe for disappointment. A proof print allows you to make necessary adjustments before the final print, saving you time, resources, and frustration.

Tips:

  • Always make a smaller, proof print to check for color accuracy and overall appearance.
  • Adjust your process based on the proof and only then proceed to the final print.

6. Failing to Consider the Viewing Environment

The lighting under which the print will be displayed can significantly affect its appearance. For instance, a print viewed under warm indoor lighting may look different from one displayed in a gallery with cooler, balanced lighting.

Tips:

  • Consider the lighting conditions where the print will be displayed.
  • Make adjustments to your print to compensate for the expected viewing conditions.

By steering clear of these common mistakes and implementing the suggested tips, photographers can significantly improve the quality and impact of their printed photographs. Remember, printing is an art in itself, and mastering it takes patience, practice, and attention to detail.

For Help Increasing Photo Resolution:

In photo editing news, Topaz Labs just announced a sale on their Gigapixel AI upscaling program. Designed to increase the resolution of your photos by up to 600%, rebuilt from the ground up to be better and faster.

gigapixel preview

Gigapixel Image Upscaling

Generate more resolution in your images – allowing you to digitally crop and upscale without loss of pixels. Works great for large-format prints where every pixel counts. Currently $20 off today.

Deal ending soon: Gigapixel A.I. Version 7

- - - - - - - - - - - - - - - - - - - - - - - - - - - - - - - - - - - - - - - - - - - - - - - - - - - - - - - - - - - - - - - - - - - - - - - - - -

This post Avoiding Common Pitfalls in Photo Printing appeared on PictureCorrect.


from PictureCorrect https://ift.tt/FGsor2a
via IFTTT
torstai 28. maaliskuuta 2024

PictureCorrect.com: Key Aspects of Composition in Flower Photography

Flower photography is an art form that allows us to capture the delicate and ephemeral beauty of flowers. Whether you’re a professional photographer or an enthusiast capturing blooms in your garden, understanding the principles of composition can significantly enhance the impact of your photographs. In this blog post, we’ll explore the most crucial aspects of composition in flower photography to help you create stunning, evocative images.

Relevant note: only a little while left for the Flower Photography Guide at 68% Off

flower composition

Photo captured by Aaron Burden; 60mm, f/4.0, 1/800s, ISO 125

1. Focus and Clarity

The focal point in flower photography is paramount. It’s essential to decide what part of the flower or scene you want to highlight. This could be the vibrant petals, the intricate patterns of the stamen, or even droplets of dew on the flower’s surface. A clear focus point draws the viewer’s eye and establishes the subject of your photograph. Employing a shallow depth of field can help isolate the subject, ensuring it stands out against a softly blurred background.

2. Lighting

Lighting can make or break a flower photograph. The best flower photos often utilize natural light, which can highlight the translucence of petals or cast fascinating shadows, adding depth and texture. The golden hours—shortly after sunrise or before sunset—offer soft, warm light that can enhance the colors and mood of your floral subjects. Conversely, overcast days provide diffused light that evenly illuminates a flower, minimizing harsh shadows and highlights.

3. Composition Rules

Understanding and applying composition rules can significantly improve your flower photography. The rule of thirds, for instance, involves dividing your image into nine equal segments with two horizontal and two vertical lines. Placing the flower or an interesting part of it at the intersections or along the lines can create a more engaging photo. Meanwhile, the use of leading lines or patterns can guide the viewer’s eye through the image, adding interest and movement.

4. Color and Contrast

Color plays a vital role in conveying the mood of your flower photographs. Warm colors can evoke feelings of passion and energy, while cool colors can impart a sense of calm and tranquility. Utilizing contrasting colors can make your subject pop and add vibrancy to your image. However, it’s essential to balance color contrast to ensure it enhances rather than overwhelms the subject.

color and contrast

Photo captured by Chris Vanhove; 94.5mm, f/4.5, 1/400s, ISO 400

5. Background and Context

The background can either complement your flower or distract from it. A cluttered or busy background can detract from the subject, while a simple, unobtrusive backdrop can make it stand out. Sometimes, including contextual elements like other flowers, leaves, or even the environment can add depth and tell a more compelling story. The key is to maintain a balance that supports the subject of your photograph.

6. Perspective and Angle

Changing your perspective or shooting angle can unveil a flower’s character in unique and unexpected ways. Don’t hesitate to experiment with different viewpoints, such as shooting from a low angle to capture the grandeur of a flower reaching towards the sky or getting close to reveal the intricate details of its texture and patterns. Each angle tells a different story and can evoke distinct emotions.

7. Simplicity

Sometimes, less is more in flower photography. A simple composition that emphasizes the flower without unnecessary distractions can be powerful. Simplicity often encourages the viewer to pause and appreciate the beauty and details that might otherwise go unnoticed.

In conclusion, mastering the aspects of composition in flower photography allows you to not only capture the beauty of your floral subject but also convey emotion and story. By focusing on these key elements, you can elevate your flower photographs from mere snapshots to compelling images that resonate with viewers. Remember, the best way to improve is to practice consistently, so don’t hesitate to explore, experiment, and let your creative vision flourish through your lens.

For Further Training on Flower Photography:

Have you ever wondered how amazing flower photographs are created? I wondered as well… And then, I found this amazing, and gifted, flower photographer- who not only knows HOW to create dynamic flower photography- she also knows how to TEACH those tricks and techniques to other photographers through this in-depth eBook. It is currently 68% off for a limited time with all the flowers blooming if you want to check it out.

flower photo guide

Flower Photography Guide (Take a Peek Inside)

156 page practical guide packed with Assignments, Key Lessons, and Self-Check Quizzes! (15 assignments, 26 key lessons, & 70 self-check questions!) With this guide, you’re getting a complete system for producing beautiful flower photographs. And, it’s at a fraction of the cost of an in-person workshop. Plus you can re-read the material anytime you want, whenever you need a quick refresh.

Deal ending soon: Photographing Fabulous Flowers at 68% Off

- - - - - - - - - - - - - - - - - - - - - - - - - - - - - - - - - - - - - - - - - - - - - - - - - - - - - - - - - - - - - - - - - - - - - - - - - -

This post Key Aspects of Composition in Flower Photography appeared on PictureCorrect.


from PictureCorrect https://ift.tt/zcUSsEI
via IFTTT

keskiviikko 27. maaliskuuta 2024

PictureCorrect.com: Introduction to Large-Format Printing for Photographers

As a photographer, your artistic journey doesn’t end when you capture that perfect shot. Presenting your work in its best light is just as crucial, and this is where large-format printing comes into play. Large-format prints can transform your photographs into eye-catching pieces of art, making them an essential aspect of photography, especially for exhibitions, high-end client work, or personal satisfaction. This blog post aims to demystify large-format printing for photographers, helping you understand its benefits, considerations, and how to get started.

Relevant reminder: only a little while left to get Gigapixel Version 7 at $20 Off

large format printing

What is Large-Format Printing?

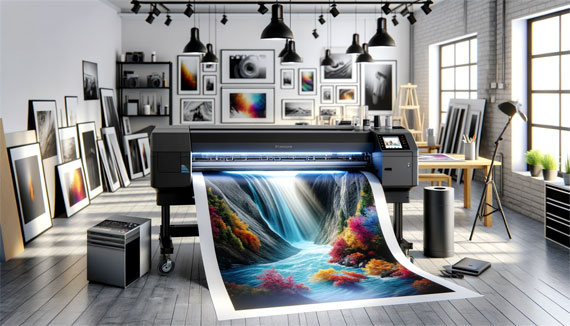
Large-format printing refers to print jobs that exceed the size of standard printers, usually wider than 24 inches. These prints can go up to several feet in both dimensions, offering incredible detail and a more immersive viewing experience. This type of printing is ideal for displaying landscape, wildlife, architectural photography, and more, at scales that capture every detail and color nuance.

Benefits of Large-Format Printing for Photographers

  • Detail and Clarity: Large-format prints retain sharpness and detail, even up close. This means your audience can see every texture, color gradation, and element you captured, no matter the size of the print.
  • Impact and Engagement: There’s an undeniable impact that large prints have in galleries, exhibitions, or even in a home setting. They draw viewers in and create a more engaging and immersive experience.
  • Professional Appeal: Offering large-format prints can set you apart in the professional world. It shows clients that you are capable of delivering high-quality work suitable for large displays or luxury settings.

Considerations for Large-Format Printing

  • Resolution: Your original photograph needs to be of high resolution. Large-format printing is unforgiving with low-resolution files, so ensure your images are captured with a high megapixel camera and preserved with minimal compression.
  • Printer Quality: Not all large-format printers are created equal. Look for printers that can handle the width of your desired print size while also offering a wide color gamut and high resolution.
  • Paper Type: The choice of paper or canvas can drastically affect the appearance of your print. Glossy, matte, satin, and canvas are just a few of the options, each providing a different aesthetic.
  • Color Calibration: Ensuring that your screen and printer are color calibrated is vital for the colors in your prints to match what you see on your monitor.
  • Professional Services: If investing in your own large-format printer isn’t feasible, consider using professional printing services. They can provide advice, quality assurance, and a range of materials to choose from.

Getting Started with Large-Format Printing

  1. Research and Select a Printer: Whether you’re buying a printer or choosing a service, research is key. Look for reviews, ask for recommendations, and compare specifications.
  2. Test Prints: Before committing to a large print, do smaller test prints to check for color accuracy and detail.
  3. Prepare Your Files: Ensure your images are correctly formatted, ideally in TIFF or a high-quality JPEG format. Check the resolution, color profile, and dimensions before sending them to print.
  4. Consider the Display: Think about where and how the print will be displayed. This can influence your choices regarding size, material, and finishing.
  5. Learn and Experiment: Each print can be a learning experience. Take notes on what works and what doesn’t, and don’t be afraid to experiment with different materials and sizes.

Large-format printing opens up new horizons for photographers, allowing your work to be seen and appreciated like never before. By understanding the basics and diving into the world of large prints, you can add a powerful tool to your photographic arsenal. Whether for exhibition, sale, or personal enjoyment, large-format prints can bring your visions to life in a grand and impactful way.

For Help Increasing Photo Resolution:

In photo editing news, Topaz Labs just announced a sale on their Gigapixel AI upscaling program. Designed to increase the resolution of your photos by up to 600%, rebuilt from the ground up to be better and faster.

gigapixel preview

Gigapixel Image Upscaling

Generate more resolution in your images – allowing you to digitally crop and upscale without loss of pixels. Works great for large-format prints where every pixel counts. Currently $20 off today.

Deal ending soon: Gigapixel A.I. Version 7

- - - - - - - - - - - - - - - - - - - - - - - - - - - - - - - - - - - - - - - - - - - - - - - - - - - - - - - - - - - - - - - - - - - - - - - - - -

This post Introduction to Large-Format Printing for Photographers appeared on PictureCorrect.


from PictureCorrect https://ift.tt/KyrOp8D
via IFTTT

tiistai 26. maaliskuuta 2024

PictureCorrect.com: New Gigapixel Image Upscaler at $20 Off

In photo editing news, Topaz Labs just announced a sale on their Gigapixel AI upscaling program. Designed to increase the resolution of your photos by up to 600%, rebuilt from the ground up to be better and faster. Offer ending soon: Gigapixel Version 7 at $20 Off

gigapixel preview

Gigapixel Image Upscaling

What’s New in Gigapixel AI v7:

  • Run locally: Upscale and enhance quickly right on your desktop. Use easy batch processing to optimize your workflows.
  • Premium AI Models: More than five years of advanced AI training has made Gigapixel 7 best-in-class.
  • Lighting Speed: Gigapixel 7 is faster than ever and optimized for your machine.

gigapixel photo

Print any image, bigger and better.

Generate more resolution in your images – allowing you to digitally crop and upscale without loss of pixels.

Perfect for large-format prints where every pixel counts.

Currently $20 off today.

Deal ending soon: Gigapixel A.I. Version 7 at 20% Off

- - - - - - - - - - - - - - - - - - - - - - - - - - - - - - - - - - - - - - - - - - - - - - - - - - - - - - - - - - - - - - - - - - - - - - - - - -

This post New Gigapixel Image Upscaler at $20 Off appeared on PictureCorrect.


from PictureCorrect https://ift.tt/w4sD28E
via IFTTT
maanantai 25. maaliskuuta 2024

PictureCorrect.com: How to Photograph a Total Solar Eclipse

The total solar eclipse of 2024 is an eagerly anticipated event for astronomers, enthusiasts, and photographers around the globe. Capturing this celestial phenomenon requires preparation, the right equipment, and a bit of know-how. Here’s your comprehensive guide to photographing the 2024 total solar eclipse.

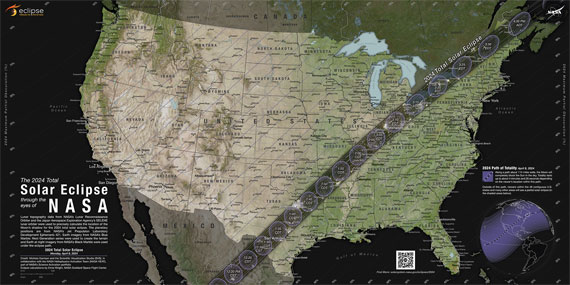
On April 8, 2024, a total solar eclipse will cross North and Central America creating a path of totality.

total solar eclipse map

Credit: NASA‘s Scientific Visualization Studio

The dark path across the map is where the largest area of the Sun will be covered by the Moon. People in this path will experience a total solar eclipse.

1. Understand the Phenomenon

Before you set out to photograph the eclipse, it’s crucial to understand what you’re about to witness. A total solar eclipse occurs when the moon passes between the Earth and the sun, completely blocking the sun’s light. This event unfolds in phases – partial eclipse, total eclipse, and then partial eclipse again.

2. Choose the Right Equipment

  • Camera: A DSLR or a mirrorless camera with manual settings is ideal. You can also use a point-and-shoot camera with manual mode or even a smartphone with a good camera.
  • Lens: A telephoto lens (200mm or longer) is recommended to capture detailed images of the eclipse.
  • Tripod: A sturdy tripod is essential to stabilize your camera, especially during the longer exposures required for eclipse photography.
  • Solar Filters: You must use a certified solar filter over your lens to protect your camera sensor (and your eyes) from the intense sunlight.

For more advanced gear & settings, check out LensRentals Eclipse Plan

3. Select Your Location

Scout for a location with a clear view of the sky. High elevation and minimal light pollution can contribute to a better photographic experience. Ensure your chosen spot is within the path of totality to capture the full effect of the eclipse.

4. Practice and Prepare

  • Practice: Test your equipment and practice your settings in the days leading up to the eclipse. Familiarize yourself with your camera’s manual mode to adjust shutter speed, aperture, and ISO quickly.
  • Prepare: Charge your batteries, clear your memory cards, and have all your equipment ready. Consider bringing backup equipment if possible.

5. Camera Settings

  • Manual Mode: The dynamic range of the eclipse requires you to switch between settings rapidly. Start with a low ISO (100-400), a small aperture (around f/8 to f/16), and adjust the shutter speed according to the brightness.
  • Focus: Use manual focus and set it to infinity. You can practice focusing on a distant object to ensure sharpness.
  • Bracketing: Since the lighting conditions change rapidly, consider using exposure bracketing to capture a range of exposures.
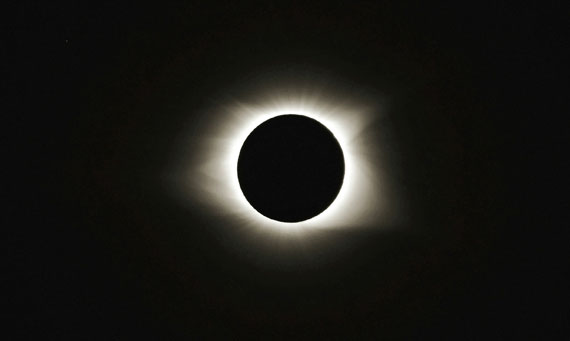
total eclipse photo

Photo captured by Jan Haerer

6. During the Eclipse

  • Partial Phases: Use your solar filter to photograph the phases leading up to and following totality. Change your settings as the light dims.
  • Totality: This is the only time you can safely remove your solar filter to capture the corona’s exquisite details. Adjust your settings to capture the dimmer light – this might include increasing the ISO or using a longer shutter speed.
  • Safety: Never look directly at the sun without proper eye protection, and ensure your camera’s viewfinder is not used to observe the sun unless you have a solar filter attached.

7. Share Your Experience

Eclipse photography is not just about the technical details; it’s also about sharing this rare celestial event’s awe and beauty. Share your images with the community, engage with other photographers, and discuss your experiences and techniques.

Photographing a total solar eclipse is a thrilling experience that combines the art of photography with the grandeur of the cosmos. With the right preparation and technique, you can capture stunning images that encapsulate the awe-inspiring beauty of this celestial event. Happy shooting, and here’s to hoping for clear skies in 2024!

For a cheat sheet you can print and take with you: Printable Photo Cheat Sheets

- - - - - - - - - - - - - - - - - - - - - - - - - - - - - - - - - - - - - - - - - - - - - - - - - - - - - - - - - - - - - - - - - - - - - - - - - -

This post How to Photograph a Total Solar Eclipse appeared on PictureCorrect.


from PictureCorrect https://ift.tt/rOYJU4y
via IFTTT
sunnuntai 24. maaliskuuta 2024

PictureCorrect.com: Perfecting Focus in Flower Photography

Flower photography is an enchanting pursuit, yet it is fraught with potential mistakes that can detract from the beauty of your final image. Among the myriad aspects to master, focus stands out as a critical element. Achieving sharp, well-defined images requires more than just a steady hand; it necessitates an understanding of focus modes, the selection of the right focus point, and sometimes, the fine-tuning capabilities of manual focus. Let’s delve into these aspects and explore how they can enhance your flower photography or, if overlooked, potentially ruin your shots.

Relevant reminder: only a little while left for the Flower Photography Guide at 68% Off

flower focus

Photo captured by Nicolas Ladino Silva

1. Choosing the Right Focus Mode

Digital cameras typically offer various focus modes, each suited to different scenarios. In flower photography, the two most relevant focus modes are Single-Servo AF (AF-S) and Continuous-Servo AF (AF-C). AF-S, ideal for stationary subjects, allows you to lock focus on a static flower. AF-C, on the other hand, is better suited for moving subjects and might not be as useful for static floral shots unless you’re dealing with elements like swaying flowers in a breeze. Selecting the wrong focus mode can result in missed focus or blurry images, especially if the flower moves after locking focus in AF-S mode.

2. Utilizing the Appropriate Focus Point

The focus point you choose can dramatically affect the impact and clarity of your flower photographs. Many photographers default to using the center focus point, but this can lead to mundane compositions. By moving the focus point to the most striking part of the flower, such as the stamen or a vivid petal edge, you can create more compelling images. Modern cameras allow for easy adjustment of focus points, enabling you to be precise about where you want the viewer’s eye to be drawn.

3. Harnessing Manual Focus for Fine-Tuning

While autofocus is incredibly useful, there are times when manual focus (MF) becomes indispensable, especially in macro flower photography where every millimeter counts. Autofocus might struggle with small or intricate subjects, leading to a focus that’s slightly off. By switching to manual focus, you can fine-tune the point of sharpest detail, ensuring that the most important part of your subject is in crystal clear focus. This is particularly beneficial in situations where the camera’s autofocus is deceived by foreground elements or complex patterns.

4. Avoiding Focus Over-reliance and Overlook

Relying solely on your camera’s autofocus without understanding its limitations can be a critical mistake. Autofocus systems, though advanced, are not foolproof and can be confused by complex scenes or low-contrast subjects like some flowers. Additionally, overlooking the need for manual fine-tuning in challenging focusing conditions can result in a lack of sharpness where it matters most.

5. Depth of Field and Focus Relationship

Understanding the relationship between focus and depth of field (DoF) is crucial. A very shallow DoF can make focusing accurately even more critical, as the margin for error is minimal. Conversely, a deep DoF can forgive slight focusing inaccuracies but might detract from the subject by including too much background detail. The aperture setting you choose directly affects DoF, so it’s essential to select it thoughtfully based on your desired focus effect.

In Conclusion

Focusing effectively in flower photography is a nuanced art that involves more than just pointing and shooting. By selecting the appropriate focus mode, carefully choosing and adjusting your focus points, and knowing when to switch to manual focus for fine-tuning, you can avoid common pitfalls that lead to unsatisfactory images. Remember, focus is not just a technical necessity but an artistic tool, guiding the viewer’s eye and emphasizing the beauty of your floral subject. With practice and attention to these details, your flower photographs can achieve a new level of clarity and impact.

For Further Training on Flower Photography:

Have you ever wondered how amazing flower photographs are created? I wondered as well… And then, I found this amazing, and gifted, flower photographer- who not only knows HOW to create dynamic flower photography- she also knows how to TEACH those tricks and techniques to other photographers through this in-depth eBook. It is currently 68% off for a limited time with all the flowers blooming if you want to check it out.

flower photo guide

Flower Photography Guide (Take a Peek Inside)

156 page practical guide packed with Assignments, Key Lessons, and Self-Check Quizzes! (15 assignments, 26 key lessons, & 70 self-check questions!) With this guide, you’re getting a complete system for producing beautiful flower photographs. And, it’s at a fraction of the cost of an in-person workshop. Plus you can re-read the material anytime you want, whenever you need a quick refresh.

Deal ending soon: Photographing Fabulous Flowers at 68% Off

- - - - - - - - - - - - - - - - - - - - - - - - - - - - - - - - - - - - - - - - - - - - - - - - - - - - - - - - - - - - - - - - - - - - - - - - - -

This post Perfecting Focus in Flower Photography appeared on PictureCorrect.


from PictureCorrect https://ift.tt/4NAk8ov
via IFTTT

lauantai 23. maaliskuuta 2024

PictureCorrect.com: Subframing in Photography Composition

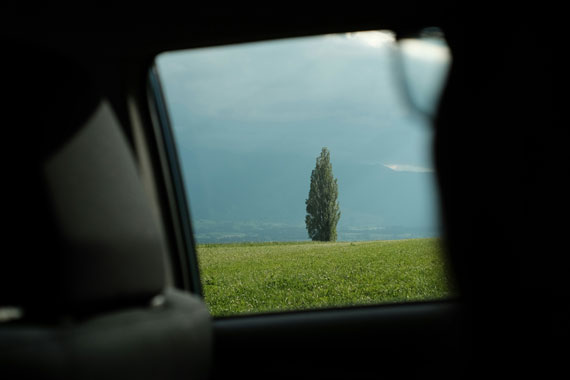
Subframing is a compelling composition technique that allows you to create more intriguing and layered images. By using elements within the scene to create a frame within the frame, photographers can guide the viewer’s attention, add depth, and enhance the storytelling aspect of their images. This blog post will delve into the concept of subframing, discuss its benefits, and provide tips on how to effectively use this technique to elevate your photography.

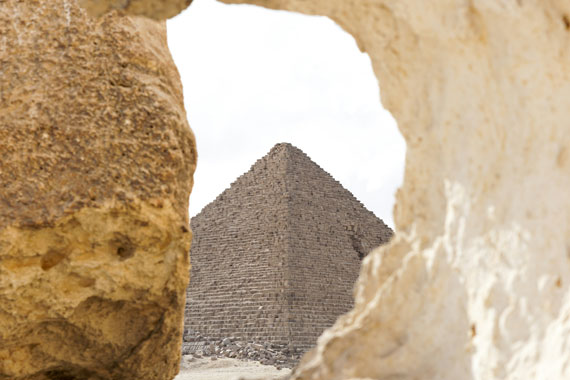
subframing

Photo captured by Lucas Fields

Understanding Subframing

Subframing involves using components of your scene to create a secondary frame within your image. This could be anything from architectural elements, like windows or doorways, to natural features like tree branches or rocks. By positioning these elements around the edge of your composition, you can isolate your subject in a way that draws the viewer’s eye directly to it.

Benefits of Subframing

  • Focus on the Subject: Subframing naturally draws the viewer’s attention towards the main subject, helping it stand out amidst potentially busy or distracting backgrounds.
  • Added Depth: Using elements in the foreground and background to create a frame adds layers to your photograph, enhancing its three-dimensional feel.
  • Narrative Quality: A frame within a frame can introduce context or suggest a story, adding a narrative element to your image.
  • Aesthetic Appeal: Subframing can add a creative and artistic touch, making images more visually appealing and engaging.

Tips for Effective Subframing

  • Look for Natural Frames: Pay attention to your environment and identify potential frames such as windows, archways, or foliage.
  • Experiment with Depth of Field: Using a shallow depth of field can blur the framing elements, placing greater emphasis on your subject while still benefiting from the subframe.
  • Consider the Light: Lighting can impact how your subframe and subject interact. For instance, backlighting can silhouette your frame, highlighting the subject inside.
  • Play with Perspectives: Changing your angle or perspective can turn ordinary elements into effective frames. Sometimes, getting lower or finding a higher vantage point can reveal framing opportunities.
  • Keep It Simple: While subframing adds complexity to your composition, it’s crucial not to overcomplicate it. Ensure that the framing elements do not overshadow the main subject.
  • Use Editing to Enhance: Post-processing can help refine your subframed shots. Adjusting contrast, sharpness, or vignetting can further draw attention to your framed subject.

Framing vs Subframing:

While both framing and subframing are compositional techniques that involve the use of elements within the scene to enhance the photograph, they serve different purposes and are employed in distinct ways. Framing, in its traditional sense, refers to the use of foreground elements to create a border around the entire photograph, helping to isolate the main subject and draw the viewer’s eye towards it. This technique typically involves using the edges of the scene to enclose the subject, offering a sense of completeness and focus.

Subframing, on the other hand, is a more nuanced approach where the photographer uses elements within the scene—not just at the edges—to create a secondary, often smaller frame within the image. This internal frame leads the viewer’s eye to a particular area or subject, adding an additional layer of context or meaning. Subframing can be more subtle and complex, allowing for richer narratives and a deeper sense of space within the photograph.

subframed image

Photo captured by Mattos Berger

In essence, while traditional framing defines the outer boundary of an image, subframing introduces an inner boundary or point of interest that guides the viewer deeper into the scene. This inner frame can intersect with the edges of the photograph or float entirely within the image, offering a unique and compelling way to highlight the focal point and add depth to the composition.

Summary:

Subframing is a powerful compositional tool that can add depth, focus, and narrative to your photographs. By mindfully observing your environment and experimenting with different techniques, you can master subframing and create more impactful and meaningful images. Remember, the best way to improve is to practice, so grab your camera and start exploring the world of subframing.

Whether you’re a seasoned professional or a budding photographer, incorporating subframing into your compositional toolkit can transform your visual storytelling and elevate your photographic work.

- - - - - - - - - - - - - - - - - - - - - - - - - - - - - - - - - - - - - - - - - - - - - - - - - - - - - - - - - - - - - - - - - - - - - - - - - -

This post Subframing in Photography Composition appeared on PictureCorrect.


from PictureCorrect https://ift.tt/gnczSys
via IFTTT

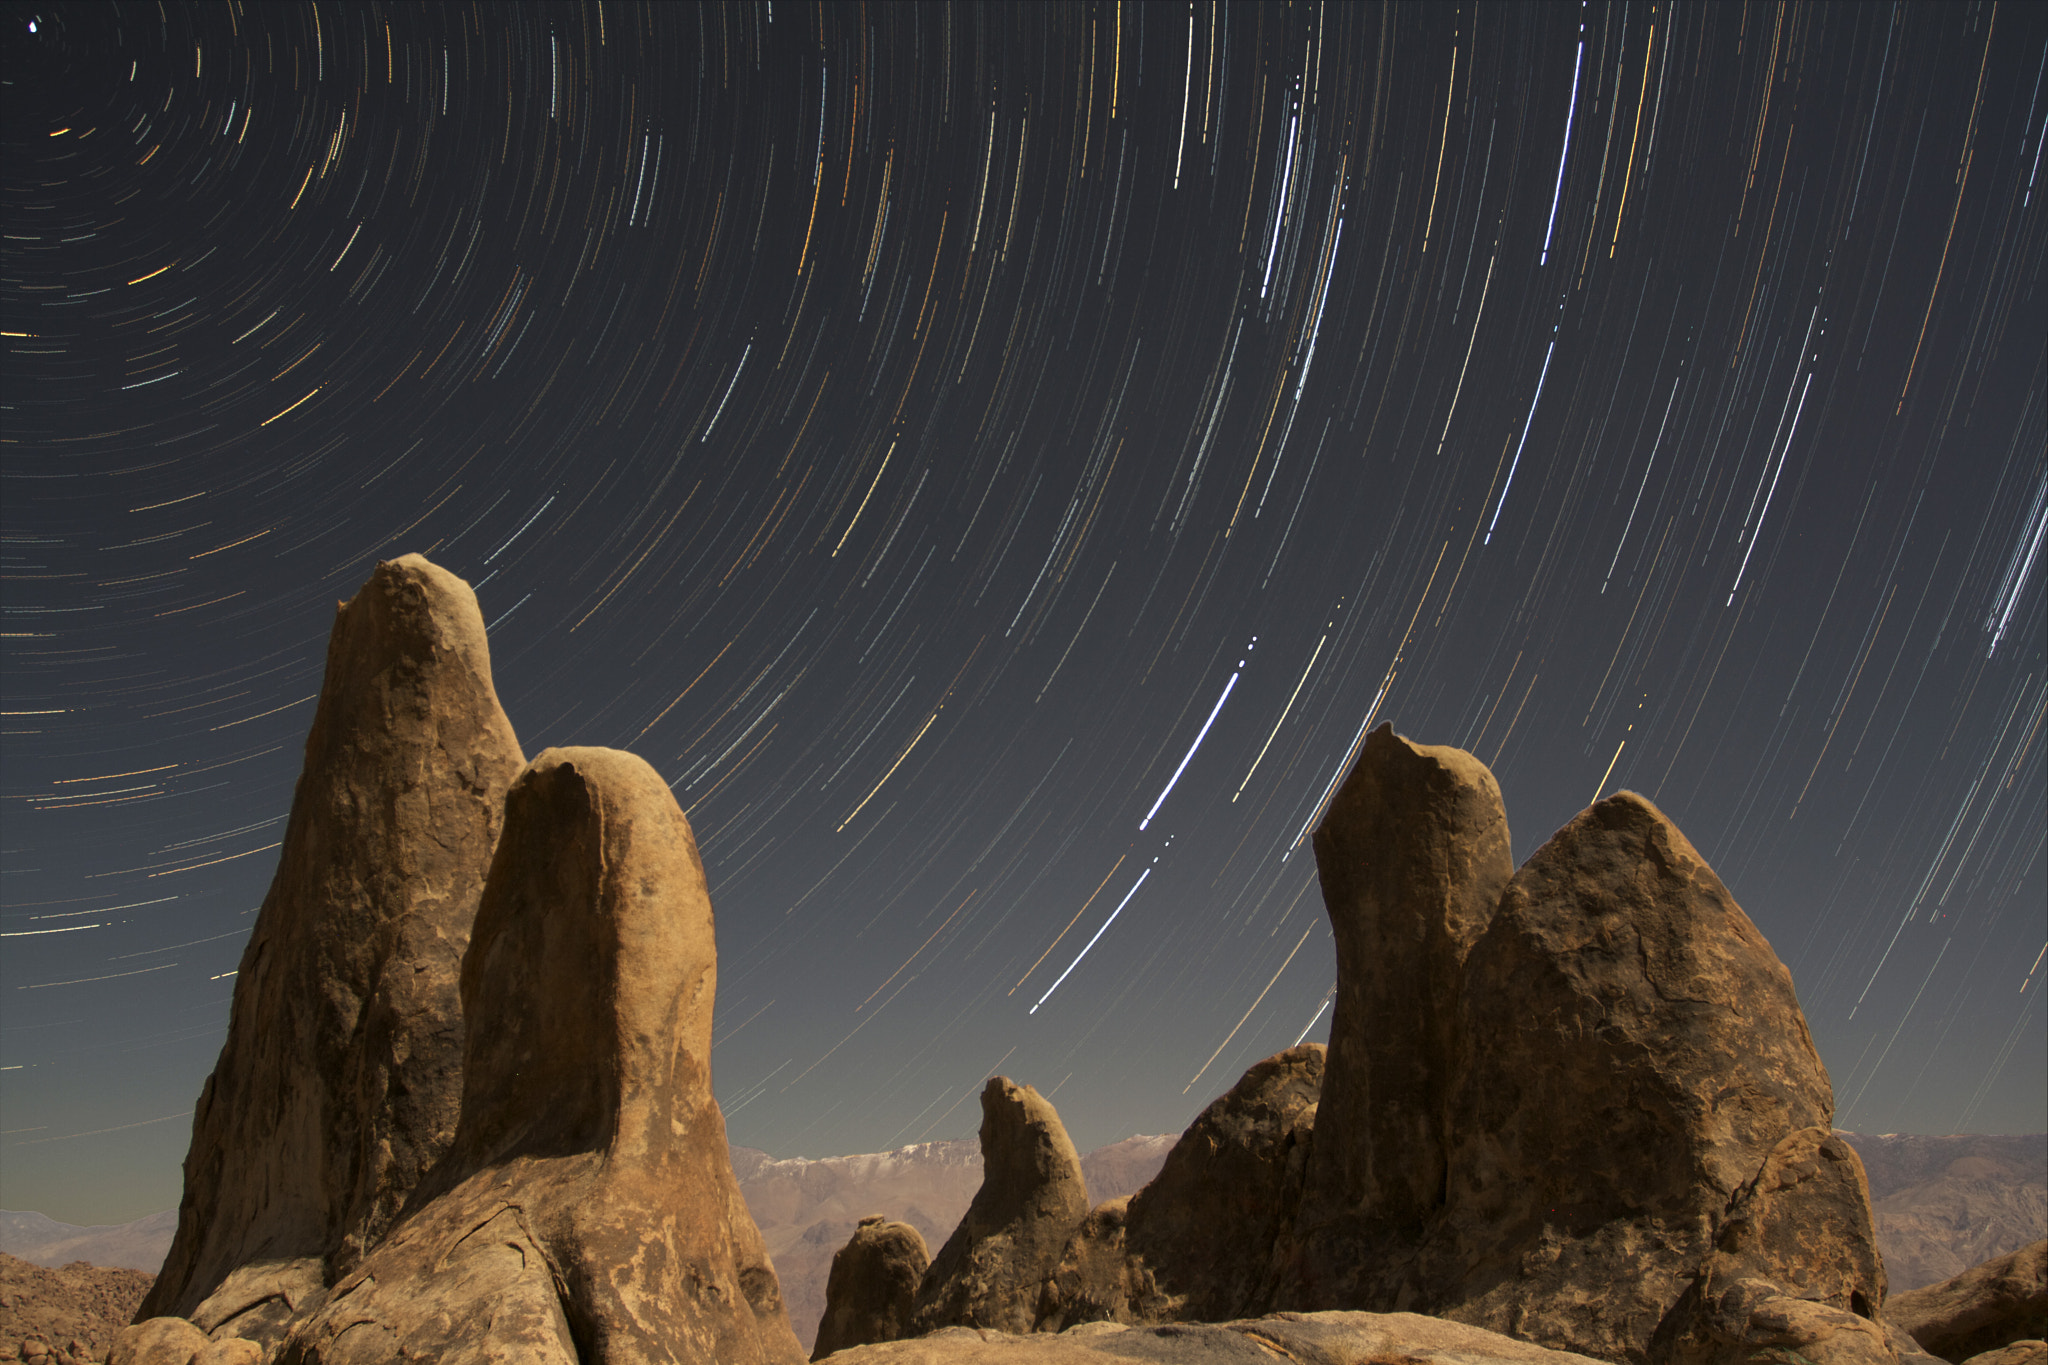
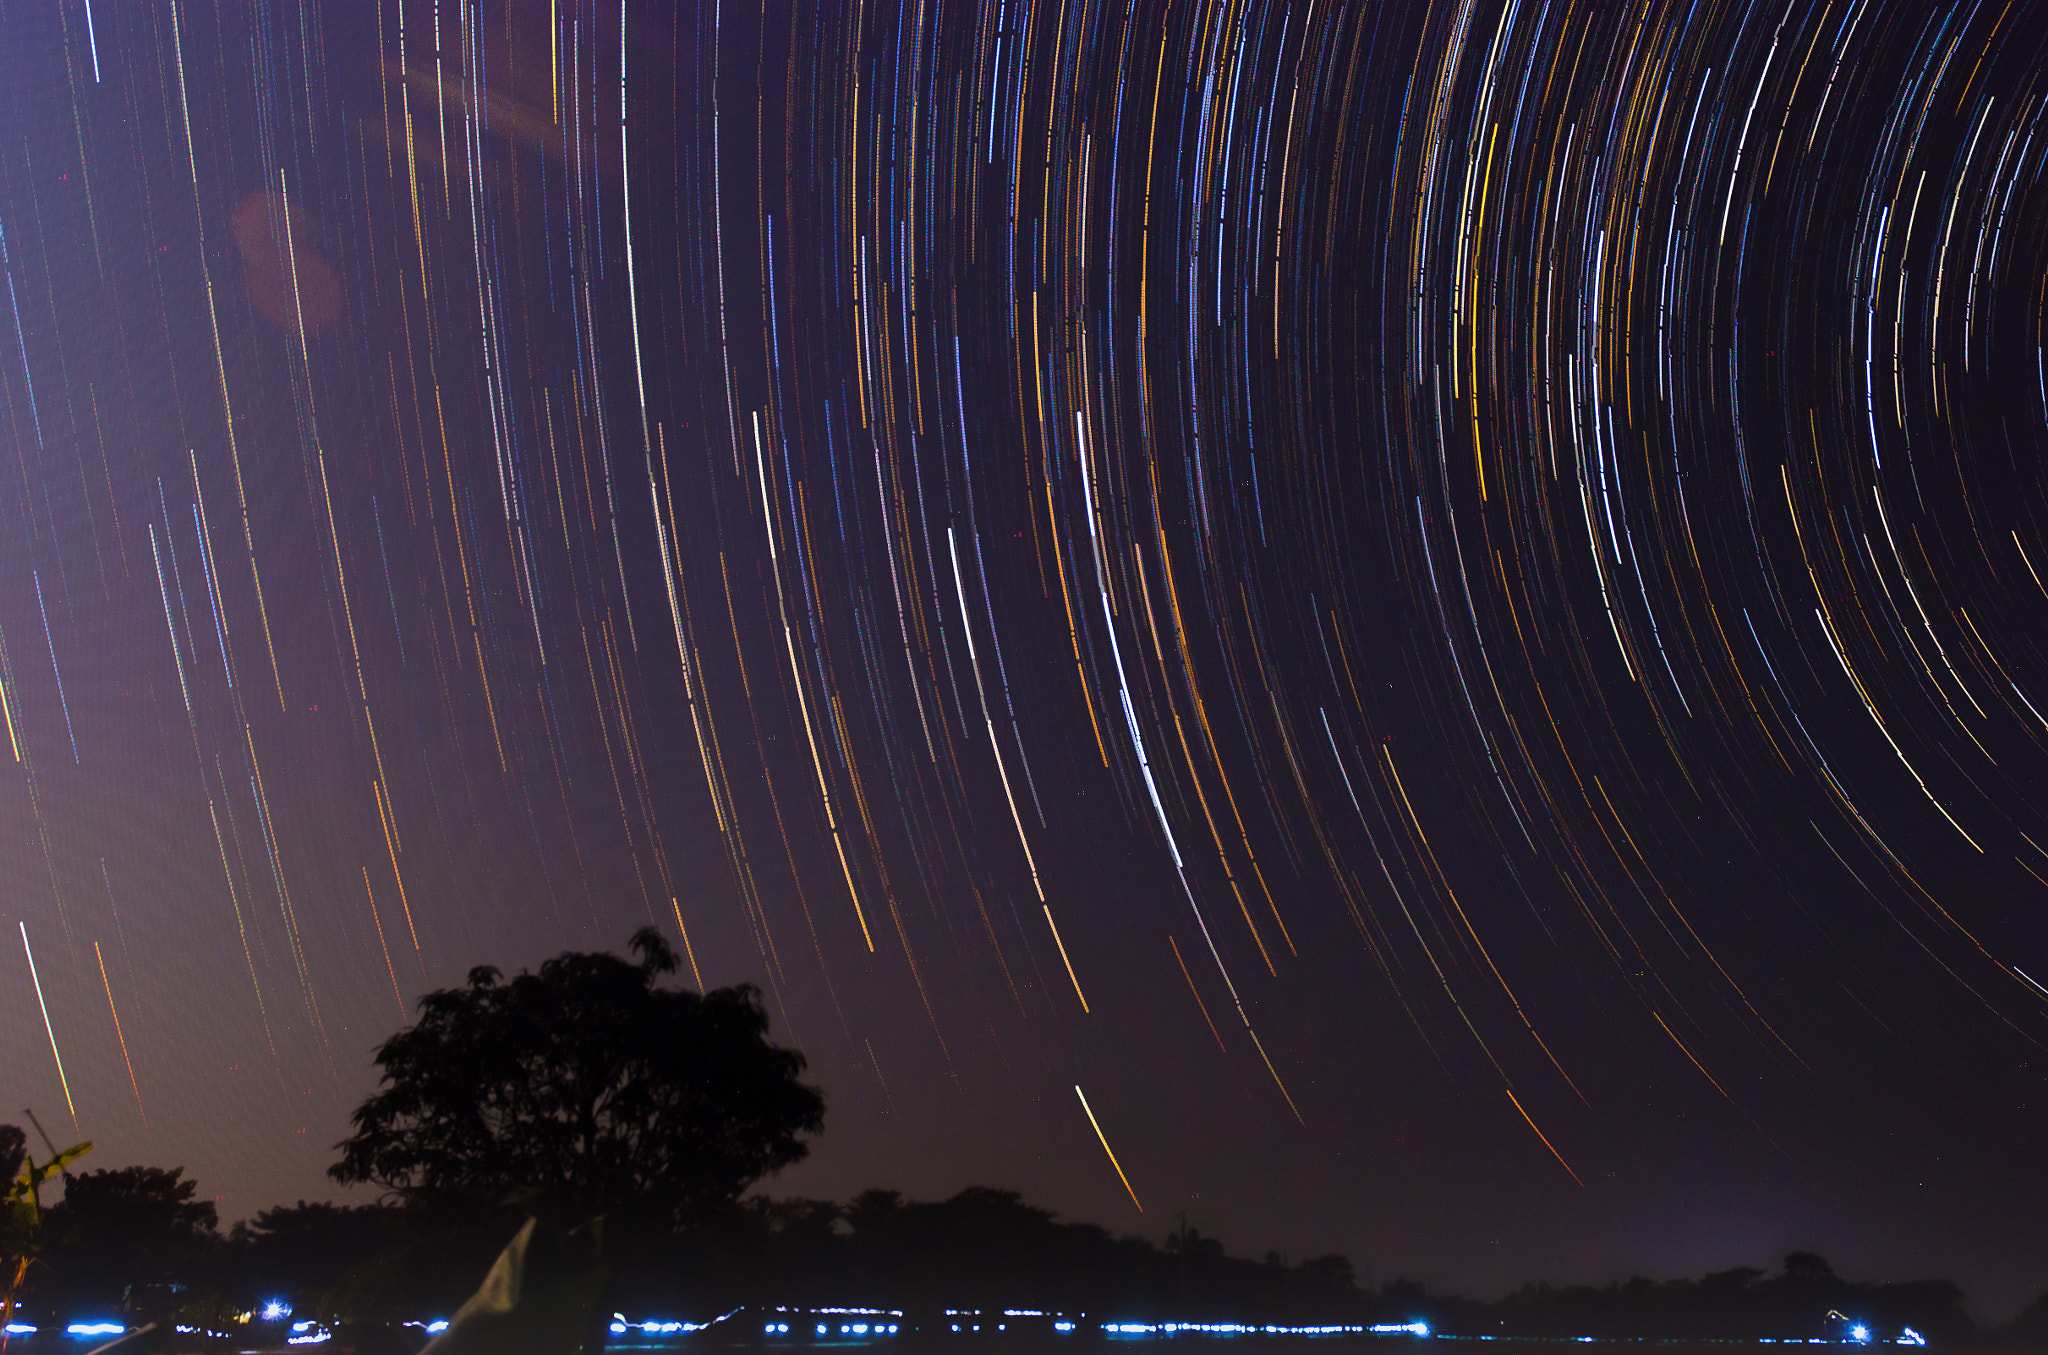
Star Trail by FazalSH (500px.com/FazalSH)


via 500px https://ift.tt/6eCJ7H1

night at the gravel pit by thalerst (500px.com/thalerst)


The gravel pit was lit up by me .. about 15 minutes with a Led Lenser torch! via 500px https://ift.tt/vr98UX6

perjantai 22. maaliskuuta 2024

PictureCorrect.com: Common Post-Processing Hurdles for Photographers

Post-processing is a critical phase in photography where the visual narrative is fine-tuned and polished. However, photographers, whether amateurs or professionals, often encounter a variety of challenges during this stage. Here, we’ll delve into some of the most common problems photographers face during post-processing and offer solutions to overcome them.

Relevant reminder: limited spots available for the Post-Processing Secrets Webinar

common post processing problems

1. Over or Underexposure Adjustments

One of the primary issues photographers face is correcting exposure levels without compromising the quality of the image. Overexposed areas can appear washed out, while underexposed sections might lack detail.

Solution: Use the histogram as a guide to balance the exposure. Tools like the ‘Shadows/Highlights’ adjustments in Photoshop or the ‘Basic’ panel in Lightroom can be incredibly effective. By making incremental adjustments and frequently referring back to the histogram, you can maintain the natural look of your photos.

2. Color Casts and Inaccurate Color Balance

Incorrect color balance can give your image an unnatural hue, making it look unrealistic. This problem is often a result of improper white balance settings during the shoot or unique lighting conditions.

Solution: To correct color casts, utilize the white balance tools available in your editing software. Identify a neutral gray or white area in the image to set a correct white balance. If the color cast is pervasive, manual tweaking of temperature and tint sliders may be necessary.

3. Loss of Detail in Highlights or Shadows

Details can be lost in overly bright or dark areas of a photograph, affecting its overall depth and realism.

Solution: To recover these details, use the ‘Highlights’ and ‘Shadows’ sliders in your post-processing software. Be cautious, though, as excessive adjustment can lead to an unnatural HDR effect. For a more advanced approach, consider using techniques like luminosity masking.

4. Noise Reduction and Sharpening Artifacts

Balancing noise reduction and sharpening is crucial. Overdoing noise reduction can lead to a loss of detail, whereas excessive sharpening can introduce unwanted artifacts.

Solution: Apply noise reduction judiciously, focusing primarily on the problematic areas of the image. Similarly, when sharpening, use a masked approach to apply the effect selectively, avoiding areas that do not require it.

5. Halos and Edge Glows

These can appear around objects or horizon lines, particularly after heavy editing or HDR processing, and can be distracting.

Solution: To mitigate halos, dial back the intensity of your adjustments or use targeted adjustments with a brush tool to reduce the effect around problem areas. It’s also helpful to zoom in and carefully inspect the edges during your editing process.

6. Banding in Gradients

Banding occurs when a smooth gradient is broken into distinct bands of color, often due to the image’s bit depth limitations.

Solution: Adding slight noise or dithering can help to blend the colors more smoothly. Also, working in a higher bit depth, like 16-bit, can reduce the likelihood of banding.

7. Time-Consuming Editing Workflows

A cumbersome editing process can drain creativity and productivity, especially if you’re dealing with a large batch of photos.

Solution: Develop and refine your workflow. Use presets and batch processing when possible to streamline your work. Consistency in your approach can also reduce the time spent on each photo.

Summary:

Post-processing is as much an art as it is a technical skill. By understanding and addressing these common problems, photographers can enhance their workflow, improve the quality of their images, and express their artistic vision more effectively. Always remember, the goal of post-processing is to complement your photography, not overshadow it.

For Further Training:

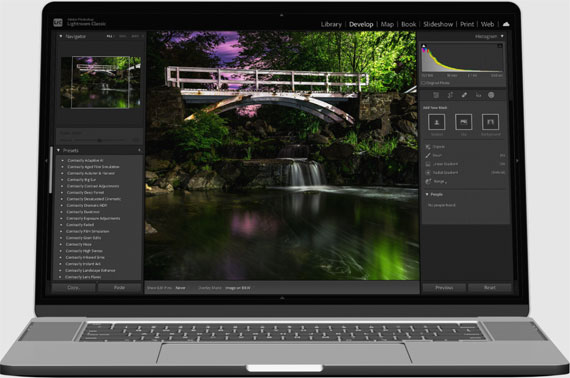
The current educational webinar titled Six Post-Processing Secrets You Cannot Live Without offers a unique opportunity for photographers of all levels to deepen their knowledge and enhance their skills in using Lightroom and Photoshop.

post processing secrets

Post-Processing Secrets Webinar (see what’s covered)

By providing a blend of technical knowledge, artistic insight, and practical advice, this event aims to equip photographers with the tools and understanding necessary to bring their creative vision to life.

Limited spots available: Six Post-Processing Secrets for Photographers

- - - - - - - - - - - - - - - - - - - - - - - - - - - - - - - - - - - - - - - - - - - - - - - - - - - - - - - - - - - - - - - - - - - - - - - - - -

This post Common Post-Processing Hurdles for Photographers appeared on PictureCorrect.


from PictureCorrect https://ift.tt/li6Uq8s
via IFTTT

torstai 21. maaliskuuta 2024

PictureCorrect.com: The Fine Line: Editing Ethics for Press Photographers

In the realm of press photography, capturing moments that tell stories is paramount. However, the question of how much editing is permissible for these photographs often leads to intense debate. Press photographers operate under strict ethical guidelines that differentiate between permissible enhancements and manipulative alterations. This post delves into these nuances, shedding light on what’s allowed and what crosses the line.

Quick reminder: limited spots available for the Post-Processing Secrets Webinar

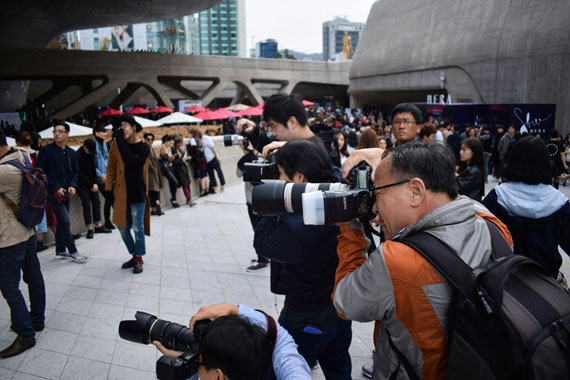
press photographers

Photo captured by Tycho Atsma

Understanding the Basics

First, it’s crucial to understand that press photography aims to present an accurate and truthful representation of events. The integrity of the image is fundamental, maintaining public trust and ensuring that the narrative remains unaltered. The guiding principle is clear: any modification that changes the factual story or misleads the viewer is off-limits.

Permissible Edits

  • Color Correction: Adjusting the white balance and color tones to reflect the scene more accurately is generally acceptable. These adjustments compensate for camera or lighting limitations, helping the image depict what the human eye sees.
  • Cropping: Cropping is often necessary to focus the viewer’s attention on the main subject, remove distractions, or fit the media’s layout. However, it must not alter the context or meaning of the image.
  • Brightness and Contrast: Adjusting brightness and contrast can help to recover details that are too dark or too bright, especially in challenging lighting conditions. Like color correction, the goal is to mirror the scene’s true appearance.
  • Sharpening: Mild sharpening can be applied to enhance clarity, especially if the image is slightly soft. Over-sharpening, however, can introduce artifacts and is generally frowned upon.

Prohibited Edits

  • Manipulating Content: Adding or removing elements from an image (e.g., people, objects, backgrounds) is strictly prohibited as it alters the reality the photo represents.
  • Misrepresentative Filters: Applying filters or effects that dramatically change the image’s mood or perception is not allowed. Such alterations can mislead viewers, affecting their understanding of the event.
  • Selective Editing: Altering specific areas of an image to highlight or downplay certain elements can bias the viewer’s perception and is therefore unacceptable.

Ethical Guidelines and Accountability

Press organizations often have their own set of detailed guidelines, adhering to broader principles set by bodies like the National Press Photographers Association (NPPA). These guidelines emphasize the importance of maintaining the authenticity and integrity of the photographic image.

Photographers found violating these ethical standards can face severe repercussions, including loss of credibility, professional censure, or even termination. In high-profile cases, unethical photo editing can lead to public outcry and legal implications.

The Role of Captioning

It’s also worth noting that the context provided by captions plays a crucial role in photojournalism. A well-written caption, in conjunction with an ethically edited photo, provides a clear and accurate narrative. Misleading captions, just like manipulated images, can distort the viewer’s understanding.

Summary

In conclusion, while press photographers have some leeway to ensure their images are clear and visually appealing, they are bound by ethical standards that prioritize truthfulness and accuracy. These standards are vital for maintaining public trust and ensuring that the visual narrative remains an authentic representation of reality. As consumers of media, understanding these boundaries helps us critically evaluate the images and appreciate the challenging work of press photographers in portraying the world with integrity.

For Further Training on Post-Processing in General:

The current educational webinar titled Six Post-Processing Secrets You Cannot Live Without offers a unique opportunity for photographers of all levels to deepen their knowledge and enhance their skills in using Lightroom and Photoshop.

post processing secrets

Post-Processing Secrets Webinar (see what’s covered)

By providing a blend of technical knowledge, artistic insight, and practical advice, this event aims to equip photographers with the tools and understanding necessary to bring their creative vision to life.

Limited spots available: Six Post-Processing Secrets for Photographers

- - - - - - - - - - - - - - - - - - - - - - - - - - - - - - - - - - - - - - - - - - - - - - - - - - - - - - - - - - - - - - - - - - - - - - - - - -

This post The Fine Line: Editing Ethics for Press Photographers appeared on PictureCorrect.


from PictureCorrect https://ift.tt/kixT8hG
via IFTTT

keskiviikko 20. maaliskuuta 2024

PictureCorrect.com: Illuminated Blooms: Backlit Flower Photography Tips

Backlit photography, where the light source is positioned behind the subject, offers a unique way to capture the ethereal beauty of flowers. This technique can illuminate the delicate details of petals, create a luminous halo around the subject, and infuse your photos with a sense of depth and drama. Here are some invaluable tips to master backlit flower photography, transforming ordinary floral scenes into breathtaking works of art.

Relevant reminder: only a little while left for the Flower Photography Guide at 68% Off

backlit flower

Photo captured by Eliecer Gallegos

1. Choosing the Right Time of Day

The golden hours—shortly after sunrise or before sunset—are ideal for backlit photography. The soft, warm light during these times can add a magical glow to your flower subjects, enhancing their colors and textures. Midday sun, though not typically recommended due to its harshness, can be harnessed creatively for high-contrast, vibrant effects.

2. Positioning Your Subject

The placement of the flower in relation to the light source is crucial. Ensure the light is directly behind the flower to achieve a glowing effect. Experiment with different angles and distances to capture varying degrees of backlighting and shadow, adding depth and dimension to your images.

3. Camera Settings

Manual mode or aperture priority is your best friend in backlit situations, as it allows full control over exposure, aperture, and shutter speed. A larger aperture (smaller f-number) helps create a narrow depth of field, focusing attention on the flower while blurring the background. Adjust the exposure to highlight the luminous edges of petals without washing out the details.

backlit petals

Photo captured by Dominik Scythe

4. Lens Flare and Sunstars

Lens flare and sunstars can add an artistic touch to your backlit flower photos. To achieve lens flare, allow a bit of direct light into the lens. For sunstars, narrow the aperture to a high f-number, like f/16 or f/22, which can create a starburst effect from the sun. Both effects can add a layer of creativity and mood to your images.

5. Using Reflectors and Diffusers

Reflectors can bounce light back onto the darker side of the flower, reducing contrast and revealing more detail. A diffuser can soften harsh sunlight, especially useful during brighter parts of the day, ensuring your flower isn’t lost in shadow.

6. Post-Processing

Post-processing plays a key role in enhancing backlit images. Adjusting highlights, shadows, and colors can help recover details and enhance the glow effect. Tools like the dehaze slider can also be particularly useful in refining the contrast and clarity of backlit elements.

backlighting macro

Photo captured by Yair Mejía

7. Creative Experimentation

Don’t be afraid to experiment with different compositions, backgrounds, and lighting intensities. Sometimes, the most captivating images come from unexpected angles or lighting conditions. Play with silhouettes, close-ups, and varying degrees of backlighting to discover your unique style.

Summary:

Backlit flower photography can transform an ordinary bloom into a stunning, radiant subject. By understanding the interplay of light and shadow, mastering your camera settings, and employing post-processing techniques, you can create luminous, striking images that capture the ephemeral beauty of flowers in a new light. So, grab your camera and venture out into the golden hours, or even the midday sun, and start exploring the luminous world of backlit floral photography!

For Further Training on Flower Photography:

Have you ever wondered how amazing flower photographs are created? I wondered as well… And then, I found this amazing, and gifted, flower photographer- who not only knows HOW to create dynamic flower photography- she also knows how to TEACH those tricks and techniques to other photographers through this in-depth eBook. It is currently 68% off for a limited time with all the flowers blooming if you want to check it out.

flower photo guide

Flower Photography Guide (Take a Peek Inside)

156 page practical guide packed with Assignments, Key Lessons, and Self-Check Quizzes! (15 assignments, 26 key lessons, & 70 self-check questions!) With this guide, you’re getting a complete system for producing beautiful flower photographs. And, it’s at a fraction of the cost of an in-person workshop. Plus you can re-read the material anytime you want, whenever you need a quick refresh.

Deal ending soon: Photographing Fabulous Flowers at 68% Off

- - - - - - - - - - - - - - - - - - - - - - - - - - - - - - - - - - - - - - - - - - - - - - - - - - - - - - - - - - - - - - - - - - - - - - - - - -

This post Illuminated Blooms: Backlit Flower Photography Tips appeared on PictureCorrect.


from PictureCorrect https://ift.tt/yibXRz8
via IFTTT

tiistai 19. maaliskuuta 2024

PictureCorrect.com: Redefining Image Clarity and Detail with ON1 NoNoise AI 2024

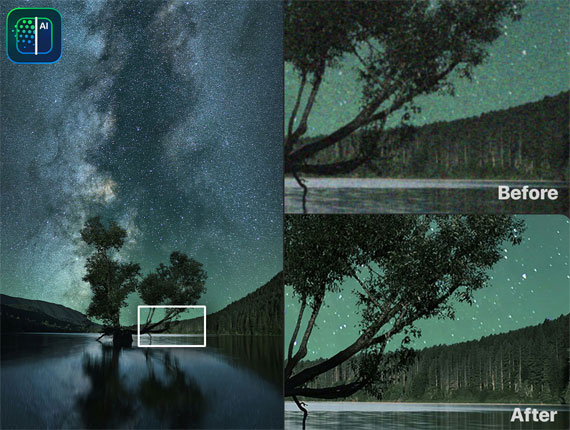
Photography enthusiasts and professionals are always on the lookout for software that can enhance their images, reducing noise without compromising detail. ON1’s latest release, NoNoise AI 2024, introduces several new features and improvements aimed at providing users with high-quality results, particularly in challenging photography genres like astrophotography and wildlife photography.

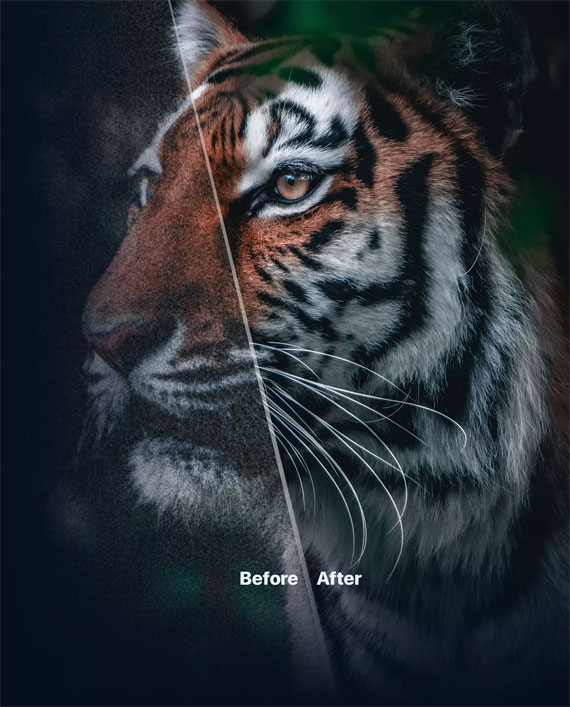
on1 nonoise ai

ON1 NoNoise AI 2024 (see how it works)

Enhanced AI Noise Reduction

At the core of ON1 NoNoise AI 2024 is its improved AI noise reduction technology. The software utilizes advanced AI models designed to offer superior noise reduction, helping photographers maintain the integrity and detail of their images, even in low-light conditions or when capturing fast-moving subjects.

Revamped User Interface

The updated user interface in ON1 NoNoise AI 2024 is designed with user experience in mind. The goal is to facilitate a smoother workflow for photographers by providing a more intuitive and less cluttered environment. This should help users navigate the software more efficiently, focusing more on their creative work and less on figuring out software mechanics.

Tack Sharp AI for Deblurring

Another significant enhancement in ON1 NoNoise AI 2024 is the Tack Sharp AI feature, which addresses the issue of motion blur. The updated AI deblurring model aims to reduce motion blur more effectively, minimizing artifacts and ensuring that the details in the image remain crisp and clear.

Compatibility and Integration

ON1 NoNoise AI 2024 continues to support integration with popular photo editors and file formats. This flexibility ensures that photographers can incorporate NoNoise AI into their existing workflows seamlessly, whether they are using Adobe Lightroom, Photoshop, Apple Photos, or other editing software.

nonoise example image

Community Feedback and Real-World Application

ON1 has engaged with its user community to refine NoNoise AI 2024, incorporating feedback and real-world image processing to tune the software’s performance. This community-driven approach helps ensure that the software meets the practical needs of photographers and delivers on its promises of enhanced image quality.

What to Expect

Photographers considering ON1 NoNoise AI 2024 can look forward to a software that not only reduces noise and sharpens details but also integrates smoothly into their current editing workflows. The improvements in user interface and performance, coupled with the advanced AI-driven features, make NoNoise AI 2024 a noteworthy option for those seeking to improve their image quality.

Final Thoughts

While ON1 NoNoise AI 2024 offers several advanced features and improvements, it’s essential for photographers to assess how these updates align with their specific needs and workflows. As with any software, the real test comes with practical application, and the new features of NoNoise AI 2024 are designed to meet the high standards expected by today’s photography community.

Launch sale ending soon: ON1 NoNoise AI 2024

- - - - - - - - - - - - - - - - - - - - - - - - - - - - - - - - - - - - - - - - - - - - - - - - - - - - - - - - - - - - - - - - - - - - - - - - - -

This post Redefining Image Clarity and Detail with ON1 NoNoise AI 2024 appeared on PictureCorrect.


from PictureCorrect https://ift.tt/73CnBIz
via IFTTT

maanantai 18. maaliskuuta 2024

PictureCorrect.com: Photographing the Brocken Spectre

The Brocken Spectre, a mesmerizing atmospheric phenomenon, has long captivated the imaginations of those fortunate enough to witness it. Occurring in specific meteorological conditions, this spectre presents a unique opportunity for photographers to capture a blend of natural wonder and optical illusion. This guide delves into understanding the Brocken Spectre and offers practical tips for photographers aiming to immortalize this fleeting marvel.

Related reminder: only hours left for the Photo Adventure Cheat Sheets Winter Sale

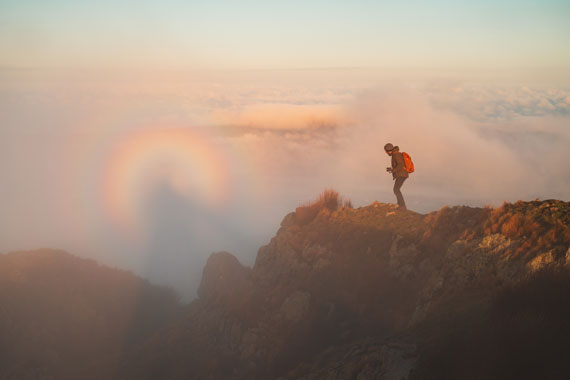
brocken spectre

Understanding the Brocken Spectre:

The Brocken Spectre appears when a person stands above the upper surface of a cloud – on a mountain or high ground – with the sun shining from behind them. When they look down into the mist, they see a magnified shadow of themselves. This shadow is often surrounded by colorful halos due to the diffraction of sunlight in the water droplets in the cloud. Named after the Brocken, a peak in the Harz Mountains in Germany where it is frequently observed, this phenomenon can actually occur in any mountainous area under the right conditions.

Photographic Challenges and Opportunities:

Capturing the Brocken Spectre requires not just the right conditions but also a keen photographic eye. The phenomenon’s transient nature, combined with the challenging light conditions, can test a photographer’s skills.

  • Timing and Location: Since the spectacle requires specific atmospheric conditions, planning is crucial. Early mornings, with clearer skies and the right amount of mist, are often ideal. Familiarize yourself with the terrain and predict where the spectre might appear.
  • Equipment: A good quality camera with manual settings is essential. Using a tripod can help stabilize your shot, especially in the tricky lighting conditions of a Brocken Spectre. A telephoto lens can also be beneficial, allowing you to zoom in on the spectre without changing your position.
  • Camera Settings: To capture the vibrant halos, a lower ISO can help reduce noise, while a higher aperture (around f/8 to f/16) can sharpen the focus on the spectre and the surrounding landscape. Experiment with shutter speed to find the right balance between light and motion, especially if the mist or your shadow is moving.
  • Composition: The Brocken Spectre offers a unique opportunity to juxtapose the human figure against the vastness of nature. Experiment with positioning the shadow in different parts of the frame to create compelling compositions. The surrounding landscape can also add context and contrast to the ethereal figure at the center.

Focusing on the Brocken Spectre:

Achieving sharp focus in the fluctuating visibility and contrast of the Brocken Spectre can be challenging, particularly when using autofocus systems that may struggle in these conditions. Manual focus becomes an invaluable tool in this context. When the spectre appears, switch your camera to manual focus and adjust carefully to ensure the edges of the shadow and the halo are as sharp as possible. Live view mode can be beneficial here, allowing you to zoom in on the screen and fine-tune the focus. If your camera has focus peaking, enable it to highlight areas of high contrast, making it easier to discern when the spectre is in sharp focus.

cloud brocken spectre

Remember, the spectre and its halo can appear and shift quickly, so being adept with your manual focus controls can make the difference between a good shot and a spectacular one. Additionally, practicing manual focusing under various conditions can enhance your readiness to capture the Brocken Spectre, ensuring that when the moment arrives, you’re fully equipped to immortalize this ephemeral marvel with clarity and precision.

Summary:

The Brocken Spectre remains one of nature’s most splendid visual treats, offering photographers a chance to explore the interplay of light, shadow, and landscape. By understanding the phenomenon, being prepared with the right equipment and settings, and approaching the subject with creativity and respect, photographers can capture stunning images of this elusive spectacle.

For Further Training:

For help remembering the camera settings for difficult situations like this, a set of Photography Adventure Cheat Sheets are designed to help. They are currently 80% off for a winter sale which ends soon if you want to check them out. The last day of Winter in the northern hemisphere is March 19.

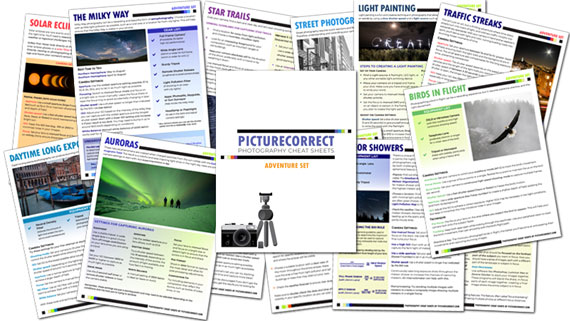
photography adventure

New! Cheat Sheets for Your Photography Adventures (see how they work)

The perfect companion for any photographer. Print one out whenever you need it. Whether you’re going on vacation or seeking out a specific photography adventure, these cheat sheets can provide you with the knowledge and inspiration you need to create your best work yet.

Only hours left: The Photography Adventure Cheat Sheets Winter Sale

- - - - - - - - - - - - - - - - - - - - - - - - - - - - - - - - - - - - - - - - - - - - - - - - - - - - - - - - - - - - - - - - - - - - - - - - - -

This post Photographing the Brocken Spectre appeared on PictureCorrect.


from PictureCorrect https://ift.tt/ZkB6dLD
via IFTTT

sunnuntai 17. maaliskuuta 2024

PictureCorrect.com: Birders vs. Photographers: Rivals or Allies in Avian Appreciation

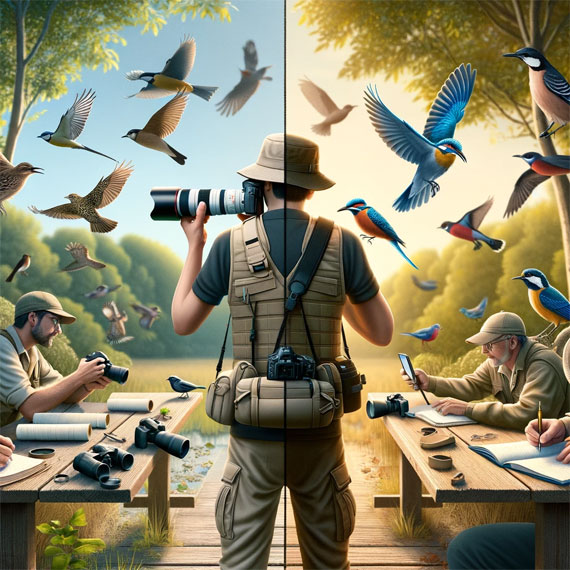
Bird photographers and birders share a common passion for avian species, yet their approaches and motivations can vary significantly. Both groups contribute uniquely to the appreciation, understanding, and conservation of birds, but they do so in ways that reflect their distinct interests and goals. Let’s delve into the differences and similarities between bird photographers and birders.

Relevant reminder: Winter ends on March 19 in the Northern Hemisphere along with the deal on these Photography Adventure Cheat Sheets which include one on photographing birds in flight.

birders vs photographers

Similarities

  1. Shared Passion for Birds: At the core, both bird photographers and birders have a profound appreciation for birds and their natural habitats. Their activities are often driven by a love for wildlife and a desire to be close to nature.
  2. Conservation Awareness: Both groups often engage in and promote conservation efforts. Their interest in birds leads to a greater awareness of the importance of habitat preservation and the threats faced by various species.
  3. Field Skills: Birders and bird photographers develop keen observation skills, learning to identify birds by sight and sound. Both must also understand avian behaviors and habitats to successfully locate and observe their subjects.
  4. Community Engagement: Both groups tend to be part of larger communities, sharing their experiences, sightings, and photographs. They participate in forums, clubs, and social media platforms, contributing to a collective knowledge base and fostering a shared enthusiasm for avian life.

Differences

  1. Primary Motivation: Bird photographers are primarily focused on capturing images of birds. Their success is often measured by the quality, rarity, or artistic value of their photographs. Birders, on the other hand, may be more interested in observing and documenting bird species, with their achievements often related to the number of species identified or the observation of rare birds.
  2. Equipment and Investment: Bird photography typically requires significant investment in specialized equipment, such as high-quality cameras, telephoto lenses, and sometimes even hides or camouflage gear. Birders might require less equipment, often relying on binoculars and field guides, though some may also use high-end optics.
  3. Approach and Time Spent: Photographers may spend considerable time waiting for the perfect shot, often focusing on a single location or individual. Birders tend to be more mobile, moving to different locations to observe as many species as possible.
  4. Interaction with Subjects: Photographers need to get close enough for a good shot without disturbing the bird, requiring a balance between proximity and respect for the bird’s comfort zone. Birders, especially those who are listers, might prioritize identification over close interaction, often using binoculars or scopes to minimize disturbance.

Potential Rivalry

Despite their shared passions, there can be moments of friction between bird photographers and birders, stemming from their different objectives and methods. Bird photographers, in their quest for the perfect shot, might inadvertently disrupt a birder’s observation or stay longer at a sighting, potentially affecting the birders’ ability to spot and identify different species. Conversely, large groups of birders moving through an area can disturb wildlife, making it challenging for photographers to capture images of birds in their natural and undisturbed state.

Some birders might view photographers as more intrusive, especially when they use playback sounds to attract birds or get closer to nests than recommended guidelines suggest. On the other hand, photographers might feel that birders do not always appreciate the effort and patience required to obtain impactful wildlife photographs.

However, these tensions are not universal and often arise from misunderstandings or the actions of a few rather than the groups as a whole. Many birders and photographers work together harmoniously, recognizing that they share more similarities than differences and that respectful dialogue and mutual understanding can help mitigate any rivalry. By focusing on their common goals and the greater purpose of bird conservation, both communities can foster a more collaborative and supportive relationship.

Convergence for Conservation

Despite their differences, both bird photographers and birders play essential roles in conservation. Photographers often capture images that inspire public interest and empathy for avian conservation. Birders contribute to citizen science projects like eBird, providing valuable data that helps in the study and protection of bird populations.

In conclusion, while bird photographers and birders might embark on their outdoor adventures with different intentions and tools, they share a fundamental connection through their appreciation and advocacy for birds. By understanding both the common ground and the unique perspectives of each group, we can better appreciate the diverse ways people engage with and work to protect the avian world.

For Further Training:

For help remembering the camera settings for difficult situations such as birds in flight, a set of Photography Adventure Cheat Sheets are designed to help. They are currently 80% off for a winter sale which ends soon if you want to check them out.

adventure cheat sheets

New! Cheat Sheets for Your Photography Adventures (see how they work)

The perfect companion for any photographer. Print one out whenever you need it. Whether you’re going on vacation or seeking out a specific photography adventure, these cheat sheets can provide you with the knowledge and inspiration you need to create your best work yet.

Only 1 day left: The Photography Adventure Cheat Sheets Winter Sale

- - - - - - - - - - - - - - - - - - - - - - - - - - - - - - - - - - - - - - - - - - - - - - - - - - - - - - - - - - - - - - - - - - - - - - - - - -

This post Birders vs. Photographers: Rivals or Allies in Avian Appreciation appeared on PictureCorrect.


from PictureCorrect https://ift.tt/nPMAhOl
via IFTTT