perjantai 31. elokuuta 2018

PictureCorrect.com: Kirlian Photography Explained

Semyon Davidovitch Kirlian was a Russian inventor that rose to fame in the 70s, although he discovered the photography technique bearing his name back in 1939. If you ever attended a New Age festival or you showed interest toward the study (or the enjoyment) of the paranormal, you probably met people luring you to take a photo of your aura.

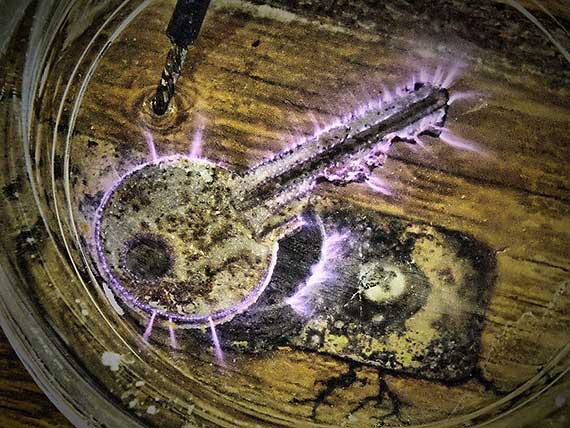
kirlian method

Photo via Wikimedia

He was somewhat famous in his community for being very good at repairing electrical equipment. Witnessing the demonstration of a high-frequency d’Arsonval electrotherapy machine in 1939, he noticed a strange phenomenon occurring: a quick and tiny flash of light sparking in between the device’s electrodes and the patient’s skin. He wondered whether he could photograph that spark.

Auras, Forces, Bio-Energy, Midichlorians

In 1970, after assiduous work together with his wife, Kirlian presented what we know today as “the Kirlian effect” or “Kirlian photography.” He claimed that he could capture the human aura and the life force surrounding all things.

He experimented on plants, people, and objects, drawing the suspicion of the academic community and the adulation of the masses who had not forgotten ectoplasm and other similar effects.

Since that day, science managed to study, dissect, replicate, elucidate, and annul the magic surrounding the “paranormal” occurrence. In this extended Kirlian photography debunked analysis, the author breaks down the Kirlian photography techniques, myths, and hard science issues for everybody to understand. Shutterbugs will, however, enjoy the added value of the presented tricks and methods to replicate Kirlian images and “auras” in DIY projects.

Today we will take a similar – yet slightly different – approach to Kirlian photography, discussing the scientific basis of the effect, its modern real-life applications, and some topics that still need further research.

What is an Electrical Corona Discharge?

As the author of the study we mentioned above says, the entire Kirlian effect relies on an electric physics phenomenon: electrical coronal discharge. Simply put, a corona discharge is an electrical discharge caused by the ionization of a fluid (air or water) surrounding an electrically charged conductor.

Kirlian photography finds its roots in this principle, not even needing a camera: if we put an object on an electrically charged photographic plate (you need high voltage), an image will take shape on the photographic plate – usually, a glow emitting light in the same manner as a gas discharge lamp.

Kirlian did not discover the corona discharge, as it can occur naturally in high-voltage systems, but used this phenomenon to further his theories about the life force. Now that those theories are just a fun read about history and superstitions, the corona discharge needs our attention, as it comes with plenty of commercial and industrial applications:

  • Ozone manufacturing
  • Pool and water basin sanitation
  • Photocopying
  • Ionization of gaseous samples for mass spectrometer analyses
  • Static charge neutralization
  • Ionic wind devices

Since Kirlian auras are merely the result of random electric ionization processes, they depend on a handful of direct, indirect, and confound variables. If you pay attention to the study mentioned above, you can learn some useful tips and tricks on how to make your Kirlian camera and have some fun with your future surreal photography project. Beware, you will have to deal with electricity, so caution and attention are always welcome.

Tesla, Kirlian and Modern Medicine

In the late 19th century, Nikola Tesla observed the effect of glow in response to excitation (electrical impulse disrupting the fluid), but that phenomenon now bears the name of “Kirlian effect” because the inventor noticed it first.

Today, science studies the Kirlian effect in modern medicine. We now know it as “electro-photon capture analysis based on gas discharge visualization technique”—and some countries research its applications as an aid in medical diagnostics.

The principle is as follows: the GDV devices and software (proposed by a Russian professor by the name of Korotkov) capture electro-photonic images of the human body, organs, and subsystems, offering extensive information on those parts’ state in the moment of the recording. The recorded electro-photonic glow signals disruptions at the level of those respective organs or body parts.

The primary purpose of the GDV analysis is to monitor patients’ response to treatments and healing process. Peer reviews and meta-analyses presently show promise in the future use of GDV as medical diagnosis and surveillance equipment.

Kirlian Photography Now

Photography aficionados show a massive interest in the Kirlian techniques for capturing auras and glows. Of course, you can create auras and glows on any picture via Photoshop and other image processing software, but the experiment itself is a once-in-a-lifetime experience.

Science and high-tech software will probably never ruin the pleasure, challenge, and excitement of those photography buffs wanting to make  Kirlian photo cameras and conducting Kirlian effects experiments. The Kirlian effect in photography is spectacular if you get it right, and we do encourage the adventurers in making works of art – as long as you mind the physics behind it.

About the Author:
After his first encounter with the visual arts, Richard Gaspari developed a passion for photography and for framing moments. For Richard, the camera is like the third eye, but with more ISO and an excellent shutter speed.


Go to full article: Kirlian Photography Explained

What are your thoughts on this article? Join the discussion on Facebook

PictureCorrect subscribers can also learn more today with our #1 bestseller: The Photography Tutorial eBook

The post Kirlian Photography Explained appeared first on PictureCorrect.


from PictureCorrect https://ift.tt/2N846Xr
via IFTTT

PictureCorrect.com: Interesting Photo of the Day: Tunnel of Light

This small beach cave is only 3 1/2 feet tall and the photographer is almost 6 1/2 feet tall. Getting the shot involved some serious squatting while the sun set. Mark Lehrbass does mainly nature photography and is an avid outdoorsman, taking him to remote locations for the perfect shot. Here we get a glimpse of El Matador State Beach in California:

long exposure beach sunset

“Tunnel of Light” by Mark Lehrbass (Via Imgur. Click image to see full size.)

The beach in Malibu, CA, is a favorite among locals and visitors alike who go for the beautiful rock formations and sunsets. After a steep trek down a long set of stairs you’ll be rewarded by the beauty of the rocks. For this shot, Lehrbass’ settings were 1 second, f/22, and ISO 64 on his Nikon D810 with a 14mm wide angle lens. Bring your tripod and be prepared to get wet!


Go to full article: Interesting Photo of the Day: Tunnel of Light

What are your thoughts on this article? Join the discussion on Facebook

PictureCorrect subscribers can also learn more today with our #1 bestseller: The Photography Tutorial eBook

The post Interesting Photo of the Day: Tunnel of Light appeared first on PictureCorrect.


from PictureCorrect https://ift.tt/2LLe3oT
via IFTTT

PictureCorrect.com: 10 Tips for Street Photography

It’s a crazy world out there. Taking candid photographs of people with events unfolding spontaneously is what makes street photography fun. As fun as street photography is, it comes with its own set of challenges. Kai Wong,  Joshua K. Jackson, and Craig Whitehead discuss 10 tips to improve your street photography:

1. Overcome the Fear

Being scared and nervous is completely acceptable for a street photographer. But, as Jackson suggests, you need to deal with your fear and negative thoughts. And a bad way to tackle that fear is using a telephoto lens. Avoid telephoto lenses as much as possible and go for wider primes. It will force you to get close to the subject. Something like a 35mm or a 50mm will do just fine for street photography.

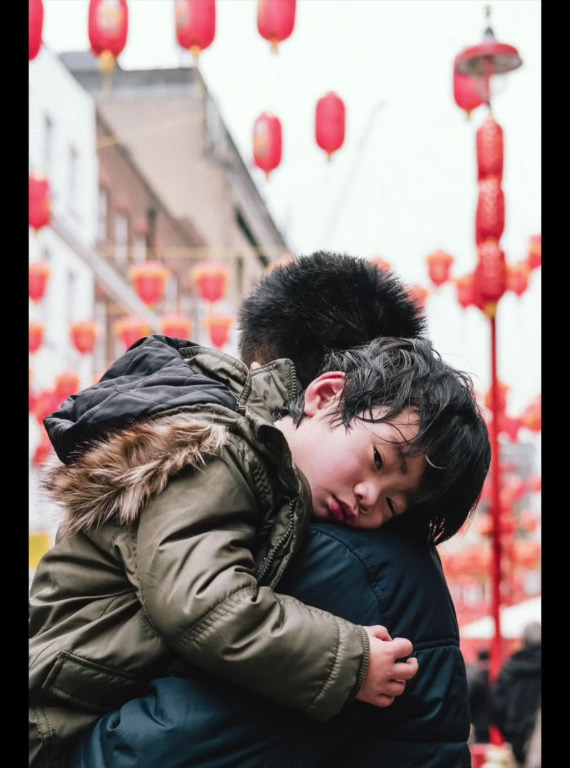
close street photo

If it is really difficult to break out of your comfort zone, Jackson suggests that you take the role of a tourist and pretend you’re shooting a movie. Make use of the LCD screen. Another tip is not to look at the person you’re photographing. This will make them assume that you’re shooting something behind them.

2. Upgrade Skills Not Gear

Gear is important and not so important at the same time. Brand doesn’t matter, but make sure that whatever camera you are using, you are comfortable using it. Upgrading your skills by practicing regularly instead of getting new and expensive gear will help you to take better photographs.

3. Have Your Camera Ready

While you’re on the move out in the streets, always have your camera ready. Carry it around your neck or use a wrist strap. By definition, street photography is very dynamic and anything can happen any second. As such, always have your gear ready.

4. Remove Technical Distractions

Be prepared to capture the spontaneous moments. You don’t want to be busy making technical decisions on things like ISO, shutter speed, aperture during the “moment.” While shooting in manual mode is great, don’t shy away from using semi automatic or automatic modes as far as street photography is concerned.

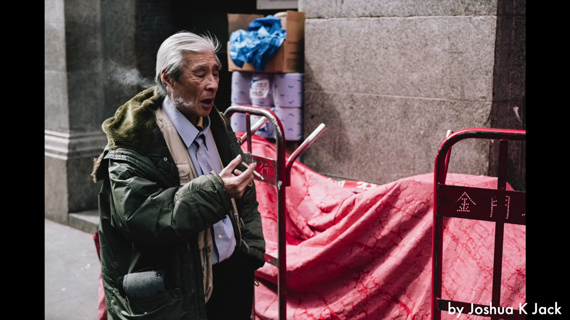
capturing moment in street photography

5. Tell a Story

If an image is easy to take, chances are that it will not turn out to be too great. Challenge yourself and try to take images that have a narrative, or those that tell a story. You have the control over how you want to present something, how you frame it, and how you compose it.

6. Everyone Shoots Bad Shots

Not every photo that you take needs to be great. No matter whether the photographer is highly experience or just a beginner, they will take many bad shots. So, do not judge yourself over every shot and don’t stress yourself.

“It’s not about how many bad shots you take but recognizing when you take a good shot and why it’s a good shot.”

Instead of being happy taking a few shots, take as many photos as you can while you’re out on the street. This will increase your likelihood of getting that magical shot. Remember this:

“You can always delete images but you can’t go back and create more once the moment is gone.”

7. Create Your Own Luck

There is no need for perfect weather conditions or for the lighting to be perfect. You need to create your own luck. Mostly it all depends on how much time you spend on the street, and how much attention you pay to the events going around you. Anticipate what might happen and be patient.

8. Forget Technical Perfection

Put more of your effort into capturing the decisive moment. Pay less attention to perfecting your images technically; stuff like color fringing, bokeh, and sharpness are secondary. Just be there at the right place to capture moments at the right time.

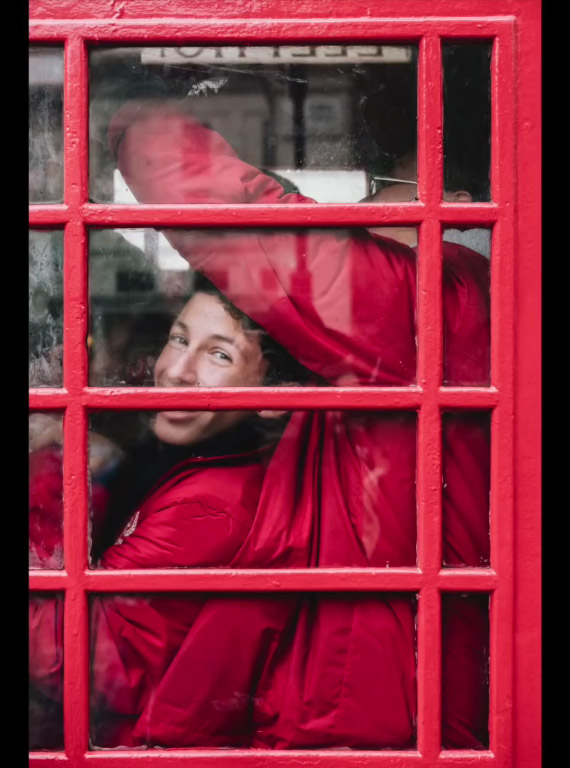
one shots out of many turn out good

9. Look for Something New

Whitehead shares that he has developed a habit of looking back more often. Being fixated on what is happening in front of you can lead you to miss out on something happening behind you. Look around your environment to see what’s happening.

10. Use Minimal Post Processing

As discussed earlier, street photography is more about the story and the moments. You can’t create an image after you’ve already taken it. Don’t attempt to augment or post-process a bad photo to make it look good. It’s the content and the story that matter and not how you edit it. So keep the edit minimal and focus more on creating the image.

I hope these handy tips from the street pros inspire you to take better street photographs.

For further training: The Photography Action Cards at 88% Off


Go to full article: 10 Tips for Street Photography

What are your thoughts on this article? Join the discussion on Facebook

PictureCorrect subscribers can also learn more today with our #1 bestseller: The Photography Tutorial eBook

The post 10 Tips for Street Photography appeared first on PictureCorrect.


from PictureCorrect https://ift.tt/2C6q5K0
via IFTTT

torstai 30. elokuuta 2018

PictureCorrect.com: Diagonal Leading Lines in Photography Composition

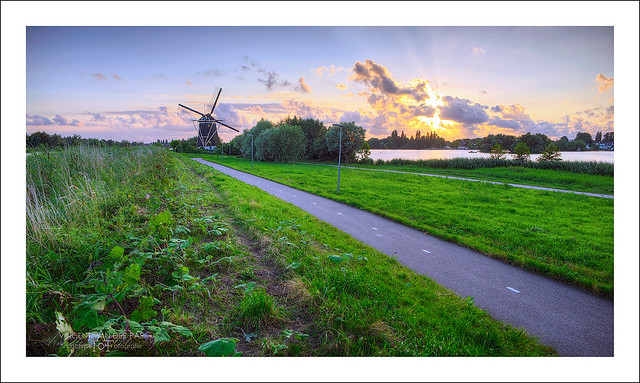
Of all the lines used in photography, diagonals are the most dynamic. You can use them to create a strong impression of movement or you can use them to create a tremendous sense of depth. All images are created with lines—some vertical, horizontal and others converging—but knowing how to place them affects the mood and composition of the final image.

diagonal leading lines

“Prinsenmolen Sunset” captured by Vincent van der Pas

A sense of order is created with vertical and horizontal lines, implying stability and strength. Diagonals are unbalanced and appear to be unstable. What they communicate is dynamic, yet precarious. They always appear to be falling over or not quite secure. This is what lends itself to a dramatic image.

The easiest way to create diagonals is simply by tilting your camera. Slanted views of horizontals and verticals and can easily be created by the photographer. I find that a bit of tilt to my camera adds a little slant to the image and creates a perfect diagonal line.

skyscraper angle photo

“Rights angles” captured by Shemsu.Hor

Try capturing a simple image like a car or skyscraper by tilting the camera forty five degrees and see the effect you create. What happens to the image? The car looks as if it is going fast while skyscraper appears to be reaching for the sky. This effect is created simply by simply turning your camera

When shooting from high up from a bird’s eye view, you can really create some stunning images. Look for lines then tilt the camera. The bird’s eye vantage allows you great leeway, as there is no right way, no up or down; everything is two dimensional. Experiment with patterns and color and you will arrive at some dramatic compositions.

Don’t be afraid to use crazy angles and change your viewpoint when shooting with diagonals. They will help give you a sense of depth and perspective. They tend to lead the eye to whatever focal point you decide, to a place where they end or disappear into nothing. Diagonals encourage the eye of the viewer to follow, almost like the Judas goat at the abattoir that leads the livestock to the slaughter. A set of footprints, a curved hedge, or river can be used to guide the viewers to the point of focus. But you must lead them to something that has a strong interest otherwise the viewer is left feeling that the image is incomplete.

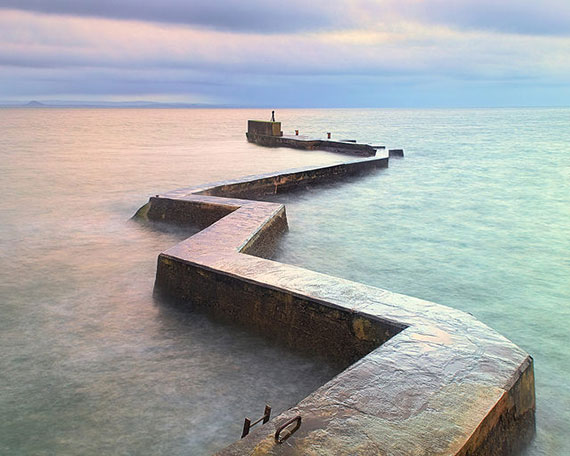
Then there is the zigzag effect when using diagonals in patterns. The repeated pattern can also be used to drag the eye into the image over a larger area of the frame. These patterns are dynamic and when used with horizontals and verticals become even more dramatic.

I have always chosen diagonals as my favorite lines because they are so dynamic and add something to my images. Bottom line though, as you learn digital photography, is that you need to experiment and above all practice what you learn in order to master it. Happy shooting!

About the Author:
Wayne Turner has been teaching photography for 25 years and has written three books on photography. He has produced 21 Steps to Perfect Photos, a program of learner-based training using outcome-based education.


Go to full article: Diagonal Leading Lines in Photography Composition

What are your thoughts on this article? Join the discussion on Facebook

PictureCorrect subscribers can also learn more today with our #1 bestseller: The Photography Tutorial eBook

The post Diagonal Leading Lines in Photography Composition appeared first on PictureCorrect.


from PictureCorrect https://ift.tt/2m2hKz8
via IFTTT

PictureCorrect.com: Interesting Photo of the Day: Forest of Poplars

Located in Morrow County, Oregon, the Boardman Tree Farm is popular with photographers in the region. Known as Pacific Albus, the type of trees that are grown in this farm are known for growing fast and yielding a beautiful yellow color during autumn. Photographer Ben Babusis took the following photo in autumn when the farm was in full yellow glory:

fall forest

“Everything is Yellow” by Ben Babušis (Via Reddit. Click image to see full size.)

The simple, straight lines of the tree trunks with the yellow color fading from top to bottom makes for a really interesting composition. Further, the way Babušis has chosen to compose the shot by creating patterns of trees is pleasing to the eye.


Go to full article: Interesting Photo of the Day: Forest of Poplars

What are your thoughts on this article? Join the discussion on Facebook

PictureCorrect subscribers can also learn more today with our #1 bestseller: The Photography Tutorial eBook

The post Interesting Photo of the Day: Forest of Poplars appeared first on PictureCorrect.


from PictureCorrect https://ift.tt/2N6uLnq
via IFTTT

PictureCorrect.com: How to Choose Between High ISO and Slow Shutter Speed

When you find yourself caught in low light conditions, do you prefer bumping up the ISO or slowing down the shutter speed? Each of these options has a benefit and a trade off of its own. High ISO introduces more noise in the image, whereas a slower shutter speed causes motion blur to show up. It’s up to you to make the decision for your photo, depending on the situation. Photographer Mark Wallace from Adorama takes up a challenge to evaluate the choices in the following video:

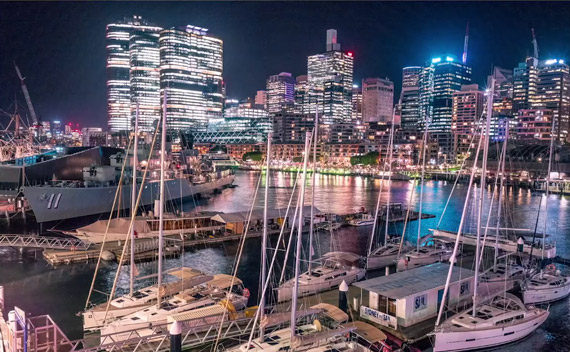
Wallace starts by setting up his Leica M10 with a 28mm lens set at f/8, ISO 100, and 16 seconds. The result is a very pleasing, clean image with beautiful motion blur of the water.

low iso and slow shutter image

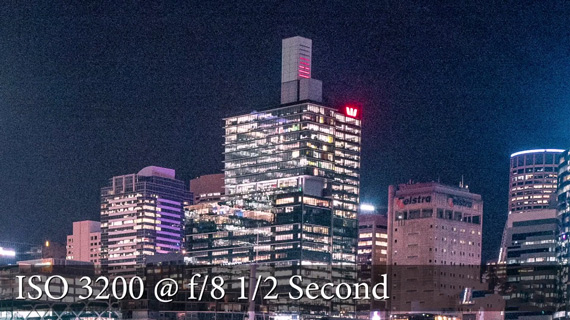
Next, he bumps up the ISO to 3200, which changes the shutter speed to 1/2 second. The result? The image looks noisy when viewed at 100 percent, and the water looked better when it was blurry.

high iso and fast shutter speed image

noise due to high iso

The image shows considerable noise when zoomed at 100 percent.

To conclude, if the subject isn’t moving, it’s a better option to shoot at a slower shutter speed and a low ISO.

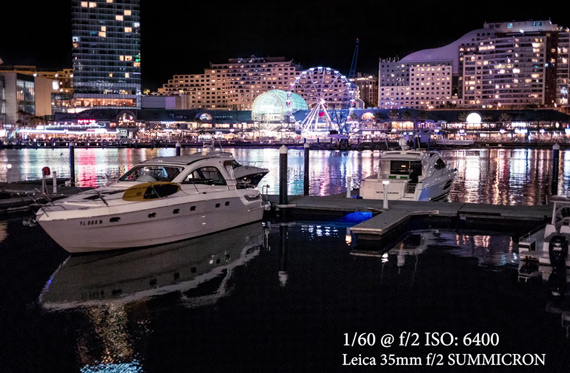
In cases when it is essential to freeze motion in a low light condition, using a low ISO and a slow shutter speed won’t cut it. You will end up getting a messy image full of motion blur. It thus becomes essential to bump the ISO up in order to have a decent shutter speed. For demonstration, Wallace sets his camera to ISO 6400 at f/2, which lands him up to a shutter speed of 1/60 second for the following image:

handheld shot at high iso

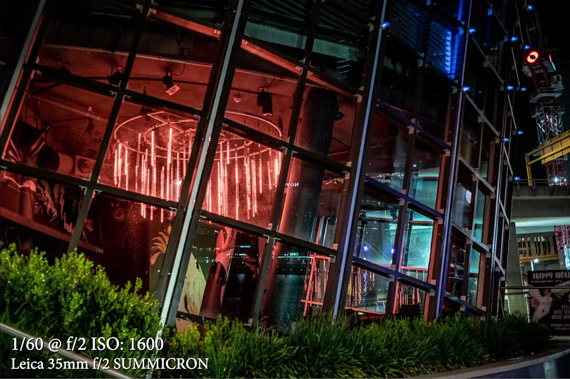
Here is another example where he uses a relatively high ISO:

high iso image

So what did we learn?

“We learned that if we are shooting something that is not moving, like a building or a mountain or maybe even the ocean, and the camera is on a tripod, we can use a very low ISO value and then let that shutter hang for 20–30 seconds or even a few minutes. But for shooting something handheld or walking around in low-light, and we don’t have a flash. . .we need to open up our aperture to let in a lot of light and boost the ISO.”

But then, there is the question of how high you can go with your ISO. Newer generations of cameras are capable of delivering acceptable images even at higher ISOs. Also, be aware that full frame cameras can handle higher ISOs better than APSC or Micro 4/3 cameras. Get to know your camera and see how much can you “exploit” it by cranking up the ISO and evaluating the results.

For further training: The Photography Action Cards at 88% Off


Go to full article: How to Choose Between High ISO and Slow Shutter Speed

What are your thoughts on this article? Join the discussion on Facebook

PictureCorrect subscribers can also learn more today with our #1 bestseller: The Photography Tutorial eBook

The post How to Choose Between High ISO and Slow Shutter Speed appeared first on PictureCorrect.


from PictureCorrect https://ift.tt/2Pkz24g
via IFTTT

keskiviikko 29. elokuuta 2018

PictureCorrect.com: Sports Photography: How Most Pros Work

In sports photography, access is key. Without access, you won’t succeed even if you have the most comprehensive array of lenses out there. So if you have access, you’ve already improved your chances of success by at least 40 percent. The other keys to success?

You have to be able to anticipate and concentrate for long periods. Being knowledgeable and following a variety of sports, not just the popular ones, is crucial. And finally, a good ounce of luck doesn’t hurt either. What exactly should you be looking for besides great action?

Faces

Back of heads are not terribly engaging. I think we are so in tuned to seeing faces, we don’t realize it. We do want to see faces of athletes whenever possible. Grimacing faces add to the drama and excitement. Unfortunately some athletes hardly show any emotions even when they win. Faces in sports can be the difference between a good picture and a great picture.

bmx photography

photo by Zorah Olivia

Timing

Peak action is probably what you’re after. There may be some luck involved but a softball picture without a visible ball is not as exciting. The ball, be it a hockey puck or shuttlecock tells your viewer what sport it is. Without the ball, you don’t get a sense of how close the play was, how bad the throw was, et cetera. With baseball and softball, the play at a base has to be close. If the throw is early or too late, the ball is either in the glove or out of your picture. But that’s not your fault. It’s just how the game goes. So the element of luck is there for sure.

softball photography

photo by Ralph Arvesen

A Different Viewpoint

Strive for a different viewpoint to surprise your viewers and to give them a fresh look of a “tired-looking” sport. This may be something as simple as shooting when weather is not so good sometimes.

Or even simply being creative with your photographic technique. It may mean working harder by bringing in more equipment but your efforts will be rewarded. If it it doesn’t work, you’ll at least learn something new.

Backgrounds

Related to viewpoint but just as important is backgrounds. Shooting with wide open apertures on long lenses can only do that much sometimes, so be on the lookout for what’s behind the subject at all times. If you’re serious about sports photography, you should try photographing different sports.

Golf

Just the same way most Americans don’t get soccer, I don’t get golf. I do know I would enjoy the sport if I play it. It’s more interesting to play than to watch.

golf photography

photo by Trysil

That said, I don’t particularly like covering golf. Here’s why:

  • Expect to be hauling at least a 300 mm lens with a monopod and 2 bodies, maybe a flash, and a 70-200 mm zoom.
  • You will be walking all 18 holes, more if it goes into playoffs.
  • You don’t get to hang out with just the same foursome.
  • If the leader boards are not kept current, you will be in a world of hurt trying to find a certain golfer when the lead changes suddenly.
  • Besides that, the light is usually extremely harsh. Faces are inevitably shielded by visors or baseball caps. You’re never close enough to be able to fill flash or anything of that sort.
  • There are restrictions. You can’t stand directly in the line-0f-sight of the golfers. You can’t trip your shutter until they actually hit the ball if they’re on the green during the short game. Don’t forget you have to be absolutely quiet.
  • If the game goes into playoffs, all those “great pictures” you took in the early rounds don’t mean much anymore. It’s like starting all over.

Soccer

My favorite sport soccer happens to be pretty tough to shoot because of the lens requirement. A 300mm lens is probably the minimum and a 400mm is more ideal. But that also depends on the sensor size of your camera body.

If you’re shooting with a camera with full frame sensors, you might even need something longer.

soccer photography

photo by Andy Eick

Most of the time, depending on the lens you have, you park yourself on the field and just hope you’re in the right place at the right time. So covering soccer is not as physically demanding as covering golf or football. You might move around when there’s a chance for a set piece like a free-kick or corner kick. It helps if you understand terms like “in-swinger” on corner kicks. The rest of the time, because the action is non-stop and the ball moves around the pitch so quickly, it’s difficult to physically move around.

Badminton

Anytime you step indoors to cover a sport, you are heading into low light and very limited options. The world’s fastest racquet sport is also hardest to photograph because of the lighting conditions and how the indoor stadiums are lit. Understanding how a game like badminton or tennis is scored is crucial. How else would you know when it’s the “critical match point’ or the significance of a tie-break?

badminton photography

photo by Tsutomu Takasu

ISO, Aperture, Shutter Speed & White Balance

Up till this point, I haven’t mentioned these camera settings because these are variable depending on the lighting conditions and how well your camera handle digital noise. Generally speaking, the newer your camera, the better it handles low ISO and digital noise. Most sports photographers have at least a 300mm f/2.8 lens at a minimum.

They will also carry a 70–200 f/2.8 lens and most likely that has built-in image stabilization. And the majority of sports photographers take their pictures at f/2.8 to blur out the background but also to get the highest possible shutter speed to freeze action.

Every now and then, they may need more depth-of-field but very rarely. That by the way, is why under the one of the Auto modes, you see the icon for Sports or someone running. It’s also exposure mode that favors high shutter speed, Shutter Priority or Tv (Time value according to Canon)

So two camera bodies are pretty standard. One body is attached to the long telephoto which is mounted on a monopod for support. Depending on the camera body, the image sensor may be full frame or may have a 1.6x, so a 300mm will be 480mm lens.

professional sports photographers

photo by Ronnie Macdonald

To successfully hand hold a lens like that with little camera shake would require you to make sure you have a minimum shutter speed of 1/500 of a second.

But even professionals don’t handhold long lenses, they use monopods. The one good thing about shooting in artificial lighting like a soccer stadium at night is this: once you have the exposure down, it doesn’t change very much, unlike a daytime game.

In day games, you have to keep an eye on light levels especially if the game is in the evening. The other advantage is the crowd in the stands are not lit, so they aren’t as distracting.

Since sports photography is a highly specialized field, there is just too much to cover in one article. These tips will hopefully get you on your way to getting better pictures.

About the Author
Peter Phun is a Riverside-based freelance photographer who also teaches photography at Riverside City College. He does portraits, weddings and editorial work and writes about photography, Macs, and the internet. He also designs websites and is a stay-at-home dad.


Go to full article: Sports Photography: How Most Pros Work

What are your thoughts on this article? Join the discussion on Facebook

PictureCorrect subscribers can also learn more today with our #1 bestseller: The Photography Tutorial eBook

The post Sports Photography: How Most Pros Work appeared first on PictureCorrect.


from PictureCorrect https://ift.tt/2oiCWiq
via IFTTT

PictureCorrect.com: Interesting Photo of the Day: Frog Eggs & Flowers in a Puddle

Art can sometimes be found in the most unexpected places. And some people have the ability to create art out of just about anything. The following photo of some frog eggs and flowers in a puddle by Anastasia is a prime example:

frog eggs and flowers in a puddle

“Frog Eggs and Flowers in a Puddle” by Anastasia (Via Reddit. Click image to see full size.)

Some viewers argue that the photograph looks like a painting, and rightly so.

Anastasia took this image after she saw the eggs in a puddle. She picked a few flowers and the leaf and allowed them to drift on the water. The arrangement in this image is all natural and looks so perfect. And the editing is minimal, as well.

Who knew you could make art out of a dirty puddle?


Go to full article: Interesting Photo of the Day: Frog Eggs & Flowers in a Puddle

What are your thoughts on this article? Join the discussion on Facebook

PictureCorrect subscribers can also learn more today with our #1 bestseller: The Photography Tutorial eBook

The post Interesting Photo of the Day: Frog Eggs & Flowers in a Puddle appeared first on PictureCorrect.


from PictureCorrect https://ift.tt/2LFT7Qt
via IFTTT

PictureCorrect.com: Creative Pet Photo Tips When Time is of the Essence

Taking compelling pictures of our four legged friends is usually easier said than done. Animals have minds of their own, and often times can’t just be posed into place like a bowl of fruit in a studio still life. But, with a few techniques in tow, it’s possible to transform the task from taxing challenge into dynamic photo session. Marcin Lewandowski from Adorama explains what he does when he has a cat, dog, or other pet standing in front of his lens:

During this one hour photo shoot, Lewandowski puts his own advice to the test, and the results prove to be phenomenal. Here are some of the basic methods he demonstrates and suggests:

Listen to cues. Animals may not be able to verbally express their thoughts and feelings, but they can certainly communicate through their behavior and body language. Pay attention to your subjects, the way you would with any human model. Try your best to accommodate their needs whenever necessary.

Have a few treats on hand. Let’s face it—we’re a lot more invested in photographing our animals than they are of actually having their picture taken. Food is one of the easiest ways to grab their attention. Use this to your advantage when setting up a composition or trying to capture an animal’s gaze.

Bring along a familiar face. If a photo shoot is the very first time you’re interacting with an animal, they understandably may be on edge. One of the easiest ways to make them comfortable is to have a familiar human companion close at hand. Aside from reassuring them that they’re safe, having a person who knows the animal first hand may be able to help you get the shot that you need.

animal with handler

Build a connection. Juxtaposing human and animal features often creates a relatable and interesting results. Alternatively, different animal subjects paired together can make for a fun photograph (provided that all the parties in play are willing to cooperate!).

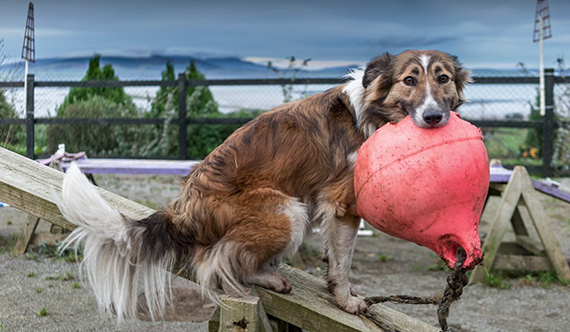
Get on their level. Animals don’t see the world from our eyes. Physically go down to the ground. You’ll almost always get a better shot when you try to understand your subject’s perspective.

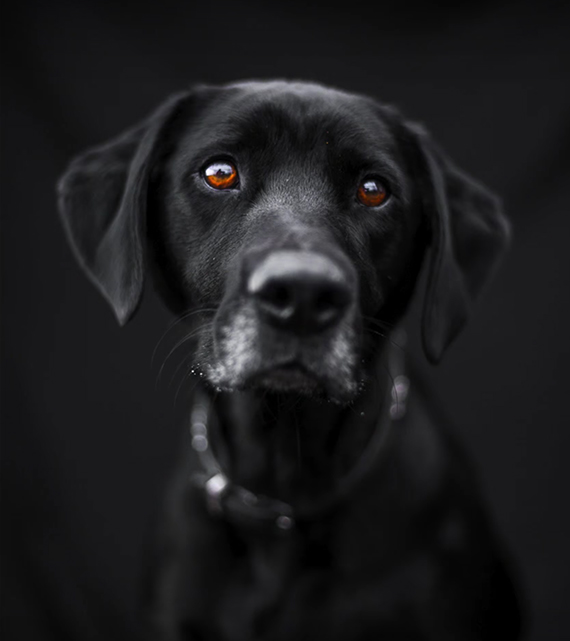
dog portraiture

Go wide. Unless you’re making an intimate portrait, try using a wider lens. Doing so will capture more of their environment and allow more opportunity for movement and action.

Come in with an open mind. There’s not a whole lot of prep that you can do before a photo shoot with an animal. It’s much more effective to dive into the situation and feel out each individual’s boundaries. Just walk in with a list of potential shots and see what works; eventually, you’ll wind up with something great.

dog outdoors

“Animals are great companions to photograph, so long as we treat them well and give them their dignity—accompanied by a few tasty treats.”

For further training: The Photography Action Cards at 88% Off


Go to full article: Creative Pet Photo Tips When Time is of the Essence

What are your thoughts on this article? Join the discussion on Facebook

PictureCorrect subscribers can also learn more today with our #1 bestseller: The Photography Tutorial eBook

The post Creative Pet Photo Tips When Time is of the Essence appeared first on PictureCorrect.


from PictureCorrect https://ift.tt/2PIXdKN
via IFTTT