Forced perspective is a technique used in photography to create an illusion of the objects being larger, smaller, closer or farther than they realyl are. In a sense, forced perspective photography can be used to manipulate reality but a better purpose is to use one’s imagination to produce creative results. Louise Carey from Practical Photography shows how you can get creative in your photography using this technique:
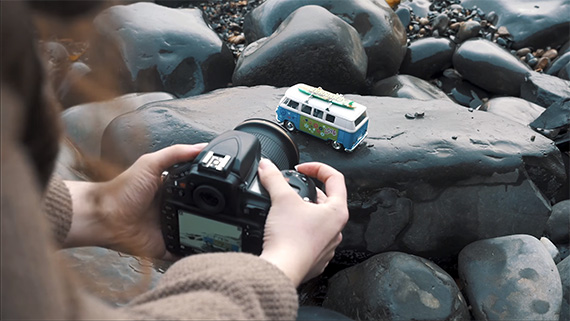
To demonstrate and to share some tips on forced perspective photography technique, Carey takes us to a rocky beach in Dorset with a toy camper van during a beautiful sunset.
Composition
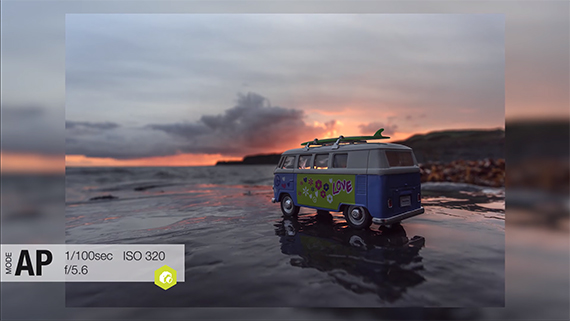
Instead of just shooting up close, pay attention to the surroundings. Carey makes the most of the beautiful light during sunset and the wet rocks by including the reflections on the rocks to give the photo a vibrant feel.
Feel free to arrange and rearrange your composition setup. Arrange your subjects by placing them at various angles until you’re happy with the composition. You can also add in little props to make it look more eye catching as Carey does with the flower in the video.
Pay attention to how high or low you place your camera. Shooting from a higher angle dominates the subject and it will appear smaller. On the other hand, shooting from a lower angle exaggerates the subject and makes it appear bigger than it really it. Shooting from a lower angle also allows you to take better advantage of the lighting and the surrounding elements. Getting low will mean that you will have to forego your tripod and work hand held. If the surface allows, get down on your belly and get your clothes dirty.
When composing around difficult surfaces that don’t allow you to lie on the ground, use Live View mode. You can also enable the grid or level gauge on your camera to make sure that the photo isn’t tilted.

Equipment and Settings
To get the maximum area in focus, Carey uses a Nikon 20mm f/1.8G lens. A wide angle perspective allows a wider field of view and a greater depth of field. But this doesn’t mean that you must use this particular lens. Go on and give it a shot with any lens of your choice. Lenses with a short “close focusing distance” are preferred as it allows you to focus on your subject even when you are quite close to it.
When lighting conditions are difficult because of a bright background, you’d ideally bracket the shot and blend the different exposures during post-processing. However, since tripods are out of the equation, you cannot use bracketing. In such conditions, expose for the highlights and adjust the exposure for the subject in post; most cameras do a lot better in recovering shadow details than highlights.
If you want the background to be in focus as well, you can use a narrower aperture (something like f/16). However, if your priority is to put more emphasis on the subject, shoot at a wider aperture, like f/5. Shooting wide open isn’t recommended because when shooting at the close focusing distance of the lens, the depth of field is vastly reduced. You’ll find it difficult to keep the whole of the subject in focus at a wide open aperture.

Now that you have an understanding of photographing forced perspective shots, go pick up your camera and your action figures, toy cars, or dolls that you may have from your childhood, and recreate your memories with them.
Go to full article: Forced Perspective Landscape Photography with Toy Cars
What are your thoughts on this article? Join the discussion on Facebook
PictureCorrect subscribers can also learn more today with our #1 bestseller: The Photography Tutorial eBook
The post Forced Perspective Landscape Photography with Toy Cars appeared first on PictureCorrect.
from PictureCorrect https://ift.tt/2Ob99Dy
via IFTTT


0 kommenttia:
Lähetä kommentti