torstai 31. joulukuuta 2020

PictureCorrect.com: New Year’s Resolutions for New Photographers

Many of us have received or bought ourselves new digital cameras for Christmas, and with this comes the zeal to create great images. Sadly, the chances of this happening are small, as most of us know that a camera doesn’t take great images, the photographer does. So what resolutions can you make that will start your photography journey in the new year on the right footing?

new year's photography

photo by Ricardo Liberato

1. Read your camera manual

Please don’t stop reading this article because I said this. Go back to the box and get the manual out. In order to become a good photographer you need to do just that. Unless you know the basic functions—and specifically, the creative modes—you’re going to struggle to get the good images you see in books and magazines. This is important if you want to proceed to the next resolution. So, at least learn the basic functions if you aren’t up to reading the whole manual.

2. Find a basic photography course

This can be a book, an online course, or a local photography course. Whatever it is, resolve to find something that is going to lay a foundation and teach you the basics. You need to get your foundations right from the get go. If you are a self-starter then find books, magazines, and Internet-based material that you can self-study. Find something that works for you.

3. Plan photography time

Photography is not something you just decide to do when you feel like picking up your camera and taking some shots. You need to plan uninterrupted photography time into your schedule. Not reading or learning time, but finger on the shutter button time. Time dedicated to taking photographs on a daily or weekly basis is so important if you want to go anywhere in your photography journey.

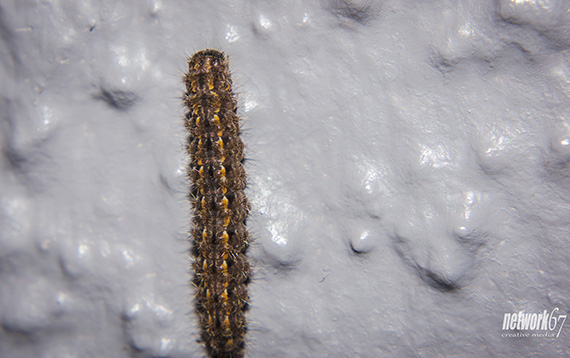
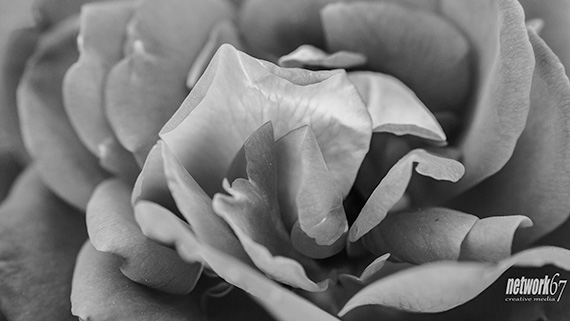
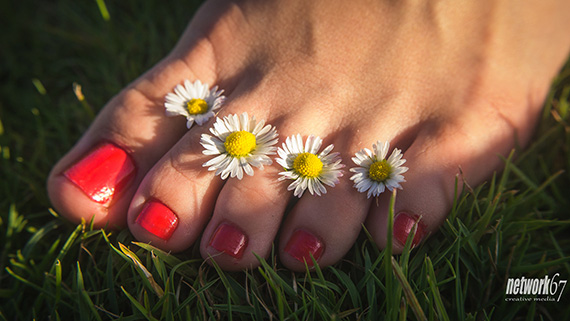
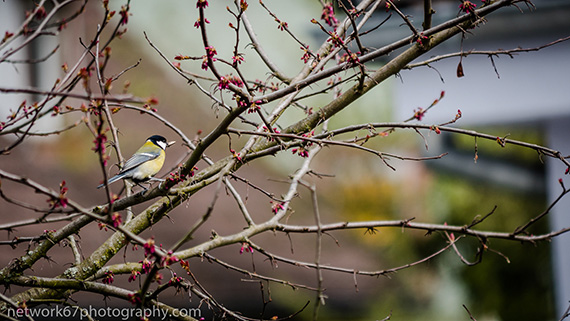
4. Discover your photographic passion

What do you like doing in your life? What are your hobbies or interests? If you are a stamp collector or an extreme sports person, the chances are that you will want to take photos of your passion. This is not always the case but it will help you discover your passion. So sit down, if you don’t already know, and write down what you love doing. Then ask yourself if any of these interests are what you like to shooting. There will be equipment limitations based on your camera and lenses, so work within these restrictions.

new year goals for photographers

photo by Brook

5. Think before you shoot

Put in your mind right at the outset of your photography journey that you are going to think before you shoot. The disease of digital is indiscriminate shooting without a plan, purpose, or thought. It’s like spraying a target with machine gun fire and hoping to hit the bull’s eye. Pretend you are shooting film and only have 36 exposures in your camera. If you can think before shooting rather than hoping that out of a hundred photos a few may be good, you are on your way to becoming a great photographer.

plan your shot

photo by Nick Page

Remember that just because you own a camera it doesn’t mean you are a photographer in the same way owning a box of paints doesn’t make you an artist. Resolve to do these things as you enter a new year with a new camera, and start your new photography journey as you learn. Happy shooting!

About the Author:
Wayne Turner has been teaching photography for 25 years. Passionate about photography, radio and video, he is a Radio CCFm producer and presenter in Cape Town.


Go to full article: New Year’s Resolutions for New Photographers

What are your thoughts on this article? Join the discussion on Facebook

PictureCorrect subscribers can also learn more today with our #1 bestseller: The Photography Tutorial eBook

The post New Year’s Resolutions for New Photographers appeared first on PictureCorrect.


from PictureCorrect https://ift.tt/2CnFO6x
via IFTTT

PictureCorrect.com: Discussion: What is Your New Year’s Resolution for Photography?

The beginning of a new year is truly a good time to set some goals for what you want to accomplish. Start off 2021 right! What is your New Year’s Resolution for Photography? We started this discussion on Facebook, it’s always great to make friends who are working towards the same goals.

Share & compare yours here: New Year’s Photography Discussion

new year's resolution

What is Your New Year’s Resolution for Photography? (Click to Join the Discussion)

Find the discussion here: What is Your New Year’s Resolution for Photography?


Go to full article: Discussion: What is Your New Year’s Resolution for Photography?

What are your thoughts on this article? Join the discussion on Facebook

PictureCorrect subscribers can also learn more today with our #1 bestseller: The Photography Tutorial eBook

The post Discussion: What is Your New Year’s Resolution for Photography? appeared first on PictureCorrect.


from PictureCorrect https://ift.tt/2C3g9MN
via IFTTT

PictureCorrect.com: How to Take Pictures of Fireworks

Since it’s New Year’s eve, it’s a good time to review the basics of photographing fireworks for the shows tonight. It’s easy, it’s fun, and it’s a great way to preserve memories of those wonderful displays.

city scape fireworks

photo by Willy Verhulst

Scout Your Location

This is one time that being close is not an advantage. Try to find an elevation some distance away that will give you a vantage point for something besides the sky bursts. Water is a great choice. You’ll get a secondary reflection off the surface that adds depth and echoes the colors in the sky. City lights would be another good choice.

fireworks photography foreground

photo by John Fowler

Keep a watch out for distinctive foreground shapes that you might use the fireworks to silhouette or frame. If you have a fill flash along the effect can be quite dramatic.

Bring Your Tripod

Hand held is a no-go for fireworks photography. The exposure times are just too long to get a decent image hand held.

Try to show up at your location early so that you still have enough time to check your framing and level with the horizon. At times like these having a bubble level on your tripod really pays for itself.

photographing a fireworks display

photo by ok, shawna

Keep in mind that, unless you’ve been to that spot before and know the terrain, you might have to shift your frame depending on the altitude the display operators are using for the shells. I mark preset points with a grease pencil above and below and left and right of my preferred frame. That way I don’t have to guess in the dark, I can simply move to the next preset. If you can, set preset marks for both horizontal and vertical framing.

Remote Release

You’ll also want to use your remote release on the “B” or bulb setting. Trying to hold the release button will invite camera shake, even on a tripod.

Aperture

A lot of people think you need a fast lens to photography fireworks but in my experience, an aperture of f/8 to f/16 usually works just fine as a starting point. Fireworks are particularly bright, so you don’t need a fast lens and lower f-stop to get the best results.

Start at f/8, and adjust if necessary.

ISO

Same story with the ISO. Using a higher ISO will just invite over-exposure of the shell bursts. Start at ISO 100 and adjust after the first couple if necessary.

urban fireworks photography

photo by Chris Phutully

Remember, you’re not striving for perfect exposure, you’re striving for the perfect fireworks shot. Sometimes those poorly exposed frames make the best shots.

The Technique

Depending on how much ambient light is left in the night sky, usually you just open the shutter before the launch and close it after the burst trails off. This is where you can start having fun.

Don’t be afraid to vary the number of bursts in one shot from just one or two to leaving the shutter open for three or four. Sometimes you’ll over-expose one, no big deal. Adjust as necessary for the conditions.

how to take pictures of fireworks

photo by Engledow Jenni

Mainly just have fun. Photography can be stressful and this is one of those rare opportunities to just break all the rules while you enjoy the show.

About the Author:
Peter Timko writes for http://www.proudphotography.com, an online photography school offering a variety of courses.


Go to full article: How to Take Pictures of Fireworks

What are your thoughts on this article? Join the discussion on Facebook

PictureCorrect subscribers can also learn more today with our #1 bestseller: The Photography Tutorial eBook

The post How to Take Pictures of Fireworks appeared first on PictureCorrect.


from PictureCorrect https://ift.tt/3aWj2Ds
via IFTTT

keskiviikko 30. joulukuuta 2020

PictureCorrect.com: Camera Modes Explained

If you’re just learning about your camera, then chances are you’ve taken a look at the top of your camera only to become immediately confused. However, you don’t need to worry, as I’m going to explain what each and every one of these camera modes does.

camera modes

“Mode Dial & Lock Lever” captured by Hideya Hamano

Automatic ([ ])

The automatic mode really doesn’t need much of an introduction; you can probably guess by the name what it does. Automatic allows your camera to set all of your camera options “automatically” to produce the exposure that it thinks is correct.

Automatic mode doesn’t allow you to set the shutter speed, aperture, ISO, or sometimes even the flash, which often pops up and ruins your photos. If you don’t know how to use your camera and are considering shooting in this mode, don’t stay here for too long or you won’t learn what your camera is really capable of.

Program Mode (P)

Program mode is a mode for beginners to start to understand their cameras. Program mode is similar to automatic in the way that it allows the camera to make the decision on which settings to use to correct the exposure. Once the settings are selected, you can easily change them. For example, if the camera thinks that the correct shutter speed would be 1/200 of a second but you think this is too slow, you can change it so it gives you a shutter speed of, say, 1/400.

If you don’t know much about cameras, I would recommend using this mode to start off with.

Aperture Priority (Av)

Aperture priority is a mode in which you set the aperture while the shutter speed is automatically set for you to give the correct exposure. This mode is useful when you want to achieve a certain depth of field. For example, if you wanted a shallow depth of field (not much in focus) then you could set the aperture to your lens’s lowest number (e.g. f/1.8), and if you wanted a wide depth of field you could set it to its highest aperture value (e.g. f/22).

aperture priority mode

“Scream!” captured by Danny Perez Photography

Shutter Priority (Tv)

Shutter priority is similar to aperture priority. This time, however, you only set the shutter speed, and the rest is done for you. This mode is useful when you want to tell the camera that you only want to shoot photos at a certain speed and not any lower or higher.

shutter priority mode

“Untitled” captured by Rick Burress

Manual (M)

While in manual mode, you are able to change all of the settings as you see fit. Aperture, ISO, shutter speed, and white balance settings can all be changed independently to create the image you’re looking for.

Learning to shoot in manual mode will help you understand photography in greater detail.

Give each of these modes a try and see how they work for you.

About the Author:
Ricky Davies is a freelance photographer.


Go to full article: Camera Modes Explained

What are your thoughts on this article? Join the discussion on Facebook

PictureCorrect subscribers can also learn more today with our #1 bestseller: The Photography Tutorial eBook

The post Camera Modes Explained appeared first on PictureCorrect.


from PictureCorrect https://ift.tt/2D0XDZi
via IFTTT

PictureCorrect.com: Interesting Photo of the Day: A Rare Clear View of Denali

Denali, also known as Mount McKinley, is renowned as the tallest mountain in North America, located in Alaska. Nearby is yet natural wonder: the Ruth Glacier. The glacier’s “Great Gorge” is a mile wide, and drops almost 2,000 feet over 10 miles. Interestingly, the height from the top of the cliffs beside the glacier to the bottom of the glacier exceeds the height of the Grand Canyon. Photographer Anders Young was able to photograph these two natural wonders in a single frame—and the way he achieved this is yet another wonder in itself.

“Aerial View of the Denali Region” by Anders Young (Via Reddit. Click image to see full size.)

Young took the image on a Nikon Z6 with the Nikkor Z 24-70mm f/4 S lens at 24mm, 1/320 seconds, f/10 and ISO 200. He flew on a Luscombe 8A aircraft about 10,000 feet high to capture all these natural marvels in a single frame.

“In the background, Denali reaches 20,310ft above sea level, over double the altitude that I took this photo from.”

If you are familiar with the environment around this place, you’ll know that such an expansive view of Denali is incredibly rare. That’s because the summit is almost always shrouded in clouds. The morning he took this photo, Young could see Denali on the horizon all the way from Anchorage, 135 miles south. Talk about being lucky!

While Denali dominates the background, Ruth Glacier in the foreground looks like a road you could drive on. Composition-wise, it acts as a fantastic leading line, drawing us into the image through the sharp granite peaks lining the gorge.

Would you complain of the bitterly cold temperature if you got to fly around this beautiful region?


Go to full article: Interesting Photo of the Day: A Rare Clear View of Denali

What are your thoughts on this article? Join the discussion on Facebook

PictureCorrect subscribers can also learn more today with our #1 bestseller: The Photography Tutorial eBook

The post Interesting Photo of the Day: A Rare Clear View of Denali appeared first on PictureCorrect.


from PictureCorrect https://ift.tt/380US91
via IFTTT

PictureCorrect.com: The Story of LIFE Magazine: Built on Powerful Photography

LIFE Magazine is an icon in 20th Century American journalism. No other magazine before or since has placed such fantastic emphasis on pure, honest, visual storytelling, and done it so well. In an age that is rapidly seeing the decline of the professional photojournalist, this BBC Four documentary by British photographer Rankin explores LIFE in its mid-century heyday, as it paralleled the rise of America as a worldwide influence:

Made possible by advances in camera technology in the first part of the century (handheld cameras, 35mm film), LIFE was molded out of a general humour magazine into a weekly photo-centric news publication in 1936. It pioneered the “photo essay” – a documentary style of photography that told large narratives through several images. Through these, as well as the magazine’s unforgettable covers and sensational singular photographs, Americans were intimately connected to the world through images for the first time – through the First World War, the Korean War, and the Vietnam War, as well as the Civil Rights Movement and the Sexual Revolution.

LIFE lasted in this form until 1972, when it became financially unstable and ceased weekly production, printing intermittent “special reports” until 1978, then re-emerging as a watered-down general interest publication, released monthly.

LIFE Magazine reportage photography

When the American public looks back on the images that LIFE created, they see the nostalgia of their country’s golden years. In these same images, we photographers – particularly the aspiring photojournalists among us – see the shining moment of our craft’s history, full of optimism, possibility, and hope for the future. When we look at the photographs, we know that there is something drastically different about them, something elusive that is in some way unrivaled by any of the millions of photos made every day. Rankin’s interviews with some of the photographers that made LIFE so monumental help us to understand and appreciate their dedication – the way they honoured their profession and took it so seriously, striving always to make the image better, more impactful, more true. There is much to be learned from these wise men, when we take the time to listen.

LIFE was built by the founder of Time Magazine, Henry Luce. It began with only four photographers – Thomas McAvoy, Peter Stackpole, Alfred Esisenstaedt, and Margaret Bourke-White. Throughout the years, though, it employed some of the greatest photographers ever known, including Robert Capa, W. Eugene Smith, Henri Cartier-Bresson, and Dorothea Lange. Many will criticize LIFE for its frequent lack of objectivity – a value which is now entrenched in modern journalism, although is actually quite a recent idea. We often think of it as meaning “unbiased” or without opinion, but strictly speaking, it is simply an emphasis on facts, and a waryness of presenting ideas or opinions as truth. When the facts are in, it is virtually impossible for a person not to form an opinion, which makes unbiased journalism sort of a wild goose chase, and LIFE understood this.

LIFE Magazine reportage photography

The story of LIFE mimics the story of America’s ascent as a cultural superpower. Through the depression, the wars, the turmoil, it suffered as America suffered and triumphed as it triumphed. It was bold, fearless, and unflinching in its examination of the ups and downs of American life, always pushing to go deeper into the national psyche. Its journey holds true to its mission, as its very existence tells the dynamic story of the society that birthed, sustained, and ultimately destroyed it.


Go to full article: The Story of LIFE Magazine: Built on Powerful Photography

What are your thoughts on this article? Join the discussion on Facebook

PictureCorrect subscribers can also learn more today with our #1 bestseller: The Photography Tutorial eBook

The post The Story of LIFE Magazine: Built on Powerful Photography appeared first on PictureCorrect.


from PictureCorrect https://ift.tt/2L8i5xe
via IFTTT

tiistai 29. joulukuuta 2020

PictureCorrect.com: A Photographer’s Five-Point Plan To Survive Lockdown

Stuck at home again. Cue the anguish of photographers everywhere, as they view the bleak prospects of another period of confinement and the denial of so much of the creative stimulus that brings us joy.

But fear not! It is said that in every crisis, there is an opportunity, so here is my five-point plan for making the most of this enforced homestay.

Food, Glorious Food

Food photography is a no-brainer for the snapper stuck at home. Colourful and exciting ingredients matched to a sturdy tripod, good lighting, minimum ISO and a slow shutter speed can produce very satisfying results.

photography ideas during lockdown food

Go Macro

Confinement is a clear invitation to expand your photographic reach. If you have a garden and a lens of 200mm or more, you are well equipped to capture winter birds and other visitors.

If you can’t go outside, go macro! Your home is full of objects (or even insects) deserving of a close-up. All you need to get going is a lens with a focal length of more than 100mm and a tripod. Add some extension tubes or macro filters and you have an inexpensive entry into a world of creative possibilities. Small really is beautiful!

photography ideas during lockdown macro

Impove Your Skills

Once you’ve exhausted the myriad camera and lens reviews on YouTube, why not check out some of the excellent tutorials from the site’s photo-meisters?

Gavin Hoey and his stablemate Mark Wallace on the Adorama channel are always excellent. The work of Lindsay Adler and Terry White is awesome too.

I pay particular attention to the output from Anthony Morganti and “The Angry Photographer” and admire the creativity and insight of many of the photographers featured on the B&H learning channel.

creative photography ideas during lockdown

Perhaps new Photoshop innovations, Lightroom editing tips, three-point lighting techniques, flash ideas and a deeper understanding of the requirements of product and landscape photography are among the ways that you too could improve your skill set.

Check and Clean Your Equipment

If, like me, you’ve got lots of camera equipment, scattered in plastic containers, then now is the time to check what works and what doesn’t.

Check the power output of your rechargeable batteries and your bags, straps and harnesses for possible fraying.

creative photography ideas during lockdown

Your camera sensor might need a deep clean too. In most circumstances, the “smear circles of death” rarely come to light—but when they do, it’s already too late. (See photos.)

You cannot rely on your camera’s in-built sensor-cleaning mechanism. Instead, take a photo of the sky at a narrow aperture (F16 – 22) and examine it closely. If necessary, push your de-hazing tool towards its maximum for a sensor health-check in all its gory detail!

Think Strategically

This pandemic allows you to concentrate on how you want to develop your photography in the future.

Review your website. Does it have the look and feel that will satisfy new clients? Does it highlight your best work? Does your website fully represent your identity as a photographer? Are there photos that should be removed and new images that could be added?

photography ideas during lockdown macro

Equally, look again at your business cards. Are they in need of a refresh?

Review your presence on social media. Some photographers may need to be dragged screaming and kicking to the pages of Instagram, Facebook and Twitter—but they are now indispensable to your positive brand communication.

What do your social media accounts say about your work and your attitude to your craft? How can you increase your “reasons to speak” on social media, so that your images and content appear more frequently and attract a more enthusiastic response? What are you doing to distinguish yourself online from other photographers? Do you have the skills, the charm, the energy and the wit to sustain a YouTube channel?

photography ideas during lockdown macro

With people dying, businesses failing and people losing their jobs, it might seem tone-deaf to be thinking about investing in new equipment.

That said, if you can afford it, go ahead and indulge your gear-a-holism!

Give a capacity-boost to your computer. Take advantage of post-holiday sales to get new software applications, an SSD card perhaps or the greater processing power you need for the year.

creative photography ideas during lockdown

For your Skype, Zoom or Bluejeans video meetings, use a Camlink HDMI plug and play gizmo to connect your DSLR and mirrorless camera to your computer.

Yes, the Camlink is expensive and hard to find. And yes, you could stick with a webcam. Nevertheless, you already know that your camera offers superior image quality than most webcams and the Camlink, so much better than cheaper alternatives, is a worthy investment and will surely prove to be a useful addition to your online marketing.

creative photo ideas for lockdown

Use this time to itemize all of your photo inventory—cameras, lenses, speedlights, flash triggers, batteries and assorted accessories. Locate the original boxes and receipts for all of your gear. This will give you an accurate view of what you own, what you wish to acquire and what you might want to sell.

Last but not least, stay safe and well.

About the Author:
Nigel Smith is the founder of network67photography.


Go to full article: A Photographer’s Five-Point Plan To Survive Lockdown

What are your thoughts on this article? Join the discussion on Facebook

PictureCorrect subscribers can also learn more today with our #1 bestseller: The Photography Tutorial eBook

The post A Photographer’s Five-Point Plan To Survive Lockdown appeared first on PictureCorrect.


from PictureCorrect https://ift.tt/2KOWEBg
via IFTTT

PictureCorrect.com: Interesting Photo of the Day: Inside-Out

How far would you go to create an image you’ve composed in your mind? For photographer Nicola Tröhler, it was a matter of investing almost six months and a good amount of money to manifest the following image. He wanted to create an image that blended the outer and inner worlds. And by the looks of his result, we can easily conclude that he has beautifully realized his goal:

a homely photography set outdoors

“An Inside-Out Feeling” by Nicola Tröhler (Via Reddit. Click image to see full size.)

Tröhler shot the image on a Fuji GFX 50s with a 63mm lens at f/4 and 1/125th of a second. And in case you’re wondering how he was able to grow the lush green grass indoors, know that the “room” is actually a set the photographer built outdoors. In fact, it took him four days to get the scene ready.

It’s obvious that Tröhler put a lot of work into taking this picture, and the image really catches the eye. The elements he has placed on the set give a cozy feeling that is aesthetically pleasing. Also, placing the model by the window with such beautiful scenery in the background makes the image even more relaxing to look at. On top of that, the foggy atmosphere—also added during the shot—enhances the mood even more.

Wouldn’t you love to have such a room at your place? It appears to be quite stress-relieving. You could simply walk into this room with your eyes closed and feel the grass between your toes.


Go to full article: Interesting Photo of the Day: Inside-Out

What are your thoughts on this article? Join the discussion on Facebook

PictureCorrect subscribers can also learn more today with our #1 bestseller: The Photography Tutorial eBook

The post Interesting Photo of the Day: Inside-Out appeared first on PictureCorrect.


from PictureCorrect https://ift.tt/38LZJKl
via IFTTT

PictureCorrect.com: Secrets of Professional Photography

Every trade has its own set of secrets. And those who are actually able to crack those secrets are the ones who become successful. Believe it or not, the field of professional photography also has its own secrets that photographers use to beat the competition and leap forward. Photographer Miguel Quiles shares 5 of such secrets that professional photographers don’t want you to know:

1. Image Quality Doesn’t Matter

You must’ve come across photographers around you who produce amazing quality images but aren’t much successful with their business. On the other hand, there are photographers whose work may not the so great, but their businesses sustain for quite a bit. Why does this happen?

“The secret is that they’re producing consistency in whatever level of images that they’re producing.”

consistency in photography

Always aim to produce consistent results. When you are consistent with your work, your potential clients already know what can be expected from you. And this is what is essential to drive business. If your portfolio has images with varying degree of quality, it can confuse potential costumers which becomes a hindrance to your business.

2. Importance of Post-Production

There are photographers out there who feel that post-production is cheating. They totally downplay the role of post-production in photography. But, if you want to be successful as a photographer, make sure that you embrace post-production as a tool to catapult your business to success.

retouching photos

A good start is to start shooting in raw format. Raw format allows you to capture the image with the greatest dynamic range, and provides you with great flexibility for post-processing. And be sure to spend some good amount of time learning post-production software like Lightroom, Photoshop, or others.

3. The Role of Lighting

“You need great lighting if you’re going to capture truly great images.”

Lighting is undeniably the most important factor that determines the quality of the image. The key is thus to look for, and shoot during favorable lighting conditions. This is why many photographers prefer to shoot during golden hour. If you want to take things into your own hands, you can create light as required using flash, and light modifiers.

golden hour lighting

4. The Truth About Pricing

The question of how much to charge for photography is quite a common one. However, there is no concrete answer to this.

“Standard pricing in the art of photography doesn’t really exist.”

It thus boils down to how good you are in your field, and how much the market is willing to pay. Professional photographers do not believe in having a standard price list. They simply create images and sell them for as much as they think the image is worth, regardless of what others are charging.

5. The Importance of Social Media

Everyone is making good use of social media these days. You can see photographers posting images regularly in Facebook and Instagram. But, the secret lies in having a strategy while posting in social media as well. Collecting likes will not matter if you are not able to land some business.

Most photographers photograph to their own taste, post the images in social media, and hope that their work gets noticed by their potential customers. But, the secret to success is totally different. Many professional photographers invest their money to shoot campaign quality images to gain the attention of brands and clients they would like to work with.

“I’ve known many pros who have paid tens of thousands of dollars to book models, wardrobe, hairstylist, and a location to add images to their portfolio so they can use those images to approach companies to get hired.”

Posting the images in social media is not alone sufficient. Sending those images to the brands via direct messaging, or even tagging them is another way of gaining their attention.

These are some really awesome tips from Quiles to help you grow your photography business. Give them a shot and see if they’ll help you give a boost to your photography business.


Go to full article: Secrets of Professional Photography

What are your thoughts on this article? Join the discussion on Facebook

PictureCorrect subscribers can also learn more today with our #1 bestseller: The Photography Tutorial eBook

The post Secrets of Professional Photography appeared first on PictureCorrect.


from PictureCorrect https://ift.tt/2MhG0Lc
via IFTTT