lauantai 29. helmikuuta 2020

PictureCorrect.com: Top Tips for Photographing People

Final reminder: only hours left to get The Art of Portrait Photography at 80% Off

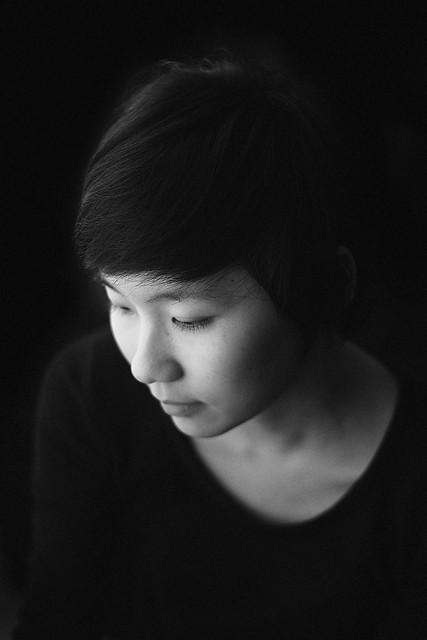
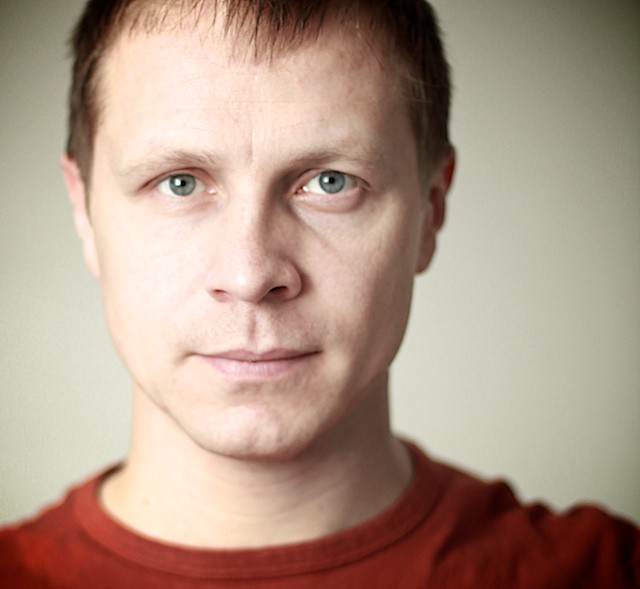
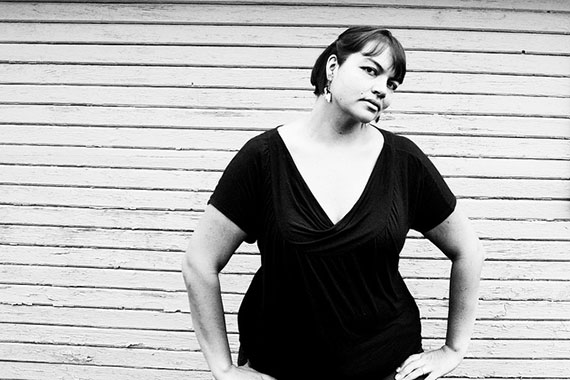
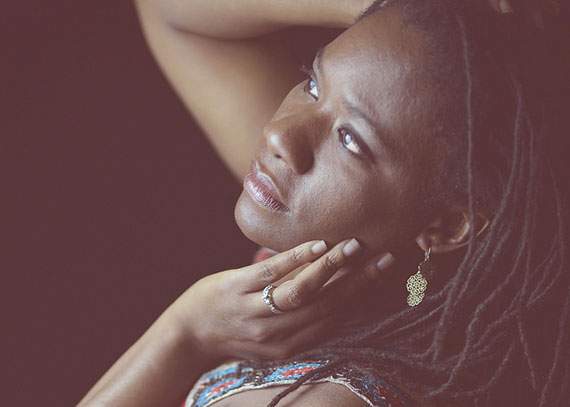
I’ll start with what I feel is the most important thing to think about.

Interacting with Your Subject

As a photographer of people, the relationship I establish with my customers is key. Not just because they pay me, but also because I want to get the best from them. I spend a lot of time and effort getting to know my clients. I have spent all my life working with people and I use all of my skills to really understand what makes them tick. It can make the difference between nicely shot photographs or beautiful images that really show the emotion between them.

To achieve this I not only get to know them but I let them get to know me, I share my personality with them. I build up a trust that means when I ask them to do something they do it, believing in me. That’s what you need to do. You probably won’t have time for three meetings and a pre-shoot beforehand like I do with my brides and grooms, but you can still achieve something.

Do you know the subject at all? No? Then before you take any pictures spend some time getting to know them and letting them get to know you! Chat over a cup of coffee. Relax in each other’s company.

If you already know them quite well, still take some time to talk before you start. Tell them what you’re going to do and what they should expect as you take their picture. Ask them about the style of pictures they like.

Calm their fears if they say, “I don’t like having my picture taken.” By the way, 99 percent of people say that to me and my aim is to hear them say, “I really enjoyed that,” after a photo shoot! This time invested will pay fantastic dividends as you start to shoot and they are relaxed and trusting with you. I’ll talk about children in more detail in part two, but getting to know your subject and explaining what you’re doing is even more vital when you’re photographing children.

Composition

This is the second most important thing to consider when you are making someone’s portrait. The picture won’t only show them, it will show their surroundings and maybe other people or objects. Are you able to take the subject where you want or are you limited to say their garden or a room in their house? If possible, go to the location beforehand and have a look around. Look for places that will make a good backdrop. Don’t discard anything; it doesn’t have to be a nice view. One of my favorite places is a beach in Devon where there is a beautiful old stone wall. So how do you choose a place?

environmental portrait

. photo by John Ragai

Keep in mind that your picture will be about a person or persons, so wherever you choose it shouldn’t take over the picture. Nor should it be the focal point or be too distracting. What would make it distracting? The eye will tend toward areas that are bright or colorful, so look at your background (and foreground) carefully. Is there anything in it that will take the viewer’s eye away from your subject? You should consider carefully exactly where you place your subject against your chosen background.

Make sure that they don’t have a building, lamppost, or other object growing out of their head! Move yourself or your subject. If you’re shooting inside someone’s house, don’t be afraid to ask him or her to move (see below reference lighting) and ask them to take pictures and personal effects down from the walls. You need to decide whether you are going to shoot your subject at full length or whether you are going to crop in close.

Whatever you decide, the rule is to avoid the joints. Don’t end your picture at a joint such as the knee, as it can make it look like the limb has been amputated. It’s fine to crop a limb but just not at a joint.

Lastly, think about where you will place your subject in the frame. Dead center is fine, but it can be a little boring. Placing the subject off center (in the left or right third) looking into the unused space can look really nice and pleasing to the eye. Put their head in the top third, too.

My biggest piece of advice to improve your composition is to look at pictures in books and magazines. Look at how they are composed. Where is the subject and how are they placed in the frame? Look at what you like and copy it.

Lighting

You don’t need to be an expert or own a bunch of fancy gear to take a nice, well-lit picture. The best light to use is natural light, and the best natural light is overcast light. The main reason is the bigger the light source the softer the light. And what bigger light source could you get than an overcast sky? There are other advantages, like the lack of harsh shadows; your subject won’t be squinting and colors are not all bleached out, as they would be in bright sunlight.

lighting for portrait photography

photo by Arvin Asadi

If it’s a sunny day and your only chance to photograph this person, don’t despair. Move them into the open shade and make sure there is some light falling on them. If there’s no shade and it’s bright sunlight, you have to make a choice. The classic choice is to have the sun falling directly on the face. This will light them up but it will be hard for the subject.

The other thing you could do is to have the sun directly behind them. This will necessitate the use of some fill in flash to light up their face. It works best if you can alter the amount of flash that is fired at the subject until it is just enough to give a nice natural look to the face. If you can’t alter the amount of flash, be aware that it may look a little bit unnatural. You could always move back to lessen the amount and crop later in the computer back to what you originally wanted.

If you can only shoot inside, use the natural light from an open door or a window. Place your subject so this light falls gently on their face—it will even work through the glass if the weather isn’t cooperating. Try to avoid using direct flash in their face wherever possible. You could also use a reflective surface to throw light onto the subject. You don’t need to pay out on expensive reflectors, but if you do, use white for older people as it’s kinder on the skin and silver on the younger faces to give them more zing!

Avoid gold reflectors unless you really want to give your subject a golden glow. A piece of white card or a white sheet will work well in the absence of a reflector. The closer the card/sheet to the subject, the more light that will fall on them. Experiment by moving it around until you find the best spot. Remember to make sure it’s not in the picture; you might need a helper to hold it for you! You could also use a mirror but the effect will be much more pronounced so place much further back.

About the Author:
Marion Frances has a professional wedding photography company in Devon, providing a complete wedding photography service.

For Further Training, Deal Ending Tonight:

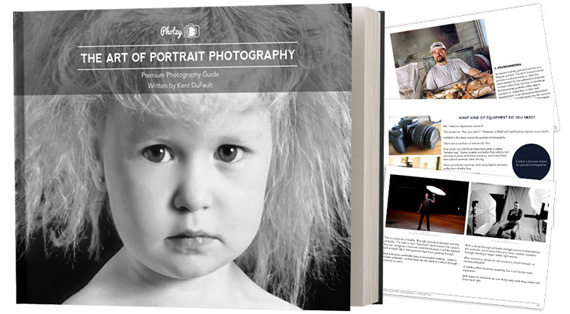
Do you know what subject generally scares the daylights out of new photographers? Photographing people! This eBook is designed to help you become a master of portraits with insider secrets used by professionals and more. It contains 214 pages of in-depth easy learning packed with illustrations, case-studies and assignments to verify your knowledge. It is currently 80% off until the end of the month, February 29, if you want to check it out.

portrait photography

The Art of Portrait Photography at 80% Off (Learn more)

Do you have lots of photographs of barns, fences, plates of food, and landscapes? But portraits – not so much? Don’t worry. We’ve all been in that same boat. Author, and professional photographer, Kent DuFault, has put over three decades of experience into this eBook. If it’s happened in a portrait session, it’s happened to him. His pain is your gain.

Only hours left: The Art of Portrait Photography at 80% Off


Go to full article: Top Tips for Photographing People

What are your thoughts on this article? Join the discussion on Facebook

PictureCorrect subscribers can also learn more today with our #1 bestseller: The Photography Tutorial eBook

The post Top Tips for Photographing People appeared first on PictureCorrect.


from PictureCorrect https://ift.tt/2PytbuC
via IFTTT

perjantai 28. helmikuuta 2020

PictureCorrect.com: Interesting Photo of the Day: Suytun Cenote Ceremony

Cenotes and the Mayan community have a special connection. Maya people believe that cenotes are gateways to the underworld. And for this reason, they perform some special ceremonies in cenotes. Today, we can see some of those performances being done for tourism, but the religious values are still intact. Photographer and filmmaker Guillermo Alarcon took the following image in Suytun Cenote and the timing is absolutely magical:

Maya ceremony performance in a cenote

“Maya Ceremony in Suytun Cenote” by Guillermo Alarcon (Via Reddit. Click image to see full size.)

“Cenotes were and still are partially sacred to the Maya people. They were seen as gateways to the underworld and portrayed throughout history as inner sacred sanctums.”

Alarcon took this image with his Sony A7RIII. While the get-up of he Maya people is something to talk about, the sunbeam working as a spotlight steals the show. The dance which is timed to line up with the sun’s position above the small opening to the cenote allowed him to capture this perfect photograph.


Go to full article: Interesting Photo of the Day: Suytun Cenote Ceremony

What are your thoughts on this article? Join the discussion on Facebook

PictureCorrect subscribers can also learn more today with our #1 bestseller: The Photography Tutorial eBook

The post Interesting Photo of the Day: Suytun Cenote Ceremony appeared first on PictureCorrect.


from PictureCorrect https://ift.tt/2wPOt0g
via IFTTT

torstai 27. helmikuuta 2020

PictureCorrect.com: Pet Portrait Photography Tips

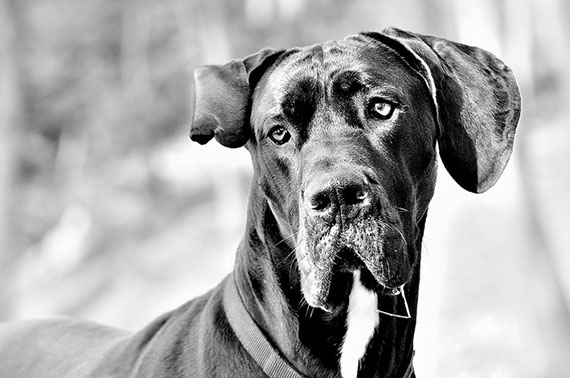
Taking great photographs isn’t easy. It takes time, patience, and a little bit of knowledge! This article focuses on taking photographs of pets or animals, and the challenges this sometimes poses.

taking pet portraits

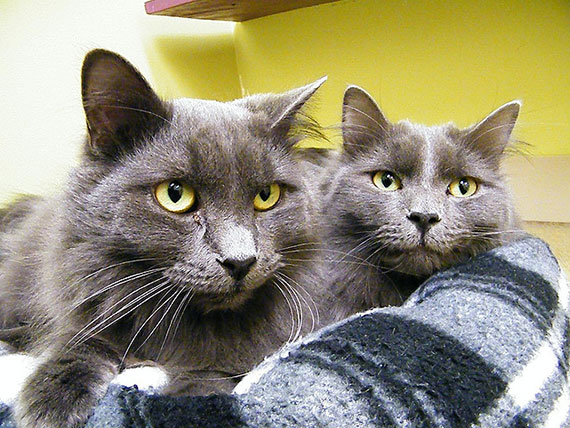
Photo by Paul B; ISO 640, f/8.0, 1/160-second exposure.

What follows are a few tips I’ve learned over the years shooting animals and pets (but these tips can also translate for shooting other subjects).

1. Patience & Positive Attitude

This is definitely number one for me. If you rush through the shoot and become frustrated, the results will suffer. A positive, carefree attitude is felt by our furry friends and in turn they become much more comfortable with having a camera in their faces (as Cesar Milan would say “calm and assertive” is the best approach!). If you’re feeling frustrated or getting impatient, just take a break and get back to it when you’re in a better frame of mind.

Don’t rush the shoot; it can sometimes take hours to get a great shot.

2. Enjoy it!

If you’re not enjoying yourself, you can’t expect to get good shots. Have fun and the pictures will practically take themselves.

3. Natural Lighting

When possible, opt for natural light. Try shooting either at dawn or dusk, as this can create great natural shadows and light. Avoid high noon, as this is the harshest time of day to take photos outside.

If it’s cloudy, not to worry! This is the absolute best scenario. Cloudy days offer a soft lighting on your subject, without the harsh shadows.

If it’s a sunny day and you need to do the shoot then, go to a shaded area and shoot there.

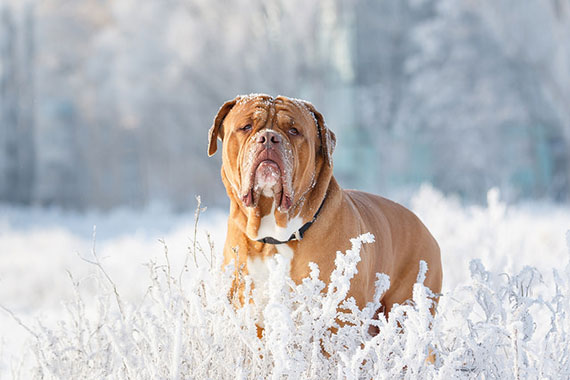
pet photography

Photo by Andrey Shkvarchuk; ISO 250, f/4.0, 1/1000-second exposure.

Indoor shoots can be a challenge, but with the right equipment they turn out great. You need a flash or a very big, bright window to get good lighting. If you have a DSLR, a mounted flash is great when bounced off the ceiling or walls. If you’re using a point and shoot, I would opt for natural window lighting as the flash on those things is usually terrible. With cats I often have to use my flash, but since I bounce it off the ceiling and surrounding walls they don’t seem too bothered by it.

4. Experiment

Try different angles, lighting, and composition to get the best variety. Change things up as much as possible.

5. Shutter Speed and Aperture

As with any portrait, make sure you have these at optimal settings. For a nice blurred background, you want a very wide aperture. If you’ve just got a point and shoot, this likely won’t mean anything to you but the portrait auto modes can do a nice job on their own.

6. Restrict Movement

This sounds cruel, but I just mean keep them contained so you can get the shot. For example, with cats that are a little nervous, you can keep them confined to one room so you’re not chasing them around the house. This works great for kittens!

tips for great pet portraits

Photo by burlingtonhumane; ISO 1600, f/3.5, 1/45-second exposure.

More detailed articles on these subjects to come!

About the Author:
Leigha Taylor Photography (leighataylorphotography) specializes in innovative and unique portraits of both people and their pets. Leigha Taylor has over 10 years of shooting experience in Toronto. She has a masters degree, a day job, and many hobbies to keep her busy. She currently works in the environmental field conserving nature and taking pictures. Her journey with photography started in the dark room, in the days of film and enlargers. She prefers natural lighting over studio lighting and loves shooting outdoors.


Go to full article: Pet Portrait Photography Tips

What are your thoughts on this article? Join the discussion on Facebook

PictureCorrect subscribers can also learn more today with our #1 bestseller: The Photography Tutorial eBook

The post Pet Portrait Photography Tips appeared first on PictureCorrect.


from PictureCorrect https://ift.tt/2HZagVE
via IFTTT

PictureCorrect.com: Low Key Rim Lighting Tutorial for Portraits (Video Tutorial)

When we talk of low key portraits, it’s about making use of the dark tones to create a dramatic image. While taking low key portraits, you can use rim lighting to create a separation between the subject and the background. Besides adding further drama, rim lighting also helps in adding depth to the image. Photographer Gavin Hoey from Adorama takes you through the process of working with rim lights using two bare flashes, and then a stripbox:

The basic idea is to place the model against a dark background, and use two lights on either side of the model. The difference however is that the lights need to be behind the model, and not at the front. Use a softer light source to illuminate the face. Then, place the second light at a greater height to create a rim light on the model. This is important to create that beautiful separation from the background.

If getting creative with lighting and taking a mysterious portrait is what you’re looking for, try low key rim lighting. It’s not so difficult to set up. But, it can definitely be a challenge to capture the mood while revealing very little of the subject.


Go to full article: Low Key Rim Lighting Tutorial for Portraits (Video Tutorial)

What are your thoughts on this article? Join the discussion on Facebook

PictureCorrect subscribers can also learn more today with our #1 bestseller: The Photography Tutorial eBook

The post Low Key Rim Lighting Tutorial for Portraits (Video Tutorial) appeared first on PictureCorrect.


from PictureCorrect https://ift.tt/2TfYQC0
via IFTTT

PictureCorrect.com: Interesting Photo of the Day: Sun & Moon Pagodas at Night

Architecture is very representative of how complex and rich a civilization was during a certain period in history. The Sun and Moon pagodas that stand tall and proud by the side of the Fir Lake in Guilin in China indeed seem to have a lot to show off. Besides being architectural marvels, they also combine art, religion, technology, and natural landscape. Photographer Nathan Ackley took the following image of the Sun pagoda superimposing the Moon pagoda, and the result is truly mesmerizing:

interesting photo of pagodas

“Sun and Moon Pagodas in Guilin at Night” by Nathan Ackley (Via Reddit. Click image to see full size.)

If you visit these pagodas, you’ll realize that there is in fact a good distance between them. However, since Ackley used a 200mm lens to take this image, the compression has made the Moon pagoda appear closer.

What really sets the mood in this image is the timing. Ackley took the image at night when the lights in these pagodas are turned on; an ideal time to truly witness the beauty of these marvels. The bronze used in the Sun pagoda gives it a warm look while the colored glaze in the Moon pagoda gives it a cooler look. Such contrasting tonalities together have given a well balanced feel to this beautiful image.


Go to full article: Interesting Photo of the Day: Sun & Moon Pagodas at Night

What are your thoughts on this article? Join the discussion on Facebook

PictureCorrect subscribers can also learn more today with our #1 bestseller: The Photography Tutorial eBook

The post Interesting Photo of the Day: Sun & Moon Pagodas at Night appeared first on PictureCorrect.


from PictureCorrect https://ift.tt/3cmUl1w
via IFTTT

keskiviikko 26. helmikuuta 2020

PictureCorrect.com: How to Take Corporate and Business Portrait Photography

Corporate and business portrait photography is a profitable niche that many professional photographers strive to become known for. Businesses constantly need portraits of executives for annual reports, websites, and correspondence. One of the best ways to add personality to a company’s website and other business materials is with photos of the people from the organization. It adds a face to the brand name so the company’s clients can relate.

business and corporate portraits

“Attorney (business portrait)” captured by PictureSocial member George Wester

To get great business portraits, you don’t need a fancy camera or expensive lighting equipment. All you need is a regular camera and the following seven steps.

1. Find a location

The location of the business portrait should be the first thing you figure out. First, you need plenty of light, but you don’t want to take the portrait in the bright sun either. Bright sun creates harsh and clearly defined shadows that can be unflattering on your subject’s face. For a flattering portrait, usually soft light is the best. Soft light creates a gentle transition from the lighter area to the shadow.

Outdoors on an overcast day is best. When the sun’s out, head for the shade and try to find a location where you can position your subject on the edge of the shade (closest to the sun).

2. Place your subject

Now that you know where the good light is, you can place your subject. When you find the location for your subject, be especially aware of the background. Make sure nothing in the background distracts from the subject (such as trees or poles that seem to come out from the top of the subject’s head). And make sure the background won’t distract from the portrait. Take your time to look around.

3. Figure out the exposure

With your subject in place, take time to figure out the proper exposure of the image. For a portrait, you are mainly concerned with the exposure of the person’s face. For an easy way to meter, fill the frame of the camera with the important parts of the image. You might need to move or zoom in to do this. Make sure there aren’t any really bright areas in the area that you are metering (for instance, if the background is really bright and you are in the shade, make sure none of the bright areas in the background are in the frame.)

After you’ve metered, take a note of the settings. Put your camera in manual mode and dial in those settings. Then take a test shot. Check the preview on the back of the camera to see how it looks. Is the face properly exposed? If it isn’t properly exposed, you can dial up or down the shutter speed or the aperture to get it to the correct exposure. You will probably only need to tweak it a bit to get it just right.

4. Reality check your settings

If you’ve had the camera determine the exposure and then dialed it in, you need to take a moment to make sure these settings are realistic. The first most important thing is that you need a shutter speed that is fast enough so that you can hold the camera without camera shake. How fast is that? Well, it depends on the lens that you are using, but you usually want a shutter speed at least 1/100, or a second or faster. Some cameras have vibration control or image stabilization technology built in, though, so you might be able to hold the camera at a slower speed. Check your camera manual to see if it has this feature and the speed it recommends. Then just make sure you are using a shutter speed faster than that.

headshot photography

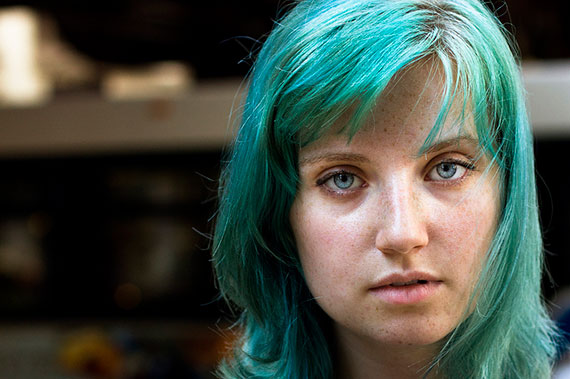
“Natalie Paradise” captured by Eleazar Paradise

The other factor to think about is your aperture. Usually for a portrait, you want the face in focus while the background becomes blurry. To do this, you want to pick a wider aperture. A wider aperture (such as f/4 or f/5.6) will give you an in-focus face with an out-of-focus background. (A narrower aperture, such as f/22, will have both the face and the background in focus.) You could pick an even wider aperture (if your camera has it), such as f2.8, just realize that getting the face in focus will be harder. An aperture such as f/4 or f/5.6 is easier to work with.

Next, is the shutter speed fast enough? If not, you’ll need to change your aperture to get a faster shutter speed. Or you could increase the ISO on your camera to get a faster shutter speed. (But don’t increase the ISO too much because images at higher ISOs have a lower quality.) Check your aperture with your shutter speed–is it what you want? You might need to tweak it a few settings, and remember that getting the right exposure is often about compromises: sometimes you need to use settings that aren’t perfect in order to make the image work.

After you’ve decided on your settings, take another test shot. Look at it again. Is everything okay? If so, you’re ready for your subject.

5. Get your subject ready

Now let your subject know that you are ready to start. Find a comfortable position for them where they look good and natural. For a portrait, having the subject look at the camera and smile is usually best. And talk to your subject as you’re working so they feel comfortable and natural.

6. Get in close

Since this is a portrait, the image is just about the person. The background really isn’t important. So get in close! Have the person fill the frame of the camera. You shouldn’t see much of the background, but have the top of their head at the top of the frame and the bottom of the frame crop somewhere around the chest. Or you can get even closer, trim the top of the head, and just show the face.

7. Wait for the good moments

As you’re taking pictures, keep looking. Keep your eyes actively engaged and look for the good moments. Watch your client for the times when their smile looks genuine and natural.

Finally, make sure you take plenty of images–the more the better. Get various expressions from your subject. If they get tired of smiling, have them relax a bit and then smile again. Then take more images.

A positive image for a business…

Great business portraits leave clients and prospects with a positive impression.

About the Author:
Cheryl Savan is a San Francisco Bay Area business photographer who helps professionals make a strong first impression through distinctive business portraits.


Go to full article: How to Take Corporate and Business Portrait Photography

What are your thoughts on this article? Join the discussion on Facebook

PictureCorrect subscribers can also learn more today with our #1 bestseller: The Photography Tutorial eBook

The post How to Take Corporate and Business Portrait Photography appeared first on PictureCorrect.


from PictureCorrect https://ift.tt/32uIFFj
via IFTTT

PictureCorrect.com: Wide Angle Landscape Photography: 7 Tips (Video Tutorial)

As a landscape photographer, when you aim to capture the magnificence of a vista, it usually requires the use of a wide angle lens. However, working with the lenses on the shorter side of the focal length spectrum is definitely challenging. That’s particularly because they capture so much in the frame that a weak composition will leave the viewer stranded. In this video, landscape photographer Nigel Danson shares 7 tips to help you make better use of wide angle lenses and improve your photography:

When working with wide angle lenses, distant objects appear pretty small. The key is thus to include interesting foreground in you composition. Keep an eye out for interesting foreground elements and tilt your camera slightly downwards. Include something that’s really engaging and powerful in the foreground, and that’ll instantly draw the viewers into your image.

“A lot of the time, I’m finding something that’s really interesting in the foreground to make the most use of the perspective that the wide-angle lens gives you, which is just fantastic.”

Next, aim to complete a good foreground with an engaging background. And whenever possible, link the foreground to the background by using some elements as a mid-ground. To include more of the mid-ground visible, a good idea is to lift the camera a bit higher.

When looking for the perfect composition, don’t get rooted. Be mobile. Movement is essential to see how your composition changes. Notice the changes by simply moving the camera around first and then setting it up on a tripod. Since a wide angle lens captures a lot in the frame, keep and eye out for dead space. Avoid them in your composition. It makes the viewers lose interest.

It’s not always necessary that you stick to a wide angle for landscape photography. Know when not to use your wide angle lens. If something looks good zoomed in, go for it. If there’s a good distance between you and the landscape, a good vista shot will still be possible while using a longer focal length.

And, remember that people work really well in wide angle landscape shots. They can add drama and direct how the viewers will look at your image. Just be sure not to place them too close to the edges. Wide angle distortion will make them appear tilted.

How do you like to take your landscape shots: zoomed in or wide? Let us know.


Go to full article: Wide Angle Landscape Photography: 7 Tips (Video Tutorial)

What are your thoughts on this article? Join the discussion on Facebook

PictureCorrect subscribers can also learn more today with our #1 bestseller: The Photography Tutorial eBook

The post Wide Angle Landscape Photography: 7 Tips (Video Tutorial) appeared first on PictureCorrect.


from PictureCorrect https://ift.tt/3cd1vFq
via IFTTT

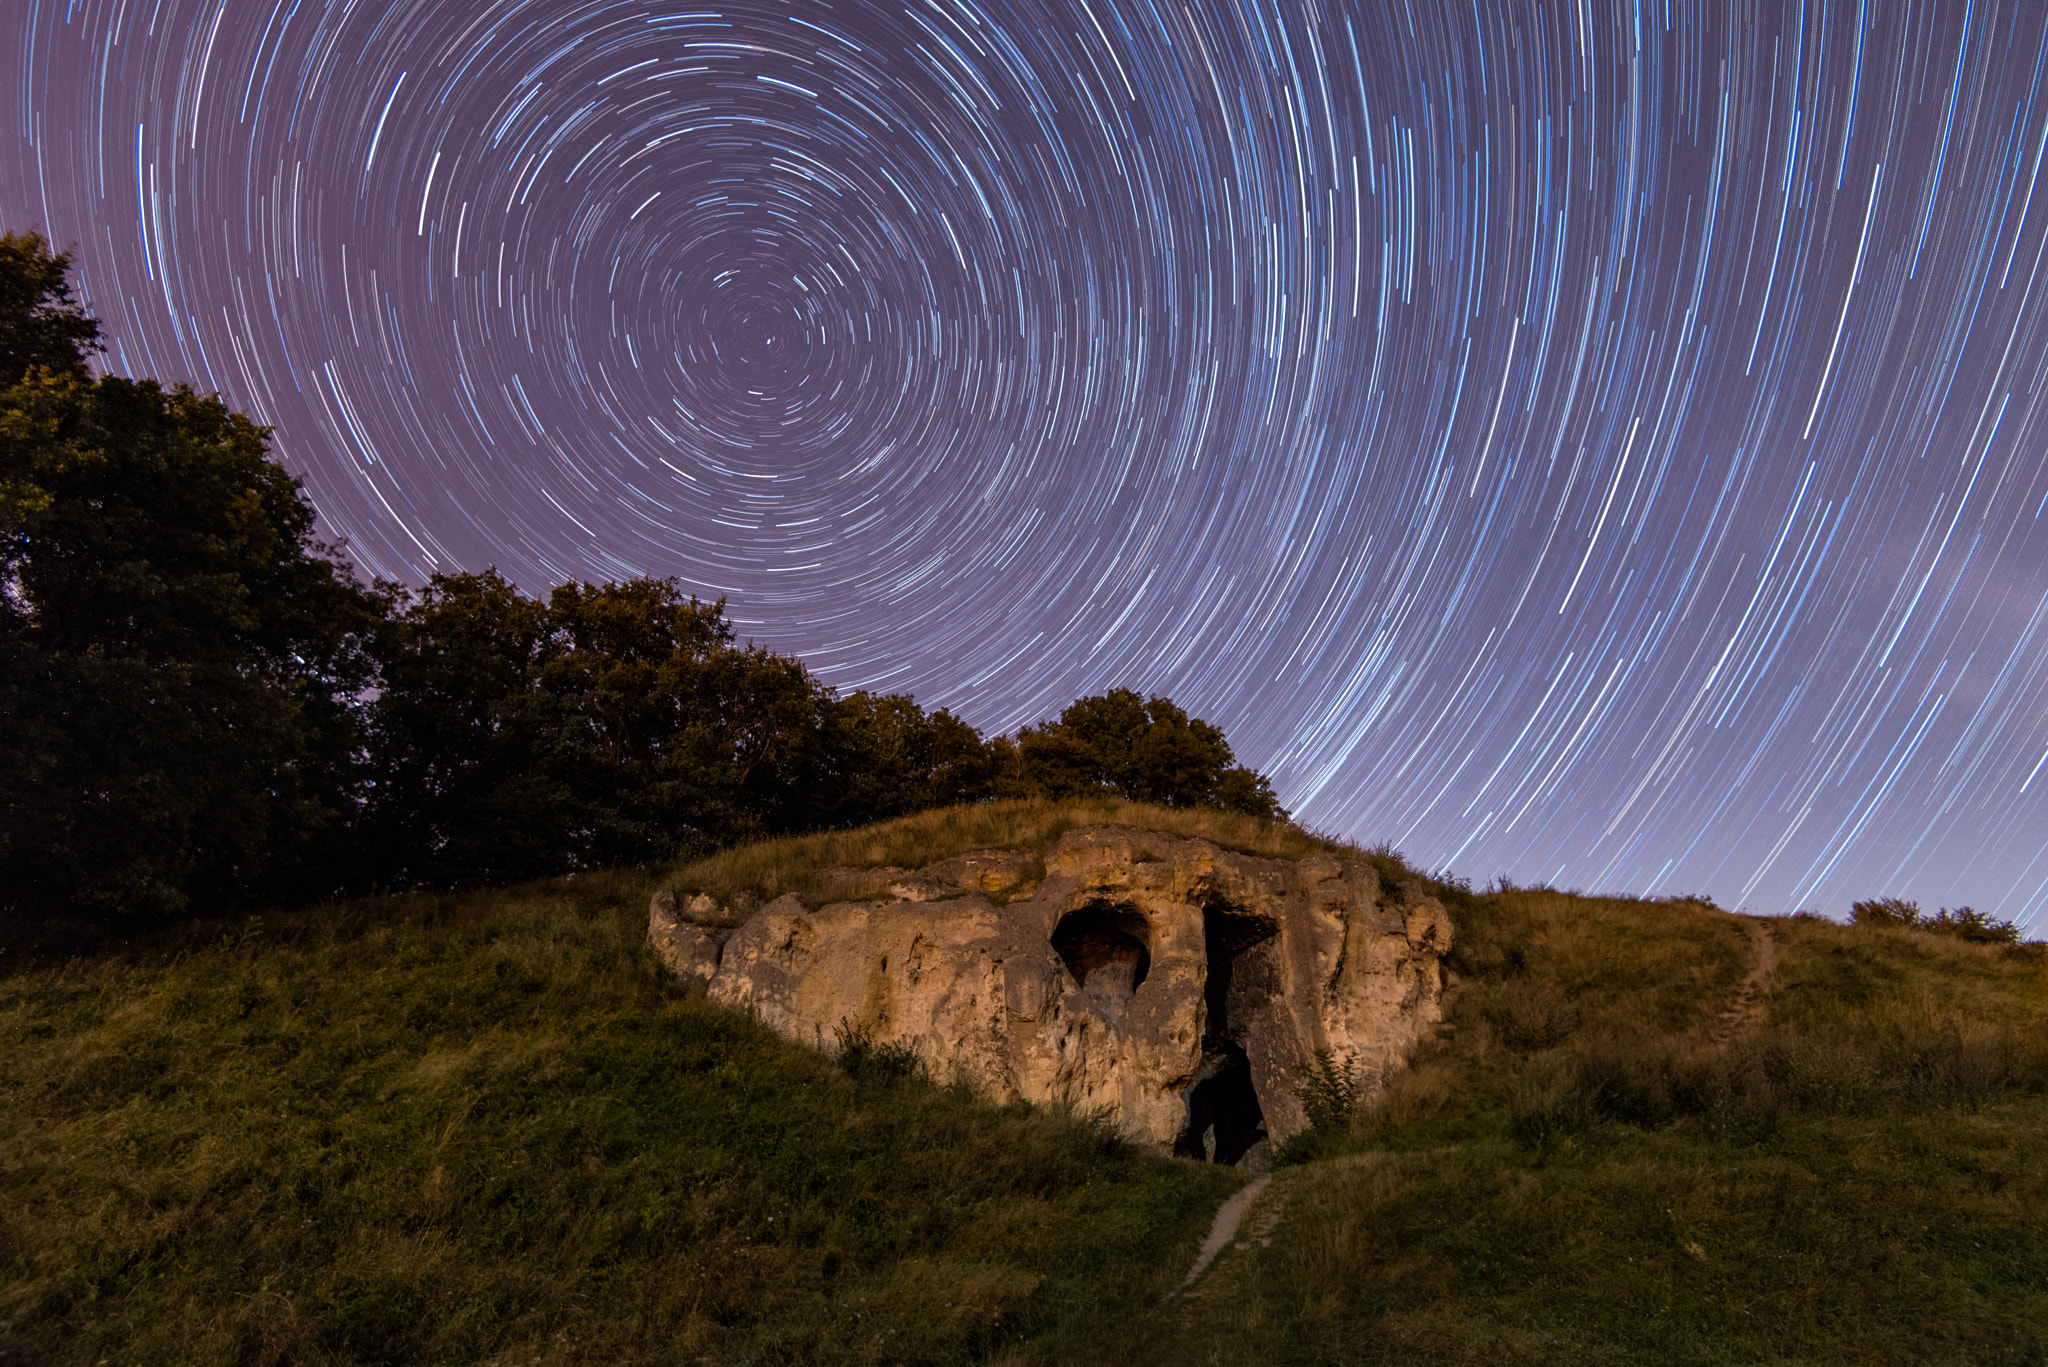
Startrails at the Devil's Cave by BertB (500px.com/BertB)


100 shots @ 30 sec, F4, Iso 1600. Manually blended via 500px https://ift.tt/2PrcSzM

PictureCorrect.com: Interesting Photo of the Day: Falcon 9 Rocket Launch Long Exposure

When SpaceX was founded, they made it clear to the world about their ambition. Starting with a motive to enable mankind to live on other planets is no joke. In case you’re wondering, what makes their rockets unique is their capability of reflight. Their Falcon 9 rocket is the world’s first orbital class rocket capable of reflight. It has been making round trips since March 2017. Photographer John Kraus who specializes in photographing rocket launches took the following image of a SpaceX Falcon 9 taking off, and it looks spectacular:

rocket launch captured

The image is a single long exposure that Kraus took with his Nikon D7500 and Nikon 14-24mm lens.

Surely, the curvature of the launch path and the symmetry is what makes this image so pleasant to look at. Kraus planned the shot around the tide so that he could achieve a reflection of the blast on the wet sand. This is a great example of how proper planning can aid in taking beautiful images.

“It was almost low tide, which meant I was able to set the camera up very close to the water. The wet sand and water allowed for the reflection.”

Besides the symmetry caused by the reflection, you can see another example of symmetry in the sky. It’s in the form of a white streak. In case you’re wondering, that’s the second stage. That’s when the rocket and the spacecraft are in orbit and the engine shuts down. Truly a marvelous capture by the photographer.


Go to full article: Interesting Photo of the Day: Falcon 9 Rocket Launch Long Exposure

What are your thoughts on this article? Join the discussion on Facebook

PictureCorrect subscribers can also learn more today with our #1 bestseller: The Photography Tutorial eBook

The post Interesting Photo of the Day: Falcon 9 Rocket Launch Long Exposure appeared first on PictureCorrect.


from PictureCorrect https://ift.tt/39dswq8
via IFTTT

tiistai 25. helmikuuta 2020

PictureCorrect.com: Winter Portrait Photography Idea

Winters can be harsh. And for a portrait photographer, the conditions can make it even more difficult to work. It can thus be a good idea to work in the comfort of your lovely warm home. All you’ll need is a small home studio and some lights. Photographer Gavin Hoey from Adorama shows you how:

As Hoey demonstrates in the video, you can add a festive and warm feeling to the image by using some Christmas lights. The key here is to start off by exposing for the LED lights. Then, add in your flash to expose for the model. Since flashes have a cooler color temperature, add an orange gel to make the image appear warmer. Then, post-process the image as required.

Besides working with Christmas lights, you can think of other props to give a feeling of warmth and coziness. You can shoot near a fireplace, have the model drink some hot chocolate, or simply photograph them reading a book bundled up in the blankets.

What other ideas can you think of?


Go to full article: Winter Portrait Photography Idea

What are your thoughts on this article? Join the discussion on Facebook

PictureCorrect subscribers can also learn more today with our #1 bestseller: The Photography Tutorial eBook

The post Winter Portrait Photography Idea appeared first on PictureCorrect.


from PictureCorrect https://ift.tt/2PoJWsg
via IFTTT

PictureCorrect.com: Using Light Effectively to Capture the Perfect Portrait

Want to capture the perfect portrait every time? Keep reading to learn some tips professionals use that you can adopt – even without a fancy camera or a studio of your own. Learn what you need to know about simple but effective lighting, flash photography, and more. You should also consider following a photography course online that would guide you step by step until you could take truly memorable portraits time and time again.

effective portrait lighting tips

Photo by double : zanzo; ISO 400, f/3.2, 1/250-second exposure.

Good lighting is key to any successful portrait. With on-camera flash, you encounter problems that detract from a quality picture. For example, flash brightly illuminates your subject in an unnatural, flat light. It can also cast harsh shadows behind your subject, especially if they’re positioned near a wall or some other object. This effect is not attractive. Additionally, flash frequently reflects light from the pupils in the eyes, causing the dreaded red eye effect—something you definitely want to avoid.

Portraits are actually much more interesting if there is some shadow on the portrait, but not harsh background shadows. It’s good to work with directional lighting and then use a reflector or some fill lighting to lighten up features that might otherwise fall into deep shadows. You don’t want to eliminate the shadows altogether, though. That can make for a portrait that lacks dimension.

Where possible, try ambient light, such as that through a large window or outdoor light . If using supplemental lighting, place a bright, diffused light directly behind where you are standing with the camera. This illuminates the subject’s face effectively. You can then try adding some subtle light to one side of the subject to fill in some of the shadows and emphasize the soft shadows on the other side. You could also “bounce” some light from a reflector onto the side of the face, instead of using direct light, so it is less intense.

This set-up creates a well-lit portrait; then you can start experimenting with adjusting the lights to see the effect you can achieve. If the light from behind you is very bright, you may need to reduce exposure settings on your camera to compensate so the final image is not overexposed.

window light portrait

“May – Graduation” captured by plaits

Another approach to try is to place the bright light to one side of the subject and then to place your fill light or a reflector on the opposite side. Your fill or reflected light should always be less intense than the main light. This will effectively reveal the curves on the face and body. If you use extra lighting, take note of how it affects your image. You may need to adjust the white balance on your camera or set your camera for the kind of lights you are using to avoid yellow or blue color casts on your photos. You can avoid this if you use natural outdoor light.

portrait with reflector

“March 6, 2011” captured by Jeremy Jenum

For a great outdoor portrait, an overcast but bright, cloudy day works well. The clouds diffuse the sun so the light isn’t too strong, yet there is plenty of light to work with. Alternatively, you can photograph in an evenly shaded area. This will also eliminate hot spots or over-exposed highlights on the face in your portrait. Make sure you don’t have any light filtering in between leaves and branches, though, as that can look odd when it shows up in your pictures. Avoid using the flash outdoors if you can help it, too.

One great way to add dimension to your portraits and flatter almost every face and body type is to turn the subject’s body away from the light about 90 degrees. In other words, have the subject face the light and then turn their body one-quarter turn. This gives shape to the body as the light wraps around it. Now turn the subject’s face, so they are facing toward the light. This illuminates the face, which is the focal point of your image. It gives your subject a subtle glow, and should result in some catch lights in your subject’s eyes, which really brings a portrait to life!

Using lighting effects successfully can be a little daunting at first, but practice makes perfect; experimentation is key. By following a reliable photography course online you could easily master these, and more, lighting techniques, learning when and how to apply each for optimum results.

About the Author:
Article written by Paul Summers is from PhotographyCourseOnline.


Go to full article: Using Light Effectively to Capture the Perfect Portrait

What are your thoughts on this article? Join the discussion on Facebook

PictureCorrect subscribers can also learn more today with our #1 bestseller: The Photography Tutorial eBook

The post Using Light Effectively to Capture the Perfect Portrait appeared first on PictureCorrect.


from PictureCorrect https://ift.tt/390SPzZ
via IFTTT

PictureCorrect.com: How to Take a Self Portrait

Related reminder: only a few days left to get The Art of Portrait Photography at 80% Off

Although you might think that a photographer would love taking a self portrait, it’s actually one of the most difficult pictures to take. With self portraits you don’t have the advantage of looking through the lens and carefully composing your image, so it can be real tricky to get it right. But with that being said, there are a few important tips you can use to make taking your self portrait a whole lot easier.

self portrait techniques

Photo by Wesley Nitsckie

Delay Timers

These days just about every SLR camera now has a delay timer which can come in very handy when taking a self portrait. This delayed timer will give you between 5-10 seconds (depending upon the camera) to push the timer and to run into the picture area just before the shutter releases. This isn’t ideal, but it will work in a pinch.

Remote or Wireless Shutter Releases

A remote shutter release will allow you to activate your shutter without having your finger on the trigger. They come in many varieties (including wireless) and work with most newer cameras and are the best option for taking serious photographs of yourself. They range in price from about $30 for wired versions to $50 for wireless, or you can build one yourself if you’re tech-minded (there are some great “how-to’s” for this available on the web).

Recruit a Friend

In almost every case (unless you can measure the distance and set your focus appropriately), it’s best to have someone sit so you can make sure the composition and focus are right on. A patient friend or family member will usually do the trick, or you can use any object that can sit at the correct height. One of the toughest part of self portraits is focusing, so you make need to take a few shots to get it right.

Be Honest

Remember that a photographer’s job is to tell the truth. It can be tempting in self-portraiture to only shoot images that show us in a positive light, but in all circumstances the integrity of the final image should take precedence over our sensitivity.

methods for self portraits

Photo by Andrea Parrish – Geyer; ISO 200, f/9.0, 1/60-second exposure.

This doesn’t mean you can’t take flattering pictures of yourself, but just consider the technical perspective instead of just considering the most complementary one. If the image tells the story you wanted to tell, whether or not you look “good” in it is secondary.

Get Your Lighting Right

Getting perfect lighting while shooting a self portrait can be quite challenging. If you use a stand-in, unless they have almost the exact same skin tone as you, there will need to be adjustments made throughout the shoot to create ideal light. The best approach is to set your camera on a full manual setting so you can adjust every photograph without being at the mercy of the camera’s internal sensors.

As far as actual “lights” go, you can use desk lamps, natural light, floor lamps, and/or your camera’s native flash to build an environment that works for what you’re trying to accomplish. Don’t be afraid to spend a couple of hours on your shoot; messing with the little details can be one of the most fun parts of self-portraiture.

Use Your Creativity

Just like with other types of portraiture, taking your self portrait requires a bit of creativity and thought. Use your imagination to think of ways that you can present yourself in different ways from the standard portrait. Try using props like costumes or dynamic lighting and interesting backgrounds that will help make your self portrait stand out.

self portraiture tips

Photo by cheriejoyful; ISO 500, f/1.8, 1/200-second exposure.

So, have fun taking your self portrait as it can be a fun break from the demands of other portraits. With self portraits, there are no pressing deadlines so take as much time as you need to get it right. In the end, it’s your own imagination that is your only limitation in getting the self portrait that you’ve always wanted.

About the Author:
Autumn Lockwood is a writer for Your Picture Frames. Shop online and see our selection of distressed picture frames in a wide variety of colors, styles and sizes.

For Further Training, Deal Ending Soon:

Do you know what subject generally scares the daylights out of new photographers? Photographing people! This eBook is designed to help you become a master of portraits with insider secrets used by professionals and more. It contains 214 pages of in-depth easy learning packed with illustrations, case-studies and assignments to verify your knowledge. It is currently 80% until the end of the month if you want to check it out.

portrait photography

The Art of Portrait Photography at 80% Off (Learn more)

Do you have lots of photographs of barns, fences, plates of food, and landscapes? But portraits – not so much? Don’t worry. We’ve all been in that same boat. Author, and professional photographer, Kent DuFault, has put over three decades of experience into this eBook. If it’s happened in a portrait session, it’s happened to him. His pain is your gain.

Deal found here: The Art of Portrait Photography at 80% Off


Go to full article: How to Take a Self Portrait

What are your thoughts on this article? Join the discussion on Facebook

PictureCorrect subscribers can also learn more today with our #1 bestseller: The Photography Tutorial eBook

The post How to Take a Self Portrait appeared first on PictureCorrect.


from PictureCorrect https://ift.tt/381ZgBj
via IFTTT