perjantai 31. toukokuuta 2019

PictureCorrect.com: Tips for Taking Family Portraits

Family portraits fall into three main categories: traditional family portraits, candid family portraits, and lifestyle family portraits. Most families have had their picture taken, but few have had a chance to have their portrait shot, because of the difference between the two. One is a quick snap, with little attention given to the technical aspects of the image; the other has more consideration given to how the final result should look.

parents and baby photo

photo by Harsha K R

It’s often said that a good portrait captures the personality of the subject(s), and that’s true, but what it also does is record the subject(s) in a way that’s different from other pictures they’ve had taken of themselves. By using a couple of simple techniques anyone can move from the realm of ‘snapshots’ to discovering how to deliver distinctive family portraits.

Capturing Expressions

An essential for a successful family portrait? Expression. Capturing expressions portrays emotion and adds dynamics to the photograph. Portraits can be left feeling incomplete without capturing the expressions that make the image more engaging. While traditional family portraits are posed (think school pictures), I feel expressions are best captured un-posed in a candid portrait setting.

Some great tips on how to do this include avoiding using flash when possible and shooting from a distance. This isn’t to say that all successful family portraits are shot on a whim. It simply means that developing a rapport is important. Actively involve yourself in directing the subject(s) to pose naturally and comfortably, and you’ll find it can achieve a great deal!

Creating a Candid Look When Posing Subjects

Whether taking individual portraits or group photos, creating a candid look is a great way to create a different type of image. Get them laughing; engaging people in a friendly, open manner will get you those shots where the subjects have stopped being self conscious!

posing family photos

photo by Jaap Joris

Another easy way to achieve a great looking candid shot that has been posed is to have your subject(s) look away from the camera. This type of casual candid posing can also be used in larger group shots. Having everyone look at each other can create a unified mood to the photograph, a connection that the viewer can sense.

Photographing Children

Props are also a great tool to utilize when photographing children. A child’s honest reactions to their immediate environment make them the very best candid portrait subjects. Even when aware of the camera’s attention—candid shots from children shine.

Try Another Perspective

The general rule for family portraits is focus on the eyes and set a wide aperture to throw the background out of focus while keeping the faces/subjects sharp. While this is standard in the context of photography, consider occasionally photographing the subject from various angles and viewpoints. Sometimes changing your view helps emphasize mood and can help set the expression of the photograph.

family silhouette

photo by Eric Ward

Try photographing a family from behind, walking away. Perhaps a lifestyle type shot of everyone’s bare feet in the sand, etc.

Change Your Framing

Many people think of portraits as a vertical photograph. Instead, try holding your camera horizontally and offset your subject to one side rather than the middle. Being conscious of switching from one framing style to the other can provide some pleasing results from the same pose.

family photo with dog

photo by Phillip Dodds

Most photography generally insists that the horizon be a straight line. The same is not always necessarily true in portrait photography! Using the horizon line to add creativity and a fun mood to the image can be a great way to step out of the box!

About the Author:
Renee Laurin (www.reneelaurin.com) has over a decade of experience in the graphic design industry and over six years of professional photography.


Go to full article: Tips for Taking Family Portraits

What are your thoughts on this article? Join the discussion on Facebook

PictureCorrect subscribers can also learn more today with our #1 bestseller: The Photography Tutorial eBook

The post Tips for Taking Family Portraits appeared first on PictureCorrect.


from PictureCorrect http://bit.ly/2JQCO6R
via IFTTT

PictureCorrect.com: Composition: 10 Photography Tips for Amazing Results

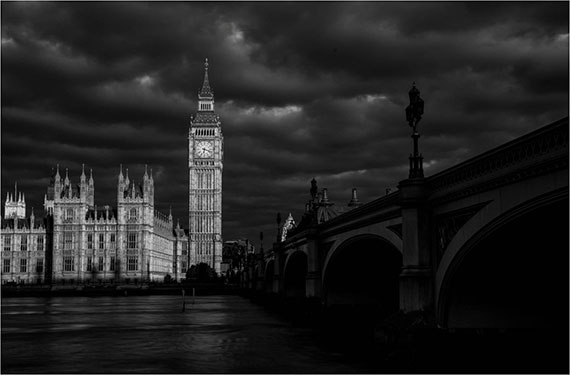
Composition doesn’t come naturally to many photographers. The technical aspects can be learned relatively easily but some say that composition can not. Although I don’t believe this to be completely true, photography is an art form and does require some natural ability.

So what can I do? My composition sucks.

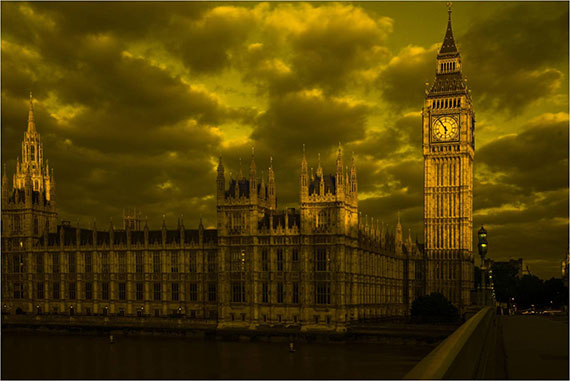
Composition is subjective so there will always be someone out there who likes you work regardless of how bad you may think it is. Most non-photographers are not that discerning, but to capture truly great shots composition is key. A well composed photograph just works. It’s pretty clear-cut but it is more a feeling than conforming to a set of rules.

Here are some composition tips to remember next time you go out to shoot. Keep them at hand and see if they work for you.

1. A painter chooses what to include in a painting, a photographer must choose what to exclude. Declutter compositions removing unnecessary components by selective framing. Use your legs, walk about looking for alternative compositions, and use the camera’s zoom to control what you want to include and more importantly, exclude.

2. The ‘rule of thirds’ is a well known compositional practice but doesn’t necessarily need to be strictly adhered to. The rule dictates that the main elements that make up the image should fall on or near imaginary vertical or horizontal thirds.

3. Check your horizon. For me the horizon should only ever be perfectly horizontal. Use the top of the window in the view finder as a reference. I often point the camera downward to align the horizon before re-composing.

4. Don’t leave large empty spaces. Leaving large holes in the composition such as uninteresting expanses of water or dark or very bright elements should be avoided. Change perspective by shortening the tripod legs to compress large gaps in the mid to near foreground. Conversely, elements should not be cluttered; raise the height of the camera to increase the distance between elements.

urban photography

Photo by Roberto Taddeo.

5. Take a walk before settling on two or three compositions to shoot. Take time to refine them instead of shooting anything and everything.

6. Make both the foreground and background interesting.

7. Use leading lines such as rock formations or movement in water to lead the eye into the frame.

8. Check the edges of the frame for any distracting elements (half a tree, breaks in clouds, etc.), and recompose if necessary. Make sure you’re able to concentrate the viewer’s attention to the subject and try not to distract them from it unnecessarily. Ask yourself, “What is this image about?”

9. Try to keep compositions balanced to some degree, where possible. A protruding headland or building can upset the balance; eliminate it and look for an alternative composition.

10. Critically review your own work and look at how other photographers compose their photos.

european city

Photo by Bernd Thaller; ISO 320, f/8, 1/250 exposure.

Above all, get out there and enjoy! Exploration of composition is a continuous learning curve.

About the Author:
If you’re a fan of photography be sure to head over to Lee’s Landscape Photography for more tips, education offerings and fantastic photography. Lee conducts both capture and post processing photography courses throughout Australia.


Go to full article: Composition: 10 Photography Tips for Amazing Results

What are your thoughts on this article? Join the discussion on Facebook

PictureCorrect subscribers can also learn more today with our #1 bestseller: The Photography Tutorial eBook

The post Composition: 10 Photography Tips for Amazing Results appeared first on PictureCorrect.


from PictureCorrect http://bit.ly/2XdPoA1
via IFTTT
torstai 30. toukokuuta 2019

PictureCorrect.com: Camera Lens Filters and What They Do

“I have a digital camera and some really good software, therefore, I no longer need to bother with filters.”

Not so!

lens filters

If you’re not making use of physical filters (as opposed to digital filters) in your digital photography, you’re missing out on a whole world of wonderful creativity. After all, what is photography? It’s about creating images that express what we see, feel, and experience in the world around us.

filters for landscape photography

And this is where filters can be so useful. This is not planned as an in-depth, tell-all article but rather as something to whet your creative appetites!

Software can be wonderful and we can be remarkably creative with it. But there are certain things at which filters excel. We start off with the basic ultraviolet or protection filter. The camera below has a broken filter with no glass, having been dropped on concrete!

The lens is fine; this makes the protection point. They are also useful when the camera is inadvertently dropped into beach sand, for example.

This can easily happen when shooting with a tripod on the beach. Cleaning sand off the filter is just so much easier than off of a delicate lens. The UV is no longer a problem with digital but the protection is useful. As with all filters it is best to buy quality, known brand products with coated glass as the glass quality is crucial.

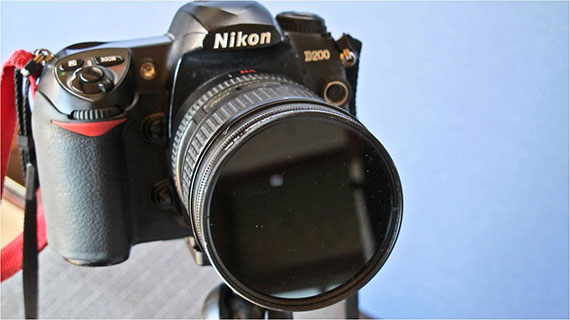
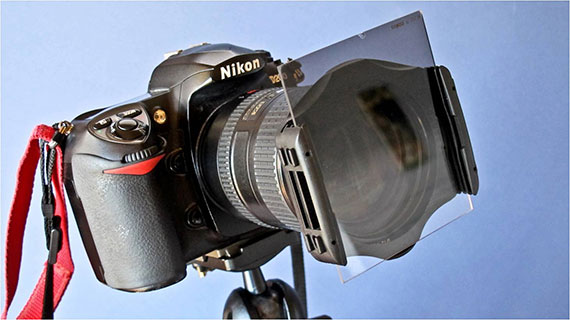
There are two basic types of filers: circular screw on and square/rectangular, which drop into a holder which screws onto the lens. With both types, you can buy step-up rings to fit different size lenses.

round filter

Screw-on Filter

types of filters

Square Filter

The Polarizer Filter

This is the filter everyone should have in their photo bag. The results that you will achieve with this filter cannot be replicated with software and they can be spectacular.

Before we even begin to discuss the filter, here is a selection of before and after images. These are all straight out of the camera with no enhancement to show you the real effects of this filter. There are even sensor spots on some images! The polarized images were taken immediately after the un-polarized image.

sky without polarizing filter

No Filter

sky with polarizing filter

With Polarizing Filter

no polarizer

No Filter

With Polarizing Filter

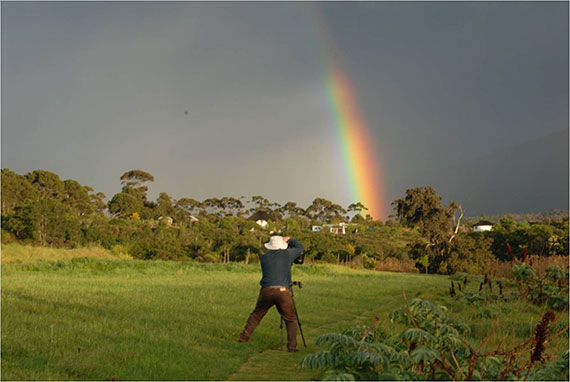
The effect on rainbows can be stunning.

rainbow without filter

No Filter

rainbow with polarizing filter

With Polarizing Filter

A polarizing filter is all about removing reflections. Direct light is non-polarized but when light is reflected from some subjects, it can become polarized when individual light waves become parallel to each other. In many settings, reflections can kill colors which are revived by the filter.

However, reflections are sometimes necessary to preserve color in an image as when, for example, photographing a sunrise or sunset. It’s the reflected light that causes the intense color.

sunset

Because it only filters the light reflected from your subject, and not the light shining on your subject, it can effectively reduce the reflected light.

foliage photo without filter

Shiny Leaves

foliage with polarizer

Non-Shiny Leaves

It also increases the color saturation (wonderful for flowers). Just bear in mind that, as the filter is discarding some light, you will need a longer exposure time—around 2 stops.

The filter just screws on to the front of your DSLR camera, and, looking through the viewfinder (or your live view screen) you just rotate it to achieve the best effect. No need to overdo it!

There is a lot more to be said about this great creative tool but the key point is that no photographer should not have one of these in the camera bag! My main aim, as mentioned, was to whet your appetite with sample images.

The Neutral Density (ND) Filter

This is another excellent creative filter. Think of it as sunglasses for your camera–albeit sunglasses that do not change the color of the light being captured by the camera and lens. Hence the neutral name. It’s a filter that, placed in front of the lens (or dropped into a filter slot), reduces the amount of light entering your camera.

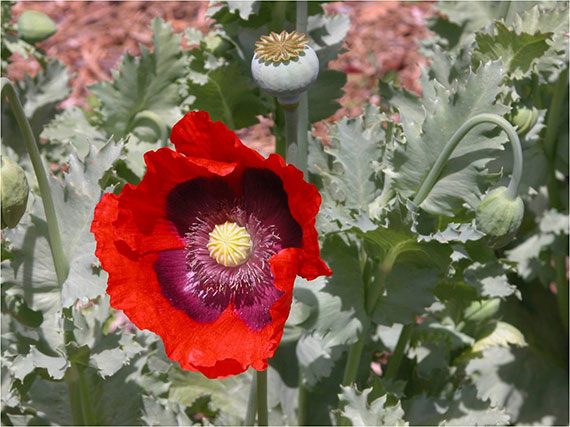
poppy

They come in varying strengths and can give you two big creative benefits:

  1. Controlling depth of field in bright light without overexposing. You can get shallow depth of field and selective focus effects under lighting conditions that too bright for your standard exposures. A 2-stop filter will take the exposure from f/8 to f/4 and a 3-stop filter will take the exposure from f/8 to f/2.8.
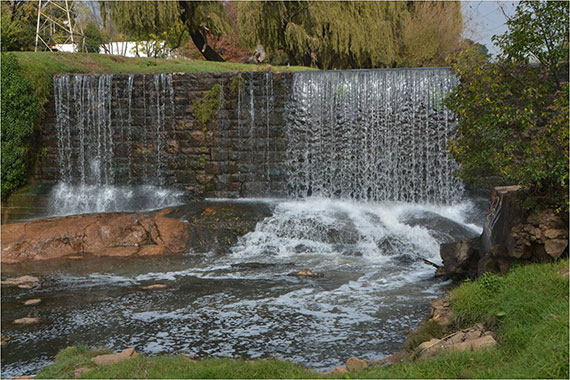
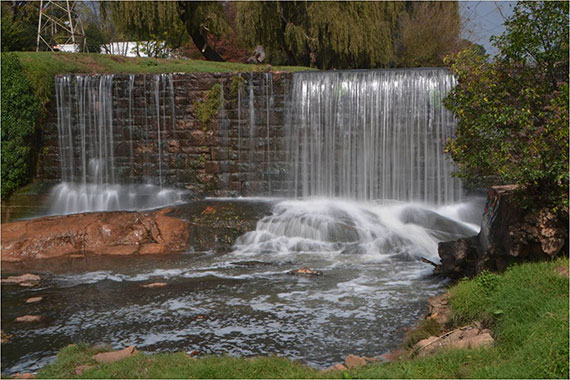
  2. Slowing the shutter speed in daylight for beautiful waterfalls, etc. If you want white misty water and the light is too bright for your shutter speed here is the answer!
water feature without filter

No ND Filter

daylight long exposure

With ND Filter

You need it for water like this. If you use a filter holder it means you can stack different filters to get even lower speeds.

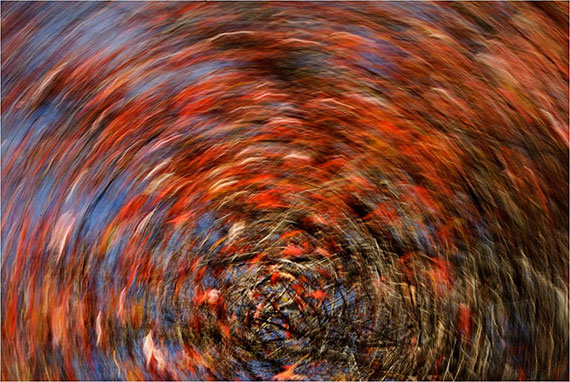
camera movement

Intentional Camera Movement

And you can use them to play with intentional camera movement and generally have creative fun!

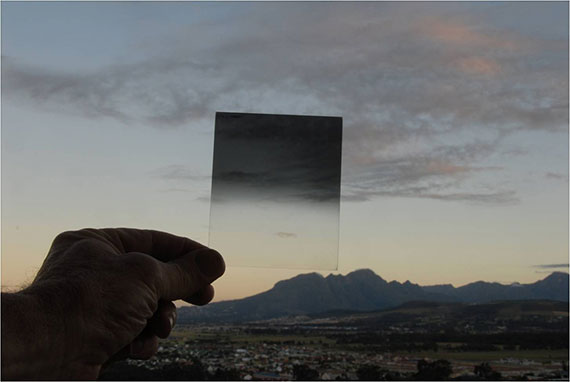
Graduated Neutral Density Filter

The fourth and final filter type I wanted to chat about is the graduated ND filter.

graduated neutral density filter

Graduated ND Filter

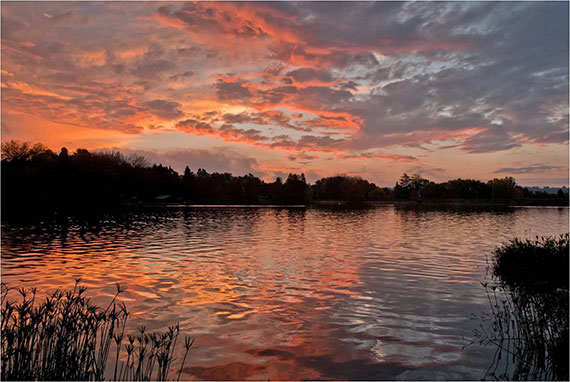
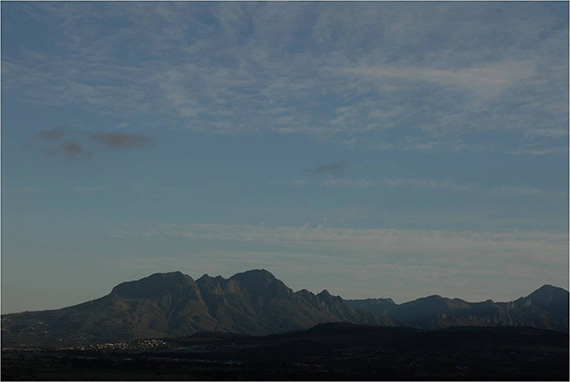
This is a great help in achieving the balanced exposure you want. This can also be done in post processing but I think it’s much better to see your actual image captured on-site rather than to imagine what it will look like when you get home. They can come in both hard-edged and soft edge versions.

My personal preference is for the soft edge, as it is less definite, as it were. Used in a filter holder you just move it up or down whilst looking through the viewfinder to achieve the balance you would like with the dark section holding back the light from the upper section of your image.

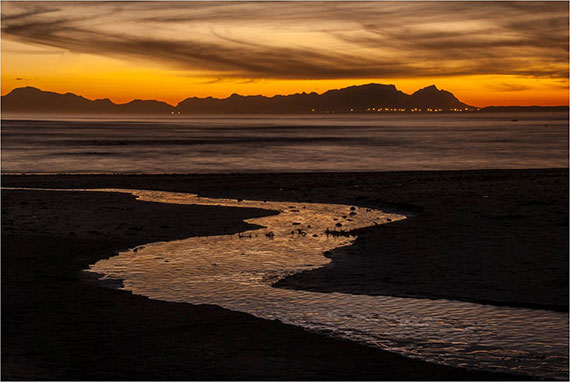
no filter beach

graduated nd filter

There is a continuing debate with some people who insist that software can replace physical filters but if you’re looking for speed, simplicity and enjoyment. The advantage of seeing immediate results on your camera screen is really hard to beat.

polarizer effects

And of course, the polarizer effects are not possible with software!

As a P.S. to filters, just a mention of infrared filters.

infrared filter

creative filter use

They can add a whole new range of creative possibilities to your photography.

About the Author
Roger Lee is a Johannesburg based photographic trainer and cruise ship speaker on photography. He runs a successful one day “Enjoy Your Camera” course, and his popular e-books for people who don’t want to drown in detail are at www.camerabasics.net. His new smartphone photography e-book is at www.smartphone.org.za.


Go to full article: Camera Lens Filters and What They Do

What are your thoughts on this article? Join the discussion on Facebook

PictureCorrect subscribers can also learn more today with our #1 bestseller: The Photography Tutorial eBook

The post Camera Lens Filters and What They Do appeared first on PictureCorrect.


from PictureCorrect http://bit.ly/2JMYWyO
via IFTTT

PictureCorrect.com: Interesting Photo of the Day: Beautiful Morning in Bali

Early morning landscapes are truly magical. It’s not just the soft, golden light but also the natural elements that play so well together during the early hours of the day to make them look magnificent. Photographer Malthe Zimakoff got lucky one morning in Bali, Indonesia and captured this near perfect fairytale moment:

sunrise in Bali

“Beautiful Morning in Bali” by Malthe Zimakoff (Via Reddit. Click image to see full size.)

Zimakoff created this image by stitching multiple frames to form a panorama. And what he’s captured is truly beautiful.

The sunrise brushing off the top of the trees contrasts well with the darker regions of the image. Furthermore, the way the mist leads us from the foreground toward the mighty Mount Agung volcano in the background is an example of a well thought out composition. And to add to the mystical nature of the image, we have the beautiful golden glow of the early sunrise.


Go to full article: Interesting Photo of the Day: Beautiful Morning in Bali

What are your thoughts on this article? Join the discussion on Facebook

PictureCorrect subscribers can also learn more today with our #1 bestseller: The Photography Tutorial eBook

The post Interesting Photo of the Day: Beautiful Morning in Bali appeared first on PictureCorrect.


from PictureCorrect http://bit.ly/2Z3umop
via IFTTT
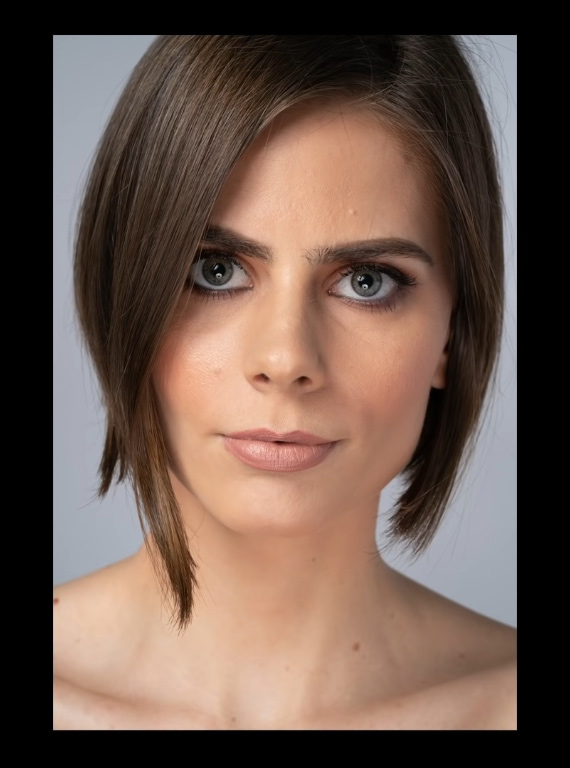
PictureCorrect.com: Portrait Posing Trick for Photographers

Knowing how to pose your portrait subjects is crucial. Many photographers struggle in this area. As a result, they resort to guides and reference images, which may not suit their subjects. The resulting images thus seem forced and unnatural. Professional portrait photographer Miguel Quiles shares one easy trick that you can use to pose anyone:

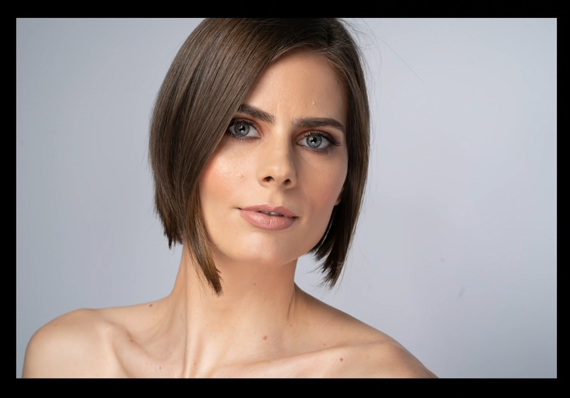
It’s one thing to memorize poses and direct people to stand in a particular way, look in a specific direction, and place their hands just so. This method might work great with professional models, actors, and actresses. But to pose an average person, Quiles asks his subject to play a character to recreate a certain mood and feel. The benefit of using this method is that you get an authentic expression.

To demonstrate what he means, Quiles poses his subject using both of these techniques. First, he poses her as he’d pose a professional model with specific directions:

posed portrait of model

posed portraiture

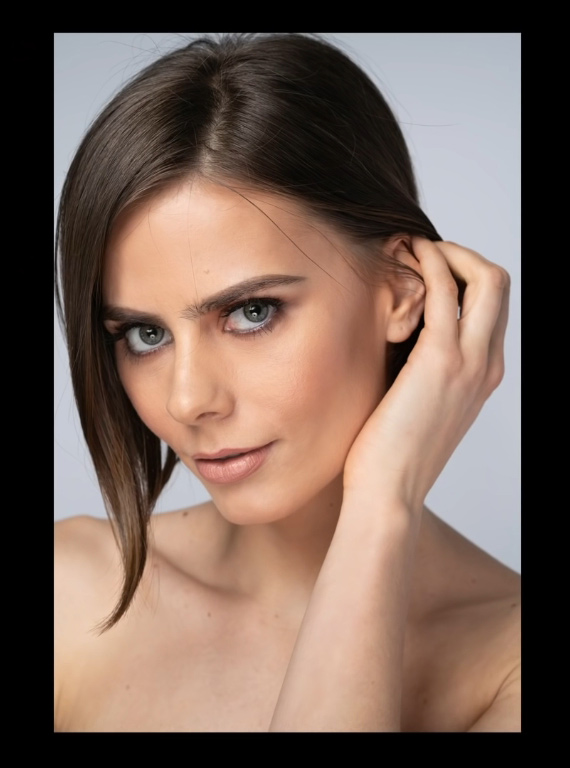
Next, he asks her to play the character of a strong, confident, and beautiful woman who is borderline intimidating:

model portraying strong character

posing trick

“If you’re shooting for 10 minutes, 15 minutes, and you get the person to play a character, you’re gonna notice that you get more variety of shots. You’re gonna get a bunch of different poses in a very limited period of time versus having to pose them shot after shot after shot.”

With this technique, you’ll no longer need to memorize poses. Instead, study your subject, think of what character suits them best, and ask them to play that role.


Go to full article: Portrait Posing Trick for Photographers

What are your thoughts on this article? Join the discussion on Facebook

PictureCorrect subscribers can also learn more today with our #1 bestseller: The Photography Tutorial eBook

The post Portrait Posing Trick for Photographers appeared first on PictureCorrect.


from PictureCorrect http://bit.ly/2Xg5YPD
via IFTTT