


As photographers, we often find ourselves drawn to the stark beauty of cold weather environments. However, transitioning your camera from a warm indoor environment to the icy outdoors can be a challenge. The key to seamless cold weather photography lies in effectively pre-cooling your camera. Let’s dive into how you can prepare your gear for the chill and capture those winter wonderland shots flawlessly.
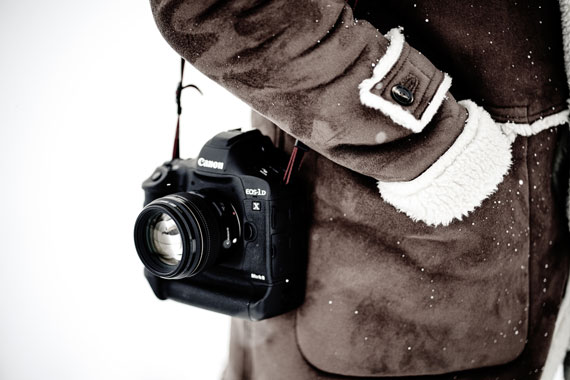
Photo captured by Jonas Allert
The Risks of Rushing the Pre-Cooling Process:
It’s tempting to skip the gradual pre-cooling process, especially when you’re eager to capture a fleeting winter moment. However, rushing it can occasionally lead to some issues. The most common problem is condensation – when warm, moist air from inside the camera condenses on the cold camera sensor and internal components. This can result in foggy images and, in worse cases, damage to the camera’s electronics.
Additionally, rapid temperature changes can cause lens elements to contract unevenly, potentially affecting focus and optical quality. In extreme cases, it can even lead to cracking of the lens elements. Therefore, patience is more than a virtue in cold weather photography; it’s a necessity for safeguarding your precious gear.
Understanding Condensation
Condensation occurs when warm, moist air meets a cold surface, a common challenge in cold weather photography. Inside a warm environment, your camera and its internal components, including the sensor and electronic circuitry, are at a much higher temperature compared to the frigid outdoor air. When you take your camera from a warm room to a cold outdoor setting, the moisture in the air inside and around the camera quickly cools down.
Since cold air holds less moisture than warm air, this rapid cooling causes the moisture to condense into water droplets. These droplets can form on both the external and internal parts of your camera, including the lens and sensor. This not only affects image clarity but also risks damaging the sensitive electronics inside your camera. Understanding this phenomenon underscores the importance of gradually acclimating your camera to colder temperatures to prevent condensation and ensure optimal performance. Here are some tips to prevent it:
1. Gradual Temperature Adjustment:
Start by gradually exposing your camera to colder temperatures. Moving your camera directly from a warm room to freezing temperatures can cause condensation, which might damage your camera’s internal components. An effective way to do this is by placing your camera in a cooler area of your house, like a garage or near a window, before taking it outside.
2. Use a Ziploc Bag:
Before stepping out, place your camera in a large Ziploc bag. This will trap the warmer air around the camera and prevent condensation when you move outdoors. Once outside, allow the camera to acclimate to the external temperature while still in the bag. This usually takes about 30 minutes.
3. Pre-Cool Your Lenses:
Lenses are just as susceptible to temperature shock as your camera body. Apply the same gradual temperature adjustment to your lenses. Remember, changing lenses in cold conditions can introduce moisture, so try to decide on a lens before heading out.
4. Keep Spare Batteries Warm:
Battery performance can drastically drop in cold conditions. Keep spare batteries in a warm pocket close to your body. This will ensure they retain their charge longer when you need to swap them out.
5. Avoid Breathing on Your Equipment:
It might be tempting to use your breath to clean the viewfinder or lens, but in cold weather, this can cause immediate frosting. Use a lens cloth or blower instead.
6. Use Silica Gel Packets:
Placing silica gel packets in your camera bag can help absorb any moisture that might accumulate, offering an extra layer of protection against condensation.
By pre-cooling your camera properly, you can make the transition to cold environments much smoother and protect your equipment from ruined images or potential damage. Remember, the beauty of winter photography is unmatched, and with these tips, you’re all set to capture it in all its glory.
For Further Training:
For help remembering these concepts, and more cheat sheets on the Most Difficult Photography Situations, this popular set of Photography Adventure Cheat Sheets have you covered. They are currently 80% off for a Pre-Black Friday sale which ends soon if you want to check them out.

New! Cheat Sheets for Your Photography Adventures (see how they work)
The perfect companion for any photographer. Print one out whenever you need it. Whether you’re going on vacation or seeking out a specific photography adventure, these cheat sheets can provide you with the knowledge and inspiration you need to create your best work yet.
Deal ending soon: The Photography Adventure Cheat Sheets at 80% Off
- - - - - - - - - - - - - - - - - - - - - - - - - - - - - - - - - - - - - - - - - - - - - - - - - - - - - - - - - - - - - - - - - - - - - - - - - -
The post From Warmth to Winter: Pre-Cooling Tips for Your Camera appeared first on PictureCorrect.
from PictureCorrect https://ift.tt/PVAdHwk
via IFTTT


0 kommenttia:
Lähetä kommentti