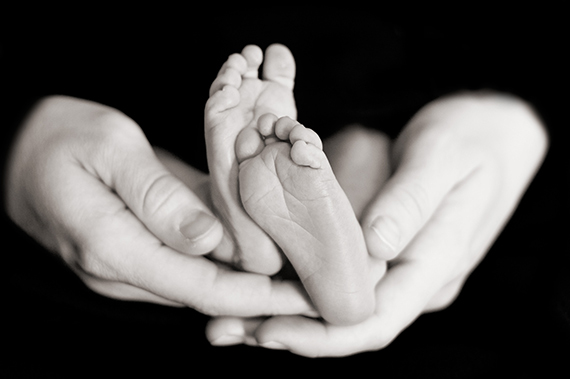
Did you know that a newborn is probably the easiest subject to photograph? That you don’t have to be Anne Geddes to take truly beautiful photos of your child during the first 30 days of his or her life?
photo by love_K_photo
Consider this. During the first month, your child sleeps up to 16 hours a day. Imagine, the most adorable and beautiful subject on earth will stay put for you – for up to 16 hours a day for 30 days – until you get a perfect portrait of him or her. I think even the highest paid model will have a hard time doing that and would, in all probability, throw a tantrum after a day.
But not your child, no. Your newborn will give you all the time to set up your camera, to focus, to shoot. He will be patient with your mistakes until you get it right. He will even give you that angelic smile when you fumble with your camera’s controls. And you know what? His only requirement is you keep him comfy and dry and well-fed all the time. So take advantage of this stage. Your newborn will not stay as cooperative and well-behaved in front of the camera. You only have up to 30 days.
Don’t worry if you have the most basic point-and-shoot camera or only a smartphone camera. Some of the best images in the world have been taken with a basic camera. Your camera, whatever brand you’re holding, will definitely do. Just try to remember the tips below and you’ll be on your way to creating beautiful pictures of your newborn. These tips assume that you have the basic knowledge to operate your camera. If not, read the camera’s manual again.
1. After feeding your newborn and you’re sure that he is comfortable, take him out of his crib and lay him down on a table with a soft, plain-colored blanket. White would be perfect. But if you cannot find a white cloth, any pastel color would be a good alternative. Laying your child on a table, instead of inside a crib, allows you to move around and give you different vantage points to photograph. It’s also easier on your back.
2. Place this table beside a big window so you don’t need to use the built-in flash of your camera. What I’m saying is don’t use the built-in flash of your camera if you want beautiful light.
3. If you have a big woven basket or huge bowl lying around the house, you can also place your newborn there. Just make sure it’s safe and stable.
4. You want to focus on your child, so don’t place any object or toy beside your child that would divert the viewer’s attention from him.

“Feet” captured by PictureSocial member Dani
5. Get close to your newborn—as much as your lens will allow.
6. If your camera has a close-up or macro option (usually represented by a flower icon), use it to take close ups of his face, eyes, ears, lips, nose, feet, hands, and fingers, even belly button.
7. You or your spouse can take turns holding the baby and photographing.
Remember, you have only 30 days to take advantage of this stage before you and your baby enter another milestone in his life. And I tell you, it’s not going to be easy as this one. So get going.
About the Author:
Tony Oquias is a professional photographer and writer based in the Philippines. He specializes in executives, factory workers, equipment, products, food, drinks, processes, corporate events, and weddings.
Go to full article: Newborn Photography Tips
What are your thoughts on this article? Join the discussion on Facebook
PictureCorrect subscribers can also learn more today with our #1 bestseller: The Photography Tutorial eBook
The post Newborn Photography Tips appeared first on PictureCorrect.
from PictureCorrect http://bit.ly/2YWJUKw
via IFTTT


0 kommenttia:
Lähetä kommentti