


Many times when you are processing portraits in Lightroom or Photoshop you are working towards a soft, pleasing look. However, with some portraits you may be after a more dramatic and intense look. In this tutorial we’ll take a quick look at how you can create an intense portrait in Lightroom, and we’ll also showcase some before and after images to show how the effect can impact photos.
For this tutorial we’ll be working with this sample photo:
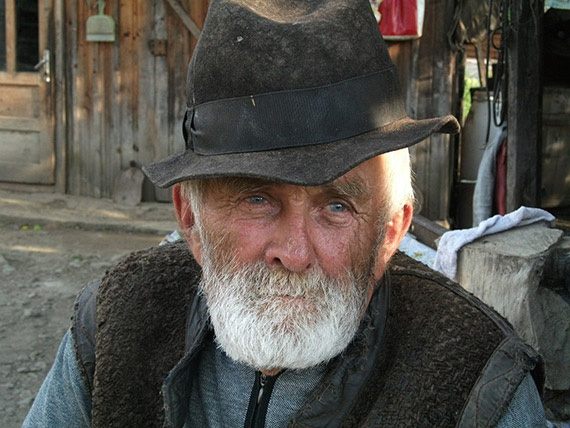
photo by jackmac34
And here is a quick preview of the effect that we will be creating:

Dragan-Style Portrait
To get started, we’ll apply the following settings in Lightroom’s Develop module:
- exposure: +0.36
- contrast: +65
- highlights: -65
- shadows: +45
- whites: -60
- blacks: -60

Basic Settings in Lightroom
The settings to highlights, shadows, whites, and blacks will give the photo and HDR-like appearance with a strong black point for deep blacks. We’ve also significantly boosted contrast and increased the exposure a little bit to avoid letting the photo get too dark with the changes that we are making. Adjust the exposure as needed for the particular photo that you are working with.
Next, make the following changes to the settings:
- clarity: +100
- vibrance: +60
- desaturation: -60

Clairty, Vibrance, Saturation
Increasing clarity to the maximum at +100 will add mid-tone contrast and give the photo a sharpened look.
Next, edit the following settings for sharpness:
- amount: 120
- radius: 2.2
- detail: 60
- masking: 0
And use these settings for noise reduction:
- luminance: 30
- detail: 50
- contrast: 25
- color: 30
- detail: 50
- smoothness: 15

Sharpening and Noise Reduction
Adjust the sharpening and noise reduction settings as needed for the specific photo that you are working with.
And the last step we’ll take is to add a vignette with the following settings for post-crop vignetting:
- amount: -20
- midpoint: 50
- roundness: 0
- feather: 50
- highlights: 0

Post-Crop Vignetting
And now we have our finished product.
After
These same settings work on all sorts of portraits, see how it looks and then adjust the settings from there to fit various situations.
About the Author:
Marc Andre is the editor of PhotographyPlanet, a website that offers downloadable products like Photoshop actions, Lightroom presets, photo overlays, textures, and print templates.
- - - - - - - - - - - - - - - - - - - - - - - - - - - - - - - - - - - - - - - - - - - - - - - - - - - - - - - - - - - - - - - - - - - - - - - - - -
Did you appreciate this newsletter? Please help us keep it going by Joining Our Patreon Supporters
What are your thoughts on this article? Join the discussion on our Facebook Page
PictureCorrect subscribers can also learn more today with our #1 bestseller: The Photography Tutorial eBook
- - - - - - - - - - - - - - - - - - - - - - - - - - - - - - - - - - - - - - - - - - - - - - - - - - - - - - - - - - - - - - - - - - - - - - - - - -
The post How to Create Intense Portraits in Lightroom appeared first in the Photography Tips category on PictureCorrect.
from PictureCorrect https://ift.tt/CKn0vur
via IFTTT


0 kommenttia:
Lähetä kommentti