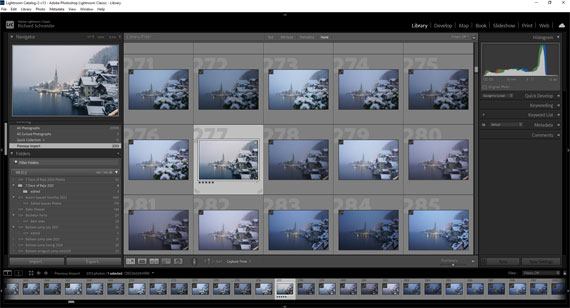
Culling photos in Adobe Lightroom is an essential step in a photographer’s workflow, allowing you to select the best images from a shoot for editing and presentation. Here are some effective strategies to streamline the culling process:

- Use Flags and Ratings Efficiently:
Flags: Quickly flag your photos as “Picks” (P key) for those you like, “Rejects” (X key) for those you don’t, and unflagged for those you’re unsure about. Later, you can filter to show only picked or rejected photos to review your selections.
Ratings: Assign star ratings (1-5) to differentiate levels of quality or potential within your selections. This can help when you need to narrow down picks further. - Use Color Labels: Assign color labels to categorize your photos further. This can be used to indicate different stages of editing, types of photos (e.g., portraits, landscapes), or priority for editing.
- Take Advantage of Smart Previews: If you’re working with a large batch of high-resolution images, consider using Smart Previews in Lightroom to speed up the loading and reviewing process. Smart Previews are smaller, lightweight versions of your photos that are much faster to work with. You can always switch back to the full-resolution files for detailed editing.
- Compare View: Use the Compare View (C key) to look at two photos side by side. This is particularly useful for choosing between similar shots.
- Survey View: When you have several candidates for a specific need, use the Survey View (N key) to see them all at once without distractions. It makes it easier to eliminate outliers until you find the best one.
- Use Auto Advance: Enable Auto Advance in the Photo menu to automatically move to the next photo after you rate or flag the current one. This can significantly speed up the culling process.
- Keyboard Shortcuts: Learn and use Lightroom’s keyboard shortcuts to speed up your workflow. Key shortcuts for flagging, rating, and moving between photos can save a lot of time.
- Initial Fast Pass: Do a quick first pass through your photos to flag obvious rejects. This can quickly reduce the number of photos you need to consider more carefully.
- Focus on Elimination, Not Selection: Sometimes it’s easier to eliminate the weakest photos first rather than trying to pick the best ones right away. This reduces the pool of candidates and makes final selections clearer.
- Take Breaks: Especially for large batches, take breaks to avoid fatigue and maintain a fresh perspective. What might look like a reject at first could be a hidden gem upon a second look.
- Use Collections: After culling, create collections in Lightroom for your selected photos. This helps organize your workflow and keeps your picks easily accessible for the next steps in your editing process.
These strategies can be adapted based on personal workflow preferences and the specific needs of a project. The goal is to make the culling process as efficient and accurate as possible, ensuring that you spend your editing time on the photos that best capture your vision.
For Further Training:
In the digital age, capturing a photo is only half the battle; the true magic happens in post-processing. This is where Lightroom Editing Mastery, an online course meticulously designed for both budding and seasoned photographers, steps in to transform the way we enhance our photographs.
For a limited time, “Lightroom Editing Mastery” is available at a significantly discounted rate, making professional-grade photo editing skills more accessible than ever.
Deal ending soon: Lightroom Editing Mastery at 80% Off
- - - - - - - - - - - - - - - - - - - - - - - - - - - - - - - - - - - - - - - - - - - - - - - - - - - - - - - - - - - - - - - - - - - - - - - - - -
This post Lightroom Culling Mastery: Tips for Choosing Your Best Photos appeared on PictureCorrect.
from PictureCorrect https://ift.tt/aF3juBE
via IFTTT


0 kommenttia:
Lähetä kommentti