This article is based on concepts from the Better B&W Photography Guide if you want to dig deeper for further training.
Black and white photographs are arguably some of the most compelling images we can create.
There is something magical about a full tonal scale black and white picture.
Did you know that you have to call upon your knowledge of color to create a top-notch black and white photo?
It’s true!
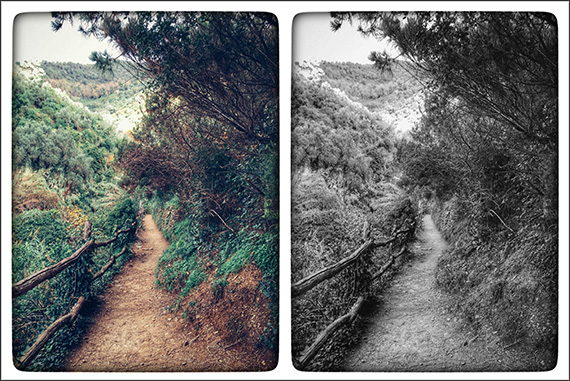
A color scene improperly converted into black and white will result in a dull, lifeless picture, such as this image from Tuscany, Italy. (Photo by Kent DuFault)
Quick Tip
In black and white photography, colors convert to shades of gray called tones.
The vital part of this equation (which not every photographer realizes) is that the conversion process is not set in stone. You have some ability to decide how the colors will be converted to shades of gray.

Graphic by Kent DuFault
Three different colors, all receiving similar lighting, can potentially convert to almost the same shade of gray.
This lack of tonal separation is what happened in the above photograph of the walking path in Italy!
How you allow different color hues to convert to gray can make your black and white photo pop or go flat and lifeless.
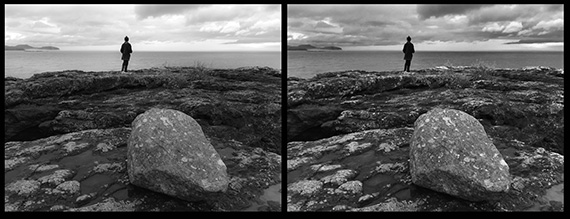
Woman standing on Lake Superior. (Photo by Kent DuFault)
In the image above, on the left, various colors were transformed without any manipulation on my part. This conversion isn’t awful. However, the foreground is relatively flat in contrast and tone, while the sky has lost all of the drama present in the original scene.
On the right, after I’ve manipulated color conversion to tone, you can quickly see how the foreground has improved, and the sky now adds to the mood.

Graphic by Kent DuFault
When shooting black and white film, or creating monochrome digital files within your camera, placing a colored glass filter in front of the lens will have the effect of brightening the matching hues in your scene.
For example, a green glass filter placed upon a lens’ front element could lighten green grass in a black and white photo.
A blue filter will brighten any blue object, while a red filter will lighten red items.
Each filter will also slightly affect other colors. For example, a red filter will lighten red objects and darken blue objects. (That combo works well for landscape photography.)
You can also control how colors convert to gray tones using your post-processing software.
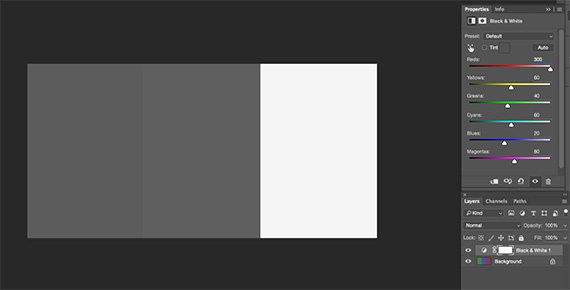
Graphic by Kent DuFault
When converting this file to monochrome, I pushed the reds slider to 300. The result is that any red object in my image will convert to an almost pure white tone.

To illustrate the opposite point, while using the same image, I set the reds slider to -200. The result is that anything red in the picture will convert to almost pure black.
Note: Notice how the green and blue bars remained similar in tone no matter where the reds slider was positioned. This fact is the advantage of creating your black and white photos in post-production. You have a greater degree of control over where individual colors will fall upon the grayscale when converted.
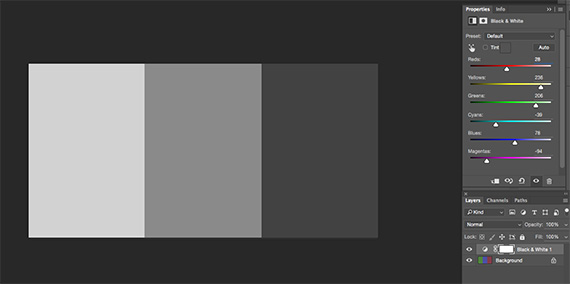
The goal of converting a color image to a black and white monochrome photo is that each hue of color should have its own tonal range. The above illustration is an excellent example of that concept. It’s effortless to see where the green, blue and red hues will fall into shades of gray.
Let’s give this conversion thing a whirl!
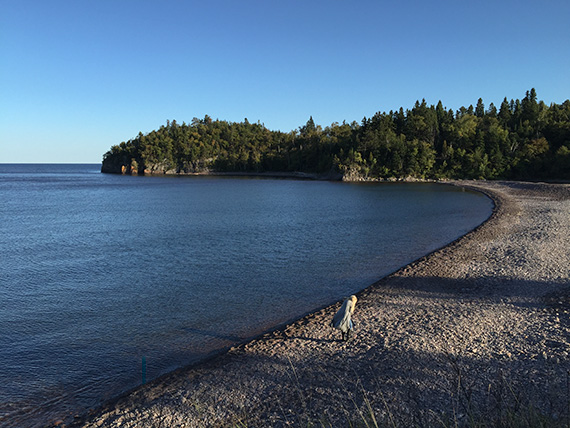
Photo by Kent DuFault
Let’s convert this beach sunset picture to a black and white photo!
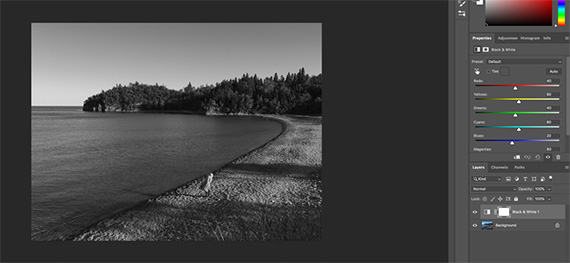
Using a black and white adjustment layer in Photoshop, the default conversion isn’t horrible. However, it doesn’t portray my vision for this picture.

I want the woman to be the primary subject.
I also wish the coastline to act as a leading line. Finally, I like the background’s landscape to support the woman as the subject and provide a story element to the composition.
In order to make this happen, I must take control of the conversion process.
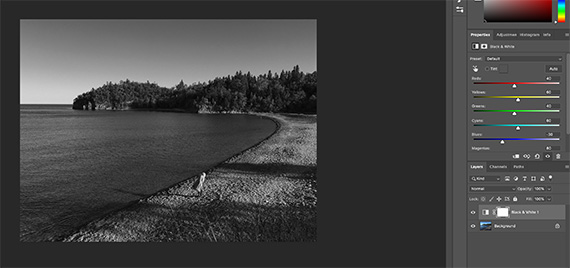
Step One: I darkened blue objects by reducing the blues slider to -30.
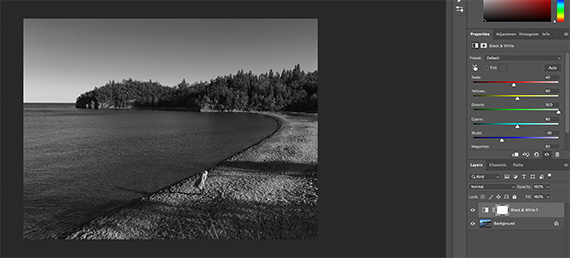
Step Two: I wanted to lighten the trees in the background. I moved the greens slider to 300.

Step Three: I wanted to put some dramatic contrast around the woman, so I decreased the reds slider to 21.
Note: If you go back and look at the original photo, you will see three primary colors in this shot: blue, green and an array of warm tones from the light of the setting sun.
To direct my composition toward the woman, I will use the warm color sliders (red, yellow and magenta) to highlight her against the surrounding landscape.

The trees still did not have the visual weight that I wanted, so I increased the yellows slider to 199.

I wanted to increase the sky’s drama slightly, so I decreased the cyans slider from 60 to 0.
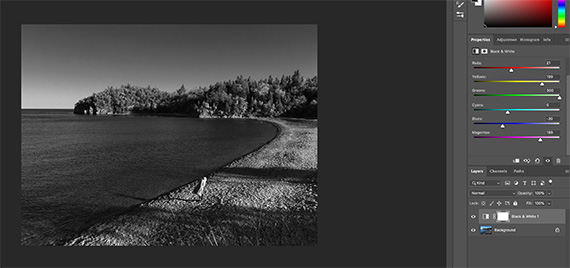
The last color to adjust was magenta. Increasing that to 189 brought some additional contrast to the shoreline.
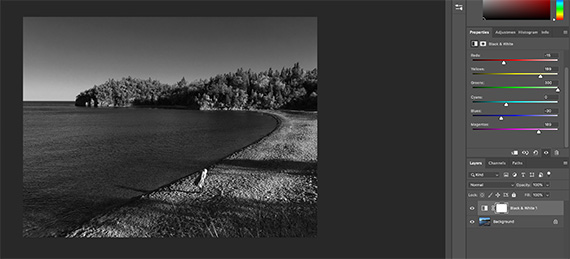
Now that I’m very close to my final conversion settings, I felt that the reds slider was too high. It was giving the woman an unnatural appearance of being too light and with too much contrast. I changed the Reds from 21 to -15.
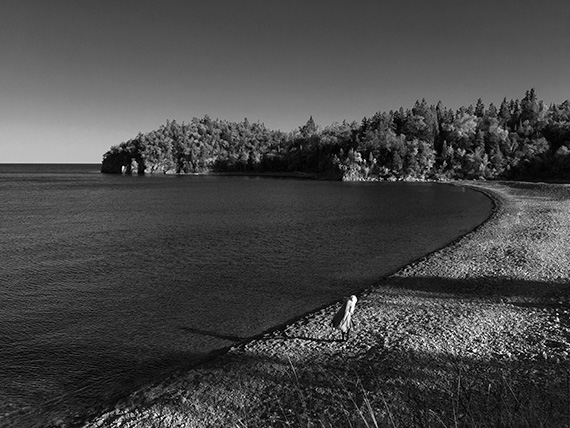
Here is my final black and white image after my custom conversion.
Let’s compare the two!
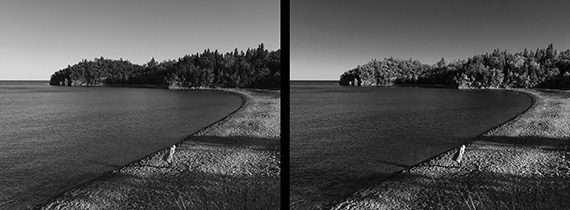
On the left is the automatic conversion. On the right is my custom conversion.
By taking control of the color-conversion process, I was able to post-process this photo to match my vision for the finished piece.
Look at how my model stands out in the right picture versus the left!
Virtually all post-processing applications that I’m aware of provide you with the option to customize your black and white conversion through individual color channels.
Make sure you take advantage of it!
About the Author:
Kent DuFault is an author and photographer with over 35 years of experience. He’s currently the director of content at the online photography school, Photzy.com.
For Further Training:
Have you ever quickly converted your shots to black & white, hoping to make them “Better”? And the result was bland to say the least? This is a very common occurrence. Knowing how to convert color to B&W with a working understanding of tone and contrast in post-processing is a very different story. This in-depth eBook is designed to cover EVERYTHING you need to know about producing your own powerful and professional B&W images.
Every step is detailed in all three programs: Photoshop, Lightroom, & Elements. But even if you don’t have these applications, there’s enough information in here to help you achieve the same results with the software you already have. It is currently 76% off if you want to check it out.
Deal ending soon: The Better Black & White Photography Guide at 76% Off
- - - - - - - - - - - - - - - - - - - - - - - - - - - - - - - - - - - - - - - - - - - - - - - - - - - - - - - - - - - - - - - - - - - - - - - - - -
The post Tips for Converting Color Photos to Black and White appeared first on PictureCorrect.
from PictureCorrect https://ift.tt/EZVhJKp
via IFTTT


0 kommenttia:
Lähetä kommentti