


Love it or hate it, it’s that time of the year again… yes, Christmas is upon us, and so are all the magical festive lighting displays! Some photographers struggle to capture night scenes, though — especially when bright lights are the main subject.
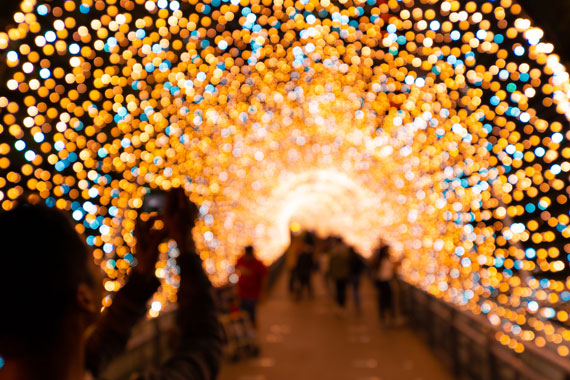
Photo captured by Winston Chen; ISO 200, f/4.0, 1/30s, 24mm.
Photographing in low-light alone poses a lot of challenges. As pretty as they are to the naked eye, accurately capturing twinkling Christmas lights on your camera takes even more finesse. Not only do you need to tackle grainy backgrounds but avoid overblown illumination, as well.
Otherwise, those photographs may be completely unsalvageable, no matter how much you edit them. Are you planning on heading out to shoot displays locally in your neighborhood or town?
Take a few tips on the best camera settings to use when photographing Xmas lights! And start by putting your camera on a tripod.
Sample Christmas light camera settings:
- I like Aperture priority mode, try starting with f/5.6
- ISO 400
- In aperture priority, the camera will choose the shutter speed.
- Auto White Balance
- More explanation
Lower Aperture
A low number aperture is a good starting point for low-light scenes — even those featuring bright lighting displays. For a bokeh effect with narrow depth of field, decrease the aperture down or closer to f/2.8. To capture a deeper depth of field image of a Xmas lighting display, increase your aperture up to f/8 or just below.
Shoot At Low ISO
Low-light photography can produce a lot of grain. Why? Amateur photographers often select a high ISO to expose the image. However, noise can be reduced by opting for a lower ISO setting instead — ideally, around 400 ISO or under. Don’t be afraid to raise the ISO if you are getting underexposed results, modern cameras are performing increasingly well at higher ISO settings.
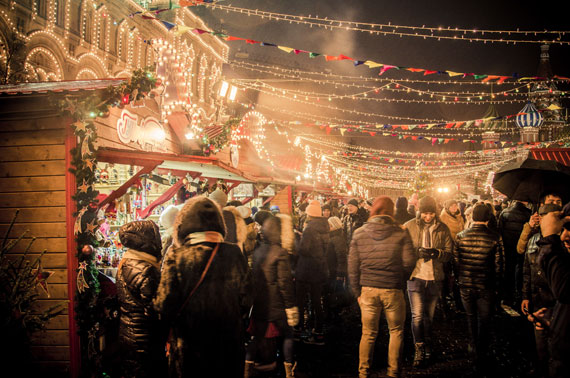
Photo captured by Daniil Silantev; ISO 400, f/4.0, 1/15s, 24mm.
Adapt To Your Sensor
Each camera has a unique sensor, so copying other photographers’ ISO settings may not always be the best idea. Instead, pros recommend you get to know your sensor and its noise levels. For example, dual-gain sensor noise isn’t linear, often dropping off at 200, 400, and 800 ISO.
Leverage Shutter Speed
One caveat of photographing on a low ISO is equally little exposure in an image. To compensate, it’s best to adjust your shutter speed. If you are setting the shutter speed manually, between 1/8 to 1/125 is often a good starting point to allow your sensor to absorb more light, even at low ISO. Then if you are still underexposed, slow down the shutter speed even more.
Expose Lights, Not the Dark
Overblown illumination is the most common night photography error — and no amount of editing can truly fix it! That’s why pro photographers prioritize lights when selecting their exposure settings. Do the same by taking test images until no light bleed is detectable in yours.
Automate White Balance
Cameras can struggle to find the correct white balance at night. Throw in a few fairy lights, bulbs, and LEDs, in various tones, and you’re in for a wild ride. If you struggle to adjust your white balance as is, opt for Auto or Tungsten. And remember, you can always edit the white balance later on.
Keep The Flash Off
Using flash may seem the logical choice when shooting at night, but it isn’t the best route when capturing lights. Your flash can counteract the brightness emanating from Christmas lights, creating additional noise. If you must, opt for an off-camera flash or professional handheld light.
Remember to Focus
Autofocusing in the dark can be tricky for your eyes and camera sensor, but minimizing AF points can help. Ideally, stick to a single or small group of AF points. Then aim it or them at the brightest subject in your frame for the best effect. Your camera will also be able to focus faster this way. Or use manual focus.
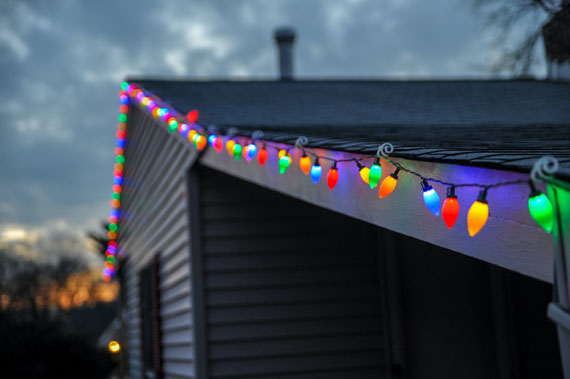
Photo captured by Bob Ricca; ISO 1000, f/2.8, 1/30s, 62mm.
Shoot In RAW
Even if you do manage to capture the perfect Christmas light shot manually, editing can really bring out its best. Shoot in RAW, that way you have more scope to play with when editing your images later on.
Merry Christmas!
For Further Training:
For help remembering these concepts, and more cheat sheets on the Most Difficult Photography Situations, this popular set of Photography Adventure Cheat Sheets have you covered. They are currently 80% off for a Holiday sale which ends soon if you want to check them out.

New! Cheat Sheets for Your Photography Adventures (see how they work)
The perfect companion for any photographer. Print one out whenever you need it. Whether you’re going on vacation or seeking out a specific photography adventure, these cheat sheets can provide you with the knowledge and inspiration you need to create your best work yet.
Deal ending soon: The Photography Adventure Cheat Sheets at 80% Off
- - - - - - - - - - - - - - - - - - - - - - - - - - - - - - - - - - - - - - - - - - - - - - - - - - - - - - - - - - - - - - - - - - - - - - - - - -
The post Camera Settings for Christmas Lights appeared first on PictureCorrect.
from PictureCorrect https://ift.tt/beFWVTK
via IFTTT


0 kommenttia:
Lähetä kommentti