This article is based on concepts from The Photography Action Cards which are currently 88% off for a summer sale if you want to dig deeper for further training.
A silhouetted photograph almost always garners immediate and positive attention.

Photo by Andrew Sharples
There is much confusion out there in Internet-land about the differences between a silhouette, a shadow, and when something is shadowed.
The picture above depicts a silhouette.
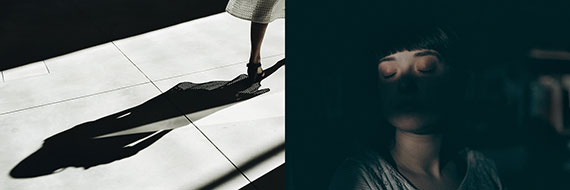
Left photo by Martino Pietropoli, Right photo by maxime caron
The photograph on the left is a shadow, and the photo on the right is a woman who is shadowed.
A shadow occurs when light is blocked by an object, and that results in a darkened area on another object. Shadowed is when an object is hit by a shadow so that part of the object is obscured due to a lack of light.
Here’s the definition of a silhouette as taken from a dictionary: a silhouette is a dark shape and outline of a person or object as viewed against a lighter background.
Each of these three results from light has its strengths. Today, I’m going to concentrate on the silhouette.
When you finish this blog post, you’ll realize that the silhouette is one of your most powerful tools as a photographer.
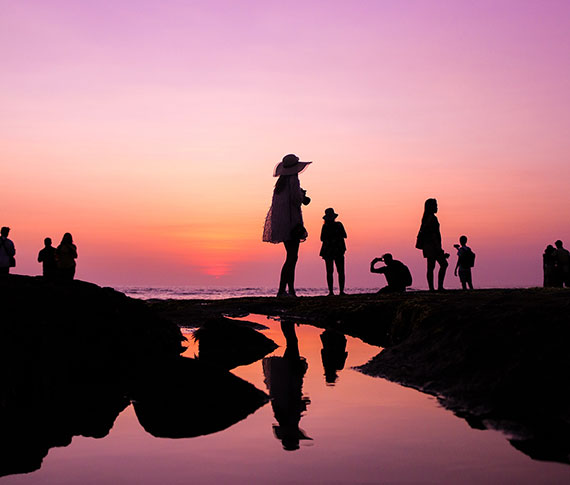
Photo by Sarah Arista
Key Thought: Silhouettes are powerful because they make use of shape. Recognizing shape is a primal instinct in the human brain. When a viewer perceives a shape within your photo, they can’t help but focus on it.
Secret to Success
The most potent silhouette photos include a storytelling element.
The above image hits every button. It has full silhouettes, a semi-silhouette (more on that in a minute), a strong story element, and fabulous color! What else could you ask for? Creating photos like this will definitely put you into the popular category.
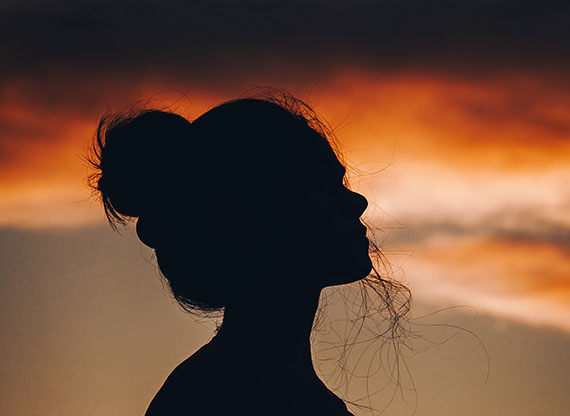
Photo by Aadesh Choudhari
Here we have what is categorized as a ‘simple’ silhouette. It gives us a clearly defined shape, but it lacks a story element.
Simple silhouettes give little to a viewer other than a brief visual pleasure. This type of silhouette is a great way to begin as you master the basics if you are new to silhouette photography.
Let’s get started!
1. Get some help from a family member or a friend.
2. Take them out on a beautiful evening when the sun is setting.
3. Position them with no direct light source illuminating them on the camera side and a brightly lit sky behind them.
4. Start with a simple profile headshot (as illustrated above).
5. Use manual mode and take your meter reading from the sky behind your subject. Start with an ISO of 200, a shutter speed of 1/125th, and an aperture of f/8. Adjust the ISO as necessary to acquire correct exposure with that combination of shutter speed and aperture.
6. Set your file type to camera raw or .jpeg if not available.
7. Experiment with your exposure, using over and underexposure in ½ stop increments up to 2 stops from the nominal setting.
8. Study your results.
Key Thought: In full silhouette photography, underexposure will almost always work in your favor. It will darken the silhouette, while also adding density and color saturation to the background.

Photo by Adam Sherez
Let’s Recap What We’ve Learned so Far
- A silhouette is the dark shape and outline of a person or object against a brighter background.
- A silhouette is not a shadow or an object that is shadowed.
- A simple silhouette displays a shape but has little storytelling value.
- The best silhouette photography includes a storytelling element for added interest to viewers.
Time to Crank it up a Notch
1. Gather a model or two.
2. Pick out some props that could make exciting storytelling shapes, such as the fishing pole, hats, handbags, tennis racquets, a bicycle, or even a permanent structure like the dock in the opening photo for this post.
3. Plan out your story.
4. Pick a location that will put your models and props against the sky.
5. Set up your shoot time for sunset.
6. Follow the steps from the first challenge in this post.
7. Go for it!
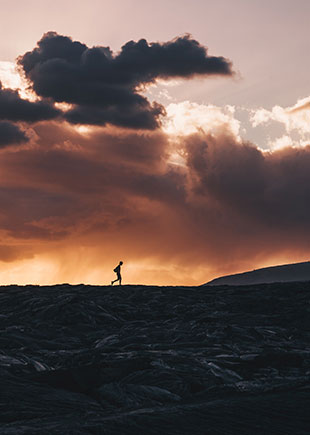
Photo by guile pozzi
The Silhouette as a Focal Point
Sometimes your silhouette will be the subject of the photograph as displayed in the first four example pictures.
However, another superpower of the silhouette is as a focal point. The image of the lone figure walking along the landscape (above) is a perfect example of a silhouette as a focal point.
The setting sun and stormy clouds over the landscape are the subjects. However, it’s the silhouette that rivets the eyes right where the photographer wants them and adds a storytelling element.
Try This!
Repeat the previous exercises, but now use the model(s) and/or props as a focal point to a landscape photo instead of the silhouette being the subject.
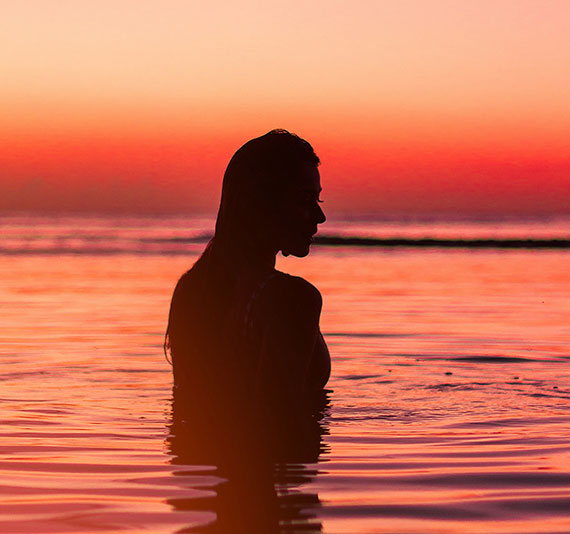
Photo by diego acosta
Are there different types of silhouettes?
We often study the topic of light. We’ve come to realize that there are various types of light and that light can be manipulated to create different effects in photography.
There are also three different types of silhouettes.
1. The Full Silhouette
2. The Semi-Silhouette
3. The Translucent Silhouette
The full silhouette is what we’ve discussed so far in this blog post. The full silhouette is a dense black shape with no visual detail facing the camera. This style of silhouette relies entirely on the shape formed to generate a viewer’s interest.
The photo of the woman standing in the water at sunset (above) is an example of a semi-silhouette.
It meets the definition of a silhouette. We have a dark shape and outline against a brighter background.
However, with a semi-silhouette, there’s some degree of detail left within the silhouetted shape. If you look deeply at the woman in the water, you’ll see her arm, her hair, and other defining features of her face.
Semi-silhouettes are much harder to produce. They take greater skill in lighting and exposure control. Many semi-silhouettes are often tweaked in post-production.
When you’re ready, give the semi-silhouette a try!
1. Follow the steps in the previous challenges with the following additions.
2. Bring a photo assistant or two. Your kids can do this!
3. Bring two pieces of cardboard that you have painted white, or get foamboard, which is a bit sturdier, at the local art supply store. The boards should be at least 3 feet wide by 4 feet long.
4. Start with a simple headshot, as displayed in the 4th photo within this article.
Note: With a semi-silhouette, underexposure is not your friend.
5. Set up your model against the sky.
6. Set your meter reading pattern to matrix or evaluative (depending upon your camera)
7. Use aperture priority and set the aperture to f/8.
8. Check the shutter speed. If it’s slower than 1/125th, then raise the ISO setting until you get a shutter speed of at least 1/125th. If the shutter speed is faster than 1/125th, then you can leave it as is.
9. Without your helpers or your reflector boards, start taking pictures and vary the exposure by ½ stop increments, go both over and under by at least 2 stops, using your exposure compensation setting on the camera.
10. Finally, move your helpers into position on either side of the model. They should hold the reflector boards, just outside of the view of the camera, with the white side reflecting the bright background light onto the dark side of your silhouetted model.
11. Again, start with a proper exposure setting and then vary it using the exposure compensation feature of your camera by 2 stops over and under in ½ stop increments.
12. Study your results.
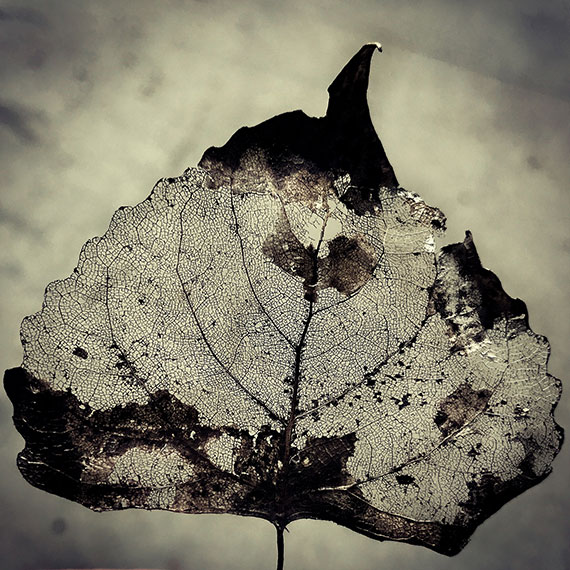
Photo by laze.life
This leaf depicts a translucent silhouette.
The leaf picture (above) meets the definition of a silhouette, but with an added dimension. When the object in silhouette isn’t wholly opaque, some of the brighter background light is going to pass through it.
This is known as translucent light.

Photo by 272447
Idea: Locate a subject you can photograph that’s part opaque and part translucent. Follow the steps in the previous challenges. This type of subject will create new levels of creativity, storytelling, and problem solving for you.
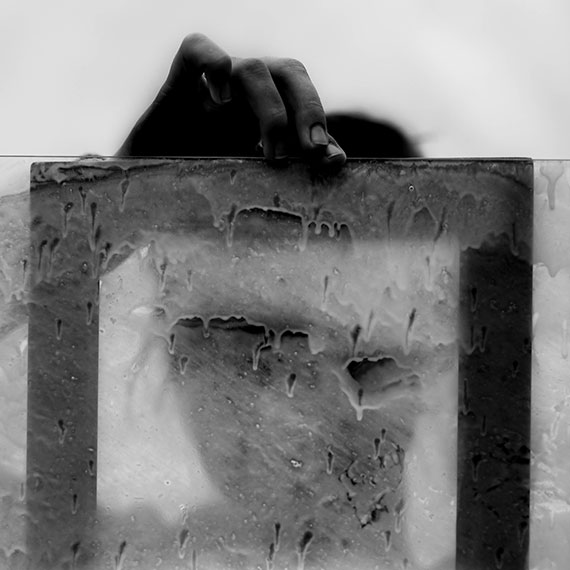
Photo by Rene Bohmer
By combining the three different types of silhouettes, you can create masterful pieces of artwork!
Are you up for this challenge?
Create a photograph where you mix all three types of silhouettes. Plus, don’t use the sky as the background. You have to find another background idea!
Post-Processing
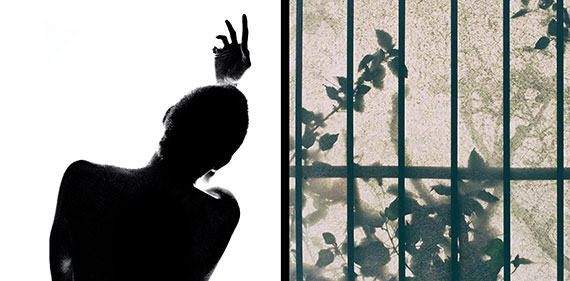
Left photo by Nathan DeFiesta, Right photo by Gabriele Diwald
Post-processing offers additional steps to your creative process.
Silhouettes lend themselves very well toward creating high contrast photos that have a poster-like lithographic film effect.
They also work exceptionally well for double exposure effects as well as texture over overlays.
The Final Challenge
Take some of the silhouettes that you created in the earlier challenges and perform some post-processing magic on them.
A silhouette often works perfectly with various actions and presets. Don’t forget to try some textured overlays.
You can use a mobile phone app for editing if you don’t have a layer editing program like Photoshop. You can import any picture into your phone, and then get creative on your silhouette images with apps like Mextures or Lens Distortions!
When you complete your mobile phone app editing, transfer your picture back to your desktop workstation.
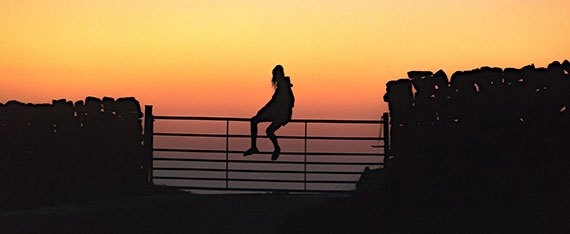
Photo by Josh Millgate
How did you do?
- Do you now understand the difference between a silhouette, a shadow, and being shadowed?
- Do you now recognize the three different types of silhouettes?
- Were you able to gain some experience and perspective on how to set up your camera and expose a silhouette picture?
- Did you accomplish a semi-silhouette photo that made you happy?
- Do you recognize the importance of adding a story element to a silhouette photo for added impact?
- Did you try some dazzling effects in post-processing?
- Did you attempt to create a photograph that included all three silhouette types?
- Did you discover how slight underexposure can really bump up the color saturation in a silhouette picture?
- Were you able to complete the challenge where you had to use a different background other than the sky?
- Are you excited about working with more silhouettes in the future?
About the Author:
Kent DuFault is an author and photographer with over 35 years of experience. He’s currently the director of content at the online photography school, Photzy.
For Further Training, Deal Ending Soon:
With summer here and readers looking for more photography practice near home, we were able to get another huge markdown on the popular Photo Action Cards. Expand your photography skills with 65 printable project sheets that will give you over 200 photography assignments, covering everything you can imagine. They are currently 88% off today if you want to try them out.
These Action Cards discuss a photographic topic, provide you with suggested considerations, and give you specific photographic assignments. They’ll kick you out of the “nest” to go have a personal discovery experience all on your own. P.S. try the coupon code picturecorrect at checkout for even more of a discount which ends soon.
Deal found here: The Photography Action Cards at 88% Off
Go to full article: Silhouette Photography Tips
What are your thoughts on this article? Join the discussion on Facebook
PictureCorrect subscribers can also learn more today with our #1 bestseller: The Photography Tutorial eBook
The post Silhouette Photography Tips appeared first on PictureCorrect.
from PictureCorrect https://ift.tt/2Yb03hz
via IFTTT


0 kommenttia:
Lähetä kommentti