perjantai 25. kesäkuuta 2021

PictureCorrect.com: Interesting Photo of the Day: Starlings Form Giant Bird

Starlings are famous for putting on a wonderful display—known as murmuration—when they flock together. They do this for a variety of reasons, including to confuse predators, create warmth at night, or exchange information. Photographer Daniel Biber sought out starlings in order to capture this amazing formation:

Photographer captures amazing bird formation created by murmuring starlings

A murmuration of starlings assumes the shape of a bird mid flight by Daniel Biber. (Via Reddit. Click image to see full size.)

A flock of starlings formed this beautiful figure of a flying bird while they were probably trying to evade a predator.

Biber captured the shot in Costa Brava in Spain after four days of scouting locations and observing thousands of birds. I’d say the image is well worth the time spent and pain undertaken. Wouldn’t you agree?


Go to full article: Interesting Photo of the Day: Starlings Form Giant Bird

What are your thoughts on this article? Join the discussion on Facebook

PictureCorrect subscribers can also learn more today with our #1 bestseller: The Photography Tutorial eBook

The post Interesting Photo of the Day: Starlings Form Giant Bird appeared first on PictureCorrect.


from PictureCorrect https://ift.tt/3dfaesU
via IFTTT

PictureCorrect.com: Photography Cliches

Photography has fashion trends, just like any other creative industry. Some enterprising soul will be playing around and come up with a new look that catches on, and before long, the world is awash in copycat photos. Some of these techniques will continue on long after the novelty has worn off and become almost a visual cliché.

Sometimes that’s okay. It’s good to be aware of the over-done photography trends—even try a couple shots of your own just to see how it works for you. Do be cautious not to let them turn into a staple of your portfolio, though. If you want to stand out as a photographer, you have to develop your own unique style.

Here are some techniques to try but be careful including in your portfolio.

Color Isolation

Selecting one element in a photograph to leave colored and gray scale the rest of the picture. This is a post-processing technique that works sometimes but tops the list of overdone visual tricks.

color isolation photo

Color Isolation

Instead, try a variation of this technique that’s a little less cliché. Isolate one color instead of one colored object. A picture where the greens stay vibrant and everything else is gray scaled. It’s a lot harder to do but can yield some very interesting results.

The Dutch Angle

Also called the Batman Angle or Dutch Tilt, this is when you hold your camera at angles between portrait and landscape in order to get more of a subject in the frame. Sometimes it works if you’re trying to challenge visual perceptions of your viewers; more often it creates a general sense of unease that’s overall unflattering.

dutch angle

The Dutch Angle

Change lenses, shift your perspective, try a lot of things before employing this technique, which was used extensively in the old Batman TV show (hence the name). It’s old, it’s over-used, and there are usually better options.

Garish Watermarks

The height of vanity combined with a healthy dose of paranoia. In these days of metadata, digital watermarks and search engines like TinEye, keeping track of image use on the Internet, it’s not all that difficult.

photo watermarks

Photo Watermarks

You don’t need to plaster your images with obscene watermarks in an attempt to get your name out. It detracts from the picture and makes you look insecure and loutish.

Over-Saturated HDR

High Dynamic Range photography is an interesting technique, but sometimes the pictures come out looking over-saturated. It’s also one of those techniques that’s been done to death. Yes, absolutely learn how it’s done. It’s a good study in controlling contrast and color depth, but don’t necessarily rely on it as a staple.

over saturated hdr

Over-Saturated HDR

If you want to be a freak about anything color related, be a freak about flesh tones. For natural looking portraits nothing beats quality natural skin tones.

Heavy Vignetting

Nothing screams “amateur hour” quite like heavy vignetting, whether it’s a genuine artifact or done in post processing (an even greater sin).

heavy photo vignette

Heavy Vignetting

Crop tighter or buy a frame. Good photography doesn’t need this type of trick to get people to focus on the subject.

Writing on Pictures

This is another distracting amateur move that not only adds little to a photograph, it robs the viewer of their ability to interpret the meaning for themselves. Instead of encouraging people to think, you’re telling them what to think.

writing on pictures

Writing on Pictures

Quality photography stands on its own and doesn’t need any help eliciting emotion from the viewer. Avoid the temptation to grab them by the nose and drag them where you want them to go.

About the Author:
Peter Timko writes for Proud Photography, an online photography school.


Go to full article: Photography Cliches

What are your thoughts on this article? Join the discussion on Facebook

PictureCorrect subscribers can also learn more today with our #1 bestseller: The Photography Tutorial eBook

The post Photography Cliches appeared first on PictureCorrect.


from PictureCorrect https://ift.tt/3wWX6Aw
via IFTTT

torstai 24. kesäkuuta 2021

PictureCorrect.com: Bird Photography Tips & Techniques

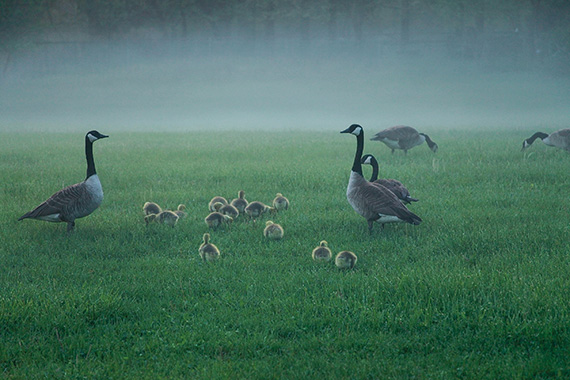
Bird photography is one of the most popular types of photography—and for good reason. There are few things as stunning to look at as a cardinal perched on a tree limb blanketed in snow, or as adorable as a group of baby geese taking their first steps in the springtime sun. Because of the size and skittishness of most birds, there are some things you can do to increase your chances of getting sharp and, more importantly, striking photographs.

geese

Geese in Fog

You’ll want to plan ahead for an afternoon (or a whole day!) of shooting, taking into account what type of birds you’ll be looking for and their size. Will you be looking for pictures of your birds perched in branches or watching for the landing of a water bird? Are there flock formations you wish you capture or behaviors you’d love to see? A little research ahead of time can help you be in right spot at the right time. Let’s talk gear first, and then we’ll get to some tips for composition.

If you’d like to get close to filling the frame with a small bird from more than 10 feet away, you will need to have a lens with at least a 300mm reach in 35mm terms (400–600mm is ideal). You may think that you have to spend $1,000 or more on a lens to get to 300–400mm, and that would be true if you want a fixed focal length of 300 or 400mm, or something like a 100–400mm f/4.5–f/5.6 lens. However, you can find some excellent 70–300mm and similar zoom lenses for DSLR and mirrorless cameras from Canon, Nikon and other brands for about $300–$700. When converted to 35mm terms, you will often reach 600mm (for example, the Micro Four Thirds system has a 2x crop factor, so a 70–150mm lens will produce a similar field of view to a 140–300mm lens on a 35mm camera). And, some “superzoom” cameras without interchangeable lenses, like the Nikon Coolpix B700 (under $500, includes the camera and a built-in 24–1440mm equivalent lens), can do a very impressive job when photographing birds and sporting events.

You’ll also want a lens that’s fast enough. That means it should have a maximum aperture (the lowest f-stop that can be used) that’s not over about f/4.5. That should allow you to keep your ISO in the ISO 400–2000 range while keeping the viewfinder image relatively bright (assuming you are using the viewfinder of a DSLR). Electronic viewfinders and live view mode with a magnified hood on DSLRs and other camera types generally provide good brightness, but you may find those options very difficult when tracking and trying to focus on birds, depending upon how small the birds are, how fast they are moving, and the quality of the LCD or EVF. The ISO you choose should be low enough not to have unwanted noise, and the number will depend on your camera, how much light is available (the more light you have, the lower an ISO value you can use) and whether you shoot in Raw (highly recommended!).

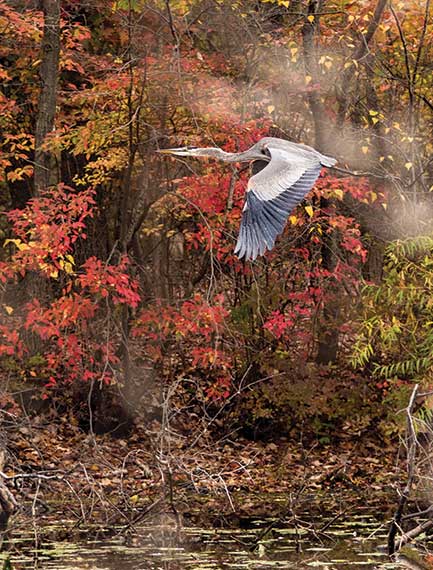
heron

Heron

A teleconverter is like a magnifying glass that is placed between your camera body and lens, and can be very helpful when trying to photograph birds. With 1.5x teleconverters, you will lose one exposure value (EV) of light, and with 2x teleconverters, you will lose two EVs. You’ll want to play around with it a bit to see the effect on your images.

Two of the advantages of using teleconverters are that you can avoid the need for buying (and carrying) an extra lens, and you can often achieve focal lengths over 500mm in 35mm terms with a lens/teleconverter combination that weighs much less than most long lenses. I should add that not all lens/AF teleconverter combinations will allow autofocusing. Research this first before making a purchase. I consider autofocus a necessity when photographing birds because it is very difficult to adjust focus manually when trying to track a bird in the air.

Locations to Consider

Birds in Trees

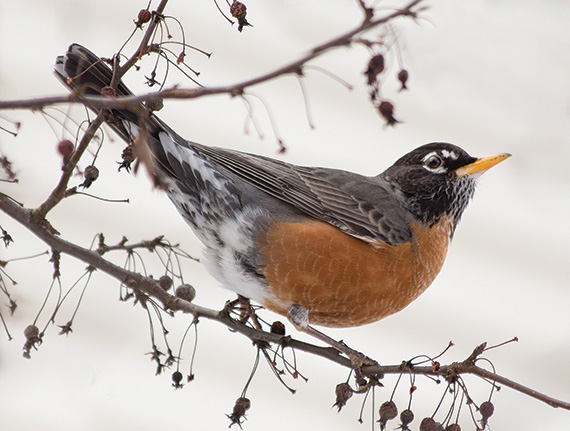
For tree photos, it’s often nice to zoom in just far enough on the bird(s) to include some of the foliage, flowers or interesting web of branches in the area. It’s also great to capture a series of images as a bird leaves a tree. To do that, set your camera to Continuous Shooting mode (a.k.a. Burst mode), and if you are lucky, you will capture a few images just as the bird leaves the branch or other perch.

robin

Robin in a Tree

Birds and Water

Look for panoramic photo opportunities of long lines of birds in a formation on the water. Also look for reflections in the water, either of the birds themselves, or of clouds, trees, etc.

Birds in Flight

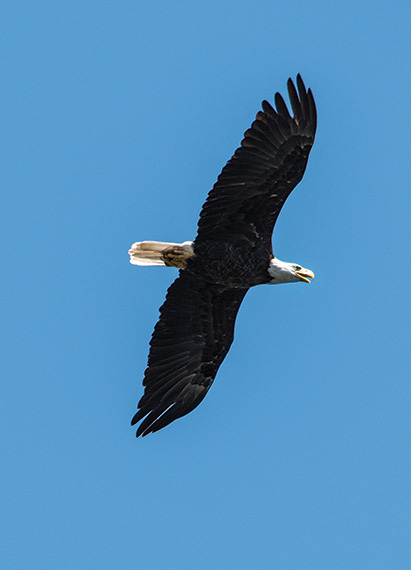
It’s probably the most challenging type of bird photography, but there are few things as graceful looking or awe-inspiring as a bird in flight. Try using back button focus so that you won’t have to recompose as branches move around the bird. If the birds are small and will be moving quickly, consider turning on all AF points because you can more easily “catch” a bird as it enters your frame. If there are multiple birds and you want to retain more control over which ones are in focus, choose manual single point focus (usually with the center square highlighted). A good Autofocus mode for this type of photography is the mode that keeps adjusting the focus point as the subject moves (AI Servo on Canon and AF-C on Nikon).

eagle

Eagle in Flight

When composing shots of birds, don’t forget the rule of thirds; part of the beauty of a bird is the sense of motion we feel when watching them, so don’t let your photos feel static by putting the bird in the center of the frame. Also, it may be tempting to zoom in as much as possible for detail, but cropping too closely can make the photo feel cramped, especially if the bird is in flight. The best thing you can do for your photography is play around, so don’t forget to experiment, and have fun!

About the Author:
Andrew Darlow, author of Focus and Filter, is a photographer, writer, and digital imaging coach based in the New York City metro area. His articles, tips, and images have been included in many publications, websites, books and on-air programs, including American Photo, Animal Planet, People Magazine, and Women’s World Magazine.


Go to full article: Bird Photography Tips & Techniques

What are your thoughts on this article? Join the discussion on Facebook

PictureCorrect subscribers can also learn more today with our #1 bestseller: The Photography Tutorial eBook

The post Bird Photography Tips & Techniques appeared first on PictureCorrect.


from PictureCorrect https://ift.tt/3dveAwf
via IFTTT

PictureCorrect.com: Interesting Photo of the Day: Starry Skies Over the Cascades

Anyone who’s visited the American Pacific Northwest can attest to the beauty of the Cascade Mountains. In a stunning pair of images, photographer Steve Schwindt proves that the majesty and grandeur of the landscape ceases to disappear once the sun sets below the horizon:

three fingered jack mountain moonset

Moonset behind Three Fingered Jack in Oregon (Via Imgur. Click image to see full size.)

Using a Canon 5D Mark II equipped with a Rokinin 24mm lens, Schwindt seized the beauty of the wilderness outside of his hometown of Portland, Oregon while on a backpacking trip. Using 11 exposures to reduce camera noise and bring out darker details in the meadow that lies at the foot of an inactive volcano known as Three Fingered Jack, he composited the consecutive shots with the help of Lightroom and Photoshop.

Pleased by the final outcome, he replicated the technique to capture one of the highest peaks in North America, Mt. Rainier:

mt rainier milky way

Mt. Rainier (Via Imgur. Click image to see full size.)

Although the photographs feature similar subject matter beneath equally stunning skies, each evokes a unique mood that’s difficult to turn away from.


Go to full article: Interesting Photo of the Day: Starry Skies Over the Cascades

What are your thoughts on this article? Join the discussion on Facebook

PictureCorrect subscribers can also learn more today with our #1 bestseller: The Photography Tutorial eBook

The post Interesting Photo of the Day: Starry Skies Over the Cascades appeared first on PictureCorrect.


from PictureCorrect https://ift.tt/2FDONSO
via IFTTT

PictureCorrect.com: Capturing Aurora Borealis on Canon DSLR Cameras

After the solar eclipse in Idaho, I couldn’t resist continuing my “long-service leave” and returning to Canada’s Yukon Territory for some early-season aurora hunting. I had just two and half weeks (one New Moon cycle), based with my friends and supporters Andrea and Florian Lemphers at Shallow Bay, north of the capital, Whitehorse.

I had with me a Canon 5D Mark IV and a pair of Canon 6D Mark II cameras (one of which was on loan from Canon Australia). Clear skies were always going to be the biggest challenge, especially during the fall, but I hit four clear nights in a row from the start, so luck seemed to be on my side. I also managed to peg some beautiful cold clear nights and sweet aurora activity at clutch locations I explored along the way. My favourites were North Canol Road and Tombstone Park on the Dempster Highway.

With the 5D Mark IV, I captured 1080p video at the camera’s maximum 32,000-ISO setting. Super-fast Canon and Sigma ART wide lenses didn’t hurt either. The video files as generated are pretty noisy (applying noise reduction in-camera on the fly is presumably too taxing for the processor?), but a simple application of Neat Video temporal noise reduction in After Effects made a big difference to the viewing quality of the footage above.

Most of these clips were captured on my first night, when the aurora went nuts for just a few minutes, which goes to show how you have to be prepared and ready to roll from the start. There’s no doubt that pushing the ISO to the max and applying heavy noise reduction softens the image crispness, but being able to show the aurora in real-time (how crazy is that!?) is still pretty cool.

I did also capture some live 4K video, but the combination of the 1.7x crop and significant reduction in maximum allowable ISO speed meant the results weren’t as impressive. However, with the extra pixel detail, noise reduction performed very well on these files. If I had another two weeks and some more brilliant aurora displays, I’d definitely play with the 4K feature again with a super-wide lens to compensate for the 4K crop-factor.

One of the selling points of the Canon 6D Mark II has been the 4K timelapse video feature. I was very keen to experiment with this under the Yukon’s Northern Lights. I’m used to capturing RAW file sequences and rendering them, but there is a lot to be said for the fun and efficiency of capturing direct-to-4K timelapse in-camera. (The 4K file is available to download and view via Vimeo, which I highly recommended for the best quality.)

When I wasn’t shooting 4K, with my four cameras, I captured 2.5 TB of RAW timelapse in just over two weeks. That creates such a headache in terms of data storage and processing power that I haven’t even started editing that footage yet. In contrast, editing this 4K video from the 6D Mark II required nothing more than throwing the clips together in Premiere Pro with just a slight brightness/contrast tweak for some punch. No noise reduction has been applied to the files out of the camera. It was a lot of fun capturing these clips—and being able to see the timelapse video result—in-camera immediately. Motivation in the field like that really helps keep you going while your fingers freeze at 2 a.m.!

The bright and fast sequences in this video were captured at one frame per second, the fastest the camera allows in 4K timelapse (resulting in footage 25 times real speed). Some of the quieter moments I captured at one frame every two to three seconds, as longer exposures per frame were required. Again, super-fast Canon and Sigma ART lenses were critical for this outcome.

There is also an auto-exposure feature in the 6D Mark II timelapse settings intended for day-to-night transitions, which I thought may be helpful for adjusting to the rapidly varying brightness of aurora displays. In practice, I found it easier and more reliable to use fixed exposure, but I’d experiment further with this feature if I had more time; it is surprisingly hard to concentrate on details like this when the aurora keeps fading and then pulsing back into action without warning.

Thanks to my talented friend, cellist and composer Kristin Rule, for the music, and to my hosts, Andrea and Florian Lemphers, whose support made all of this possible.

For Further Training:

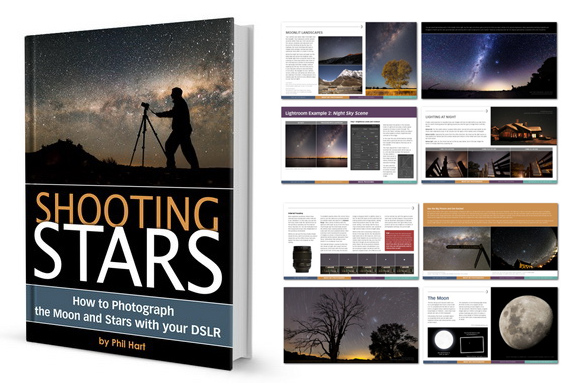
Capturing star trails and other night sky scenes is truly one of the most technically difficult forms of photography. This popular in-depth eBook, Shooting Stars, written by astrophotography award winner Phil Hart, will show you how to shoot your own stunning images of the moon and the stars with just your digital SLR and a tripod.

shooting stars ebook

Shooting Stars In-depth Tutorial eBook

We were able to arrange an exclusive 50% discount for PictureCorrect readers which ends soon. It also carries a 90 day happiness guarantee, if you are not satisfied just let us know and we will give you a full refund so there is no risk in trying it.

Deal found here: Shooting Stars – How to Photograph the Moon & Stars at 50% Off


Go to full article: Capturing Aurora Borealis on Canon DSLR Cameras

What are your thoughts on this article? Join the discussion on Facebook

PictureCorrect subscribers can also learn more today with our #1 bestseller: The Photography Tutorial eBook

The post Capturing Aurora Borealis on Canon DSLR Cameras appeared first on PictureCorrect.


from PictureCorrect https://ift.tt/2T33uHE
via IFTTT

keskiviikko 23. kesäkuuta 2021

PictureCorrect.com: Music Photography: Tips on How to Get Started

Music photography is one of the best jobs in the world for someone who loves music. Imagine being at the front of a concert watching your favourite artist while being paid for it. Photographing live music is one of the most rewarding jobs there is, and the energy you get from the music and the ambiance, and the reward of capturing a moment in time, is something that can’t be explained until you experience it.

This article is for the photographers who want to get involved with music and concert photography but don’t know where to start.

beginner's guide to music photography

Photo by James Mathews

Basic Music Photography Kit

Not everyone can afford the latest camera equipment, but that’s OK. To photograph concerts, you don’t need to have the best equipment in the world—at least when you’re getting started.

I began my photography journey many years ago with a Canon 1000D and an 18-55mm kit lens, and if you have used a kit lens you will know they struggle in low-light conditions such as music venues. A kit lens cuts your starting costs down, but I wouldn’t recommend it—it’s too difficult to capture sharp images in dark settings.

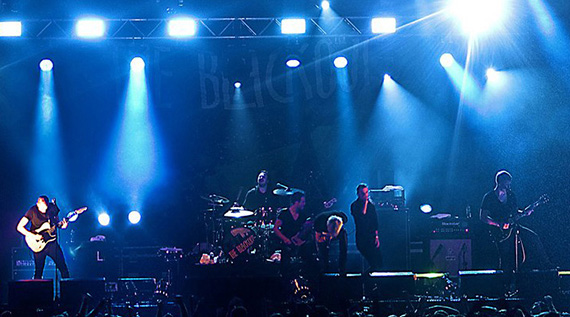
When most people think of concert photography they think of photographers in stadiums and huge venues with impressive lighting rigs, but when you first start as a music photographer, you will be shooting gigs in small dark venues.
beginner's guide to starting as a concert photographer

Photo by James Mathews

You may be thinking that you can just pop up your flash and start firing it off—but there are two problems with that.

The first is that your photos, taken with a regular flash, will often look terrible. They will lack depth and will show shadows in all of the wrong places. You would get much better pictures by using a portable Speedlight flash, but this brings us to the second problem: most venues and artists won’t allow you to use flash photography, as it’s very distracting. Often security or the venue manager will tell you this before a show.

To get around this problem, you are going to need a DSLR camera and lens that are “fast”.

A fast lens is something you will hear often if you hang around enough photographers and photography forums. It refers to any lens with a large aperture. The larger the aperture, the faster the lens and the lower the f-number. For example, the kit lens mentioned above was an f/3.5-5.6, which is considered a slow lens.

Fast lenses are expensive, which is problematic for newcomers to photography. However, Canon, Nikon, Sony and many of the other camera manufacturers produce a relatively inexpensive 50mm f/1.8 lens that is perfect for concert photography—it’s cheap and lets a lot of light in.

As you become a more seasoned concert photographer, you may want to add a 24-70mm f/2.8 lens to your arsenal, as you will generally be farther away from artists when you shoot bigger shows.
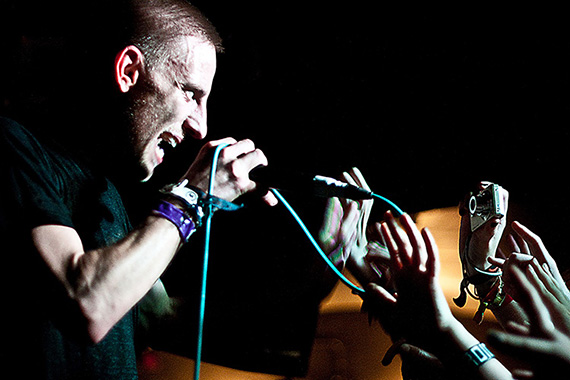
beginner's guide to concert photography

Photos by James Mathews

Choosing a camera is going to be a personal choice of yours and there’s no right or wrong answer. Personally, I prefer Canon cameras, but you may have a preference for Nikon or Sony.

Other Music Photography Must-Haves

When photographing concerts, a lot of your time is going to be spent in transit. Because of this, you should invest in a good camera bag that will keep your camera equipment safe. I’d also recommend choosing a bag that doesn’t look like a typical camera bag, so you mitigate the odds of someone trying to steal your gear.

Inside your camera bag, you should have a few spare batteries and memory cards, as it’s very easy to use up both in a short period. A nice bit of kit is a battery grip that makes it easier when shooting vertically and expands your battery life. But if you’re on a budget, you don’t strictly need one.

Getting Access to Shows

The saying “everyone starts somewhere” is very true, especially in music photography. I can’t count the number of bands I have photographed that had fewer than 10 people in the crowd. But don’t let that discourage you.

Take your time in these small venues to learn the craft of photography and use it to build up connections with other photographers and bands. This could lead to paid work in the future.
amateur photographer guide to concert photography

Photo by James Mathews

To get access to venues all you need to do is contact the venue and ask them can you shoot their show. Often they will ask if the pictures are going to be used anywhere and if you have a website you can send them there.

As a new photographer without a portfolio, you will need to pay the venue for entry and they will let you access the photo pit. As you photograph more shows and expand your portfolio, you pay less often and get given passes to shows.

You can email venues and bands in advance to get a pass in return for some of your photos, but as you become more seasoned in your craft, you shouldn’t give your images away for free like that.

Here’s a great tip I can share with you that has worked well over the years: if you want to photograph a well-known artist, but you’re just starting out, try contacting the supporting acts. They’re far more likely to get you a photo pass, as it gives them exposure while you get to stay and photograph the larger artists later on.

If a venue or artist doesn’t respond by email, make sure to contact them on their social media channels. Their manager will often run these and can be very responsive to press requests.

Music Photography Tips

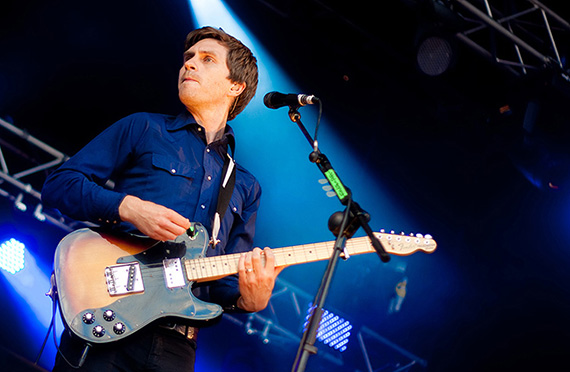
As mentioned above, a fast lens is vital for music photography, as you’re going to need as much light entering your lens as possible to shoot at the quickest shutter speeds and capture sharp images.
beginner photo tips for music concerts

Photo by James Mathews

You should play around with your camera settings and experiment to see what works well for you and gain your style. With that said, when you first start, all the options on your camera can seem confusing.

If I forgot everything I knew about photography and had to start again tomorrow, I would increase the ISO level on my camera to the point where my photos are not grainy (maximum ISO 800 on entry-level DSLRs) and set the camera to shoot in aperture priority mode (f/1.8 on the 50mm) and go from there.

The settings above will allow the camera to choose its shutter speed to capture any image.

Trying to shoot in manual mode as a beginner, in my opinion, is going to cause too much frustration, since lighting conditions change so quickly during concerts. Start somewhere simple, but not fully automatic.

Shooting in full auto allows the camera to do all of the thinking for you, and doesn’t allow you to think and progress as a photographer.

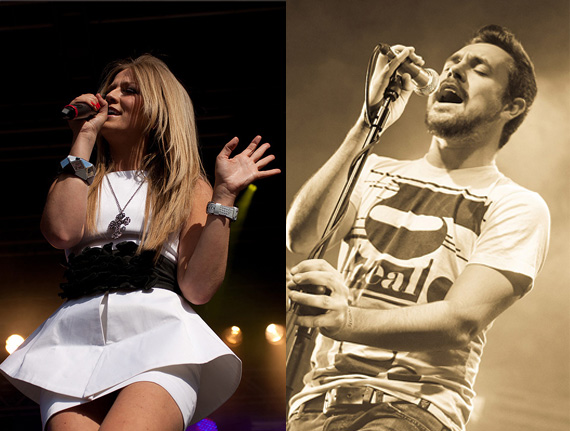
music concert tutorial photos

Photo by James Mathews

As a beginner, you are going to overexpose and underexpose your photos. The best way of fixing this is by shooting your photos in RAW format. This way, you have more control over the exposure in post-production, but note that it will take up more space on your memory card—so bring along spares.

Building your Brand

If you want to get paid as a photographer, you need to build your brand. I’ve had companies such as Getty reach out to me in the past to shoot shows for them because they have seen my images online.

My recommendation would be to set up your social media accounts as soon as you have photographed a few shows. Don’t add all of your photos on them—that looks amateurish—but select the best images you have and upload them.

If your time is limited and you can’t manage all the social media channels out there, I would pick one and stick with it. Instagram is an obvious choice for photographers, and once you build up a following, you will get artists and their managers reaching out to you to cover their shows.

Embracing Chaos

If you find it hard to cope when everything around you is happening at a million miles an hour, concert photography is going to be difficult. My recommendation: embrace the chaos.

You will make mistakes, both as a beginner and once you become more experienced. That’s just part of the job. I’ve run out of battery mid-shoot, and I once filled a memory card without a spare so I ended up standing around for the next several minute pretending to take photos.

My advice would be not to panic, and just to go with the flow. If you miss a vital shot, it’s not the end of the world. Take this opportunity to learn from your mistakes so you can become a better photographer.

About the Author:
When James Mathews isn’t photographing artists you can find him at bouncecolor.com where he helps other photographers and videographers edit their content quickly and professionally through preset assets.


Go to full article: Music Photography: Tips on How to Get Started

What are your thoughts on this article? Join the discussion on Facebook

PictureCorrect subscribers can also learn more today with our #1 bestseller: The Photography Tutorial eBook

The post Music Photography: Tips on How to Get Started appeared first on PictureCorrect.


from PictureCorrect https://ift.tt/3dafXQB
via IFTTT

PictureCorrect.com: Interesting Photo of the Day: Lava Leading Line to Volcano

Fagradalsfjall in Iceland has recently been an area of attraction for many, and for good reason. A volcanic eruption began there on March 19, 2021, which has attracted thousands of tourists—especially photographers. If you haven’t come across any image of what’s been happening, photographer Ryan Fitzsimons has a delightful treat for you:

erupting volcano at Fagradalsfjall Iceland

“Erupting Fagradalsfjall Volcano in Iceland” by Ryan Fitzsimons (Via Reddit. Click image to see full size.)

Fitzsimons used a drone to photograph the magnificent event from this perspective. And while getting even a single shot was a challenge, this image is a five-image panorama. Can you imagine the level of risk he had to take? You don’t have to imagine it: he describes it for us.

“What made it difficult is that the lava river is hot enough to melt the drone if you get this low to it. So I had to hover higher up, wait for the eruption and lower quickly to get the 5 shots.”

Difficulties aside, the beauty of this image is something that you cannot simply ignore. The lava river works brilliantly as a powerful foreground element and a leading line to draw us right into ground zero. Then there’s the erupting volcano, with lava spewing several feet up in the air, and the clouds of gases and ash add further drama by reflecting the red glow of the lava.

Would you dare fly your drone in such an intense situation? This image is surely worth the risk.


Go to full article: Interesting Photo of the Day: Lava Leading Line to Volcano

What are your thoughts on this article? Join the discussion on Facebook

PictureCorrect subscribers can also learn more today with our #1 bestseller: The Photography Tutorial eBook

The post Interesting Photo of the Day: Lava Leading Line to Volcano appeared first on PictureCorrect.


from PictureCorrect https://ift.tt/3qo6V8c
via IFTTT