sunnuntai 4. lokakuuta 2026

PictureCorrect.com: The Most Popular Focal Length for Landscape Photography

When it comes to landscape photography, choosing the right focal length is crucial for capturing breathtaking and expansive scenes. The most popular focal lengths for landscape photography typically fall within the wide-angle range, as they allow photographers to include as much of the scene as possible within the frame. Here’s a look at why certain focal lengths are favored and how they impact landscape photography.

The 24mm focal length has become the gold standard in landscape photography for several reasons, contributing to its popularity among enthusiasts and professionals alike. This preference stems from its ability to provide a wide field of view, capturing vast landscapes in a single frame without the extreme distortion often found with wider lenses. It offers a natural perspective that closely mirrors the human eye, making scenes appear expansive yet true to life.

Related note: for help mastering camera settings, check out the Autumn Kickoff Sale Today 🍂 on our Fundamental Camera Cheat Sheets

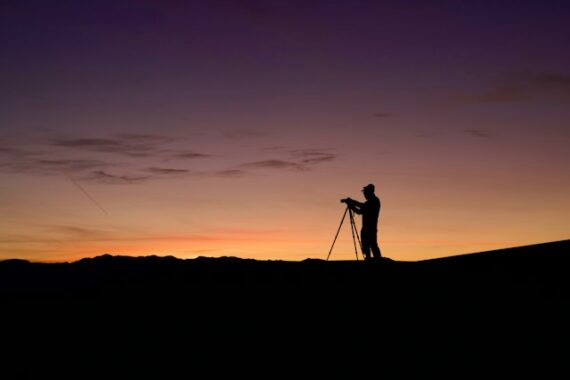
24mm lens

Photo captured by Jakob Owens

Photographers favor 24mm because it excellently balances foreground interest with the depth of the background, creating dynamic and engaging compositions. Its versatility in various settings, from mountain ranges to urban landscapes, further cements its status as a preferred choice. The 24mm lens, by offering this unique blend of wide-angle perspective and minimal distortion, has become an indispensable tool for capturing the beauty and grandeur of the natural world, making it a clear favorite in the landscape photography community.

Wide-Angle Lenses (24mm to 35mm)

Within the wide-angle category, lenses ranging from 24mm to 35mm are particularly beloved for their versatility. These focal lengths capture a broad field of view, making them ideal for including sweeping vistas and dramatic skies in the composition. A 24mm lens is especially favored for its balance, as highlighted above, but even moving towards 35mm can offer a slightly tighter composition while still retaining a wide perspective.

Ultra-Wide Lenses (14mm to 24mm)

For photographers aiming to capture an even wider perspective, ultra-wide lenses ranging from 14mm to 24mm are the go-to choice. These lenses excel at emphasizing foreground elements and creating a profound sense of depth and scale. However, they may introduce noticeable distortion, which can either be used creatively or need to be corrected in post-processing.

Standard to Short Telephoto Lenses (50mm to 100mm)

Beyond the realm of wide and ultra-wide lenses, standard to short telephoto lenses (50mm to 100mm) offer a unique perspective in landscape photography. A 50mm lens provides a view close to that of the human eye, offering compositions with minimal distortion and a natural feel. Lenses in the 70mm to 100mm range are excellent for isolating subjects, compressing scenes, and highlighting specific features of the landscape, offering a different approach to capturing nature’s beauty.

Summary:

The choice of focal length for landscape photography depends greatly on the photographer’s vision, the landscape being captured, and the desired outcome. While wide and ultra-wide lenses are popular for their capacity to envelop expansive scenes, longer focal lengths provide unique perspectives and compositional opportunities. The 24mm lens, in particular, stands out for its unparalleled ability to balance the vastness of landscapes with realistic perspectives, making it a favorite among landscape photographers. Experimentation with different focal lengths can unlock new and exciting ways to depict the natural world, continually enriching the art form of landscape photography.

For Help Mastering Camera Settings:

Have you ever wanted to photograph an amazing moment but missed the shot because you didn’t know the right camera settings to use? That’s where these fundamental Camera Cheat Sheets come in. They are currently 80% off for a 🍂 Autumn Kickoff Sale if you want to check them out.

camera cheat sheets

Whether you’re a seasoned professional or just starting out, photography cheat sheets can be a valuable resource for improving your skills and taking your photography to the next level. The perfect companion for any photographer. Print one out whenever you need it.

Offer ending soon: The Fundamental Camera Cheat Sheets 🍂 Autumn Kickoff Sale


from PictureCorrect https://ift.tt/2uStlBA
via IFTTT

perjantai 2. lokakuuta 2026

PictureCorrect.com: The Simple Manual Mode Formula for Night Photography

Night photography can make Manual Mode feel more complicated than it really is. During the day, you can often change a setting and immediately see what happened. At night, exposures may last several seconds, autofocus can struggle, and the camera’s meter can become less useful.

The solution isn’t to memorize dozens of settings. Instead, give each of the three exposure settings one specific job. Once you decide what matters most in the scene, the settings become much easier to choose.

Related reminder: Want to master manual mode faster? Only 1 day left for the October PictureCorrect Premium Special Enrollment 🎉

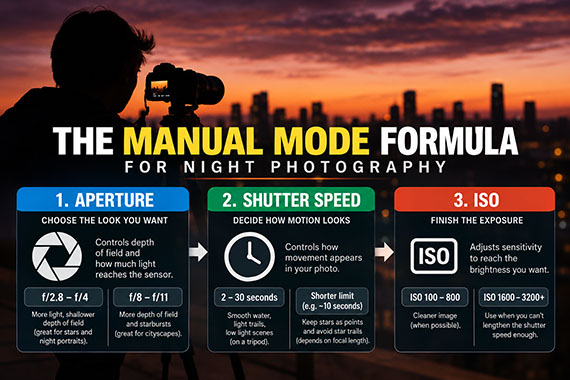
night formula

Photo captured by Steve Gribble

Step 1: Choose Your Aperture for the Look You Want

Start with aperture because it controls both depth of field and how much light reaches the sensor.

For many nighttime scenes, a good starting point is:

f/2.8 to f/4

This works especially well for stars, night portraits, and scenes where gathering light is important.

But if you’re photographing a cityscape and want more of the scene sharp—or you want pronounced starbursts around streetlights—you might use:

f/8 to f/11

Don’t choose the aperture simply because it makes the exposure brighter. Choose it based on the depth of field and visual effect you want.

Then leave it alone unless the scene changes.

Step 2: Set the Shutter Speed Based on Motion

Next ask yourself:

What is moving, and how do I want that movement to look?

If nothing important is moving and your camera is on a tripod, you have enormous freedom. A shutter speed of 2, 5, 10, or even 30 seconds may work perfectly well.

If cars are moving through the scene, a longer exposure can transform their headlights and taillights into streaks.

If people are walking through the frame, several seconds may make them blur—or even nearly disappear.

Stars are different. If you want stars to remain points rather than becoming trails, your maximum exposure time depends on factors including focal length, sensor size, and resolution. This is where rules such as the 500 Rule can provide a rough starting point, although checking your stars at high magnification is more reliable.

The important idea is simple:

Shutter speed controls what happens to movement.

Choose it intentionally.

night formula

Step 3: Let ISO Finish the Exposure

Now you’ve made the two creative decisions.

Your aperture controls depth of field.

Your shutter speed controls motion.

That leaves ISO.

Instead of randomly changing all three settings until the exposure looks right, increase ISO until the image reaches the brightness you want.

For example, you might begin with:

Aperture: f/2.8
Shutter speed: 10 seconds
ISO: 800

Take a test shot.

Too dark?

Try ISO 1600.

Still too dark?

Try ISO 3200.

You now have a controlled process instead of guessing.

And if you’re using a tripod and your subject isn’t moving, you may have another option: lengthen the shutter speed instead of raising ISO. That can give you a cleaner image.

You’re not searching for a mysterious combination of “correct” settings.

You’re making a few deliberate decisions in a logical order—and then using a test shot and histogram to refine them.

Once you start working this way, night photography becomes far less about guessing settings and much more about deciding how you want the photograph to look.

Premium Subscribers Are Already Ahead:

Every week, more photographers are subscribing to PictureCorrect Premium (special October Enrollment discount going on this weekend 🔥) to level up their craft — and you could be next. Subscribers receive expert-led tutorials, creative challenges, and printable exercises that make each lesson stick.

october enrollment

Whether you’re working to master manual control, advanced lighting, or composition, Premium gives you the structure to make steady progress. The special $1 intro offer is ending soon, and once it’s gone, so is your chance to lock in early access.

Only 1 day left: October Enrollment Special Intro Offer


from PictureCorrect https://ift.tt/nD4w5sY
via IFTTT

torstai 1. lokakuuta 2026

PictureCorrect.com: The Fall Photography Composition Mistake That Makes Photos Feel Cluttered

Fall can be one of the most exciting times of year to photograph. Color is everywhere—red leaves, golden trees, winding paths, textured branches, and patches of warm afternoon light. But all that visual interest creates a surprisingly common problem:

There’s too much competing for attention.

A scene that looks beautiful to your eyes can become a cluttered photograph because your brain is very good at ignoring distractions. Your camera isn’t. It records every branch, bright leaf, patch of sky, and background object with equal enthusiasm. The solution is often simplification.

Also remember that an 🍂 Autumn Sale for the Cheat Sheets on all the Compositional Elements is ending soon!

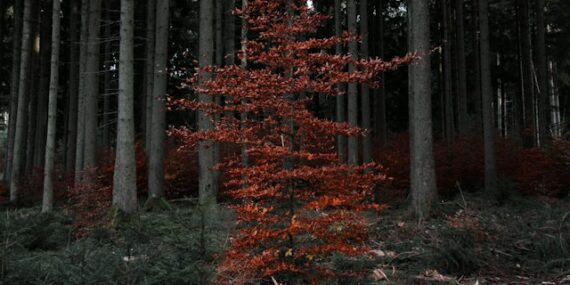
fall colors composition

Photo captured by Tứn Đi Cùng

Decide What the Photo Is About

Before taking the picture, ask yourself:

What do I want someone to notice first?

Maybe it’s one brilliant red tree. Maybe it’s a person walking beneath yellow leaves. Maybe it’s a winding trail disappearing into the woods.

Once you’ve identified that subject, everything else in the composition should either support it or get out of the way.

If a branch, bright patch of sky, or colorful object is competing with your subject, change your composition.

Watch the Background

Fall backgrounds can become especially chaotic because they’re often filled with hundreds of small leaves, branches, highlights, and colors.

Sometimes moving only a few feet can completely change the photograph.

Try stepping left or right, getting lower, moving closer, or using a longer focal length. Look for an angle that places your subject against a relatively simple area of the scene.

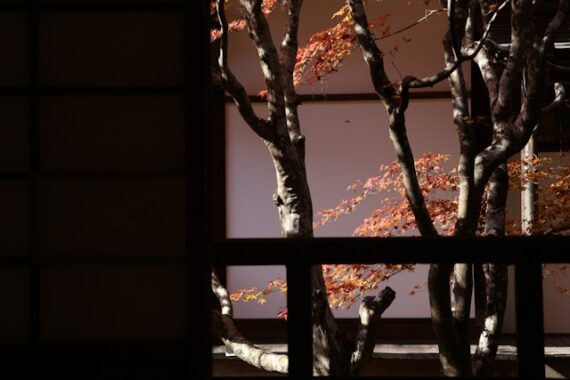
tree composition

Photo captured by Jens Aber

You don’t necessarily need a completely blurred background. You just need one that doesn’t fight for attention.

Be Careful With Bright Areas

Your eye naturally gravitates toward bright parts of a photograph.

That makes small patches of white sky between branches particularly distracting.

Before pressing the shutter, quickly scan the edges and corners of your frame. If you see a bright opening in the trees or another distracting element, slightly adjusting your position may eliminate it.

This tiny habit can dramatically improve woodland and fall foliage photographs.

Don’t Try to Include Everything

When you encounter an incredible autumn landscape, the instinct is often to use a wide-angle lens and capture the entire scene.

But sometimes the better photograph is hidden inside the larger scene.

Instead of photographing an entire hillside, isolate three colorful trees.

Instead of photographing the entire forest, concentrate on one winding path surrounded by leaves.

Instead of photographing the whole tree, photograph a single branch catching beautiful light.

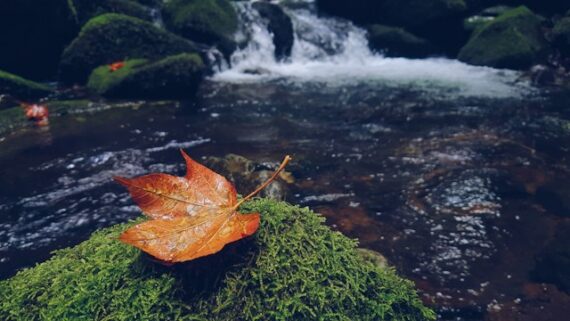
tree branch light

Photo captured by Yanhao Fang

Removing elements can make your subject more powerful.

Try This Simple Fall Composition Exercise

The next time you’re photographing fall colors, find a scene you like and take your first photograph normally.

Then challenge yourself to make three progressively simpler versions.

Move closer. Change your angle. Remove distracting sky. Isolate one tree. Use a longer focal length. Keep eliminating elements until only the strongest parts of the scene remain.

Compare the photographs afterward.

You may discover that the image with the least information communicates the most.

That’s one of the great paradoxes of composition: when autumn gives you everything to photograph, sometimes the best thing you can do is show less.

For Further Training on Composition:

Do you ever have trouble remembering all the elements of composition? These popular Composition Cheat Sheets have you covered. With clear, concise information on all the essential elements of composition, you’ll never be unprepared again. They are currently 81% off today for an 🍂 Autumn Sale if you want to check them out.

composition cheat sheets

Composition Cheat Sheets (see all the elements covered)

The perfect companion for any photographer. Print one out whenever you need it. These cheat sheets consolidate crucial composition-related information, allowing you to concentrate on what truly matters – composing striking photographs.

Autumn sale ending soon: The Composition Cheat Sheets at 81% Off


from PictureCorrect https://ift.tt/yahIqRG
via IFTTT