keskiviikko 10. marraskuuta 2021

PictureCorrect.com: Exercise: Photographing a Landscape 5 Different Ways

It’s one thing to take photographs of things, but quite another to take photographs about them. Taking photographs of something is the equivalent of simply pointing a camera and pressing the shutter button. When it comes to taking a photograph about it, many other considerations need to be made. In today’s video, landscape photographer James Popsys talks about this photography process and shares a relevant exercise that helped him make his photos better over the years.

An effective way to make your images more powerful is to take photographs about your subjects, rather than of them. When you take this approach, you start looking for ways to add more context to your images and even tell stories. Popsys shares his method, wherein he shoots a scene (or a subject) in five different ways that help him establish context.

The idea is to photograph not only the subject, but also have supporting elements that add value and context. An important point that Popsys raises is to ensure that the supporting element does not overshadow the main subject. Supporting elements should not compete for attention. He also demonstrates how taking a step back and building a path toward the hero element can tremendously improve the overall image.

A very interesting idea that Popsys shares is to replicate the feeling you get while being around the subject. If you feel calm, depict peacefulness in your image. If you feel thrilled, add more energy to your composition—and so on.

Watch the complete video and be sure to give this method a try. By having one main character, and using other elements to support it, you can easily level up your photography game.

For further training: The Complete Landscape Photography Guide


Go to full article: Exercise: Photographing a Landscape 5 Different Ways

What are your thoughts on this article? Join the discussion on Facebook

PictureCorrect subscribers can also learn more today with our #1 bestseller: The Photography Tutorial eBook

The post Exercise: Photographing a Landscape 5 Different Ways appeared first on PictureCorrect.


from PictureCorrect https://ift.tt/3qzh9Eu
via IFTTT
tiistai 9. marraskuuta 2021

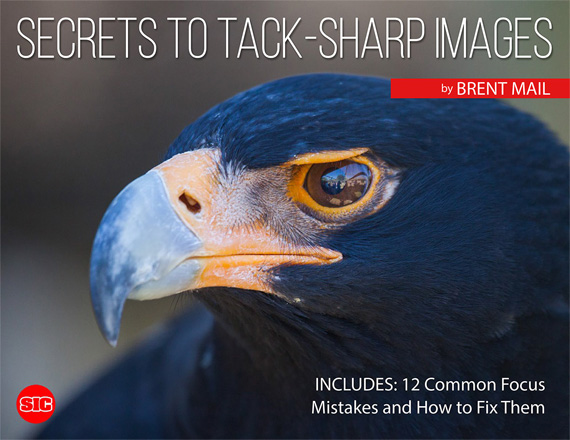
PictureCorrect.com: Secrets to Tack-Sharp Images Guide

Are you like most of us photographers who rush back to your computer, excited to download your images, but all too often you feel disappointed by what you see? Especially when your best images are spoiled because of focus issues? This guide from professional Australian landscape photographer Brent Mail was written to help. It is currently 77% off today if you want to check it out. Deal found here: Secrets to Tack-Sharp Images Guide at 77% Off

tack sharp images

Tack-Sharp Image Guide (see inside)

This quick-read eBook contains heaps of secrets to help you overcome the 12 most common focus mistakes that spoil your favorite photos including.

1. How to choose the perfect Shutter Speed

2. Stop Camera Shake

3. Capture Moving Subjects

4. Choose the right Focus Mode

5. Dial in the best Aperture

6. Get sharp images in low-light without a Tripod

7. Over Auto-Focus issues (including ‘focus-hunting’ in low light)

8. Use Panning to capture the energy of action shots

9. Kill Foreground distractions

10. Make Macro magic

11. Use Flash to take group shots from gloomy to glad

12. Break the rules for even more stunning results

Plus, an in-depth, yet super-practical focus overview and 41 images to help you get results fast.

How to Get the Tack Sharp eBook for a Discount Today:

Currently 77% off which ends soon (normally $39, currently just $9). Plus, you’ll get 3 bonus video tutorials to help. It also comes with a generous satisfaction guarantee so there’s no risk in trying it.

Deal ending soon: Secrets to Tack-Sharp Images Guide at 77% Off


Go to full article: Secrets to Tack-Sharp Images Guide

What are your thoughts on this article? Join the discussion on Facebook

PictureCorrect subscribers can also learn more today with our #1 bestseller: The Photography Tutorial eBook

The post Secrets to Tack-Sharp Images Guide appeared first on PictureCorrect.


from PictureCorrect https://ift.tt/30aCQQ7
via IFTTT

PictureCorrect.com: Interesting Photo of the Day: Giant Jack-O’-Lantern Mushrooms

When learning photography, we always recommend beginners try varying the perspective. It can be surprising to see how everyday objects can seem so different just by changing the way we look at them. Consider the following image of jack-o’-lantern mushrooms, taken by photographer Daniel Francois Diaz. Had he shot it from the top, like we usually do, the image would’ve been plain boring. But thanks to his creative eye, he was able to capture this beautiful scene.

“Backlit Jack-O’-Lantern Mushrooms” by Daniel Francois Diaz (Via Reddit. Click image to see full size.)

The one thing that Diaz did differently for this image is that he shot it from a very low perspective. His choice of perspective alone is responsible for elevating this image to the next level. And in case you’re wondering how he was able to get his camera so low, there’s a surprise for you: he shot this using his iPhone X. This also showcases how good today’s smartphone cameras really are.

Because the mushrooms were shot from a very low angle, they appear huge, like trees. It’s as if we’re looking at the mushrooms from an insect’s perspective. Or maybe a smurf’s, perhaps!

Another interesting aspect of this image is the way the sunlight is illuminating them. The sun is lighting them from the back, which adds a golden glow to the orange texture and a sense of warmth to the image. Also, the mixture of lights and shadows adds a beautiful contrast to the photograph.

What aspect of this photograph do you like the most? Let us know in the comments.


Go to full article: Interesting Photo of the Day: Giant Jack-O’-Lantern Mushrooms

What are your thoughts on this article? Join the discussion on Facebook

PictureCorrect subscribers can also learn more today with our #1 bestseller: The Photography Tutorial eBook

The post Interesting Photo of the Day: Giant Jack-O’-Lantern Mushrooms appeared first on PictureCorrect.


from PictureCorrect https://ift.tt/3wuTbvf
via IFTTT

PictureCorrect.com: Studio Portrait Flash Distance

When taking studio portraits, many photographers recommend you put the flash as close to the subject as possible. But have you ever wondered if this is indeed good advice, or just another misguided repetition? In today’s video, photographer Gavin Hoey with Adorama puts this theory to the test by varying the distance between flash and subject. As you’ll see here, it’s not just the light that changes.

For the purpose of this video, Hoey places a camera on a tripod in front of his subject and photographs her by just moving the flash. To keep the exposure consistent, he also meters the shot every time he moves the light.

As you can see,  a lot of changes take place when he moves the light away from the subject. Basically, the catchlight becomes smaller and smaller, and the overall look of the image keeps getting less flattering. The light doesn’t get to wrap around the subject’s face when it’s farther, so the image appears flatter. Even the shadows are elongated and weaker when the light is far away from the subject.

Besides these differences, another interesting observation that Hoey made was that the colors in the image appeared warmer as the light is moved away. This is an indication that the flash’s output had different temperatures at different power settings.

When we compare all the images, it seems that the best option is to place the light as close to the subject as possible. But how close is close? Well, Hoey has a simple technique that he follows.

“It’s gotta be just in the shot, and then just slightly back it up until it’s just out of frame. That’s how close I like to put my light.”

Like Hoey states, having the light close to the subject has many other advantages. You get to use the flash at a lower power, leading to less battery consumption, faster recycle time and sharper images.

Do you have any reasons for setting up your flash far from your subject?

For further training: The Electronic Flash Photography Guide


Go to full article: Studio Portrait Flash Distance

What are your thoughts on this article? Join the discussion on Facebook

PictureCorrect subscribers can also learn more today with our #1 bestseller: The Photography Tutorial eBook

The post Studio Portrait Flash Distance appeared first on PictureCorrect.


from PictureCorrect https://ift.tt/3wtBL22
via IFTTT

maanantai 8. marraskuuta 2021

PictureCorrect.com: Underwater Product Photography Techniques

Admit it, images of products look pretty cool when shot underwater. The splash of water along with the bubbles oozing out of the products add life to an otherwise boring image. However, if you need to set a camera up underwater as well, then it becomes a really challenging and an expensive ordeal. It takes all the fun out of it. Popular photographer and filmmaker Peter McKinnon teaches you some easy and budget friendly techniques to help you take underwater photos:

The general idea is to use a fish tank almost full of water wherein you can drop the products. Strobes or flashes work great, but if you don’t have them, you can use bright continuous lights too. Then, set your camera up to shoot at continuous high frame rates with a very fast shutter speed. You can then take a burst of photos as the product is dropped into the water. Be sure to have a plain or black background for minimal distraction.

Since tracking the product can be a challenge, manual focus works best. Focus on the product manually before it’s dropped. Also, set the aperture to a greater value for a greater depth of field. This ensures that most of the product, bubbles, and the splash are in focus.

While all of this sounds simple on paper, it also boils down to luck. Since you have zero control over how the product will behave underwater, you can’t determine how it will align itself. You may thus need to retake the shot multiple times before you’re happy with the result. Remember, patience is key. And after shooting the photo, you can also retouch it to make it appear even better.

“When you get that perfect frame, it looks incredible.”


Go to full article: Underwater Product Photography Techniques

What are your thoughts on this article? Join the discussion on Facebook

PictureCorrect subscribers can also learn more today with our #1 bestseller: The Photography Tutorial eBook

The post Underwater Product Photography Techniques appeared first on PictureCorrect.


from PictureCorrect https://ift.tt/2VoZXQV
via IFTTT

PictureCorrect.com: Interesting Photo of the Day: Mount Shasta on a Clear Night

A highly detailed nighttime shot looks clean when it’s illuminated to show the foreground leading into the impressive backdrop. In this case, different exposures are required to capture the log and dirt while it’s brighter outside. Later on, another exposure or two can be photographed to display the darkening sky. Together, these multiple exposures merge together to form a very impressive image:

exposure nighttime foreground detail

“Mount Shasta on a Clear Night” by Victor Carreiro (Via Imgur. Click image to see full size.)

Photographer Victor Carreiro took this shot of Mount Shasta by shooting several exposures and stacking them in Photoshop. He had these instructions on his process for interested viewers:

  1. Make RAW adjustments and sync adjustments to other frames.
  2. Import into Photoshop.
  3. Align frames either by transforming by hand or using automation. (They will be slightly off because of the different focal points.)
  4. Mask in the sharp parts of each frame (either by hand or by using PS automation).

This helps to create the high detail starting in the foreground and moving all the way back to the starry sky and mountaintop. He used a Nikon D610 camera with a Tamron 15-30mm lens. His settings were f/4 for the sky, f/16 for the foreground and mountain, 13 second exposure, and ISO 100.


Go to full article: Interesting Photo of the Day: Mount Shasta on a Clear Night

What are your thoughts on this article? Join the discussion on Facebook

PictureCorrect subscribers can also learn more today with our #1 bestseller: The Photography Tutorial eBook

The post Interesting Photo of the Day: Mount Shasta on a Clear Night appeared first on PictureCorrect.


from PictureCorrect https://ift.tt/2oRo8r8
via IFTTT

PictureCorrect.com: 5 Ideas to Photograph When You’re Out on the Street

1. Seek Out Emotion

This is an easy point to make—photographs are better when they show people’s emotions. However, it’s much easier said than done. It is difficult to capture emotions in the wild, but they are there if you look for them. Be careful about getting overly distracted by a person’s clothing or look and instead pay attention to people’s faces and postures and capture them when they are expressive—both the strong and subtle expressions.

Protégé, SoHo.

Protégé, SoHo

2. Tell a Story

This is related to photojournalism in a way, but think about a story and capture it. Gentrification in my neighborhood is a big and often talked about issue so when I’m out I pay attention to scenes and situations that portray it.

Gentrification, East Village.

Gentrification, East Village

The photo above is of a beautiful, old, faded black and red trimmed building that is in the midst of a complete renovation, now half painted in sterile white paint. Black to white – it’s so simple yet so poignant.

Another example is the shot below of a trendy crowd waiting outside a popular brunch spot. There are a million and a half ways to visually show the effects of gentrification.

Brunch Fur Coat, East Village.

Brunch Fur Coat, East Village

3. Create a Strong Design

When all else fails, just create a gorgeous design. Pay attention to colored walls, lines and columns, advertisements, and textures. Pay attention to strong contrasts, especially with colors. I know some of these elements may seem new and ordinary, but as many of them age they will have significant cultural value. Seek out everyday things that are beautiful and create some beautiful scenes.

Always pay attention to the lines and corners in your photos and also think about the way that a viewer’s eyes might enter and follow through the scene. This is important to the balance of your images.

72 Walker Street.

72 Walker Street.

Flashdancers and Blue Wall, Lafayette Street.

Flashdancers and Blue Wall, Lafayette Street

4. Photograph the Unseen

Often we are attracted to the colorful, fashionable, extroverted people, or on the other end of the spectrum, to the down and out, the homeless, or the ‘dark side’. These extremes account for such a small sliver of actual life and the reality is that a majority of the world resides between them. Capture the stories in the middle.

Construction Worker, Canal Street.

Construction Worker, Canal Street

And if you ever interview people keep this in mind. The most average looking people often have the most interesting stories to tell.

5. Create Intrigue and Ambiguity

Find ways to make people curious about the meaning of your images. Make people question what is going on. Ambiguity done correctly is a special thing. It creates a work that someone can put on their wall and continue to think about over time with the meaning changing constantly depending on what the viewer chooses to believe at any moment.

A Tree Grows.

A Tree Grows, Chase Bank.

This is similar to capturing a story and I find it to be the hardest to do. The goal is to capture an image that has a point of view or makes a statement. It us the type of image that you could write a lot about.

Varietions of The Same.

Varietions of The Same.

New Arrivals.

New Arrivals

Above, you’ll find a couple of images that are critiques on modern fashion trends and consumption. When shooting street photography, remember, the best shots will not always be glaringly obvious. You must learn how to open your mind and use your eye in way that opens you up to seeing the bigger picture.

About the Author:
James Maher is the author of Essentials of Street Photography, which covers everything about the genre even down to specific post processing techniques that can bring the best out of street scenes.


Go to full article: 5 Ideas to Photograph When You’re Out on the Street

What are your thoughts on this article? Join the discussion on Facebook

PictureCorrect subscribers can also learn more today with our #1 bestseller: The Photography Tutorial eBook

The post 5 Ideas to Photograph When You’re Out on the Street appeared first on PictureCorrect.


from PictureCorrect https://ift.tt/3EOTvIe
via IFTTT