perjantai 2. heinäkuuta 2021

PictureCorrect.com: 6 Tips on How to Capture Great Fireworks Photos

1. Use a Slow Shutter Speed

When you photograph fireworks, it is very important that you set your camera to a slow shutter speed. This includes a shutter speed that is anywhere between 1 second and 30 seconds or longer, about ISO 100. The shutter speed that is suitable varies depending on the amount of ambient light as well as the amount of fireworks in the sky.

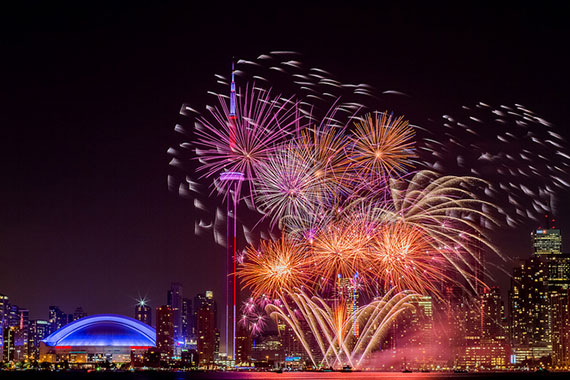
Why use relatively long exposures to photography fireworks? This is simply because long exposures can capture the burst of fireworks, producing moving streaks against the dark sky. Using long exposures will indeed produce stunning effects.

long exposure fireworks

“Macy’s 4th of July Fireworks” captured by Joyce A

Since slow shutter speeds are necessary, you will also have to ensure good camera support. This will make sure that the pictures taken will turn out looking steady and clear.

2. Ensure Camera Stability

No doubt, one of the best ways to ensure camera stability is to use a tripod. Nonetheless, if you do not have a tripod, you can opt to brace yourself against a building or maybe a tree. Otherwise, you can have your camera placed on sturdy surface. You can also use your camera’s shutter release cable or self-timer function. Using either of these options will release the shutter without any camera shake.

3. Do Not Use Flash

Don’t use flash when photographing fireworks. Flash will not help capture fireworks at a distance. Nonetheless, flash does help light up subjects in the foreground. A perfect example of this is when photographers shoot portraits with fireworks as the background; they will often use flash to illuminate their model.

fireworks portrait

“Kyle & Laura” captured by Charles Siritho

4. Set Your Camera and Lens to Manual Mode

Fireworks photography is definitely a genre for which you will have to be brave and enter into the world of manual settings. Both your lens focus and exposure mode must be set to manual. On your lens, adjust the focus ring so that it is set to infinity focus. The symbol for infinity is similar to the number eight, except that it is turned sideways.

5. Experiment With Exposure

As mentioned earlier, you should experiment with long shutter speeds. There really isn’t any perfect shutter speed. All you need to do is to try different shutter speeds and get the sort of fireworks photography you are after.

Another thing you should do is to dial in a relatively small aperture. Anywhere between f/8 and f/16 will be good. Doing this will prevent the scene from being overexposed during the long exposures.

6. Try Using One Long BULB Exposure

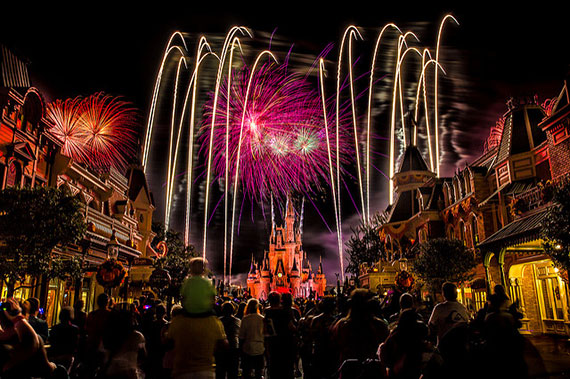
fireworks photography

“Magic Kingdom – Happy Fourth of July” captured by
Jeff Krause

With one long BULB exposure, you can combine a few fireworks together into one picture when you hold the shutter open for half a minute or longer. Adjust your camera settings so that it is set to manual mode, and set the shutter speed to BULB. Check your camera manual for instructions.

As long as the shutter release is depressed, the shutter will stay open. This will allow you to photograph a few bursts of fireworks in one picture, rather than just one burst of fireworks.

While you’re at this, remember to block off the lens and sensor in between the bursts of fireworks by using a piece of paper or cloth in front of the lens. Doing this allows you to refrain from facing problems such as skies looking muddy grey in pictures.

About the Author:
This article was written by Michelle Lee Fui Jinn from tipsforphotographers. It takes time to practice and improve your photography skills.


Go to full article: 6 Tips on How to Capture Great Fireworks Photos

What are your thoughts on this article? Join the discussion on Facebook

PictureCorrect subscribers can also learn more today with our #1 bestseller: The Photography Tutorial eBook

The post 6 Tips on How to Capture Great Fireworks Photos appeared first on PictureCorrect.


from PictureCorrect https://ift.tt/36eOxVG
via IFTTT
PictureCorrect.com: Interesting Photo of the Day: Urban Light and Shadow

Light and shadows: these are two of the most important elements of a photograph that beginner photographers can easily ignore. Being focused on the subject and story is important, of course, but by paying more attention to the interplay between light and shadows, you will be surprised to see how much they can elevate your images. They can sculpt your photos, as they do in the following image taken by photographer Christian D’Antonio. Notice how simple yet spectacular the image appears:

light and shadows

“Capturing Light and Shadows” by Christian D’Antonio (Via Imgur. Click image to see full size.)

D’Antonio took this image on the streets of Toronto, Canada, with a Sony A7III and a Sigma 24-70 lens at 1/1000s, f/7.1 and ISO 300. He shot it at around three or four in the afternoon.

“I had been visiting this building now and then, waiting for the sun to strike it perfectly—in a way I could get light on one side and none on the other. I had to wait an hour to get this shot.”

The first thing we can observe in the image is the fantastic composition of light and shadows. The stark contrast between light and dark is what makes this image really beautiful. Thanks to his patience, Christian was able to capture the image exactly as the cyclist in red passed through the intersection, creating a pop of balanced color with the red walls of the downtown building.

How often do you pay attention to light and shadows when taking photographs? If you don’t, we hope this image inspires you to start.


Go to full article: Interesting Photo of the Day: Urban Light and Shadow

What are your thoughts on this article? Join the discussion on Facebook

PictureCorrect subscribers can also learn more today with our #1 bestseller: The Photography Tutorial eBook

The post Interesting Photo of the Day: Urban Light and Shadow appeared first on PictureCorrect.


from PictureCorrect https://ift.tt/3dElZJw
via IFTTT

PictureCorrect.com: How to Set Up for a Fireworks Photography Session

With the 4th of July right around the corner, it’s time to get ready for some awesome fireworks displays. Getting great fireworks shots isn’t really that difficult, but if you’ve never done it before, it can help to start out with a few tips. With that in mind, photographer David Bergman gives you everything you need to know in this brief minute tutorial:

Tips for Taking Fireworks Shots:

  1. Scout your location ahead of time. Keep in mind, this might mean needing to reserve your space, as the best vantages tend to be in high demand.
  2. Provide context. While fireworks on their own can be pretty stunning, giving the context of your shoot (e.g. the foreground or background) can add depth and interest to your photo.

long exposure fireworks photo

  1. Choose the right camera settings. A good starting place for fireworks is an of ISO 100, f/11, and a long shutter speed. Bergman recommends starting at something as long as 8 seconds, but you can cut that down to something as quick as a half a second if you’re looking for something faster. The longer shutter speed will capture as many bursts as possible in one frame and give you a brighter exposure on your foreground. A quicker shutter speed will allow you to capture as many different shots as possible. (You’ll need a tripod either way.)
  2. Shoot in manual mode. This will prevent your autofocus from wasting time figuring out what to focus on while you’re trying to capture that perfect firework. Also, turn off your flash.
  3. Stabilize your tripod. Add some weight to it to keep it from moving. Most tripods have a hook on the center pole that will let you hang something on; many photographers simply use their backpacks.
  4. Use a cable release. Fire your shutter using a cable release so you don’t have to touch the camera while taking the photos. This will avoid any inadvertent camera shake.

getting great fireworks photos

Camera Gear for Fireworks Photography

You can take some amazing fireworks shots with just about any DSLR and tripod, but in case you’re wondering what David Bergman prefers, here’s his equipment list:

  • Canon 5DS R
  • Canon EF 24mm-105mm f4 L IS USM lens
  • Manfrotto MT055XPRO3 Aluminum 3 Sections Tripod
  • Manfrotto MHXPRO-BHQ6 XPRO Ball Head
  • Canon RS-80N3 Remote Switch
  • Domke Gripper Camera Strap, 1″” with Swivel Quick Release, Black
  • Think Tank Airport Security V2.0, Carry On Roller Bag

fourth of july photo ideas

If this is your first time shooting fireworks, you’ll most likely be surprised at how easy it is to get good shots. If you’re an old hand at it and have  more tips for us, let us know in the comments!


Go to full article: How to Set Up for a Fireworks Photography Session

What are your thoughts on this article? Join the discussion on Facebook

PictureCorrect subscribers can also learn more today with our #1 bestseller: The Photography Tutorial eBook

The post How to Set Up for a Fireworks Photography Session appeared first on PictureCorrect.


from PictureCorrect https://ift.tt/3dDdgrc
via IFTTT

PictureCorrect.com: 7 Musts of Great Composition in Photography

What makes a great picture? There is always room for creative interpretation, but if you want to create a memorable photograph, these are seven things you must do.

photography composition musts

“One of these things doesn’t belong here” captured by Lynford Morton

1. Find a clear subject

Speaking of musts, every discussion about photography and composition must begin here. Before you ever hoist your camera or touch your shutter, you should say to yourself, “This is a picture of a ____.” When you fill in the blank, be as specific as possible. The more specific you are, the better the picture you can take. This is one of the truisms of photography. To have a great picture, you must have a clear, unmistakable subject.

The reverse is also true. If you ever find that you aren’t crazy about one of your pictures, ask yourself, “What’s the subject?” If a long, awkward pause follows, you’ve just solved the puzzle for your lackluster photo.

2. Fill the frame

It’s not enough to have a clear subject; you must make it prominent in the frame. The easiest way to do that is to dominate most of the real estate of your image with your subject. That often means getting close. It might mean standing back and zooming in. Each decision has its own creative implication. The reverse rule also works here. If you look at your image, and your subject isn’t obvious, you are probably too far away. Zoom with your feet, and fill the frame.

3. Harness the light

The old adage is that photography is painting with light, and if that’s the case, you have to harness the light to create great pictures. A painter doesn’t carelessly swipe paint across a canvas. As a photographer, you should never be careless with light either. This means you should always be aware of your main light source. You should know if it is coming direct to your subject, diffused through a filter, bouncing off another object, or completely controlled. Each decision has enormous consequences. For great pictures, this decision is never left to chance. You must actively decide how you will manipulate the light.

harness light in composition

“Mary, full of haze” captured by Lynford Morton

4. Evoke interest

Here is the question you must answer with your photo: So what? So many messages and images clamor for our attention. Why should I stop to look at yours? Great images have an arresting quality about them. They create a mood or evoke an emotion. They make me stop. They make me look. They make me feel. You must evoke my interest if you want me to care.

5. Create a sense of balance

We are attracted to harmony and balance—in life and in art. Great composition balances the objects in the frame so there is even weight. If you have all of the items on one side of your frame, your photo will feel lopsided. Dark objects must be balanced against light ones. Large items play against smaller items. Empty space can be balanced against busier areas of your frame. For pleasing composition, you must balance the objects in your frame.

balance in photo compositions

“Cows” captured by Lynford Morton

6. Tell me a story

A great picture usually tells a story at a glance. The photo’s elements, characters, and setting all communicate in an instant exactly what is going on in a way that we can connect and relate. Great storytelling always has strong characters, an obvious challenge, drama, controversy, and a satisfying conclusion. It might be hard to get all these elements into one photo, but with enough creative elements, you can have a dramatic effect. At a glance, you will know exactly what is going on. A great picture must tell me a story.

7. Break the rules

Effective composition follows very well established rules, but if you really want to be great, you must know when to break them. The Rule of Thirds has been widely accepted by photographers and painters for more than 200 years, but there are times when you can put the subject in the center. Break the rule because it creates a desired effect or emotion, not because of an oversight. Learn the rules, then break them. After all, they aren’t commandments.

breaking composition rules

“Breakfast” captured by Lynford Morton

Can you get all seven musts in every photo? Probably not, but if you do, the picture is likely to be unmistakably great. At the end of the day, that is what we must strive for.

About the Author:
Lynford Morton from ShutterBugLife spends weekends at Washington, DC’s favorite locations—making new friends and sharing his love of photography with eager new photographers.

For Further Training on Composition:

The extensive Photographer Snap Cards includes cards specifically on critical elements of composition and more. What are these “snap cards”? They are a “Training Boot Camp” in your camera bag… Photography training and reference cars that you can take with you wherever you go. They are currently 86% off for a summer sale which ends soon.

photography snap cards

Snap Cards for Photographers (see how they work)

Enter 44 printable key photography lessons that you can take with you anywhere! Wherever you are, these SNAP Cards are your own personal photographic mentor- Your boot camp instructor pushing you to new limits. P.S. also try the coupon code picturecorrect at checkout for an even larger markdown.

Deal ending soon: Composition Snap Cards and More at 86% Off


Go to full article: 7 Musts of Great Composition in Photography

What are your thoughts on this article? Join the discussion on Facebook

PictureCorrect subscribers can also learn more today with our #1 bestseller: The Photography Tutorial eBook

The post 7 Musts of Great Composition in Photography appeared first on PictureCorrect.


from PictureCorrect https://ift.tt/3qJRhnr
via IFTTT

PictureCorrect.com: Interesting Photo of the Day: Pfeiffer Beach

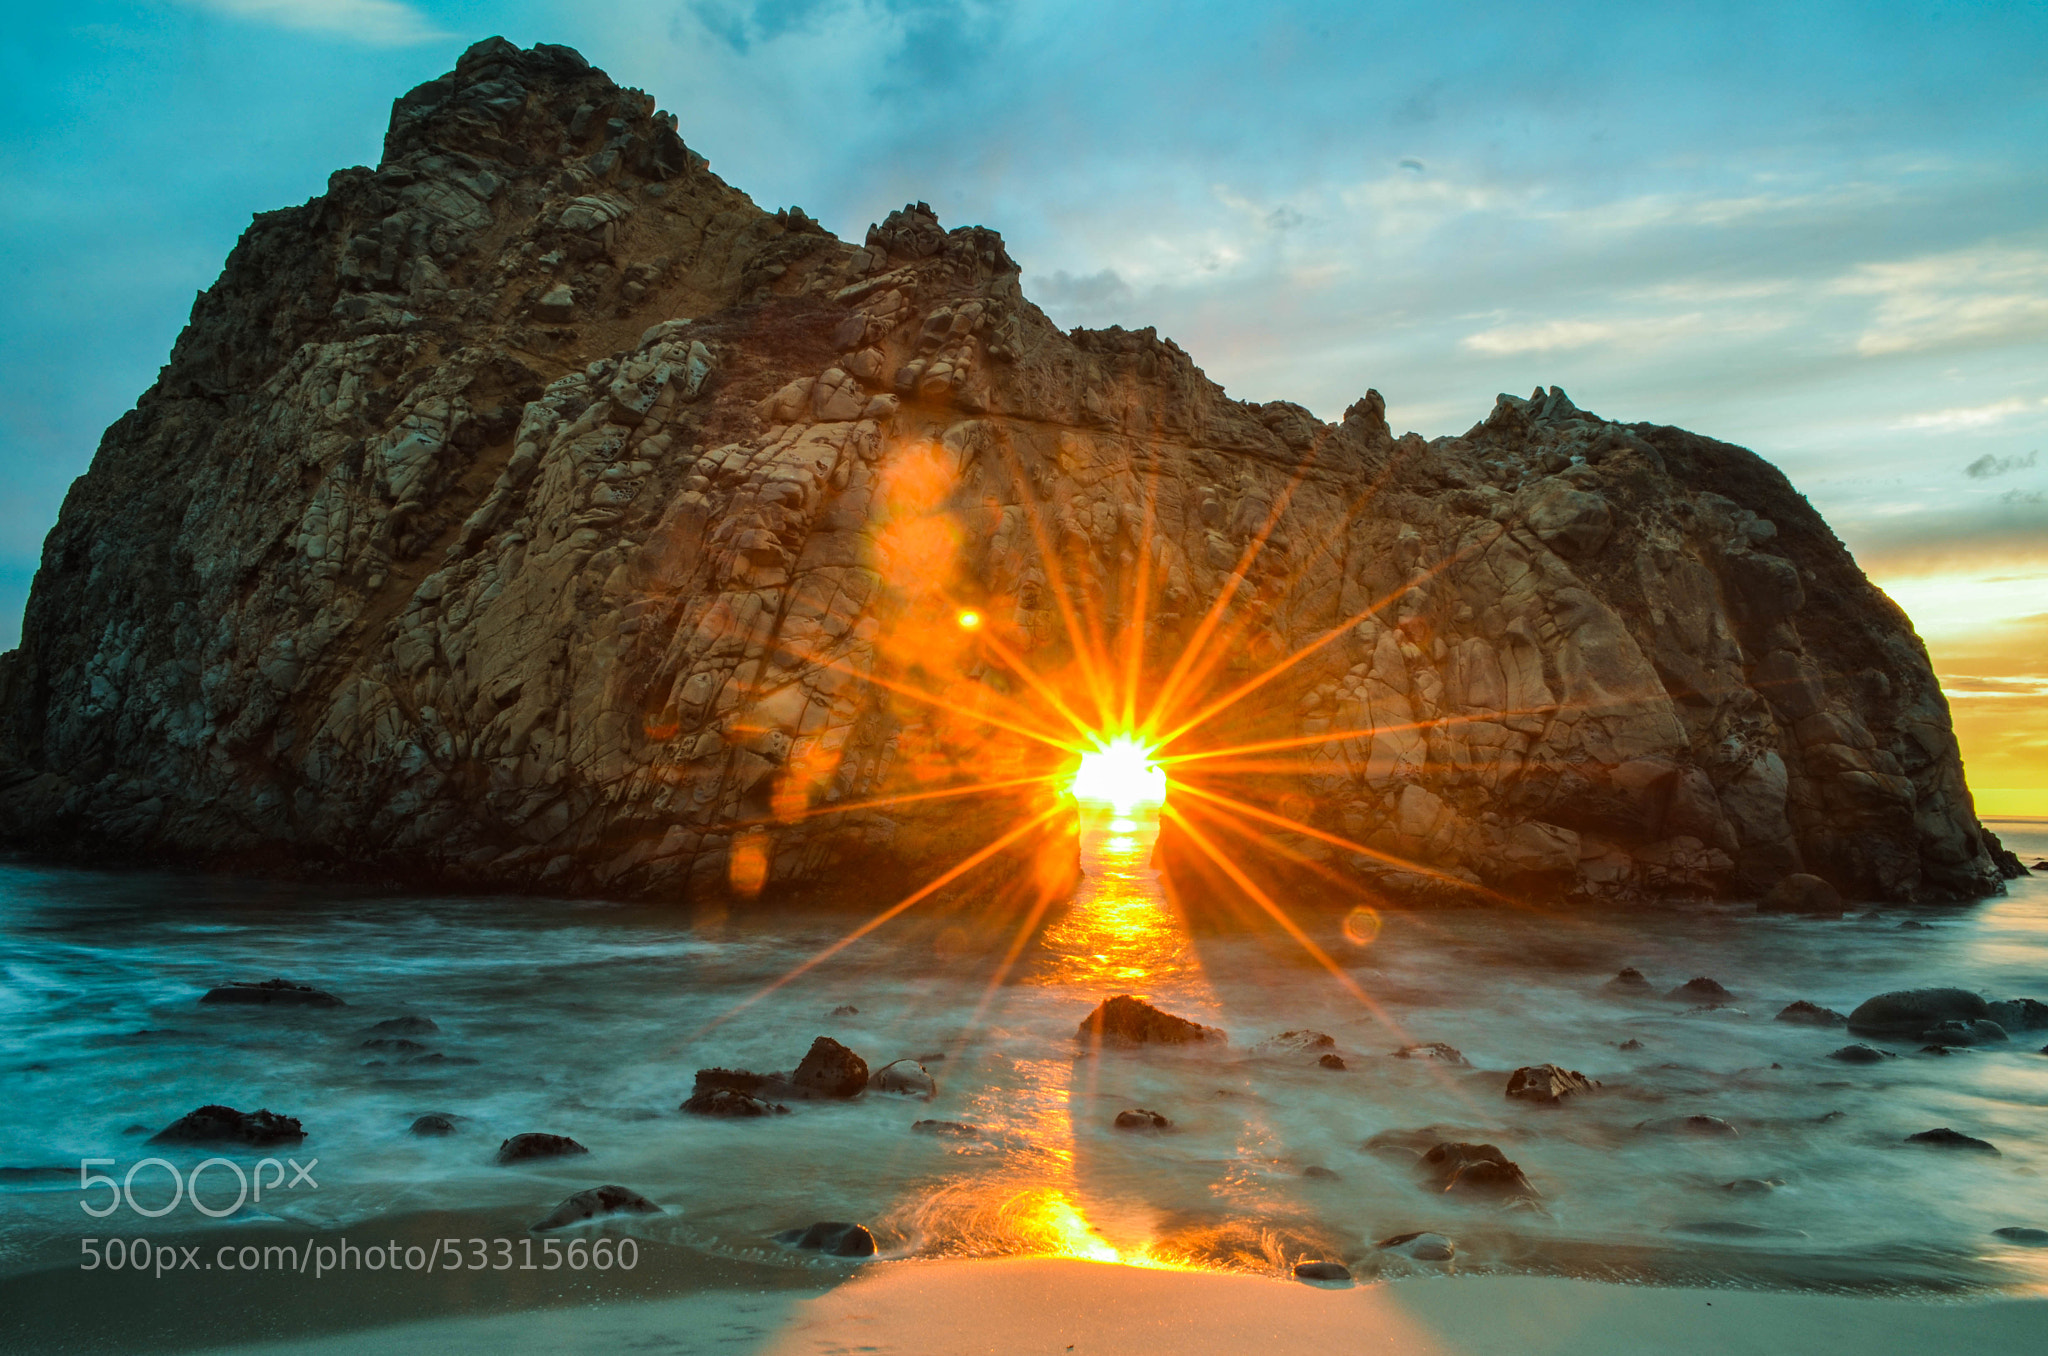
What a great example of a perfectly timed photograph! During an outing to Pfeiffer Beach in Big Sur, California, photographer Senthil Balakrishnan caught the sunset at the precise moment it passed by this opening in a rock, creating a superb frame within a frame:

The photographer was insightful enough to create a natural frame around the sunset. (Via 500px)

To capture this beauty, Balakrishnan used a Nikon D5100 with 18-55mm lens at 18mm. He used a shutter speed of 5 seconds at f/22 (hence the starburst effect on the sun) and ISO 125.


Go to full article: Interesting Photo of the Day: Pfeiffer Beach

What are your thoughts on this article? Join the discussion on Facebook

PictureCorrect subscribers can also learn more today with our #1 bestseller: The Photography Tutorial eBook

The post Interesting Photo of the Day: Pfeiffer Beach appeared first on PictureCorrect.


from PictureCorrect https://ift.tt/3hstBQj
via IFTTT

torstai 1. heinäkuuta 2021

PictureCorrect.com: Self Portrait Advanced Tutorial

When we think of self-portraits, they don’t necessarily need to be those mediocre snapshots that we take with our phones. If planned and executed thoughtfully, you can’t easily differentiate a self-portrait from a portrait taken by another photographer. So, if you’re a little short on manpower and want to take some sick-looking self-portraits, we have photographer Aidin Robbins for you today. He shares some great tips and techniques to help you take great self-portraits in this advanced selfie photography tutorial:

As Robbins explains in the video, an intervalometer will help you a lot in taking some great-looking self-portraits. Using an intervalometer, you can program your camera to continuously take photos at certain intervals. This way, you don’t need to move back and forth. Instead, you can just concentrate on being more creative. Some cameras come with a feature that mimics the intervalometer. So, be sure to go through your camera manual.

And as for the composition, go for environmental portraits. You can emphasize not just yourself (the subject), but also the surrounding elements. You’ll need to shoot a bit wider for this. And this will also give you greater flexibility in terms of focus and framing. Composing with the environmental elements will also allow you to distribute emphasis between you and your surroundings and reduce the pressure on yourself. You can even use the environmental elements to your advantage by interacting with them.

Robbins also shares an interesting tip at the end of the video that’ll allow you to capture motion in your surroundings while you’re perfectly frozen. So, be sure to watch the complete video and take some awesome self-portraits.


Go to full article: Self Portrait Advanced Tutorial

What are your thoughts on this article? Join the discussion on Facebook

PictureCorrect subscribers can also learn more today with our #1 bestseller: The Photography Tutorial eBook

The post Self Portrait Advanced Tutorial appeared first on PictureCorrect.


from PictureCorrect https://ift.tt/2SI3e0D
via IFTTT

keskiviikko 30. kesäkuuta 2021

PictureCorrect.com: Fireworks Photos: Preparation and Planning

Everyone loves a great fireworks show and it seems that lots of people take pictures while they are at the show. Here is a question for you. How many great pictures of fireworks have you seen taken by any of your friends or relatives?

I’ll bet your answer is not many. Now, have you ever wondered why everyone doesn’t have at least a couple of really good shots of fireworks? After all, the shows are free and the people that there seem to be snapping pictures like crazy.

photographing fireworks

Photo by Brett Kiger; ISO 100, f/11.0, 15-second exposure.

I’ll answer the question for you. It is because a little preparation and planning is needed to increase your chances of getting some really nice shots at a fireworks display.

The following are a few tips that might help when you are photographing fireworks.

Use a Tripod: This fireworks photography tip applies whether you are using a point and shoot Digital Compact Camera or a Digital SLR camera. The reason you will need a tripod is because it is best to photograph fireworks at slow shutter speeds.

Slower shutter speeds allow the camera to gather more light from the fireworks scene against the dark sky. When a camera is hand held and a slow shutter speed is used, the result will be a blurred picture.

If you don’t have a tripod, try placing the camera on a steady surface when taking the pictures. Sometimes, even the roof of your car might help.

Arrive early, claim a good spot: If you have time before the show, this fireworks photography tip can be very useful. As you probably know, fireworks shows are usually pretty crowded and you don’t want to have to reach over someone’s head to take a shot.

Some people might like to be close to the fireworks, but from a photography standpoint, it is better to be a little distance away from the actual scene. It is better to be able to shoot towards the fireworks rather than shooting straight up at them.

Also, if you are not right upon the fireworks, you might be able to include a little more than the fireworks burst in your picture. A building, a monument, or a skyline along with the fireworks bursts might make the images a little more interesting.

It is up to you to decide if you want anything but fireworks in your pictures. However, no matter what you decide, make sure you have a clear line of vision before you begin to photograph the fireworks.

Horizontal or Vertical? It doesn’t make a whole lot of difference if you hold the camera in the vertical or horizontal position when photographing the fireworks. However, since fireworks are shot upward in a vertical plane, it might not be a bad idea to shoot single bursts with the camera in the vertical position. On the other hand if there are several bursts going on at one time, the horizontal position will give you more room to frame the whole scene.

best firework photography tips

Photo by Anthony Quintano; ISO 400, f/9.0, 4-second exposure.

Exposure settings for photographing fireworks: If you are using a compact digital camera, you cannot manually change exposure settings. Try using the fireworks scene mode of your camera. The fireworks mode will automatically set a slow shutter speed to photograph fireworks. (once again that is why you need a tripod or a steady surface for the camera).

If you are a Digital SLR user, use your cameras’ manual mode. It would be great if you use the bulb “B” shutter setting. The “B” setting allows you to keep the shutter as long as you like. That way can open the shutter just before the burst, and close it right after if you choose to do so.

If you don’t use the “B” setting, experiment with shutter speeds from 2-8 seconds. Also, try using a remote shutter release to avoid camera shake from pressing the shutter button.

As for the camera lens aperture settings, use smaller aperture openings between F8 and F16 if possible. Although the sky is dark, the fireworks are bright and overexposure is possible when using large aperture and slow shutter speed.

firework photo tips

Photo by Duncan Rawlinson – Dunca; ISO 100, f/18.0, 17-second exposure.

Use low ISO settings like ISO 100 if possible: Higher ISO setting like ISO 800 or ISO 1600 might produce grainy looking images. (depending on what camera you use.) So try to use an ISO setting of ISO 200 or less.

Timing is everything: Fireworks bursts will appear quickly and disappear just as fast. Pre focus your digital compact camera on an area where the fireworks are being generated from. Hold that focus until you are ready to take your next shot. You will save time by not having to focus once the firework is in the air.

If you are using a Digital SLR camera use your manual focus feature prior to or during the first burst. You won’t have to refocus if you stay in the same location and use the same focal length.

Listen for a thump like sound or a whistling sound in the air. Those sounds indicate that fireworks have just been shot into the air. For best results do not wait until you see the bright explosion. Press the shutter as soon as you know something has been fired into the air. That way your camera will get the full effect of the burst from the beginning.(that is if your camera is already pointed right at the area of the fireworks and set at a slow shutter speed).

Photographing fireworks might be a little tricky at first. However, with a little practice you should come out with some pleasing results.

I hope these tips on photographing fireworks will be useful to you.

About the Author:
Keith Jones writes for http://easybasicphotography.com. A site geared towards beginners through serious amateurs who want to learn a little more about basic digital photography.


Go to full article: Fireworks Photos: Preparation and Planning

What are your thoughts on this article? Join the discussion on Facebook

PictureCorrect subscribers can also learn more today with our #1 bestseller: The Photography Tutorial eBook

The post Fireworks Photos: Preparation and Planning appeared first on PictureCorrect.


from PictureCorrect https://ift.tt/3h6dTvb
via IFTTT