


You carefully compose your shot, mount your camera on a sturdy tripod, use a remote shutter release, and even wait for the wind to die down.
So why do your photos still look just a little softer than you expected?
The culprit might be a camera feature that usually helps—but in some situations can actually work against you: image stabilization.
Related reminder: only a little while left for the new Tack Sharp Photo Guide at 70% Off
Why Image Stabilization Can Cause Problems
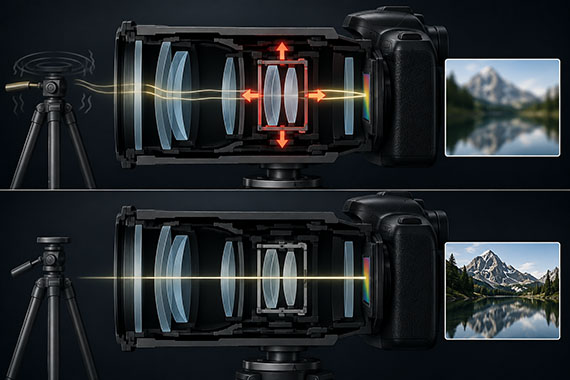
Image stabilization—often labeled IS, VR, OSS, VC, OS, or IBIS—is designed to compensate for tiny movements caused by handholding a camera.
When you’re shooting handheld, that’s exactly what you want.
But when your camera is mounted securely on a tripod, those movements no longer exist.
Some older stabilization systems may continue searching for movement anyway. As the stabilization elements shift inside the lens, they can actually introduce tiny amounts of blur rather than eliminate it.
The result? Images that aren’t quite as tack sharp as they could be.
Does This Still Apply to Modern Lenses?
Not always.
Many newer lenses include tripod detection, allowing the stabilization system to recognize when the camera is mounted on a tripod. These systems can automatically reduce or adjust stabilization to avoid introducing unnecessary movement.
However, not every lens includes this feature.
If you’re unsure whether your lens has tripod detection, check the manual or the manufacturer’s recommendations for your specific model.
As a general guideline:
- Older lenses: Turn image stabilization off when using a sturdy tripod.
- Many newer lenses: Either setting may work, but following the manufacturer’s recommendation is best.
When You Should Leave Stabilization On
There are a few situations where stabilization can still be useful—even when the camera is supported.
For example:
- You’re using a monopod.
- You’re shooting from a lightweight travel tripod in strong wind.
- You’re photographing from a vibrating surface, such as a bridge or viewing platform.
- You’re panning with a moving subject.
- Your lens manufacturer specifically recommends leaving stabilization enabled.
A camera may be mounted on a tripod without being completely motionless. Wind, unstable ground, a flexible tripod head, or vibrations from the surrounding environment can still affect sharpness.
That is why this isn’t a universal rule. The right setting depends on the lens, the tripod, and the conditions.
Don’t Forget In-Body Image Stabilization
If your camera has in-body image stabilization, commonly called IBIS, you may need to check the camera menu as well as the switch on the lens.
Some camera and lens stabilization systems work together. Others are controlled entirely through the camera.
Turning off the switch on the lens may disable the entire system, but this varies between manufacturers and camera models.
Before an important long exposure, confirm exactly how stabilization is controlled on your equipment.
Other Tripod Mistakes That Reduce Sharpness
Disabling stabilization is only one part of getting the sharpest possible image.
Don’t overlook these common problems:
- Touching the camera during the exposure.
- Forgetting to use a remote release or self-timer.
- Extending the tripod’s center column unnecessarily.
- Leaving the tripod legs partially locked.
- Shooting on unstable or vibrating ground.
- Allowing a camera strap to flap in the wind.
- Using a shutter speed that allows the subject to move.
A tripod can eliminate camera movement, but it cannot stop leaves, water, people, wildlife, or clouds from moving during the exposure.
A Simple Sharpness Test
If you’re not sure how your stabilization system behaves on a tripod, run a quick comparison.
- Mount the camera securely on a tripod.
- Photograph a detailed, stationary subject with stabilization turned on.
- Take the same photo with stabilization turned off.
- Use the same focus point, aperture, shutter speed, and ISO.
- Compare the images at 100% magnification.
This simple test can reveal whether stabilization is helping, hurting, or making no visible difference with your particular equipment.
The Bottom Line
Image stabilization is one of the most useful features for handheld photography—but it isn’t automatically beneficial once your camera is firmly mounted on a tripod.
If you’re using an older stabilized lens, turning stabilization off could be the difference between a good image and one that’s truly razor sharp.
If you’re using newer equipment with tripod detection, stabilization may automatically adjust itself. Even so, it is worth understanding exactly how your camera and lens behave.
The next time you’re setting up for a landscape, long exposure, or night scene, take a moment to check your stabilization setting.
It only takes a second—and it might be the reason your next image is noticeably sharper.
Want Consistently Tack-Sharp Photos?
Getting perfectly sharp images involves much more than simply using a tripod. Focus technique, shutter speed, aperture, camera stability, lens performance, and post-processing all play important roles.
Our new Tack Sharp Photography Guide walks you through a complete system for capturing consistently crisp, professional-looking photos in virtually any situation (currently 70% off today for a  Summer Sale).
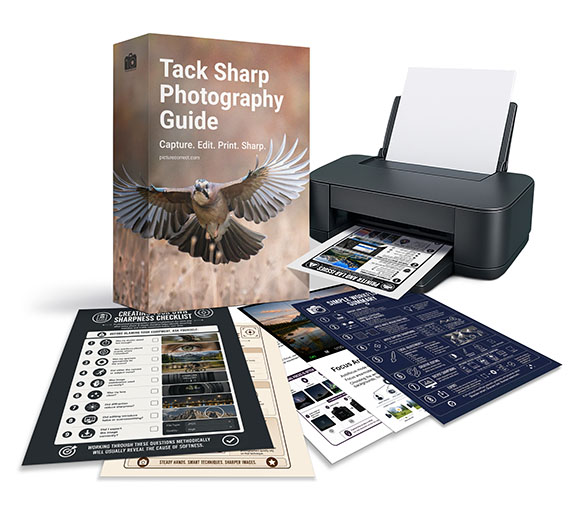
Inside, you’ll learn how to choose the right camera settings, master autofocus, eliminate camera shake, maximize lens sharpness, develop an efficient editing workflow, and prepare your photos for stunning prints. Whether you shoot landscapes, wildlife, travel, portraits, macro, or sports, the techniques apply to virtually every style of photography.
Deal ending soon: The Tack Sharp Photography Guide at 70% Off
from PictureCorrect https://ift.tt/zGeQCUO
via IFTTT


0 kommenttia:
Lähetä kommentti