


Many photographers switch to Manual mode because they want complete control over their camera. Ironically, one of the best ways to stay in control is to let your camera handle one setting automatically.
That’s where Auto ISO comes in.
When configured properly, Auto ISO can react to changing light far faster than you can. Instead of constantly adjusting ISO as clouds pass overhead or your subject moves between sunlight and shade, you can concentrate on composition and timing while your camera keeps the exposure where it needs to be.
The trick is knowing how to set it up for different types of photography.
Quick reminder: today’s lesson is based on one of the Fundamental Camera Cheat Sheets which are currently 80% off for a  Summer Sale.
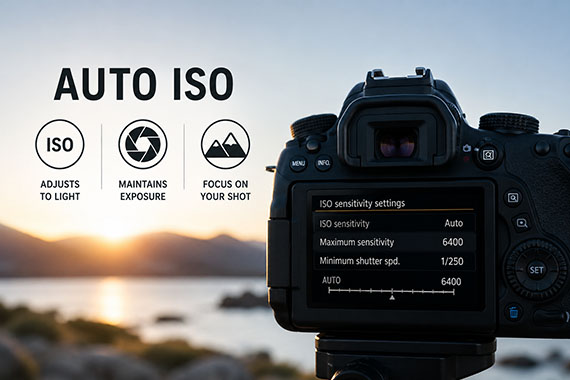
Understanding Auto ISO
ISO controls how sensitive your camera’s sensor is to light. Lower ISO values generally produce the cleanest images, while higher values allow you to shoot in darker conditions at the cost of increased noise.
With Auto ISO enabled, your camera automatically raises or lowers the ISO as lighting changes while respecting the exposure settings you’ve chosen.
Most modern cameras also let you customize:
- A minimum ISO
- A maximum ISO
- A minimum shutter speed before the ISO increases
These three settings determine how intelligently Auto ISO behaves.
Everyday Walk-Around Photography
For casual photography, travel, and family outings, Auto ISO is one of the easiest ways to avoid missed shots.
A good starting point is:
- Minimum ISO: 100
- Maximum ISO: 3200
- Minimum shutter speed: 1/250 sec
This setup keeps image quality high while allowing your camera to respond quickly as lighting changes throughout the day.
Portrait Photography
When photographing people, preventing motion blur is usually more important than keeping ISO as low as possible.
Recommended settings:
- Minimum ISO: 100
- Maximum ISO: 3200–6400
- Minimum shutter speed: 1/250 sec, or faster for active children
If your subject is moving around, increase the minimum shutter speed to 1/500 sec to keep expressions sharp.
Wildlife Photography
Wildlife often appears without warning, making Auto ISO incredibly valuable.
Recommended settings:
- Minimum ISO: 100
- Maximum ISO: 6400
- Minimum shutter speed: 1/1000 sec for larger animals
- Minimum shutter speed: 1/2000 sec or faster for birds in flight
In wildlife photography, sharpness usually matters far more than a little extra image noise.
Sports Photography
Fast-moving athletes require very fast shutter speeds.
Recommended settings:
- Minimum ISO: 100
- Maximum ISO: 6400, or higher if needed
- Minimum shutter speed: 1/1000–1/2000 sec
Your camera will automatically raise ISO whenever the light drops, helping you freeze the action.
Street Photography
Street scenes can change from bright sunlight to deep shade in seconds.
Recommended settings:
- Minimum ISO: 100
- Maximum ISO: 3200
- Minimum shutter speed: 1/500 sec
This combination allows you to react instantly without stopping to adjust settings.
Landscape Photography
Landscape photographers generally have more time to work, so Auto ISO isn’t always necessary. However, it can still be useful when shooting handheld.
Recommended settings:
- Minimum ISO: 100
- Maximum ISO: 800–1600
- Minimum shutter speed: 1/focal length, or faster
If you’re using a tripod, simply disable Auto ISO and shoot at your camera’s base ISO for the best possible image quality.
Macro Photography
Tiny movements become exaggerated at close distances.
Recommended settings:
- Minimum ISO: 100
- Maximum ISO: 3200
- Minimum shutter speed: 1/250–1/500 sec
Auto ISO helps maintain fast shutter speeds as you move between sun and shade.
Night Photography
Auto ISO can be useful for handheld night photography but is generally less helpful for tripod-based long exposures.
For handheld shooting:
- Minimum ISO: 100
- Maximum ISO: 6400–12800
- Minimum shutter speed: 1/60 sec or faster
For landscapes, Milky Way photography, or cityscapes on a tripod, it’s usually better to disable Auto ISO and select your ISO manually.
Use Auto ISO with Manual Mode
One of the most powerful techniques is combining Manual exposure mode with Auto ISO.
You choose:
- Aperture
- Shutter speed
Your camera adjusts only the ISO to maintain the proper exposure.
This gives you complete creative control while allowing the camera to compensate for changing light automatically.
Many professional sports, wildlife, and event photographers work this way because it lets them concentrate on capturing decisive moments instead of constantly adjusting exposure.
Don’t Set the Maximum ISO Too Low
A common mistake is limiting the maximum ISO too aggressively.
For example, setting a maximum ISO of 800 might sound like a good way to avoid image noise, but if the light gets too dim, your camera has nowhere else to compensate. Instead, it will begin using slower shutter speeds, which often results in blurry photos.
In most situations, a sharp image with a little noise is far more useful than a blurry image with perfect image quality.
Let Your Camera Do the Busy Work
Auto ISO isn’t about giving up control—it’s about letting your camera handle repetitive adjustments while you focus on creativity.
Once you’ve customized the minimum shutter speed and maximum ISO for the type of photography you’re doing, Auto ISO becomes one of the most valuable tools your camera offers.
Give it a try the next time you’re shooting in changing light. You may find yourself spending less time adjusting settings and more time capturing great photographs.
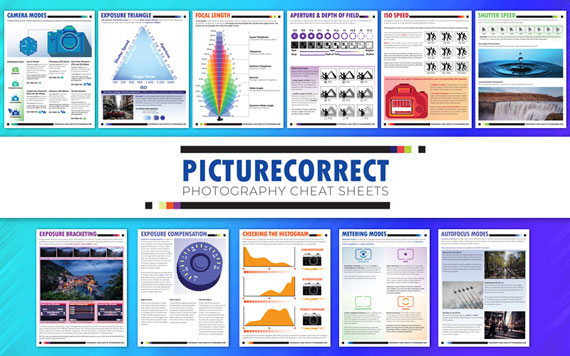
Have you ever wanted to photograph an amazing moment but missed the shot because you didn’t know the right camera settings to use? That’s where our popular cheat sheets come in. They are currently 80% off for a Summer Sale which ends soon if you want to check them out.
Print a Cheat Sheet Whenever You Need It
Whether you’re a seasoned professional or just starting out, photography cheat sheets can be a valuable resource for improving your skills and taking your photography to the next level. The perfect companion for any photographer. Print one out whenever you need it.
Summer sale ending soon: The Camera Cheat Sheets at 80% Off
from PictureCorrect https://ift.tt/ilNer3V
via IFTTT


0 kommenttia:
Lähetä kommentti