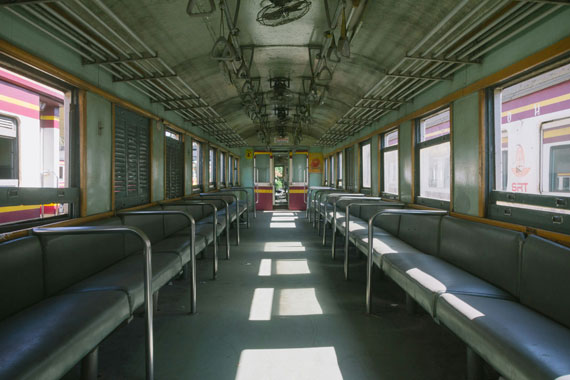
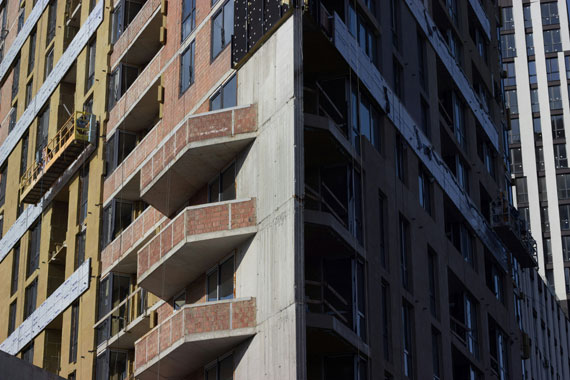
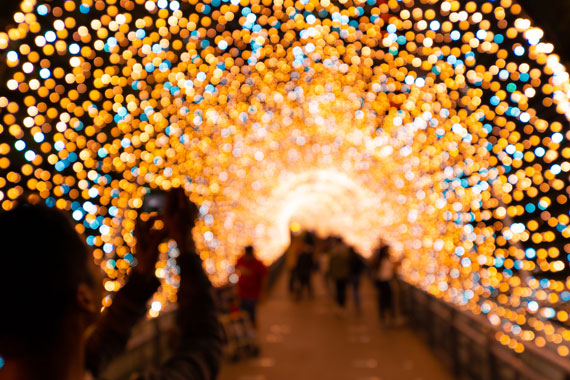
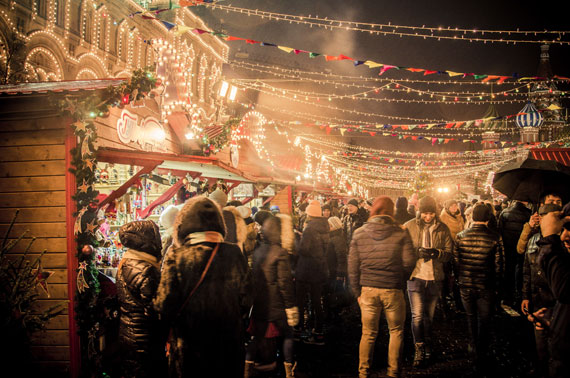
maanantai 8. joulukuuta 2025

PictureCorrect.com: New! Winter Photography Snap Cards

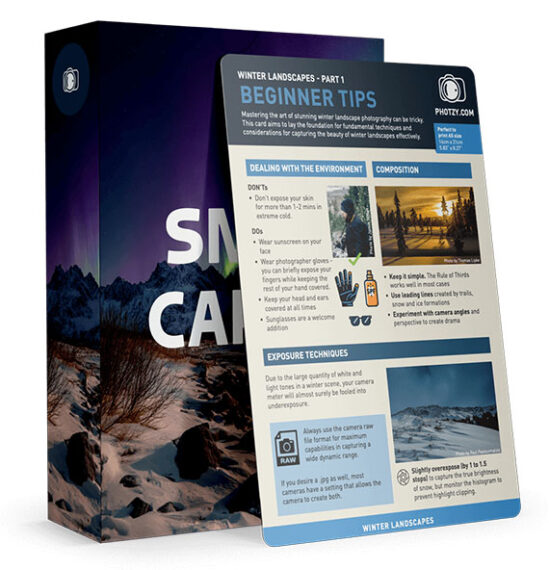
Winter is one of the most beautiful — and most challenging — seasons to photograph. Bright snow, low light, and fast-changing weather can make it tough to remember the right settings when the moment hits. That’s why a publisher created the new Snap Cards Winter Photography set: a pocket-sized toolkit designed to help you capture better winter photos with less guesswork. And right now, it’s available at a special launch price of 80% off, making it an easy upgrade for any photographer.

winter snap cards

What’s Inside

The Winter Edition includes 25 printable cheat sheets focused entirely on cold-weather shooting. You’ll get quick references for snow scenes, falling snow, icy textures, winter portraits, fog, low-light landscapes, and more. Each card gives you simple, glance-ready guidance for exposure, composition, and gear — all tailored to winter conditions.

The launch deal also includes bonus materials, such as extra winter photography guides and eBooks that go deeper into topics like snow photography, winter landscapes, and motion in cold weather.

Why They’re Useful

Snap Cards are made for real-world shooting — especially when you don’t want to stand in the cold scrolling through tutorials or second-guessing your settings. They’re clear, visual, and easy to follow, making them ideal for beginners and hobbyists who want fast, practical help on location.

Who They’re Best For

If you want to photograph snowy landscapes, frosty mornings, winter city nights, or cozy indoor scenes, these cards give you the quick technical guidance to get your shot right the first time — even in tough conditions.

Launch Sale:

Winter offers some of the most magical photographic opportunities of the year — and these snap cards help you make the most of them. With the 80% off launch sale and the valuable bonus materials included, it’s one of the most accessible ways to level up your winter shooting this season.

Deal ending soon: Winter Photography Snap Cards Launch Sale


from PictureCorrect https://ift.tt/xM9cu3f
via IFTTT

sunnuntai 7. joulukuuta 2025

PictureCorrect.com: How to Photograph Snow

Are you ready to capture stunning winter wonderland scenes with your camera? Whether you’re a seasoned pro or a beginner photographer, snow photography can be a fun and rewarding way to express your creativity. With a little bit of planning and the right camera settings, you can capture breathtaking images of snow-covered landscapes, frosty trees, and sparkling snowflakes. In this tutorial, we’ll show you how to master the art of snow photography, from choosing the right equipment to getting the perfect shot.

Also just a quick reminder, for a snow landscapes cheat sheet and more difficult winter photography situations, you may want to check out this holiday sale wrapping up soon on the popular Photography Adventure Cheat Sheets at 80% Off

photograph snow

Photo captured by Lucas Allman

Here are some tips for photographing snow:

Focus on contrast: Snow can be bright and featureless, so try to find subjects that provide contrast and interest. Look for dark trees, colorful hats or scarves, or other elements that will stand out against the snow.

Try exposure compensation: exposure compensation is a way to adjust the exposure of a photograph by telling the camera to make the image lighter or darker. When you photograph a scene that is predominantly white, like snow, the camera’s meter may be tricked into thinking the scene is brighter than it actually is. This can cause the camera to underexpose the image, resulting in a photograph that is too dark. Try using an exposure compensation of +1 or +2 to start.

Use aperture priority: Aperture priority is a shooting mode that allows you to control the aperture (f-stop) while the camera chooses the appropriate shutter speed. This can be useful when photographing snow because you can choose a small aperture (higher f/stop number) to not allow as much light into the sensor and adjust the depth of field to keep both the foreground and background in focus.

Try setting your white balance manually: Snow appears blue in photographs because it reflects blue light. This can cause the photograph to look cool and unbalanced if the white balance is not set correctly. To correct for this, you can set your white balance to “cloudy” or use a custom white balance. This will warm up the photograph and give it a more natural appearance.

snow white balance

Photo captured by Tobias Bjorkli

Protect your gear: Snow and cold temperatures can be tough on camera equipment. Make sure to keep your gear protected from the elements by using a weather-sealed camera and lens, and consider using a rain cover or umbrella to keep your gear dry.

Handle condensation: If you go from a cold outdoor environment to a warm indoor environment, your camera and lens may become covered in condensation. To prevent this, put your camera in a sealed bag before bringing it inside, and let it gradually warm up to room temperature before taking it out of the bag.

Try a polarizing filter: A polarizing filter is a type of lens filter that helps reduce glare and increase contrast by filtering out certain wavelengths of light. When you photograph snow, a polarizing filter can help reduce the glare from the sun and increase the contrast between the bright snow and the darker elements in the scene. This can help make the photograph more visually appealing and bring out the details in the scene.

Try a lens hood: A lens hood is a piece of equipment that attaches to the front of a lens and helps to reduce lens flare and improve contrast. When you photograph snow, the bright light reflecting off the snow can cause lens flare, which is a type of glare that appears as a series of bright streaks or circles in the photograph. Lens flare can be caused by light entering the lens from an angle, and it can reduce the contrast and overall quality of the photograph. A lens hood can also help to protect the front element of your lens from snow, moisture, and other elements. This can be especially useful when you are photographing in cold, wet conditions.

Get close to your subject: Snow scenes can often appear flat, so getting close to your subject can add depth and interest to your photograph. By getting close to your subject, you can create a sense of intimacy and bring out the details in the scene.

snow landscape composition

Photo captured by Adriaan Greyling

Experiment with different compositions: Photography is all about experimentation and trying different things. When you photograph snow, try shooting from different angles and perspectives, and play with the placement of elements in the frame. This will help you find a composition that works best for the scene you are photographing and create more visually interesting photographs.

We hope these tips have helped you capture beautiful photographs of snow! Remember to have fun and experiment with different camera settings and compositions to find what works best for you. Whether you’re capturing sweeping landscapes or close-up shots of frosty trees, snow photography is a great way to celebrate the beauty of winter. So bundle up, grab your camera, and head out into the snowy wonderland – you never know what amazing shots you might capture!

For Further Training:

For help remembering the camera settings for difficult situations like this, a set of Photography Adventure Cheat Sheets are designed to help. They are currently 80% off for a Christmas Sale which ends soon if you want to check them out.

photography adventure

New! Cheat Sheets for Your Photography Adventures (see how they work)

The perfect companion for any photographer. Print one out whenever you need it. Whether you’re going on vacation or seeking out a specific photography adventure, these cheat sheets can provide you with the knowledge and inspiration you need to create your best work yet.

Found here: The Photography Adventure Cheat Sheets Christmas Sale


from PictureCorrect https://ift.tt/OHzEg7A
via IFTTT

lauantai 6. joulukuuta 2025

PictureCorrect.com: From Auto to Manual: A Step-by-Step Journey Through Camera Modes

Learning how to use a camera and its various modes can significantly improve your photography skills, allowing you to creatively control your camera and adapt to different shooting conditions. Here’s a recommended order for learning camera modes, starting from the basics to more advanced settings.

Related: Want to level up your photography fast? PictureCorrect Premium is designed to be an accelerator with lessons, exercises, and more — it’s only $1 to start for the Holidays🎁

camera mode order

Photo captured by Giannis Agathokleous

Auto Mode (A or Auto): Most cameras have an automatic mode that makes all the decisions for you. It’s a good starting point to begin taking photos without worrying about the settings. Auto mode adjusts the aperture, shutter speed, ISO, and sometimes flash to suit the subject matter.

Program Mode (P): Once you’re comfortable with Auto mode, move to Program mode. It still selects the aperture and shutter speed for you but gives you more control over other settings like ISO, white balance, and flash. It’s a step towards understanding how different settings affect your images.

Aperture Priority Mode (A or Av): In Aperture Priority mode, you select the aperture (the size of the lens opening), and the camera automatically selects the shutter speed. This mode is essential for learning about depth of field (how much of your image is in focus) and for controlling how much light enters the camera.

Shutter Priority Mode (S or Tv): Here, you choose the shutter speed, and the camera selects the appropriate aperture. This mode is crucial for understanding how to capture motion in your images, allowing you to freeze action with fast shutter speeds or create motion blur with slow shutter speeds.

Manual Mode (M): Manual mode gives you full control over the camera settings, including shutter speed, aperture, and ISO. It requires a good understanding of how these settings interact. Start experimenting with manual mode in different lighting conditions to see the effects of your adjustments.

ISO Sensitivity: Alongside learning about modes, it’s essential to understand ISO sensitivity, which controls the camera’s sensitivity to light. Higher ISO values are used in darker conditions but can increase the graininess or “noise” in photos.

Bulb Mode (B): This is a specialized mode that allows for long exposures, useful for night photography, star trails, and other low-light conditions. In Bulb mode, the shutter stays open as long as you hold down the shutter button, allowing for exposure times longer than the camera’s preset limits.

Start with Auto and Program modes to get a feel for taking pictures and gradually work your way through to Manual mode, experimenting and learning how each setting affects your images. It’s also beneficial to read the camera manual, join photography courses, or watch tutorials to deepen your understanding of these modes. Practice is key; the more you shoot, the better you’ll understand how to control your camera to achieve the desired results.

Early Subscribers Are Already Ahead:

Every week, more photographers are joining PictureCorrect Premium to level up their craft — and you could be next. Inside, you’ll find expert-led tutorials, creative challenges, and printable exercises that make each lesson stick.

photography subscribers

Whether you’re working to improve composition, lighting, or manual control, Premium gives you the structure to make steady progress. The special $1 intro offer is ending soon, and once it’s gone, so is your chance to lock in early access.

🎁 Try it during the Holiday Enrollment for only $1 to Start


from PictureCorrect https://ift.tt/MpeTbza
via IFTTT

perjantai 5. joulukuuta 2025

PictureCorrect.com: How to Photograph Your Christmas Tree

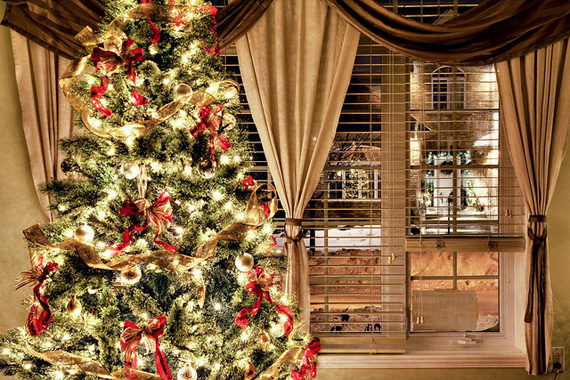
Photographing a Christmas tree seems simple—until you actually try it. Bright lights, deep shadows, and reflective ornaments can confuse your camera and produce washed-out highlights or muddy detail. With just a few small adjustments in technique and setup, you can capture warm, glowing images that look exactly like the cozy holiday scene in front of you.

Below are some practical tips to help you create beautiful Christmas tree photos, whether you’re using a DSLR, mirrorless camera, or even a smartphone.

Related: only a little while left for the Lighting Cheat Sheets 🎁 Cyber Week Sale

how to shoot christmas trees

Photo by Artur Staszewski.

Set the Scene Before You Start Shooting

Before touching your camera, take a minute to shape the scene. Fluff the branches, space out ornaments, hide visible wires, and turn off any harsh room lighting. Ambient light from lamps can contaminate colors or create unwanted reflections. The soft glow of the tree lights alone often produces the most pleasing atmosphere.

If you want a touch of extra illumination, use dim nearby lights—or bounce light off the ceiling using a flash set to a very low power. The key is to maintain the warm holiday mood without introducing harsh light.

Choose the Best Time of Day

Your tree will look most magical when photographed in low light. Early morning, dusk, and evening are ideal. Daylight from windows can overpower your tree lights, so aim for times when the room is darker and the bulbs shine brightest.

Use a Tripod for Sharper Results

Tree photos often require slower shutter speeds, which can introduce blur if you’re shooting handheld. A tripod—or even resting your camera on a table—keeps everything steady. If you’re using a phone, prop it against something sturdy or use a small phone tripod.

Turn on your camera’s self-timer or use a remote release to avoid shaking the camera when you press the shutter.

Dial in the Right Exposure Settings

Lower ISO for Cleaner, Better Color

Start with ISO 100–400. You’ll get richer lights and cleaner shadows. Higher ISO values add noise and can dull the glow.

Use a Slow Shutter Speed

Christmas tree lights look best when you let them “burn in” a little. Try 1–2 seconds if the room is dark. This long exposure captures the warmth and softness of each bulb.

If you want individual bulbs to appear bright and crisp rather than glowing, use a faster shutter speed—something closer to 1/60s—but you may need more ambient light.

Choose a Moderate Aperture

Aperture between f/4 and f/8 usually works well.

  • Wide apertures (f/1.8–f/2.8) give you dreamy background blur but may make ornaments too soft.
  • Narrow apertures (f/11–f/16) help you capture more detail in the branches and can create small starburst effects on tree lights.
christmas photography

Photo by Donnie Ray Jones; ISO 800, f/5.3, 0.8-second exposure.

Create Beautiful Light Bokeh

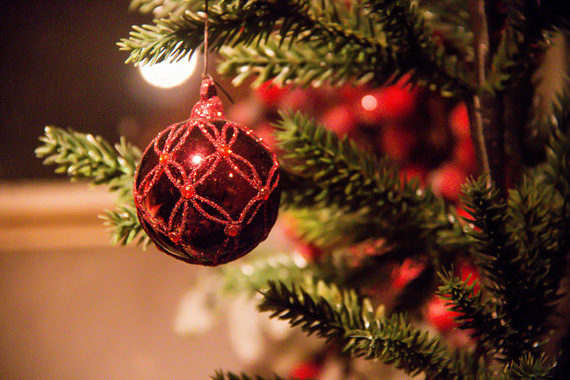
If you want those gorgeous blurry light circles, stand farther back and zoom in with a long focal length. Use the widest aperture your lens allows and focus on a foreground ornament. The tree lights in the background will naturally turn into creamy bokeh.

This is an easy way to create artistic holiday photos with a single dazzling subject.

Photograph the Entire Scene

Don’t forget to include the environment around the tree:

  • Presents
  • Fireplace or stockings
  • Window light
  • Pets or kids interacting with the tree

A wider shot that includes the room adds storytelling context and creates a more meaningful holiday image.

Experiment With Angles and Perspectives

A few creative ideas:

  • Shoot from low angles to make the tree look grand and towering.
  • Capture close-ups of ornaments to highlight personal details.
  • Photograph the tree through a doorway for a warm, candid mood.
  • Try reflections in windows or shiny ornaments.

These small variations lead to a more complete set of tree photos.

Try a Starburst Effect

If your tree lights are small and bright, stop your aperture down to f/16 or f/22. This creates a natural starburst effect on each bulb—an especially festive look.

You’ll need a tripod, as the image will get darker and require a longer shutter speed.

christmas photography

Photo by Susanne Nilsson; ISO 6400, f/5.6, 1/125-second exposure.

Smartphone Tips

If you’re shooting with a phone:

  • Tap to set focus on an ornament
  • Drag the exposure slider down slightly to keep highlights from blowing out
  • Use “Night mode” for long exposures (or try a manual camera app)
  • Clean the lens—phone lenses pick up smudges easily, which dull the lights

Modern phones can produce stunning holiday images with just a few tweaks.

Final Thoughts

Photographing your Christmas tree is all about balancing the glow of the lights with the details of the scene. Take your time, experiment with different exposures, and try both wide and close-up shots. With a steady setup and thoughtful lighting, you’ll end up with photos that capture the warmth, color, and magic of the season.

For Further Training:

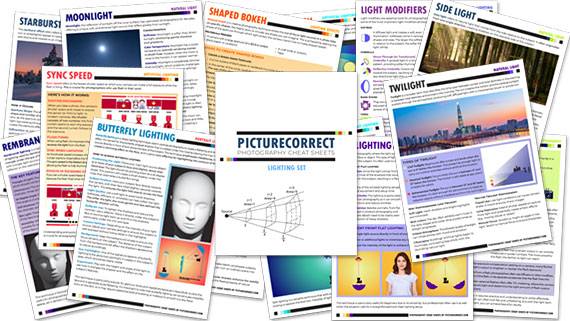
Lighting is arguably the most important aspect of photography; but do you know how to use it? These new Photography Lighting Cheat Sheets are designed to help. With critical information on ALL the types of natural light and artificial light you can use. They are currently 80% off today for a Cyber Week Sale 🎁
lighting cheat sheets

New! Cheat Sheets for Photography Lighting (see how they work)

Whether you’re a seasoned professional or just starting out, photography cheat sheets can be a valuable resource for improving your skills and taking your photography to the next level. By having all the key information you need in one place, you can focus on what’s important – capturing amazing photos.

Cyber Week sale ending soon: Photo Lighting Cheat Sheets at 80% Off

The post How to Photograph Your Christmas Tree first appeared on PictureCorrect.


from PictureCorrect https://ift.tt/tOlNdDB
via IFTTT

torstai 4. joulukuuta 2025

PictureCorrect.com: Focus Stacking in Luminar Neo

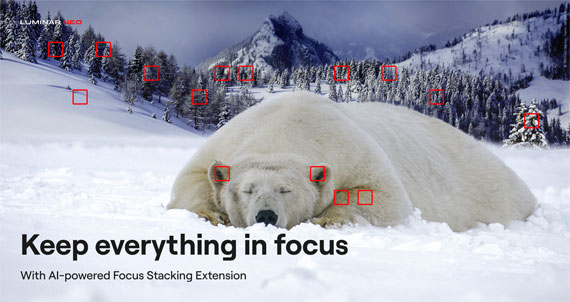
Focus stacking is one of the most effective ways to achieve sharp detail from front to back in your images, especially for macro photography, product work, or landscapes with strong foreground elements. Luminar Neo makes this technique incredibly accessible with its dedicated Focus Stacking tool. And with their Cyber Week Sale currently running, it’s an excellent moment for photographers considering Neo to explore the full capabilities of the software.

focus stacking luminar

Opening the Focus Stacking Tool

Luminar Neo includes a built-in Focus Stacking Extension designed to handle the entire merging workflow automatically. After launching Neo, open the Extensions panel and select Focus Stacking. If you don’t see it listed, make sure the extension is installed and activated. Many users add it during the Cyber Week Sale while the upgrade bundles are discounted.

Loading Your Images

Start by clicking Load Images and selecting all the frames you’ve shot for your focus stack. Luminar Neo displays the thumbnails so you can confirm the full sequence is present and in the correct order. Once imported, the software begins aligning and preparing the frames for processing behind the scenes.

Performing the Stack

When you’re ready, simply click Stack. Neo analyzes each image, identifies its sharpest areas, aligns all frames, and blends the focused regions into a single composite with extended depth of field. The entire process is fully automated—there’s no need to fine-tune complex settings or manually mask areas for sharpness.

macro focus stacking

Reviewing the Merged Image

When the stack is finished, Luminar Neo creates a new merged file in your Catalog. Open it in the Edit panel to refine it like any other photo. You can adjust exposure, color, detail, contrast, or creative effects. The stacked version supports all editing tools, giving you full flexibility to shape the final look.

Cleaning Up Any Artifacts

If you notice halos, ghosting, or slight softness around edges, Neo provides several ways to clean them up. Tools like Erase, Clone, and Masking allow for precise corrections. And if the individual frames were shot at a high ISO, applying NoiselessAI can help refine the final image while preserving clarity.

Exporting the Final Result

When you’re happy with your edits, use the Export panel to save the final image in your preferred format, size, and color space. The result is a crisp, beautifully blended photograph ready for sharing or printing.

A Quick Note on Cyber Week

If you’ve been thinking about adding Luminar Neo or expanding your toolset with additional extensions, their Cyber Week Sale is one of the rare times the entire ecosystem is discounted. It’s a good chance to explore tools like Focus Stacking, HDR Merge, NoiselessAI, and their newer AI-powered features at a lower price.

Offer ending soon: Luminar Neo Cyber Week Sale

The post Focus Stacking in Luminar Neo first appeared on PictureCorrect.


from PictureCorrect https://ift.tt/OPLEb8v
via IFTTT

keskiviikko 3. joulukuuta 2025

PictureCorrect.com: Using Symmetry or Asymmetry in Photography Composition

Photography, at its core, is an art form that thrives on composition – the way elements are arranged in a frame. Two powerful tools in a photographer’s arsenal are symmetry and asymmetry. Mastering the use of these can dramatically alter the feel, balance, and appeal of a photo. In this blog post, we’ll explore how to effectively use symmetry and asymmetry to enhance your photography.

Related: offer ending soon for the Composition Cheat Sheets 🎁 Cyber Monday Sale

symmetry composition

Photo captured by James Best

Understanding Symmetry in Photography

Symmetry is all about balance. When a photograph is symmetrical, it means that one side of the frame mirrors or closely resembles the other. This can be vertical symmetry (top to bottom), horizontal symmetry (left to right), or even radial symmetry (centered around a central point).

How to Use Symmetry:

  1. Look for Natural Symmetry: Nature is full of symmetrical patterns. Reflections in water, the wings of a butterfly, or the structure of a leaf are all great examples.
  2. Architectural Symmetry: Buildings and urban landscapes often have symmetrical designs. Capturing the essence of these structures can create visually striking images.
  3. Center Your Subject: In symmetrical photography, placing your subject in the center can enhance the impact of the symmetry. This works exceptionally well in portrait photography.
  4. Use Symmetry to Create Harmony: Symmetrical compositions often feel harmonious and pleasing to the eye, creating a sense of calm and balance.
  5. Reflections Are Your Friend: Water bodies, glass, and other reflective surfaces can be used to create natural symmetry.

Embracing Asymmetry in Photography

Asymmetry involves an imbalance in the composition, where one part of the frame does not mirror the other. It’s a powerful way to create dynamic, interesting, and thought-provoking images.

asymmetry

Photo captured by Daniel Harmatiy

How to Use Asymmetry:

  1. Rule of Thirds: Imagine your image is divided into nine equal segments by two vertical and two horizontal lines. Place your subject along these lines or at their intersections for a more engaging composition.
  2. Leading Lines: Use lines within your frame to lead the eye to your subject. These can be natural, like a row of trees, or man-made, like a winding road.
  3. Play with Angles: Sometimes, just changing your angle can introduce asymmetry in an image. Look for unique perspectives or viewpoints.
  4. Contrast and Color: Use contrasting elements or colors to create a focal point in your image. This can draw the viewer’s eye to a specific part of the photo.
  5. Fill the Frame Differently: Instead of centering your subject, place it off to the side and let the rest of the frame ‘breathe’. This can create a sense of movement or action.

Tips for Both Symmetry and Asymmetry

  • Understand Your Message: The choice between symmetry and asymmetry should depend on the story you want to tell. Symmetry often conveys peace, stability, and balance, while asymmetry can convey excitement, movement, or unease.
  • Experiment: Try both symmetrical and asymmetrical compositions in the same setting to see how they change the mood of the photo.
  • Post-Processing: Sometimes, symmetry can be enhanced or created during the editing process, while asymmetry can be emphasized by cropping or adjusting angles.
  • Keep Practicing: The more you practice, the better you will become at seeing and utilizing these compositional elements in your photography.

In conclusion, both symmetry and asymmetry have their unique appeals and can greatly impact the composition and storytelling of your photographs. By understanding and applying these principles, you can add depth and interest to your photography, regardless of your subject. So, grab your camera and start experimenting with these composition techniques today!

For Further Training on Composition:

Are you ever tired of your photos looking dull or boring? These popular Composition Cheat Sheets have you covered. With clear, concise information on all the essential elements of composition, you’ll never be unprepared again. They are currently 81% off for a Cyber Monday Sale 🎁 which ends soon if you want to check them out.

composition cheat sheets

Composition Cheat Sheets (see all the elements covered)

The perfect companion for any photographer. Print one out whenever you need it. These cheat sheets consolidate crucial composition-related information, allowing you to concentrate on what truly matters – composing striking photographs.

Deal ending soon: The Composition Cheat Sheets at 81% Off

The post Using Symmetry or Asymmetry in Photography Composition first appeared on PictureCorrect.


from PictureCorrect https://ift.tt/XJ4L2iq
via IFTTT

tiistai 2. joulukuuta 2025

PictureCorrect.com: Camera Settings for Christmas Lights

Love it or hate it, it’s that time of the year again… yes, Christmas is upon us, and so are all the magical festive lighting displays! Some photographers struggle to capture night scenes, though — especially when bright lights are the main subject.

Related: offer ending soon for the Photo Adventure Cheat Sheets 🎁 Cyber Monday Sale

christmas lights

Photo captured by Winston Chen; ISO 200, f/4.0, 1/30s, 24mm.

Photographing in low-light alone poses a lot of challenges. As pretty as they are to the naked eye, accurately capturing twinkling Christmas lights on your camera takes even more finesse. Not only do you need to tackle grainy backgrounds but avoid overblown illumination, as well.

Otherwise, those photographs may be completely unsalvageable, no matter how much you edit them. Are you planning on heading out to shoot displays locally in your neighborhood or town?

Take a few tips on the best camera settings to use when photographing Xmas lights! And start by putting your camera on a tripod.

Sample Christmas light camera settings:

  • I like Aperture priority mode, try starting with f/5.6
  • ISO 400
  • In aperture priority, the camera will choose the shutter speed.
  • Auto White Balance
  • More explanation

Lower Aperture

A low number aperture is a good starting point for low-light scenes — even those featuring bright lighting displays. For a bokeh effect with narrow depth of field, decrease the aperture down or closer to f/2.8. To capture a deeper depth of field image of a Xmas lighting display, increase your aperture up to f/8 or just below.

Shoot At Low ISO

Low-light photography can produce a lot of grain. Why? Amateur photographers often select a high ISO to expose the image. However, noise can be reduced by opting for a lower ISO setting instead — ideally, around 400 ISO or under. Don’t be afraid to raise the ISO if you are getting underexposed results, modern cameras are performing increasingly well at higher ISO settings.

christmas market

Photo captured by Daniil Silantev; ISO 400, f/4.0, 1/15s, 24mm.

Adapt To Your Sensor

Each camera has a unique sensor, so copying other photographers’ ISO settings may not always be the best idea. Instead, pros recommend you get to know your sensor and its noise levels. For example, dual-gain sensor noise isn’t linear, often dropping off at 200, 400, and 800 ISO.

Leverage Shutter Speed

One caveat of photographing on a low ISO is equally little exposure in an image. To compensate, it’s best to adjust your shutter speed. If you are setting the shutter speed manually, between 1/8 to 1/125 is often a good starting point to allow your sensor to absorb more light, even at low ISO. Then if you are still underexposed, slow down the shutter speed even more.

Expose Lights, Not the Dark

Overblown illumination is the most common night photography error — and no amount of editing can truly fix it! That’s why pro photographers prioritize lights when selecting their exposure settings. Do the same by taking test images until no light bleed is detectable in yours.

Automate White Balance

Cameras can struggle to find the correct white balance at night. Throw in a few fairy lights, bulbs, and LEDs, in various tones, and you’re in for a wild ride. If you struggle to adjust your white balance as is, opt for Auto or Tungsten. And remember, you can always edit the white balance later on.

Keep The Flash Off

Using flash may seem the logical choice when shooting at night, but it isn’t the best route when capturing lights. Your flash can counteract the brightness emanating from Christmas lights, creating additional noise. If you must, opt for an off-camera flash or professional handheld light.

Remember to Focus

Autofocusing in the dark can be tricky for your eyes and camera sensor, but minimizing AF points can help. Ideally, stick to a single or small group of AF points. Then aim it or them at the brightest subject in your frame for the best effect. Your camera will also be able to focus faster this way. Or use manual focus.

focus point

Photo captured by Bob Ricca; ISO 1000, f/2.8, 1/30s, 62mm.

Shoot In RAW

Even if you do manage to capture the perfect Christmas light shot manually, editing can really bring out its best. Shoot in RAW, that way you have more scope to play with when editing your images later on.

For Further Training:

For help remembering the camera settings for difficult situations like this, a set of Photography Adventure Cheat Sheets are designed to help. They are currently 80% off for Cyber Monday🎁 which ends soon if you want to check them out.

photography adventure

New! Cheat Sheets for Your Photography Adventures (see how they work)

The perfect companion for any photographer. Print one out whenever you need it. Whether you’re going on vacation or seeking out a specific photography adventure, these cheat sheets can provide you with the knowledge and inspiration you need to create your best work yet.

Deal ending soon: Photo Adventure Cheat Sheets 🎁 Cyber Monday Sale

The post Camera Settings for Christmas Lights first appeared on PictureCorrect.


from PictureCorrect https://ift.tt/HgLb9ra
via IFTTT