


When it comes to macro photography, getting your subjects tack sharp from front to back is a real challenge. A lens’s depth of field is greatly reduced when the subject is very close to it. But how do macro photographers take detailed macro shots of their subjects? Well, you can use a technique called focus stacking for that purpose. In this video, photographer Micael Widell talks about focus stacking to help you get started with macro photography:
What is Focus Stacking?
Focus stacking involves taking a series of shots, with each shot focusing on a different plane of the subject. The shots are later processed using software to display only the sharpest parts of the image. The result is a sharp image that has a depth of field greater than that in the individual images.
What You’ll Need
Macro lens: True macro lenses have the ability to recreate life-size images (1:1) of subjects on the sensor. Widell uses a Laowa 60mm f/2.8 macro lens.
Macro slider: A macro slider allows you to move the camera back and forth with slight movements. This way, you get to take multiple images with the lens focusing on different planes every time. Widell uses a basic macro slider from Velbon.
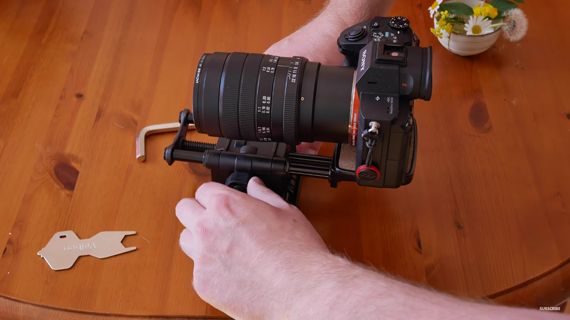
Tripod: For focus stacking, you cannot simply move the camera. You’ll need to mount it on a tripod. The only movement it should make should be via the macro slider.
Lighting: If lighting isn’t sufficient, you’ll need some artificial lights. Widell uses a Godox LED light, but you can use any other light source of your choice. If you’re shooting outside on a sunny day, natural light may suffice.
Remote Shutter Release: For the best possible results, use a remote shutter release. This way, you eradicate any chance of introducing camera shake when pressing the shutter button. If you don’t have one, you can use your camera’s 2-second self-timer option.
Software for Focus Stacking: Since you will need to merge the images together to reveal the sharpest areas, you’ll need to use some kind of software. Widell uses Helicon Focus, which is an application dedicated to focus stacking.
Taking Photos for Focus Stacking
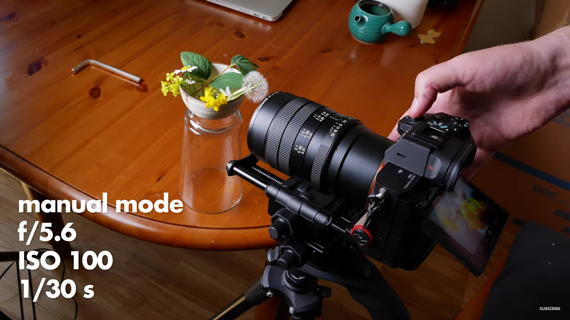
For consistent results, turn the camera to manual mode. Then, select an aperture value that will deliver sharp results. This value can differ on every lens but you can safely go with aperture values somewhere around f/5.6-f/11. Widell sets his lens to f/5.6 because that is where his lens performs great. For clean and detailed results, set the ISO to the lowest setting. And since you’ll have the camera mounted on a tripod, you can get away with using slower shutter speeds, as well.
Once you have your subject, camera setup, and lighting in place run through the following steps to get started with focus stacking:
- Start by finding a point on your subject to focus on. It’s usually best to start from the part of the subject that’s closest to you. Be sure to have the camera in manual focus mode and leave it there while focusing. Once happy with the first composition, take the photo.
- After you take a photo, shift the camera a bit forward using the macro slider and take the photo again. Be sure not to shift the camera forward too much. This can result in blurry sections in your image. Repeat this process until you reach the furthest end of your subject.
Focus Stacking Using Software
Load the images in the Helicon Focus application after taking the images. When doing so, make sure that you place them in the right order of distance. Otherwise, the image will appear distorted, and sometimes you’ll even notice that not everything will be in the correct place.

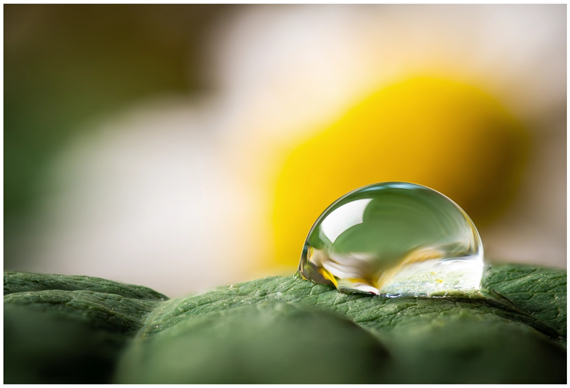
Notice the section of the water droplet that is out of place.
Once you load the images in the right order, simply press the render button and let the application do its magic. If you loaded the files correctly, the resulting image will be a composite of all the sharp sections of the images. This simply means that the final image will have a greater depth of field than the individual macro images. If you notice something wrong, check the order of the images individually.
If you’ve been thinking of ways to get a greater depth of field in your macro images, this is one of the simplest methods.
- - - - - - - - - - - - - - - - - - - - - - - - - - - - - - - - - - - - - - - - - - - - - - - - - - - - - - - - - - - - - - - - - - - - - - - - - -
Did you appreciate this newsletter? Please help us keep it going by Joining Our Patreon Supporters
What are your thoughts on this article? Join the discussion on our Facebook Page
PictureCorrect subscribers can also learn more today with our #1 bestseller: The Photography Tutorial eBook
- - - - - - - - - - - - - - - - - - - - - - - - - - - - - - - - - - - - - - - - - - - - - - - - - - - - - - - - - - - - - - - - - - - - - - - - - -
The post Macro Photography Focus Stacking Tutorial appeared first in the Photography Tips category on PictureCorrect.
from PictureCorrect https://ift.tt/0SjtI8M
via IFTTT


0 kommenttia:
Lähetä kommentti