lauantai 14. syyskuuta 2024

PictureCorrect.com: Photography Basics: Qualities of Natural Light

We all know that we need light to take pictures. If you’re planning to take pictures outdoors during the daytime, you might believe that light is the least of your concerns. While that might be somewhat true, many people don’t realize that natural outdoor lighting has an effect on the overall look of their pictures. Natural light has different qualities. It may have warm tones or cool tones. Natural light can also be soft or hard. The quality of the light that shows in your images will depend on outdoor conditions (weather) as well as the time of day you are taking pictures.
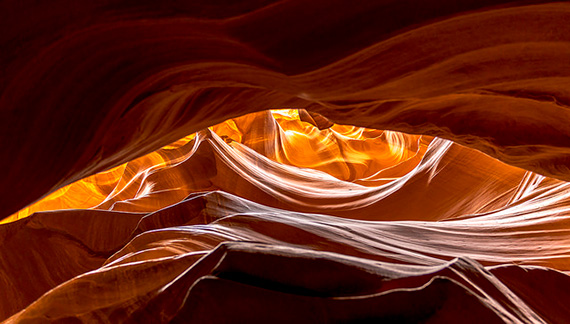
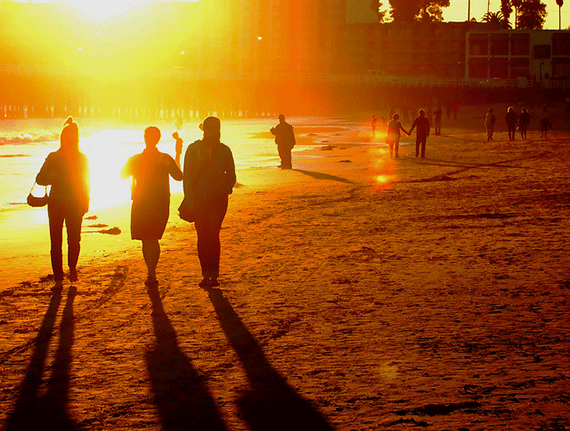
shadows in natural light

photo by kewlscrn

Something else to consider is the fact that sunlight creates shadows. Shadows are a part of nature, but depending on your subject, those shadows could enhance or detract from your picture. Another reason to “see the light” when you are taking pictures outdoors is the fact that the available light influences camera exposure settings that will produce a properly exposed picture. You can’t change the natural lighting outdoors, but paying attention to light will help you make better decisions about how and when you might want to take your pictures.

Cloudy Days and Sunny Days

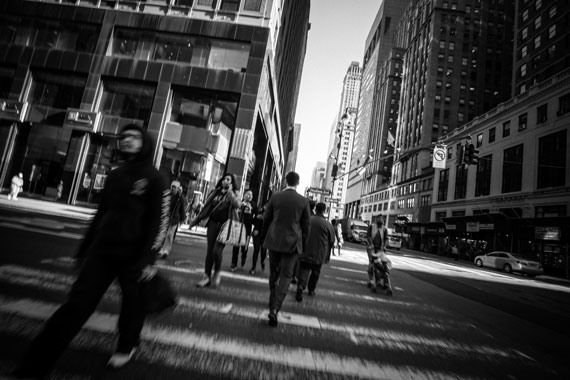
Direct, bright sunlight on a clear day is considered to be hard light. Depending on the angle and intensity of that light, sharp edged shadows may be cast on your subject. Those shadows work well for some subjects, such as landscape scenes, but a portrait that shows one part of the subject’s face in shadows is usually not very flattering. Bright light and shadows also create more contrast in an image. Pictures with higher contrast will bring out more details in a subject or scene.
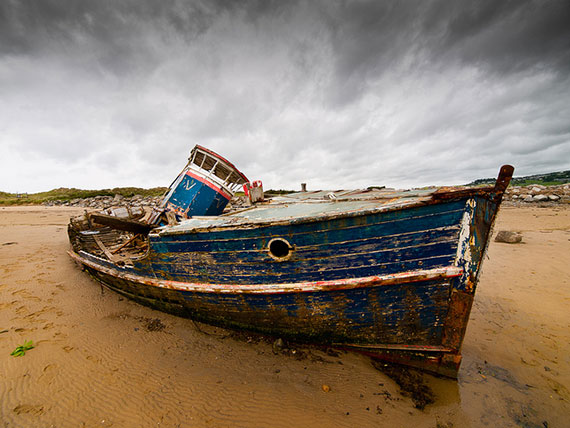
cloudy day photography

photo by William Warby

The light on a cloudy, overcast day is not as bright or as hard as the light on a sunny day. Pictures taken on cloudy days have much less contrast than those taken on bright, sunny days. Pictures taken on cloudy days have very soft shadows, if there are any at all. The overall light on a cloudy/overcast day is pretty even, making it ideal for portraits. Take note that pictures taken in shaded areas on clear days will have pretty much the same light qualities as those taken under very cloudy conditions.

Color Tone and Time of Day

Many people don’t think about the color tone that will be in their pictures while they are taking the shots. Yet, as previously mentioned, the color tone in the atmosphere can have a distinct effect on the overall look of your pictures. The color tone on a very cloudy or overcast day is considered to be cool. The overall tone on a cloudy day is slightly bluish and gray. The natural colors of a scene or subject taken on a cloudy day will still show in your images. However, they won’t appear to be as bright or vivid as the same subject taken on a clear day. The colors will appear to be more subdued or cool.

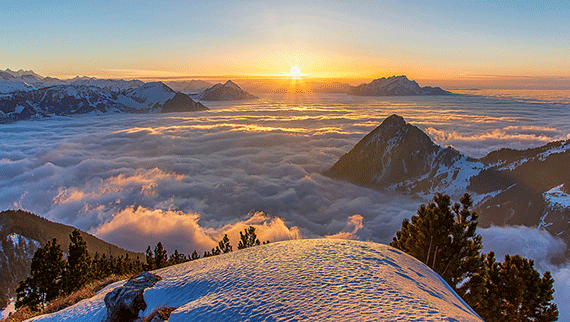
On a clear day, during the hour or two after sunrise, the early morning light has a warm, yellowish color tone. The same is true for the hour or two before sunset. The hour or so after sunrise and before sunset is known as the golden hour(s). Many photographers love taking pictures at these times because of the warm tones, but also because the light is not as hard or harsh as it might be around midday. Since the sun is still near the horizon during these hours, it produces long shadows. However, these shadows are not quite as sharp and hard as shadows produced by midday sunlight. As the sun continues to rise, the warm tones gradually fade during the hours from mid-morning to midday.
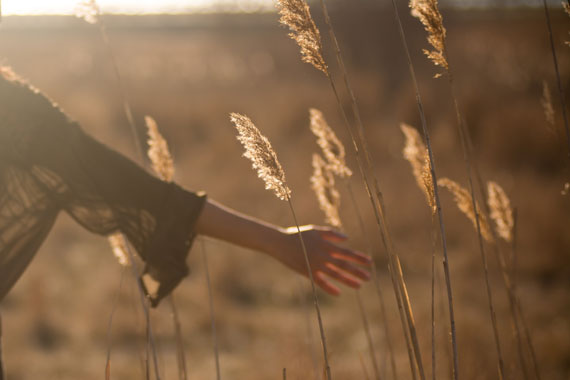
golden hour

Photo captured by Oliver Pacas; ISO 100, f/2.8, 1/2500s.

The light at midday is considered to be neutral or colorless (as far as color tone). However, the midday light is the hardest light of the day and produces hard, sharp edged shadows. This type of light may work well for some subjects, but it is probably the least desirable type of lighting for portraits. After midday, the tone of the light in the atmosphere gradually begins to become warmer as we head into late afternoon. We then head toward another golden hour before sunset. All cameras have a white balance feature, which is designed to make sure that anything white in a scene shows as white in the picture. However, depending on your camera settings, it might cause the warm glow to be eliminated from your picture. On the other hand, your camera also has settings that can enhance the warmth or coolness of your images. Check your camera’s manual to see which white balance setting will work best for the effect you want.

Once again, you can’t change outdoor conditions when you’re taking pictures. But you should get to know how natural light affects your photos. There may be times when you have something specific in mind as far as what type of natural light would work best for a particular scene or subject. Now, since you know the main qualities of natural light, you will be able to make good decisions as to how and when you take those pictures.

About the Author:
Keith Jones writes for https://www.easybasicphotography.com/, a site geared towards beginners through serious amateurs who want to learn a little more about basic digital photography.

For Further Training:

Lighting is arguably the most important aspect of photography; but do you know how to use it? These new Photography Lighting Cheat Sheets are designed to help. With critical information on ALL the types of natural light and artificial light you can use. In the spirit of summer, they are currently 80% off today for a Sunlight sale.
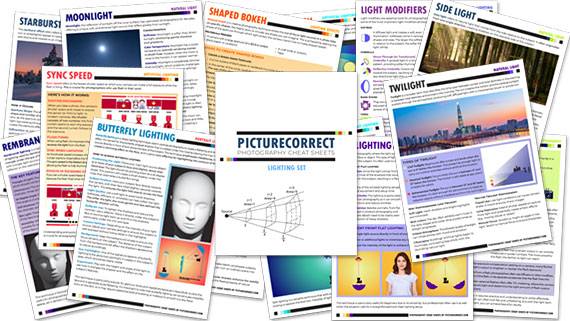
lighting cheat sheets

New! Cheat Sheets for Photography Lighting (see how they work)

Whether you’re a seasoned professional or just starting out, photography cheat sheets can be a valuable resource for improving your skills and taking your photography to the next level. By having all the key information you need in one place, you can focus on what’s important – capturing amazing photos.

Sunshine sale ending soon: The Photography Lighting Cheat Sheets at 80% Off

- - - - - - - - - - - - - - - - - - - - - - - - - - - - - - - - - - - - - - - - - - - - - - - - - - - - - - - - - - - - - - - - - - - - - - - - - -

Photography, like any art or skill, thrives on consistency. The journey to becoming an adept photographer is paved with regular practice. Learn how PictureCorrect Insiders can help.

- - - - - - - - - - - - - - - - - - - - - - - - - - - - - - - - - - - - - - - - - - - - - - - - - - - - - - - - - - - - - - - - - - - - - - - - - -

This post Photography Basics: Qualities of Natural Light appeared on PictureCorrect.


from PictureCorrect https://ift.tt/3gJ8Q46
via IFTTT
perjantai 13. syyskuuta 2024

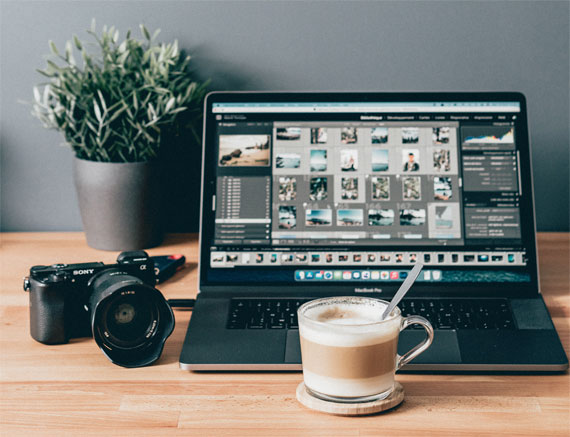
PictureCorrect.com: Workflow Example in Lightroom

The most common workflow order/steps photographers use in Adobe Lightroom can vary depending on the individual’s preferences, but here’s a general workflow that many photographers follow if it helps:

Related reminder: exclusive deal ending soon for the Lightroom Mastery Guide at 50% Off

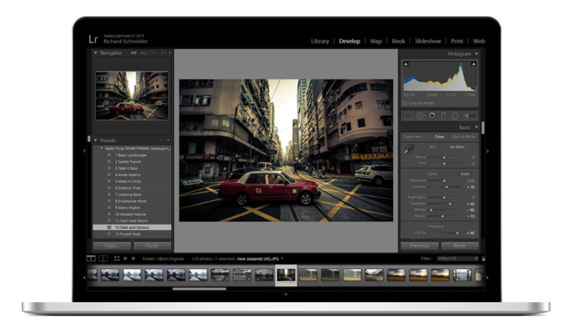
lightroom workflow

Photo captured by Mylene Tremoyet

Importing photos: Add photos to the Lightroom catalog by importing them from your camera or storage device.

Culling and organization: Browse through your imported photos and delete any unwanted images. Use flags, ratings, and color labels to sort and organize your images.

Apply metadata and keywords: Add metadata such as copyright information, location, and other details to your photos. Assign keywords to make it easier to search for specific images in the future.

Develop module: Start editing your photos by adjusting exposure, contrast, and other basic settings in the Develop module. This is where most of the creative work takes place.

Apply presets or profiles: Use presets or profiles to apply a specific look or style to your images. You can use built-in presets, create your own, or import presets from other sources.

Local adjustments: Use tools like the adjustment brush, radial filter, and graduated filter to make local adjustments to specific areas of your images.

Detail enhancement: Sharpen your images and reduce noise using the Detail panel.

Lens corrections: Apply lens corrections to fix issues such as distortion, chromatic aberration, and vignetting.

Transform and crop: Use the Transform panel to straighten and correct perspective issues, and the Crop tool to frame your image to your liking.

Spot removal: Use the Spot Removal tool to clean up any dust spots, blemishes, or other unwanted elements in your photos.

Export: Once you’re satisfied with your edits, export your images in the desired file format, size, and quality for sharing, printing, or archiving.

This is a general workflow, and photographers may adjust it to their preferences or skip certain steps if they are not applicable to their project. The key is to develop a consistent process that works best for you and your photography needs.

For Further Training:

Are you tired of spending hours on end fiddling around in Lightroom Classic and not getting the results you expect? This in-depth eBook is designed to help photographers master Lightroom Classic to its full potential. We were able to arrange an additional 50% discount for our blog readers which ends soon.

lightroom mastery

Lightroom Mastery (Click to Learn More)

Not by droning repetitions of someone else’s editing style, but through teaching you the basic premises of the software using easy to understand, real-world language that will unlock your potential for learning.

Deal ending soon: The Lightroom Mastery eBook at 50% Off

- - - - - - - - - - - - - - - - - - - - - - - - - - - - - - - - - - - - - - - - - - - - - - - - - - - - - - - - - - - - - - - - - - - - - - - - - -

Photography, like any art or skill, thrives on consistency. The journey to becoming an adept photographer is paved with regular practice. Learn how PictureCorrect Insiders can help.

- - - - - - - - - - - - - - - - - - - - - - - - - - - - - - - - - - - - - - - - - - - - - - - - - - - - - - - - - - - - - - - - - - - - - - - - - -

This post Workflow Example in Lightroom appeared on PictureCorrect.


from PictureCorrect https://ift.tt/T6ny1z0
via IFTTT

keskiviikko 11. syyskuuta 2024

PictureCorrect.com: 10 Lightroom Tools for Photographers to Know

Adobe Lightroom is an essential tool for photographers, as it offers a range of features to help edit, organize, and enhance photos. Here are the top 10 most important Lightroom tools that photographers should know how to use:

Relevant note: offer going on now for the Lightroom Mastery Guide at 50% Off

lightroom tools

Photo captured by Szabo Viktor

Histogram: The histogram provides a visual representation of the tonal range in an image. It helps you assess exposure and make adjustments as needed.

Crop and Straighten: The Crop tool allows you to trim your image to a desired aspect ratio, while the Straighten tool enables you to correct any slanted horizons or lines.

White Balance: This tool is essential for correcting color temperature in your images. You can use the eyedropper tool to select a neutral area or manually adjust temperature and tint sliders.

Tone Curve: The Tone Curve allows you to make precise adjustments to the tonal range of your image. You can control highlights, shadows, and midtones to create the desired contrast and tonal balance.

Basic Panel: The Basic Panel offers controls for Exposure, Contrast, Highlights, Shadows, Whites, and Blacks. These sliders help you adjust the overall brightness, contrast, and tonal balance of your images.

HSL / Color Panel: This panel allows you to adjust Hue, Saturation, and Luminance (HSL) for individual colors. This is useful for enhancing specific colors or correcting color imbalances in your photos.

Sharpening and Noise Reduction: These tools help you enhance image details and reduce noise, particularly in high ISO images. The Detail Panel contains the sharpening and noise reduction sliders.

Lens Corrections: Lightroom has a built-in database of lens profiles that can automatically correct common lens issues like distortion, vignetting, and chromatic aberration.

Graduated and Radial Filters: These filters allow you to apply adjustments selectively to specific areas of your image. Graduated filters are ideal for landscapes, while radial filters work well for isolating subjects and creating vignettes.

Spot Removal: The Spot Removal tool is perfect for getting rid of sensor dust, small blemishes, or other unwanted elements in your images. You can choose between Clone and Heal modes, depending on the desired effect.

By mastering these essential Lightroom tools, photographers can greatly improve their workflow and image quality.

For Further Training:

Are you tired of spending hours on end fiddling around in Lightroom Classic and not getting the results you expect? This in-depth eBook is designed to help photographers master Lightroom Classic to its full potential. It is currently 50% discount for those of you working on your photo editing skills – which ends soon.

lightroom mastery

Lightroom Mastery (Click to Learn More)

Not by droning repetitions of someone else’s editing style, but through teaching you the basic premises of the software using easy to understand, real-world language that will unlock your potential for learning.

Deal found here: The Lightroom Mastery eBook at 50% Off

- - - - - - - - - - - - - - - - - - - - - - - - - - - - - - - - - - - - - - - - - - - - - - - - - - - - - - - - - - - - - - - - - - - - - - - - - -

Photography, like any art or skill, thrives on consistency. The journey to becoming an adept photographer is paved with regular practice. Learn how PictureCorrect Insiders can help.

- - - - - - - - - - - - - - - - - - - - - - - - - - - - - - - - - - - - - - - - - - - - - - - - - - - - - - - - - - - - - - - - - - - - - - - - - -

This post 10 Lightroom Tools for Photographers to Know appeared on PictureCorrect.


from PictureCorrect https://ift.tt/faYk7pZ
via IFTTT

tiistai 10. syyskuuta 2024

PictureCorrect.com: New Outdoor Backpacks for Photographers

Peak Design has launched its latest product range, the Peak Design Outdoor Line, aimed at enhancing the carrying experience for outdoor adventurers and photographers. This new collection includes backpacks, slings, and modular packing tools, all designed for optimal organization, comfort, and ease of use.

outdoor line

Peak Design Outdoor Line

Addressing Common Outdoor Carry Issues

The Outdoor Line is designed to tackle common challenges in outdoor and photography carry, such as poor fit, bulky harness systems, and limited access to gear. The collection consists of two backpacks, two slings, and a series of packing tools to provide customizable and modular organization. The goal is to improve comfort and accessibility without sacrificing functionality or durability.

Outdoor Backpack Features

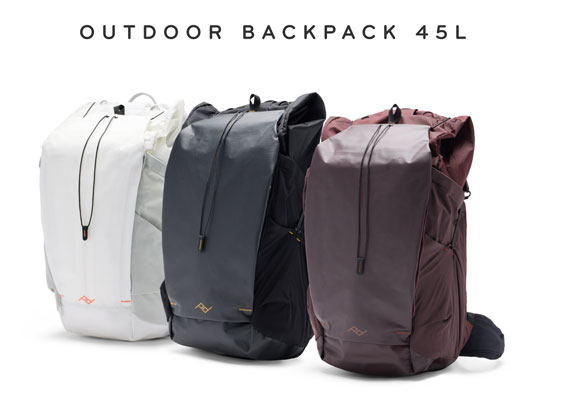
At the core of the collection are the Outdoor Backpacks, available in 45L and 25L sizes. These backpacks are built with a low-profile, adjustable harness system featuring shoulder and waist straps designed to distribute weight more evenly. Inspired by running vests, the straps aim to provide a more comfortable carry over longer distances.

The backpacks feature two access points: the Ultra Cinch™ quick-opening top hatch and a large rear access panel. These offer flexibility in packing and retrieving gear. External storage is enhanced by the Cord Hook™ carry system and Flex Pockets™, which accommodate items like water bottles, tripods, and clothing.

Outdoor Sling Features

The Peak Design Outdoor Sling is available in 7L and 2L sizes and is designed for versatility. The slings can be worn either cross-body or around the waist, with a padded, removable strap and quick-adjustment hardware.

outdoor sling

The 7L version can hold a Peak Design X-Small Camera Cube, making it suitable for carrying a camera, while both sling sizes can be attached to the Outdoor Backpacks for additional storage.

Compatibility and Durability

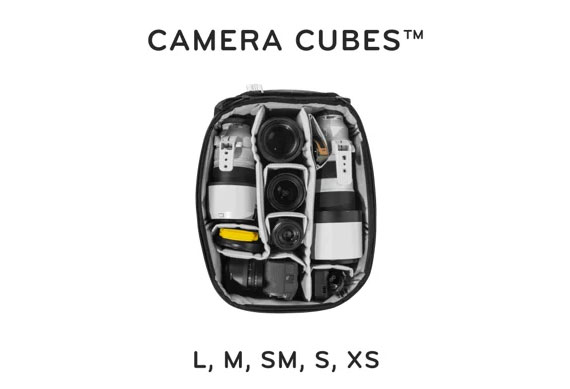
The new products are fully compatible with Peak Design’s Camera Cubes and Ultralight Packing Cubes, allowing users to configure their storage for a wide range of outdoor gear or photography equipment. Built to withstand rugged conditions, the bags feature PFAS-free recycled Terra Shell™ fabric, Ultra Zips™, and ultra-durable, slash-resistant UHMWPE cording.

camera cubes

Availability and Pre-Orders

The Peak Design Outdoor Line is available for pre-order through a Kickstarter campaign, running from September 3 to October 15, 2024. Pre-order discounts of 20-25% off MSRP are offered during this period, with prices ranging from $59.95 to $329.95. Products are expected to ship in January 2025, and the line will be available through Peak Design’s website, Amazon, and other retailers worldwide starting in late November 2024.

Kickstarter pre-order offer found here: Peak Design Outdoor Line

- - - - - - - - - - - - - - - - - - - - - - - - - - - - - - - - - - - - - - - - - - - - - - - - - - - - - - - - - - - - - - - - - - - - - - - - - -

Photography, like any art or skill, thrives on consistency. The journey to becoming an adept photographer is paved with regular practice. Learn how PictureCorrect Insiders can help.

- - - - - - - - - - - - - - - - - - - - - - - - - - - - - - - - - - - - - - - - - - - - - - - - - - - - - - - - - - - - - - - - - - - - - - - - - -

This post New Outdoor Backpacks for Photographers appeared on PictureCorrect.


from PictureCorrect https://ift.tt/RbJF5DV
via IFTTT

maanantai 9. syyskuuta 2024

PictureCorrect.com: Step-by-Step Guide to Better Sunset Photography

Having a DSLR or mirrorless camera to use is the ultimate thrill for a budding photographer. Taking great sunset shots should be easy with such a great tool, right? This article suggests steps you can take to optimize your camera for sunset photographs.

steps to better sunset pictures with your camera

Photo by Howard Ignatius; ISO 400, f/11.0, 1/25-second exposure.

1. Shooting Mode

Many compact cameras have a setting for sunsets, yet many DSLRs don’t, so you have to take control of the situation. Turn off your fully auto, or basic shooting modes, and use your creative zone modes of P (program mode), Tv (shutter priority), Av (aperture priority) or M (manual) so that you have full control over the camera’s parameters.

2. White Balance

Auto White Balance can neutralize a sunset’s glow, so switch to manual White Balance and choose a setting of Cloudy or Shade.

instructions for better sunset photography

Photo by Rennett Stowe; ISO 100, f/13.0, 1/160-second exposure.

3. ISO

Set your ISO at the lowest setting of ISO 100. There’s usually plenty of brightness in the sky, so this is fine. Sunsets can suffer from grainy images with higher ISO settings.

4. Metering Mode

Exposure is important in any sunset shot. It’s best to switch to partial metering mode and take a manual meter reading. This can be a difficult aspect of digital photography for beginners, so I’ll explain how to do this.

Once in partial metering mode, point the camera at a bright area of the sky, directly above the setting sun. Press the star button on the back of the camera to take a light reading and to set the exposure. Then compose your shot and press the shutter release to drive the autofocus and capture the image.

5. Composition

step by step instructions to taking beautiful sunset photos

Photo by darwin Bell; ISO 200, f/9.0, 1/250-second exposure.

Consider your composition. Silhouetted objects and figures in the foreground will add interest. Reflective surfaces, such as lake water, the sea, or wet roads will bring added color to the shot.

Beware—once the sun starts to near the horizon, it sinks surprisingly quickly. This also happens to be the optimum moment when you will catch the strongest shots, yet it can come and go in an instant. Be prepared—make sure all your settings are in place well before this time.

sunset photography advice and tips

Photo by Lukas Schlagenhauf; ISO 100, f/8.0, 1/40-second exposure.

When the sun has disappeared, it doesn’t mean you should. For another thirty minutes or so, there can often be some amazing color across the sky, so keep looking for more opportunities for great photos.

learn to take amazing sunset photography

Photo by Vincent Hou; ISO 100, f/11.0, 15-second exposure.

I hope this step-by-step sunset guide for beginning photographers has been helpful and that you can catch some beautiful sunset photos in the future. They truly are wonderful shots to look back on.

About the Author:
Article written by Paul Summers from PhotographyCourseOnline.

- - - - - - - - - - - - - - - - - - - - - - - - - - - - - - - - - - - - - - - - - - - - - - - - - - - - - - - - - - - - - - - - - - - - - - - - - -

Photography, like any art or skill, thrives on consistency. The journey to becoming an adept photographer is paved with regular practice. Learn how PictureCorrect Insiders can help.

- - - - - - - - - - - - - - - - - - - - - - - - - - - - - - - - - - - - - - - - - - - - - - - - - - - - - - - - - - - - - - - - - - - - - - - - - -

This post Step-by-Step Guide to Better Sunset Photography appeared on PictureCorrect.


from PictureCorrect https://ift.tt/PQ581gn
via IFTTT

perjantai 6. syyskuuta 2024

PictureCorrect.com: Shooting from the Hip: Street Photography Tips for Travelers

Street photography is an art form that captures the candid moments of life, often in urban settings. For travelers, it offers a unique way to document the essence of a place, its people, and its culture. One popular technique in street photography is “shooting from the hip,” which involves taking photos without raising the camera to the eye. This method can yield spontaneous and unposed shots, but it also comes with its own set of challenges, ethics, and safety concerns.

Related note: sale going on now for the Street Photo Editing Presets at 67% Off

Let’s delve into the world of hip-level street photography for travelers.

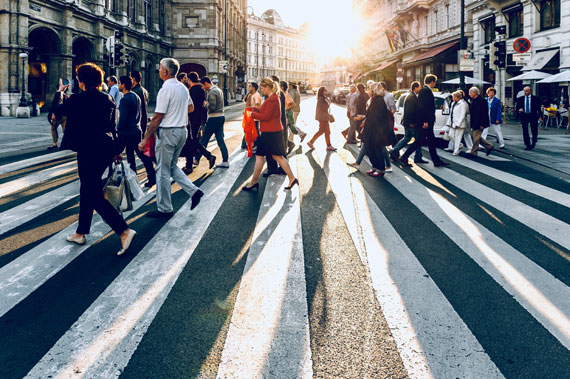
shooting from the hip photo

Photo captured by Richard Schneider

1. What is “Shooting from the Hip”?

Shooting from the hip is a technique where the photographer takes a photo without looking through the viewfinder or at the screen. The camera is typically held at waist level, and the shot is taken discreetly. This approach allows for more candid shots, as subjects often don’t realize they’re being photographed.

2. Why Use this Technique?

  • Candidness: People act more naturally when they don’t know they’re being photographed. This can lead to more authentic and spontaneous images.
  • Discretion: In busy streets or markets, raising a camera can attract attention. Shooting from the hip can be more discreet.
  • Unique Perspective: Photos taken from waist level offer a different viewpoint than those taken from eye level, adding variety to your shots.

3. Tips for Shooting from the Hip

When shooting from the hip in street photography, you’ll want to optimize your camera settings to ensure you capture sharp, well-exposed images, especially since you won’t be using the viewfinder or screen to compose or focus. Here are some recommended settings:

hip camera settings

Aperture (f-stop):

  • Wide Depth of Field: Use a smaller aperture (larger f-number) like f/8 or f/11. This provides a wide depth of field, ensuring that more of the scene is in focus. This is especially useful since you’re not looking through the viewfinder to focus.

Shutter Speed:

  • Freeze Motion: To ensure sharp images, especially in bustling street scenes, use a faster shutter speed. A good starting point is 1/125s, but if there’s a lot of movement or you’re walking, consider going faster, like 1/250s or 1/500s.

ISO:

  • Adaptable ISO: If you’re shooting in manual mode, adjust the ISO to achieve the correct exposure given your chosen aperture and shutter speed. In brighter conditions, a lower ISO (e.g., ISO 100 or 200) is ideal. In lower light, you might need to increase the ISO.
  • Auto ISO: Many modern cameras offer an Auto ISO feature. When using this, the camera will automatically adjust the ISO based on the lighting conditions, ensuring a proper exposure. This can be handy for street photography where lighting can change frequently.

Focus:

  • Zone Focusing: Pre-focus your lens to a specific distance (e.g., 8-10 feet) and use a smaller aperture to maximize depth of field. This way, everything within a certain range will be in focus.
  • Autofocus: If you trust your camera’s autofocus system, set it to continuous autofocus (often labeled AF-C or AI Servo). This will continuously adjust the focus as subjects move. Pair this with a center or wide-area focus point setting.
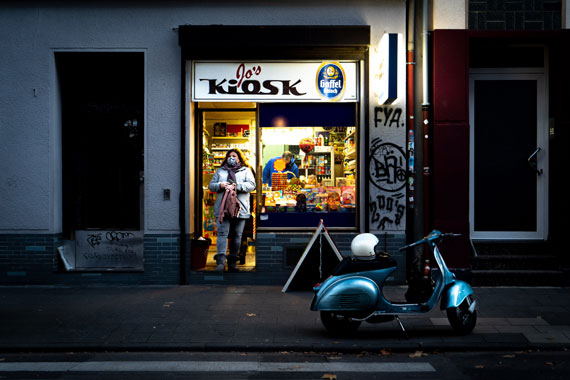
street shop picture

Photo captured by Mika Baumeister

Drive Mode:

  • Burst Mode: Also known as continuous shooting mode, this allows you to take several shots in quick succession by holding down the shutter button. This increases the chances of getting a well-composed and sharp image.

Lens Choice:

  • Wide-Angle Lens: A lens with a focal length between 24mm and 35mm (on a full-frame camera) is ideal. It offers a broad field of view, which is forgiving when shooting without looking.

Camera Mode:

  • Aperture Priority (Av or A): This mode lets you set the desired aperture, and the camera will automatically adjust the shutter speed. It’s a good balance between control and adaptability.
  • Manual (M): If you’re comfortable with it and the lighting conditions are relatively consistent, manual mode gives you full control over both aperture and shutter speed.

Image Stabilization:

  • If your camera or lens offers image stabilization (IS or VR), consider turning it on. It can help reduce the effects of camera shake, especially if you’re moving.
    Remember, these settings are starting points. Street photography often requires adaptability, so be ready to adjust based on the specific conditions and scenes you encounter. With practice, adjusting these settings will become second nature, allowing you to focus on capturing the moment.

4. Ethics in Street Photography

Street photography can be invasive, so it’s essential to approach it with sensitivity and respect.

  • Respect Privacy: Avoid taking photos of people in vulnerable situations or compromising positions. If someone indicates they don’t want to be photographed, respect their wishes.
  • Be Transparent: If confronted, be honest about what you’re doing. Offer to show or delete the photo if someone is uncomfortable.
  • Research Local Customs: In some cultures, taking photos without permission is considered highly disrespectful or even illegal. Always be aware of local customs and norms. Here are some examples:

France: While you can take photos in public, France has strict privacy laws. It’s illegal to publish or distribute photos of people without their consent, even if they were taken in a public space. This means that while you can take candid shots, sharing them without the subject’s permission can lead to legal complications.

Germany: Similar to France, Germany values individual privacy. You can take photos in public, but publishing images without the subject’s consent can be problematic, especially if the person is the main subject or focus of the image.

Hungary: In 2014, Hungary introduced laws that made it necessary to get permission from everyone in a photograph before it’s taken, even if it’s shot in a public place. However, the interpretation and enforcement of this law can vary.

Austria: While public photography is generally allowed, if the person is recognizable and the image is published without their consent, it can lead to legal issues.

South Korea: Taking candid photos without consent can be considered a violation of a person’s portrait rights, especially if the image is shared or published.

Japan: While street photography is popular in Japan, there are concerns about “portrait rights.” It’s generally advised to seek permission if you intend to publish or sell the photo.

Saudi Arabia: It’s crucial to be cautious when taking photos in public, especially of people, government buildings, palaces, and even some public streets. Taking an unauthorized picture can sometimes constitute a crime.

United Arab Emirates: Taking photos of people, especially women, without permission can be considered disrespectful and can lead to legal issues.

Greece: Taking photos of people without their consent for commercial use is prohibited. While personal use might be more lenient, it’s always best to be cautious.

Quebec (Province in Canada): Quebec’s civil law protects a person’s image, meaning you could face legal issues for taking and publishing a photo of someone without their consent.

street photo from the hip

Photo captured by Jacek Dylag

5. Safety Concerns

  • Stay Aware: When you’re focused on photography, it’s easy to become oblivious to your surroundings. Always be aware of traffic, obstacles, or potentially unsafe situations.
  • Avoid Risky Areas: Especially when traveling, be aware of areas that might be unsafe for tourists. Always prioritize your safety over getting a shot.
  • Secure Your Gear: Use a strap to secure your camera. Be aware of pickpockets, especially in crowded areas.

Shooting from the hip in street photography offers travelers a unique way to capture the essence of a place. While it can lead to incredible, candid shots, it’s essential to approach the technique with respect, ethics, and safety in mind. With practice and sensitivity, you can document your travels in a way that truly reflects the spirit of the places you visit.

For Help with Photo Editing:

To help with a street photo editing workflow, these presets are designed to help photographers instantly bring out the best attributes of their street photography with exposure adjustments, clarity, vibrance, saturation, split toning, highlights, shadows, sharpening, noise reduction, vignetting, graduated filter adjustments and much more. They are currently 67% off today if you want to check them out.

street presets

Amazing street photo edits in seconds (see how they work)

As street photographers, it’s our job to catch the emotional essence of a city and show it to others through street portraits, documenting moments, and more. In many cases it’s about being in the right place at the right time. How can you do that if you are always stuck at your computer editing photos?

Deal ending soon: The Street Photographer’s Presets at 67% Off

- - - - - - - - - - - - - - - - - - - - - - - - - - - - - - - - - - - - - - - - - - - - - - - - - - - - - - - - - - - - - - - - - - - - - - - - - -

Photography, like any art or skill, thrives on consistency. The journey to becoming an adept photographer is paved with regular practice. Learn how PictureCorrect Insiders can help.

- - - - - - - - - - - - - - - - - - - - - - - - - - - - - - - - - - - - - - - - - - - - - - - - - - - - - - - - - - - - - - - - - - - - - - - - - -

This post Shooting from the Hip: Street Photography Tips for Travelers appeared on PictureCorrect.


from PictureCorrect https://ift.tt/Y3AcyVM
via IFTTT

torstai 5. syyskuuta 2024

PictureCorrect.com: At Home Pet Photography Tips

This article is based on concepts from The Photography Snap Cards if you want to dig deeper for further training.

The act of capturing a fabulous photo of your pet is rewarding and well worth the effort.

However, our critters often have their own agenda, which doesn’t always mean posing for pictures.

In this blog post, we’ll discuss some ideas on how to capture great shots of your beloved pets.

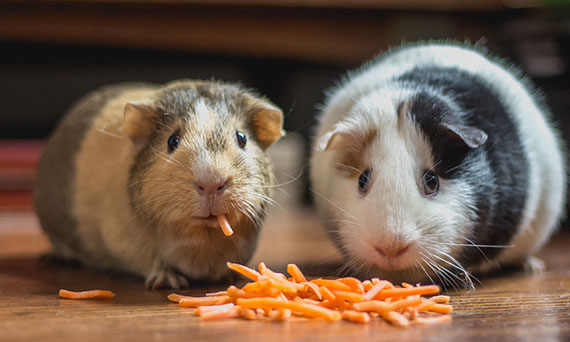
hamster photo with effected expression

Photo by Bonnie Kittle

Pet photography often looks its best when:

  • You capture their image from their level.
  • They are engaged in some activity (even a simple one).
  • The lighting highlights the color and texture of their fur, feathers, or scales without clipping the highlights or the shadows.
  • The lens focus is placed directly upon the eyes.
  • You can ‘effect’ an expression. (For example, the hamster on the left is eating, but he or she most certainly has an expression. This is an ‘effected’ expression.)

Let’s examine three pet pictures together and discuss what worked and what didn’t.

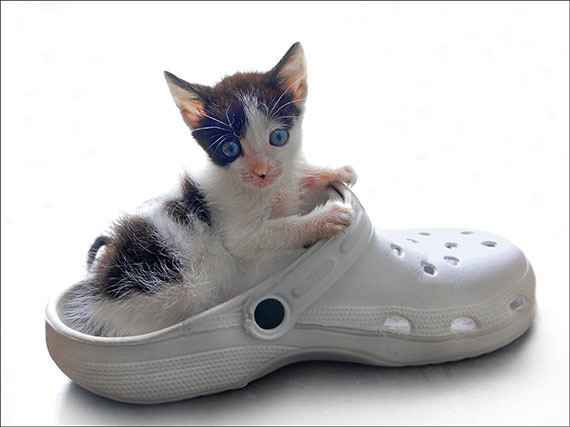
backlit kitten in shoe photo mistake

Photo by Ernesto Carrazana

Key Thought: Rarely will backlighting provide the best photograph of your pet. If you’re interested in playing around with backlighting, try to do a silhouette.

In the above pet picture, the camera angle is low, thus getting down to the kitty’s point of view, and the kitty is engaged with a prop. Those elements work well. However, the backlighting did not work to show off the kitten’s fur or highlight those beautiful eyes.

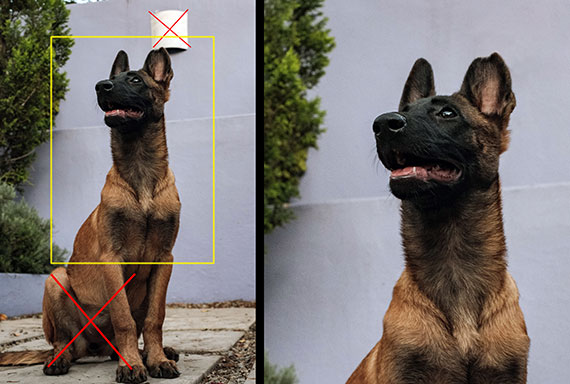
pointing out pet photography mistakes

Photo by Gerrie van der Walt

Key Thought: When you want to get down to the pet’s point of view, judge that position by the face.

For this pet portrait, the camera position is too low. The low camera placement showcased unnecessary body parts and also resulted in distractions behind the dog’s head.

Cropping the image and cloning out the light fixture helped improve this shot.

However, it’s still not a great capture of the pup’s facial expression, as there’s no eye contact.

Take note that the lighting is excellent for pet photography. It allowed a nice even exposure of the fur and placed a highlight in the dark eyes.

IDEA: If your pet has dark eyes, a highlight in the eyes will open them up and help to create an effected expression. You can create a highlight in the eyes by how you position the pet relative to the light source. You can also use a very low powered electronic fill flash on the camera (only outdoors!) Or, you can create a bounce card with cardboard and tinfoil that you place in front of the pet’s face.

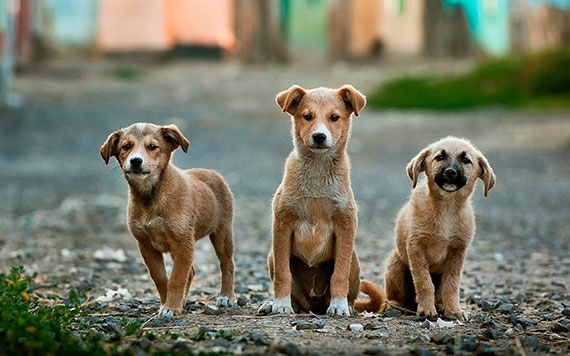
This is an exquisitely captured pet photograph.

  • The camera is at eye level to the pup.
  • The critical focus has been placed upon the eyes.
  • The background adds a sense of place and mood without causing distractions.
  • The lighting accentuates the fur and places a highlight in the dark eyes.
  • The pup has a happy and alert effected expression.

Lighting

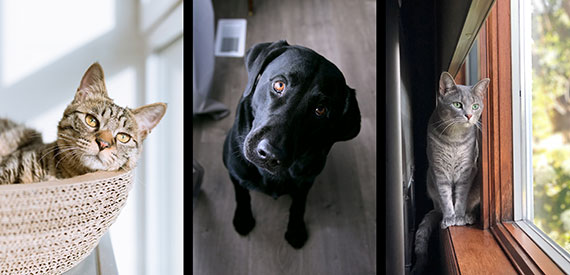
indoor lighting for pet photography

Left photo by Eric Han, Center photo by Sharon McCutcheon, Right photo by author

Key Thought: Without additional lighting resources, your best lighting for indoor pet pictures will be by a window or a doorway. Make sure the light is indirect. In other words, you don’t want the sun shining right into that window.

IDEA: A simple homemade reflector can often save a picture. The shadow side of the black lab has clipped off the shadows (they are too dark) – even with the soft window light. A reflector placed just to the dog’s left would’ve improved this picture by bringing up the exposure level on the shadow side.

To make a reflector, obtain a piece of sturdy cardboard or foam board that is about 3 feet x 4 feet.

Make one side of your board flat white, and on the other side, glue on tin foil. The white side will reflect a soft, even light, and the tinfoil side will reflect a brighter, more specular light.

NOTE: Which side will you use? This depends upon the light source and the color of your pets’ fur, in general, for darker fur use the tin foil side and lighter fur use the white side.

pet photography outdoors

Photo by Anoir Chafik

Key Thought: To obtain the best lighting for an outdoor pet picture – there are three opportune situations.

  • Place your pet in the shade, so that no direct sunlight is involved. Make sure that the shaded area is consistent and not dappled with light, as this would create exposure problems.
  • Photograph your pet on a slightly overcast day. A thin veil of clouds works best. Heavy cloud cover can reduce your exposure and create white balance problems.
  • Photograph your pet during the Golden Hour. The Golden Hour works wonderfully for pets as well as people. Be sure to observe the color of the light. If it is too yellow, orange, or red, place the sun behind the pet and expose for the face.

Containing the Wiggles

getting your pet to stay still for photos

Photo by Erda Estremera

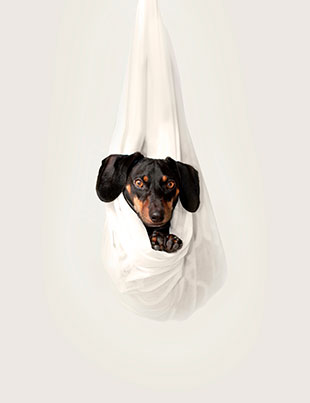
Many pets simply don’t have the patience to sit still while you photograph them. It’s up to you to get creative and come up with some interesting ideas on how to contain them in a working area.

This dachshund is contained, and the resulting picture is fun and very cute to look at.

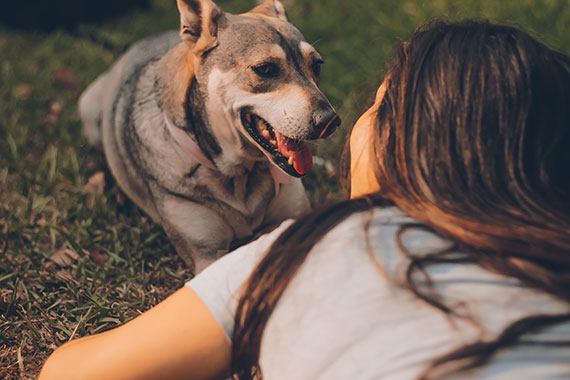
how to contain your pet while photographing

Photo by Tran Mau Tri Tam

This kitten is contained by the location. Three sides of possible escape are effectively blocked. It works because of the kitten’s expression. Don’t forget to remove unnecessary and disruptive objects from the background!

IDEA: Treats and toys can help contain a pet, as well as direct their attention to you. Hold the treat or toy near the camera lens for the best effect.

The Human Element

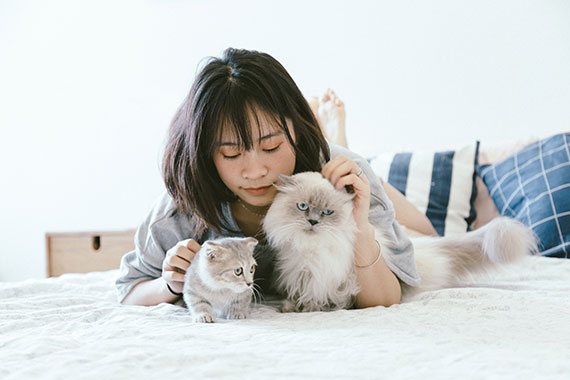
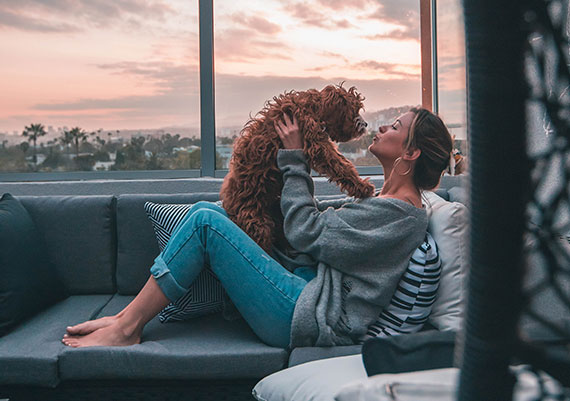
example of person in pet photo

Photo by Tran Mau Tri Tam

Key Thought: Including a family member is a great way to provide containment while also adding a personal touch to your pet picture.

pet photography mistake not showing faces

Photo by Manuel Meza

Key Thought: Keep in mind several points in pet photos. Don’t awkwardly cut off the pets’ ears, paws, or tail on the edge of the frame. Plus, if you include the human element, the best pictures occur when you see the faces of both the pet and the person.

Activity and Personality

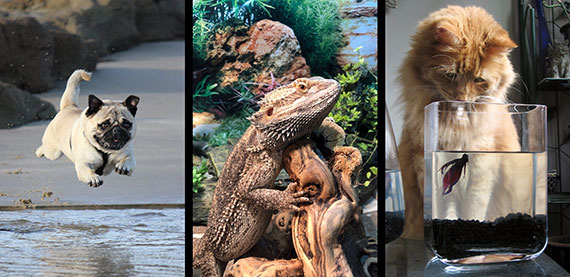
activity and personality in pet photography

Left photo by Bruce Galpin, Center photo by author, Right photo by Daniel Tuttle

Successfully capturing your pet’s personality and activity is going to be one of your more significant challenges. Pets rarely do their fun stuff under perfect photography conditions.

IDEA: If you haven’t embraced the purpose of the mobile phone camera, give it a try, especially for indoor pet pictures. Mobile phone cameras do a darn good job when a quick shot is needed. Images like the bearded dragon, and the cat on the right, can be perfectly captured with a mobile phone camera indoors.

When the situation requires a DSLR or mirrorless camera, such as the running pug puppy, try these settings to get started.

  • Use shutter priority and set according to the level of activity.
  • Set the ISO to Auto. If your camera allows it, set a maximum allowable ISO. For most cameras, I would suggest a maximum allowable setting of ISO 1200.
  • Use a center-weighted metering pattern.
  • Use the camera raw file setting.
  • Use Auto WB.
  • Use continuous drive – low or high according to preference.
  • Use all focus points or a center cluster if preferred.
  • Use the continuous focus mode or auto mode if your camera has it.
  • A zoom lens provides maximum creative options.

Problem Solving

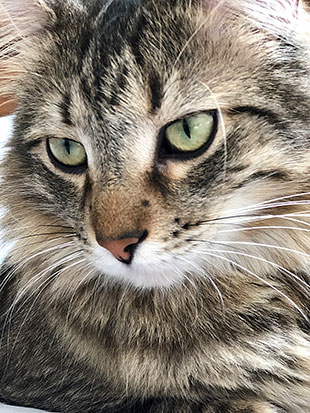
solving the problem of stray whiskers in cat photos

Photo by author

With many pet pictures, the errant whisker is a real problem. Let’s take a look at how you can quickly fix this.

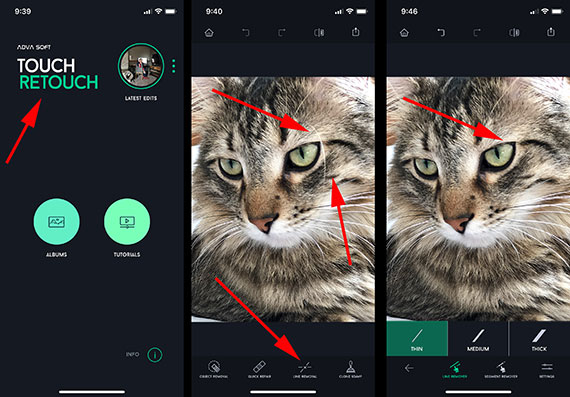
use retouch to eliminate unwanted lines in pet photos

Photo by author

TouchRetouch is a standalone editing app that is available for IOS, Android, Windows, and Mac OS. It’s a powerful and inexpensive tool to remove unwanted objects from a photograph.

It works particularly well for lines, such as whiskers.

  1. Import the photo into the TouchRetouch app.
  2. Select Line Removal
  3. You remove the line by dragging along the whisker that you wish to remove. There are several options for settings. You’ll have to play with them as each picture works a little differently.

Once you get the hang of TouchRetouch, you’ll wonder how you ever got along without it.

Capturing the Eyes

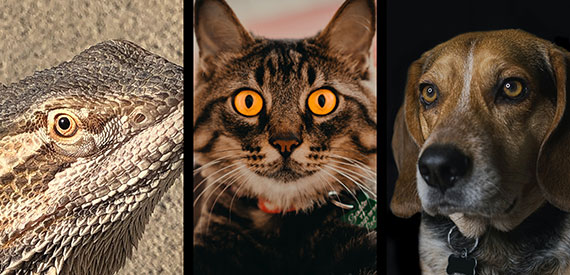
capture the eyes of your pet in photos

Left photo by author, Center photo by Thiago Cerqueira, Right photo by Dan LeFebvre

It’s often said that the eyes are the window to the soul, and nowhere is that truer than staring into the eyes of your pet.

This is why the number one factor to a successful pet photo is placing the critical focus on the eyes!

IDEA: Many pets can have exotically colored eyes. I would discourage the practice of brightening and oversaturating the color of the eyes. When you do this, the picture becomes all about the color and not about the pet.

photo showing pet photography elements

Photo by Roberto Nickson

Closing Thoughts

  • Any camera can capture great pet pictures – even your smartphone camera!
  • If using a DSLR or mirrorless camera, making use of a zoom lens gives you more room to quickly recompose your pet picture.
  • While indoors use window light. While outdoors use a shady area, a lightly overcast day, or use the Golden Hour.
  • An electronic flash isn’t recommended, especially indoors.
  • Pet play toys or treats can help with containment and expression.
  • Have your camera set and always at the ready.

About the Author:
Kent DuFault is an author and photographer with over 35 years of experience. He’s currently the director of content at the online photography school, Photzy.com.

For In-Depth Photo Tips You Can Carry Around:

The new Photographer Snap Cards are a simple way for you to learn and master photography on-the-go…. What are these “snap cards”? They are a “Training Boot Camp” in your camera bag. Photography training and reference cars that you can take with you wherever you go. They are currently 86% off for a summer sale which ends soon.

photography snap cards

Snap Cards for Photographers (Click to See How They Work)

Enter 44 printable key photography lessons that you can take with you anywhere! Wherever you are, these SNAP Cards are your own personal photographic mentor- Your boot camp instructor pushing you to new limits.

Deal ending soon: The Photography Snap Cards at 86% Off

- - - - - - - - - - - - - - - - - - - - - - - - - - - - - - - - - - - - - - - - - - - - - - - - - - - - - - - - - - - - - - - - - - - - - - - - - -

Photography, like any art or skill, thrives on consistency. The journey to becoming an adept photographer is paved with regular practice. Learn how PictureCorrect Insiders can help.

- - - - - - - - - - - - - - - - - - - - - - - - - - - - - - - - - - - - - - - - - - - - - - - - - - - - - - - - - - - - - - - - - - - - - - - - - -

This post At Home Pet Photography Tips appeared on PictureCorrect.


from PictureCorrect https://ift.tt/Hnq2Ylg
via IFTTT