torstai 25. heinäkuuta 2024

PictureCorrect.com: How and Why to Diffuse Your On-Camera Flash

I was recently asked a great question about how to diffuse an on-camera flash. This is an important concept to understand—not just how, but why! Today’s photo tip will explain diffusion and how to create and use it.

on camera flash diffuser

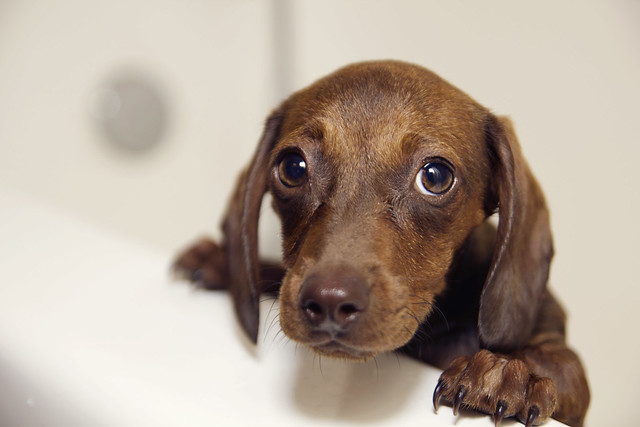
“Pitiful” captured by latteda

Here is the question I was asked:

“When using flash inside a room with a low ceiling and white walls I understand how to use the flash to get soft light. But if the ceiling and walls are not white, how do you soften the light without off-camera flash?”

This is a great question because it brings out several issues:

  1. By off-camera flash, he is referring to studio lighting or being able to take the actual flash off the camera. But what if you don’t have any studio lights and your flash either won’t come off the camera, or it will, but you don’t have the necessary gear to use it?
  2. Why would you want to soften the light in the first place, and what do we even mean by softening the light?
  3. How does the color of the walls and ceiling affect the light?
  4. How can we soften it?

If you’re shooting with an undiffused flash—any kind of flash, not just on the camera—it has a tendency to be very harsh. It makes deep shadows on the face and so on.

But, that’s not all, it makes shadows on the walls and ceilings and the color of the light tends to be cold, harsh, and unforgiving.

There are times when this is perfect and just what you’re after, but not usually. Particularly when you’re shooting with a flash unit on your camera.

To soften the light and make it less harsh, we want to diffuse it in some way.

To best illustrate light diffusion, go outside on a bright sunny day and observe your shadow. You’ll notice that it’s dark in color and has a sharp edge. This is caused by the intensity of the light source (the sun) and its size relative to the subject. If you think about it, it’s pretty tiny way up there in the sky!

Now go out on an overcast day, or just wait until a cloud comes between you and the sun. Now the sunlight is entering the top of the cloud and bouncing all over the place. When it comes out the bottom—and hits us—the light is not all coming out in one place. It’s coming out fairly evenly across the whole bottom surface of the cloud. Now our light source becomes the cloud, not the sun. And it’s huge! It’s a lot bigger than the sun was. Possibly from horizon to horizon!

Now look at our shadow. It is no longer such a deep color. It is now more of a gray than black, and it isn’t so harsh. Rather than hard edges, the edges of the shadow are now softer and less defined. They tend to fade away rather than just go from deep black to nothing.

This is diffusion. It softens the light and makes it larger in relation to the subject. That’s why you see studio photographers using softboxes and shooting through umbrellas. It’s an in studio attempt at replicating a cloud.

Back to our on-camera flash…

flash diffuser

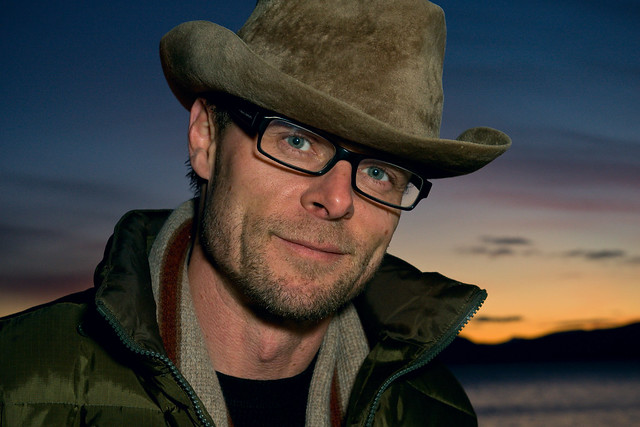
“Larry Pollman” captured by Michael Carian

Since most of our problems are being caused by the size of the flash relative to the subject, we need to make it bigger. Thus, higher end flash units have the ability to swivel the flash head while it remains on the camera.

Now, rather than shooting straight at the subject with this tiny, harsh light source, we swivel the head and bounce the light off the wall or ceiling. This makes the light a LOT bigger and solves most of our problems.

But, what if the walls and ceiling are not white?

Don’t bounce off of them. The light will pick up the color and reflect it onto the subject’s face. Either move your model to another location or diffuse the light in another manner.

They do sell tiny softboxes that you attach to your on camera flash or white plastic covers you put over the flash lens, but the easiest and most popular way is to tape some sort of diffusion material over the flash. Tracing paper works well and you can increase or decrease the amount of diffusion by the number of layers of tracing paper you use.

diffused flash for flower photography

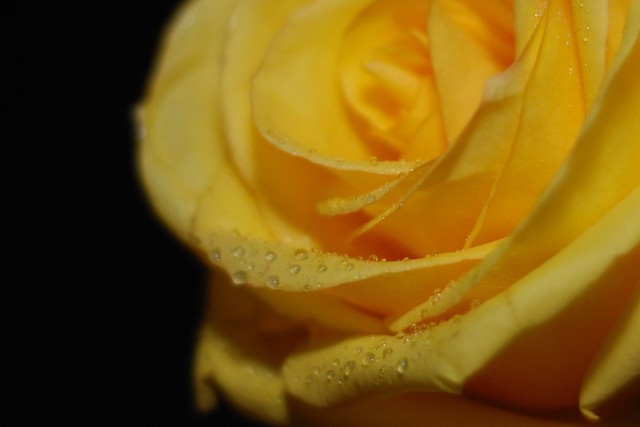
“A single rose can be my garden…” captured by Denise Cross

These solutions aren’t ideal; the best way to diffuse a flash is to swivel it and bounce the light into the subject from a wall. But they’ll work in a pinch.

Another bounce option would be to use a large white reflector. Bounce the light off of that rather than the wall.

Using and diffusing on camera flash isn’t difficult, but it is one of those photo tips that just have to be done!

About the Author:
Dan Eitreim writes for OnTargetPhotoTraining. He has been a professional photographer in Southern California for over 20 years. His philosophy is that learning photography is easy if you know a few tried and true strategies.

- - - - - - - - - - - - - - - - - - - - - - - - - - - - - - - - - - - - - - - - - - - - - - - - - - - - - - - - - - - - - - - - - - - - - - - - - -

Photography, like any art or skill, thrives on consistency. The journey to becoming an adept photographer is paved with regular practice. Learn how PictureCorrect Insiders can help.

- - - - - - - - - - - - - - - - - - - - - - - - - - - - - - - - - - - - - - - - - - - - - - - - - - - - - - - - - - - - - - - - - - - - - - - - - -

This post How and Why to Diffuse Your On-Camera Flash appeared on PictureCorrect.


from PictureCorrect https://ift.tt/zHwB23I
via IFTTT

tiistai 23. heinäkuuta 2024

PictureCorrect.com: Understanding Vanishing Point in Photography Composition

Vanishing points are a fundamental concept in photography that can significantly enhance the depth and realism of your images. Understanding how to use them effectively can transform your compositions, drawing the viewer’s eye into the photograph and creating a sense of three-dimensional space.

Today’s lesson is based on concepts from Visual Flow, the Ultimate Photography Composition Course by Ian Plant, it is currently $25 off today if you want to check it out.

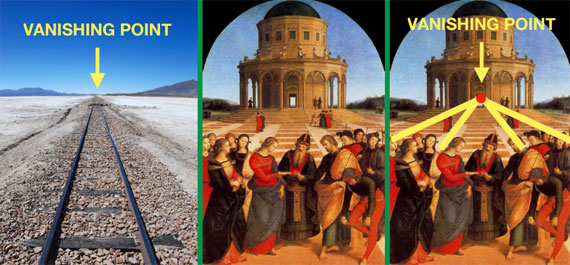
vanishing point examples

What is a Vanishing Point?

A vanishing point is the point in the distance where objects become too small to see clearly and appear to converge. This concept is easily illustrated by railroad tracks. Despite being parallel, when you look down a set of tracks, they seem to converge to a point at the horizon. This point is known as the vanishing point, and it plays a crucial role in implying depth in a photograph.

Historical Context

The concept of the vanishing point revolutionized perspective in art during the Renaissance. Great masters like Raphael used vanishing points to create depth and realism in their paintings. By understanding that parallel lines appear to converge at a single point as they recede into the distance, artists could create more lifelike and compelling compositions.

The Power of Vanishing Points

Vanishing points are powerful because they rivet the eye, compelling it to travel deep into the image. According to Gestalt principles, the human eye naturally follows a line to its conclusion, even if the line has ended. This makes the vanishing point a focal area where multiple lines in a composition converge, drawing the viewer’s attention and creating visual energy.

Using Vanishing Points in Photography

In photography, leading lines such as roads, rivers, or paths often create vanishing points. Even though these elements are made up of two lines or curves, they appear to converge in the distance, forming a vanishing point. When used effectively, these converging shapes can create depth and lead the viewer’s eye deep into the scene.

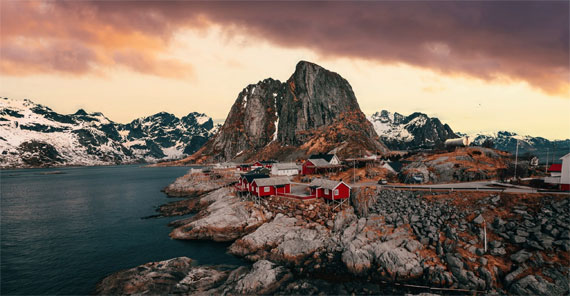
vanishing point landscape

Photo captured by Ian Plant

For example, a curving stream flowing into the distance can create a vanishing point. This effect is reinforced by the convergence of lines formed by trees on both sides of the stream. The eye is inevitably drawn to the vanishing point, creating a sense of depth and movement in the image.

The Role of Triangles

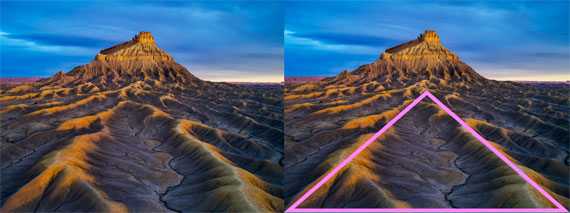
Triangles naturally create vanishing points, as they lead the viewer’s eye from the foreground to the background. When two lines converge at a vanishing point and are mentally closed off at the bottom, they form a triangle. This shape is powerful in art and photography, helping to create depth and guiding the viewer’s eye through the composition.

Practical Tips for Using Vanishing Points

  1. Identify Leading Lines: Look for natural or man-made lines in your scene that lead toward the horizon. Roads, rivers, fences, and buildings are great examples.
  2. Centralize the Vanishing Point: Often, vanishing points work well when they are centrally located in the composition. This placement can create a balanced and harmonious image.
  3. Incorporate Triangles: Use triangular shapes to enhance the effect of the vanishing point. This can be done by positioning lines to form implied triangles that draw the eye into the image.
  4. Experiment with Different Heights: Vanishing points do not always need to originate from the bottom of the frame. They can be just as effective when they start higher up in the composition, as demonstrated by Renaissance paintings.

Conclusion

Mastering the use of vanishing points in photography can elevate your compositions, making them more engaging and dynamic. By understanding how to identify and utilize leading lines, triangles, and central placement, you can create images that draw viewers in and hold their attention. So next time you’re out shooting, keep an eye out for those converging lines and see how they can transform your photos.

For Further Training:

Hailed by customers and critics alike as the best resource available on explaining the secrets of making compelling photographic compositions, Ian Plant’s Visual Flow Course is designed to revitalize your photography. Currently $25 off today if you want to take a look.

visual flow

Once you learn the visual design secrets of the great masters of art, it will change the way you see the world

Deal ending soon: Visual Flow Composition Course at 25% Off

- - - - - - - - - - - - - - - - - - - - - - - - - - - - - - - - - - - - - - - - - - - - - - - - - - - - - - - - - - - - - - - - - - - - - - - - - -

Photography, like any art or skill, thrives on consistency. The journey to becoming an adept photographer is paved with regular practice. Learn how PictureCorrect Insiders can help.

- - - - - - - - - - - - - - - - - - - - - - - - - - - - - - - - - - - - - - - - - - - - - - - - - - - - - - - - - - - - - - - - - - - - - - - - - -

This post Understanding Vanishing Point in Photography Composition appeared on PictureCorrect.


from PictureCorrect https://ift.tt/BOTfKhu
via IFTTT

maanantai 22. heinäkuuta 2024

PictureCorrect.com: Drone Photo Editing Tools in Luminar Neo

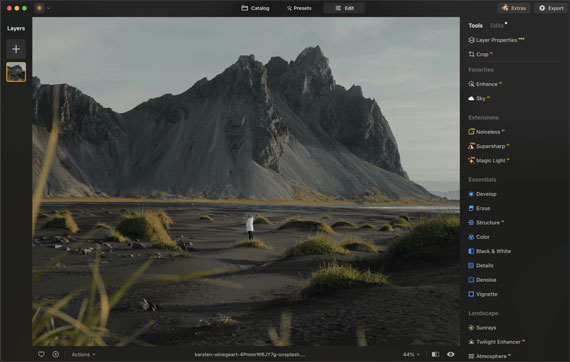
For those interested in improving their aerial images, selecting the right editing software is crucial. Luminar Neo is a powerful, user-friendly tool that offers advanced features tailored for drone photography.

drone photo editing

Transform Your Aerial Photos

Luminar Neo provides a variety of tools to enhance aerial images:

  • Panoramic Photo Creation: Transform video footage into vibrant, dynamic HDR panoramas.
  • Photo Stitching: Seamlessly stitch multiple photos together to create expansive scenes.
  • Action Photos: Combine moving objects across multiple frames into a single, dynamic action photo.

Enhance AI: One-Slider Magic

Enhance AI simplifies the editing process with a single slider that adjusts up to a dozen fundamental controls, including shadows, highlights, contrast, tone, saturation, exposure, and details. This feature produces realistic and visually appealing photos.

Versatility in Different Conditions

Luminar Neo is designed to handle varying lighting conditions, whether capturing a bright blue sky, a sunset, or a starry night. It provides tools to enhance drone photos taken in diverse environments.

Extensive Toolset for Perfecting Drone Shots

Luminar Neo includes numerous features for drone photography:

  • Standalone or Plugin: Available as a standalone app for macOS and Windows, and as a plugin for Adobe Photoshop, Adobe Lightroom Classic, and Photos for macOS.
  • High-Quality Tips: Improve panoramas by applying basic photography principles, finding balance and focal points, and waiting for optimal lighting conditions.

photo editing tools

Tips for High-Quality Drone Photos

  1. Apply Basic Photo Concepts: Treat panoramas as large photos and apply fundamental photography principles.
  2. Balance and Composition: Look for balance in images with wide aspect ratios. Identify focal points such as a person, building, or the setting sun.
  3. Perspective and Height: Use panoramas to achieve a wider perspective when flying high is not an option.
  4. Crops for Composition: Consider cropping within captured photos for better composition rather than creating huge panoramas.
  5. Lighting: Wait for good lighting conditions. Speckled cloud cover can add depth to images when sunrise and sunset are not options.

Summary

Luminar Neo offers a comprehensive suite of editing tools and AI-driven enhancements, making it a valuable tool for drone photographers. With a 30-day money-back guarantee, users can explore its features risk-free.

Luminar Neo is a versatile and effective solution for enhancing aerial photos.

For 20% off try the code: AFF-5fY6cI

Deal ending soon: Drone Photo Editing Tools in Luminar Neo

- - - - - - - - - - - - - - - - - - - - - - - - - - - - - - - - - - - - - - - - - - - - - - - - - - - - - - - - - - - - - - - - - - - - - - - - - -

Photography, like any art or skill, thrives on consistency. The journey to becoming an adept photographer is paved with regular practice. Learn how PictureCorrect Insiders can help.

- - - - - - - - - - - - - - - - - - - - - - - - - - - - - - - - - - - - - - - - - - - - - - - - - - - - - - - - - - - - - - - - - - - - - - - - - -

This post Drone Photo Editing Tools in Luminar Neo appeared on PictureCorrect.


from PictureCorrect https://ift.tt/AmNus10
via IFTTT

PictureCorrect.com: Layer Photo Editing Tricks in Capture One

Today’s tutorial kindly comes to us from Capture One Hidden Features. Our readers can use coupon code pc10 for a discount on the full eBook.

In recent years, the Layers tool in Capture One has drastically evolved. You can now create complex masks in a couple of clicks and perform all the editing in layers. Here are my favorite unobvious features of layers!

Taking Full Control Over Gradients

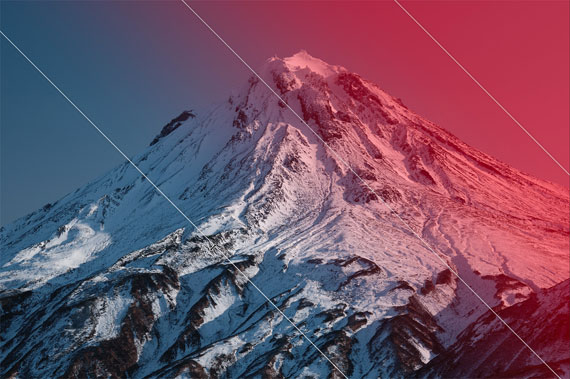
layer gradient

Use these simple tricks to gain full control over gradients:

  • To change a gradient smoothness – hold down Shift and move lines.
  • To relocate a gradient – hold down Cmd (Ctrl in Windows) and drag a mask.
  • To move lines separately – hold down Alt and move lines.
  • To rotate a gradient by a 45-degree angle – hold down Shift and rotate the radial gradient.
  • To change the shape of a radial gradient — move one of the anchor points.
  • To lock the opposite point and change the shape of a radial gradient — hold Alt and move one of the anchor points.
  • To change the scale of a radial gradient — hold Shift and move one of the anchor points.
  • To lock the opposite point and change the scale of a radial gradient — hold Alt + Shift and move one of the anchor points.

Brush Shortcuts

You can change all the brush settings with shortcuts and cursor
movements. For instance, to adjust brush size, simply hold down Ctrl, Opt,
and left-click-n-drag mouse or trackpad.

Here is the full list of the quick control keys:

Mac

  • Size: Ctrl + Opt + left-click and horizontal drag (right/left)
  • Hardness: Ctrl + Opt + left-click and vertical drag (up/down)
  • Opacity: Shift + Ctrl + Opt + left-click and horizontal drag
  • Flow: Shift + Ctrl + Opt + left-click and vertical drag (up/down)

Windows

  • Size: Alt + right-click and horizontal drag (right/left)
  • Hardness: Alt + right-click and vertical drag (up/down)
  • Opacity: Shift + right-click and horizontal drag (right/left)
  • Flow: Shift + right-click and vertical drag (up/down)

BTW, the same shortcuts work with Magic Brush as well!

Brush Icon

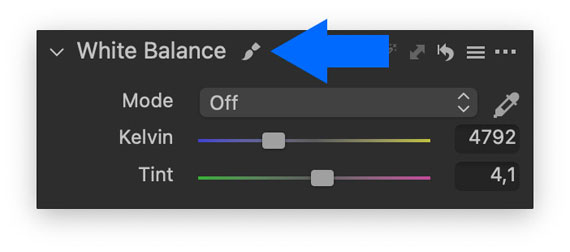
You can quickly understand whether you’re adjusting the main image or a layer merely by checking this brush icon:

brush icon

The brush icon will appear on most Capture One tools if you have selected a layer.

Finishing Gradients with Brush and Eraser

Gradients in Capture One can be edited just like regular masks, and I use this feature a lot! The only thing you need to do is rasterize a layer with a gradient. You can then easily erase a part of a gradient to exclude an unwanted element from the mask or reduce layer impact on it.

Rasterizing Luma Range Mask

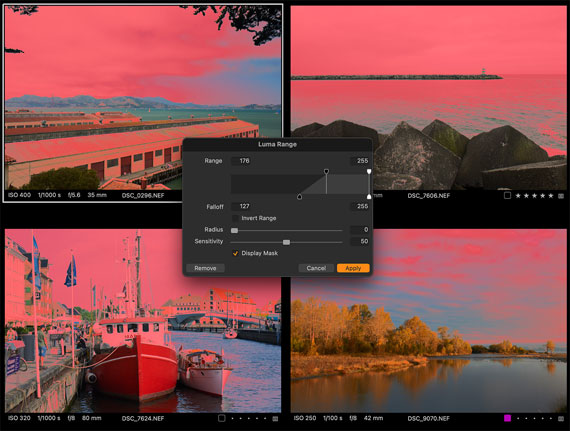
Speaking of rasterizing, there is a curious feature of the Luma Range tool. Luma Range doesn’t transform your mask. It simply hides parts of the mask according to the selected luminosity range.

Why is this important? Your layer mask stays the same; thus, you can’t refine the Luma Range mask. Fortunately, you can easily avoid this restriction by rasterizing the mask. With rasterizing, you truly transform it into a regular mask so that you can perform all kinds of layer actions.

The same feature allows you to create a new filled layer, apply Luma Range and copy/paste it to a group of images. The mask will look differently on every image:

luma range

Duplicate a Layer Mask with Adjustments

There is a simple life hack to duplicate a layer mask with adjustments:

  1. Create a clone variant of your image
  2. Copy/paste layers from an original image

You’ll get the same image with duplicated layers.

Black & White in Layers

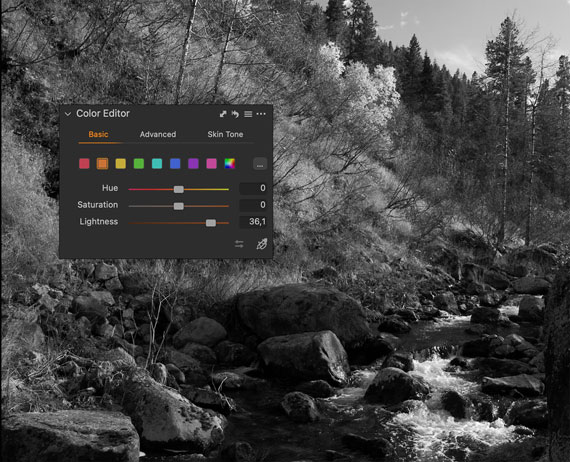
Unfortunately, the Black & White tool doesn’t support layers. However, there is a workaround to get a pretty similar effect.

The main feature of the Black & White tool is the ability to adjust color channels in B&W mode. You can get similar control over color by desaturating an image in Color Editor and using Lightness sliders.

black white layers

Keep in mind that Basic Color Editor is always a safe choice; you can’t ruin an edit with it. Advanced mode offers more editing freedom, but you have to know what you are doing.

The effect will slightly differ from the B&W tool, but it will allow you to use it in layers!

How to Skip Copying Layers

Sometimes you might need to skip layers when copying adjustments. By default, Capture One applies all the adjusted settings, and first, you need to turn it off here:

copying layers

Next, in Adjustments Clipboard, manually select all the tools you usually copy, except for Layers. Now, you can copy adjustments using Copy/Apply shortcuts, and it will not affect layers on your images.

BTW, in the final part of the book, I’ll show you how to create a macro that removes layers during copying automatically.

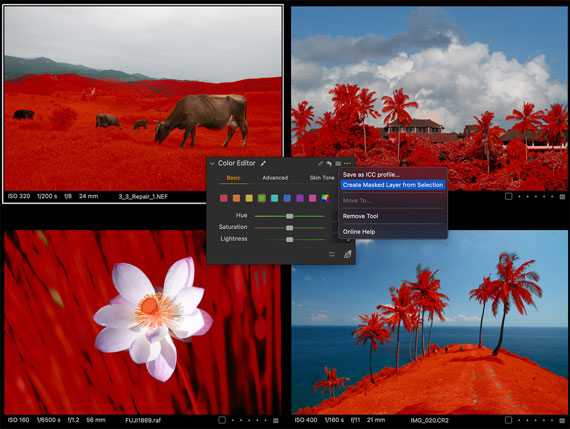
Batch Masks from Color

Mask from color can be created for a bunch of images simultaneously. Simply select all the required images and run the process — each image will get a unique mask!

masks from color

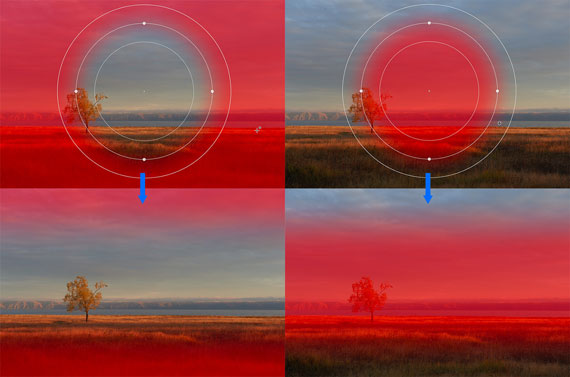
Drawing Two Gradients on a Single Layer

Technically, Capture One allows drawing only one gradient per layer. However, a radial gradient in Capture One supports a significant level of transformation, and you can quickly form it into an elongated shape, making two gradients out of one.

two gradients on layer

Mixing Layer Features

Finally, all layer features work just perfectly together.

For example, you can create a mask from color, refine it, and then remove some parts from this mask with Luma Range. Rasterize this mask, and you can now erase some objects, copy the mask, or invert it.

This is the key to efficient layer workflow in Capture One. It’s not just about making some local adjustments. You can get fantastic results if you re-adjust your mindset to incorporate all these features into your editing.

For Further Training:

Capture One Hidden Features is a collection of more than 200 pro hints to improve your Capture One workflow structured into an easy-to-read book.

capture one features

Capture One Hidden Features eBook (peek inside)

The book has four parts; each is designed to uncover hidden features of different areas of Capture One workflow. Try the coupon code pc10 for a discount.

Found here: The Capture One Hidden Features Guide

- - - - - - - - - - - - - - - - - - - - - - - - - - - - - - - - - - - - - - - - - - - - - - - - - - - - - - - - - - - - - - - - - - - - - - - - - -

Photography, like any art or skill, thrives on consistency. The journey to becoming an adept photographer is paved with regular practice. Learn how PictureCorrect Insiders can help.

- - - - - - - - - - - - - - - - - - - - - - - - - - - - - - - - - - - - - - - - - - - - - - - - - - - - - - - - - - - - - - - - - - - - - - - - - -

This post Layer Photo Editing Tricks in Capture One appeared on PictureCorrect.


from PictureCorrect https://ift.tt/qQIzO6h
via IFTTT

lauantai 20. heinäkuuta 2024

PictureCorrect.com: Focal Lengths and Types of Photography

Focal length is defined as the distance between the point of light ray convergence of your lens and the sensor/film (measured in millimeters). The longer the focal length, the narrower the angle of view. The shorter the focal length, the wider the angle of view.

focal length

Photo captured by Jonathan Mabey

Focal length is an essential factor to consider when choosing a lens for different types of photography. Here’s a list of common focal length ranges and their recommended uses:

Ultra-Wide (8-24mm): Ideal for capturing expansive landscapes, cityscapes, and architecture. Also used for creative, exaggerated perspectives and astrophotography.

Wide-Angle (24-35mm): Suitable for landscape, street, environmental portraits, and indoor photography. It allows for a wider field of view without introducing too much distortion.

Standard (35-70mm): Versatile lenses, great for everyday photography, including street, documentary, travel, and environmental portraits. They provide a natural perspective, similar to what the human eye sees.

Short Telephoto (70-105mm): Preferred for portraiture, as they help separate the subject from the background, creating flattering images with minimal distortion. Also suitable for close-up sports and event photography.

Medium Telephoto (105-200mm): Excellent for sports, wildlife, and event photography, as they allow you to get closer to the subject without physically moving closer. These lenses produce a shallow depth of field, creating a strong subject-background separation.

Super Telephoto (200-600mm and beyond): Typically used for wildlife, bird, and sports photography, where the subject is at a considerable distance. They produce a very shallow depth of field and are ideal for isolating subjects from their surroundings.

Remember that these ranges are general guidelines, and the best focal length for a specific type of photography can vary depending on the photographer’s style, vision, and the desired outcome.

For a handy cheat sheet on Focal Length that you can print out for reference, you may want to check out this summer sale before it is over.

focal length cheat sheet

Focal Length Cheat Sheet & More (see them all)

Have you ever wanted to photograph an amazing moment but missed the shot because you didn’t know the right camera settings to use? That’s where our new cheat sheets come in. They are currently 75% off for a summer sale if you want to check them out.

Summer sale ending soon: The Fundamental Camera Cheat Sheets at 75% Off

- - - - - - - - - - - - - - - - - - - - - - - - - - - - - - - - - - - - - - - - - - - - - - - - - - - - - - - - - - - - - - - - - - - - - - - - - -

Photography, like any art or skill, thrives on consistency. The journey to becoming an adept photographer is paved with regular practice. Learn how PictureCorrect Insiders can help.

- - - - - - - - - - - - - - - - - - - - - - - - - - - - - - - - - - - - - - - - - - - - - - - - - - - - - - - - - - - - - - - - - - - - - - - - - -

This post Focal Lengths and Types of Photography appeared on PictureCorrect.


from PictureCorrect https://ift.tt/vtKUQrB
via IFTTT

perjantai 19. heinäkuuta 2024

PictureCorrect.com: Abstract Photography Exercises

If part of your photographic self-awareness includes a little voice that wants to play without rules or retribution, well then, abstract is the photo genre for you!

In the world of abstract photography the sky is limit. Your creativity isn’t bound by conventions in any way.

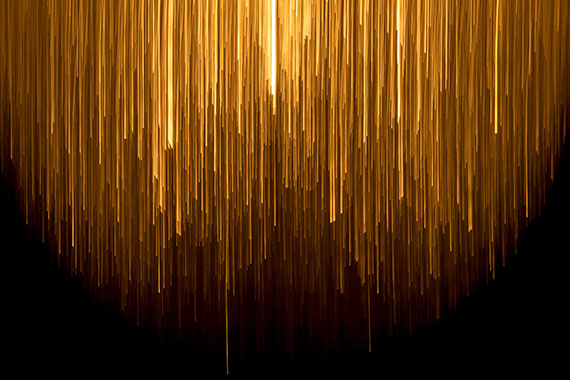
introduction to abstract photography

Photo by Jr Korpa

That being said, there are three types of abstract photography, and it’s worth your time to understand the differences.

The above photograph is what’s known as ‘Abstract Expressionism.’ Here’s a definition.

Key Thought: Photographic, abstract expressionism is a form of abstract art that doesn’t necessarily abandon all realistic and representational elements. In other words, it’s mostly unrecognizable, but not entirely unrecognizable. There are realistic elements within the photo that the photographer uses to manipulate a viewer’s mood or feelings.

Here’s the definition of abstract art (photography).

Key Thought: Photographic, abstract art makes no attempt to represent external reality. It sends a message to a viewer through the use of shape, form, line, color, and texture.

example of abstract photographic art

Photo by Rene Böhmer

The above photograph is an example of abstract photographic art.

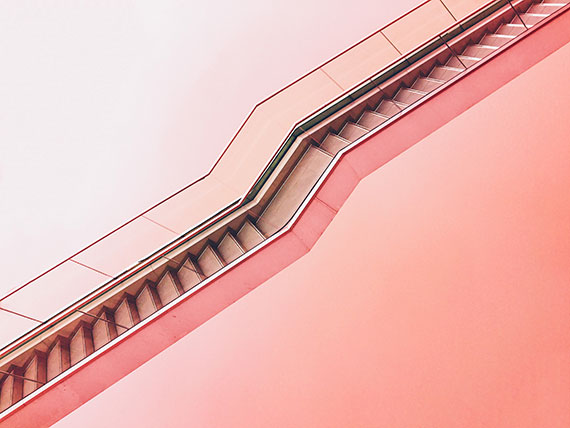
Here’s the definition of semi-abstract art (photography).

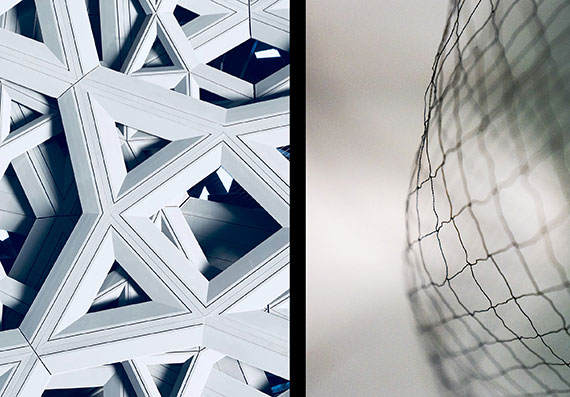
Key Thought: Semi-abstract photographic art remains recognizable to a viewer. But the form, color, shape, and lines are represented in a highly stylized manner that derives its composition from the idea of abstract photographic art. In other words, you depict reality in an unusual way.

The above image of the stairwell is an excellent example of semi-abstract photographic art.

Getting Started

This is the exciting part! To get started in abstract photography, all you need is a camera, some light, and your imagination. Post-processing software can add additional tools to your creativity, but it isn’t absolutely necessary.

For this article, let’s focus on some abstract ideas to get your creativity bubbling!

Focus Blur

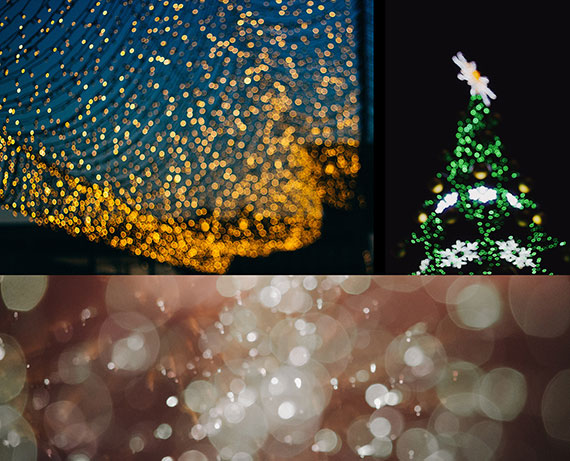
Focus blur is an easy and fun way to explore abstract photography.

When you rack your lens out of focus- shapes, colors, and lines blend together like dripping paint. The more out of focus the lens is, the more abstract your resulting picture becomes.

example of focus blur

Top left photo by Mark Kamalov, Top right photo by Dmitry Bayer, Bottom photo by Kelly Sikkema

IDEA: Begin your focus blur abstract adventure with some lights. String lights, such as holiday lighting or patio lighting, work really well. Once you have your lights, follow this camera setup.

• Put your camera on a tripod or place it on a solid surface such as a tabletop.
• Use a cable release or the camera shutter release timer.
• Use any lens you wish. Set it to manual focus.
• Set the camera to manual mode.
• Set the ISO to 400.
• Set the aperture to the widest opening.
• Use the matrix/evaluative metering mode.
• Find the correct exposure (shutter speed) as indicated by your camera and reduce the exposure by one stop. (For example, if the meter says the right shutter speed is 1 second with your lens set at its widest opening, reduce the exposure one stop by changing the shutter speed to ½ second.)

Key Thought: The above settings are suggestions to get you started. Remember, with abstract photography, there are no rules. Change everything as your heart desires!

Pick an area where you want to photograph your lights. A darker area works better to showcase the brightness of the lights. A lighter area will reduce the visual weight of the lights while bringing in background elements.

Finally, place your lights and begin having fun. You could set your lights over a person, an object, or simply hang them in the middle of an empty air space.

Change the focus of your lens to many different settings as the effect will vary with each position.

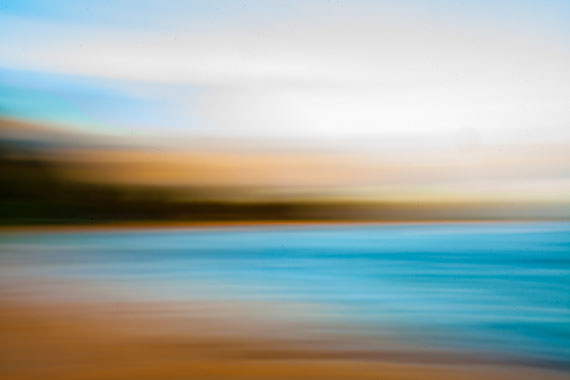
Camera Blur – often referred to as ICM (intentional camera movement)

Camera blur (ICM) is a lot of fun because it’s completely random. With a focus blur, the process tends to be slower and more calculated. With ICM, you’re throwing caution to the wind, having fun, and doing everything the experts have told you not to do.

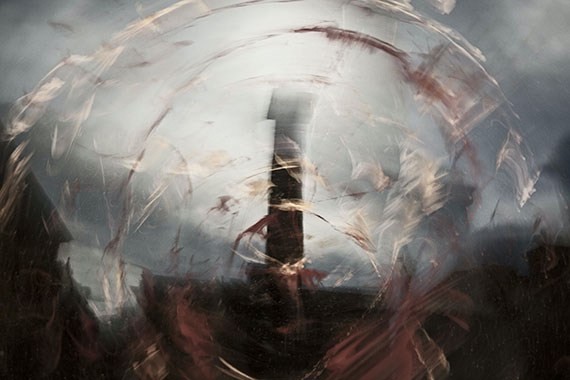
example of abstract photo camera blur

Photo by Taylor Leopold

IDEA: Many examples of ICM photography are taken outdoors. We’ve all seen the ‘stand of trees’ ICM photo. Here’s how to make ICM work for you indoors. Look for areas of light, shadow, and color contrast. Don’t fixate on trying to capture something recognizable such as the example photo above. Concentrate on a complete abstract photograph. Remember to communicate something that you feel through shape, form, line, color, and texture.

Key Thought: The outcome of an ICM photograph is primarily governed by the shutter speed and how you move the camera while completing the exposure. However, you can also alter the effect by your choice of lens, aperture, focus placement, color balance, and exposure.

Start with these camera settings:

• Camera in shutter priority mode.
• Shutter speed at ¼ of a second. Use this range of shutter speeds to begin with: 1/30th, 1/15th, 1/8th, ¼, ½, 1 second, and 2 seconds. The longer the shutter is left open, and the more you move the camera, the more abstract your picture will become.
• Auto ISO set to a maximum of ISO 1000 (If your camera doesn’t allow this function, then set it to ISO 800 and adjust as necessary.)

Take the Shot: Once you have your camera settings and a chosen subject, release the shutter while moving the camera. Experiment with different types of camera movement – up and a down, side to side, zig-zag, and etc.

Combining a Viscous Fluid with Water

This abstract photo activity is exquisitely different because it requires some setup, but also provides unpredictable results.

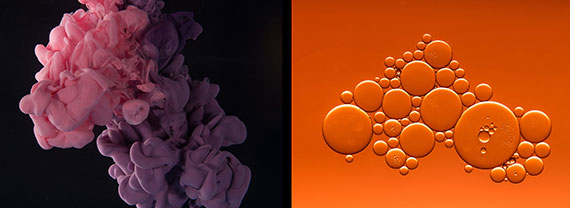
examples of combining viscous fluid in water

Left photo by Bilal O., Right photo by Sharon Pittaway

In the left example photo above, a water-based paint was poured into water. In the right example photo above, cooking oil was dripped into water.

Here’s What You Need:

• A light source. Any light source can work. However, this is one style of abstract photography where the quick burst of an electronic flash can be helpful.
• You will need a clear glass container. Keep in mind that the container itself can add to the abstract effect if it’s textured.
• Some type of colored paper or gels is helpful to add color to a background, but it isn’t required.

Use the following set up:

• Use a tripod. This isn’t required, but it will make things more predictable.
• Use the appropriate lens. This will be dictated by how close you need to focus. Set the lens to manual focusing.
• Use aperture priority.
• Set the aperture to f/2.8 – f/8 depending on the power of your light source.
• Place your clear glass container, that is filled with water, on a stool or table with some working room and no background distractions (as done in the left example photo).
• Set up your light source to provide side lighting or backlighting if your point of view is from the side (such as the left example photo above).
• Alternately, place your glass container or a piece of glass on supports that allow you to look down upon your set (example photo on the right). Use backlighting or position the light source to hit the background (in the example photo, the light is illuminating the background and not the subject), which was orange art paper.
• Set your ISO to 800. (Adjust as needed depending on your light source. Check your shutter speed. A faster shutter speed freezes the action, and a slower one blurs it.)
• Use a center-weighted metering pattern.
• Set the Drive mode to single shot
• Place an object into the center of the glass container and manually focus on it. (I use the handle of a kitchen spoon.)

NOTE: Get your exposure set before you begin dropping in your viscous fluid. Paint and oil are the easiest fluids to find and work with when starting out.

You’re all set!

Start dropping some viscous fluids into your water and let the magic happen.

Close Up and the Unusual Camera POV

This type of abstract photography turns you into a creativity detective. You will crawl around your house looking for everyday items that you can capture from a unique camera point of view (POV) that makes the object unrecognizable or nearly so.

examples of close up and point of view abstract photography

Left photo by Alvaro Pinot

IDEA: Having the ability to close focus, either using filters or a macro (close focusing) lens, is a valuable option. But it’s not absolutely necessary. This exercise can even be accomplished with your smartphone camera.

Shooting Though Translucent Materials

This idea is super easy. Go around the house and gather translucent materials, such as glass, plastic, or cloth. If the translucent material has a texture to it, that’s even better. You can also create variations in the surface of the material on your own. Smear it with Vaseline, or a thin coat of paint, or some leftover cosmetics.

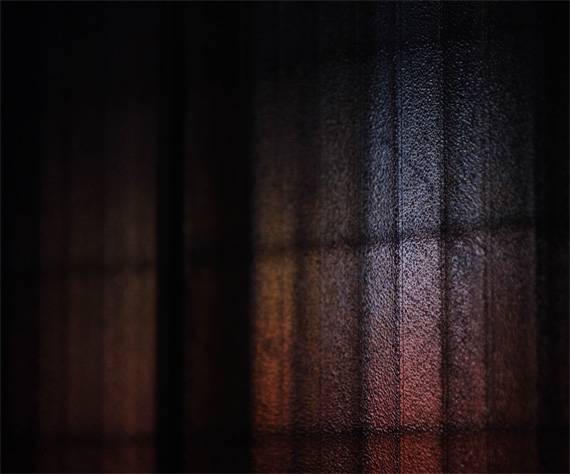
shoot through translucent material

Photo by Rene Bohmer

IDEA: You’ll photograph your subject through your translucent material. Put the translucent material between you and something else of interest, such as the window above. Your lighting will play a significant role in how your image turns out. Start with backlighting and side lighting.

Post-Processing Abstract Fun

Post-processing can be used to create abstraction on its own, or you can combine it with some of the other ideas presented in this article.

try out different lighting shooting through translucent material

Photo by Jr Korpa

A layering program provides you with infinite possibilities.

This is the time to try presets and actions. Go for the gusto and make your images completely unrealistic.

Let’s close with a gallery of inspiration.
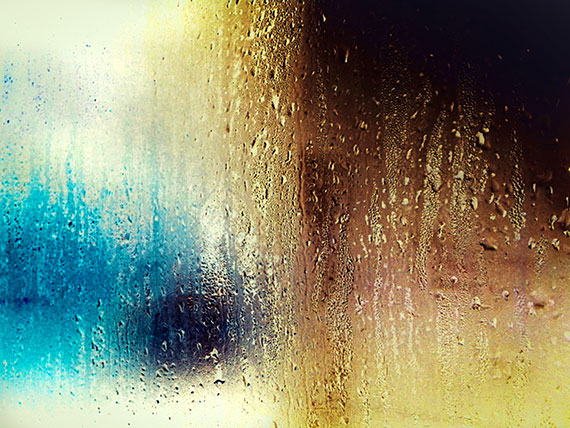
inspiration for abstract photography

Photo by Mike Ko

abstract photography inspiration

example of abstract photography art

About the Author:
Kent DuFault is an author and photographer with over 35 years of experience. He’s currently the director of content at the online photography school, Photzy.com.

For Further Training:

Introducing 20 printable project sheets, with over 60 new photography assignments to really push and expand your shooting skills. These Advanced Action Photography Cards are currently 71% off today if you want to check them out.
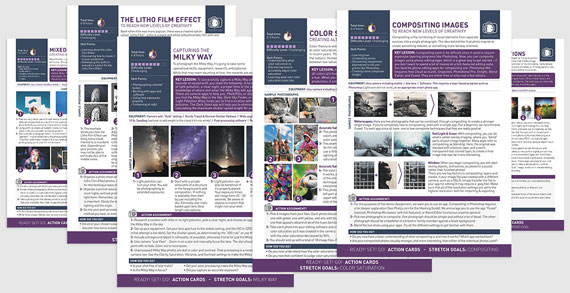
photo action cards

Advanced Photography Action Cards

These Action Cards discuss a photographic topic, provide you with suggested considerations, and give you specific photographic assignments. They’ll kick you out of the “nest” to go have a personal discovery experience all on your own.

Deal ending soon: Action Photography Cards Advanced Projects at 71% Off

- - - - - - - - - - - - - - - - - - - - - - - - - - - - - - - - - - - - - - - - - - - - - - - - - - - - - - - - - - - - - - - - - - - - - - - - - -

Photography, like any art or skill, thrives on consistency. The journey to becoming an adept photographer is paved with regular practice. Learn how PictureCorrect Insiders can help.

- - - - - - - - - - - - - - - - - - - - - - - - - - - - - - - - - - - - - - - - - - - - - - - - - - - - - - - - - - - - - - - - - - - - - - - - - -

This post Abstract Photography Exercises appeared on PictureCorrect.


from PictureCorrect https://ift.tt/5j8iUbk
via IFTTT

torstai 18. heinäkuuta 2024

PictureCorrect.com: Pre-dawn Landscape Photography Tips

There was a time when I’d come home from most sunrise shoots disappointed.

Why?

Because I didn’t like cloudless skies.

And by the time I’d realise the sunrise was going to be a “boring” one, I’d already be out of bed and on the way, so I might as well go through with the shoot. (Breakfast at a nearby cafe afterwards would be the highlight on these mornings.)

That was until I learned to appreciate shooting pre-dawn.

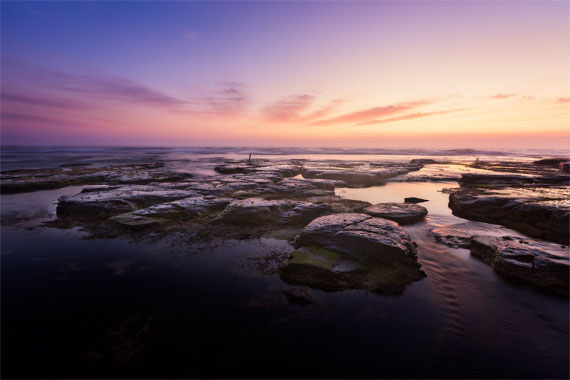
There’s a certain glow that even a cloudless landscape takes on in the half an hour before the sun comes up, that I really like.

Like in the photo at the top of this message.

Here are some tips you can follow to get great pre-dawn shots of any landscape:

1: Start shooting 30 minutes before sunrise

Once the sun rises in a cloudless sky, it will be so bright and harshly lit that it loses most of the colour. Your best shots of a cloudless sky will happen between 30 and 10 minutes before sunrise.

predawn landscape

2: Shoot slightly away from where the sun is coming up

To capture the nice deep yellows and blues in the sky, keep the brightest part of the sky just out of frame. (Also for the reason mentioned in tip 4)

3: Shoot multiple exposures

Even before sunrise, it will still be a high-contrast scene that will probably require bracketed exposures to capture detail in the darkest shadows and the brightest highlights.

multiple exposures

This photo required two bracketed exposures to capture the entire dynamic range of the scene, which were then blended using luminosity masking techniques in Photoshop to produce the finished image.

When you capture the entire dynamic range, it gives you full creative license to edit it how you like whereas if you capture only one exposure, you’ll likely lose detail in either the shadow or highlight (which may not be recoverable!)

4: Create a three-dimensional foreground

foregound dimensions

Even with the sun below the horizon, the light will still reflect off of objects in the scene. If you’re shooting away from where the sun will rise, then see a great three-dimensionality to the objects in your foreground by creating interesting light and shadows. (Note the bottom-left corner of my shot above as a great example of this)

5: Process to the darker end of the histogram

Let shadows be shadows. The deep colorful pre-dawn glow will get lost if you process the image to appear bright and vibrant.

It might be tempting to process the foreground brighter (for the detail), whilst keeping the sky darker (for the colour). But try to resist, else it will create an imbalance between foreground and sky and make things look a bit weird.

That said, you can still show lots of detail in the shadows (especially if you’ve bracketed exposures), just keep them in proportion.

In other words, keep what should be dark, dark and what should be bright, bright.

If you want to learn more about editing your landscapes in Photoshop, then you may want to check out the author’s 12-module Landscape Editing Masterclass:

landscape editing masterclass

The Landscape Editing Masterclass (learn more)

We were able to arrange an exclusive 80% discount for our readers for a limited time.

Deal ending soon: The Landscape Editing Masterclass at 80% Off

- - - - - - - - - - - - - - - - - - - - - - - - - - - - - - - - - - - - - - - - - - - - - - - - - - - - - - - - - - - - - - - - - - - - - - - - - -

Photography, like any art or skill, thrives on consistency. The journey to becoming an adept photographer is paved with regular practice. Learn how PictureCorrect Insiders can help.

- - - - - - - - - - - - - - - - - - - - - - - - - - - - - - - - - - - - - - - - - - - - - - - - - - - - - - - - - - - - - - - - - - - - - - - - - -

This post Pre-dawn Landscape Photography Tips appeared on PictureCorrect.


from PictureCorrect https://ift.tt/ELP43iB
via IFTTT