perjantai 2. huhtikuuta 2021

PictureCorrect.com: The Five Levels of Becoming a Better Photographer

Once you pick up a camera and start taking photos, the journey to becoming a better photographer is not a simple one. It is a roller coaster ride and you’re sure to face a lot of hurdles along the way. If you want to take photos that provoke feelings and emotions—photos that really make your viewers pause and think—that’s where the process gets challenging. In today’s video, photographer Adam Karnacz describes his philosophy about getting better at photography. Whether you just want to take good snapshots or photographs that inspire, you’ll find his ideas quite useful:

In the video, Karnacz explains in detail his five levels of photography. You can use his philosophy as a reference to determine where you fall at present and what you can do further to improve yourself.

In the beginning, it is quite natural to get overwhelmed by the different camera settings. And while many make an attempt to understand and move past the auto mode, they may find themselves stuck there. In the early stage, you may even feel that your gear is limiting you. You may develop the notion that your photos will improve if you improve your gear. However, keep in mind that the key is in learning to take the best photos using the least amount of gear. As time goes on, you’ll soon realize when it’s time to upgrade.

To get the best results from what you’re currently using, it is essential to master the technicalities. Make an active effort to get acquainted with the manual mode, learn how exposure works and expand your knowledge base. You’ll need to spend years shooting at least semi-frequently in order to graduate from this level.

As for the next level, Karnacz suggests trying to imitate a photo that you like. Copying others takes some pressure off you—you don’t need to try and be original. You can think more about the lighting, settings and composition that the original photographer might have used. This might sound easy, but unless you have a good understanding of these behind-the-lens settings, the process can actually be quite challenging. That said, don’t be afraid to mix in your own ideas and improvise.

Remember, there is no shortcut to being a good photographer. How good you get all boils down to the effort you put into the art form. Patience and persistence are key. You must be willing to do things over and over again. Keep yourself open to learning from every shot you take. Hard work is the absolute difference-maker and will definitely pay off.

You’ll know you’ve mastered the art of photography when you start innovating. You’ll constantly come up with different ideas that you want to try out. A good idea is to keep yourself with different photography projects—not necessarily big ones. Of course, at this level, it makes sense that you print your work too. This gives you better insight into your own work and motivates you in the process.

The beauty of these levels that Karnacz discusses is that they’re not linear. In fact, they are cycles, and we can go around them as long as we want. What level do you think you’re at?


Go to full article: The Five Levels of Becoming a Better Photographer

What are your thoughts on this article? Join the discussion on Facebook

PictureCorrect subscribers can also learn more today with our #1 bestseller: The Photography Tutorial eBook

The post The Five Levels of Becoming a Better Photographer appeared first on PictureCorrect.


from PictureCorrect https://ift.tt/3fG703w
via IFTTT

torstai 1. huhtikuuta 2021

PictureCorrect.com: Interesting Photo of the Day: Milky Way Over Lindis Pass

New Zealand has been blessed with beautiful landscapes. Pair that with the amazing view of the Milky Way, and what better combo could you ask for? Astro photographer Paul Wilson captured the following image of the Milky Way over Lindas Pass in New Zealand:

lindis pass milky way

Lindis Pass, New Zealand by Paul Wilson (Via Reddit. Click image to see full size.)

Wilson took multiple images with his Canon 5D Mark IV and stitched them together to create this magnificent photo. The foreground is a panorama that he got by stitching 80 shots, which he shot using his 200mm lens. The sky, on the other hand, is a result of stitching 35 shots that he took with his 50mm lens, each shot being a 60-second exposure at f/2.8, and ISO 1600. Since each sky photo was exposed for 60 seconds, he used an astro tracker to avoid any star trails.

Considering the way Wilson has taken the images, it is clear that he has put in a lot of effort. And his effort has clearly paid off. The brighter portion of the foreground beautifully leads the viewers to the bright spot on the mountains. And the gigantic and beautiful Milky Way makes for a beautiful backdrop for this brilliant image.


Go to full article: Interesting Photo of the Day: Milky Way Over Lindis Pass

What are your thoughts on this article? Join the discussion on Facebook

PictureCorrect subscribers can also learn more today with our #1 bestseller: The Photography Tutorial eBook

The post Interesting Photo of the Day: Milky Way Over Lindis Pass appeared first on PictureCorrect.


from PictureCorrect https://ift.tt/2OHUymz
via IFTTT

PictureCorrect.com: Lens Hoods: How to Make Your Own Tutorial (Video)

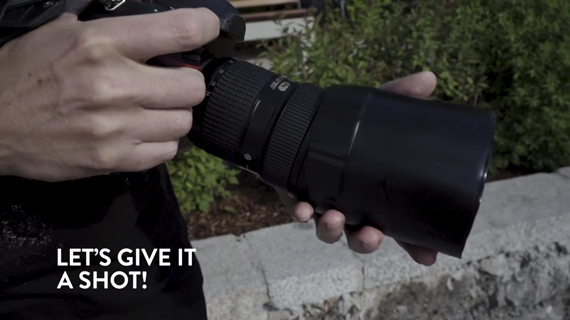
A lens hood is a simple tool that does some important work. Its primary purpose is to block direct light from striking the front element of the lens. This reduces unwanted flares and ghosting, thereby boosting contrast. It also helps in protecting the front element of the lens. In this video, COOPH presents a hack to make your own DIY lens hood using a bottle and black paint:

Here’s what you will  need to make your own DIY lens hood:

  • a soda bottle
  • a knife
  • black spray paint
  • rubber gloves

Start by cutting off the neck and base of the soda bottle carefully with the knife, leaving just the cylindrical portion. Then, clean it using a soft, dry towel.

Move to a well-ventilated area and paint the plastic bottle black. Wear rubber gloves for your safety.

Once done, leave the painted bottle to dry.

how to make your own lens hood

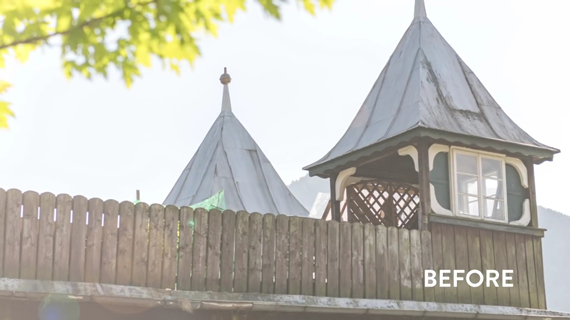
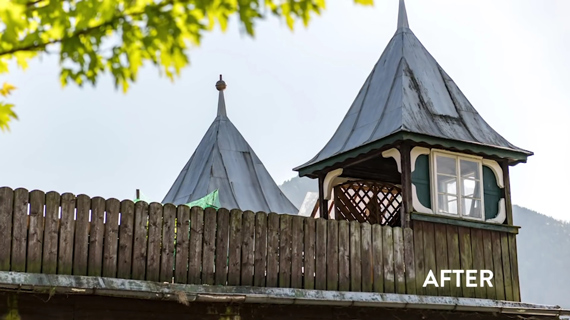
When it comes to using the lens hood, pop it over the lens so as to block off any direct light. You will instantly notice a difference in contrast.

glare without lens hood

lens hood higher contrast

While this is not a long-term or convenient solution, it still works!


Go to full article: Lens Hoods: How to Make Your Own Tutorial (Video)

What are your thoughts on this article? Join the discussion on Facebook

PictureCorrect subscribers can also learn more today with our #1 bestseller: The Photography Tutorial eBook

The post Lens Hoods: How to Make Your Own Tutorial (Video) appeared first on PictureCorrect.


from PictureCorrect https://ift.tt/2QKxfLb
via IFTTT

PictureCorrect.com: How to Hold a Camera for Sharp Photos

Blur or lack of sharpness due to camera shake is a common problem for many photographers. It’s caused by the movement of the hand(s) holding camera itself. It can cause you to take a completely useless photo from a good opportunity.

Luckily, holding a camera correctly is not that hard. You can find many guides all over the internet showing you how you should hold your camera. Since I’m a big fan of simplicity, I will try to tackle this with just one principle that you can apply to every single situation.

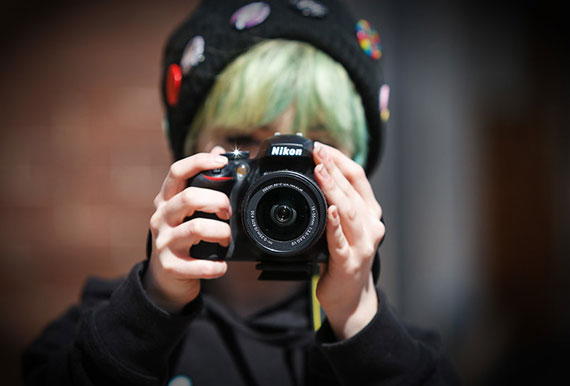
get sharper images by holding your camera like this

Photo by Vaidotas Mišeikis; ISO 200, f/1.4, 1/2500-second exposure.

Let’s start with the worst case, what I will call the fingertip approach. You hold the camera in front of you with your fingertips. Your arm is extended, your fingers are extended, and the camera is shaking.

The basic and important thing to remember is the heavier your camera is, the less likely it is to shake.

Now, before you say, “I don’t want to carry a heavy camera!” well, neither do I. Fortunately, there are ways to make your camera “heavier” without carrying a single gram more.

How? In the fingertip approach, the “weight” of the camera is just itself, say 200 grams for a small compact digital camera. Now try to think of something to combine it with so it gets heavier.

Hmmm…

Found it yet?

For starters, your whole hand! Let’s apply the principle, one step at a time.

sharp photography by holding your camera

Photo by greg Robinson; ISO 100, f/4.0, 1/800-second exposure.

Hold the camera with the palm of your right hand, instead of just with the fingertips. Now, your arm is extended, but you have “integrated” your hand with the camera; they move together. The “weight” of the camera is now the camera plus your hand, say 0.5kg. You have about doubled the “weight,” and this will be a little steadier than the fingertip approach.

One more step. Instead of holding the camera with just your right hand, hold it with both hands. Now, you have a much more balanced platform for your camera; the “weight” of the camera is around 1kg. Be careful not to block the flash or lens with your left hand.

OK, now it’s time to minimize arm movement. Instead of having your elbows at the sides, have them rest on your chest in front of you. Now, you have essentially cut out the movement of the upper arm and fastened the camera a little better to a heavy object—yourself. If you do this, you will want to control your breathing when shooting. It’s surprising how much your lungs move up and down when breathing.

Now the motion of the camera is much more closely tied to your body, and the apparent “weight” of the camera is increased.

The next step is to cut out your motion. If you’re standing up, you will inevitability move a little bit. What you have to do is increase your apparent weight by “integrating” yourself to some heavier object. The technique that I use most often is to find a column or a wall and brace myself against it. You can sit somewhere, lie down on the ground—whatever stops your motion. You can also try to brace just your main shooting hand on a still object.

Obviously, there are different styles for different cameras. SLRs or other cameras with viewfinders, for example, are inherently less prone to camera shake, because in putting your eye to the viewfinder, you often “integrate” them with your head, which is obviously heavier than your hand(s).

For an SLR, I find it best to hold the camera normally with my right hand and place the left side of the camera in my palm so that I am holding the lens with my left hand fingers. (Thumb to the left, fingers to the right of the lens.) When shooting in portrait orientation, I keep the same grip and always tilt the camera to the left (counter clockwise). I find that my right hand is always steadier when tilting to the left. This is what works best for me; you can probably use this as a good starting point to find out exactly how you feel comfortable.

For any camera, and any hand holding situation, just remember the basic principle: make your camera heavier.

About the Author:
Can San writes for notesonphotography.

For Further Help Achieving Crisp, Sharp Photos:

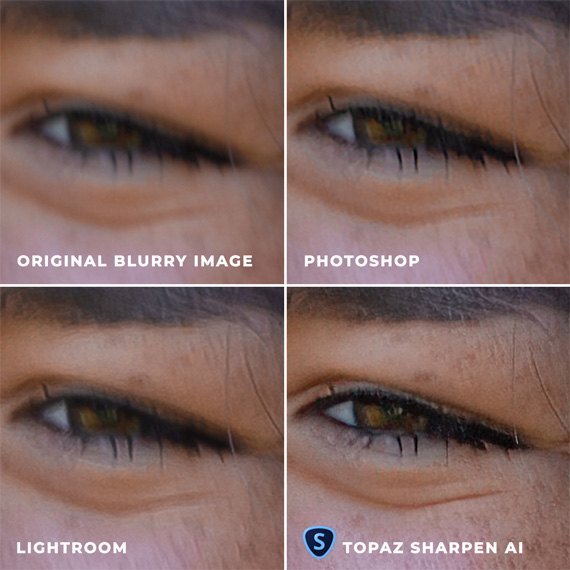
Currently on sale to celebrate a recent update, Topaz Sharpen A.I. takes some of the tedious work out of post-processing. With the new auto-detect feature in the Masking tool, Sharpen AI will automatically detect the subjects in your image for sharpening. It can detect 20 different types of subjects including people, cars, planes, various animals, and more.

sharpen comparison

Results Comparison (see more)

It is currently 25% off which ends soon, plus our readers can save even more by using the coupon code picturecorrect at checkout.

See how it works here: Topaz Sharpen A.I. at 25% Off


Go to full article: How to Hold a Camera for Sharp Photos

What are your thoughts on this article? Join the discussion on Facebook

PictureCorrect subscribers can also learn more today with our #1 bestseller: The Photography Tutorial eBook

The post How to Hold a Camera for Sharp Photos appeared first on PictureCorrect.


from PictureCorrect https://ift.tt/2UcCbpD
via IFTTT

PictureCorrect.com: Interesting Photo of the Day: Lake Te Anau Sunset

The town of Te Anau in the southern region of New Zealand is quite popular among travelers. While it’s notorious for activities such as kayaking, cycling, and even jet boar riding, one cannot leave the region without appreciating its spectacular views. Home to photographer William Patino, the views are a truly magical:

sunset reflection in Te Anau lake

“Sunset Reflections in Lake Te Anau, New Zealand” by William Patino (Via Reddit. Click image to see full size.)

Patino has truly captured a magical moment in this image. While the soft light of the golden hour plays a role in making this image interesting, it’s just one part of the equation. The snow patterns on the mountain in the foreground act as wonderful leading lines to draw viewers into the image. In the mid-ground, we have the beautiful Te Anau Lake with the gorgeous reflection of the dramatic sky and amazing clouds. Then, at the background, we have the colorful sky and the mighty mountains of Fiordland to complete the image.

This photo is a perfect example of how a basic composition guide can be used to create a powerful image.


Go to full article: Interesting Photo of the Day: Lake Te Anau Sunset

What are your thoughts on this article? Join the discussion on Facebook

PictureCorrect subscribers can also learn more today with our #1 bestseller: The Photography Tutorial eBook

The post Interesting Photo of the Day: Lake Te Anau Sunset appeared first on PictureCorrect.


from PictureCorrect https://ift.tt/2Tf6VGZ
via IFTTT

PictureCorrect.com: Abandoned Building Photography Tutorial: 11 Tips (Video)

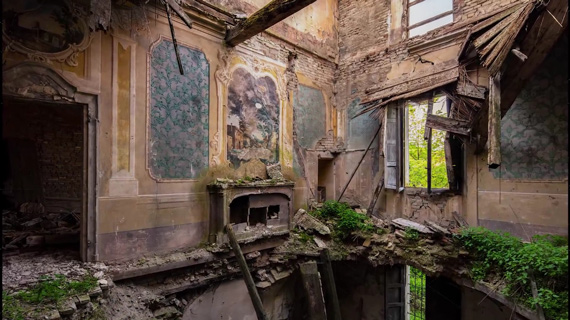
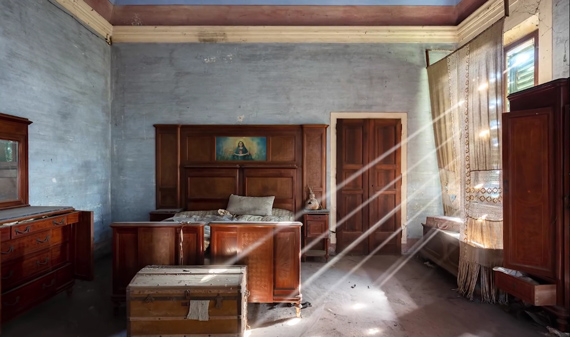
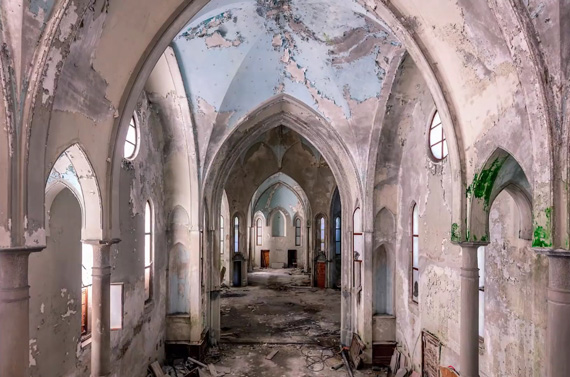
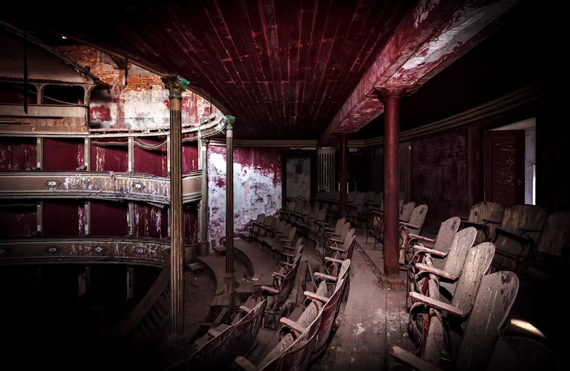
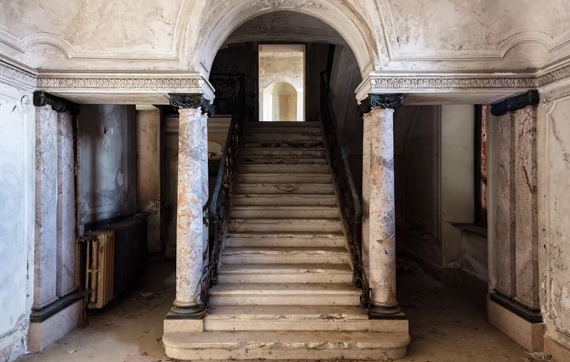
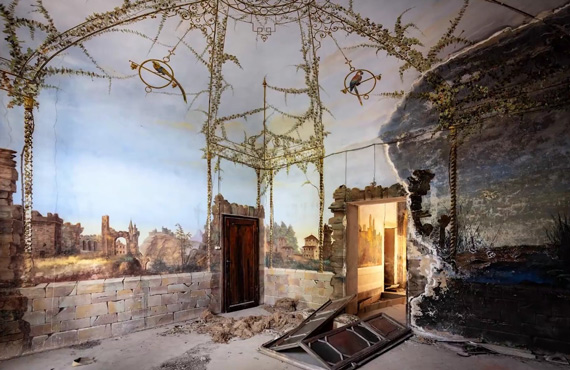
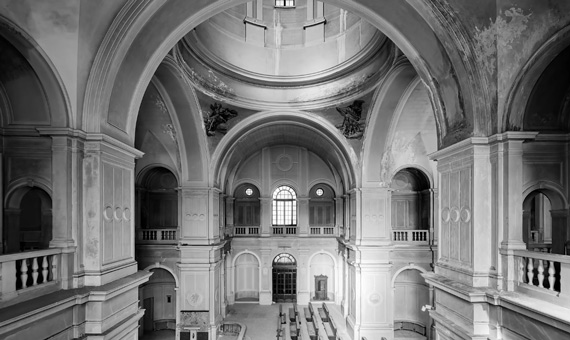
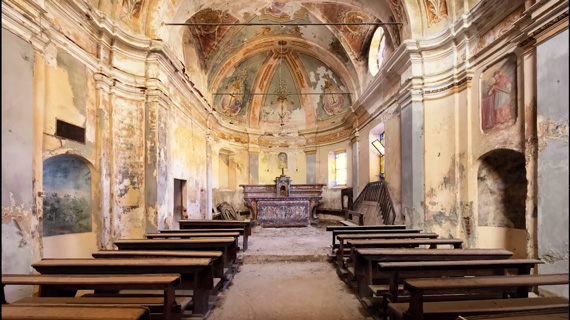
Abandoned buildings can be a great source of images that portray broken emotional connection and also the power of time. However, there is a certain level of preparation and precautionary measures to take into consideration. Photographer James Kerwin with COOPH presents 11 useful tips and tricks to photograph abandoned buildings in the following video:

Before starting out with photographing abandoned building, please be cautioned that urban exploration can be dangerous. Be sure to exercise caution and only enter at your own risk.

1. Go Prepared

Preparation is the key. Kerwin suggests the following points to prepare yourself for photographing abandoned buildings:

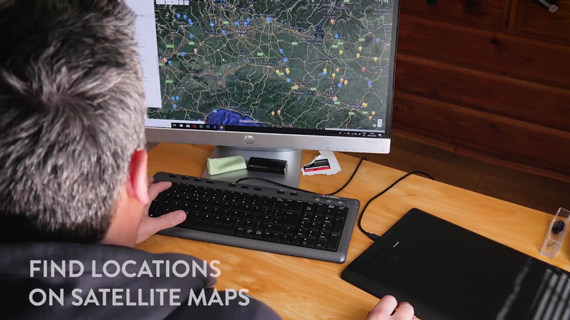
  • Make use of satellite maps to find locations. Google Maps is often the best source.
  • Bring a sturdy tripod with you in case you need to take low light shots.
  • Have a flash light or headlamp ready.
  • Bring a friend. Who knows what kind of danger might be lurking around.
  • Have a lens cloth handy. Abandoned buildings can be dirty, causing dust to settle on the front element of your lens.

abandoned building photography

2. Capture Neglect

As mentioned earlier, photographing abandoned buildings is a perfect way to show broken connection—a connection that now seems like neglect. You can use this as an opportunity to document the impact that time has had on the building.

  • Shoot abandoned dining tables that previously represented family union.
  • Portray how cracks and fissures have developed around the house with the passage of time.
  • See if any ceilings have fallen and created a void.

neglected builings

3. Seek Natural Light

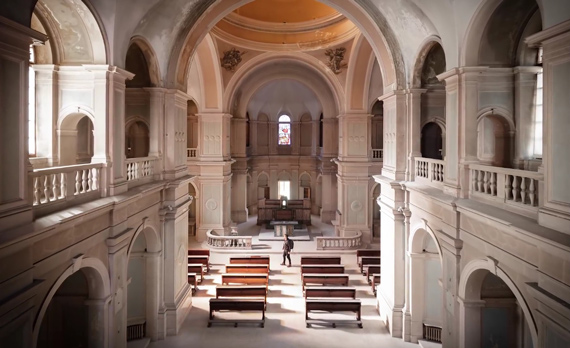
Natural light can be the best source to portray the mood in an abandoned building. Artificial light may not allow you to really capture the feeling that an abandoned building possesses. Find a soft, natural light source with some penetrating sunbeams. Such light adds ethereal vibes to your images.

abandoned building natural light

4. Look for Symmetry

Human beings are “programmed” to love symmetry. A symmetrical distribution of elements in your frame can draw the viewer’s attention to your image. Try shooting down the center point for a near mirror mage.

symmetry in photography

5. Capture Nature

Nature often starts taking over abandoned buildings. Use this as an opportunity and choose to shoot in heavily overgrown locations. This way, you can illustrate that mother nature is the one who is in charge. This also allows you to convey the message that the abandoned building has been long forgotten.

nature in abandoned structures

6. Find Shadows

Shadows are other important elements that add drama to your images. Try to incorporate shadows as much as possibles. However, if the lighting conditions are challenging, you can make use of external flashes to brighten up certain images. If done properly, it allows you to create strong contrast and capture dramatic and gloomy aesthetics.

shadows add drama to abandoned building photos

7. Include Staircases

Stairs form compelling leading lines. Keep and eye out for staircases and shoot square on. To further add interest, you can also use staircases to add geometric elements to your image.

staircase photography

8. Add Shapes and Patterns

Look around the struture and try to find some appealing shapes and patterns. We tend to perceive regular patterns as calming effect and are naturally attracted to them. On the other hand, asymmetrical patterns create busy and chaotic visuals and can still draw attention. Try to play around and find out what your viewers prefer.

shapes and patterns abandoned buildings

9. Shoot in Black and White

Shooting in black and white can be a great method to flatten contrast and give the image an aged look.

using black and white

10. Look for Vibrancy

The building might have fallen apart, but there can still be areas inside that are vibrant and colorful. Spend some time to look around and find some vibrant scenes and capture the beauty of abandonment. Make the colors in your images pop during your edit.

abandoned building photography vibrance

11. Use a Tilt Shift Lens

If the ceilings are high, you might have a difficult time getting an image with straight walls and pillars. They help you in getting images without perspective distortion. Using tilt shift lenses, you can also experiment with panoramas and ultra wide shots. To give a sense of how high the ceiling really is, you can even add a person to the scene.

tilt shift lenses abandoned structures

Photographing abandoned buildings can be a great exercise to push your creative limits. I hope that you can make use of some of the tips and tricks discussed in the article on your next outing.


Go to full article: Abandoned Building Photography Tutorial: 11 Tips (Video)

What are your thoughts on this article? Join the discussion on Facebook

PictureCorrect subscribers can also learn more today with our #1 bestseller: The Photography Tutorial eBook

The post Abandoned Building Photography Tutorial: 11 Tips (Video) appeared first on PictureCorrect.


from PictureCorrect https://ift.tt/2z7wuAN
via IFTTT

keskiviikko 31. maaliskuuta 2021

PictureCorrect.com: Why Photography Is Such A Great Hobby

It’s a simple question. Why am I taking pictures? What’s so special about photography compared to other visual art forms?

I’m not writing this to give you an answer, but I’m sharing why I love what photography does for me and why I think it’s such a great hobby to integrate into my life, which also resulted to me starting a photography blog site.

why make photography your hobby

Photo by Vincent Anderlucci; ISO 100, f/4.0, 1/250-second exposure.

Why Photography Means A Lot To Me

As I share my personal reasons to these questions and I’d like to encourage you to add yours in the commenting section as well. Feel free to add a link to your blog or gallery for everyone to enjoy as well.

I’m sure everybody has a GREAT story to tell.

Photography Fills A Need

I believe we all picked up a camera at a very young age, no matter how simple or basic that camera may have been. My first camera was a Canon Snappy 50 given to me by my mom when I was 8. I believe it was because of the 84 Olympics ads that I saw in the magazines that kept advertising this camera. It’s unusually long frame and that little orange tab to make the flash fire were icing on the cake for an 8-yo! I wanted the star-spangled version but that was unavailable in Asia back then.

Anyway, my mom was a shutter bug, not in a technical or artistic sense, however.

Like most moms, she snaps everything and records every little embarrassing memorable moment my sister and I go through. It was like a diary for her, and she ended up having suitcases of photo prints sorted in plastic bags and Dymo labels (remember those? Damn I’m dating myself too much here!).

Fast forward to my grade school and high school years, my camera adventures circled around taking photos of friends, skateboarding antics, and martial art events. In college, the acquisition of a proper SLR opened the floodgate of gear lust and more serious phases of photography.

Now that I’m a father, my camera’s job circled back to what my mom used to do, documenting my son’s adventures. My son’s daily photo diary started four years ago and I’m still doing it now. I wished I was able to start the daily photo project earlier, but at least I took enough pictures of him since birth that my collection can still be considered ‘complete’.

great things about photography as a hobby

Photo by Saurabh Chatterjee; ISO 200, f/4.8, 1/640-second exposure.

Photography also fills a lot of less personal needs for me. From taking pictures for my businesses, earning opportunities through paid photography services, or even starting my online blogging journey (this site!). I wouldn’t have experienced those things if it wasn’t because of photography.

Practicality

Many feel that photography isn’t an art nor should it deserve as much attention as paintings because it’s relatively easy to get into photography. While I do agree to a certain extent, there are several factors the naysayers fail to realize as well.

Anyone with an image-capturing device can get started with photography, that makes it fun and personal for everyone. Yes, you don’t need talent to take pictures, but unless your goal was to make photography your art medium, there’s nothing wrong with just snapping pictures with no concern on technicalities nor aesthetics.

I don’t think there’ll be many people out there walking into an art store buying a set of paint brushes and start painting out of convenience or impulse. I’ve yet to see a major headline news moment being drawn or painted either, it’s just not an immediate way to communicate compared to photography. Ever wondered why it’s easier to find a camera for sale than a set of art brush?

I appreciate a good sketch or painting as much as anyone, but for a guy like me who has no talent in painting or drawing, there’s a big, invisible wall preventing me from connecting to any paint artist.

A photograph, on the other hand, allows me to imagine as if I’m seeing the place through the eyes of the photographer (I hate that cliché, but there’s no better phrase).

With digital photography, the immediate feedback connects us even faster. Camera phones, remote uploads, social media sharing all allows us to see the world as it happens – yes, even if there’s no skill involved!

Now how is that a bad thing?

reasons to take up photography as a hobby

Photo by John Getchel; ISO 100, f/22.0, 30-second exposure.

The Gadgets Are Fun

As with any hobby, the success, growth and longevity depends greatly with its marketability.

The technology revolving around photography is highly addictive and the way brands play into people’s minds produced both amusing conflicts and insipirational camaraderie. The simple fact that most of the products aren’t that different but they are marketed in such a way that only subjective comparisons can be made these days allows photography to be an endless source of debate, which by itself is entertaining and attention grabbing already.

Film cameras in the past get to enjoy a life cycle of about 2-3 years per model. Now in the digital world, even the highest models only get 18 months of life before being supplanted by a new model. Entry level cameras won’t even last a year before they’re due for replacement.

New technologies bring out new needs for additional accessories and gadgets, and for most of us gear heads, we’re more than willing to help out the economy and feed that gear lust of ours.

Immortalizes The Things You Care About

The biggest reason, I believe, is just the ability of capturing a moment as it happens with just a single click of a button. Sure, skilled and experience photographers may capture the scene in a more artistic manner compared to the casual snapper, but the key point is, you captured what you want to remember right then and there!

Our brain and its stored memory are amazing, you can piece together fragments of an event and relive the entire day with ease. If it’s a group event, all of you can recall every single detail collectively with just one photograph. The emotions a photograph can throw back at you can be overwhelming at times regardless of technical execution.

The ability of photography to connect to our past, associate us in an event, and preserve memories without words or interpretation makes it an influential hobby for all of us.

why photography makes the best hobby

Photo by Chris JL; ISO 3200, f/4.0, 1/80-second exposure.

What’s your story? How did you get started with photography? Where has it taken you and what else will you do with it? Share it below for the world to see.

About the Author:
David (from https://davidleetong.com/) is a freelance photographer, blogger, and writer providing quality and free photography-related tutorials, camera reviews, and Adobe Photoshop tips through his blog and workshops.


Go to full article: Why Photography Is Such A Great Hobby

What are your thoughts on this article? Join the discussion on Facebook

PictureCorrect subscribers can also learn more today with our #1 bestseller: The Photography Tutorial eBook

The post Why Photography Is Such A Great Hobby appeared first on PictureCorrect.


from PictureCorrect https://ift.tt/31zcGUT
via IFTTT