perjantai 11. toukokuuta 2018

PictureCorrect.com: Modern Corporate Headshot Photography Methods

What comes to mind when you hear the phrase “corporate headshots”? If you’re like photographer Aaron Nace, you think of words like boring, traditional, stale, stiff, or forced. But it doesn’t have to be that way. See how Nace combines editorial style with corporate style to make great headshots:

This headshot lighting setup tutorial demonstrates how to create modern headshots that give a real picture of the subject while still being suitable for use on websites and corporate materials. The subjects are well-dressed, upbeat, and professional, but they appear more genuine than they might in a more traditional headshot.

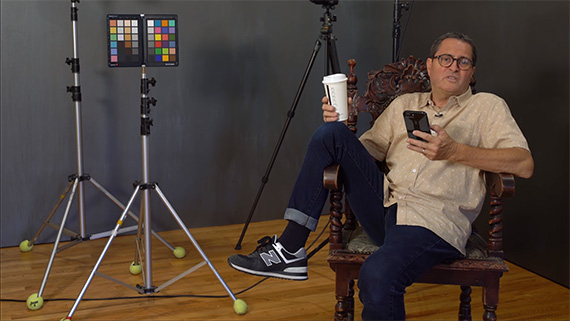
For this style, Nace starts with a classic set: a grey seamless backdrop behind a subject seated on a stool. The lighting, however, is less traditional. He prefers to use one main light to light the subject from the front. For this, he uses a medium octobox directly in front of and above the subject. Lighting from above creates shadows under the eyes and chin, so he also uses a V-flat to produce fill light. The V-flat consists of two 4′ x 8′ sheets of white foamcore with two Einstein E640 Flash Units fired into it: one positioned low and one positioned high. The light bounces back onto the subject to fill in the shadows. Another light with a 7-inch reflector is pointed at the bottom of the seamless backdrop to produce a glow.

modern-headshots-2

Typical corporate headshots are usually taken quickly, so, more often than not, they result in fake, uninspiring smiles. To get shots with relaxed, natural expressions, Nace gets out from behind the camera. He uses a Pocketwizard as a remote trigger for his camera so he can interact and connect with his client during the photo shoot. This way, the subject doesn’t feel as if he or she is on stage in front of a robot. They’re conversing with the photographer, who is chatting casually and using breathing exercises to calm his subjects.

Melding style, lighting technique, camera settings, and comfortable client interaction results in flattering professional headshots that give a sense of personality.

modern-headshots-3

modern-headshots-7

modern-headshots

“People, when they’re a little bit calm, they tend to give you…who they really are. So we help people to get to that place.”


Go to full article: Modern Corporate Headshot Photography Methods

What are your thoughts on this article? Join the discussion on Facebook

PictureCorrect subscribers can also learn more today with our #1 bestseller: The Photography Tutorial eBook

The post Modern Corporate Headshot Photography Methods appeared first on PictureCorrect.


from PictureCorrect https://ift.tt/2jRFJ01
via IFTTT

PictureCorrect.com: The Trick Photography eBook at 50% Off

If you want to learn some amazing photography tricks this weekend you may want to take a look at this sale. The 2nd edition includes 100 new in-depth eBook pages (300 pages total) and 9 full hours of video tutorials. Its one of the most popular training eBooks for photographers and it is currently 50% off today. Deal found here: The Trick Photography eBook at 50% Off

panorama photo tutorial

Extensive Chapters on How to do Non-Traditional Panoramic Photography

light painting photo

Extensive tutorials on how to do Light Painting

hdr photo

HDR Photography Techniques and Style Strategies

photography trick techniques

Capturing Split Second High Speed Photos

high speed photography

High Speed Photography Tutorials

bokeh photo

How to Achieve Bokeh in Photography

picture effects

Many Chapters on Composite Photography and Combining Photo Elements

waterfall photo tutorials

Various Techniques for Capturing Smooth Water Motion

tips for taking compelling images

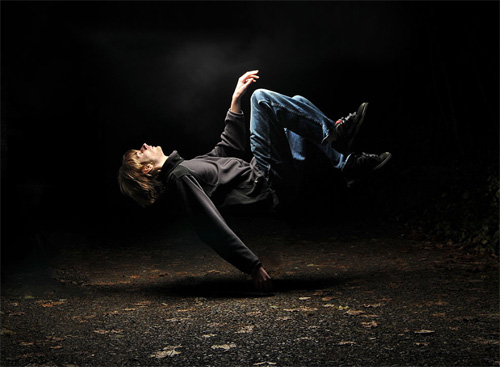
Photography Tricks for Dynamic Floating Subjects Such as Fruit

clear night photos

Tutorials on Creative Night Photography Methods

infrared photo tutorial

Tutorials and Chapters on Infrared Digital Photography

long exposure tricks

Articles on How to Capture Portraits at Long Exposures

long exposure photography tricks

Steel Wool Light Painting Photography and more with Long Exposures

How to Get a Discounted Copy Today:

If you have been wanting to learn any of these techniques, today is a good time to check it out for the sale! It also carries a 60 day no-questions-asked guarantee so there is no risk in trying it.

Deal found here: Trick Photography & Special Effects at 50% Off


Go to full article: The Trick Photography eBook at 50% Off

What are your thoughts on this article? Join the discussion on Facebook

PictureCorrect subscribers can also learn more today with our #1 bestseller: The Photography Tutorial eBook

The post The Trick Photography eBook at 50% Off appeared first on PictureCorrect.


from PictureCorrect https://ift.tt/2rznpNA
via IFTTT

tiistai 8. toukokuuta 2018

PictureCorrect.com: 8 Ways to Get Fired from a Photography Set

Have you ever encountered that really annoying photographer’s assistant who always seems to have a piece of advice to give to the director on the set? Or the random individual who seems bent on creating a personal relationship with the client when their real job is to be useful somewhere else? It’s always irritating to have people like these on set. They usually end up getting fired—or at least never called back. Jay P Morgan shares eight easy ways to get fired on a set:

1. Show up late

We all know what time the shoot starts. The least we can do is arrive on time.

2. Arrive unprepared

The best way to get the message across that you really don’t care is to arrive unprepared. Bring no tools with you and expect someone will take care of your needs on the set.

3. Make your opinions known

No one likes the person who always has a piece of advice on how to get things done and is not shy to speak up. Even if the recipient of that advice is the director or the producer on the set, that’s a serious breach of etiquette and a great way to get fired.

4. Be on your phone

Obviously, when a person hires you to do a job, they don’t expect you to be on your phone all the time. Make sure that your phone is invisible and only pops out during breaks.

tips for being a photography assistant

5. Make yourself scarce

If you’re on set and are never around, chances are you will not be missed and someone else will take your job the next time. That someone will have a better sense of what’s going on, a keen eye, and presence of mind. Someone who is always in earshot and ready to help whenever called for is most appreciated.

6. Go to work to eat

If you are the sort of individual who goes to work only to eat, chances are you will end up getting fired. Make sure to put your priorities in order. If you have to eat in between work, just grab something quickly and get back to work.

7. Establish a personal relationship with a client

No one hires an assistant to create a business relationship with the client. Do the work you were hired for.

8. Leave a mess

It’s your mess. Clean it up. Don’t leave it for someone else.

So, what’s your story? Have you fired someone or been fired yourself? Share your story with us.


Go to full article: 8 Ways to Get Fired from a Photography Set

What are your thoughts on this article? Join the discussion on Facebook

PictureCorrect subscribers can also learn more today with our #1 bestseller: The Photography Tutorial eBook

The post 8 Ways to Get Fired from a Photography Set appeared first on PictureCorrect.


from PictureCorrect https://ift.tt/2K6RkmL
via IFTTT

maanantai 7. toukokuuta 2018

PictureCorrect.com: 7 Advanced Smartphone Photography Tips

While most smartphone users are happy simply shooting in auto mode, phone cameras are much more powerful than they might think. The key to smartphone photography nirvana is in unlocking manual mode. In this video, COOPH shares seven tips for making pro photos with your smartphone:

1. Manual Mode

Unsurprisingly, the first tip is to switch to manual shooting mode. But even before you actually switch to manual mode, make sure you have a high quality camera. Look for a smartphone camera with a sharp lens, a fast aperture, great color rendition, excellent dynamic range, and good noise suppression.

2. Long Exposure

Using a tripod, set your shutter speed to something very slow to capture light trails and movement.

light painting mode

Alternatively, you can activate Light Painting mode. You can also experiment by setting up at a higher angle to capture unique perspectives while using a slow shutter speed.

3. Action Shot

Your smartphone is a capable action shooter, provided you’re shooting in good light. Dial in a faster shutter speed. Find a subject. Fire away.

4. Sequence Shot

With your phone on a tripod or other stabilizer, use the burst mode while a subject does something active.

smartphone sequence shot

Incorporate all the images into Photoshop and merge them together to produce a sequence shot.

5. Depth of Field

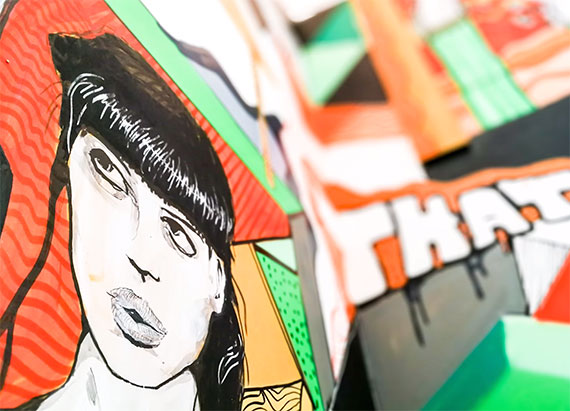
You don’t need the latest iPhone X or the Google Pixel 2 to achieve shallow depth of field. What you need is a subject and some smart shooting approaches. If your phone camera has a wide aperture mode, use it.

smartphone photography shallow depth of field

Let’s say you’re shooting a wall. Hold your camera to shoot down the wall in order to create depth.

6. Macro Mode

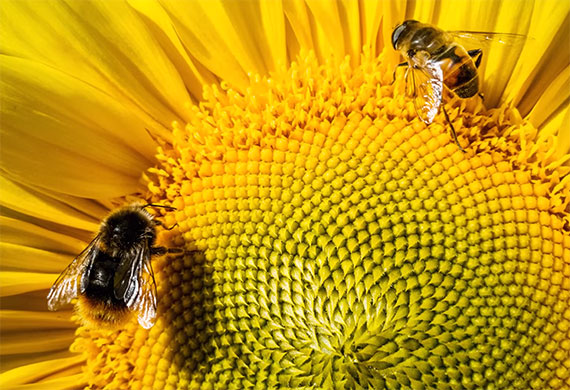
Getting close to your subject with a smartphone is relatively easy. The lens doesn’t extend out of the body and therefore doesn’t obscure the light that falls on the subject. Get as close to your subject as your smartphone camera permits.

smartphone photography macro mode

7. Timelapse

Modern smartphone cameras come with a built-in timelapse feature. Or you can download an app that does the trick. You’ll need a tripod for this.

There are many ways you can shoot a timelapse. Use your imagination to come up with something unique.

For further training: The iPhone Photography Academy


Go to full article: 7 Advanced Smartphone Photography Tips

What are your thoughts on this article? Join the discussion on Facebook

PictureCorrect subscribers can also learn more today with our #1 bestseller: The Photography Tutorial eBook

The post 7 Advanced Smartphone Photography Tips appeared first on PictureCorrect.


from PictureCorrect https://ift.tt/2wlfiZP
via IFTTT

perjantai 4. toukokuuta 2018

PictureCorrect.com: 7 Top Tips for Destination Wedding Photographers

Having been a professional wedding photographer in Hong Kong for many years, I’m now getting booked for more and more destination weddings in far flung and exotic locations such as India, Thailand and the USA. Preparing for any wedding is a big job, but shooting a huge event somewhere unfamiliar requires a whole new level of attention to detail. It’s an honor to be chosen as someone’s destination wedding photographer, and of course you want to do your couple proud. Here are my seven top tips to help you do just that.
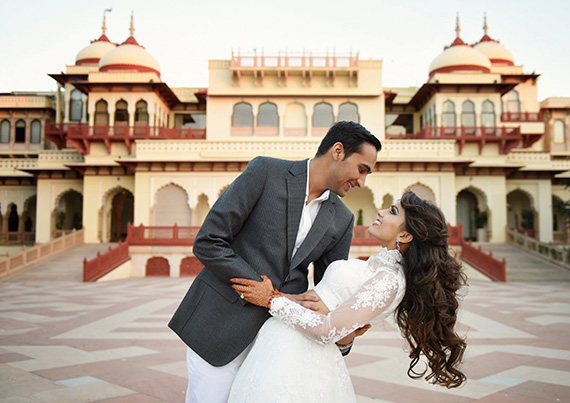
tops tips for destination weddings

Go in eyes open

It’s very tempting, especially when you’re new to destination wedding photography, to say yes to every client. However, every destination wedding is different, so it’s important to know exactly what you’re in for before you sign on the dotted line. The first step, of course, is to find out what the couple want, E.G. how many events/days they would like covered and what sort of turnaround they’re expecting in terms of processed images. I’ve photographed plenty of four-day+ Indian weddings, for example, and putting the final touches to that much great material takes a whole lot of time. I, for one, would rather do just 3 to 4 big weddings a year than stretch myself too far over too many. If you can’t fit it in with your other commitments, you have to say no. It’s not fair to the couple and their families otherwise.
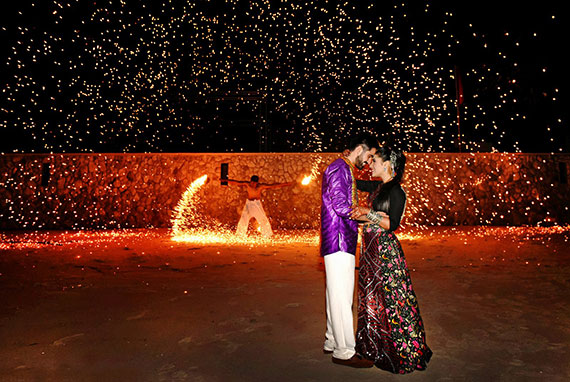
fireworks wedding portrait

Leave nothing to chance

Once you’ve committed to photographing a destination wedding, you need to prepare like never before. Firstly, meet with the couple and nail down as many details as you can about the style of photography they’re looking for, the schedule and any special requirements. Then figure out your visa situation and make sure you’re fully covered for both health and equipment insurance. If you already have insurance on your gear, make sure it covers the destination you’re traveling to. It’s also a good idea to make a list of everything you’re taking, plus take photos and take proof of purchase if possible. It’ll save you a whole lot of hassle and heartache if you drop your favorite lens off the side of a yacht. Obviously, back up, back up and back up immediately all the photos you take on each day of the wedding!
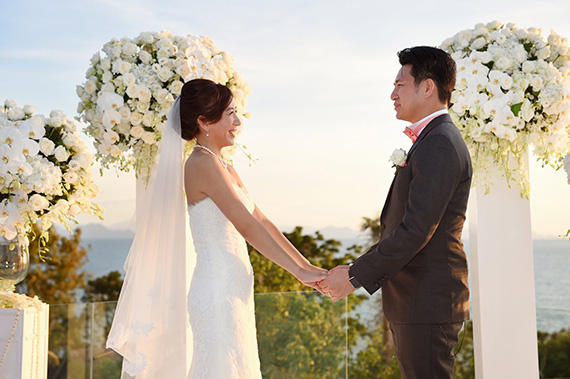
wedding couple holding hands

Carry on carrying on

It’s dangerous to part with your gear when you’re flying, so maximize your carry-on allowance. Most airlines allow for a small wheelie bag and another piece of carry-on luggage, neither of which are usually weighed. It’s also a smart idea to put whatever you plan to wear when you photograph the wedding into one of these bags. If the worst happens and your checked luggage gets lost, you won’t have to shoot the wedding in your jogging bottoms and T-shirt.

Have a communication plan

In the wonderfully convenient modern world we live in, it’s easy to forget that some of our communication devices stop working as soon as we leave the borders of the country in which they’re registered. When shooting a destination wedding, therefore, be sure to have a communication plan with your couple. Designate a time to meet at their hotel or arrange to swap your local numbers online when you arrive. This will save you, and most importantly them, a great deal of stress.
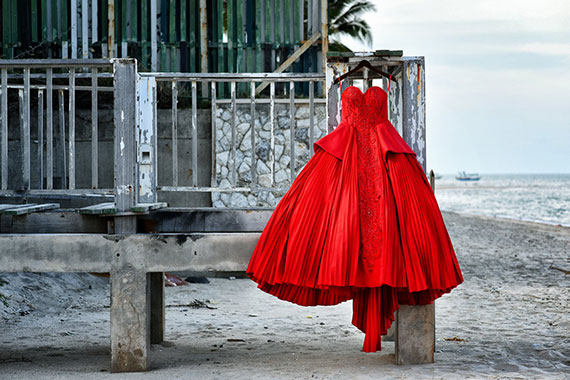
red dress

Be the early bird

When booked for a destination wedding, I always arrive at least one or two days early. This allows for weather and flight mishaps as well as a bit of catchup sleep if jet lag is a factor. Most importantly, it gives me time to go scouting for locations before the big day. I always do lots of research months before even stepping foot on the plane, but nothing compares to actually seeing the destination with your own eyes. There are always so many amazingly photogenic scenes that are overlooked by travel guides, Google images and even the locals themselves.

Explore the venue with the couple

Destination weddings are huge feats of planning and organization, so you can’t just expect to turn up on the day and do your thing. I always meet with the bride, groom and wedding planner (if there is one) at the venue the day before to go through the order of events and exactly where they want me and when. You’ll probably have already figured out the balance between candid and posed shots the couple seek in your previous conversations, but this final meeting will allow you to discuss a few on-site features and even have a say in the direction the ceremony faces. Light is obviously a massively important factor in photography and you don’t want to end up on the wrong side of it at the all-important moment.
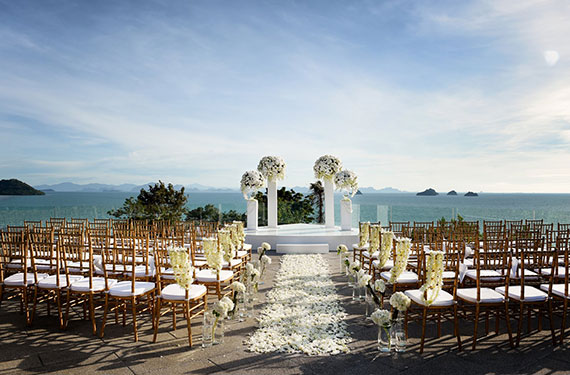
beach wedding

Preserve the family legacy

Weddings are essentially about being reunited with old family members and welcoming new ones, so I always try to get some nice captures of different generations when shooting weddings. The kids grow up fast and the older generations aren’t with us forever, so these are often the pictures that are cherished the most (other than those of the bride and groom, of course) for years to come.
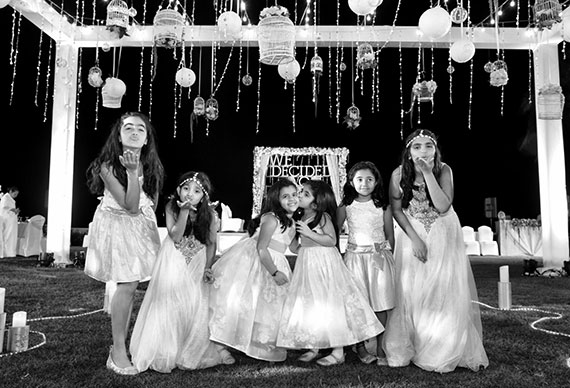
bridesmaids and flower girls

In summary, it’s a privilege being a wedding photographer because clients are trusting you with their happiest and most intimate family moments, other than the birth of their children of course. Therefore, you have a responsibility to be at your professional best and make sure you do the best job possible! Thanks to all the wonderful couples who’ve allowed me to be part of their beautiful destination weddings. It’s truly been an honor.

About the Author
Ali Ghorbani (otherwise known as, Ali G) is a luxury wedding, events, corporate and celebrity photographer based in Hong Kong. You can follow him on Facebook and Instagram.


Go to full article: 7 Top Tips for Destination Wedding Photographers

What are your thoughts on this article? Join the discussion on Facebook

PictureCorrect subscribers can also learn more today with our #1 bestseller: The Photography Tutorial eBook

The post 7 Top Tips for Destination Wedding Photographers appeared first on PictureCorrect.


from PictureCorrect https://ift.tt/2ju6dV2
via IFTTT

PictureCorrect.com: Tips for Using the Clone Stamp Tool

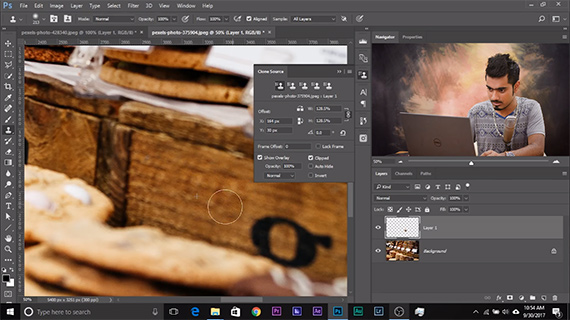
You likely use Photoshop’s clone stamp tool on a regular basis for removing lens specks or for replicating elements, and so on and so forth. But the clone stamp tool can sometimes be a little unwieldy, such as when working on a target area that is curved instead of being a straight line. Unmesh Dinda from PiXimperfect has a solution:

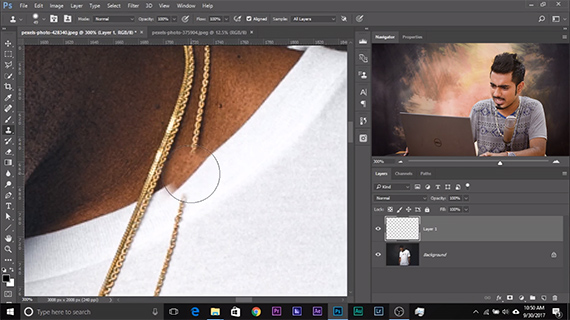
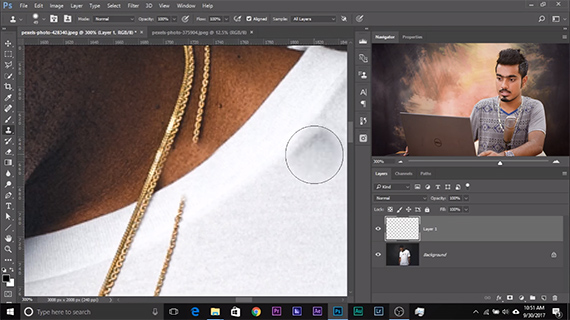
Suppose you want to remove the chains from this man’s photo. The clone stamp tool creates a problem with the rounded edge of the model’s shirt.

The Clone Stamp Tool Unplugged

To overcome this problem you need to rotate the sample.

Hold the Alt/Option + Shift + < or >.

Depending on the angle of curve of the selected sample, you will need to use either the ‘<‘ key or the ‘>’ key to align the sample area with the target area.

Keep pressing the ‘<‘ or ‘>’  key until the sample area is aligned perfectly.

The Clone Stamp Tool Unplugged

You can then proceed to remove the rest of the chain normally using the clone stamp tool.

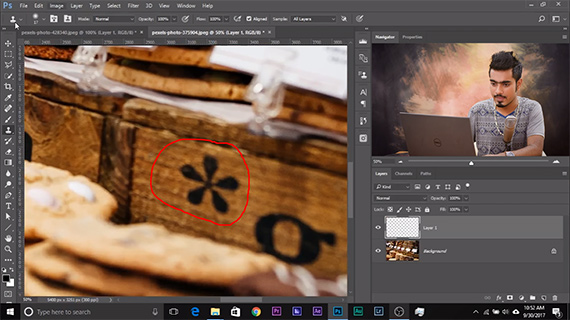
Dinda demonstrated another example to showcase how useful this technique can be in a wide variety of other situations. Let’s say that you have a small logo to be removed from an image.

how to use the clone stamp tool

But if you use the clone stamp in the traditional way, you get a messy result.

making the most of the clone stamp

The solution?

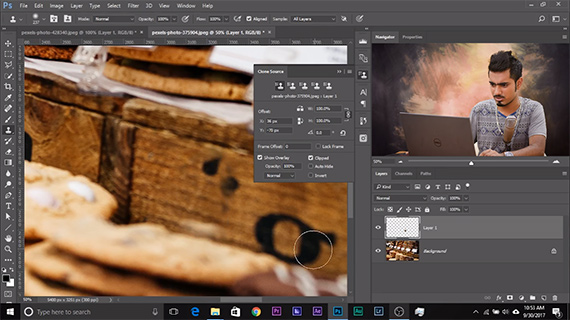
Hold the Alt/Option + Shift + [ or ] key.

This will make the sample area larger or smaller, depending on what you need. Now you can paint over the target area. A smaller sample area is useful when you have a cluttered image and that means taking a larger sample also incorporates unwanted details.

clone stamp tips photoshop

Once you’re done using the clone stamp tool, don’t forget to reset it, otherwise the changes you made will be replicated when you work on a different image.


Go to full article: Tips for Using the Clone Stamp Tool

What are your thoughts on this article? Join the discussion on Facebook

PictureCorrect subscribers can also learn more today with our #1 bestseller: The Photography Tutorial eBook

The post Tips for Using the Clone Stamp Tool appeared first on PictureCorrect.


from PictureCorrect https://ift.tt/2jteHf0
via IFTTT