You likely use Photoshop’s clone stamp tool on a regular basis for removing lens specks or for replicating elements, and so on and so forth. But the clone stamp tool can sometimes be a little unwieldy, such as when working on a target area that is curved instead of being a straight line. Unmesh Dinda from PiXimperfect has a solution:
Suppose you want to remove the chains from this man’s photo. The clone stamp tool creates a problem with the rounded edge of the model’s shirt.
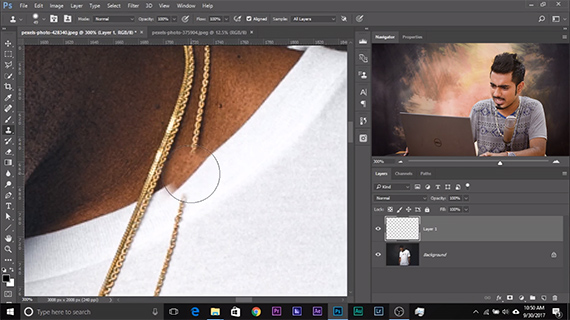
To overcome this problem you need to rotate the sample.
Hold the Alt/Option + Shift + < or >.
Depending on the angle of curve of the selected sample, you will need to use either the ‘<‘ key or the ‘>’ key to align the sample area with the target area.
Keep pressing the ‘<‘ or ‘>’ key until the sample area is aligned perfectly.
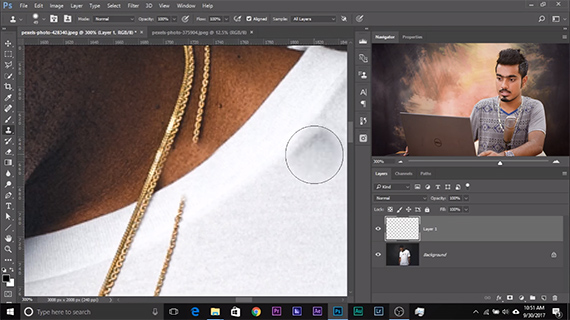
You can then proceed to remove the rest of the chain normally using the clone stamp tool.
Dinda demonstrated another example to showcase how useful this technique can be in a wide variety of other situations. Let’s say that you have a small logo to be removed from an image.
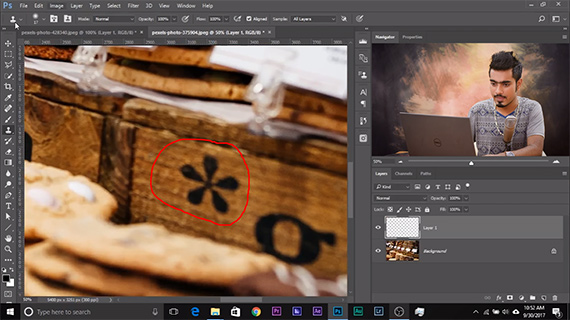
But if you use the clone stamp in the traditional way, you get a messy result.
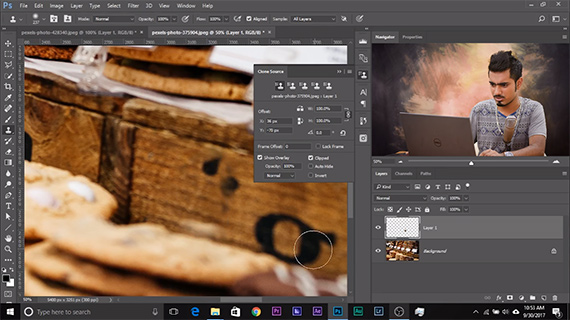
The solution?
Hold the Alt/Option + Shift + [ or ] key.
This will make the sample area larger or smaller, depending on what you need. Now you can paint over the target area. A smaller sample area is useful when you have a cluttered image and that means taking a larger sample also incorporates unwanted details.
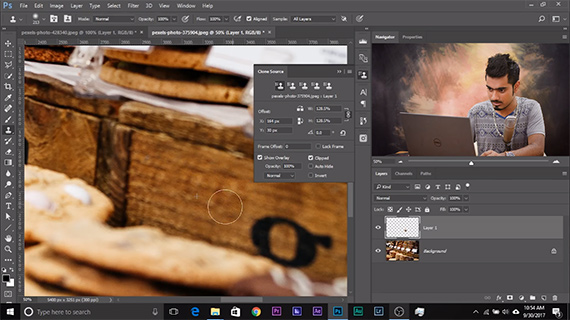
Once you’re done using the clone stamp tool, don’t forget to reset it, otherwise the changes you made will be replicated when you work on a different image.
Go to full article: Tips for Using the Clone Stamp Tool
What are your thoughts on this article? Join the discussion on Facebook
PictureCorrect subscribers can also learn more today with our #1 bestseller: The Photography Tutorial eBook
The post Tips for Using the Clone Stamp Tool appeared first on PictureCorrect.
from PictureCorrect https://ift.tt/2jteHf0
via IFTTT


0 kommenttia:
Lähetä kommentti