


Snowy environments can produce some of the most striking portrait images—but they’re also one of the easiest ways to end up with dull, underexposed photos. If you’ve ever reviewed your images after a winter shoot and wondered why the snow looks gray and skin tones feel lifeless, the issue usually isn’t your camera or your settings. It’s your camera meter doing exactly what it was designed to do—just not what you want it to do.
Understanding how exposure meters behave in snow, and knowing when to override them, is the key to consistently strong winter portraits.
Related reminder: only a little while left for the Lighting Cheat Sheets  Winter Sale
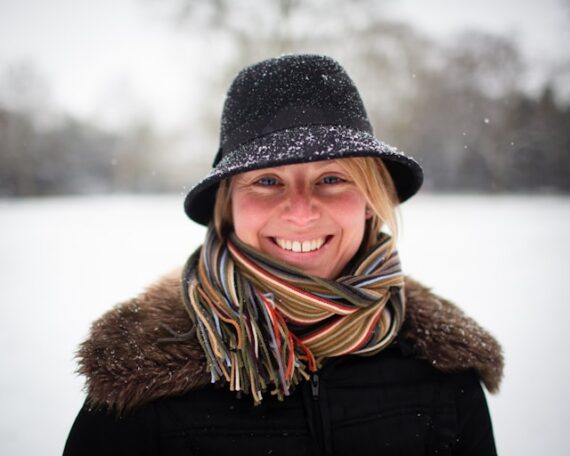
35mm, f/1.6, 1/8000s, ISO 1000; captured by Will McClintock
Why Snow Fools Your Camera’s Meter
Most camera meters are designed to expose scenes as a middle gray—roughly 18% gray. In average conditions, this works well. But snow-covered scenes are anything but average.
When your frame is dominated by bright white snow, your camera assumes the scene is too bright and tries to compensate by darkening the exposure. The result is predictable:
- Snow turns dull gray
- Shadows deepen unnecessarily
- Skin tones lose brightness and life
The camera isn’t broken—it’s just trying to force a very bright scene into a neutral exposure. For portraits in the snow, that behavior works against you.
Using Exposure Compensation (The Simple Fix)
One of the easiest ways to correct this problem is by using exposure compensation.
In aperture priority or shutter priority modes, dial in +1 to +2 stops of exposure compensation as a starting point. The exact amount depends on:
- How much of the frame is snow
- Whether the light is sunny or overcast
- The subject’s clothing and skin tone
A lightly snow-dusted background may only need +1 EV. A scene that’s nearly all white snow often benefits from closer to +2 EV.
The goal is simple: tell the camera that the brightness you’re seeing is intentional and should not be darkened.
Why Slightly Overexposing Skin Tones Matters
For portraits, skin tones matter more than the snow.
In winter scenes, underexposed skin tones are especially unforgiving. Cold light, reflective snow, and darker exposures combine to make faces look flat, gray, or muddy. Slightly brighter skin tones:
- Look healthier and more natural
- Preserve more usable detail
- Are easier to fine-tune in post-processing
This doesn’t mean blowing highlights or losing texture. It means prioritizing exposure for the subject’s face, even if that pushes the snow close to the right side of the histogram.
A good rule of thumb:
If you’re choosing between perfect snow and good skin tones, choose the skin tones every time.
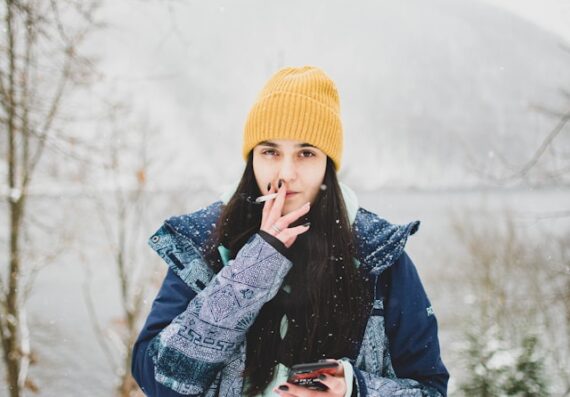
35mm, f/1.8, 1/2000s, ISO 800; captured by June Andrei George
Watch the Histogram, Not the LCD
Snow can make your camera’s rear screen misleading—especially outdoors in bright conditions. Instead of judging exposure by eye, rely on the histogram.
For well-exposed snow portraits:
- Highlights should be close to the right edge, but not clipped
- Skin tones should sit comfortably in the upper midtones
- Avoid large gaps on the right side of the histogram (a sign of underexposure)
This approach helps you stay consistent even as lighting conditions change throughout a winter shoot.
Manual Mode: Helpful, Not Required
You don’t need to shoot in full manual mode to get good results in the snow—but it can help in consistent lighting.
If the light isn’t changing much:
- Set exposure manually based on the snow
- Lock it in
- Focus entirely on posing, expression, and composition
If clouds are moving or the subject shifts between sun and shade, exposure compensation is often faster and more flexible.
Final Takeaway
Snowy portraits fail exposure-wise for one main reason: cameras don’t understand that white scenes are supposed to be white. Once you accept that and take control—through exposure compensation, histogram checks, and prioritizing skin tones—the problem disappears.
Get the exposure right in-camera, and snow portraits go from frustrating to effortless.
For Further Training:
Lighting is arguably the most important aspect of photography; but do you know how to use it? These Photography Lighting Cheat Sheets are designed to help. With critical information on ALL the types of natural light and artificial light you can use. They are currently 80% off today for a Winter Sale
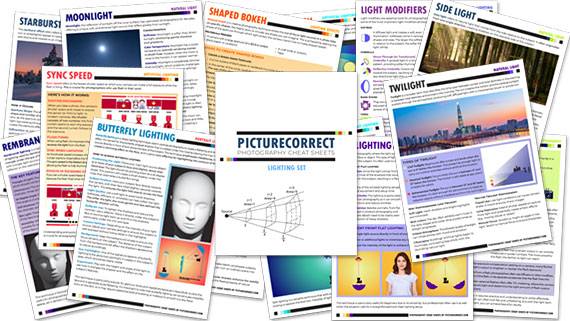
New! Cheat Sheets for Photography Lighting (see how they work)
Whether you’re a seasoned professional or just starting out, photography cheat sheets can be a valuable resource for improving your skills and taking your photography to the next level. By having all the key information you need in one place, you can focus on what’s important – capturing amazing photos.
Winter sale ending soon: Photo Lighting Cheat Sheets at 80% Off
from PictureCorrect https://ift.tt/FGghZYL
via IFTTT


Great tips on nailing exposure for snowy portraits — the way you explained balancing highlights and shadows really helps photographers avoid blown-out snow. For more photography insights, lighting ideas, and editing tips, check out our blog at Beatcolor: https://beatcolor.com/. Thanks for the helpful guide!
VastaaPoista